AA

おすすめ製品

    人気のカテゴリー

      急上昇ワード

        記事

          ブログ

            製品

              カテゴリー

                検索候補

                  検索中…
                  結果がありません
                  エラーが発生しました。
                  ↑↓ 選択↵ 開くEsc 検索を閉じる
                  • English
                  • Čeština
                  • Deutsch
                  • Español
                  • Français
                  • Italiano
                  • Polski
                  • 日本語
                  • 注文
                  • 住所
                  • 在庫ありのアラート
                  • 講座
                  • サブスクリプション
                  • アカウント編集
                  • 3Dプリンター9+▾

                    3Dプリンターnew

                    newPrusa CORE One Lさらに詳しく
                    newPrusa CORE One+さらに詳しく
                    newPrusa CORE One L+ INDX 8-ToolnewPrusa CORE One+ (Gen 2) INDX 8-ToolPrusa CORE One L: Critical InfrastructureOriginal Prusa MK4SnewOriginal Prusa XLOriginal Prusa XL:クリティカルインフラストラクチャー

                    プリンターのアップグレード

                    newCORE One/+ INDX Conversion KitnewMK3S/+ から MK4SnewXL - シリコンプリンティングツールヘッドnewMMU3 (Multi Material Upgrade)
                    Prusa 報酬プログラムシェアして、紹介して、特典をゲット。
                    3Dプリンターを選び方スペース・予算・用途に合わせて最適なマシンを選ぶための基本をご紹介します。
                    無料の電子書籍無料の電子ブック Basics of 3D Printing with Josef Prusa をダウンロードして、3Dプリンティングの世界への第一歩を踏み出しましょう。
                    Original Prusa のプリント可能なパーツOriginal Prusa 3Dプリンターとアップグレード用のプリント可能なスペアパーツコレクション。
                    配送情報プリンターの現在の生産量と納期に関する情報を定期的に更新しています。
                    カスタム3Dプリント様々な素材を使用したプロフェッショナルなカスタム3Dプリントサービス。
                  • マテリアル▾

                    フィラメント

                    PrusamentPLAPETGASA / ABSPCブレンドPA (Nylon)FlexComposites特別Materials clearance sale

                    レジン

                    Prusament Resin Tough柔軟性
                    フィラメントガイドプルサメントスプールをチェック
                    Prusament.com
                  • 部品 & アクセサリー▾

                    アクセサリー

                    エンクロージャーノズルスチールシート必須アクセサリーカメラ&アドオンツール&クラフト接着剤

                    補修部品

                    商品

                    スペアパーツ - すべてのプリンターCORE OneMK4/S & MK3.9/SMK3/MK3S/MK3S+XL
                    Merch
                  • 法人向け▾
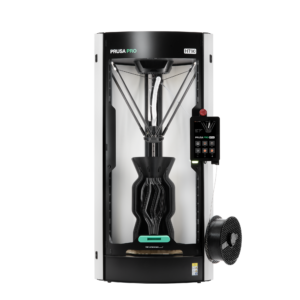
                    Prusa Pro HT90Prusa Pro SLXPrusa Pro AFSPrusa Pro Medical OneOriginal Prusa XLOriginal Prusa XL:クリティカルインフラストラクチャー
                    Prusa CORE One+さらに詳しく
                    Prusa CORE One Lさらに詳しく
                    Prusa CORE One L: Critical Infrastructure Edition クリティカルインフラ版(高セキュリティ対応モデル)

                    3Dプリンティングの用途

                    製造と研究開発自動車産業ヘルスケア教育と学術研究建築家とデザイナー映画産業重要インフラ

                    3Dプリンティングのストーリー

                    No items yet.

                    プルサ正規販売代理店
                    サステナビリティ
                    Prusa Education
                    お問い合わせ・ご連絡
                    カスタム3Dプリント
                    ISO認証取得
                  • ソフトウェア▾
                    PrusaSlicer

                    PrusaSlicerPrusaSlicer

                    PrusaSlicer は、オープンソースで機能が豊富、頻繁に更新されるツールで、3Dプリンタ用の完璧なプリントファイルをエクスポートするために必要なものがすべて含まれています。ニュースやリリースログは Github で確認できます。

                    WindowsMacOSLinux
                    Prusa Connect

                    Prusa Connect

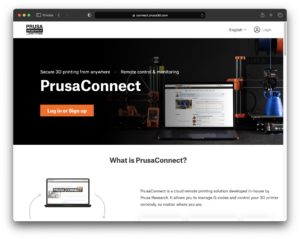
                    Prusa Connectは、3Dプリンターの遠隔操作と監視を可能にするクラウドサービスで、安全なデータの取り扱い、簡単なセットアップ、どこからでも複数のプリンターを管理できるサポートを提供します。

                    ログインして接続する
                    Prusa.app

                    Prusa.app

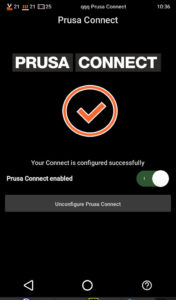
                    Prusa Connect技術を活用し、どこからでもリモートでプリンターを操作可能!Prusa.appは、AndroidおよびiOSデバイス向けに新たなPrusaプリンター体験を提供します。

                    今すぐお試しください!
                    ドライバー&ファームウェア3Dプリンタの最新のファームウェアとドライバをダウンロードしてください。
                    PrusaSlicer サポート
                    Prusa Connect サポート
                  • 3Dモデル▾
                    3Dプリンターアート&デザインホビー&メーカー日用雑貨テーブルトップミニチュアおもちゃ&ゲームPrintablesストア

                    人気の3Dモデル

                    • Strong garden hose holder
                    • Prusa Spool Bot
                    • Build Tray — Modular Organizer for Assembly, Disassembly and Maintenance
                    • Broom Holder
                    • Octagon Fabric
                    • Prusa CORE One ? (Mimic Skin)

                    デザインコンテスト

                    • Framework Laptop 12 Mainboard Re-Use2026/9/1 – 2026/9/30
                    • 🏆 Designer Challenge: Magic tricks!2026/9/1 – 2026/9/22
                    • Od prototypu k produktu: Příslušenství ke kamerám2026/8/1 – 2026/9/14
                  • コミュニティ▾

                    イベント情報

                    • Maker Faire Tokyo 20262026/9/5 – 2026/9/6 · Tokyo, Japan · Prusa Team
                    • IFA 20262026/9/4 – 2026/9/8 · Berlin, Germany · Prusa Team
                    • 3D Printopia 20262026/9/26 – 2026/9/27 · Pennsylvania, United States · Prusa Team
                    • Maker Faire Bay Area2026/9/25 – 2026/9/27 · Kalifornie, United States · Prusa Team

                    プルサフォーラム

                    • [PrusaSlicer 3.0 Plugin] Filament Sample Card Generator
                    • Main-plate can't be removed (Filament stuck)
                    • Core One UI freeze
                    プルサワールドマッププルサワールドマップ地元の3Dプリントユーザーを見つけて、あなたの周りのコミュニティを探索してみてください。
                  • ヘルプ▾
                    ガイド & チュートリアルPrusaSlicerPrusa Connectマテリアル

                    プリンターモデル

                    CORE One INDXCORE One LCORE One+CORE One

                    ハードウェアのトラブルシューティング

                    • Selftest failed (CORE One/+)
                    • ホットエンドの詰まり (MK4)
                    • ベルトテンションの調整(CORE One L/CORE One)
                    • Prusa ConnectとPrusaLink について

                    ドライバー&ファームウェア

                    INDX familyCORE One familyMK4 familyXL familyMMU familyPRO family
                  • コース一覧▾

                    3Dプリンティングのエキスパートになろう

                    Prusa アカデミーでは、3Dプリンティングに関する様々なトピックのオンラインコースを提供しています。各コースの特徴:

                    • 多くの写真と短いビデオを含む読みやすいテキスト
                    • インスピレーションやさらなる学習のためのリンク
                    • 知識を試すためのテスト
                    • 修了証明書
                    Browse all coursesMy courses library
                    • 3D Modeling in Autodesk Fusion
                    • PrusaSlicerマスタークラス – 初心者から上級者まで
                    • Complete Guide to 3D Print Postprocessing, Painting, and Detailing
                    • Airbrush Your 3D Prints: From Basics to Advanced Tricks
                  • ブログ▾
                    • より高品質なプリントを、もっと簡単に:Prusa XL+、CORE One L+、CORE One+(Gen 2)― 大規模製品アップグレード
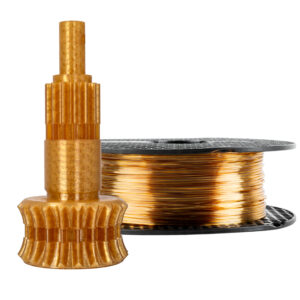
                    • Prusament PA11 Natural:極めて優れた機械的・耐薬品性を備えた素材 ギアや可動部品の造形に最適
                    • INDXの状況 ― 2026年7月アップデート:Founder’s Editionの出荷開始と今後の展開
                    電子書籍: 3Dプリンティングの基礎
                  • 会社概要▾

                    Prusa Research について

                    私たちは、ヨーロッパおよびアメリカ最大の3Dプリンターメーカーです。

                    Prusa Research は、チェコ出身のホビイスト/メイカー/発明家である Josef Prusa によって 2012 年に 1 人で立ち上げられました。そこからわずか 15 年で、従業員 1,200 名を超える企業へと成長しました。毎月、チェコ共和国プラハの本社および米国デラウェア州から、160 カ国以上のユーザーに向けて 10,000 台以上の革新的で安全な 3D プリンターを設計・製造・出荷しています。

                    動画をご覧になり、Prusa Research がどのように誕生し、わずか 10 年で何を達成したかをご確認ください!

                    Prusa Research についてタイムラインサステナビリティオープンソース
                    Prusa Research について
                    お問い合わせ
                    ロゴ・写真素材
                    ISO認証取得
                  1. サポート
                  2. このプリンターを使用

                  ブログ

                  • より高品質なプリントを、もっと簡単に:Prusa XL+、CORE One L+、CORE One+(Gen 2)― 大規模製品アップグレード
                  • Prusament PA11 Natural:極めて優れた機械的・耐薬品性を備えた素材 ギアや可動部品の造形に最適
                  • INDXの状況 ― 2026年7月アップデート:Founder’s Editionの出荷開始と今後の展開

                  ニュースレター

                  ご登録いただくと、毎月 新しいファームウェア、PrusaSlicerの新バージョン、3Dプリントプロジェクトの一般的なヒントなど、役立つ情報をお届けします。

                  クリックして、ニュースレターを受け取る。

                  このサイトはreCAPTCHA Enterpriseによって保護されており、Googleのプライバシーポリシーと利用規約が適用されます。

                  Strong garden hose holder
                  E-shop
                  • 3Dプリンター
                  • プリンターのアップグレード
                  • フィラメント
                  • アクセサリー
                  • Prusa 商品

                  © Prusa Research a.s.

                  Printables
                  • 3Dモデル
                  • Store
                  • Clubs
                  • 3Dデザインコンテスト
                  • Brands
                  コミュニティ
                  • ワールドマップ
                  • フォーラム
                  • ユーザーグループ
                  • イベント
                  ヘルプ
                  • Prusa ヘルプ
                  • Prusa アカデミー
                  • 3Dプリンティング計算機
                  ソフトウェア
                  • PrusaSlicer
                  • Prusa.app
                  • Prusa Connect
                  • ドライバーとソフトウェア
                  会社概要
                  • 私たちについて
                  • Blog
                  • プルサ正規販売代理店
                  • お問い合わせ
                  • ISO 9001・ISO 14001・ISO 45001 認証取得済み
                  • 一般利用規約
                  • PRUSAウェブサイト利用のための一般利用規約
                  • プライバシーポリシー
                  • クッキーに関する情報
                  • お客様の苦情対応に関する方針
                  • Webサイトのステータスページ
                  • Cookie 設定
                  • 一般利用規約
                  • PRUSAウェブサイト利用のための一般利用規約
                  • プライバシーポリシー
                  • クッキーに関する情報
                  • お客様の苦情対応に関する方針
                  • Webサイトのステータスページ
                  • Cookie 設定

                  © Prusa Research a.s.

                  JOSEF PRUSA®、PRUSA RESEARCH®、PRUSA POLYMERS®、PRUSA ORANGE®、PRUSA 3D ® および PRUSAMENT® は、Prusa Development a.s. の登録商標であり、Prusa Research a.s. が Prusa Development a.s. からのライセンスに基づき使用しています。

                  トピックス

                  • 3Dモデル
                  • 材料ガイド
                  • スライス処理
                  • プリンターメンテナンス
                  • Prusa Connect [進行中の翻訳]

                  このプリンターを使用

                  PETG

                  PETG

                  概要 PETG は最も簡単にプリントできる材料の一つで、安価で初心者に適しています。 比較的高い靱性と耐熱性があるのでエンジニアリングパーツ (たとえばプリンターパーツ)のプリントに適しています。   推奨ノズル温度: 1層目が230℃ 、2層目からは240℃   推奨ベッド温度: 1層目が85℃、2層目からは90℃   シート: パウダーコートされたテクスチャーもしくはサテンシートの使用を強くお勧めします。スムーズPEIシートにプリントすると密着が高すぎてシートが破損することがあります。 詳細な説明 PETG…

                  ノズルの変更・交換 (MK2.5/S, MK3/S/+, MK3.5/S)

                  ノズルの変更・交換 (MK2.5/S, MK3/S/+, MK3.5/S)

                  オリジナルPrusa MK2.5/S、MK3/S/+、およびMK3.5/SはE3D V6ホットエンドを使用しています。E3D V6ホットエンドと互換性のあるノズルであれば、どれでも取り付けることができます。プリンターに付属する標準ノズルはE3D V6 0.4 mmの真鍮ノズルですが、他のタイプや直径のものも使用できます。以下の手順は、Olsson Rubyを除くすべてのノズルに適用されます。 Olsson…

                  i3プリンターの定期的なメンテナンス

                  i3プリンターの定期的なメンテナンス

                  プリンターは定期的に時間をかけてメンテナンスすることをお勧めします。 プリンターが好調でうまく機能しているとしても、定期メンテナンスは実行しておく必要があります。 プリント時間の200〜300時間毎に、使われているコンポーネントのチェックと保守を行う必要があります。 このガイドは、Original Prusa i3 プリンター、すなわち MK3S+、MK3s、MK3、MK2.5S、MK2.5、MK2S、およびPlus…

                  ASA

                  ASA

                  基本情報 ASAは屋外使用に適した技術材料であり、高いUV耐性と耐熱性を持っています。他の材料がより危険な化学薬品に溶解するのに対し、ASAはアセトンで溶解可能です。この材料の主な欠点は大きな反りであり、高い周囲温度でのプリントが必要です。 推奨ノズル温度:260°C 推奨ベッド温度:最初の層は105°C、他の層は110°C。 ヒートベッド:スムースまたはパウダーコートPEIシートにスティックのりを使用してください。 説明 ASA(アクリルスチレンアクリロニトリル)は、ABSの後継とされる技術材料です。ABSと比べて、ASAはUV耐性が高く、反りが少なく、臭いも少ないです。ASAは強靭で耐久性があり、UVおよび耐熱性(最大93°C)のおかげで、屋外使用や技術部品の製作に適しています。もう一つの大きな利点は、アセトンで溶解できることです。これにより、滑らかで光沢のある仕上がりにすることができます。これによりモデルは見た目が良くなるだけでなく、異なる機械的特性も得られます(詳細は化学的スムージングに関する記事をご覧ください)。 ASAの主な欠点は、モデルと周囲の温度差による大きな反りです。もう一つの欠点は、ASAがプリント中に潜在的に有害な煙を放出することです。そのため、プリンターは換気の良い場所で使用してください。ASAはウェット・ドライの両方で簡単に研磨できます。 ASAのプリントには特定の条件が必要です。プリント中は材料から煙や物質が放出され、健康リスクとなる可能性があるため、必ず換気の良い部屋で作業してください。ただし、換気の際にプリントの周囲に風を起こさないようにしてください。これは結果に悪影響を与えます。 ASAでのプリント方法の詳細は、詳細記事をご覧ください。 対応する材料特性の比較は、材料表をご覧ください。 長所 短所 ✔…

                  柔軟な材料

                  柔軟な材料

                  基本情報 フレキシブル材料は、その優れた柔軟性、粘り強さ、および耐薬品性が特徴です。 これらの材料は比較的珍しく、高価であり、プリントが非常に難しいため、主に上級ユーザーに適しています。 推奨ノズル温度:230°C-245°C(材料の硬度とブランドによって異なります)。 推奨ベッド温度:60°C-75°C(オブジェクトのサイズによっては、オブジェクトが大きいほどベッド温度を高くする必要がある傾向があります)。 説明 フレキシブルフィラメント…

                  ABS

                  ABS

                  基本情報 ABSは高い靭性と耐熱性を持つため、機械的にストレスのかかる部品のプリントに適した技術材料です。表面はアセトンで滑らかにすることができます。主な欠点は大きな反りと有害なガスの発生です。 推奨ノズル温度:255°C 推奨ベッド温度:100°C。オブジェクトの大きさによって80~110°Cの間で設定できます(大きいオブジェクトほど高温が必要)。 …

                  PLA

                  PLA

                  基本情報 PLAは、最もプリントしやすい素材の一つです。コストが安く、初心者にも適しています。通常、高い機械的・化学的・耐熱性を必要としない、細かいモデルやフィギュア、迅速なプロトタイプのプリントに使われます。 推奨ノズル温度: 最初の層は215°C、その他の層は210°C 推奨ベッド温度: 60°C ヒートベッド: サテンまたはスムースPEIシートが最も良い接着力を提供します。 説明 PLA(ポリ乳酸)は、植物由来のポリエステルです。PLAはヒートベッドを必要としません。低温で迅速にプリントでき(融点は約175°C)、細かいモデルからプリントボリューム全体を埋めるような大きなオブジェクトまでプリントできます。他のフィラメントと異なり、PLAは大きな反りが起こりにくいです。迅速なプロトタイプや、美しく低コストなモデル(コンセプト、プロトタイプ、簡単なおもちゃ、ジュエリー、彫像など)の作成に適しています。技術用途や屋外用途には向いていません。高温には弱く(60°C以上で柔らかくなり変形します)、紫外線によって劣化し、機械的強度も劣ります(衝撃で層間や破片に割れます)。層間接着力も他の素材より弱いです。PLAはサンドペーパーで研磨できますが、水冷(ウェットサンディング)が必要です。 様々な情報源で、PLAは生分解性であるとされています。この素材はトウモロコシ、サトウキビ、またはサトウダイコンから作られており、実際に分解されますが、それは80°Cを超える専門の堆肥化施設でのみ可能です。PLA廃棄物を家庭の堆肥に捨てるのは絶対におすすめしません。素材は分解されず、土壌をプラスチック微粒子で汚染してしまいます。 PLA素材自体は食品に安全ですが、皿や食品と直接接触するもののプリントには推奨しません(他のフィラメント素材も同様)。主な理由は、プリント層や溝に細菌が繁殖しやすいためです。それでも3Dプリントした食器や食品容器を作りたい場合は、表面を密閉する特別な層(食品用コーティング)を施すことと、ステンレスノズルでプリントすることをおすすめします。 サポートされている素材の特性比較については、素材表をご覧ください。 長所 短所 ✔…

                  ファームウェアのアップデート方法 (MK3S+/MK3S/MK3)

                  ファームウェアのアップデート方法 (MK3S+/MK3S/MK3)

                  新しいバージョンでは新しい機能の追加と修正が行われるので 全てのユーザーに ファームウェアのアップデートをお勧めします。 新SuperPINDAを利用するには、MK3Sに最低でもファームウェアバージョン3.9.2が必要です! ファームウェアをプリンターに書き込むには、次のものが必要です: Windows、MacOS、もしくはLinuxがインストールされているパソコン。 USBケーブル、できればプリンター付属のオリジナル品。 PrusaSlicerとプリンターのドライバーがインストールされていること。(ここからダウンロード) プリンターに入っているファームウェアバージョンを確認するには、電源を入れて…

                  ノズルの交換/取り替え(MINI)

                  ノズルの交換/取り替え(MINI)

                  この記事では、Original Prusa MINIプリンターのノズル交換の手順をご案内します。ノズル交換には工具が必要で、プリンターの破損や火傷に注意が必要です。 ノズル交換が必要な理由 ノズル交換が必要となる理由は主に2つあります: ノズルが摩耗して交換が必要 異なる直径のノズルでプリントしたい 真鍮ノズルで研磨材を含有するフィラメントをプリントしない限り、標準ノズルは数百時間のプリント時間を持ちます。比較的新しいノズルを詰まりの解決のために交換するのは適切ではありません。 Original…

                  ホットエンドの分解&ヒートシンクのヒートブレイクがスタック

                  ホットエンドの分解&ヒートシンクのヒートブレイクがスタック

                  このガイドは、MKシリーズのE3D V6 Hotend用です。Prusa MINIには使用しないでください。 完全なE3DsのV6 hotendの組み立てマニュアルがあり、分解については、それを逆にたどってください。これはOriginal Prusa MK3S/MK2.5S/MK2Sに搭載されている純正のホットエンドです。しかし、このマニュアルは新品の部品を扱うため、何度も何百度も繰り返し加熱されることで起こる変化については考慮されていません。金属は収縮・膨張し、サーマルペーストは時間の経過とともにカサカサになってしまいます。そのため、長期間使用した後に分解する場合には、手順に若干の変更があります。   [id=21664|title=MK3S/MK2,5S/MMU2S」、「id=17360|title=MK3/MK2.5」については、こちらのガイドに従ってホットエンドを取り出してください。 分解について  assembly…

                  ポリカーボネート(PC)

                  ポリカーボネート(PC)

                  基本的な情報 ポリカーボネート(PC)は、粘り強さ、引張強度、耐熱性などに優れた技術材料です。しかし、プリントが非常に難しく、そのため主に上級者に適しています。しかし、当社のPrusament PC Blendはその限りではなく、他のポリカーボネートに比べて格段にプリントしやすくなっています。 推奨ノズル温度: 275 °C 推奨ベッド温度: ファーストレイヤー110…

                  ポリアミド(ナイロン)

                  ポリアミド(ナイロン)

                  基本情報 ポリアミド(ナイロン)は、優れた耐熱性と機械的強度を持つ多用途素材です。高温や機械的強度が求められる機能性部品のプリントに適しています。ただし、プリントは非常に難しく、経験豊富なユーザーのみに推奨されます。 推奨ノズル温度: 285 °C 推奨ベッド温度: 110 °C ヒートベッド: 専用のPAナイロンシートがほとんどのポリアミドに最適な密着性を提供します。 説明 ポリアミドは非常に耐久性に優れた素材で、摩耗に強く、特に技術的な部品に適しています。層同士の密着性も良好です。体積が大きい場合は優れた機械的強度を持ち、薄い層では柔軟性を維持します。摩擦係数が低く、融点が高いです。ただし、ポリアミドは吸湿性が高いため、乾燥状態を保つ必要があります(乾燥剤とともに密閉保管)。不適切な保管により、フィラメント重量の最大10%程度まで水分を吸収することがあります。ポリアミドは強いにおいと、危険な可能性のある超微粒子(UFP)を発生させるため、十分な換気のある部屋やエンクロージャー内でのプリントが必須です。 対応素材の特性比較については、材料表をご参照ください。 長所 短所 ✔…

                  コールドプル (MK3/S/+, MK2.5/S, MK3.5/S)

                  コールドプル (MK3/S/+, MK2.5/S, MK3.5/S)

                  「コールドプル」は、プリンターのノズルとホットエンドに詰まったり焦げ付いたりした材料を取り除くための技術です。また、通常のメンテナンスの際にホットエンドをクリーニングするためにも使用できます。 Nozzle Xを使用している場合は、コールドプル法を使用せず、クリーニングフィラメントのみを使用してください。 コールドプルは、ノズルが部分的に詰まっていて、まだフィラメントが押し出されている場合に行うべきです。ノズルが完全に詰まっている場合は、詰まったノズルのガイドをご確認ください。 私たちのテストでは、PLAがコールドプルに最適であることがわかりました。他のフィラメントはPLAのように先端を保持せず、破れたり溶けすぎたりします。ただし、ホットエンドのクリーニング専用に作られたフィラメントもあります。 手順 LCDメニュー…

                  PrusaLink (SL1/SL1S)

                  PrusaLink (SL1/SL1S)

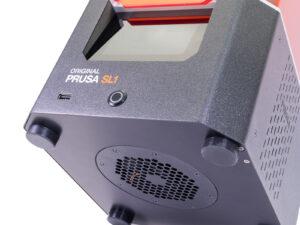
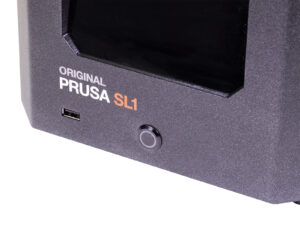
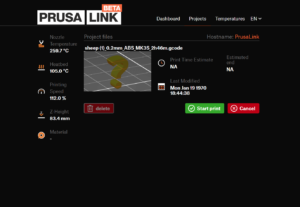
                  Via the web interface called PrusaLink, you can monitor and control your Original Prusa SL1/SL1S over your local network. You will be able to: Upload project files. Start and…

                  安全機能のテスト(MK3/MK3S)

                  安全機能のテスト(MK3/MK3S)

                  私たち Original Prusa i3 MK3は、新しい安全機能をたくさん備えています。これにより、プリントの信頼性と安全性が格段に向上しました。この記事では、それらのすべてを適切にテストする方法と、デバッグする方法を紹介します。 これらの機能はすべて、実行中のプリントでテストする必要があります。 同梱のSDカードから、例えばバットマンやPrusaのロゴなどのモデルを使用することができます。 フィラメントセンサー フィラメントセンサーのテスト方法 まず、フィラメントセンサーがONになっていることを確認する必要があります。LCD…

                  Modeling with 3D printing in mind

                  Modeling with 3D printing in mind

                  Modeling for 3D printing presents several interesting challenges. FFF (Fused Filament Fabrication), with its layer-by-layer manufacturing process, the orientation and geometry…

                  複合材料(カーボン、ケブラー、ガラスを充填したもの)

                  複合材料(カーボン、ケブラー、ガラスを充填したもの)

                  基本情報 複合材料(PC、PETG、ポリアミド、PPなどに対してカーボン、ガラスなどを充填した材料)は通常、未改質フィラメントとは異なる機械的特性を持っています。複合フィラメントは寸法安定性が向上し、より軽量になりますが、プリントには硬化ノズルが必要です。 推奨ノズル温度: 240-285 °C(フィラメントの種類による) 推奨ベッド温度: 70-110…

                  Firmware updating (MMU2S)

                  Firmware updating (MMU2S)

                  When updating from the 1.0.6 to the 3.0.0 firmware version or above, go in LCD menu - Settings - MMU, and set it to ON. Updating the firmware is recommended for all users as every…

                  水溶性フィラメント (BVOH/PVA)

                  水溶性フィラメント (BVOH/PVA)

                  基本情報 BVOHとPVAは、主にプリント時のサポート材として使用される特別な水溶性材料です。モデル本体はPLAなどの標準材料でプリントし、BVOHやPVAによるサポートはプリント後に溶解・洗浄し、簡単に除去することができます。これらの材料はドライボックスで保管し、マルチマテリアルアップグレード(またはデュアルノズル/エクストルーダー)でプリントする必要があります。上級者向けの材料です。 推奨ノズル温度:195°C(PVA+)、215°C(BVOH) 推奨ベッド温度:60°C ヒートベッド:スムースPEIおよびパウダーコートサテンシートが最適な密着性を提供します。 説明 BVOH(ブテネジオールビニルアルコール共重合体)およびPVA(ポリビニルアルコール)は、水溶性材料であり、複雑な形状のモデルのサポート材として理想的です。非水溶性サポートでは除去が困難な場合に特に有効です。最適な材料の組み合わせは、PLAとBVOHまたはPVAの併用で、プリント温度が近いためです。BVOHとPVAは非常に吸湿性が高いため、できるだけ乾燥した状態で保管してください。BVOH…

                  PVB

                  PVB

                  基本情報 ポリビニルブチラール(PVB)はイソプロピルアルコール(IPA)で簡単にスムージングできるよう設計された素材です。その透明性のおかげで、花瓶やランプシェード、その他のデザインオブジェクトのプリントに適しています。プリント設定はPLAと似ており、機械的特性はやや優れています。 推奨ノズル温度:215±10 °C 推奨ベッド温度:75…

                  ベルト張力の調整  (MK4/S, MK3.9/S, MK3.5/S, MK3/S/+)

                  ベルト張力の調整 (MK4/S, MK3.9/S, MK3.5/S, MK3/S/+)

                  ベルトが緩むとプリンターが正常に機能せず、適切なプリントができなくなる可能性があります。レイヤーシフト、ゴースティング、または円柱をプリントする際に完全な円ではなく不規則な形状になるなど、他のプリント異常の原因となることがあります。Y軸ベルトはヒートベッドの下にあり、X軸ベルトはプリントヘッドを動かします。すべての調整は2.5mmの六角レンチで行います。 ベルトの張力チェック 新しい手順…

                  ポリプロピレン(PP)

                  ポリプロピレン(PP)

                  基本情報 ポリプロピレン(PP)は軽量で化学薬品に強い素材であり、食品加工業界での保管や梱包によく使用されます。実験器具やエンジンオイル容器などのプリントにも利用可能です。価格が高くプリントも難しいため、3Dプリントの初心者にはおすすめできません。 推奨ノズル温度:220~270℃ 推奨ベッド温度:85~100℃ ヒートベッド:PPシートを使用すると最も良い密着性が得られます。 説明 3Dプリントにおいて、PP(ポリプロピレン)は主に高い化学耐性や耐熱性が求められる各種プロトタイプや特殊な機器(実験器具、エンジンオイル缶など)の作成に使われます。この素材は軽量であるため、様々なRCモデル部品にも適しています。純粋なPPは薄い層では曲げやすく、半透明です。 主な欠点は、反りやすくプリント面への密着性が非常に低いことです。メーカーは通常、カーボンやガラス繊維を複合して反りを抑えています。Prusament…

                  HIPS

                  HIPS

                  基本的な情報 HIPSは、大きなオブジェクトのプリントや、ABS、ASA、PETGをプリントする際、大きなモデルのサポートに適した丈夫な素材です。プリント面の密着性が高く、リモネン(またはアセトン、ただしABS/ASAモデルも溶かしてしまいます)に溶かすことができます。   推奨ノズル温度:220 °C   推奨ベッド温度:110 °C   プリントシート:当社のシートはすべて(スムースPEI、パウダーコートテクスチャー、パウダーコートサテン)、最高の接着力を発揮します。 概要 HIPS(High…

                  NGEN

                  NGEN

                  基本情報 NGENはPETGに似た素材ですが、プリント適性、機械的・化学的耐性が高く、試作品や美的モデルからハイテク補綴物まで幅広い用途で使用されています。   推奨ノズル温度: 240 °C   推奨ベッド温度: 90 °C   ヒートベッド: パウダーコートテクスチャーシートまたはサテンシートを使用することを強く推奨します。スムースPEIシートにプリントすると、シートが損傷する場合があります。 概要 NGENはEastman…

                  CPE

                  CPE

                  基本情報 CPEは様々な機械部品の試作に適した素材です。 その機械的特性やプリント品質はPETGに似ています。CPEは優れた耐薬品性、層間接着性、プリント面への密着性を持っています。 推奨ノズル温度:275°C 推奨ベッド温度:90°C ヒートベッド:パウダーコートTXTまたはサテンシートの使用を強く推奨します。スムースPEI面でプリントするとシートが損傷する可能性があります。 説明 CPEはテレフタル酸をベースとしたコポリエステルです。その機械的特性はPETGとABSの中間にあり、層間接着性も良好なため、機械部品のプロトタイプのプリントに適しています。CPEは耐薬品性・耐機械性・寸法安定性に優れています。ABSのような強い臭いや反りの問題もありません。CPEは耐薬品性・耐熱性(最大75°Cまで)を持つ素材です。CPEの引張強度はABSと同等です。透明性があるため薄肉モデルのプリントにも適しています。CPEはビジュアル・機能試作、機械部品などの作成に適しています。 CPEはスムースPEIプリントシートに非常に強く密着し、表面を損傷する可能性があることに注意してください。PETGと同様に、スティックのりを薄く塗るか、サテンまたはパウダーコートTXTシートを使用してください。 対応素材の特性比較については、material…

                  複合材料(金属や木の粒子が入っているもの)

                  複合材料(金属や木の粒子が入っているもの)

                  基本情報 金属や木材の粉末を充填した複合材料は、通常PLAまたはPETGフィラメントです。添加剤によって特別な特性や魅力的な外観が得られますが、ノズルの詰まりやすさが増すため、プリント自体の難易度は上がります。金属充填フィラメントの場合は、硬化ノズルが必要です。 推奨ノズル温度:190~270°C(フィラメントの種類による) 推奨ベッド温度:60~100°C(フィラメントの種類による) ヒートベッド:スムースPEIシートが最適な密着性を提供します。 木材や金属粉末充填フィラメントは、主に美観目的で使用され、選択した素材(木材や金属)を模倣します。しかし、さまざまな添加剤を充填した素材もあり、特別な特性を持つものもあります。例えば、Prusament…

                  フィラメントの除湿

                  フィラメントの除湿

                  FFF 3Dプリントで使用される材料の多くは吸湿性があります。これは、周囲の環境から水分子を容易に引き寄せることを意味します。プリントに使用する際、湿気を吸収した材料は期待通りに動作しない場合があります。 予防策 フィラメントによって吸湿性の高いものとそうでないものがあります。新しい材料を使用する際は、その特性と最適な保管方法について調査してください。可能であれば、フィラメントを乾燥させる必要がないようにするのが最善です。 フィラメントは密閉されたスペースや箱に乾燥剤と一緒に保管するのが最適です。こうした保管スペースが限られている場合は、より吸湿性の高いフィラメントを優先して保管しましょう。例えばPLAは湿気を吸っても特性の変化は大きくありませんが、ポリアミドはかなり影響を受けます。 吸湿性の高い材料(ポリアミド、ポリプロピレン、PVA、BVOHなど)で問題を防ぐには、乾燥した環境で保管するか、毎回プリント前に乾燥させることを推奨します。 フィラメントを乾燥状態に保つための専用ボックスを購入することもできますし、自作することも可能です。 フィラメントを乾燥状態に保つもう一つの一般的な方法は、保管用の真空バッグを使用することです。フィラメント専用のバッグもありますが、フィラメントが入るサイズならどんなものでも利用できます。保管時はバッグ内に乾燥剤を入れてください。 マルチツールプリント Original…

                  Original Prusaのプリント可能なパーツ

                  Original Prusaのプリント可能なパーツ

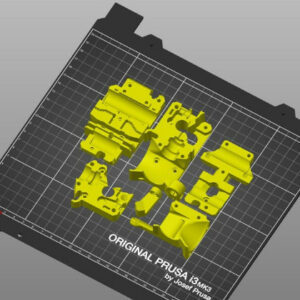
                  3Dプリンターで使用されるプラスチック部品は、RepRapプロジェクトの元のアイデアを踏襲し、同じ機械でプリントされています。交換部品やアップグレード、異なる色のプリンター、または部品の改造をプリントしたい場合、それらはすべてオンラインで入手可能です。 プリント部品の命名について プリント可能な部品の由来を知るために、部品名は常にアルファベットで始まり、その後に数字が続きます。識別子は大きな部品に見つけることができます。識別子が収まらない小さなプリント部品では、ドットと四角が使用されます。単一のドットから始まり、ドットの数がバージョンの通し番号に対応します。カスタムプラスチックには四角が使用され、1つの四角から始まり、四角の数がバージョンの通し番号に対応します。 A/B/C/D/ドット/三角形:…

                  Firmware updating (MK2.5S/MK2S)

                  Firmware updating (MK2.5S/MK2S)

                  Updating the firmware is recommended for all users as every new version brings new features and fixes. To flash the firmware onto your printer, you need: Computer running Windows,…

                  テスト済みのレジン

                  テスト済みのレジン

                  We have tested hundreds of resins before we released the SL1, and still are trying out different types, colors and brands. The table below is extracted from PrusaSlicer, per January…

                  M.I.N.D.A.センサーの交換方法 (MINI)

                  M.I.N.D.A.センサーの交換方法 (MINI)

                  エクストルーダープーリーのアクセス方法と清掃方法 (MINI/MINI+)

                  エクストルーダープーリーのアクセス方法と清掃方法 (MINI/MINI+)

                  SDカード・USBメモリ

                  SDカード・USBメモリ

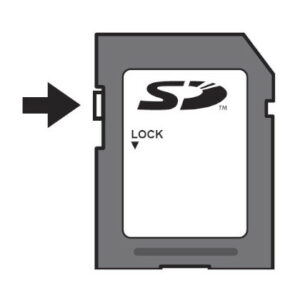
                  リモートでファイルを転送し、プリントをスタートする方法があるように、SDカードやUSBフラッシュメモリは、最も一般的で信頼性の高い方法です。一般的で便利ではありますが、フラッシュメモリーはそれ自体最も信頼できるものではなく、ストレージが破損したり、明らかな兆候なしに容量がいっぱいになってしまうことがあります。そこで、Original Prusaプリンタ用のメモリーのメンテナンス、フォーマット、購入の方法について、ガイドをまとめました。 SDカードがロックされていないか確認しましょう SDカードの側面には、ラッチが付いています。SDカードを使用する前に、ラッチが「ロック」の位置になっていないことを確認してください。ロックされている場合、カードにファイルを保存することができず、プリンタもSDカードを開くことができません。 32GBを超える容量の場合 対応する記憶媒体の容量に上限はありませんが、Windows内蔵のフォーマットツールは、32GB以上の記憶媒体をFAT32にフォーマットすることはサポートしていません。弊社プリンタでは現在サポートしていないexFATのオプションが提供されるのみです。Apple社のOSxの各バージョンでも同様の制限があり、正しくフォーマットするためにはサードパーティーのアプリケーションを使用する必要があります。 このようなドライブをフォーマットするには、Rufus、FAT32フォーマット、またはEaseUS…

                  ヒートベッドサーミスターの交換方法 (MK3S+/MK3S/MK2.5S/MK2S)

                  ヒートベッドサーミスターの交換方法 (MK3S+/MK3S/MK2.5S/MK2S)

                  How to import profiles to Cura 4.x (Windows & macOS)

                  How to import profiles to Cura 4.x (Windows & macOS)

                  コールドプルテクニック(MINI)

                  コールドプルテクニック(MINI)

                  コールドプルとは、プリンターのホットエンドやノズルに付着したフィラメントやゴミなどの障害物を取り除くために行う技術です。また、プリンタの定期的なメンテナンスの一環として実施することをお勧めします。コールドプルは通常、フィラメントがノズルに到達できる場合のみ有効です。ノズルまでに障害物がある場合、コールドプルでは解決できない可能性が高いです。こちらの記事ノズル/ホットエンドの詰まり…

                  ファームウェアのアップデート方法 (MINI/MINI+)

                  ファームウェアのアップデート方法 (MINI/MINI+)

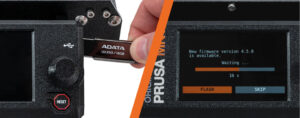
                  MINIでは、USBフラッシュメモリーを使用してファームウェアをアップデートします。 ファームウェアのZipファイルをダウンロードし、パソコンで解凍してください。 .bbfファイルをUSBメモリーのルートディレクトリにコピーします(フォルダー内ではありません)。 USBメモリーを挿入し、リセットボタンを押します。ブートローダは自動的にインストールされているバージョンとドライブ上のバージョンを比較し、より新しい場合は自動的にアップデートすることを提案します。 「FLASH」ボタンを選択し、ツマミを押して更新を確認します。…

                  ヒートブレーク/ヒートブロックの交換方法  (MINI/MINI+)

                  ヒートブレーク/ヒートブロックの交換方法 (MINI/MINI+)

                  エクストルーダーからの手動によるフィラメントの取り出し

                  エクストルーダーからの手動によるフィラメントの取り出し

                  ホットエンドに詰まりがある場合、フィラメントがボンドテックのギアに接触して損傷し、引き抜くことができなくなることがあります。手で引き抜こうとすると、PTFEチューブの真上で折れてしまうかもしれません。この場合、フィラメントを手動で取り出す必要があります。 アイドラードアを開放する エクストルーダーの左側にあるバネ付きネジを外して、アイドラードアを開きます。 MK3S/MK3S+/MMU2Sエクストルーダー(アイドラースクリュー1本) MK3エクストルーダー(アイドラースクリュー2本)   MMU2S/MMU3のアイドラードア MMUには「チムニー」(IR-sensor-holder-MMU2S)があるため、背面のヒンジネジ(赤矢印)を緩めてアイドラードア全体を取り外す必要があります。    どこで折れてしまっているか 方法1を使用 方法2を使用 フィラメントがPTFEチューブの端で折れてしまった場合は、方法1として、フィラメントをホットエンドに押し通そうとすることから始めます。フィラメントから0.5~1cmほど飛び出している場合は、ボンドテックのフィラメントプーリに届くように、ペンチで引き抜く方法2から始めます。 準備 LCD…

                  How to import profiles to Simplify3D 4.x (Windows & macOS)

                  How to import profiles to Simplify3D 4.x (Windows & macOS)

                  プルサコネクト ローカル (MINI)

                  プルサコネクト ローカル (MINI)

                  ATTENTION: この記事は廃止され、現在はメンテナンスされていません。MINI/MINI+ に最新ファームウェア を更新し、新しいウェブ user interface PrusaLink をご使用ください。 ファームウェア4.0.5より、Prusa Connect Localと呼ばれるウェブインターフェースを介して、ローカルネットワーク上でOriginal…

                  ベルトの調整方法 (MINI/MINI+)

                  ベルトの調整方法 (MINI/MINI+)

                  ベルトが緩んでいるとプリンタの故障の原因となり、適切なプリントができなくなります。確認する最も簡単な方法は、円形の物体をプリントすることです。ベルトが適切に締められていないと、完全な円ではなく不規則な形状になります。Y軸ベルトはヒートベッドの下にあり、X軸ベルトはプリントヘッドを動かします。 ベルト張力の確認 ベルトチューナー 私たちは独自にベルトチューナーアプリをリリースしています。このアプリケーションは、ベルトをはじいて生成された振動の周波数を測定することでベルトの張力を決定します。 リンクされたベルトチューナーアプリの指示に従って、ベルトの張力を調整してください。 ベルト張力テスト 各軸を右端または左端に移動させ、指で軸の中央部分のベルトを押し下げてみてください。ベルトを曲げるには多少の力が必要なはずです。プリンタを損傷する可能性があるので、ベルトを過度に引っ張らないように注意してください。適切に張られたベルトは、はじいたときに低音のベース音のように鳴るはずです。 ベルトが正しい張力にあるかを確認する優れた方法は、このGT2ベルト用テンションメーターをプリントすることです。 X軸ベルトの調整 微調整 2.5…

                  定期的なメンテナンス (MINI/MINI+)

                  定期的なメンテナンス (MINI/MINI+)

                  Original Prusa MINI/+を定期的にメンテナンスすることをお勧めします。プリンターが完璧に動作している場合でも、これを行う必要があります。 シートの清掃 プリントされたオブジェクトがプリントシート表面に適切に接着しない場合は、シートを拭いて清掃する必要があります。シートに適した洗浄剤(IPA、Windexなど)を選び、無香料のペーパータオルに少量注ぎ、プリント表面を拭きます。 テクスチャー加工およびサテン粉体塗装シートをアセトンで清掃しないでください!そうすると、PEIテクスチャーにマイクロクラックが生じ、時間とともに表面が劣化します。 最良の結果を得るには、シートを冷めた状態で清掃する必要があります…

                  Creating MMU models: Export model from Fusion 360

                  Creating MMU models: Export model from Fusion 360

                  ホットエンドファンの交換方法 (MINI)

                  ホットエンドファンの交換方法 (MINI)

                  エクストルーダーモーターの交換方法 (MINI/MINI+)

                  エクストルーダーモーターの交換方法 (MINI/MINI+)

                  Prusa ConnectとPrusaLink について

                  Prusa ConnectとPrusaLink について

                  Prusa ConnectとPrusaLinkは、Prusaが独自に開発したリモートプリントソリューションです。その起源は、プラハ本社にある記録的な規模のプリントファームで使用されている管理システムにあります。 Prusa Connectはクラウドサービスで、どこからでも利用可能です。 PrusaLinkはプリンター上でローカルに動作し、ローカルネットワーク内でのみアクセス可能です。 Prusa…

                  Bondtechギアのチェックとアラインメント調整 (MK3.5/S, MK3S/+, MK2.5S)

                  Bondtechギアのチェックとアラインメント調整 (MK3.5/S, MK3S/+, MK2.5S)

                  Bondtechのギアは非常に強い引っ張り力を持っています。しっかりと固定されているように見えるかもしれませんが、モーターのシャフトの平らな側面に適切に締め付けられていないと、緩んで回転するシャフトの周りで静止したままになってしまうことがあります。最初は断続的にしか起こらず、押出量不足のように見えるかもしれませんが、放置すると、ギアはフィラメントの経路からずれ続ける可能性があります。 典型的な問題(偽詰まり) 最初はノズル詰まりのように見えるかもしれませんが、モーターの軸が完全に回転しているのが見え、ホットエンドの詰まりでよく発生するクリック音がありません。フィラメントは全く動いておらず、引き出すとギアによって削られたようにも見えないため、「偽詰まり」または「ゴースト詰まり」と呼ばれます。 軸の半径上に線を描くと、それが回転しているかどうかを見るのに役立ちます。 Bondtechギアへのアクセス 1.5…

                  エラーのある3Dモデル

                  エラーのある3Dモデル

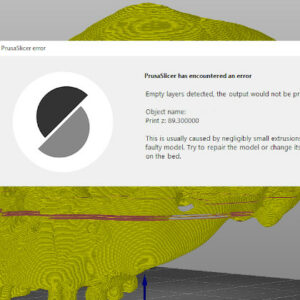
                  インターネット上で見つけることのできる3Dモデルの中には、何らかの形で壊れているものが意外と多くあります。最近のスライサーは、ユーザーが気づかないうちにモデルを修復するようになってきています。しかし、すべての壊れた3Dモデルを自動的に修復できるわけではありません。そこで、これらを修復する方法について、いくつかのヒントをご紹介したいと思います。 PrusaSlicerによる修復 PrusaSlicerはある程度自動でモデルを修復しますが、専用のサービスを使って修復する必要がある場合があります。Windows…

                  X軸ベアリングの交換方法 (MINI/MINI+)

                  X軸ベアリングの交換方法 (MINI/MINI+)

                  ネットワーク経由でプリンターにGコードを送信する(PrusaConnect、PrusaLink、Octoprint)

                  ネットワーク経由でプリンターにGコードを送信する(PrusaConnect、PrusaLink、Octoprint)

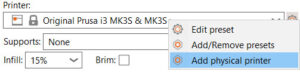
                  PrusaSlicerでは、Printerプロファイルからプリンタ接続設定を 物理プリンタプロファイル に分離しています。 プリンタプロファイルのセレクトボックスで プリンターの追加 をクリックするか、歯車のアイコンをクリックして 物理プリンターの追加 を選ぶと、新しい物理プロファイルを作成することができます。 物理プリンタダイアログでは、プリンタに名前を付け、1つまたは複数のプリンタプロファイルを割り当てることができます。例えばMMU2Sアップグレードを使用する場合、物理プリンターは1台だけ設定すればよいのですが、シングルモードとMMUの両方のプロファイルをリンクさせることができます。 ネットワーク情報が記入された物理プリンタを現在のプリンタとして選択している場合、生成されたGコードを直接デバイスに送信することができます。 PrusaConnect PrusaConnectでプリンタにファイルを送信する場合は、物理プリンタを追加するか、既存のプリンタを編集してください。 Host…

                  Buddyボードの電気配線(MINI)

                  Buddyボードの電気配線(MINI)

                  Original Prusa MINIのリリースに伴い、再び新しいメインボードを開発し、32ビットプラットフォームとしました。24Vで動作し、モーターにはTrinamicドライバーを使用しているため、超静音プリントが可能です。また、イーサネット、Wifiによる拡張、32ビットシステムにより、より複雑な計算やGコード以外の処理も可能になっています。 Buddyボードの交換方法、ケーブルマネージメントに関する詳しい情報は、ガイドBuddyコントロールボードの交換方法…

                  ファームウェア更新方法 (CORE One, MK4/S, MK3.9/S, MK3.5/S, XL)

                  ファームウェア更新方法 (CORE One, MK4/S, MK3.9/S, MK3.5/S, XL)

                  Prusa CORE One、Original Prusa MK4/S、MK3.9/S、MK3.5/S、およびXLでは、ファームウェアはUSBドライブを使用して書き込みされます。これはすべてのファームウェアアップデート方法に適用されます。 USBドライブによるオフラインでの手順 お使いのプリンタの最新ファームウェアをダウンロードし、コンピュータ上で解凍してください(zipファイル) Prusa…

                  Resin Calibration (SL1/SL1S)

                  Resin Calibration (SL1/SL1S)

                  Both Original Prusa SL1 and SL1S SPEED have a growing library of resin print profiles in the PrusaSlicer, which were tested and verified by Prusa Research. However, the printers…

                  ファームウェアのアップデート方法 (MINI/MINI+)

                  ファームウェアのアップデート方法 (MINI/MINI+)

                  ホットエンドサーミスターの交換 (MK3S/MK3S+)

                  ホットエンドサーミスターの交換 (MK3S/MK3S+)

                  プリント中の振動とノイズ (MINI/MINI+)

                  プリント中の振動とノイズ (MINI/MINI+)

                  お使いのOriginal Prusa MINIおよびMINI+プリンターは、使用中に多少の振動が発生することがあります。ほとんどの場合、これによってプリントに問題が生じることはありませんが、これを最小限に抑える方法、あるいは完全に取り除く方法をご紹介します。 ノイズの特定 Printer display -> Settings -> Move Axis で、XとYを個別に移動して、ノイズが1つの軸に絞られるかどうか確認します。また、プリントを開始し、動作中/ノイズ中に、様々な部品に手を置いてみて、音が減衰するかどうかを聞いてみてください。 下記の部品がポイントです: ヒートベッド モーター LCD部分 音の中には、X軸とY軸を同時に動かしたときにしか現れないものや、特定しにくいものがあります。そのため、ノイズの発生場所がはっきりしない場合でも、この記事で説明したすべてのポイントを点検することをお勧めします。 この記事は、Original…

                  PTFEチューブのトリミング方法 - Original Prusa プリンター

                  PTFEチューブのトリミング方法 - Original Prusa プリンター

                  Buddyコントロールボードの交換方法 (MINI)

                  Buddyコントロールボードの交換方法 (MINI)

                  ホットエンドPTFEチューブの交換方法 (MK3S+/MK3S/MK2.5S/MMU2S)

                  ホットエンドPTFEチューブの交換方法 (MK3S+/MK3S/MK2.5S/MMU2S)

                  PEIシートの交換 (MK3S/MK3/MK2.5S/MK2.5)

                  PEIシートの交換 (MK3S/MK3/MK2.5S/MK2.5)

                  メンテナンスのコツ

                  メンテナンスのコツ

                  ホットエンドPTFEチューブの交換方法 (MINI/MINI+)

                  ホットエンドPTFEチューブの交換方法 (MINI/MINI+)

                  独自の3Dモデルを作成する

                  独自の3Dモデルを作成する

                  Creating a brand new 3D model from scratch can be a little daunting if you have no prior experience. However, at some point, you might want to give 3D modeling a go. There are…

                  プリントファンの交換方法 (MK3S/MK3S+)

                  プリントファンの交換方法 (MK3S/MK3S+)

                  3Dモデルはどこで入手できますか?

                  3Dモデルはどこで入手できますか?

                  The best way to get started with 3D printing is to find pre-made models on the internet - they should be in the .stl, .obj or .3mf format to be used with PrusaSlicer. Fortunately,…

                  MK3のPSU(電源ユニット)の交換方法

                  MK3のPSU(電源ユニット)の交換方法

                  PTFEチューブの交換方法(MK3/MK2.5)

                  PTFEチューブの交換方法(MK3/MK2.5)

                  IR-sensor の交換方法 (MK3S/MK3S+)

                  IR-sensor の交換方法 (MK3S/MK3S+)

                  FEP film replacement (SL1)

                  FEP film replacement (SL1)

                  Please note: Every time you replace the FEP film, tighten the screws properly, but don’t use excessive force. Overtightening the screws may lead to issues with their removal, during…

                  X軸ベアリングの交換方法 (MK3S+)

                  X軸ベアリングの交換方法 (MK3S+)

                  ホットエンドの交換方法 (MK3S/MK3S+)

                  ホットエンドの交換方法 (MK3S/MK3S+)

                  SuperPINDAセンサーの交換方法 (MK3S/MK3S+)

                  SuperPINDAセンサーの交換方法 (MK3S/MK3S+)

                  ヒートブレーク/ヒートシンク/ヒートブロックの交換方法 (MK3S+/MK3S/MK2.5S/MMU2S)

                  ヒートブレーク/ヒートシンク/ヒートブロックの交換方法 (MK3S+/MK3S/MK2.5S/MMU2S)

                  ヒートシンクの交換方法 (MINI/MINI+)

                  ヒートシンクの交換方法 (MINI/MINI+)

                  Modifier-meshes: Custom supports and other magic

                  Modifier-meshes: Custom supports and other magic

                  This will be covered more extensively in the near future, but for now, we want to give you a quick overview on how to use some of the amazing new features available in PrusaSlicer.…

                  ヒートブレーク/ヒートブロック/ヒートシンクの交換方法 (MK3/MK2.5)

                  ヒートブレーク/ヒートブロック/ヒートシンクの交換方法 (MK3/MK2.5)

                  ホットエンドヒーターの交換方法 (MINI/MINI+)

                  ホットエンドヒーターの交換方法 (MINI/MINI+)

                  MMU2Sの通常メンテナンス

                  MMU2Sの通常メンテナンス

                  For future reference, see the picture below and try to remember the name of each part of the MMU unit. You will find this information in your printed MMU handbook as well. Hobbed…

                  Y軸ベアリングの交換方法 (MINI/MINI+)

                  Y軸ベアリングの交換方法 (MINI/MINI+)

                  How to replace a hotend thermistor (MK2S)

                  How to replace a hotend thermistor (MK2S)

                  プリントファンの交換方法 (MINI)

                  プリントファンの交換方法 (MINI)

                  ヒートベッドサーミスターの交換方法 (MINI/MINI+)

                  ヒートベッドサーミスターの交換方法 (MINI/MINI+)

                  プリントヘッドのPTFEチューブの交換方法 (MINI/MINI+)

                  プリントヘッドのPTFEチューブの交換方法 (MINI/MINI+)

                  ヒートベッドの交換方法 (MINI/MINI+)

                  ヒートベッドの交換方法 (MINI/MINI+)

                  プリントパーツの後処理方法

                  プリントパーツの後処理方法

                  M.I.N.D.A.センサー/SuperPINDA センサーの高さ調整(MINI/+)

                  M.I.N.D.A.センサー/SuperPINDA センサーの高さ調整(MINI/+)

                  Community translations

                  Community translations

                  The firmware for each Original Prusa printer is currently translated into multiple languages and we would like to expand it further. We welcome everyone to join us and localize…

                  Original Prusa i3プリンターのPTFEチューブ

                  Original Prusa i3プリンターのPTFEチューブ

                  What is PTFE and where do I find it? Polytetrafluoroethylene (PTFE) is a synthetic material, similar to Teflon (and closely related to it). Thanks to their low friction coefficient,…

                  SuperPINDAセンサーの交換方法 (MINI/MINI+)

                  SuperPINDAセンサーの交換方法 (MINI/MINI+)

                  Y軸ベアリングの交換方法 (MK3S+)

                  Y軸ベアリングの交換方法 (MK3S+)

                  プリンタの定期メンテナンス (MK4/S, MK3.9/S)

                  プリンタの定期メンテナンス (MK4/S, MK3.9/S)

                  Original Prusa MK4/S および MK3.9/S は定期的にメンテナンスすることをお勧めします。これは、プリンタが完全に動作している場合でも行う必要があります。 便利な道具 六角レンチ、ニードルノーズプライヤー、IPA(イソプロピルアルコール)とペーパータオルなど、通常の工具のほかに必要なものもあります: エアダスター:圧縮された空気を出す缶で、OA機器の清掃用として知られています。スプレー中には逆さまに持たないように注意してください。電子部品を掃除しようとして損傷する可能性があります。 ブラシ:ヒーターブロックの清掃には、小さな真鍮ブラシが便利です。真鍮ブラシがない場合は、毛の硬いブラシでも問題ありません。 Prusa潤滑油:Prusa…

                  Firmware updating (SL1/SL1S)

                  Firmware updating (SL1/SL1S)

                  The Original Prusa SL1 has an update-server, which is checking for updates automatically. There is no need to do it manually, but this option is still possible. Starting from firmware…

                  ホットエンドサーミスターの交換 (MINI/MINI+)

                  ホットエンドサーミスターの交換 (MINI/MINI+)

                  PTFEチューブのトリミング方法 - マルチマテリアル

                  PTFEチューブのトリミング方法 - マルチマテリアル

                  P.I.N.D.A.センサーの交換方法 (MK3S)

                  P.I.N.D.A.センサーの交換方法 (MK3S)

                  ホットエンドヒーターの交換方法 (MK3S/MK3S+)

                  ホットエンドヒーターの交換方法 (MK3S/MK3S+)

                  G-code preparation for MMU2S

                  G-code preparation for MMU2S

                  頭が潰れてしまったネジの外し方

                  頭が潰れてしまったネジの外し方

                  プリンターのネジを外そうとしたときに、ネジが外れないままが回り続けてしまう場合、ネジが取れていることを意味します。 ネジに穴をあけたり、エキストラクターを使用した経験がある場合は、これらの工具を使用することをお勧めします。経験のない方は無理をせず、下記の要領で行ってください。 インターネット上で見かける方法が、電子機器や繊細な部品に特化したものでない場合は、従わないようにしてください。木工に特化した方法は、プリンタを損傷する可能性があります。 強力な磁石があれば、六角レンチに取り付けて、可能な限りゴミを取り除き、ネジを抜きやすくすることができます。 六角レンチが違う:間違った六角レンチを使用しているか、工具が損傷している可能性があります。六角レンチの反対側を使用してみてください。特に小さいネジの場合、このようなことが起こる可能性があります。 ネジのグリップを良くする:ネジの頭が損傷している場合、ネジの頭と六角レンチの間に何かを挟むとグリップが良くなります。最もよく使われるのは幅広の輪ゴムですが、他にもラテックス手袋、アルミホイル、スチールウールなどを使うことができます。ネジに一定の力を加え、ネジが抜けるまでゆっくりとキーを回してください。 ペンチ:ネジの頭が見える場合は、ペンチでネジの頭をしっかり持ち、ネジが緩むまでペンチを回してみてください。 破損したネジを取り外した後は、二度と使用しないように捨ててください。

                  How to replace the print display (SL1)

                  How to replace the print display (SL1)

                  SL1/SL1S print removing

                  SL1/SL1S print removing

                  In this guide, we will show you what to do when your SL1 print is successfully finished and you want to remove it from the metal platform. When handling resins, always wear protective…

                  How to replace a filter (SL1/SL1S)

                  How to replace a filter (SL1/SL1S)

                  SL1/SL1S maintenance

                  SL1/SL1S maintenance

                  Regular Printer Maintenance Although the Original Prusa SL1/SL1S has a number of smart sensors and has been carefully designed to be easy to use, it’s still a machine and requires…

                  PrusaSlicer から PrusaLink へファイルを転送する

                  PrusaSlicer から PrusaLink へファイルを転送する

                  How to replace a blower fan (SL1)

                  How to replace a blower fan (SL1)

                  Splitting STL using MeshMixer

                  Splitting STL using MeshMixer

                  Splitting STL with single compact part

                  Splitting STL with single compact part

                  Firmware updating (CW1)

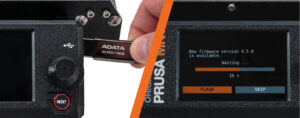
                  Firmware updating (CW1)

                  Updating the firmware is recommended for all users as every new version brings new features and fixes. To flash the firmware onto your printer, you need: Computer running Windows,…

                  レジン

                  レジン

                  Liquid resins are photosensitive materials used for printing on DLP, SLA and MSLA 3D printers. Resins are also known as photopolymers and they are cured (solidified) by UV light…

                  How to replace the power button (SL1/SL1S)

                  How to replace the power button (SL1/SL1S)

                  マルチマテリアルアップグレード用に.stlファイルとGコードを準備する方法

                  マルチマテリアルアップグレード用に.stlファイルとGコードを準備する方法

                  Preparing .stl files and G-codes which are supposed to be printed in one material is a rather easy process. This process became quite tricky once we must cope with up to 5 materials.…

                  How to replace an optical sensor (SL1)

                  How to replace an optical sensor (SL1)

                  How to replace a UV LED assembly (SL1)

                  How to replace a UV LED assembly (SL1)

                  How to replace the USB connector (SL1/SL1S)

                  How to replace the USB connector (SL1/SL1S)

                  G-code preparation for MMU1

                  G-code preparation for MMU1

                  CW1 メンテナンス

                  CW1 メンテナンス

                  To ensure that the CW1 remains in proper working order, ​keep the device clean, and never leave the tank with isopropyl alcohol inside of the device when the machine is off / not…

                  ベルトの調整方法 (XL)

                  ベルトの調整方法 (XL)

                  Original Prusa XLでは、ベルトを最適な張力に調整することが、プリントの品質を高めるために重要です。ベルトが緩んでいると、Layer shifting、Ghosting、または完全な円の代わりに不規則な形状になるなどのプリント異常の原因になります。ベルトを締めすぎると、X軸とY軸が不規則に動くことがあります。 Original Prusa…

                  Replacing the PEI sheet on the MK2/S

                  Replacing the PEI sheet on the MK2/S

                  コールドプル #26702 (MK4S) #13702 (MK4) #28702 (MK3.9S) #21702 (MK3.9) #17702 (XL)

                  コールドプル #26702 (MK4S) #13702 (MK4) #28702 (MK3.9S) #21702 (MK3.9) #17702 (XL)

                  コールドプルテクニックを使用すると、プリンターのノズルとホットエンドに詰まったり焦げ付いたりした材料をクリーニングできます。また、通常のメンテナンス時にホットエンドをクリーニングするのにも使用できます。ファームウェア6.0.0以降のMK4/SとMK3.9/S、およびファームウェア6.1.3以降のXLでは、プリンターが自動的にこのプロセスを実行します。 Nozzle…

                  PrusaLink経由でMK3/S/+でプリントする。

                  PrusaLink経由でMK3/S/+でプリントする。

                  PrusaLink および Prusa Connect のセットアップ (MK3/S/+)

                  PrusaLink および Prusa Connect のセットアップ (MK3/S/+)

                  How to replace a UV LED fan (SL1S)

                  How to replace a UV LED fan (SL1S)

                  How to replace the A64 board (SL1)

                  How to replace the A64 board (SL1)

                  How to replace the FEP film (SL1S)

                  How to replace the FEP film (SL1S)

                  How to replace a Lid safety switch (CW1)

                  How to replace a Lid safety switch (CW1)

                  How to replace the print display (SL1S)

                  How to replace the print display (SL1S)

                  How to replace UV LED assembly (SL1S)

                  How to replace UV LED assembly (SL1S)

                  How to disassemble the CW1

                  How to disassemble the CW1

                  How to replace a display (CW1)

                  How to replace a display (CW1)

                  How to replace a blower fan (SL1S)

                  How to replace a blower fan (SL1S)

                  ファームウェアのダウングレード (MK4/S, MK3.9/S, MK3.5/S, XL)

                  ファームウェアのダウングレード (MK4/S, MK3.9/S, MK3.5/S, XL)

                  時には、ファームウェアの古いバージョンを再インストールする必要があることがあります。ファームウェア更新方法 (CORE One, MK4/S, MK3.9/S, MK3.5/S, XL)">ファームウェアをアップデートする方法では、新しいファームウェアバージョンのみをフラッシュすることができます。同じファームウェア、または古いバージョンをフラッシュするには、以下の手順に従ってください。 繰り返しプリンタが起動してホーム画面が表示されるだけの場合は、SDカード・USBメモリ">USBフラッシュドライブをフォーマットするか、別のものを試してみてください。G-コードやプリントには問題なく動作するフラッシュドライブでも、ファームウェアのフラッシュには適していない場合があります。 ダウンロードページにアクセスし、お使いのプリンターを選択して古いバージョンをクリックして、古いバージョンを見つけます。 .bbfファイルをUSBドライブのルートフォルダに直接コピーします。 ドライブをプリンターに挿入します。 リセットボタンを押し、プリンターのロゴが画面に表示されたら、ノブを押し続けます。 新しい画面で、「FLASH」ボタンを選択してノブを押し、アップデートを確認します。 工場出荷時設定へのリセット 工場出荷時の状態へのリセット…
                  Prusa モバイルアプリ

                  Prusa モバイルアプリ

                  Prusaアプリの最初のバージョンでは、スマートフォンからPrusa Connectを使用するオプションを提供しています。 このアプリには、プリンタやチームの観察機能、基本的なダイレクトプリントオプション、NFCとの連携、通知機能などがあります。 ダウンロード Prusa アプリでできること プリンタ:プリンタとその現在のステータスを簡単にモニタリング ジョブ:現在および過去のプリントジョブの概要、最新状況の遠隔管理 通知:…
                  定期的なメンテナンス (XL)

                  定期的なメンテナンス (XL)

                  Original Prusa XLを定期的にメンテナンスすることをお勧めします。これは、プリンターが完璧に動作している場合でも行う必要があります。様々な部品の点検とメンテナンスは、プリント時間約200-300時間ごとに行うべきです。 便利なツール 六角レンチ、ニッパー、IPA(イソプロピルアルコール)+ペーパータオルなどの通常のツールの他に、以下のものが必要になる場合があります: エアダスター:缶入り空気としても知られています。スプレーする際に逆さまに持たないように注意してください…
                  How to set a Static IP Address

                  How to set a Static IP Address

                  This article is intended for experienced users only! When using PrusaLink, you connect to your printer via its IP address, which is assigned to it by the DHCP server on your network.…

                  Prusament リフィルの使い方

                  Prusament リフィルの使い方

                  プルサメントリフィルは、空のフィラメントスプールを再利用、充填できるよう設計されています。フィラメントがなくなったら、スプールの黒いプラスチックの側面を取り外し、プルサメントリフィルに取り付けます。リフィルの手順については以下をご覧ください。   基本的な情報 プルサメント・スプールは、黒いプラスチックのサイドと厚紙のセンターピースで構成されています。サイドはセンターピースに押し付けられ、取り外すことができます。 高度な素材に使用されるグレーのプルサメントスプールもあります。フィラメントによっては高温で乾燥させる必要があるため、側面は中央の厚紙に接着されています。   リフィルスプールの組み立て 1)…

                  MMU3の定期メンテナンス

                  MMU3の定期メンテナンス

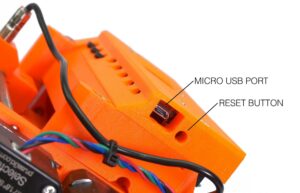
                  Original Prusa MMU3アップグレードの定期的なメンテナンスをおすすめします。下記の画像を参考に、MMU3ユニットの各部品の名称を確認してください。 アイドラーモーター:アイドラーを回転させます。 アイドラー:5つのプーリーが内蔵されています。アイドラーを回転させることで、1つのプーリーがフィラメントに直接接触し、圧力をかけます。その後、プーリーモーターがフィラメントをセレクターに押し込みます。 左ハードウェアボタン:セレクターを左に動かします。 中央ハードウェアボタン:選択した位置にフィラメントを予備送りします。 右ハードウェアボタン:セレクターを右に動かします。 LEDインジケーター:MMUの現在の状態(選択位置、エラーなど)を示します。 SuperFINDA(またはFINDA):セレクターに内蔵されたMMU3フィラメントセンサーです。 セレクター:指定された位置に移動してフィラメントスロットを選択します。その後、プーリーモーターによってフィラメントがセレクターを通り、ノズルに押し込まれます。 Festoフィッティング:前面のPTFEチューブに2つあり、もう1つはエクストルーダーの上部に取り付けられています。 リセットボタン:MMU3ユニットのみをリセットします。 MicroUSBポート:PC経由でMMU3のファームウェアを書き込むためのものです。 プーリーモーター:MMU3ユニット内でフィラメントを動かすプーリーを回転させます。 セレクターモーター:セレクターを左右に動かします。 便利なツール 通常使用する六角レンチ、ラジオペンチ、IPA+ペーパータオル以外に、以下のものがあると便利です: エアダスター(圧縮空気):スプレーする際は逆さにしないでください。逆さにすると、電子部品を掃除しようとして損傷する恐れがあります。 ブラシ:小型の真鍮ブラシがプーリーの掃除に最適です。真鍮ブラシがなければ、硬めのブラシでも代用できます。代替案として、プリンターに付属の鍼や爪楊枝も使用できます。 MMUユニット プリンターのメンテナンスを行う際は、MMUユニットにも同様にメンテナンスを行ってください。 定期メンテナンス…

                  Prusa Connect - Camera API

                  Prusa Connect - Camera API

                  Prusa Connect's Open API allows for seamless integration of third-party cameras, allowing you to link your camera to the given printer in Prusa Connect to retrieve images (snapshots).…

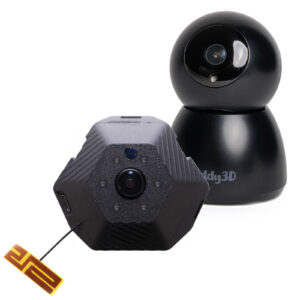
                  Buddy3Dカメラ

                  Buddy3Dカメラ

                  The Buddy3D camera features high-quality optics and IR illumination, allowing you to monitor your printer even in complete darkness.  A USB-C connection can power the camera. The…

                  Wi-Fi と PrusaLink のインストール(MINI+)

                  Wi-Fi と PrusaLink のインストール(MINI+)

                  PETG sheets (Enclosure)

                  PETG sheets (Enclosure)

                  The Original Prusa Enclosure has side panels made of PETG. See below some maintenance tips for the sheets. Cleaning The PETG sheets in your enclosure can be cleaned by washing…

                  Camera compatibility (RPi + PrusaLink)

                  Camera compatibility (RPi + PrusaLink)

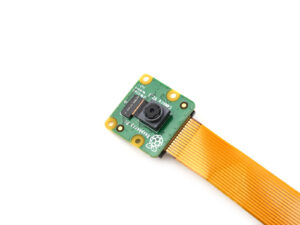
                  PrusaLink for Original Prusa MK2.5/S or MK3/S/+ printers is powered by an Raspberry Pi (RPi) board. A camera can be connected to it either using CSI or USB connection. Alternatively,…

                  接続認証の失敗

                  接続認証の失敗

                  何が起きているのか? Original Prusa MINI/+、MK4/S、MK3.9/S、MK3.5/SまたはXLで、Prusa Connectの設定中にエラーが発生し、プリンタに「Prusa Connectへの登録に失敗しました: ~」というメッセージが表示されることがあります。~の部分には、以下のリストから詳細なテキストが表示されます。表示されるテキストによって、原因と解決方法が異なります。 エラー名:…

                  Printing without purge tower on the XL (Multi-Tool)

                  Printing without purge tower on the XL (Multi-Tool)

                  The Original Prusa XL can print true multi-material prints without the need for any purge or wipe tower. The purge tower is turned ON by default (when you are mixing materials…

                  Fire Suppression system (Enclosure)

                  Fire Suppression system (Enclosure)

                  The Original Prusa Enclosure can have as an add-on a Self-contained tube-style BlazeCut Fire Suppression System. The system operates automatically and independently of any power…

                  Resin yellowing and how to reduce it

                  Resin yellowing and how to reduce it

                  When printing various resins, you may notice a more or less significant yellowing effect after curing your models. This affects most MSLA materials, including all of our Prusament…

                  Print surface preparation

                  Print surface preparation

                  Before you start printing, you should know that various materials have different adhesions on various surfaces. It is crucial to pick the right steel sheet for your printer and…

                  Nozzle replacement (HT90)

                  Nozzle replacement (HT90)

                  The Prusa PRO HT90 uses quick-swap REVO nozzles. To change a nozzle, go to More -> Nozzle change in the printer menu. If the nozzle is too hot at this point, you will be presented…

                  How to connect to RPi via SSH

                  How to connect to RPi via SSH

                  This article is intended for experienced users only! During the regular RPi + PrusaLink operation, there should be no need to set up and use SSH. Since we develop neither Raspberry…

                  IPA pigment filter (CW1/CW1S)

                  IPA pigment filter (CW1/CW1S)

                  The Original Prusa Curing and Washing Machine (CW1/S) uses isopropyl alcohol (IPA) to wash the uncured resin around the print model before curing it. The resin usually leaves pigment…

                  接続認証の失敗 #17401 (XL)

                  接続認証の失敗 #17401 (XL)

                  何が起こったのか? Original Prusa XLでPrusa Connectの設定中に、この設定でエラーが発生し、プリンタに「Prusa Connectへの登録が失敗しました:~」というメッセージが表示されることがあります。~の部分には、より詳細な説明テキストが表示されます。 エラー名:Connect登録失敗 エラーコード:#17401 どのように修正するか? Buddyファームウェアを搭載した当社のプリンタ共通のConnect登録失敗ガイドの指示に従ってください。このガイドには、このエラーの考えられる原因とその解決策についてのより詳細な情報が記載されています。

                  PEI (Ultem)

                  PEI (Ultem)

                  Basic info Ultem, also known as PEI (Polyetherimide), is a high-performance thermoplastic material ideal for 3D printing. Its extreme resistance to heat and chemicals makes it…

                  Regular printer maintenance (MK3.5/S)

                  Regular printer maintenance (MK3.5/S)

                  It is recommended to regularly take some time to maintain your printer. This should be done even if the printer is working perfectly. The inspection and maintenance of its various…

                  Connect Registration Failed #23401 (MK3.5)

                  Connect Registration Failed #23401 (MK3.5)

                  What happened?  During the configuration of Prusa Connect on the Original Prusa MK3.5, an error on this configuration can occur and the printer shows the message "Registration…

                  HueForge filament transparency values and HexCodes

                  HueForge filament transparency values and HexCodes

                  If you're using the HueForge program, you might find these values useful. The HueForge transparency (TD) and HexCode values are measured for all of our Prusament materials and…

                  How to update firmware (HT90)

                  How to update firmware (HT90)

                  The Prusa Pro HT90 has firmware installed during production. It is possible to update the firmware in three ways. Menu update Connect the printer to the internet network. Then…

                  Connect Registration Failed #12401 (MINI)

                  Connect Registration Failed #12401 (MINI)

                  What happened?  During the configuration of Prusa Connect on the Original Prusa MINI/+, an error on this configuration can occur and the printer shows the message "Registration…

                  PEEK-CF (Polyetheretherketone)

                  PEEK-CF (Polyetheretherketone)

                  PEEK-CF is an advanced thermoplastic filament with excellent mechanical properties and high-temperature resistance. This material is based on polyetheretherketone (PEEK) with added…

                  PEKK-CF (Polyetherketoneketone)

                  PEKK-CF (Polyetherketoneketone)

                  PEKK-CF is an advanced thermoplastic filament combining excellent mechanical properties, high-temperature resistance, and chemical stability. This material is based on polyetherketoneketone…

                  Changing or replacing the Prusa Nozzle

                  Changing or replacing the Prusa Nozzle

                  Replacing the Prusa Nozzle on your printer varies depending on the model of your printer. This article provides an overview of the different methods to replace the Prusa Nozzle,…

                  How to update firmware (MMU3)

                  How to update firmware (MMU3)

                  When updating from the 1.0.6 to the 3.0.0 firmware version or above, go to LCD menu - Settings - MMU, and set it to ON. Updating the firmware is recommended for all users as every…

                  Changing or replacing the Nextruder Hotend

                  Changing or replacing the Nextruder Hotend

                  Replacing the Nextruder Hotend assembly on your printer may differ depending on the specific model you own. This article outlines various approaches for replacing the Nextruder…

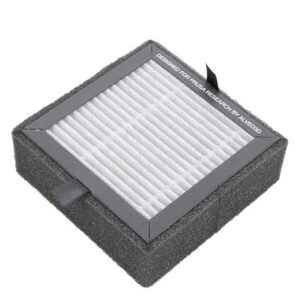
                  HEPA filter replacement (HT90)

                  HEPA filter replacement (HT90)

                  The Prusa Pro HT90 has a HEPA filter in the upper part of the printer through which air passes from the printer into the room. The filter needs to be replaced every 600 print hours.…

                  PPSU (Polyphenylsulfone)

                  PPSU (Polyphenylsulfone)

                  PPSU (polyphenylsulfone) is a technical thermoplastic material with excellent resistance to heat and chemicals and superior hydrolytic stability. The main characteristic of this…

                  Changing the print head

                  Changing the print head

                  The Prusa Pro HT90 supports two print head configurations. The default high flow print head handles materials up to 300°C. For industrial materials like PEI, PEKK, and PEEK, use…

                  How to print with PEI 1010

                  How to print with PEI 1010

                  You’ve probably guessed it already but the PEI 1010 isn’t exactly a “plug and print” material like our basic Prusaments (PLA, PETG…). Although we do our best to make our filaments…

                  Regular printer maintenance (HT90)

                  Regular printer maintenance (HT90)

                  The Prusa Pro HT90 is engineered for maximum efficiency and reliability. However, it is still a mechanical device with components that require regular maintenance. Follow the guidelines…

                  PPS (Polyphenylene sulfide)

                  PPS (Polyphenylene sulfide)

                  PPS or Polyphenylene sulfide is a semi-crystalline technical thermoplastic material suitable for 3D printing characterized by high resistance to heat and chemicals. The main characteristic…

                  Connect Registration Failed #21401 (MK3.9)

                  Connect Registration Failed #21401 (MK3.9)

                  What happened?  During the configuration of Prusa Connect on the Original Prusa MK3.9, an error on this configuration can occur and the printer shows the message "Registration…

                  LW PLA

                  LW PLA

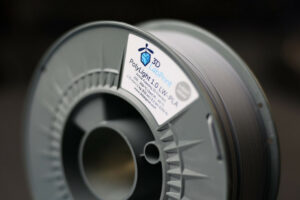
                  Basic info LW PLA is a filament that can expand during printing. It is useful for parts that need to be light. Recommended nozzle temperature: 210 - 250 ºC.   Recommended bed…

                  Prusament Resin Model Color Kit

                  Prusament Resin Model Color Kit

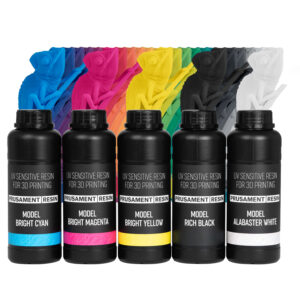
                  Introduction In this article, you will learn everything you need to know when mixing resin colors using the Prusament Model Resin Color Kit - either with the help of the Sample…

                  PSU (Polysulfone)

                  PSU (Polysulfone)

                  PSU, or Polysulfone, is a technical thermoplastic material with an excellent combination of properties that make it suitable for various applications including 3D printing. Its…

                  Prusa Connect setup (SL1/S)

                  Prusa Connect setup (SL1/S)

                  Starting from firmware 1.8.0, the Original Prusa SL1/S can be added to Prusa Connect. There are three ways to do it. Touchscreen GUI on the printer Go to the printer menu to Settings…

                  Prusa Connect (HT90)

                  Prusa Connect (HT90)

                  It is possible to connect your Prusa Pro HT90 to PrusaConnect in order to print and monitor your printer remotely. Connecting Go to the printer menu to More -> Settings -> Prusa…

                  Installing or changing the Nextruder V6 Nozzle Adapter

                  Installing or changing the Nextruder V6 Nozzle Adapter

                  The Nextruder V6 Nozzle Adapter enables the use of V6-compatible nozzles on printers equipped with the Nextruder. Installing the Nextruder V6 Nozzle Adapter on your printer varies…

                  Regular printer maintenance (CORE One/+)

                  Regular printer maintenance (CORE One/+)

                  It is recommended to regularly take some time to maintain your Prusa CORE One/+. This should be done even if the printer is working perfectly.  Useful tools Besides the usual tools,…

                  Prusament TPU 95A material guide

                  Prusament TPU 95A material guide

                  Prusament TPU 95A is a flexible material with high mechanical resistance and print reliability. Although it’s one of the easiest flexible materials to print, it still requires…

                  Prusament PETG Ultraglow troubleshooting

                  Prusament PETG Ultraglow troubleshooting

                  Prusament PETG Ultraglow green is the brightest glow-in-the-dark filament on the market. It is filled with the highest possible amount of strontium aluminate, which is the hardest…

                  Prusament Woodfill

                  Prusament Woodfill

                  Prusament Woodfill is our own in-house-made filament with ±0.04 mm manufacturing tolerance. The material is filled with wood for great looks, while it maintains very easy printability. Recommended…

                  PETG V0

                  PETG V0

                  PETG V0 is the one-in-the-world UL-certified self-extinguishing PETG filament. It is especially suitable for housings and insulating parts in electronics, due to its self-extinguishing…

                  PETG Magnetite 40%

                  PETG Magnetite 40%

                  Prusament PETG Magnetite 40% is a specialized technical material with unique paramagnetic properties and high density. It is filled with fine magnetite powder, making it responsive…

                  PETG Tungsten

                  PETG Tungsten

                  Prusament PETG Tungsten 75% is a high-density material containing 75% tungsten powder. This non-reactive, hypoallergenic, and non-toxic filament is designed primarily for printing…

                  MK3シリーズのホットエンドガイド

                  MK3シリーズのホットエンドガイド

                  Fusion 360

                  How to replace Heatbed (CORE One)

                  How to replace Heatbed (CORE One)

                  How to install the Nextruder V6 Nozzle Adapter (CORE One)

                  How to install the Nextruder V6 Nozzle Adapter (CORE One)

                  How to replace the CoreXY plastic parts

                  How to replace the CoreXY plastic parts

                  How to replace Heatbed Thermistor (CORE One)

                  How to replace Heatbed Thermistor (CORE One)

                  ヒートベッドの交換方法 (MINI/MINI+)

                  ヒートベッドの交換方法 (MINI/MINI+)

                  How to lubricate linear bearing rails (XL)

                  How to lubricate linear bearing rails (XL)

                  How to set up a Buddy3D Cam

                  How to set up a Buddy3D Cam

                  How to replace a hotend assembly (CORE One)

                  How to replace a hotend assembly (CORE One)

                  How to replace a print fan (MK4S / MK3.9S)

                  How to replace a print fan (MK4S / MK3.9S)

                  How to lubricate the magballs (HT90)

                  How to lubricate the magballs (HT90)

                  How to replace Nextruder heatsink (XL Single-tool)

                  How to replace Nextruder heatsink (XL Single-tool)

                  IPA pigment filter

                  IPA pigment filter

                  How to install the Nextruder V6 Nozzle Adapter (XL single-tool)

                  How to install the Nextruder V6 Nozzle Adapter (XL single-tool)

                  Buddy3D Camera for CORE One Installation

                  Buddy3D Camera for CORE One Installation

                  How to replace the Prusa Nozzle (XL single-tool)

                  How to replace the Prusa Nozzle (XL single-tool)

                  How to replace the side filament sensor (CORE One)

                  How to replace the side filament sensor (CORE One)

                  How to replace the Hotend assembly (XL single-tool)

                  How to replace the Hotend assembly (XL single-tool)

                  フィラメントガイドアドオン (MK4S/MK4)

                  フィラメントガイドアドオン (MK4S/MK4)

                  ネクストルーダーV6ノズルアダプター(MK4/MK3.9)の取り付け方法

                  ネクストルーダーV6ノズルアダプター(MK4/MK3.9)の取り付け方法

                  Prusaノズルの交換方法(MK4/MK3.9)

                  Prusaノズルの交換方法(MK4/MK3.9)

                  Prusament リフィル 900gの使い方

                  Prusament リフィル 900gの使い方

                  How to replace the door sensor (CORE One)

                  How to replace the door sensor (CORE One)

                  How to replace a Nextruder (XL single-tool)

                  How to replace a Nextruder (XL single-tool)

                  Prusaノズル(XLマルチツール)の交換方法

                  Prusaノズル(XLマルチツール)の交換方法

                  How to replace a Z-axis motor (XL)

                  How to replace a Z-axis motor (XL)

                  Packing the Prusa XL printer for return - Original Packing material

                  Packing the Prusa XL printer for return - Original Packing material

                  How to replace a heatbed tile and a heatbed tile cable (XL)

                  How to replace a heatbed tile and a heatbed tile cable (XL)

                  How to replace a print fan (XL single tool)

                  How to replace a print fan (XL single tool)

                  How to fix Modular bed error (HW solution)

                  How to fix Modular bed error (HW solution)

                  Loveボードの交換方法 (MK4S/MK4/MK3.9S/MK3.9)

                  Loveボードの交換方法 (MK4S/MK4/MK3.9S/MK3.9)

                  How to replace trapezoid nuts (XL)

                  How to replace trapezoid nuts (XL)

                  How to clean the side filament sensor (XL)

                  How to clean the side filament sensor (XL)

                  How to change xLCD and xLCD cable (XL single-tool)

                  How to change xLCD and xLCD cable (XL single-tool)

                  How to replace a Dwarf board (XL multi-tool)

                  How to replace a Dwarf board (XL multi-tool)

                  How to replace Nextruder heatsink (XL Multi-tool)

                  How to replace Nextruder heatsink (XL Multi-tool)

                  How to replace a Dwarf board (XL single-tool)

                  How to replace a Dwarf board (XL single-tool)

                  How to replace the filament sensor (HT90)

                  How to replace the filament sensor (HT90)

                  銀のPSUから黒いPSUへの交換方法

                  銀のPSUから黒いPSUへの交換方法

                  How to replace the Hotend assembly (XL multi-tool)

                  How to replace the Hotend assembly (XL multi-tool)

                  How to replace a hotend thermistor (XL Single-Tool)

                  How to replace a hotend thermistor (XL Single-Tool)

                  How to replace Z motors (CORE One)

                  How to replace Z motors (CORE One)

                  How to replace a Z-axis linear rail (XL)

                  How to replace a Z-axis linear rail (XL)

                  How to replace a profile insert (XL)

                  How to replace a profile insert (XL)

                  How to replace the hotend fan (XL Multi-tool)

                  How to replace the hotend fan (XL Multi-tool)

                  How to replace a PSU (XL)

                  How to replace a PSU (XL)

                  How to replace a hotend heater (XL Single-Tool)

                  How to replace a hotend heater (XL Single-Tool)

                  ホットエンドヒーターの交換方法 (MK4/MK3.9)

                  ホットエンドヒーターの交換方法 (MK4/MK3.9)

                  ホットエンドサーミスターの交換 (MK4/MK3.9)

                  ホットエンドサーミスターの交換 (MK4/MK3.9)

                  How to lubricate the coupler pins on Original Prusa XL (Multi-Tool)

                  How to lubricate the coupler pins on Original Prusa XL (Multi-Tool)

                  ホットエンドファンの交換方法 (MK4/MK3.9)

                  ホットエンドファンの交換方法 (MK4/MK3.9)

                  xBuddyボードの交換方法 (MK4/MK3.9/MK3.5)

                  xBuddyボードの交換方法 (MK4/MK3.9/MK3.5)

                  How to replace the tch-profile-insert (XL)

                  How to replace the tch-profile-insert (XL)

                  プリントファンの交換方法 (MK4 / MK3.9)

                  プリントファンの交換方法 (MK4 / MK3.9)

                  ホットエンドアッセンブリの交換方法 (MK4/MK3.9)

                  ホットエンドアッセンブリの交換方法 (MK4/MK3.9)

                  How to replace a Heatbed Thermistor (MK4/S, MK3.9/S, MK3.5/S)

                  How to replace a Heatbed Thermistor (MK4/S, MK3.9/S, MK3.5/S)

                  How to replace the Sandwich Board (XL)

                  How to replace the Sandwich Board (XL)

                  How to replace the rubber band on Original Prusa XL (Multi-tool)

                  How to replace the rubber band on Original Prusa XL (Multi-tool)

                  How replace the CoreXY Cover Rear (Original Prusa XL)

                  How replace the CoreXY Cover Rear (Original Prusa XL)

                  ネクストルーダーV6ノズルアダプターの取り付け方法 (XLマルチツール)

                  ネクストルーダーV6ノズルアダプターの取り付け方法 (XLマルチツール)

                  How to replace a XY motor (XL)

                  How to replace a XY motor (XL)

                  How to replace a hotend heatsink (MK4 / MK3.9)

                  How to replace a hotend heatsink (MK4 / MK3.9)

                  How to replace xLCD (MK4/MK3.9/MK3.5)

                  How to replace xLCD (MK4/MK3.9/MK3.5)

                  Packing the XL Enclosure for return - Original Packing material

                  Packing the XL Enclosure for return - Original Packing material

                  Unpacking the printer (HT90)

                  Unpacking the printer (HT90)

                  How to change the belt (XL)

                  How to change the belt (XL)

                  How to replace the Prusa Nozzle (MK4S/MK3.9S)

                  How to replace the Prusa Nozzle (MK4S/MK3.9S)

                  How to use accelerometer (MK3.5/S)

                  How to use accelerometer (MK3.5/S)

                  How to replace a hotend assembly (MK4S / MK3.9S)

                  How to replace a hotend assembly (MK4S / MK3.9S)

                  How to install the Nextruder V6 Nozzle Adapter (MK4S/MK3.9S)

                  How to install the Nextruder V6 Nozzle Adapter (MK4S/MK3.9S)

                  How to install the Camera dummy module (HT90)

                  How to install the Camera dummy module (HT90)

                  How to change the xLCD (XL)

                  How to change the xLCD (XL)

                  How to replace the door (HT90)

                  How to replace the door (HT90)

                  How to replace the Prusa Nozzle (CORE One)

                  How to replace the Prusa Nozzle (CORE One)

                  How to reverse the door orientation (CORE One)

                  How to reverse the door orientation (CORE One)

                  How to pack the Prusa CORE One for return - Original Packing material

                  How to pack the Prusa CORE One for return - Original Packing material

                  How to replace the main cable connector cover (XL)

                  How to replace the main cable connector cover (XL)

                  Maintenance warning #31117 (CORE One) #26117 (MK4S) #13117 (MK4) #27117 (MK3.9S) #21117 (MK3.9) #28117 (MK3.5S) #23117 (MK3.5)

                  Maintenance warning #31117 (CORE One) #26117 (MK4S) #13117 (MK4) #27117 (MK3.9S) #21117 (MK3.9) #28117 (MK3.5S) #23117 (MK3.5)

                  What happened?  The Prusa CORE One/+, and the Original Prusa MK4/S, MK3.9/S, MK3.5/S can be equipped with an MMU3 upgrade kit. Having the MMU3 upgrade kit installed significantly…

                  Maintenance failure warning #28116 (MK3.5S) #23116 (MK3.5)

                  Maintenance failure warning #28116 (MK3.5S) #23116 (MK3.5)

                  What happened?  The Original Prusa MK3.5/S can be equipped with an MMU3 upgrade kit. Having the MMU3 upgrade kit installed significantly increases the number of loads and unloads.  After…

                  Maintenance failure warning #31116 (CORE One) #26116 (MK4S) #13116 (MK4) #27116 (MK3.9S) #21116 (MK3.9)

                  Maintenance failure warning #31116 (CORE One) #26116 (MK4S) #13116 (MK4) #27116 (MK3.9S) #21116 (MK3.9)

                  What happened? The Prusa CORE One/+ and the Original Prusa MK4/S and MK3.9/S can be equipped with an MMU3 upgrade kit. Having the MMU3 upgrade kit installed significantly increases…

                  How to lubricate linear bearing rails (HT90)

                  How to lubricate linear bearing rails (HT90)

                  How to install Advanced Filtration (CORE One)

                  How to install Advanced Filtration (CORE One)

                  How to replace HEPA filter (HT90)

                  How to replace HEPA filter (HT90)

                  How to clean external filters (HT90)

                  How to clean external filters (HT90)

                  How to replace the desiccant in the Prusa Pro Filament Drybox

                  How to replace the desiccant in the Prusa Pro Filament Drybox

                  How to put on Prusa socks

                  How to put on Prusa socks

                  How to replace a high-temperature nozzle (HT90)

                  How to replace a high-temperature nozzle (HT90)

                  How to tension the belts (HT90)

                  How to tension the belts (HT90)

                  How to pack the Prusa CORE One for return - Custom Packing material

                  How to pack the Prusa CORE One for return - Custom Packing material

                  Prusa Pro HT90 Maintenance Kit

                  Prusa Pro HT90 Maintenance Kit

                  Regular maintenance is key to ensuring long-term reliability, high-quality prints, and trouble-free operation of your Prusa Pro HT90. A dedicated Maintenance Kit for HT90 is available,…

                  How to assemble the spool holder (HT90)

                  How to assemble the spool holder (HT90)

                  How to replace external input fuse (HT90)

                  How to replace external input fuse (HT90)

                  How to replace the LCD control panel (HT90)

                  How to replace the LCD control panel (HT90)

                  How to replace the PDU splitter (XL)

                  How to replace the PDU splitter (XL)

                  How to replace the PTFE Bowden tube (HT90)

                  How to replace the PTFE Bowden tube (HT90)

                  How to replace the heatbed (XL)

                  How to replace the heatbed (XL)

                  How to replace the xBuddy board (CORE One)

                  How to replace the xBuddy board (CORE One)

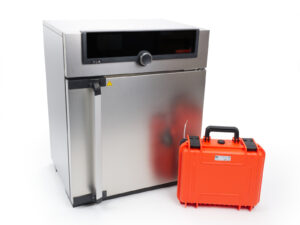
                  Drying filament in Memmert UF-series universal oven

                  Drying filament in Memmert UF-series universal oven

                  Drying filament before printing is a critical step when working with high-performance materials. The Memmert UF-series ovens offer precise temperature control, active ventilation,…

                  Packing the MK4/S + MMU3 bundle for return - original packaging

                  Packing the MK4/S + MMU3 bundle for return - original packaging

                  How to replace Hotend fan (CORE One)

                  How to replace Hotend fan (CORE One)

                  How to replace Nextruder Filament Sensor (CORE One)

                  How to replace Nextruder Filament Sensor (CORE One)

                  How to replace Heatsink NTC Thermistor (CORE One)

                  How to replace Heatsink NTC Thermistor (CORE One)

                  How to replace Hotend Heatsink (CORE One)

                  How to replace Hotend Heatsink (CORE One)

                  Xモーター/Yモーターの交換方法(CORE One)

                  Xモーター/Yモーターの交換方法(CORE One)

                  Cold Pull #31702 (CORE One) #35702 (CORE One L)

                  Cold Pull #31702 (CORE One) #35702 (CORE One L)

                  A 'cold pull' is a technique for cleaning your printer’s nozzle and hotend from any material that may be stuck or burnt inside. You can also use it to clean your hotend during…

                  How to replace the print fan (XL multi-tool)

                  How to replace the print fan (XL multi-tool)

                  How to replace the print fan (CORE One)

                  How to replace the print fan (CORE One)

                  How to install the Nextruder V6 nozzle adapter (CORE One L/+)

                  How to install the Nextruder V6 nozzle adapter (CORE One L/+)

                  How to replace the Prusa Nozzle (CORE One L)

                  How to replace the Prusa Nozzle (CORE One L)

                  How to replace a hotend assembly (CORE One L)

                  How to replace a hotend assembly (CORE One L)

                  How to replace the hotend fan (CORE One L)

                  How to replace the hotend fan (CORE One L)

                  How to replace the Heatbed Power Cables (CORE One)

                  How to replace the Heatbed Power Cables (CORE One)

                  How to replace the side filament sensor (CORE One L)

                  How to replace the side filament sensor (CORE One L)

                  How to install the Advanced Filtration (CORE One L)

                  How to install the Advanced Filtration (CORE One L)

                  How to replace the Buddy3D camera cable (CORE One L)

                  How to replace the Buddy3D camera cable (CORE One L)

                  How to replace the Chamber fan (CORE One)

                  How to replace the Chamber fan (CORE One)

                  How to replace a Hotend Heater (CORE One L)

                  How to replace a Hotend Heater (CORE One L)

                  How to replace a Heatsink Thermistor (CORE One L)

                  How to replace a Heatsink Thermistor (CORE One L)

                  How to replace Nextruder Filament Sensor (CORE One L)

                  How to replace Nextruder Filament Sensor (CORE One L)

                  How to replace the print fan (CORE One L)

                  How to replace the print fan (CORE One L)

                  How to replace a Hotend Thermistor (CORE One)

                  How to replace a Hotend Thermistor (CORE One)

                  How to replace a Hotend Heater (CORE One)

                  How to replace a Hotend Heater (CORE One)

                  How to replace the Accelerometer (CORE One L)

                  How to replace the Accelerometer (CORE One L)

                  How to replace the Belt Tensioner Pulley (CORE One)

                  How to replace the Belt Tensioner Pulley (CORE One)

                  How to replace Hotend Heatsink (CORE One L)

                  How to replace Hotend Heatsink (CORE One L)

                  How to replace the Belt Tensioner Left (CORE One)

                  How to replace the Belt Tensioner Left (CORE One)

                  How to replace the Belt Tensioner Right (CORE One)

                  How to replace the Belt Tensioner Right (CORE One)

                  How to reverse the door orientation (CORE One L)

                  How to reverse the door orientation (CORE One L)

                  Care and maintenance of wooden parts (Prusa Signature Oak)

                  Care and maintenance of wooden parts (Prusa Signature Oak)

                  The Prusa Signature Oak is a unique edition of the 3D printer featuring structural components made from solid oak wood. As a natural material, wood is susceptible to environmental…

                  Blown fuse (XL)

                  Blown fuse (XL)

                  The Original Prusa XL electronics are equipped with fuses to protect crucial components. If your printer or some of its components suddenly stop working, it is recommended to…

                  How to replace Loveboard (CORE One L)

                  How to replace Loveboard (CORE One L)

                  How to replace Loveboard (CORE One)

                  How to replace Loveboard (CORE One)

                  How to replace a Hotend Thermistor (CORE One L)

                  How to replace a Hotend Thermistor (CORE One L)

                  Regular printer maintenance (CORE One L)

                  Regular printer maintenance (CORE One L)

                  It is recommended to regularly take some time to maintain your Prusa CORE One L regularly. This should be done even if the printer is working perfectly.  Useful tools Besides the…

                  How to replace trapezoid nuts (XL)

                  How to replace trapezoid nuts (XL)

                  How to replace the White LED strip (CORE One L)

                  How to replace the White LED strip (CORE One L)

                  How to pack CORE One L for return

                  How to pack CORE One L for return

                  How to replace the heatbed fans (CORE One L)

                  How to replace the heatbed fans (CORE One L)

                  ヒートベッドの交換方法(CORE One L)

                  ヒートベッドの交換方法(CORE One L)

                  ACボックスの交換方法(CORE One L)

                  ACボックスの交換方法(CORE One L)

                  Regular printer maintenance (Signature Oak)

                  Regular printer maintenance (Signature Oak)

                  The Prusa Signature Oak was designed from the beginning as a true print "workhorse". Despite its high reliability, it is still a device with mechanical components that require…

                  First setup and filament loading (USS Drybox)

                  First setup and filament loading (USS Drybox)

                  Before using the Prusa USS Drybox for the first time, it is important to prepare it correctly to ensure a stable low-humidity environment for your filament. This article covers…

                  Prusa USS Drybox - Installation on CORE One

                  Prusa USS Drybox - Installation on CORE One

                  This guide describes how to install the Prusa USS Drybox on the Prusa CORE One printer. The CORE One uses a different spool holder system compared to CORE One+ and CORE One L,…

                  Prusa USS Drybox - Installation on CORE One L / CORE One+

                  Prusa USS Drybox - Installation on CORE One L / CORE One+

                  This guide describes how to install the Prusa USS Drybox on Prusa CORE One+ and CORE One L printers. Both printers use the same spool mounting system and filament routing interface,…

                  Prusa USS Drybox - Installation on HT90

                  Prusa USS Drybox - Installation on HT90

                  This guide describes how to install the Prusa USS Drybox on the Prusa HT90 printer. The installation includes an adapter between the printer and the Drybox mounting puck. This…

                  Prusa USS Drybox - Installation on XL

                  Prusa USS Drybox - Installation on XL

                  This guide describes how to install the Prusa USS Drybox on the Prusa XL printer. The XL uses a multi-toolhead system, and each toolhead requires a different PTFE length and mounting…

                  Prusa USS Drybox - Installation on MK4/3.9 series

                  Prusa USS Drybox - Installation on MK4/3.9 series

                  This guide describes how to install the Prusa USS Drybox on Prusa MK4/S and MK3.9/S The Drybox is not compatible with MK printers installed in the Enclosure or with the MK3/S/+ All…

                  How to replace the main cable (CORE One/+)

                  How to replace the main cable (CORE One/+)

                  How to replace a hotend heatsink (MK4S / MK3.9S)

                  How to replace a hotend heatsink (MK4S / MK3.9S)

                  Regular printer maintenance (CORE One INDX)

                  Regular printer maintenance (CORE One INDX)

                  It is recommended to regularly take some time to maintain your Prusa CORE One INDX. This should be done even if the printer is working perfectly.  Useful tools Besides the usual…

                  Prusa Connect と ESPカメラ

                  Prusa Connect と ESPカメラ

                  Wi-FiとPrusa Connect/Link のセットアップ方法 (CORE One, MK4/S, MK3.9, MK3.5, XL, MINI/+)

                  Wi-FiとPrusa Connect/Link のセットアップ方法 (CORE One, MK4/S, MK3.9, MK3.5, XL, MINI/+)

                  Prusa Connect へのプリンタの追加 (CORE One, MK4/S, MK3.9/S, MK3.5/S, XL, MINI/+)

                  Prusa Connect へのプリンタの追加 (CORE One, MK4/S, MK3.9/S, MK3.5/S, XL, MINI/+)

                  Wi-Fi and PrusaLink setup (XL firmware up to 4.7.5)

                  Wi-Fi and PrusaLink setup (XL firmware up to 4.7.5)

                  Adding the printer to Prusa Connect (XL firmware up to 4.7.5)

                  Adding the printer to Prusa Connect (XL firmware up to 4.7.5)

                  PrusaLink / Prusa Connect with RPi 3/4 USB (MK2.5/S MK3/S/+)

                  PrusaLink / Prusa Connect with RPi 3/4 USB (MK2.5/S MK3/S/+)

                  PrusaリンクおよびPrusaコネクトのカメラのセットアップ

                  PrusaリンクおよびPrusaコネクトのカメラのセットアップ

                  Prusa Connect - Telegram notifications setup

                  Prusa Connect - Telegram notifications setup

                  Prusa Connect - Discord notifications setup

                  Prusa Connect - Discord notifications setup

                  Prusa Connect - Slack notifications setup

                  Prusa Connect - Slack notifications setup

                  How to update PrusaLink (MK2.5/S MK3/S/+)

                  How to update PrusaLink (MK2.5/S MK3/S/+)