Relevant for


A clogged nozzle is a possible issue for FFF/FDM printers. If there are no issues, the filament is pushed into the hotend, melted, and then extruded through the nozzle. However, if the nozzle is damaged or there are impurities in the filament, it might get stuck in the hotend, clogging the printer.
Check if there are clicking noises from the extruder
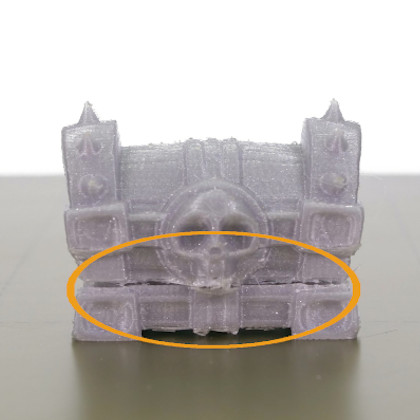
Sometimes the clog is partial, meaning that the printer is able to push some filament through, but it is not enough to print the object properly, leading to visible gaps and missing layers. An early sign of a clogged nozzle is that the filament is not extruded consistently, curls up, and sticks to the nozzle.
The hotend or the nozzle is partially or fully clogged, and the internal resistance against the flow of the filament is greater than what the gears are able to push. As a result, the gears are skipping, leading to the “clicking” noise and, in most scenarios, also to the grinding of the filament.
Choosing the right method depends on whether you are able to at least partially load/unload the filament or whether the printer is fully jammed and refusing the move the filament even a little.
Before you start fixing the printer, try unloading the filament and removing it completely. If you are unable to do it, it might indicate a more serious problem, but we will deal with this one as well.
Also, move the extruder upwards from LCD Menu -> Settings -> Move Axis -> Z-axis or by long-pressing the LCD rotative controller. This way, you will get better access to the parts that are clogged.
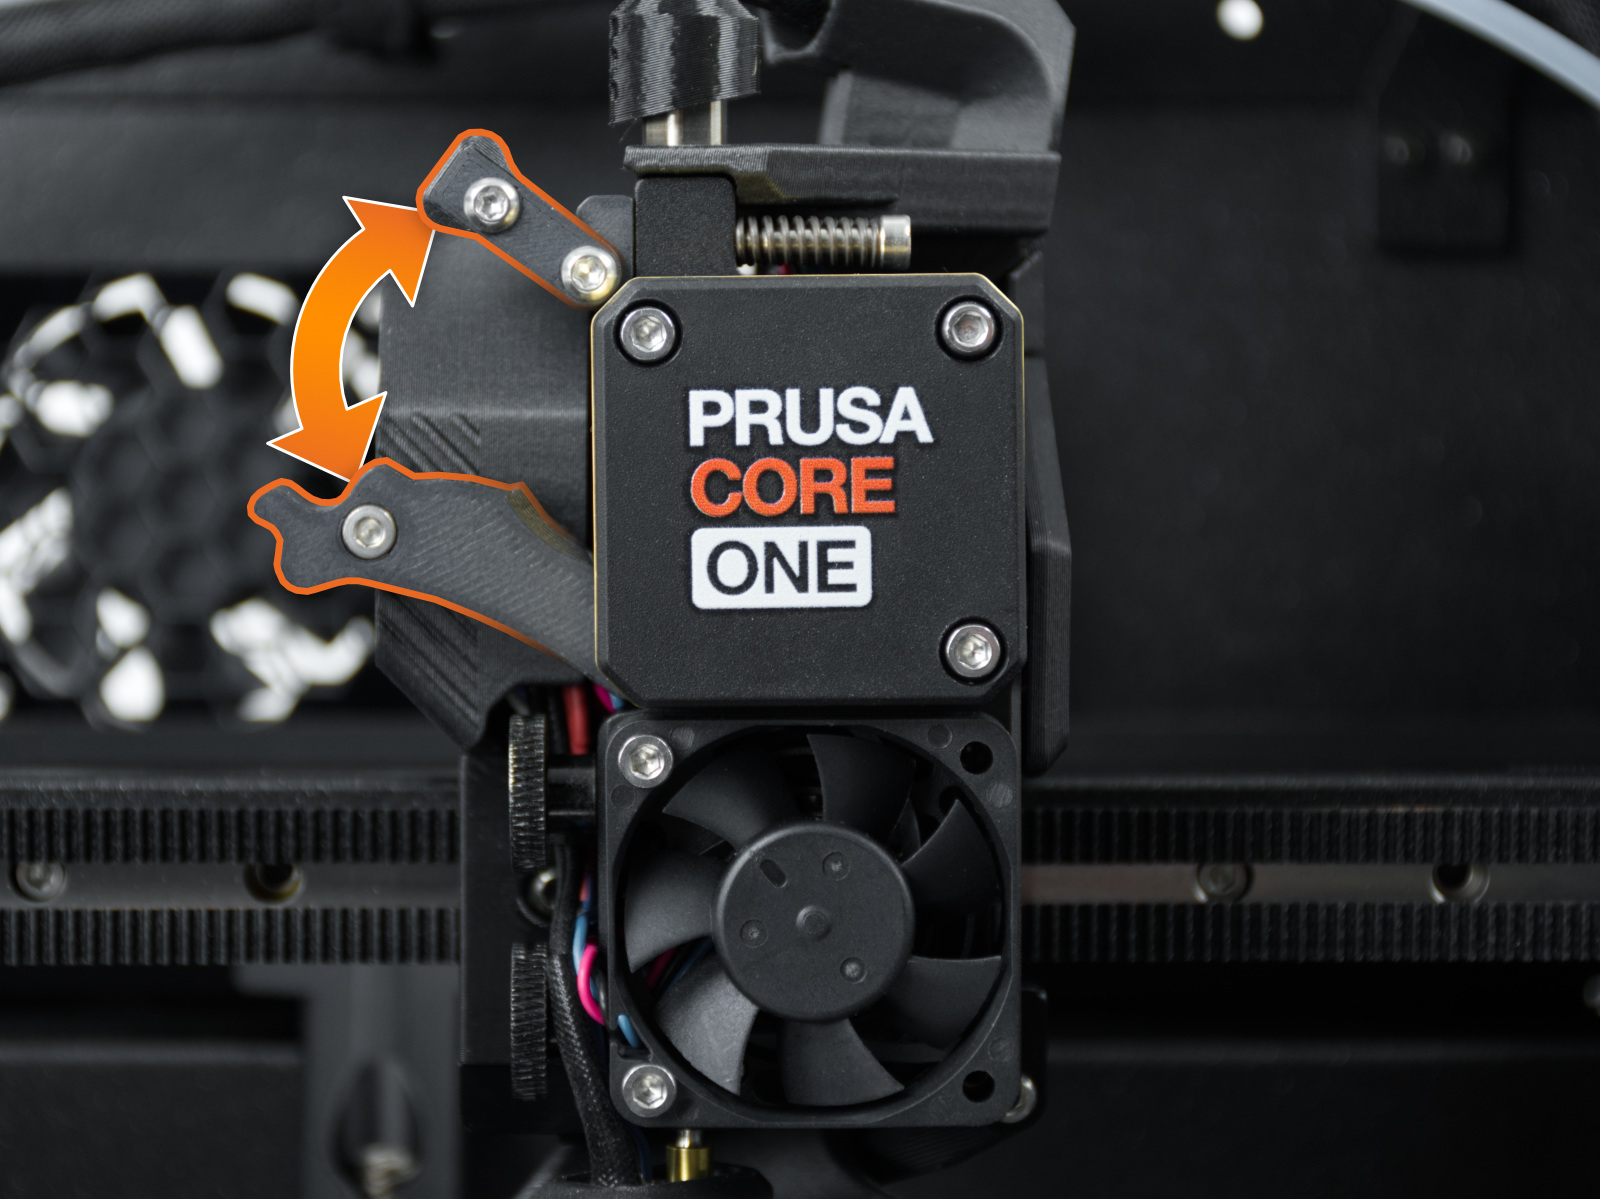
The extruder includes two idler tension screws to set the correct distance between the drive gear and the two driven gears. These are set to the optimal position at the factory.
In case of an intervention on that part, you can adjust the idler tension screws to their optimal position: the tips of the screws must be aligned with the front surface of the Idler Nut.
When doing this check, if the filament broke off, observe the area next to the gearbox and top of the nozzle tube, to assess whether there is filament sticking out of the tube. If it is there, consider skipping to the technique described in the Pull out filament with pliers paragraph.
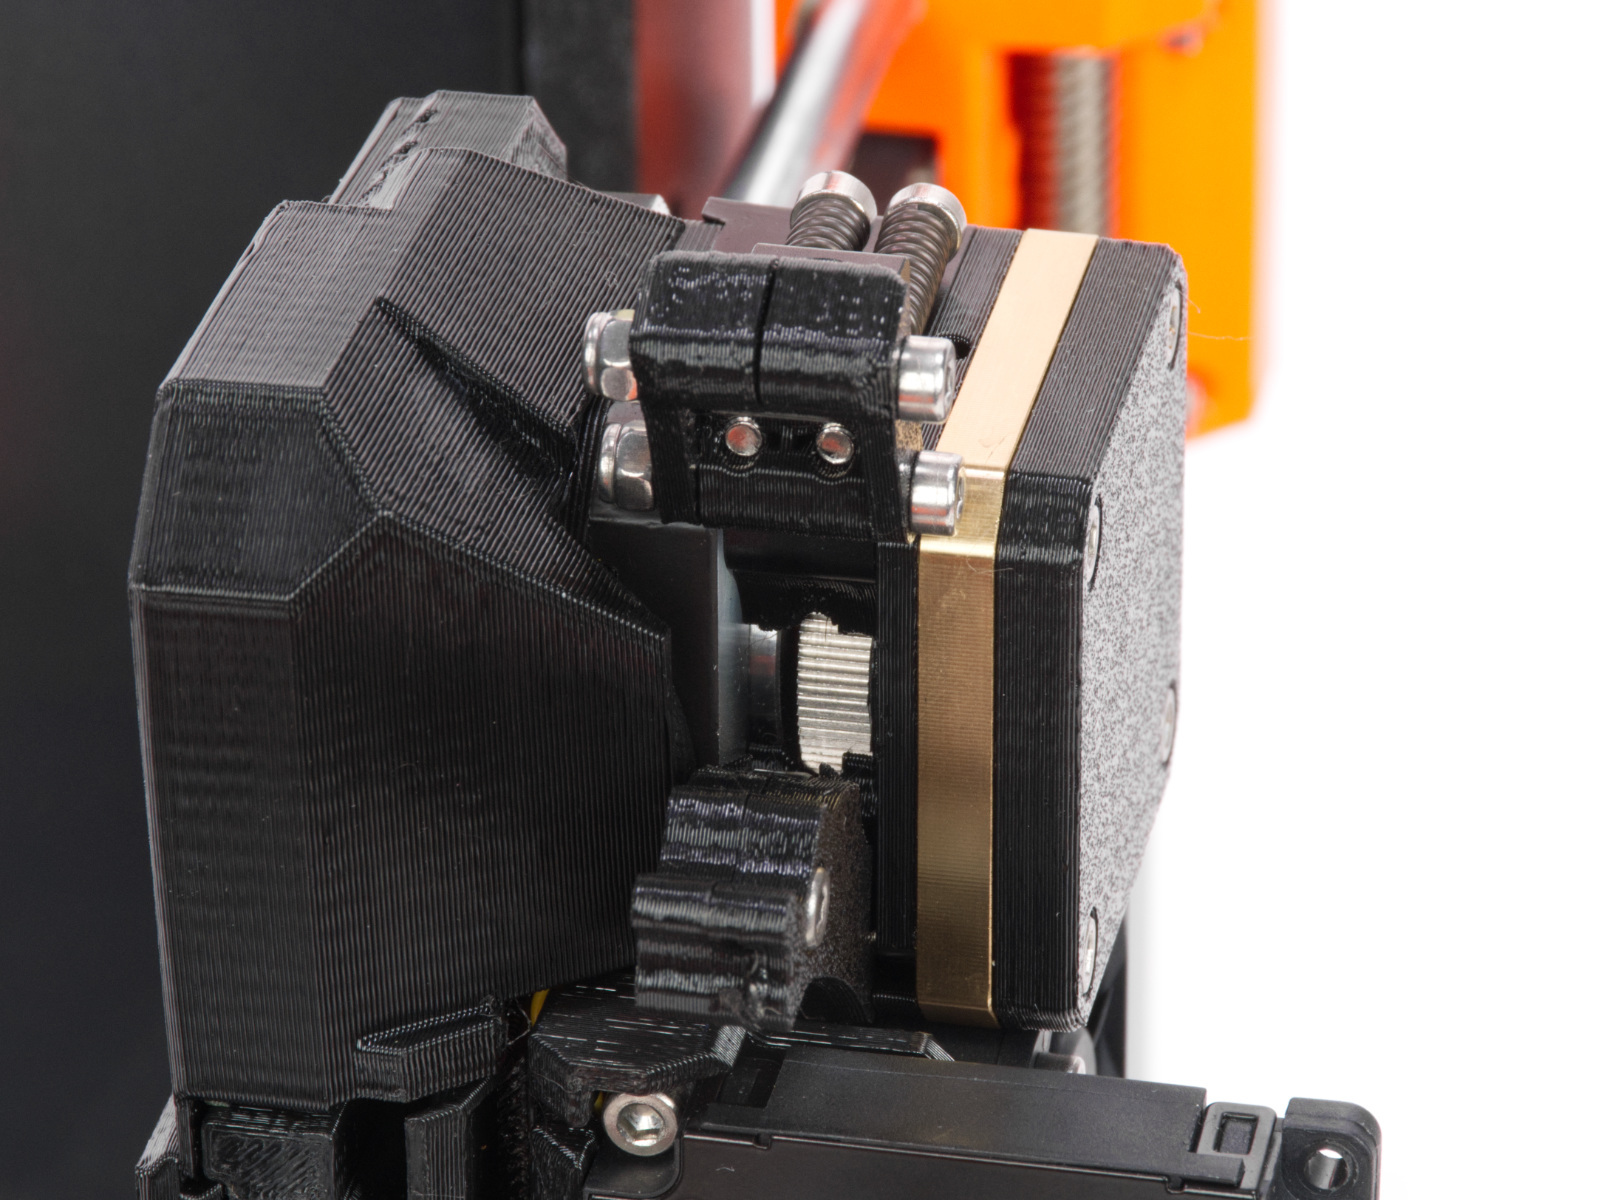 | 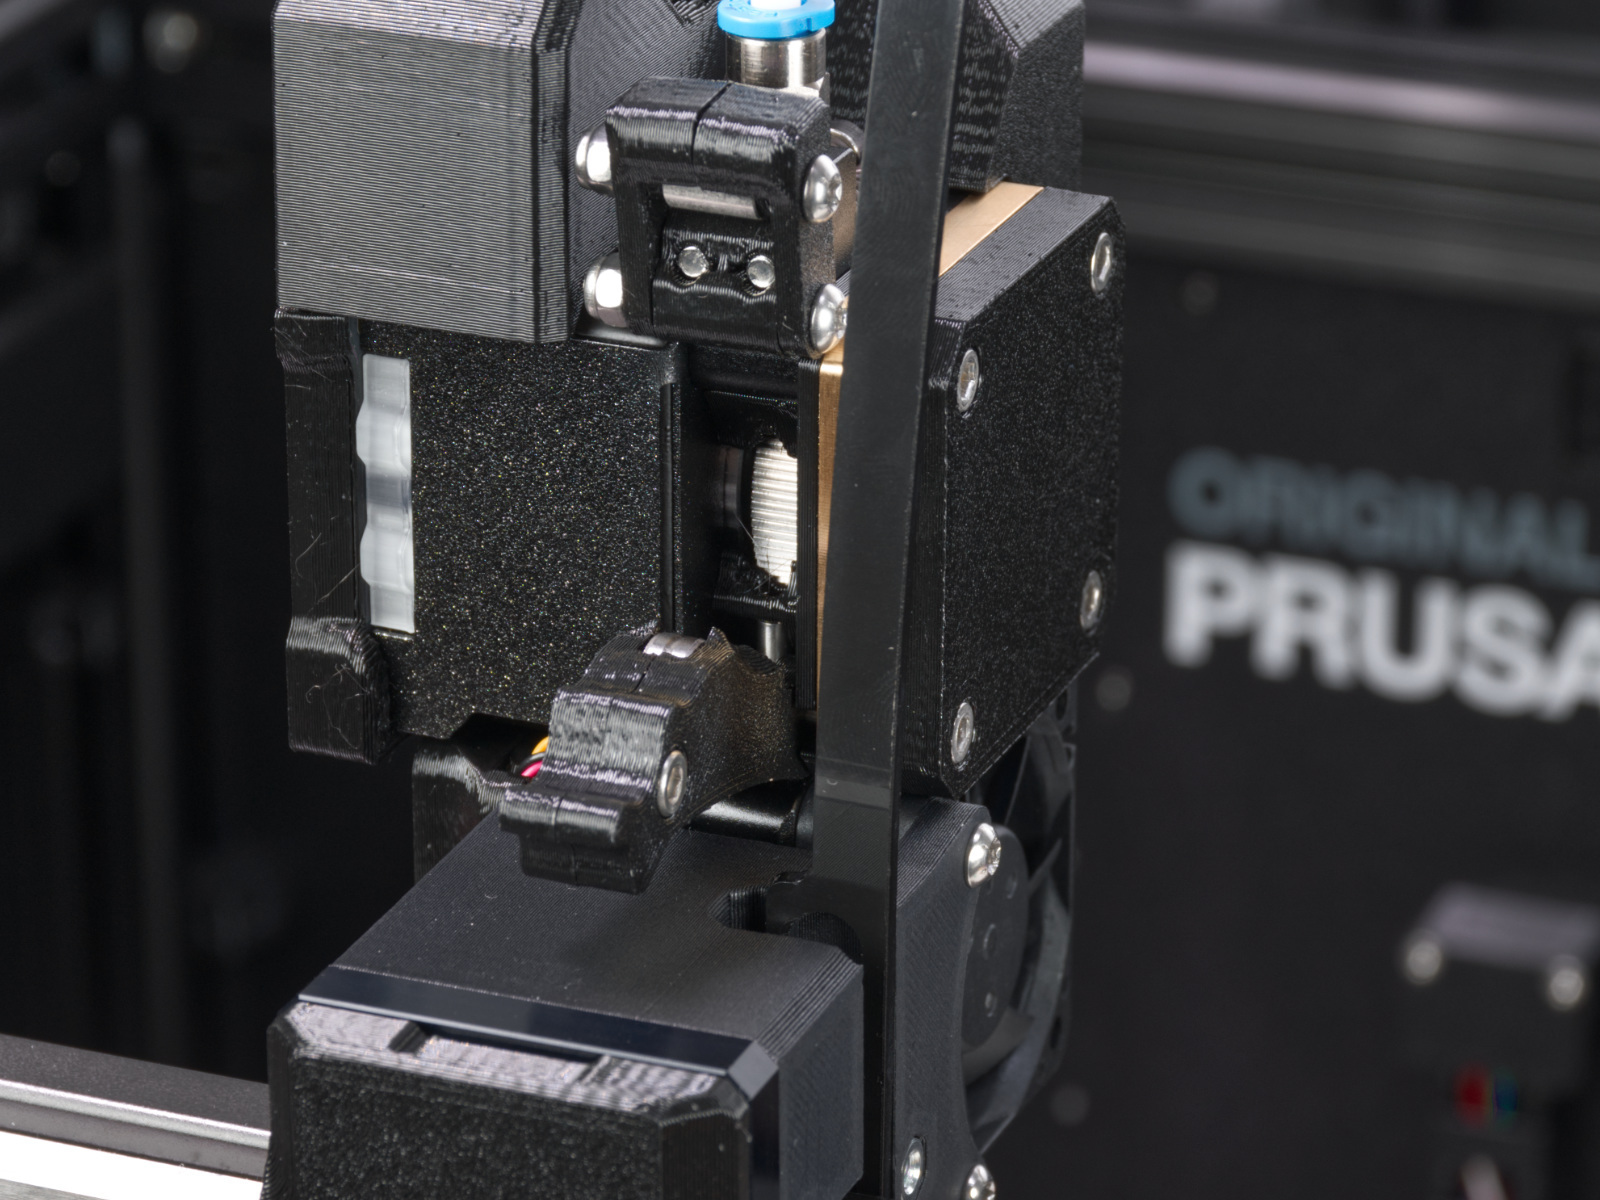 |
Over time, a deposit of filament debris can form in the grooves of the feeding gear, which then causes insufficient filament extrusion. Access the extruder by lifting the Idler Nut, and then moving the Idle Shaft. You can blow away the dirt with compressed air, or use a brass brush or an ordinary toothpick. Use the access hole on the side of the extruder.
This procedure involves taking the gearbox apart.
On XL, make sure the firmware version is 6.4.1 or higher, to have access to the needed gearbox alignment procedure from the printer menu. Other Nextruder printers have this procedure accessible on all firmware versions.
Ensure the printer is cold and switched off, and that you have the PG-assembly-adapter before continuing with the following procedure. If you do not have it, you can purchase it from our e-shop, or you can print it using the files below, depending on the printer you will use.
The component helps during reassembly of the gearbox, especially in case of not managing to remove the gearbox cover and gearbox in one piece.
PG-assembly-adapter e-shop page
PG-assembly-adapter printed with CORE One, MK4/S, MK3.9/S, XL
PG-assembly-adapter printed with MK3/S/+, MK3.5/S
Remove the PG-case, together with the PG-ring, gearbox, and main plate. Remove all of these parts in one piece.
Manually rotate the Nextruder motor shaft with your fingers. Assess the resistance: the shaft should rotate relatively smoothly, with a slight but uniform resistance.
If you feel harsh resistance, catching, or a grinding sensation, there may be debris stuck deep within the gearbox teeth, a worn-out gear, or a mechanical fault within the motor.
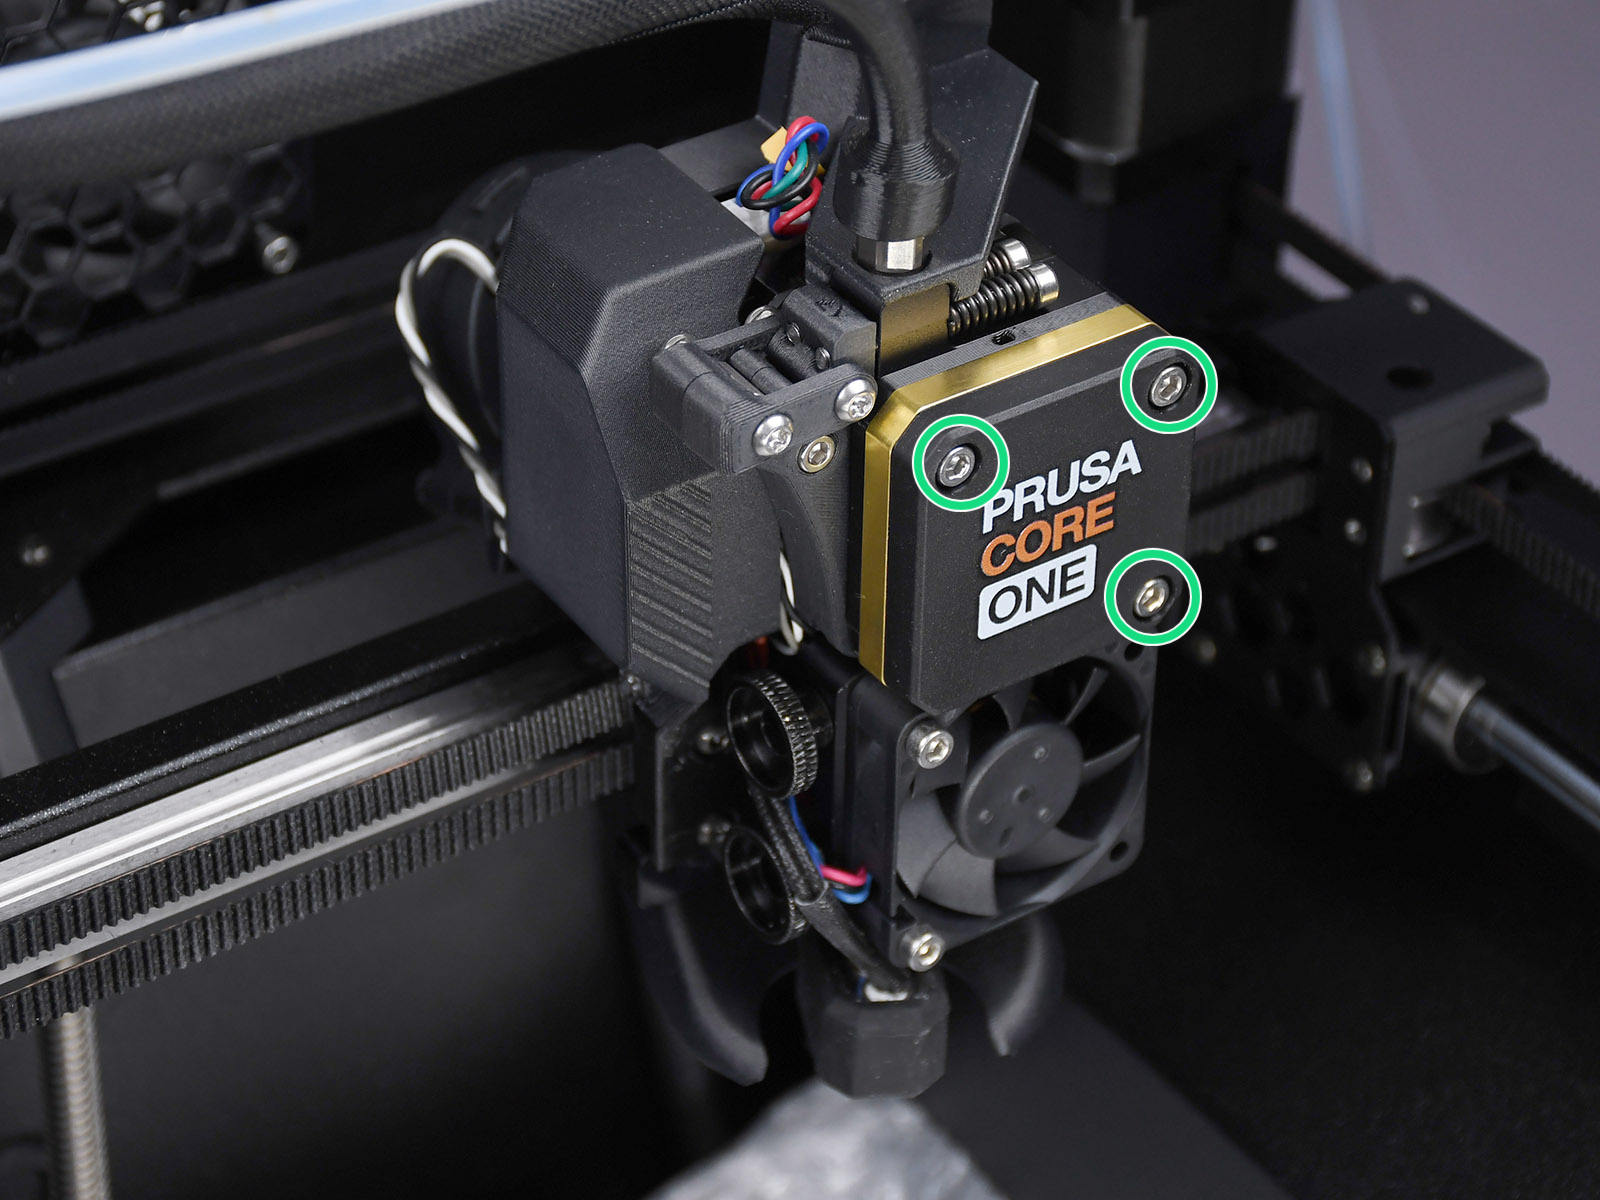 | 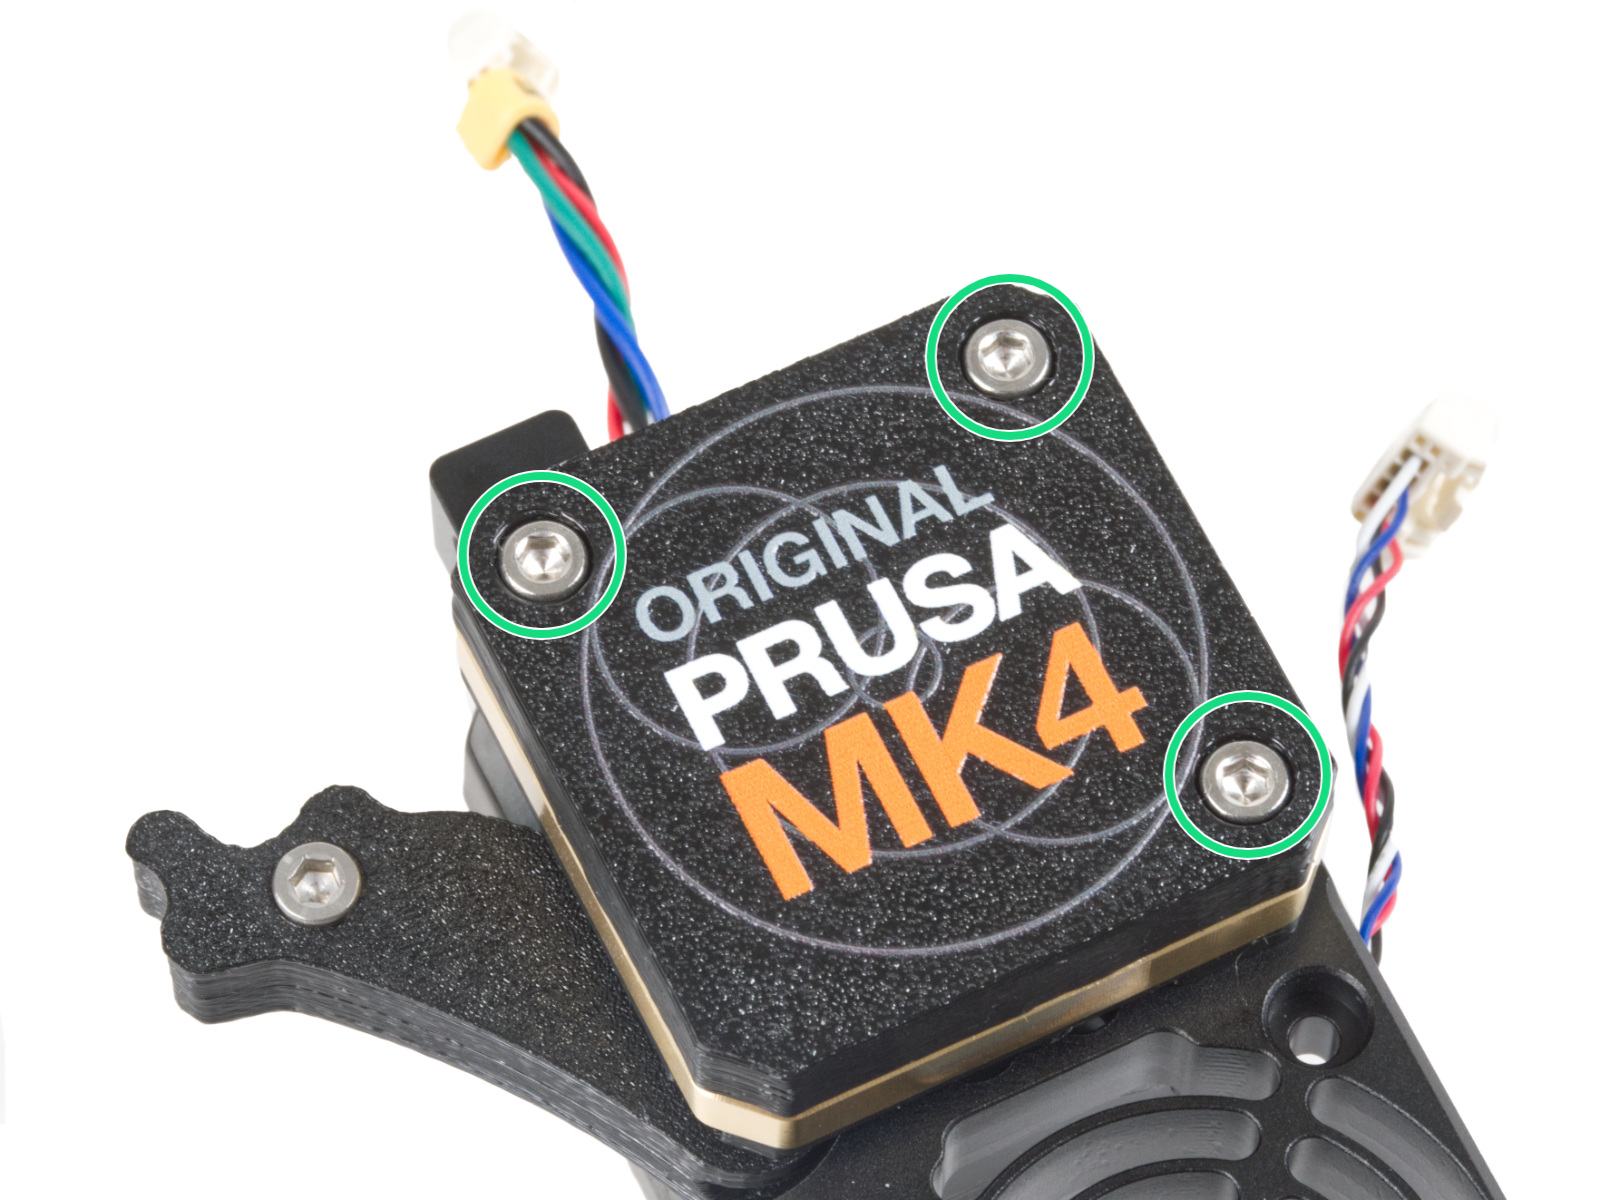 |
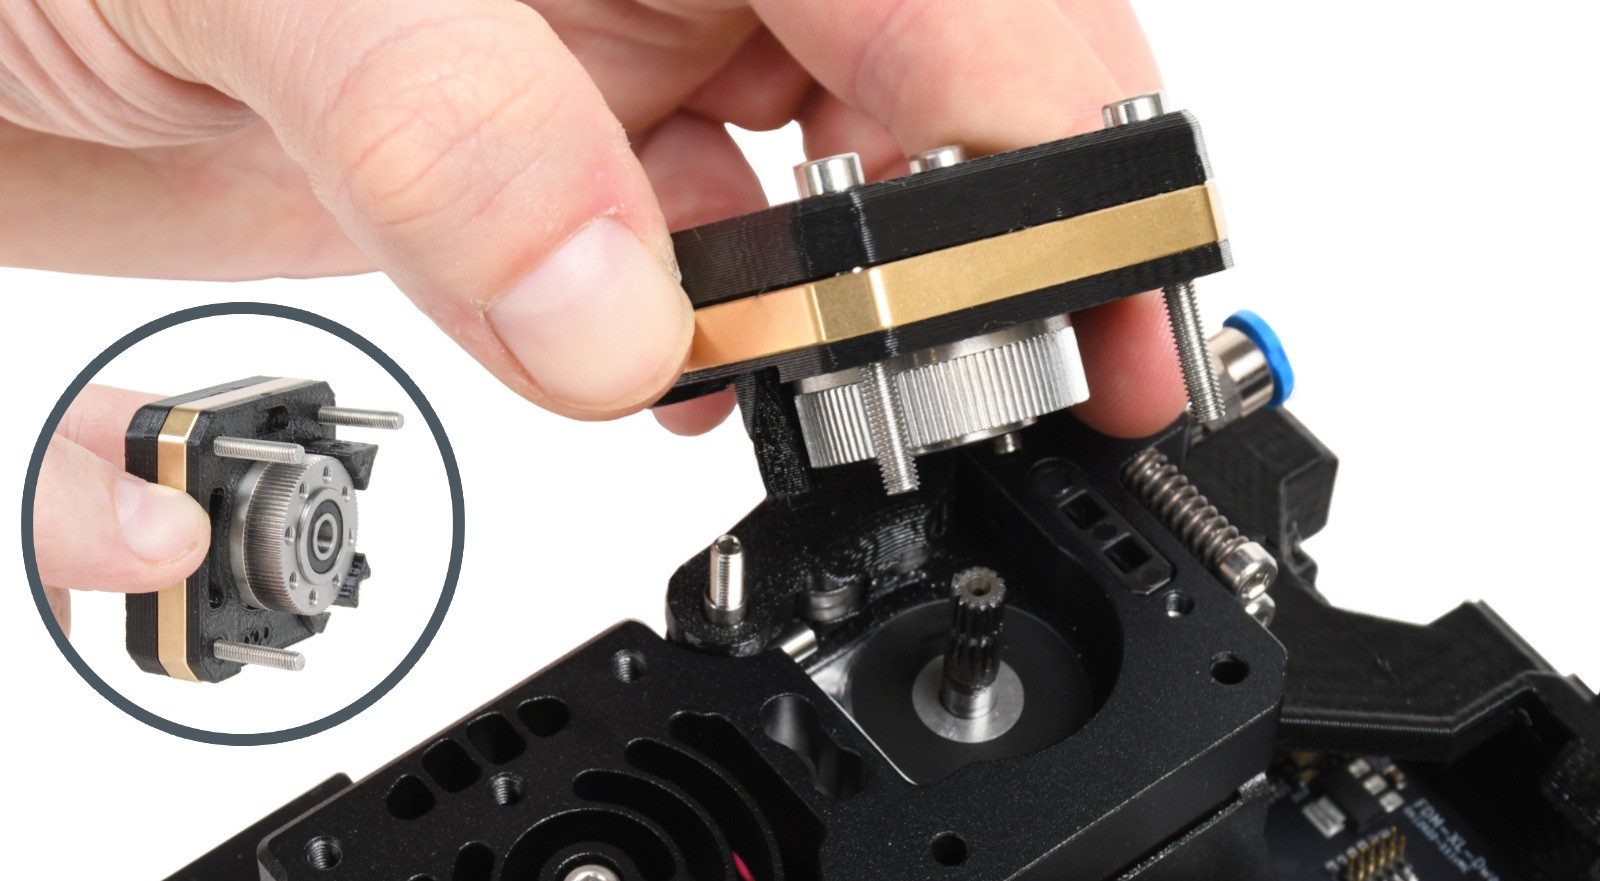 | 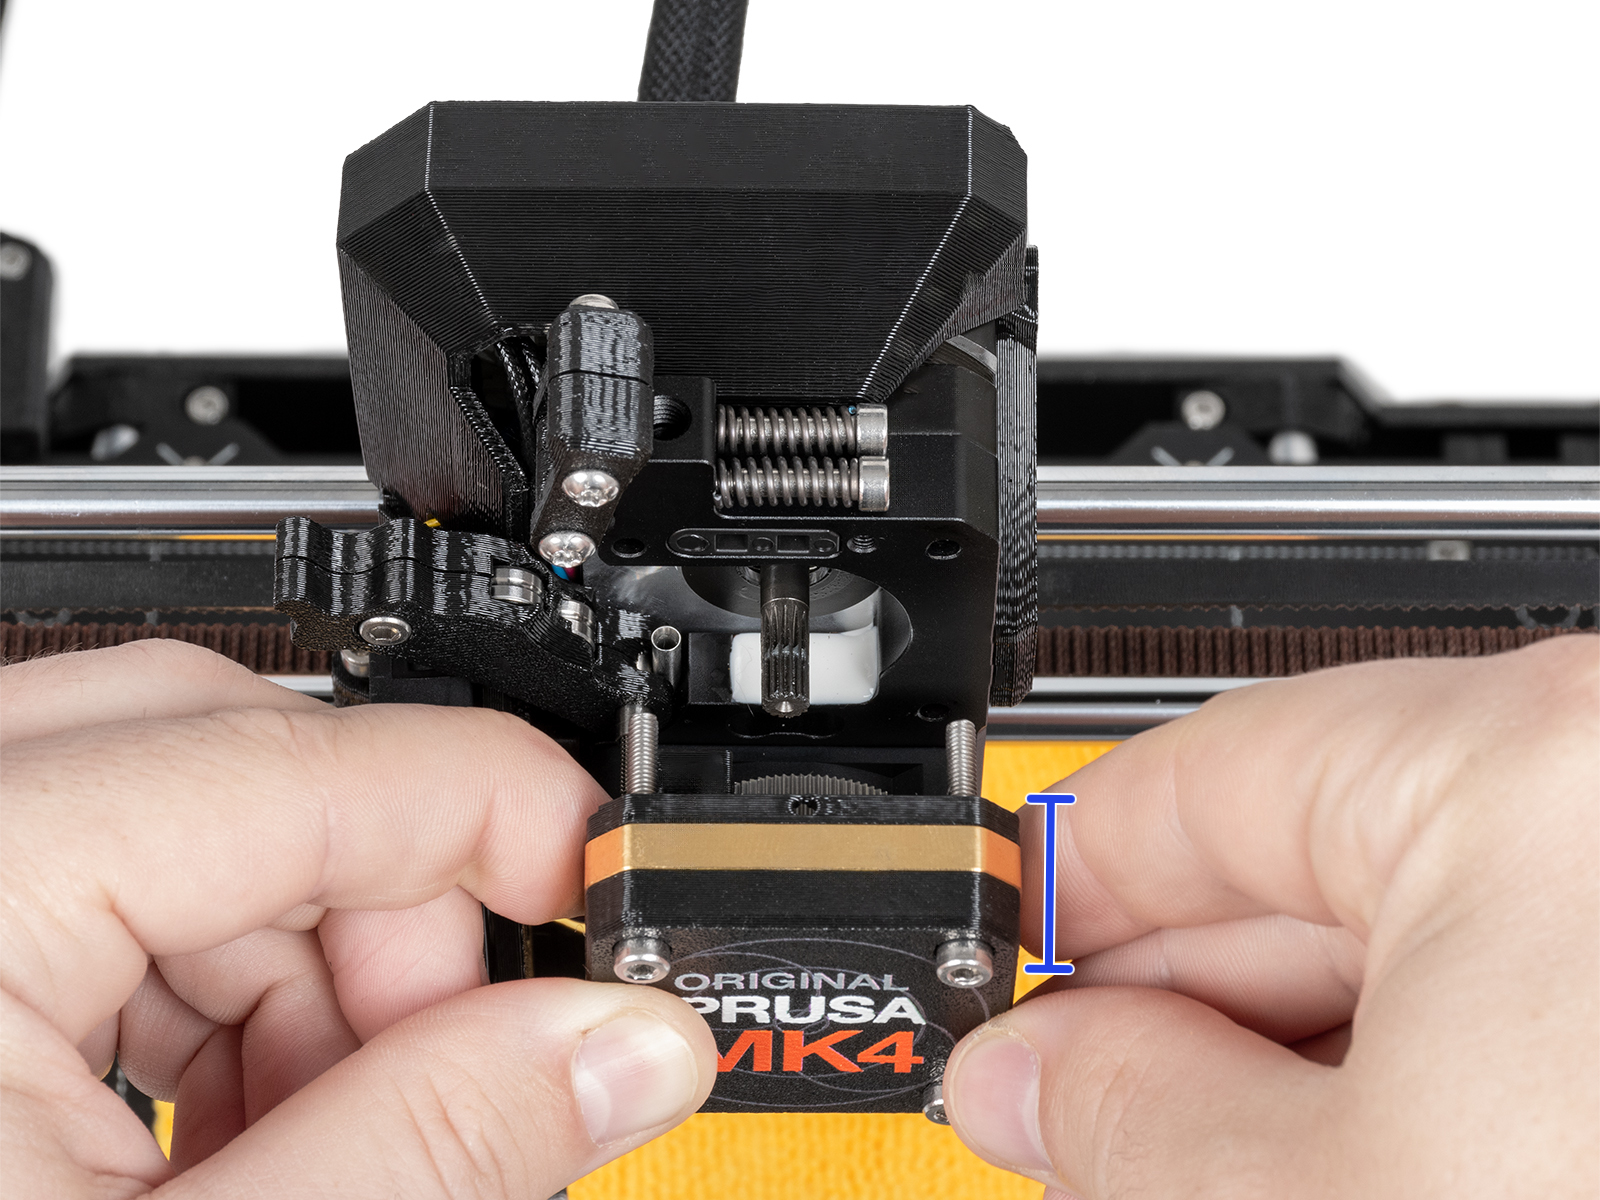 |
When reassembling, reassemble the block with PG-case, PG-ring, gearbox, and main plate.
Then, perform the gearbox alignment, following the procedure from the dedicated gearbox alignment article.
On the following procedures that require nozzle heating, heat the nozzle only using the printer's menu. Do not heat the nozzle using an external heating source, as this can cause damage.
This procedure is applicable to both high-flow and non-high-flow nozzles.
If filament flows after steps 5 and 6, the clog might have been cleared. Attempt some filament loading or test prints to confirm this.
If filament flow is not reestablished with these steps, most likely the nozzle needs to be replaced, with the blockage being further up from the nozzle tip.
A cold pull is another technique that can help unclog a nozzle. However, if the procedure in the previous paragraph, 'push new filament into the nozzle', hasn't helped reestablish filament flow, it is unlikely the cold pull procedure would be doable.
However, we still recommend an attempt, in particular, the automatic cold pull if available on your printer model.
If a small amount of filament is visible from the top of the nozzle tube once we open the idler components, this technique might be effective, even in case the tip of the filament is not touching the nozzle, as in that case the pushing filament technique does not reestablish filament flow.
While hotend is heated to 280° C, firmly grab the filament with needle-nose pliers. Slowly drag/feed the filament upwards, bit by bit, through the top of the extruder body, until it is completely removed from the nozzle tube.
If this technique is successful, performing a cold pull after this, described one paragraph above, is recommended.
If you are printing low-temperature materials like PLA, keeping your printer in a fully closed enclosure or a very warm room can cause heat creep. Heat travels up the hotend, melting the filament before it reaches the melt zone. This causes the filament to swell and clog the extruder. Depending on the printer model at hand, always open the enclosure doors or top cover vents when printing PLA.
Wet or degraded filament can swell, bubble, or create internal steam pockets, disrupting the consistency of your prints. If possible, store your filament in dry boxes with desiccant, such as our USS Drybox. Additionally, low-quality filaments often have inconsistent diameters or impurities that can physically jam the Nextruder gears or nozzle.
Always double-check your slicer settings before sending a print. If your printer is equipped with a High Flow (HF) nozzle, you must use an HF print profile. Using a standard profile for an HF nozzle (or vice versa) throws off the volumetric flow calculations, which can lead to severe under-extrusion or structural clogs.
19 comments
Bin seit 4 Jahren im 3d Druck(Elegoo/Bambulab)unterwegs und hatte das Problem noch nie! Bin echt genervt,dass ich erstmal ein Problem lösen muss,ohne großartig was gedruckt zu haben….
I am experiencing clogged nozzles with jammed filaments in the feeder gear of core one+, with my first E****o PETG HF spool. Had clogging issue with the shipped 0.4 CHF brass nextruder. After troubleshooting without success, For my investigation, First I opened a new 0.4mm regular flow brass nextruder and I use PLA prusament it worked, then I tried PETG prusament since PETG is my go to filament it worked too. Since I was using E****o PETG HF at the time it last clogged, I retry this filament it clogged again. I have to open a new 0.6mm regular flow brass nextruder (no other stock on hand) and it worked as for now I am using Prusaments as a precaution. My thoughts, I am thinking if the filament absorbed moisture, or dust, (no clogging issue with other brand, P*******r PETG). For other information, I have encountered filament jamming with the feeder gears (melted E****o PETG HF) maybe the effect of retractions (0.7mm). The jammed/melted filaments observed to go to the wide clearances between the feeder gears, the main plate (filament hopper part- filament sometimes doesn't enter to the nextruder's intake (my observation the filament hopper protruded design is flimsy because it is hanging on the motor surface without support) and into the front surface of the extruder motor. These are the many factors to be considered and the above are some of the thoughts, it also appears that my 3D printed design causes the clogging, parts that had small area and that have gaps (default parameters used).
I wish to investigate further with the PG part but since I have only one printer with 0.6mm nozzle and the printer was assembled (thank you for the free conversion), I do not have the PG-alignment guide and the luxury to proceed.
Maybe we can have a more reliable main plate, maybe an acetal or PTFE injection moulded or milled aluminum/bronze/EP or 3D printed solution. Just my thought, the Prusa Core One+ I have appears professionally looking machine but can we go further than just 3D printed critical parts or is it possible to have a matured designs/parts that can be injection moulded so that it can be scalable or say transferrable to future designs. Thanks for the service, I appreciate how you help others cultivate their creative ideas to reality.
I managed this issue, though I am not sure if this way is recommended. I first removed hot end, and using pliers, I grabbed the remaining filament in order to remove it backwards. It didn't work. Then, using a small drill, I drill about 1cm inside the nozzle. It needed pliers again, but this time to grab the drill in order to remove. It worked, but only a small amount of filament removed, about 1cm as long as it was drilled. However, it was enough. I plugged it on, and using "Push new filament into the nozzle" of this guide, it got over.
As I understand, the issue it was not a true clogged nozzle, because fillament got stuck just in the top of the nozzle.
I still use old school nozzles on my Prusa MK3S+. Less performant but at least, cheap enough if things go wrong.