What happened?
The printer is showing the message "Check the print head thermistor wiring for possible damage."
Error name: Hotend mintemp error
Error code: #31208 (CORE One) #35208 (CORE One L) #26208 (MK4S) #13208 (MK4) #27208 (MK3.9S) #21208 (MK3.9)
This error is shown when the printer's nozzle temperature drops below 5 ºC at any point during the print . If this happens during a print, the print will be stopped.
How to fix it?
Ensure that the ambient temperature where the printer is is stable, and above 18 ºC. If not due to low ambient temperature, this error is usually caused by the hotend thermistor.
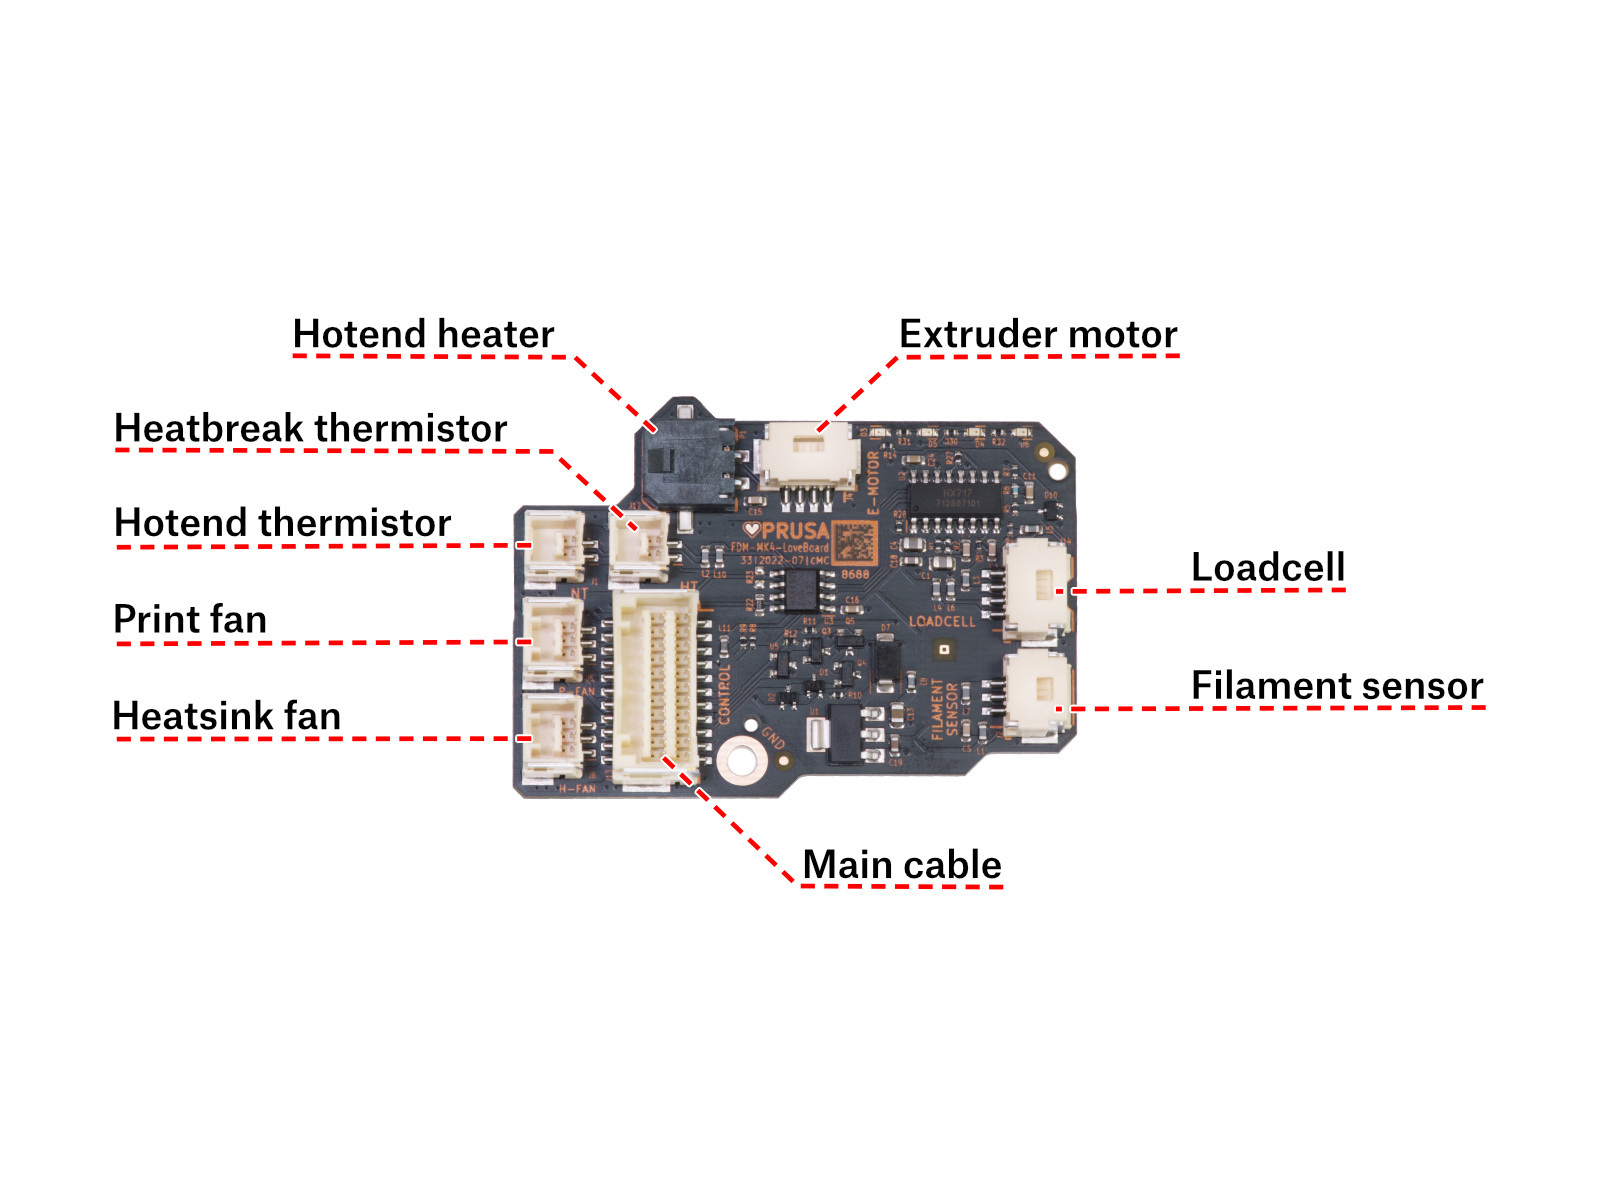
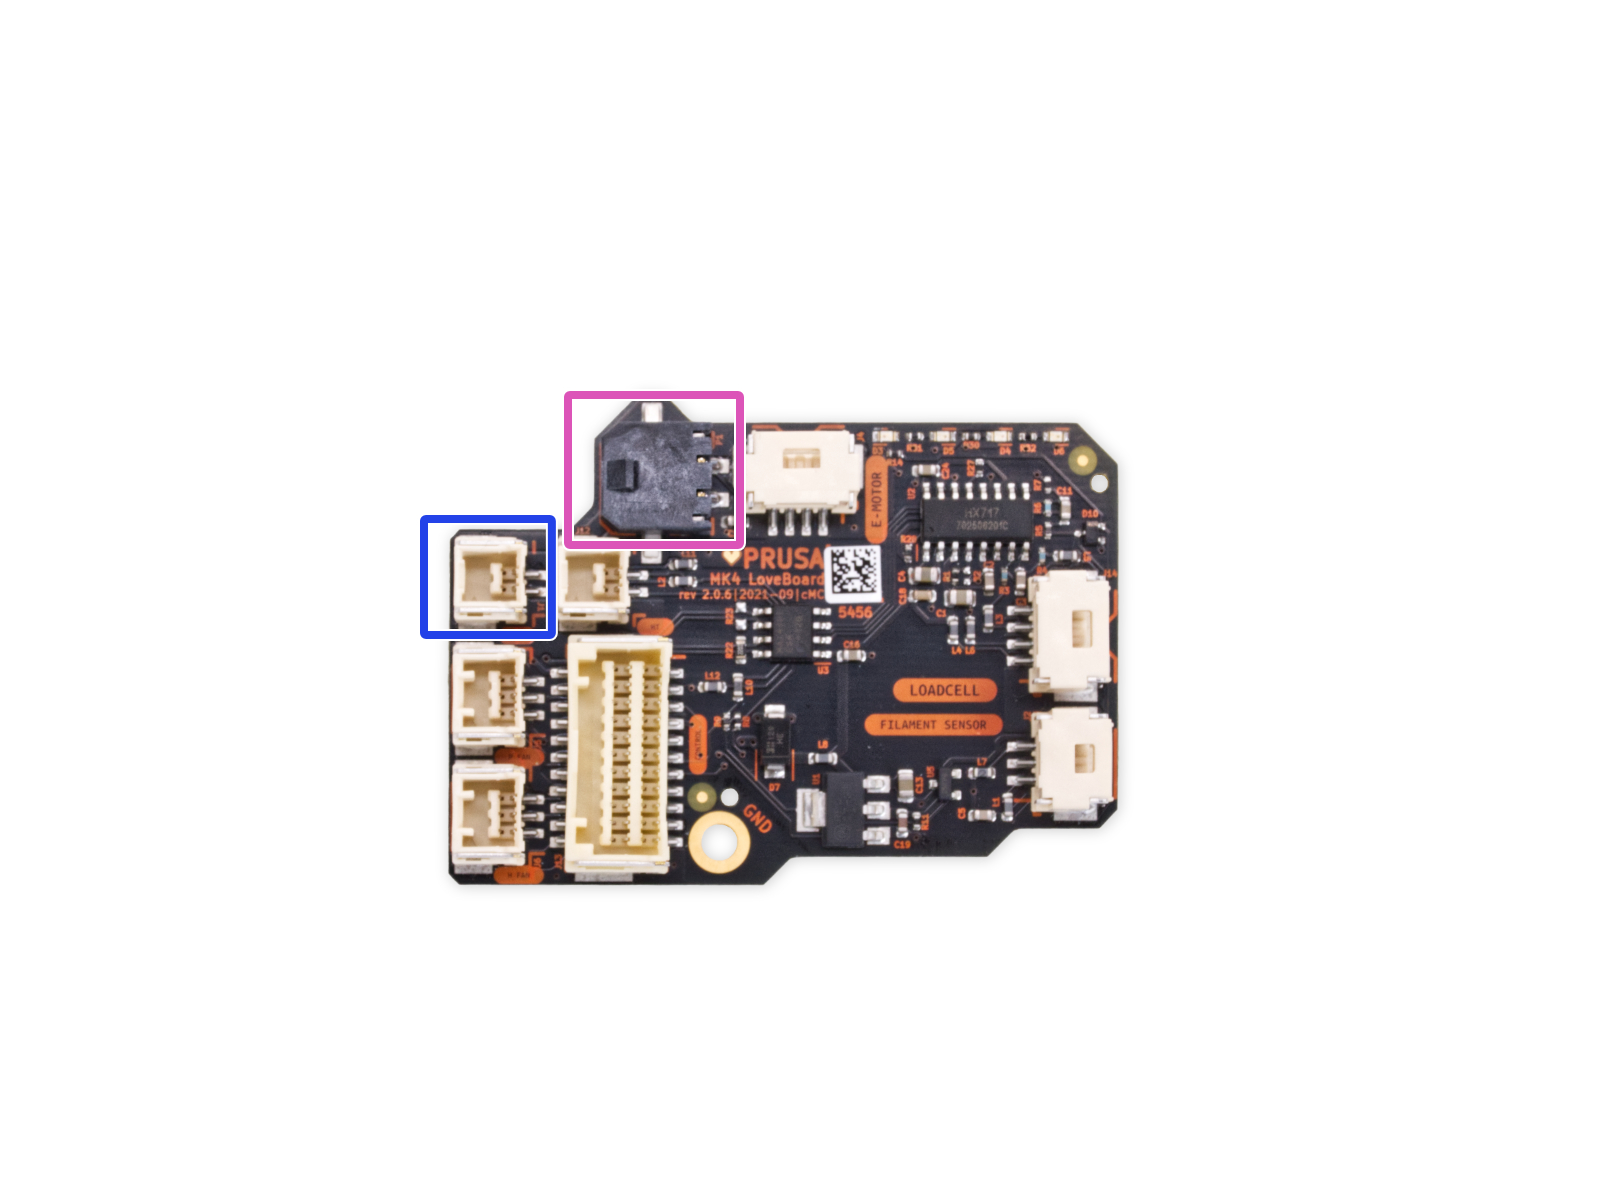
Access the LoveBoard and check the heater and thermistor cables. Make sure that they are connected correctly and that there is no damage along their length.
 |  |
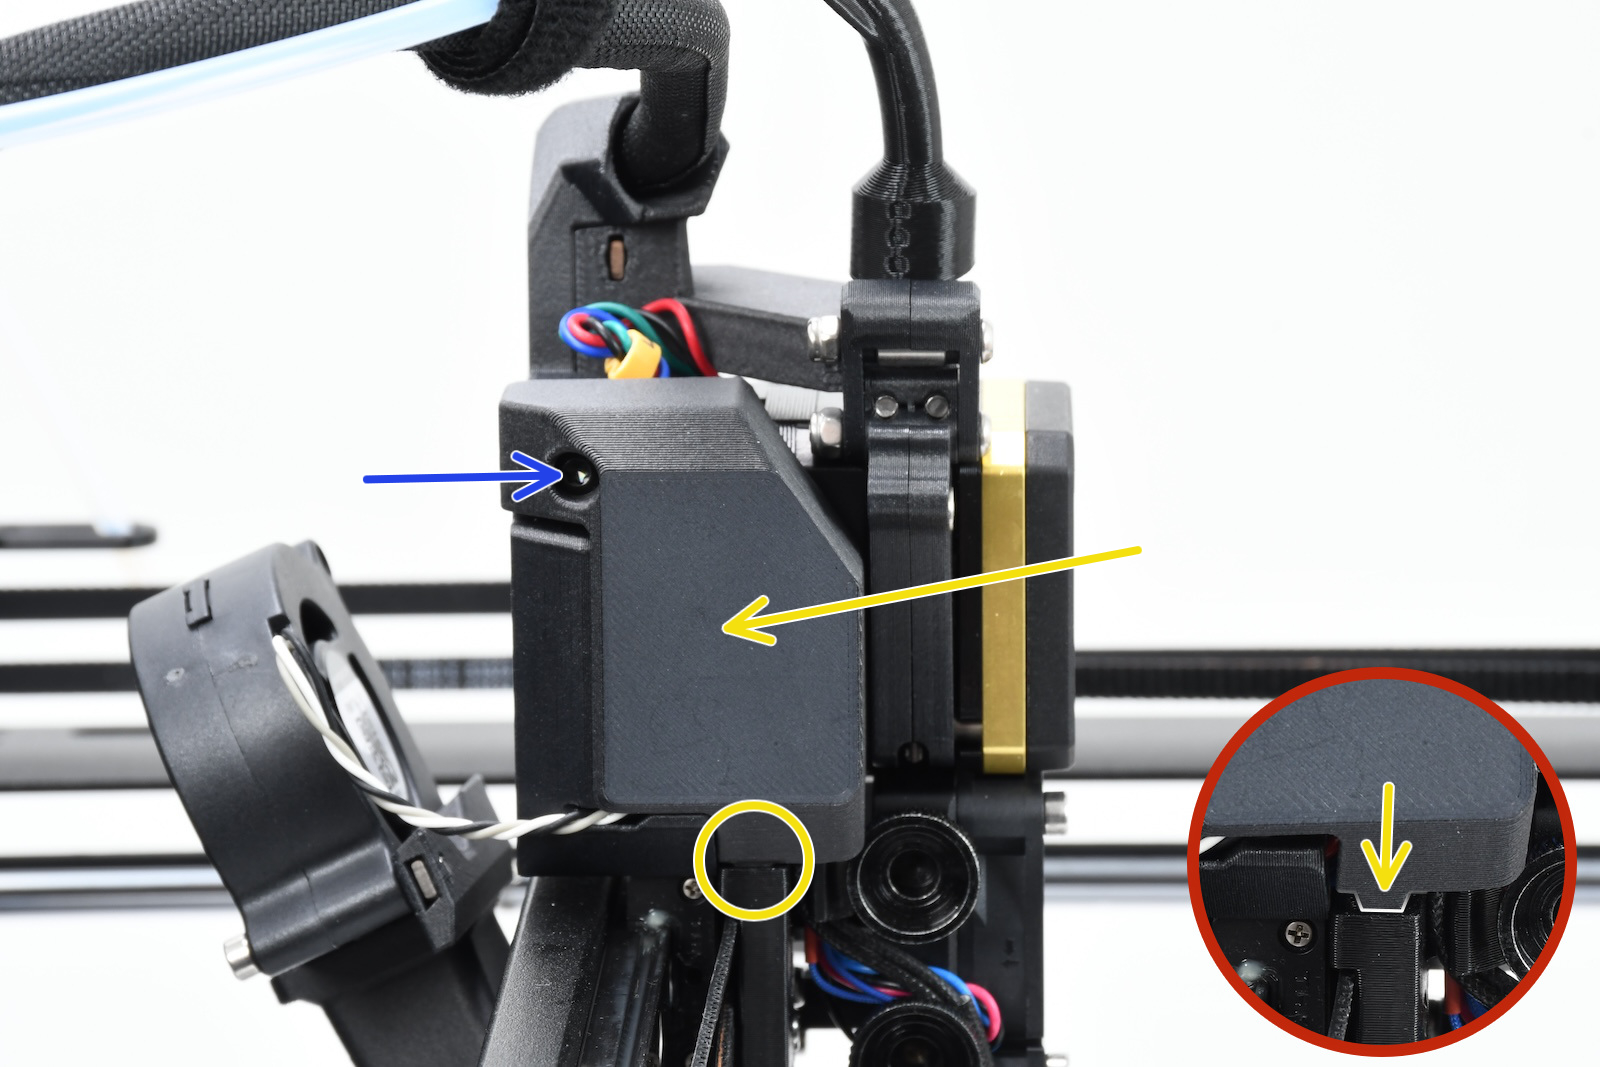
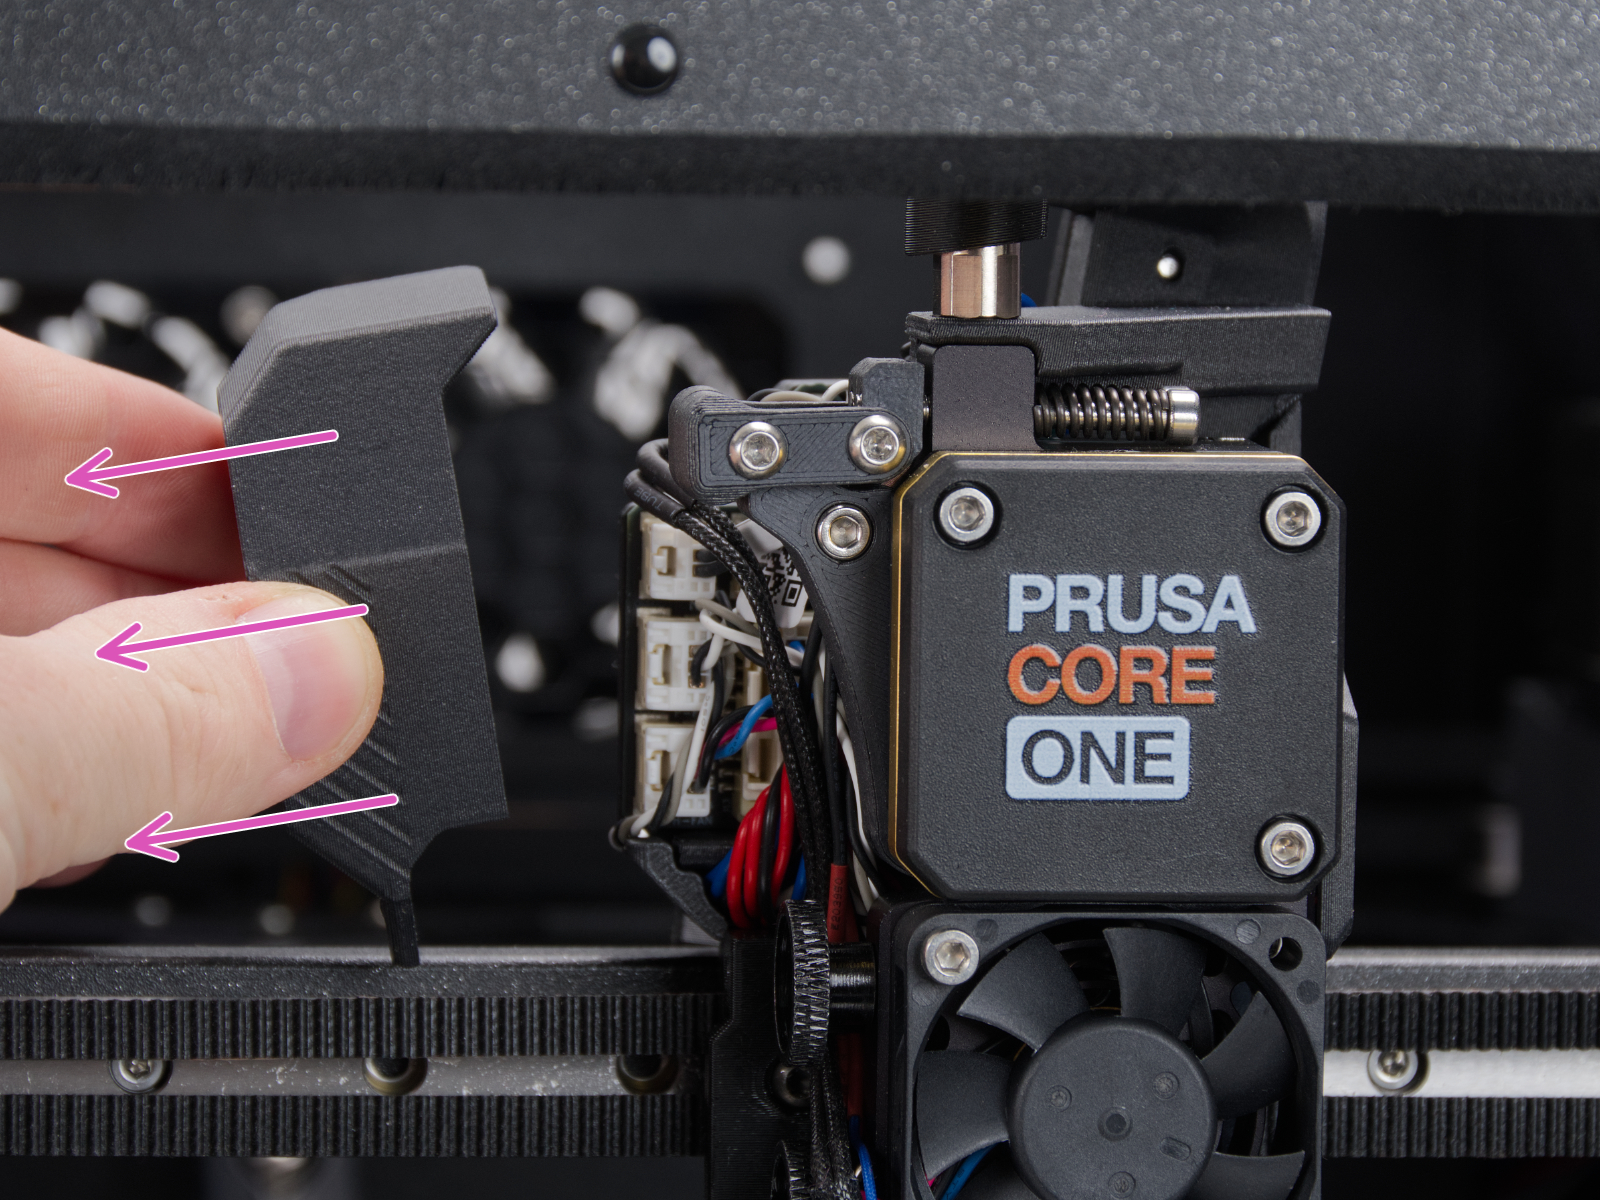
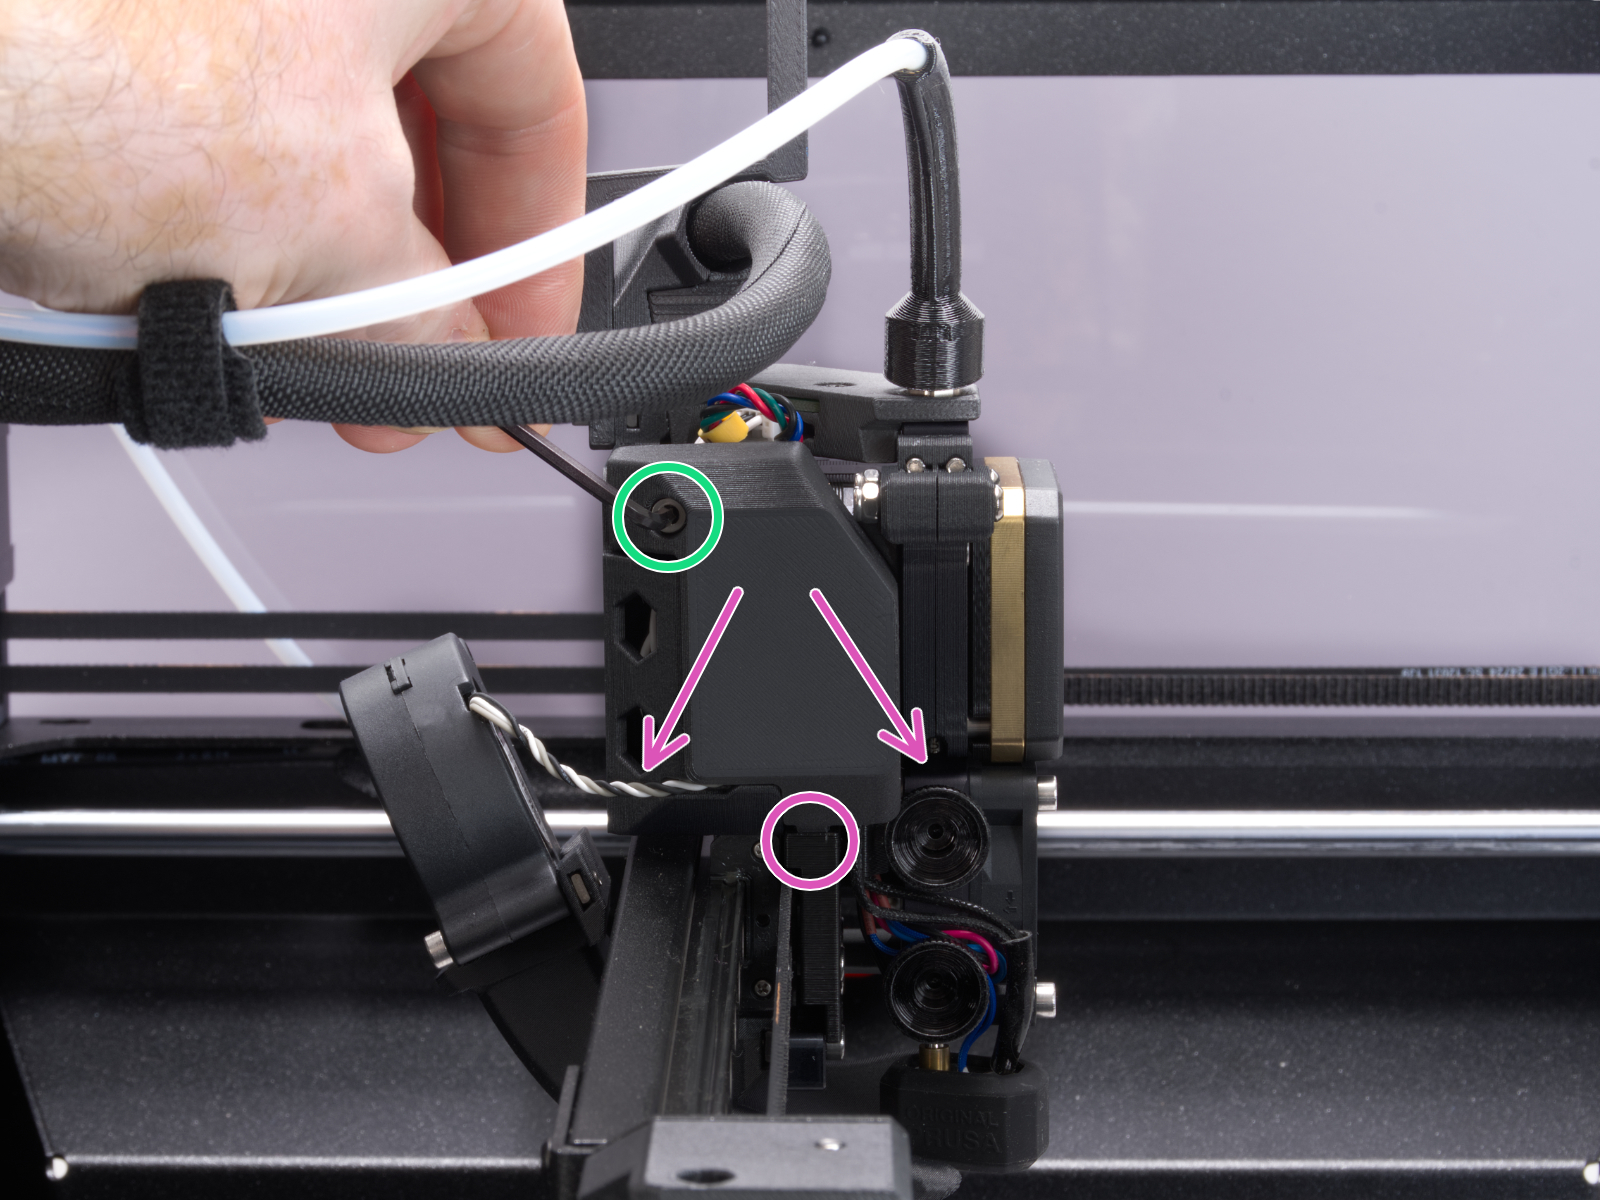
How to access the LoveBoard left side - CORE One
Using a T10 Torx key, loosen and remove one M3x6rT bolt. Then, release the side cover.
 |  |
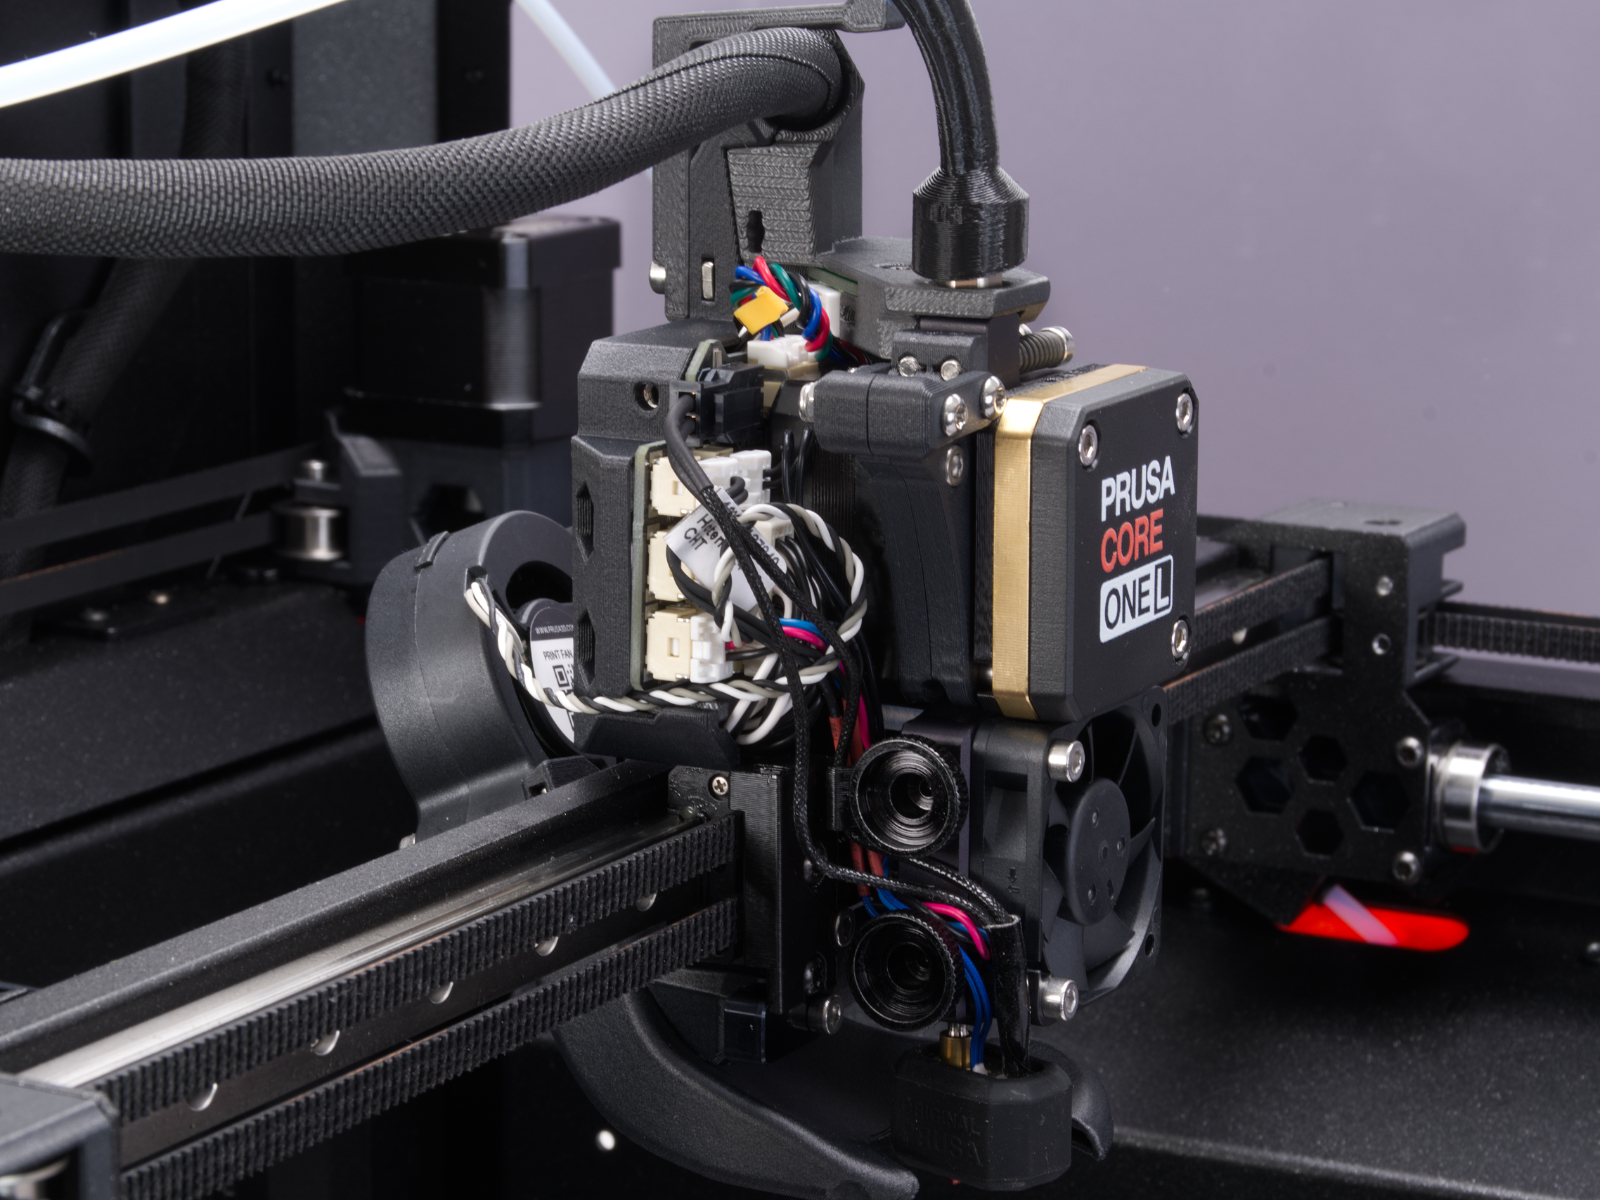
How to access the LoveBoard left side - CORE One L
Using a 2.5mm Allen key, remove the M3x10 screw on top of the cover to release it.
 |  |
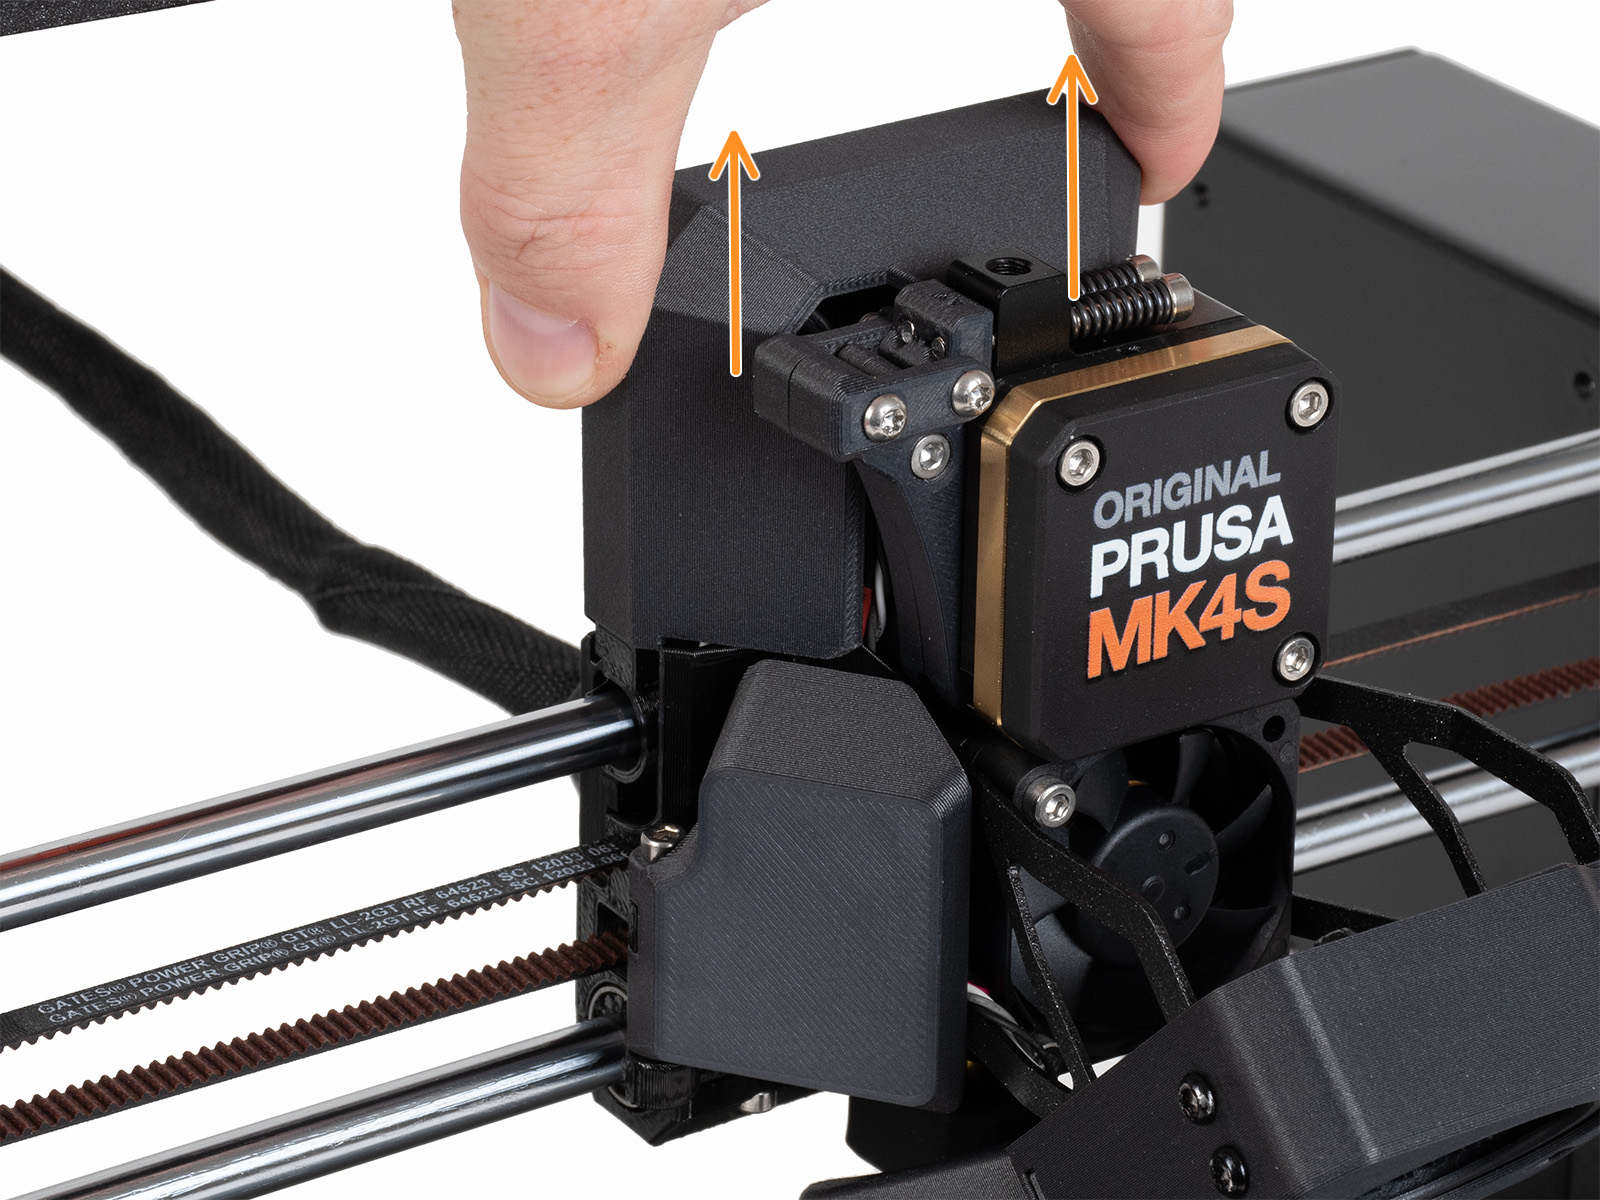
How to access the LoveBoard left side - MK4/S, MK3.9/S
Slide the LoveBoard cover upward to remove it from the Nextruder
On the xBuddy board, check if the fuse that protects the extruder is not damaged.
Make sure that the Loveboard main cable is correctly connected to the xBuddy board, and not pinched.
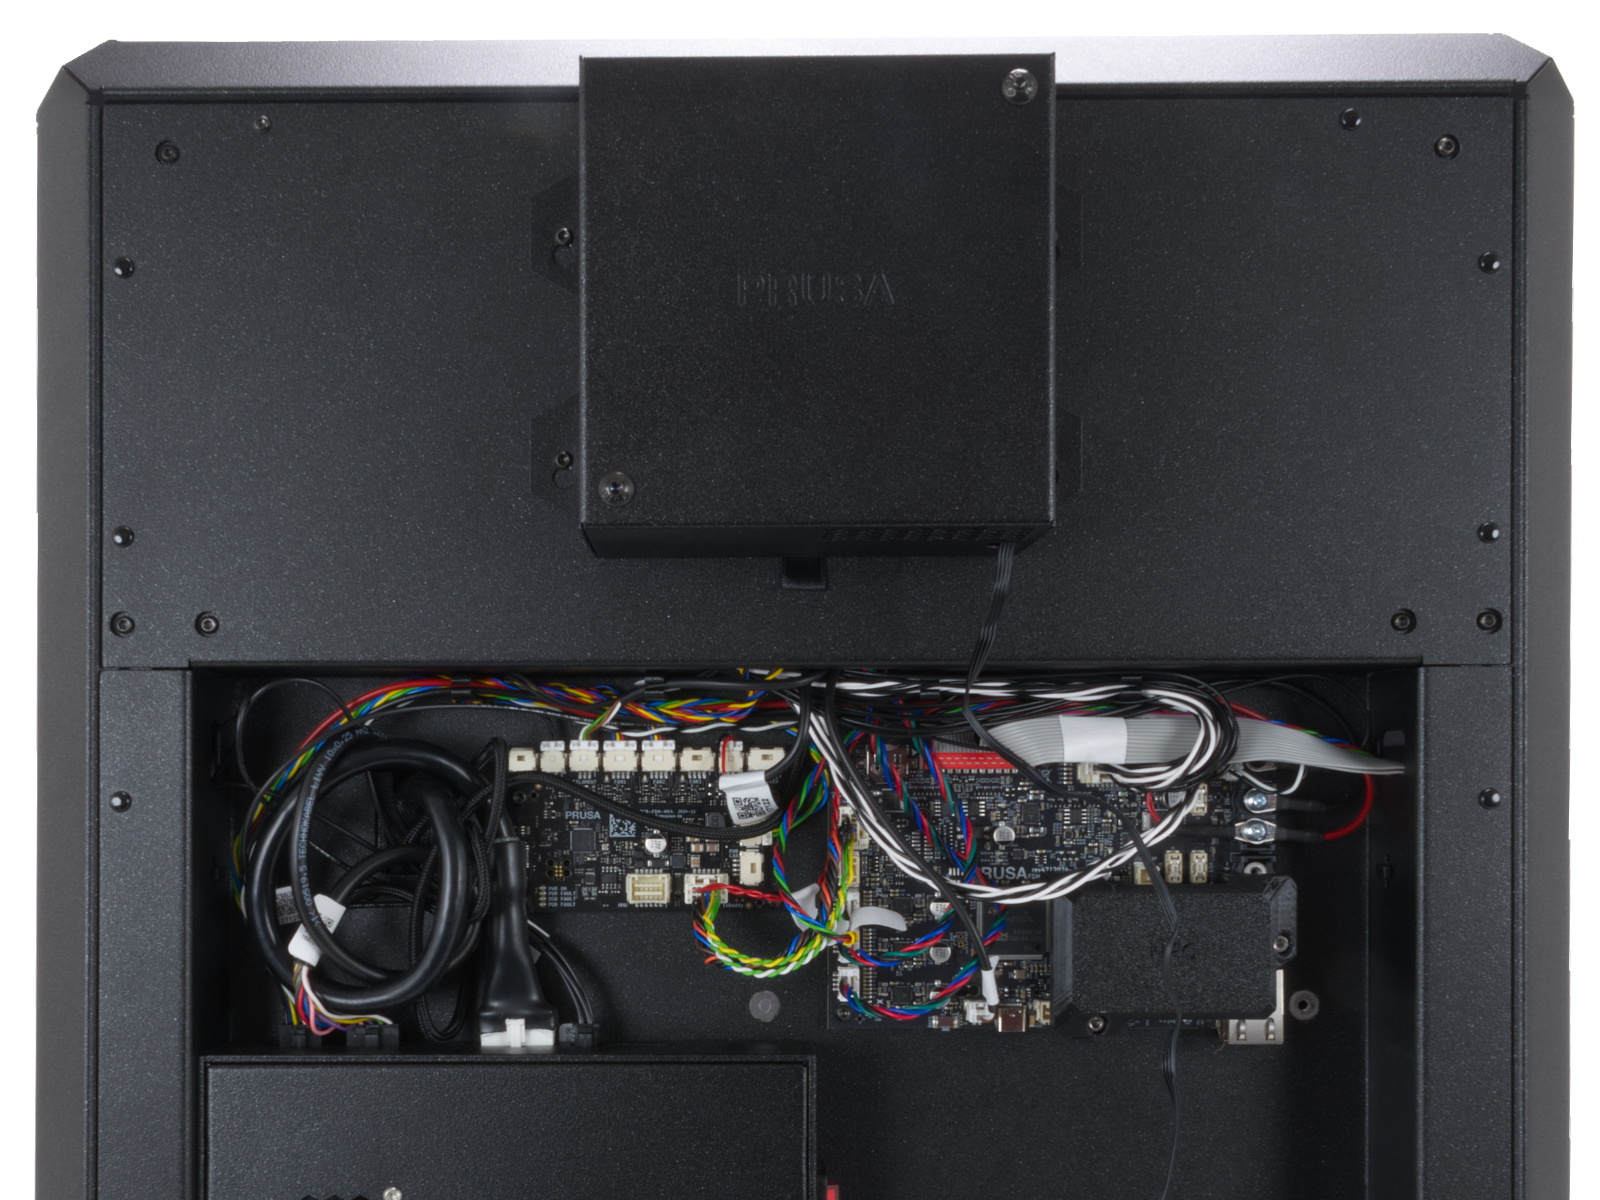
How to access the xBuddy board - CORE One
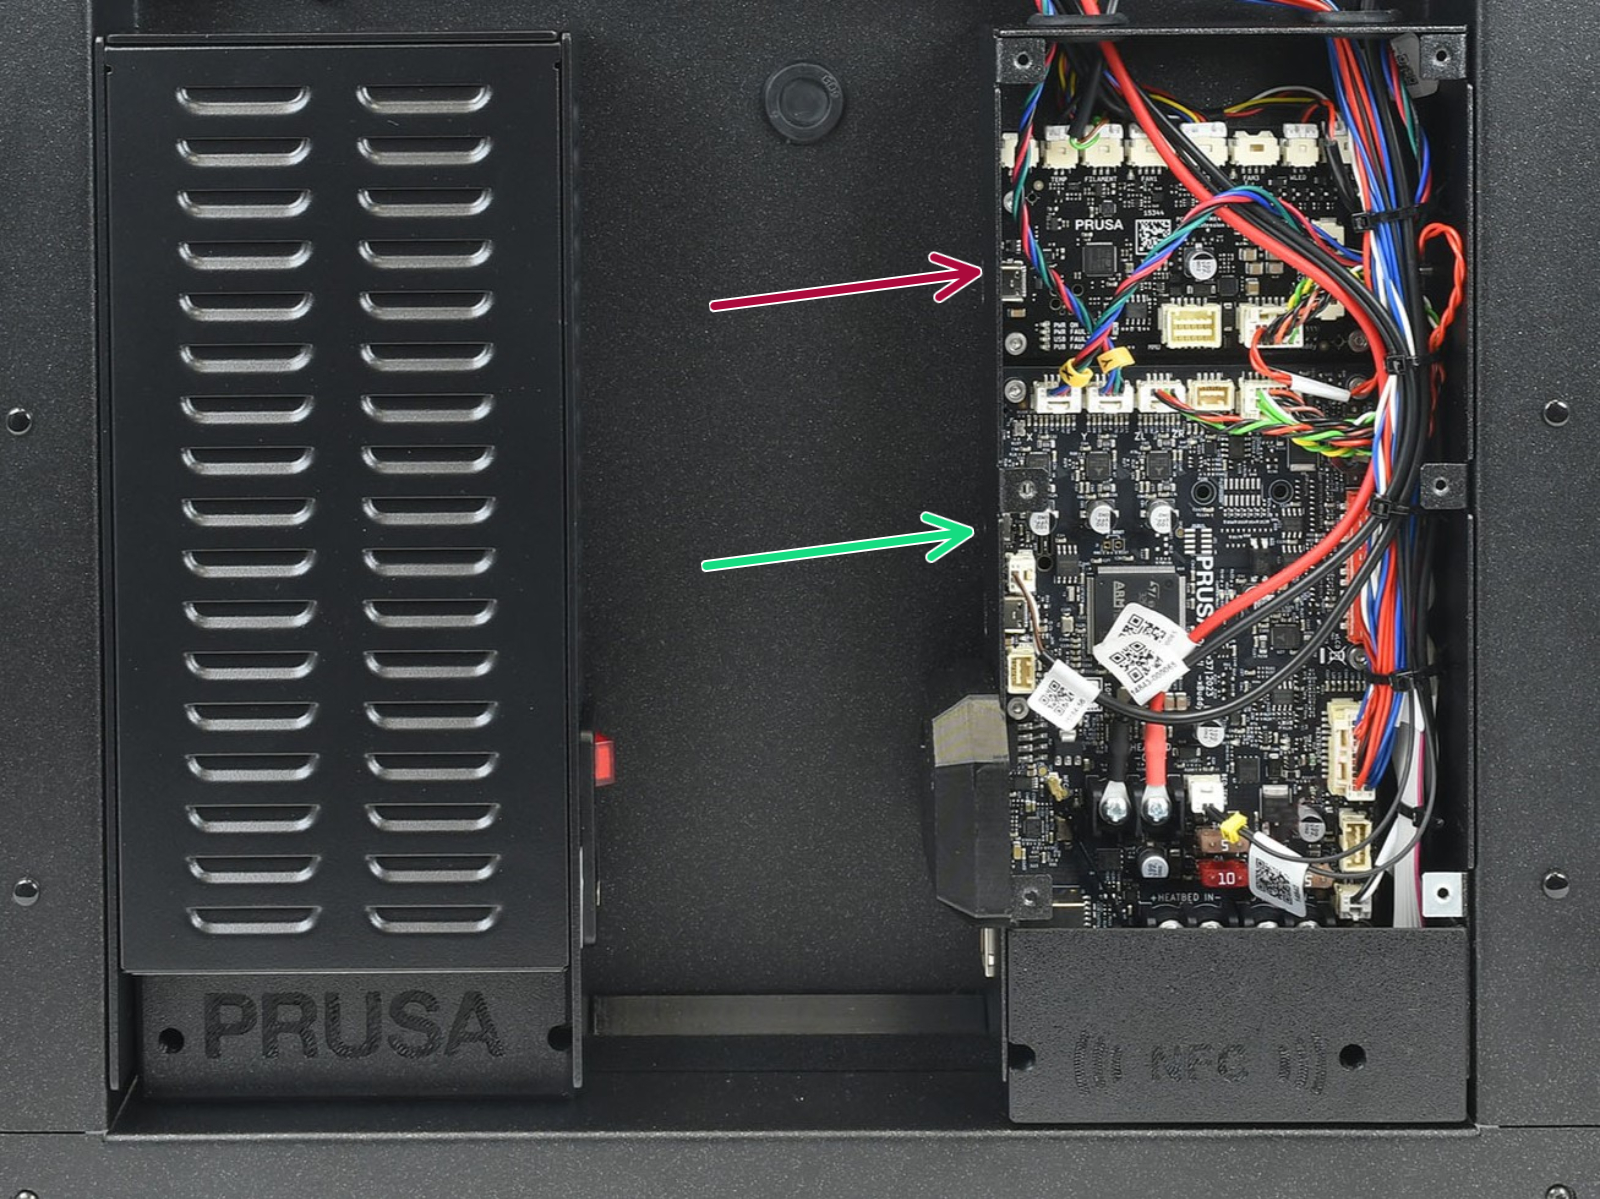
Locate the xBuddy board case. Looking at the printer from its rear, it is the rightmost case.
Using a T10 Torx key, remove six M3x4bT bolts to release the xBuddy box cover.
The bottom larger board is the xBuddy board, while the top smaller board is the xBuddy extension board.
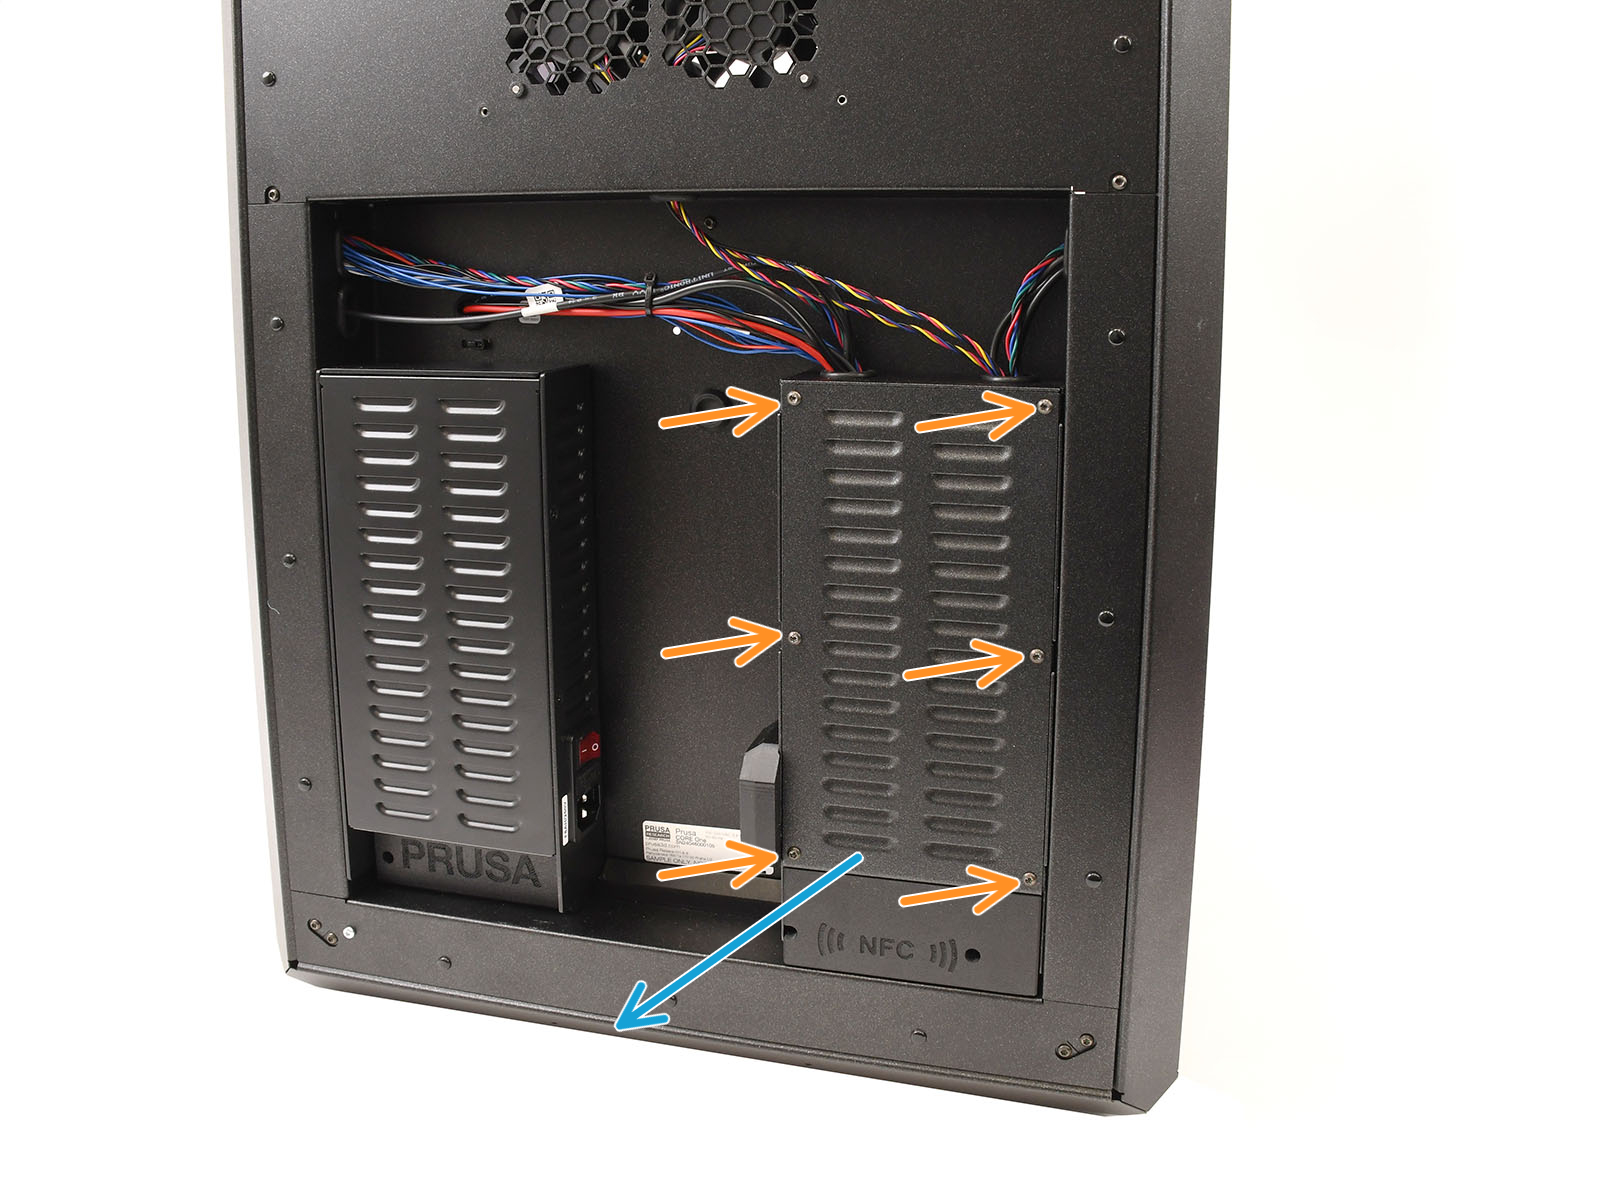 |  |
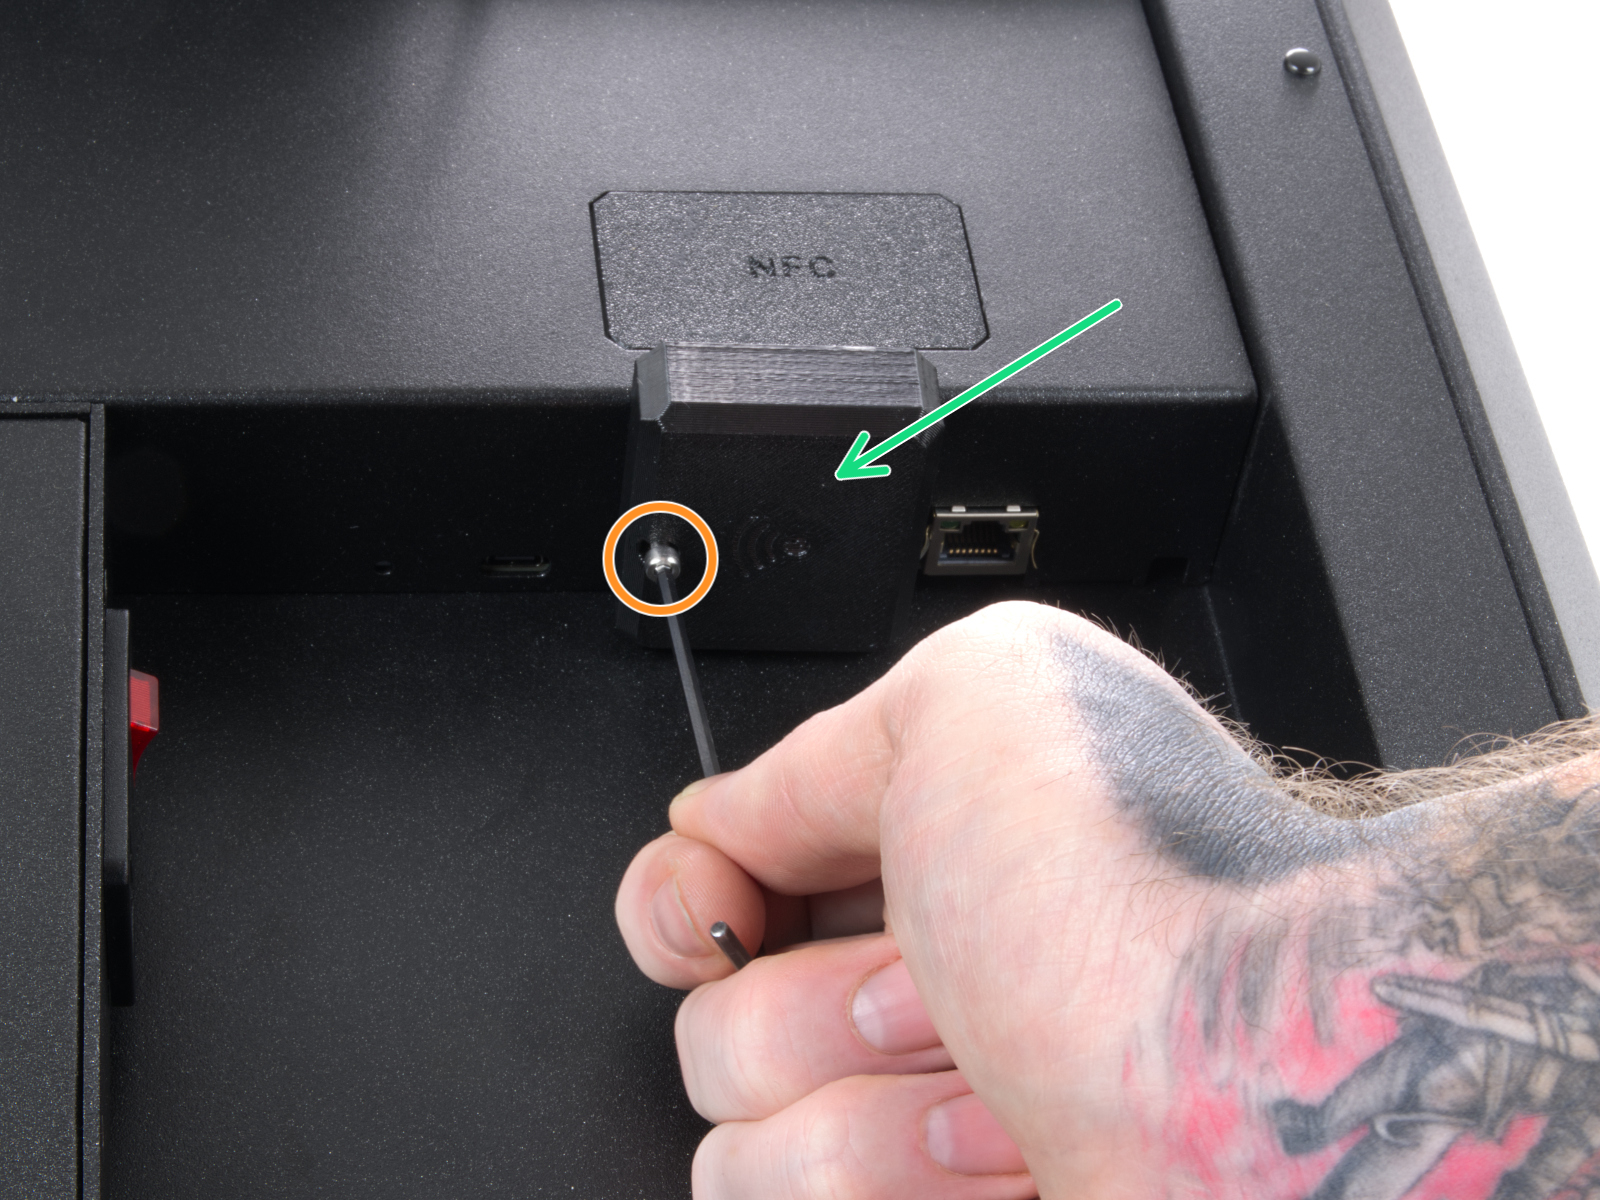
How to access the xBuddy board - CORE One L
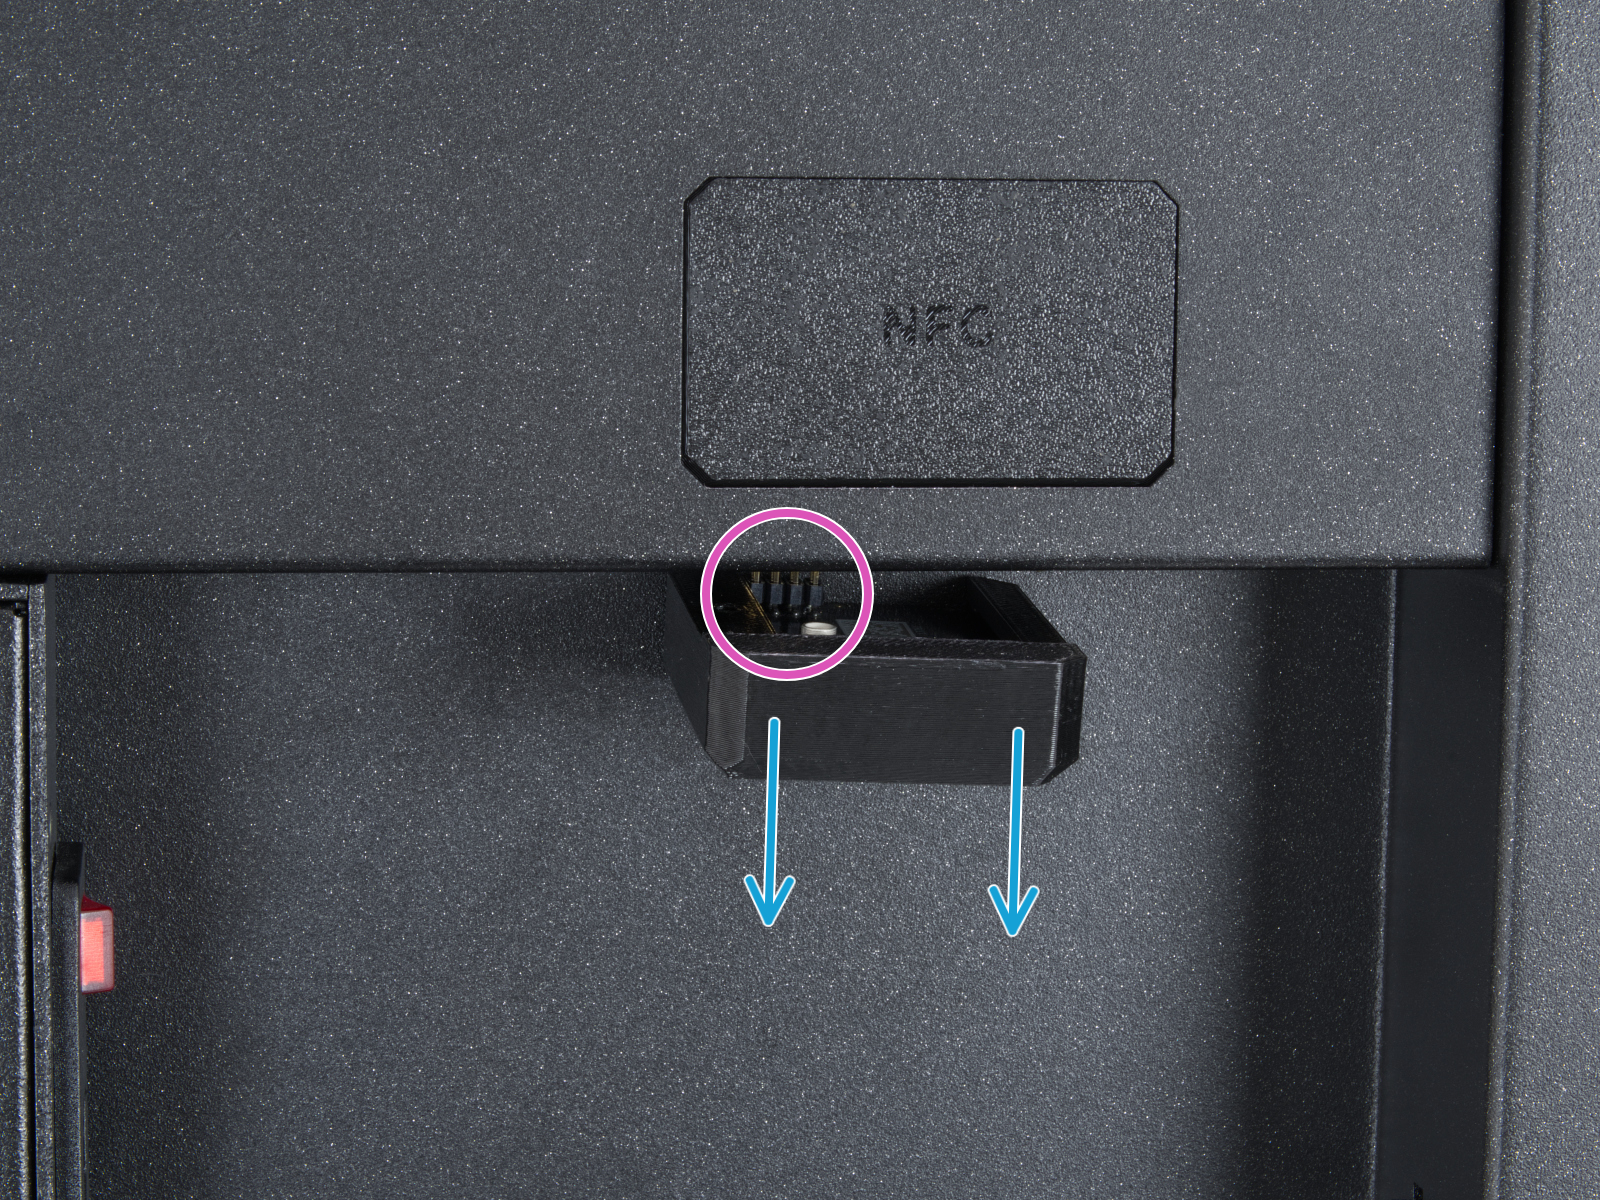
Locate the Wi-Fi module on the rear panel of the printer. Using a 2.5 mm Allen key, remove the M3x14 screw. Gently pull the Wi-Fi module straight downward to remove it from the printer.
 |  |
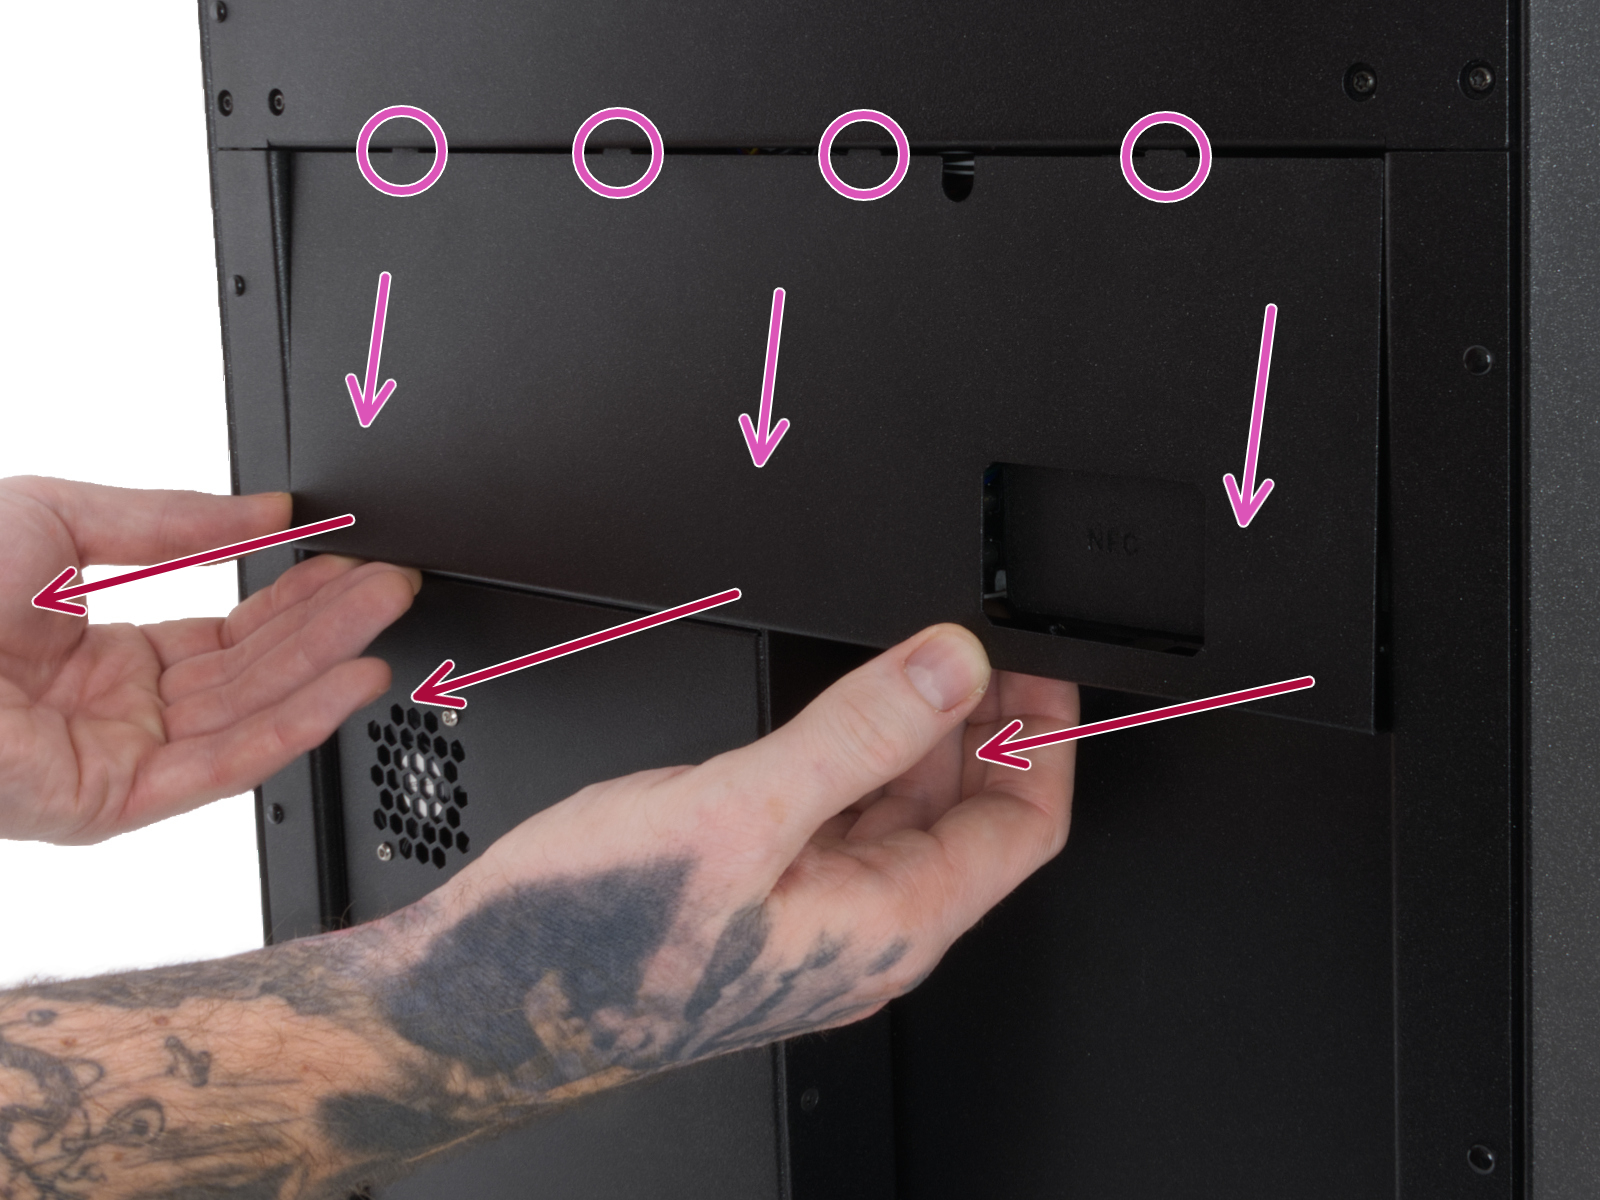
From the inside of the printer, locate on the rear side the highlighted M3x4bT bolts.

Using a T10 Torx key, remove two M3x4rT bolts to release the rear xBuddy box cover. Lift the cover to expose the xBuddy and xBuddy extension boards.
 |  |
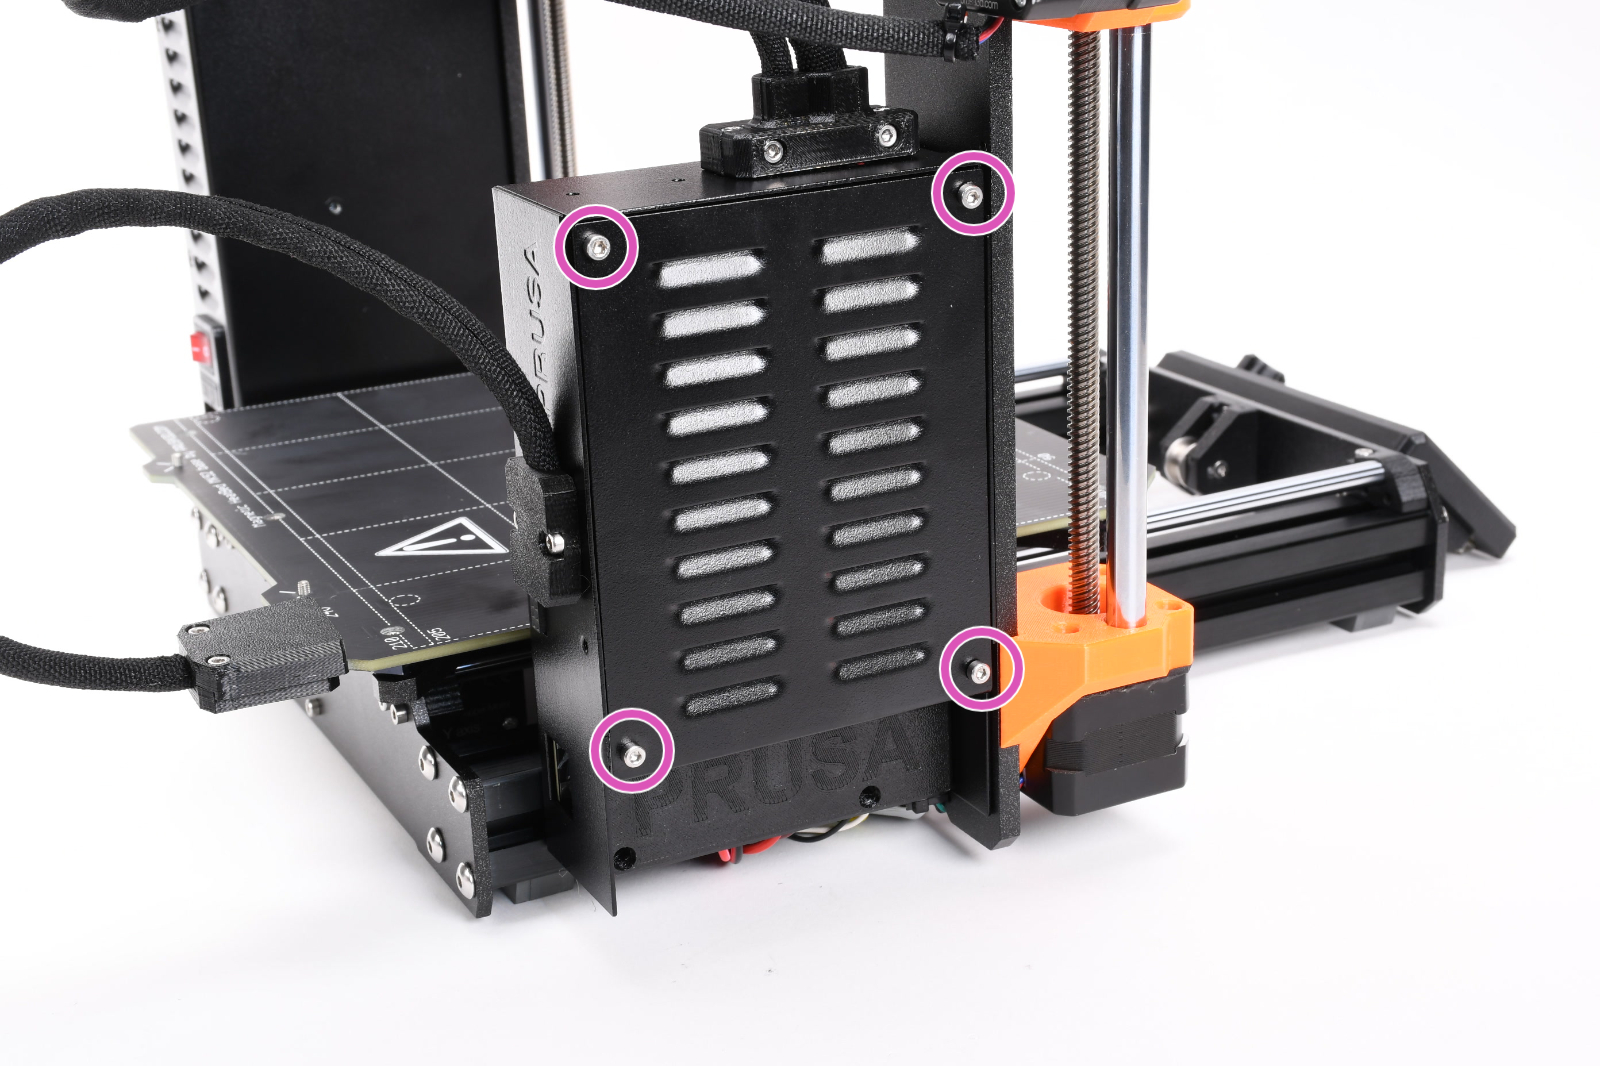
How to access the xBuddy board - MK4/S, MK3.9/S
Access the xBuddy board by loosening four M3x6 bolts.
Multimeter check
If you have a multimeter available, use this guide to check the resistance on the hotend heater and the hotend thermistor.
16 comments
What should I do next?
another you can do is turn off the machine, take off the full hotend.
And install a brand new hotend and see if it works.
Don't try to change the temperature of the nozzle. Just check at the bottom left of the lcd screen if the nozzle has a temperature.
On my machine, I found out that the hotend wire had a very small loose contact which was the problem. By changing the hotend, it works now without the error. This is only for my situation.
∘
Could you please advise?
Removed the hot end thermistor and it read 113k Ohms, well within the normal range.
Tested the NTC thermistor, and that one read 115k Ohms, also normal range.
Wiring on both thermistors shows no damage, and did not see any intermittent readings when measuring the resistance.
Checked Love board cable to Buddy Board, and both ends were secure.
After reseating the two thermistor cables and reassembling everything, the printer booted up fine and no longer threw the error on any attempt to heat the nozzle.
Unfortunately this leaves the printer in a suspect state, and prints are still failing (nozzle clog/under extruding). Tried to contact support, but the link just kept sending me back to the top of the page, and doesn't allow any other report to be filed.
Leaving the side panels off of the nextruder is allowing printing to happen, but this connection to the Love Board is not very tight.
Took the Thermistor out and inspected visualy. No damage to be seen.
Measuring it with the Multimeter, i get 87 kOhm at ca. 30 degree celsius which seems normal for a ntc 100k thermistor.
Any ideas what could be wrong?