On the Prusa CORE One, CORE One+, and CORE One L, adjusting the belt to the optimal tension is crucial to achieving good quality on the prints. A loose belt can cause Layer shifting, Ghosting, or other print abnormalities, like getting an irregular shape instead of a perfect circle. An over-tightened belt can cause an irregular movement in the X and Y axes.
Assembly reminder - lubricate tensioner screws (CORE One kit)
The following check applies exclusively to CORE One and CORE One+ kits. Pre-assembled CORE One, CORE One+, and CORE One L have this step done at the factory.
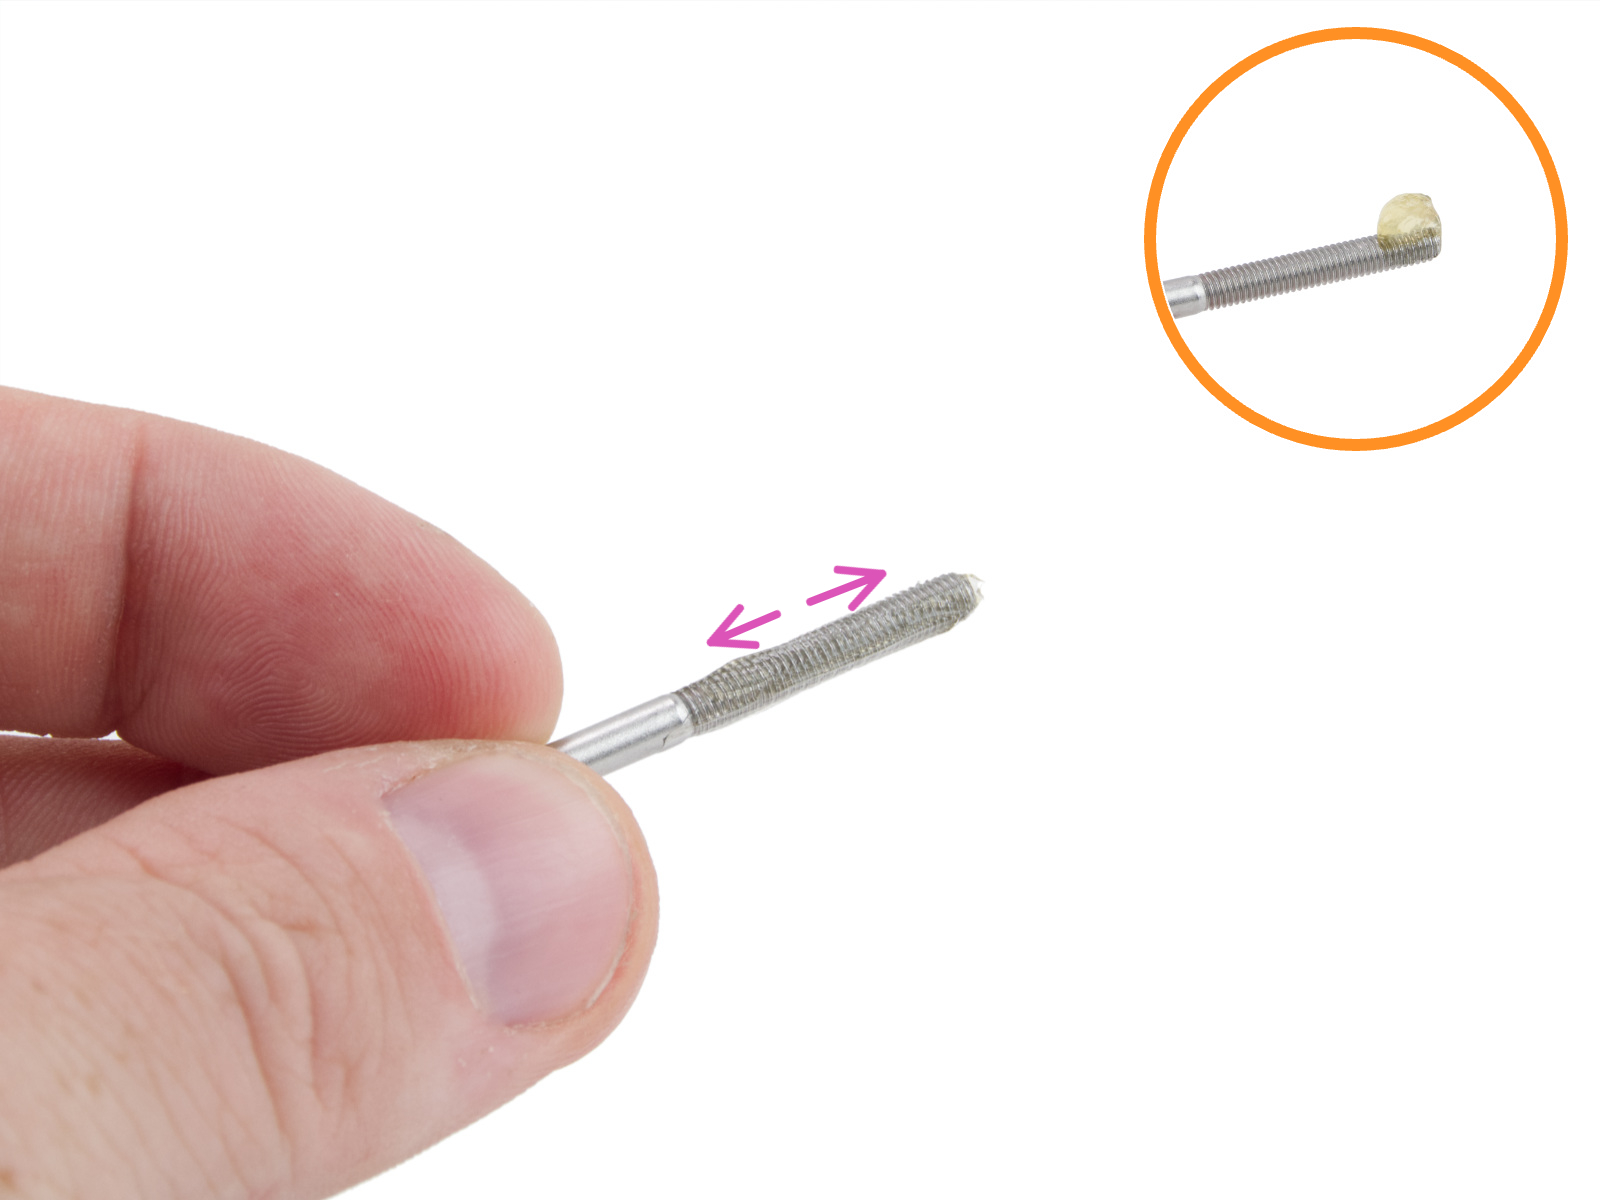
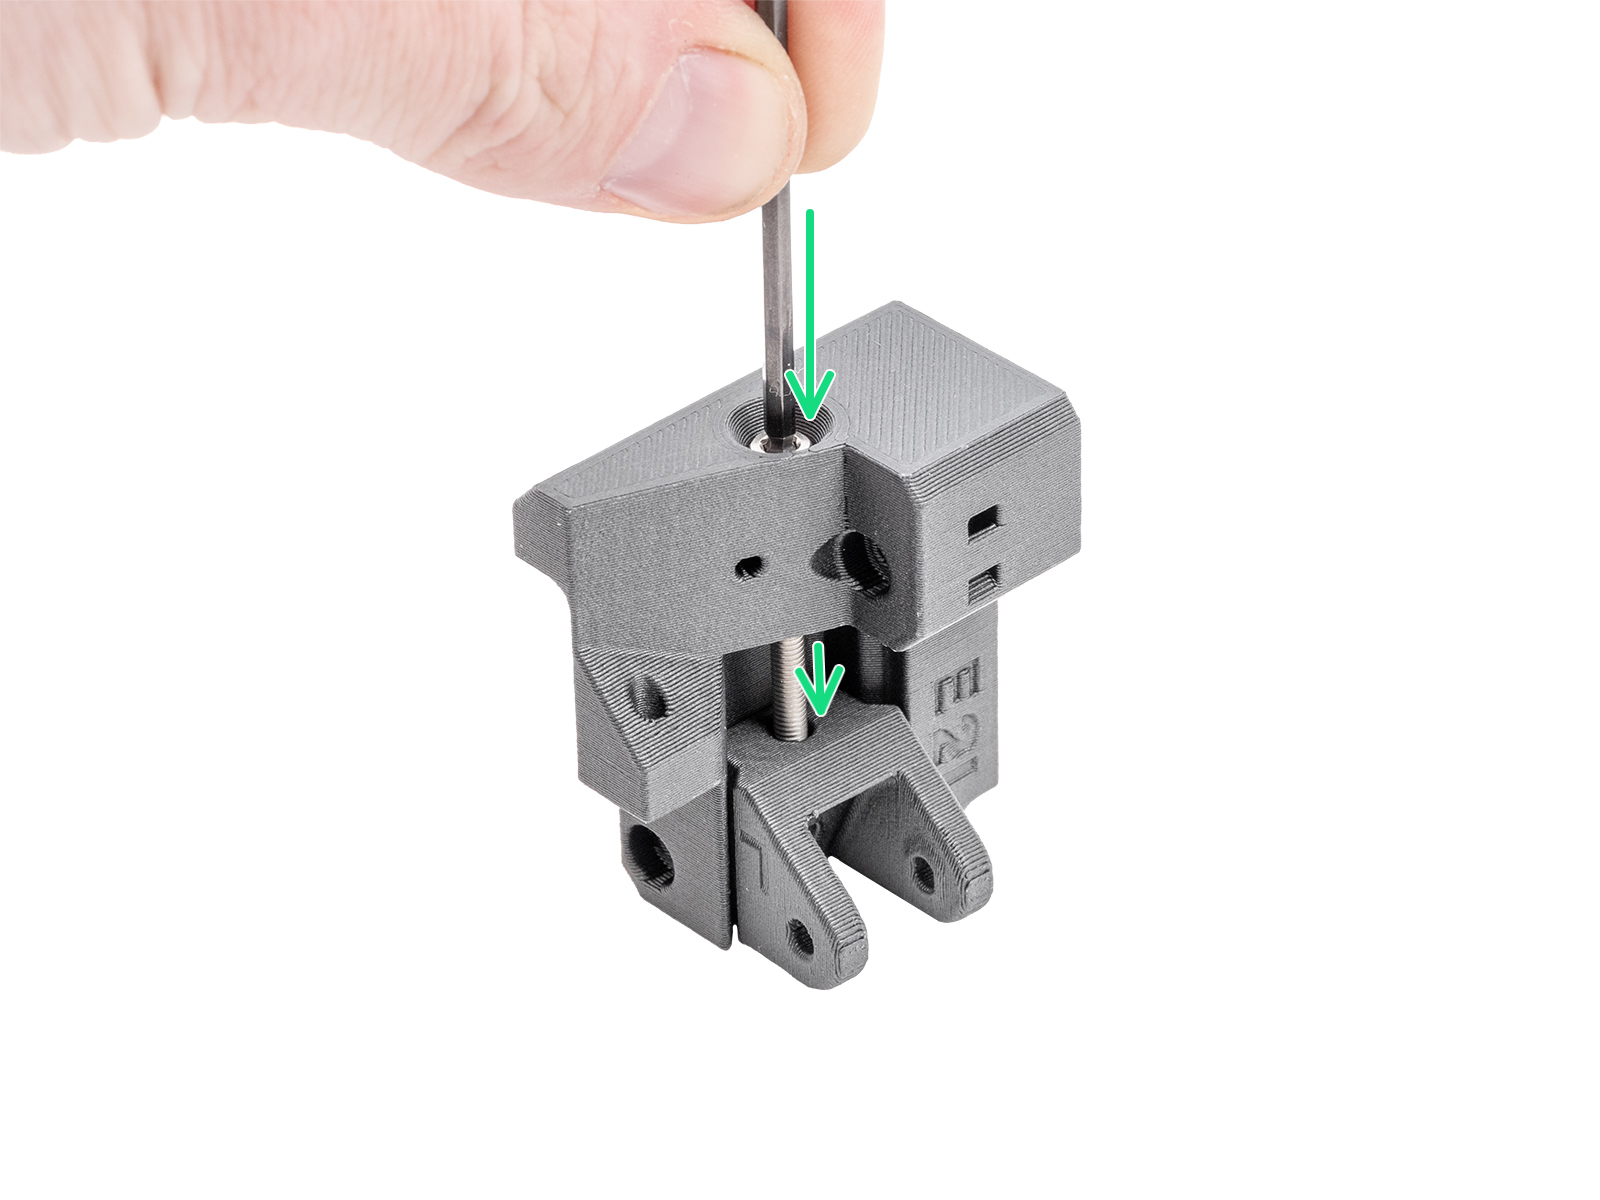
During the assembly process, we instruct on applying a small amount of Prusa lubricant to the tip of both M3x30 screws for the belt tensioner parts. If this was done during the assembly of the kit, there is no need to redo it, proceed directly to the next steps.
However, early CORE One kits did not have this step recommended in our manual. If this is the case, and other steps have not worked, the belt tensioner right/left, and their attached belt tensioner pulleys might need to be replaced.
- How to replace the Belt Tensioner Left (CORE One)
- How to replace the Belt Tensioner Right (CORE One)
- How to replace the Belt Tensioner Pulley (CORE One)
 |  |
Alignment
Before adjusting the belt, ensure the proper alignment of the CoreXY structure.
- Ensure the stepper motors are disabled. This can be done by switching the printer off, or through the LCD Menu -> Control -> Disable Motors.
- By hand, move the Nextruder to the frontmost Y-axis position and to the center of the X-axis.
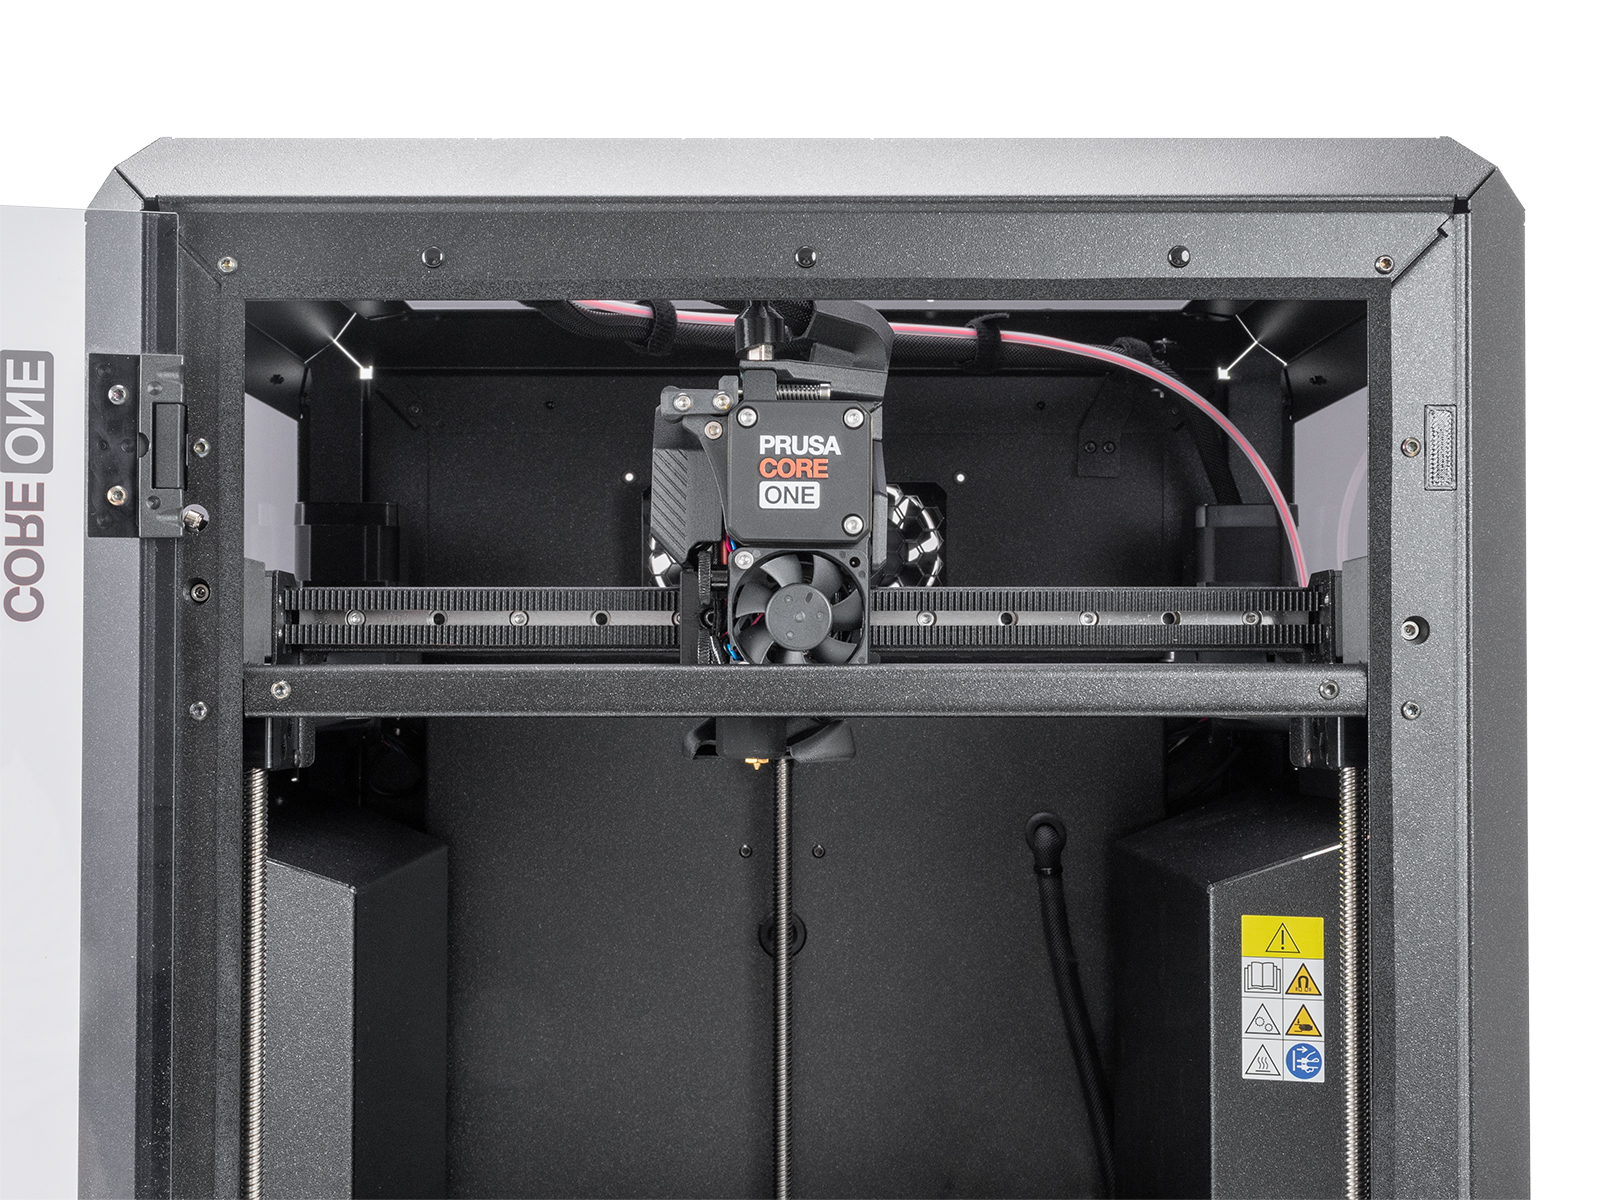
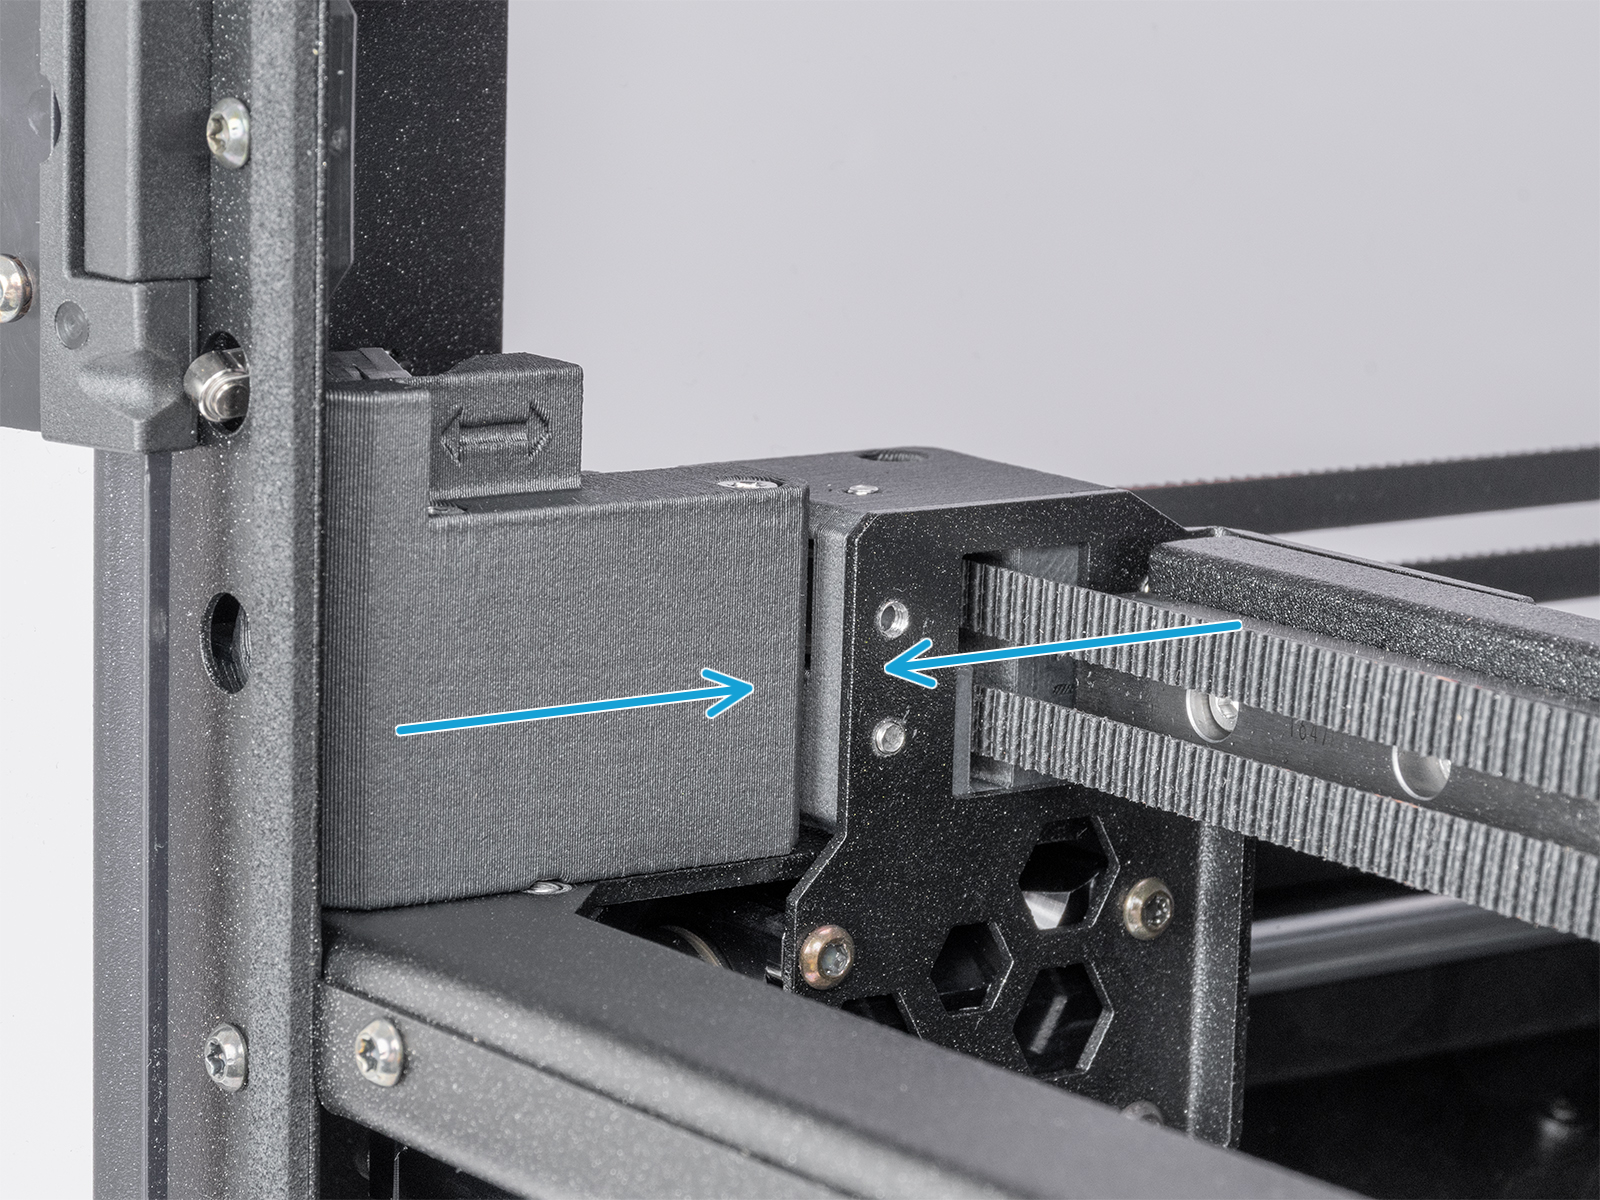
- Press the gantry corner against the front of the CoreXY, and make sure there is no play. Do this procedure on both sides. If there is any play in either side, perfect alignment is not achieved yet.
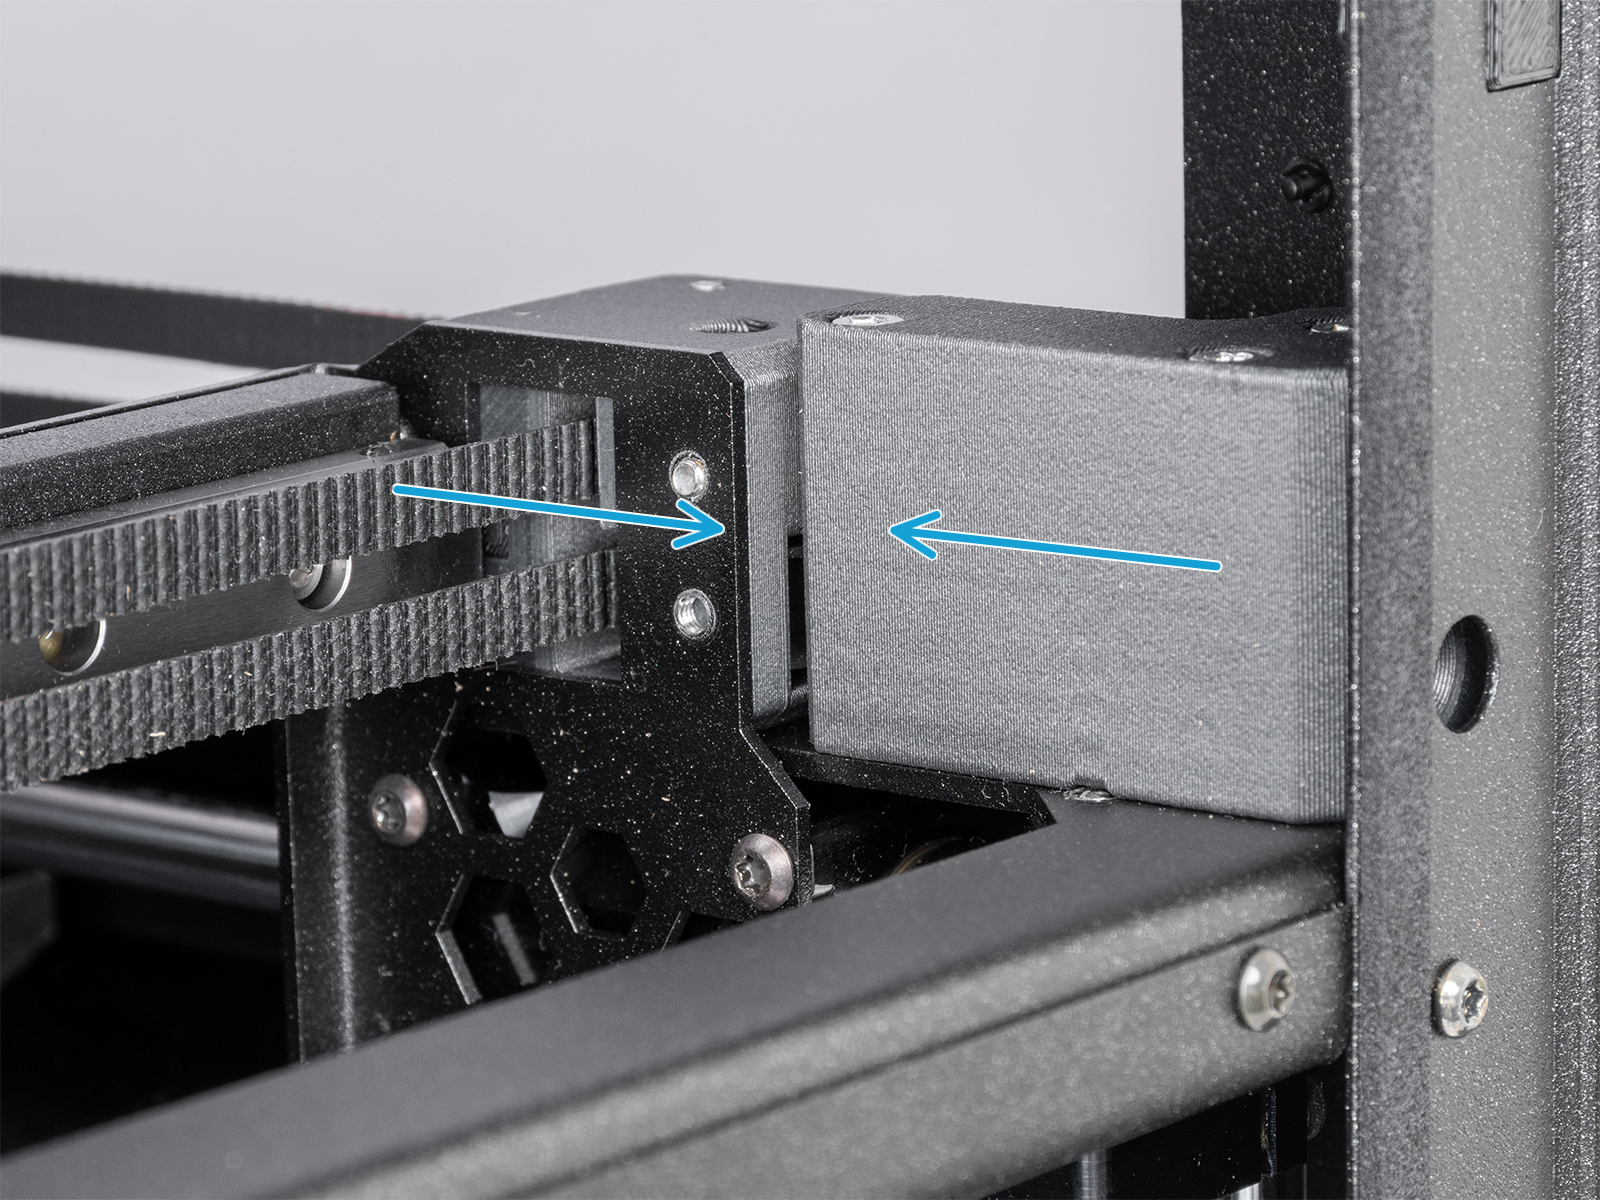 Quick gantry alignment
If there is a gap in either side of the gantry, you can try to force it in the opposite direction manually:1. Fully loosen both tensioner bolts; this will allow free gantry movement.
2. Move the gantry halfway back along the rails.
3. Grip the gantry firmly on both ends and apply a gentle counter-force in the opposite direction of the tilt until it straightens.
4. Check the alignment with the belts still loose, and carefully push the gantry forward. Since the loose belts will not pull it all the way, you may need to guide it by hand. Verify that there is no gap on either side at the front position.
5. Tighten both tensioner bolts gradually, alternating between them, tightening each by the same amount to keep the gantry straight. You may hold the gantry in place with your hand while tightening. After tightening both belts, make sure no gap has reappeared.Note: Apply force carefully to avoid damaging belts or bearings.
- Slightly loosen both the belt tensioner bolts. Loosen the bolt on the corner with play less than the other.
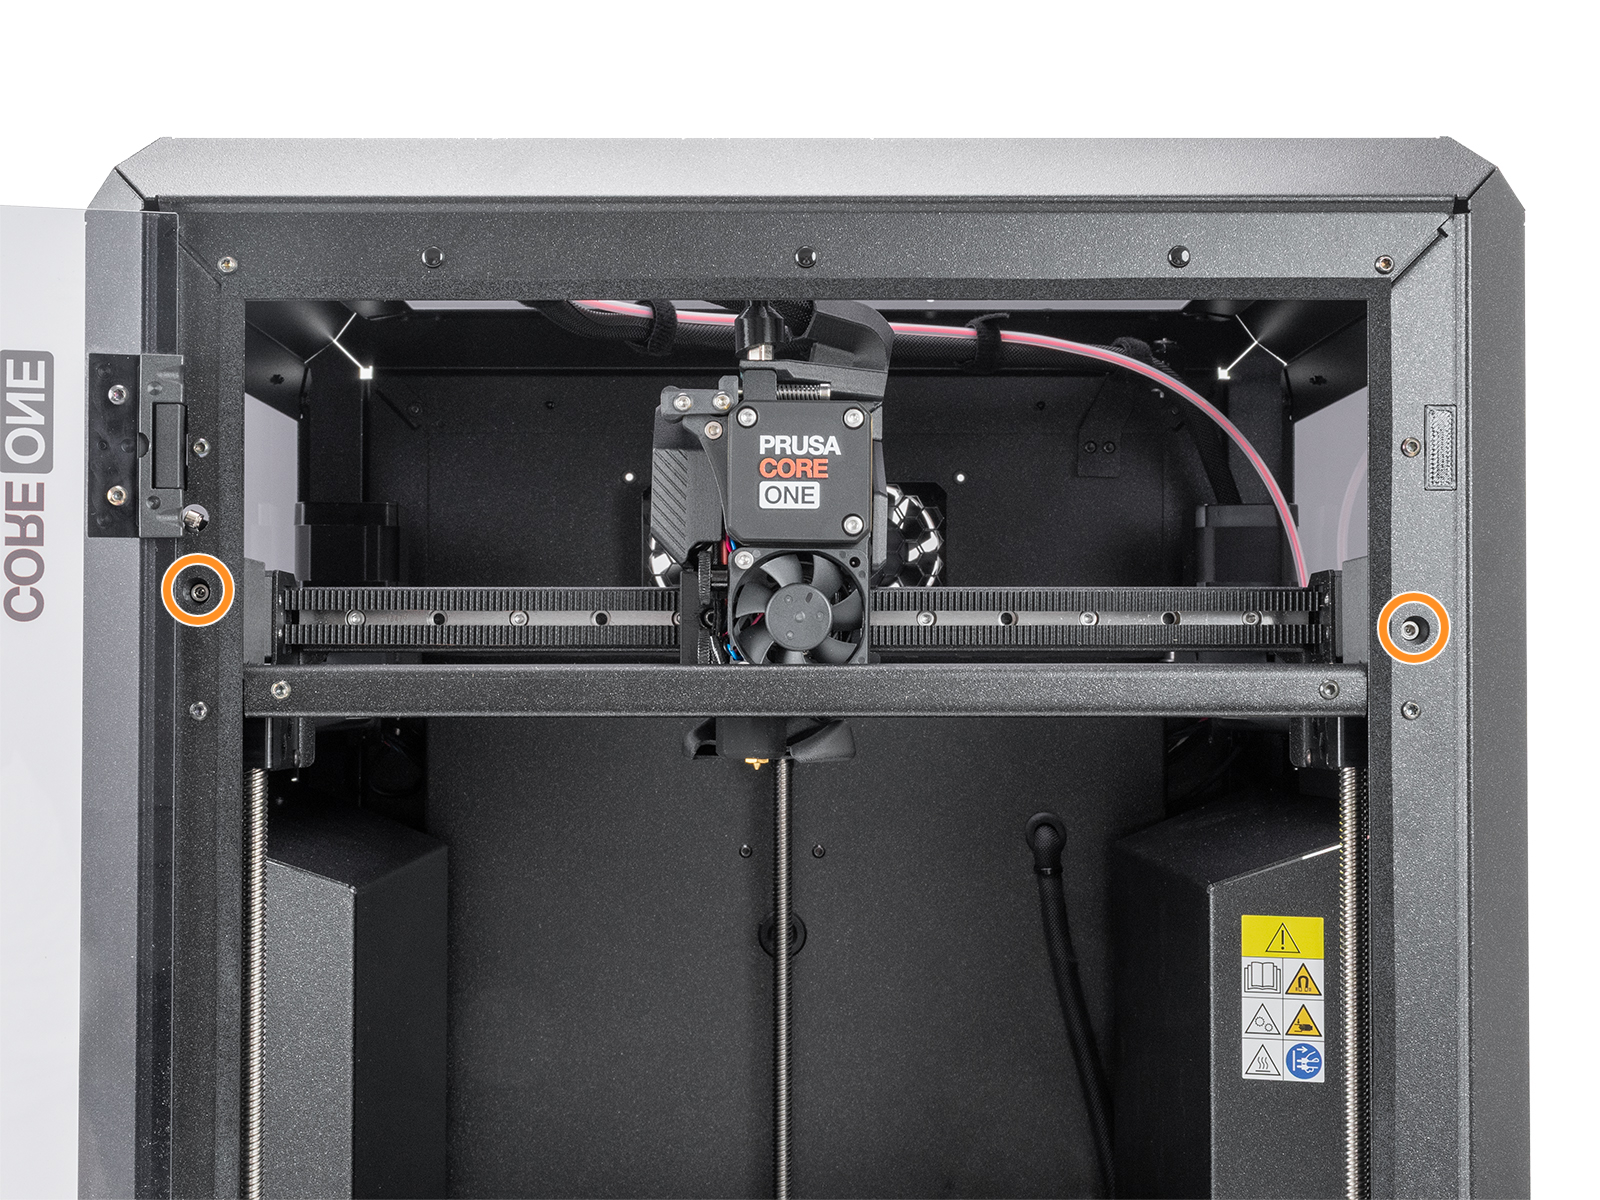
- Repeat steps 3 and 4 until a perfect alignment is reached. Do not worry if the belt is loose at this stage; adjusting the belt tension is done at a later step.
Belt tuning wizard
Starting from firmware 6.4.0, a belt tuning wizard is available in the printer menu, navigating in LCD Menu -> Settings -> Manual Belt Tuning. The printer uses controlled belt excitation combined with stroboscopic feedback to visualize belt resonance.
The wizard begins by prompting the user to check that the gantry is properly aligned, as misalignment can affect measurement accuracy. Follow the in-screen instructions to verify the gantry alignment, and in case of misalignment, follow the steps in the previous alignment paragraph.
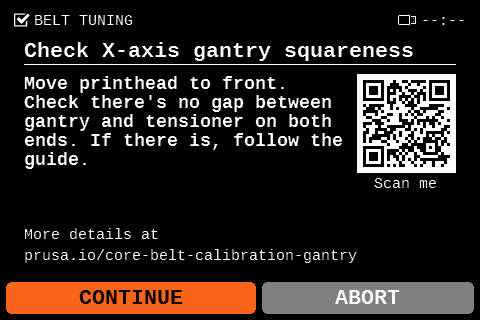
The wizard then measures the vibration frequency of both belts and recommends whether to tighten or loosen them. Follow the in-screen instructions to turn the encoder to vary the vibration frequency, and at the same time, observe the vibrating movement made by the selected belt as the frequencies are changed.
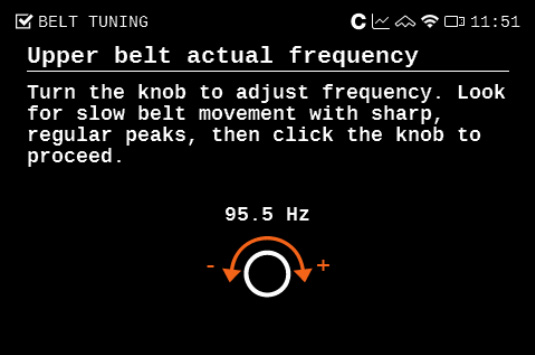
Look for a slow, extended, and steady resonating movement of the selected belt. Once you see that movement on the selected belt, select the current frequency on the printer screen.
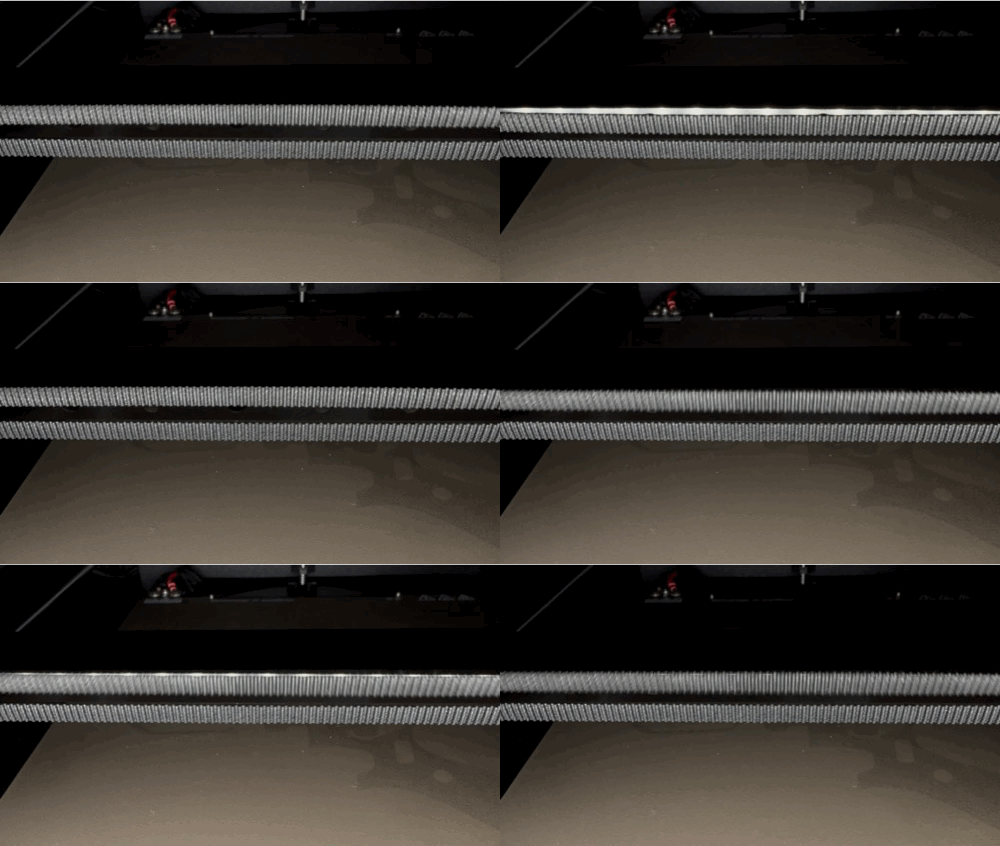 | 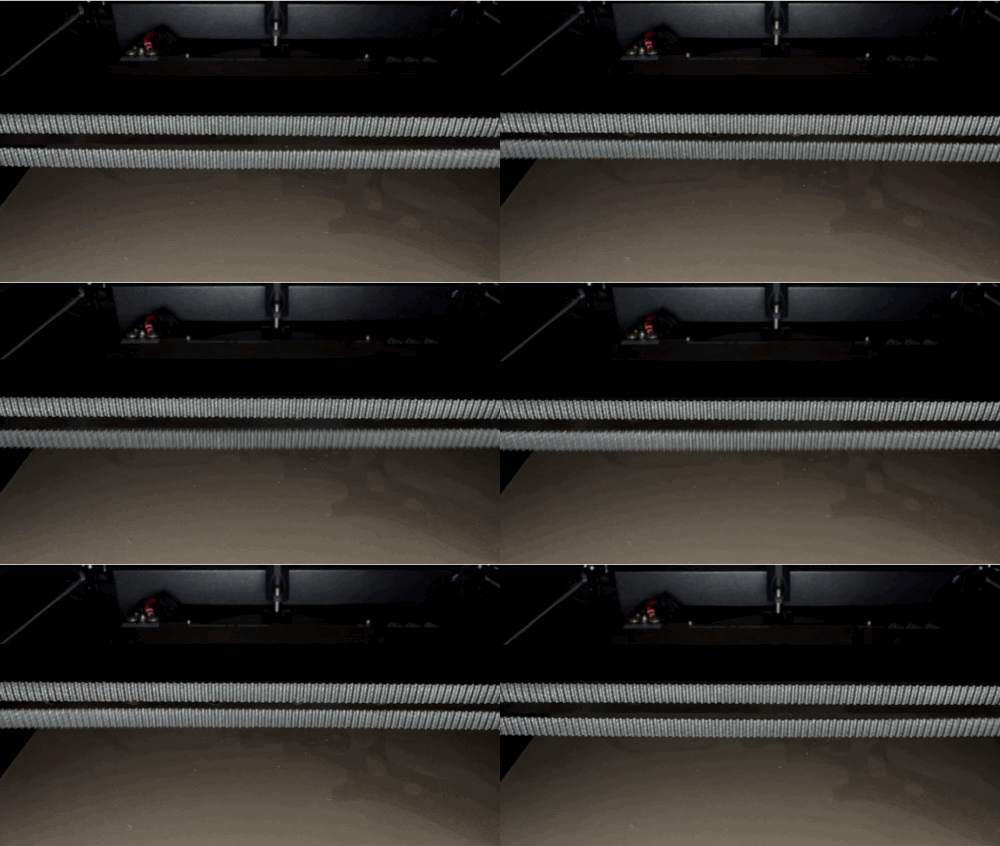 |
| Upper belt resonating movement | Lower belt resonating movement |
On CORE One, the ideal target frequency range is a maximum of 98 Hz for the upper belt and a minimum of 90 Hz for the lower belt.
On CORE One L, the ideal target frequency range is a maximum of 95 Hz for the upper belt and a minimum of 85 Hz for the lower belt.
Once the resonance test is completed, the printer dialog shows the found resonating frequencies and the suggested adjustment.
Important: always tighten both tensioner bolts evenly and alternately. This ensures that the gantry stays square during adjustment.
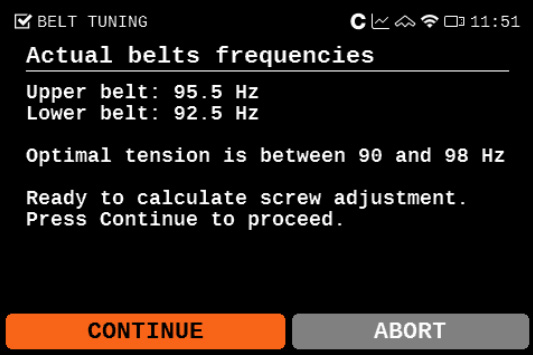 | 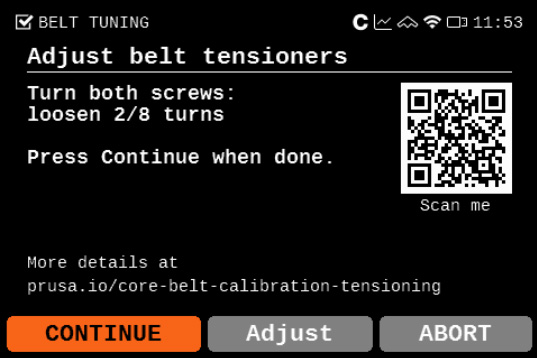 |
Belt tuner (CORE One)
We have our own belt tuner, available on our belt tuner webpage. The belt tuner can also be accessed in our Prusa App, navigating to >Menu >Belt Tuner.
The belt tuner uses your device's microphone and determines the belt tension by measuring the frequency of the vibration generated by strumming it.
Select CORE One, then select XY-belt, and follow the instructions shown on your device. When ready to measure the belt frequency, tap on Start listening to use your device's microphone.
Adjusting the belts
On CORE One, the ideal target frequency range is a maximum of 98 Hz for the upper belt and a minimum of 90 Hz for the lower belt.
On CORE One L, the ideal target frequency range is a maximum of 95 Hz for the upper belt and a minimum of 85 Hz for the lower belt.
If your gantry is out of alignment, you may not be able to reach these exact values. In some cases, the lower belt can even show a slightly higher frequency than the upper belt. This is acceptable as long as the difference between the two does not exceed 8 Hz, and both values remain within the 90–98 Hz range (CORE One) and within the 85-95 Hz range (CORE One L).
If you cannot achieve this, you will need to square the gantry manually before adjusting the belt tension. See the instructions in “Quick Gantry Alignment” above or “Extensive Adjustment of gantry and belts” at the bottom of this article.
Important: Always tighten both tensioner bolts evenly and alternately. This ensures that the gantry stays square during adjustment.
Small adjustment
-
- Ensure the stepper motors are disabled. This can be done by switching the printer off, or through the LCD Menu -> Control -> Disable Motors.
- By hand, move the Nextruder to the frontmost Y-axis position, and to the rightmost X-axis position.
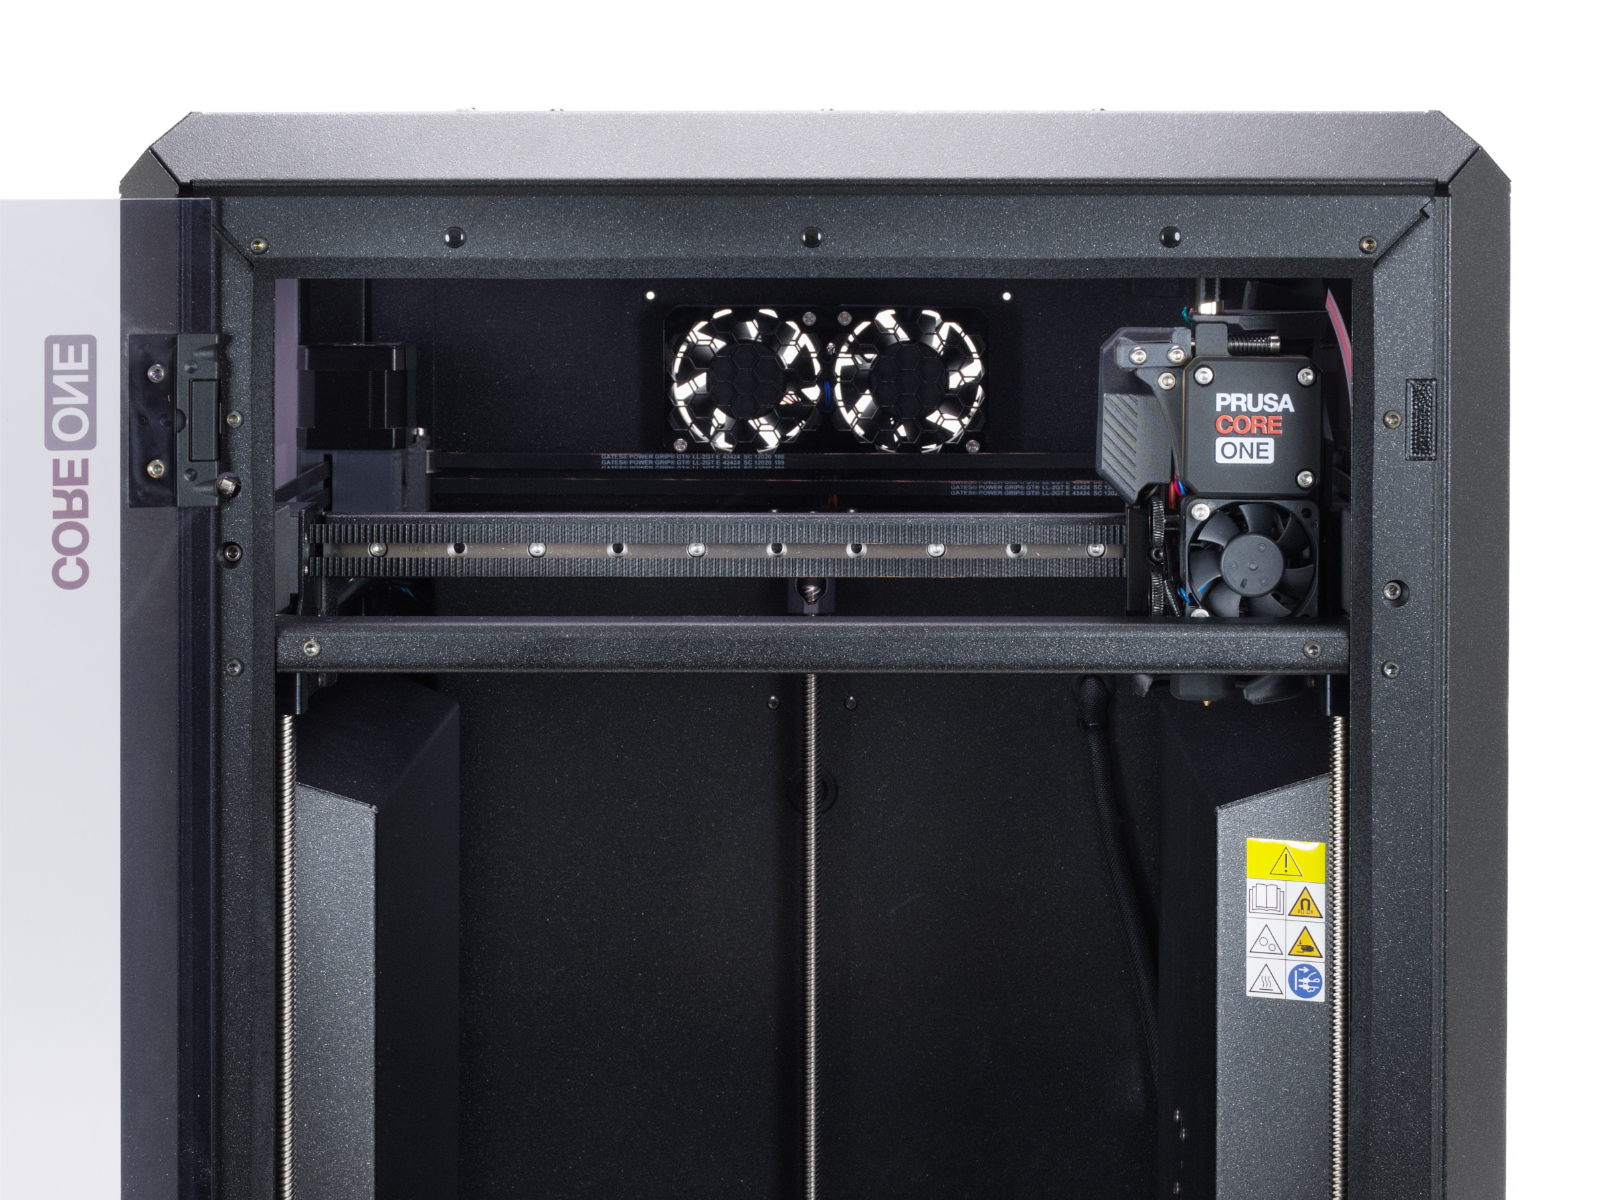
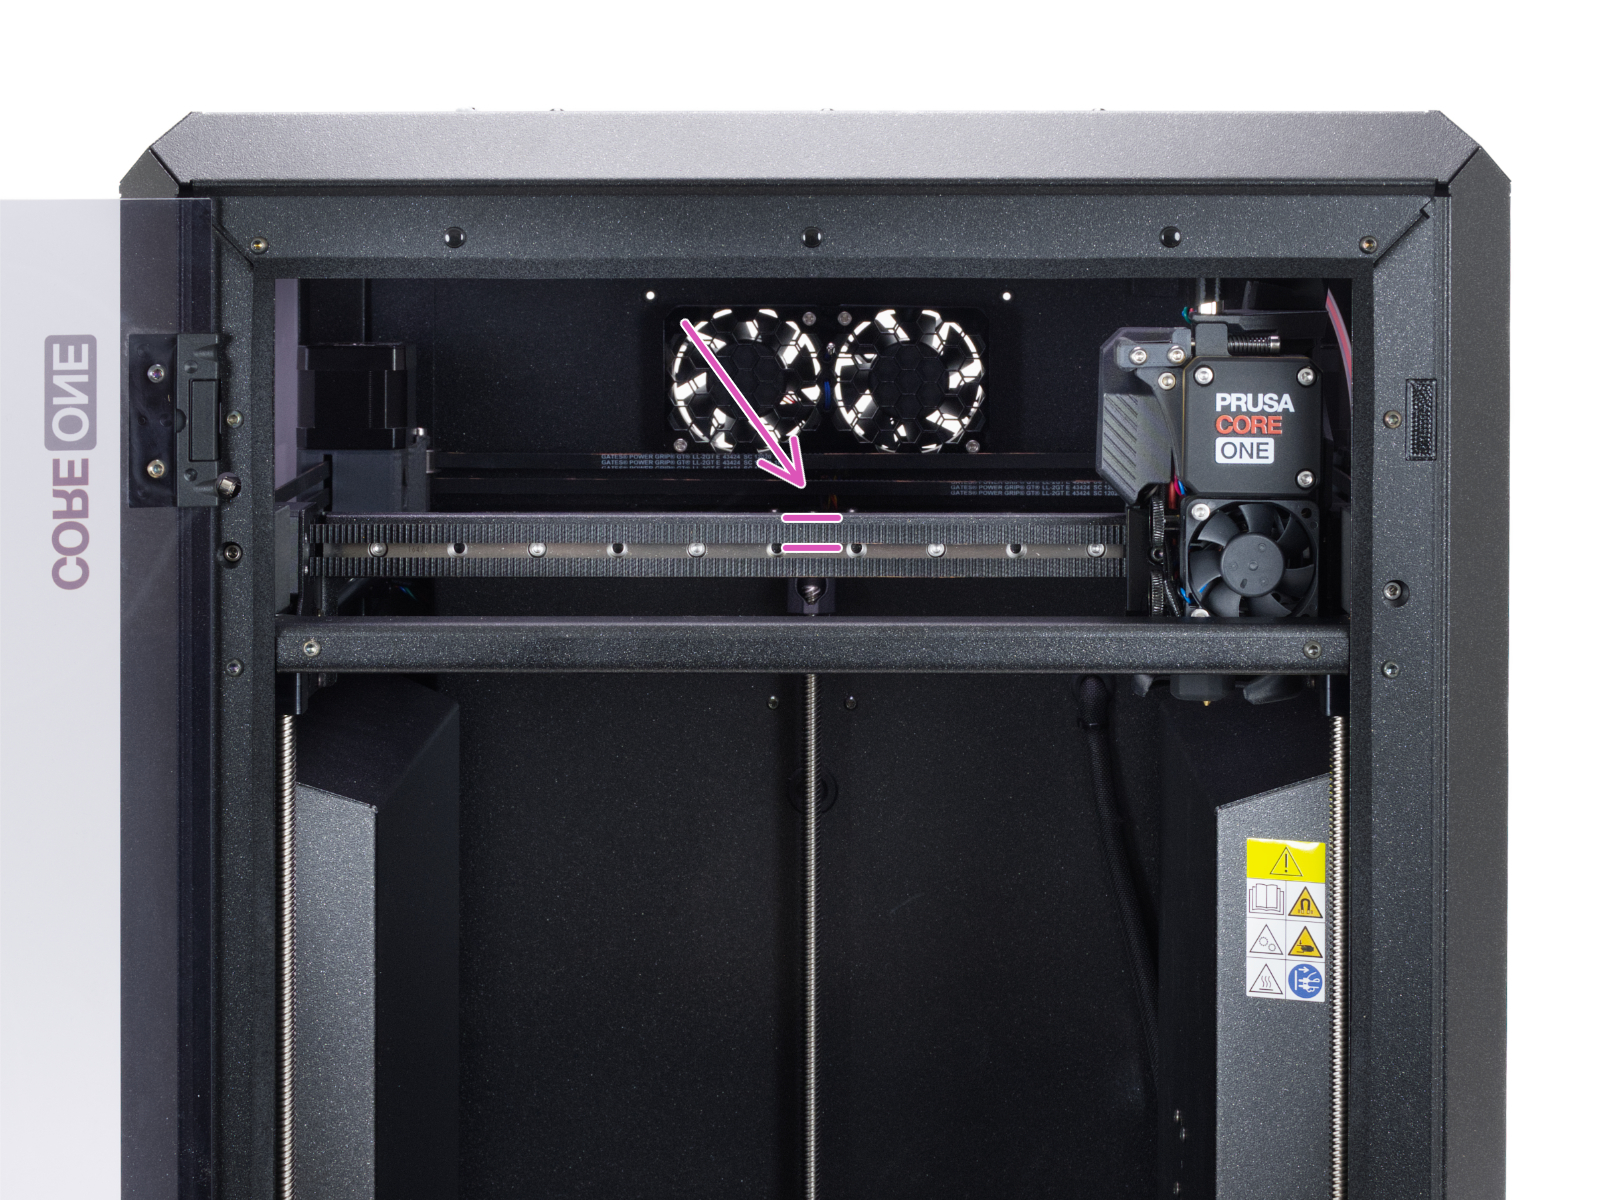
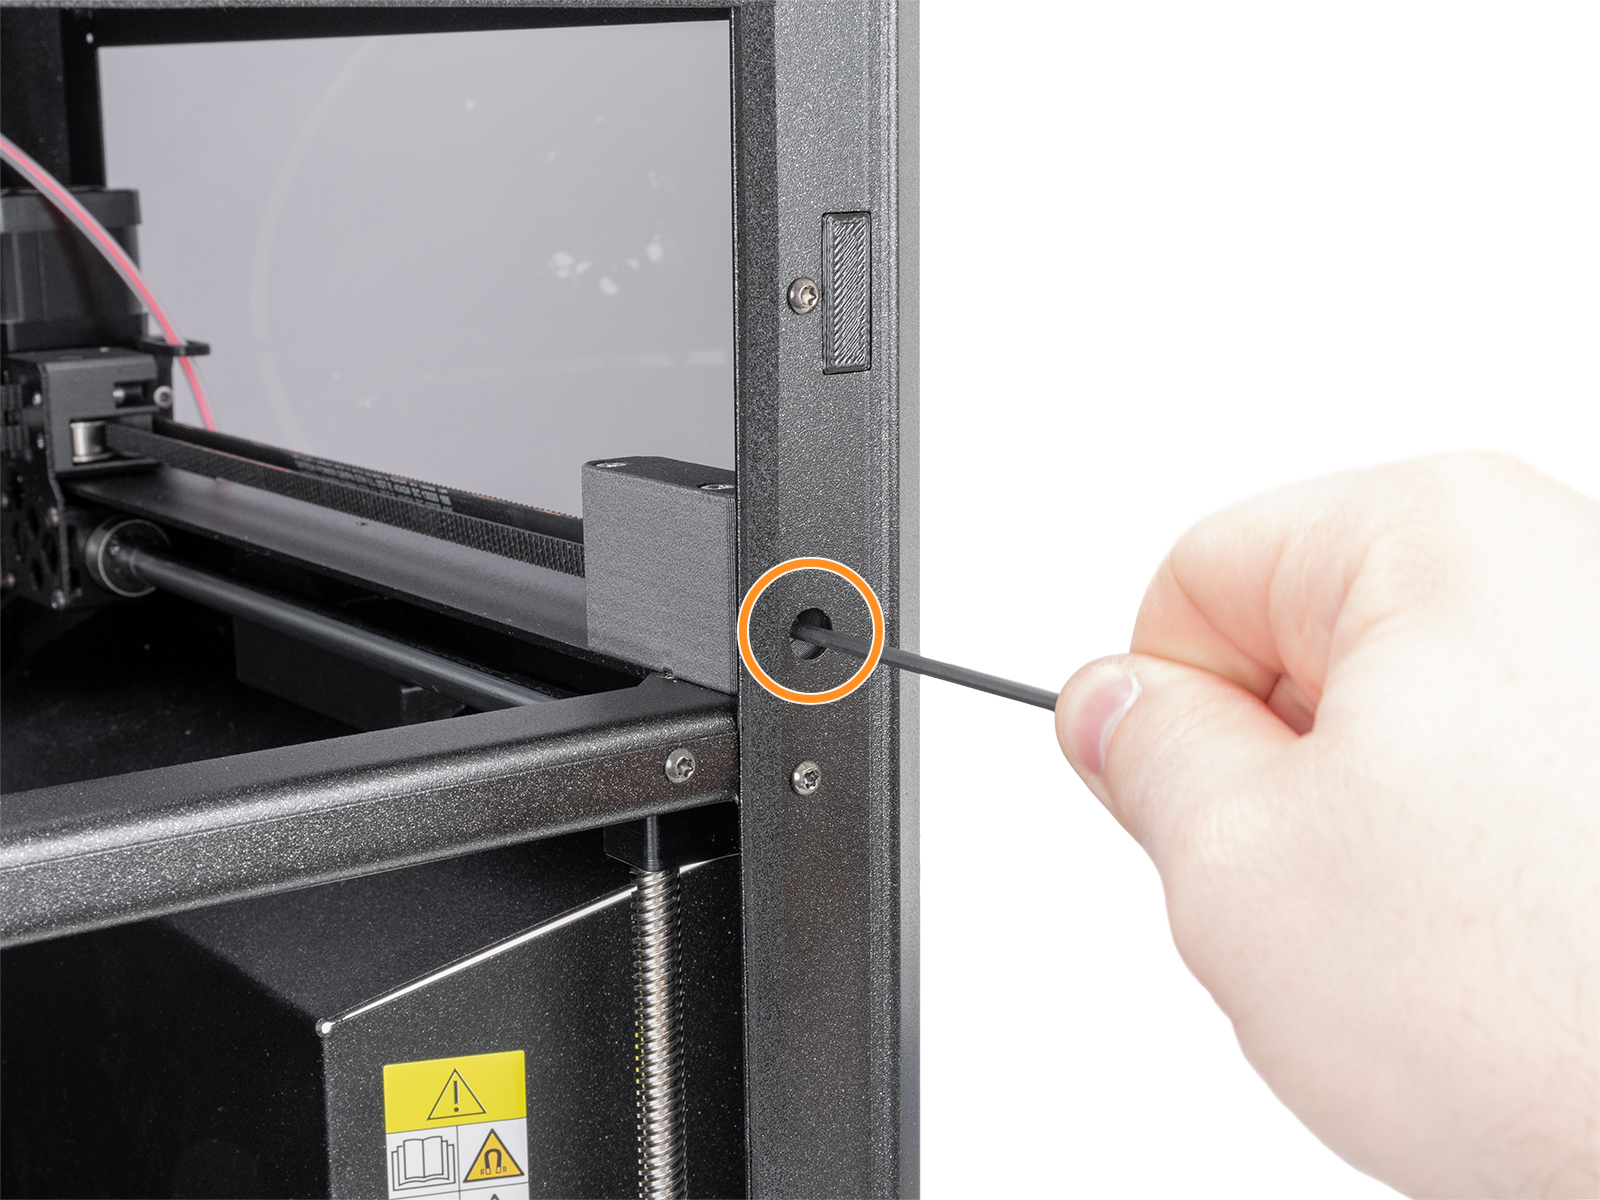
- On the front of the gantry, strum the middle of the upper belt. Place your device next to the belt during this step, to measure the frequency in Hz of the belt sound. The ideal frequency for the upper belt is 96Hz.
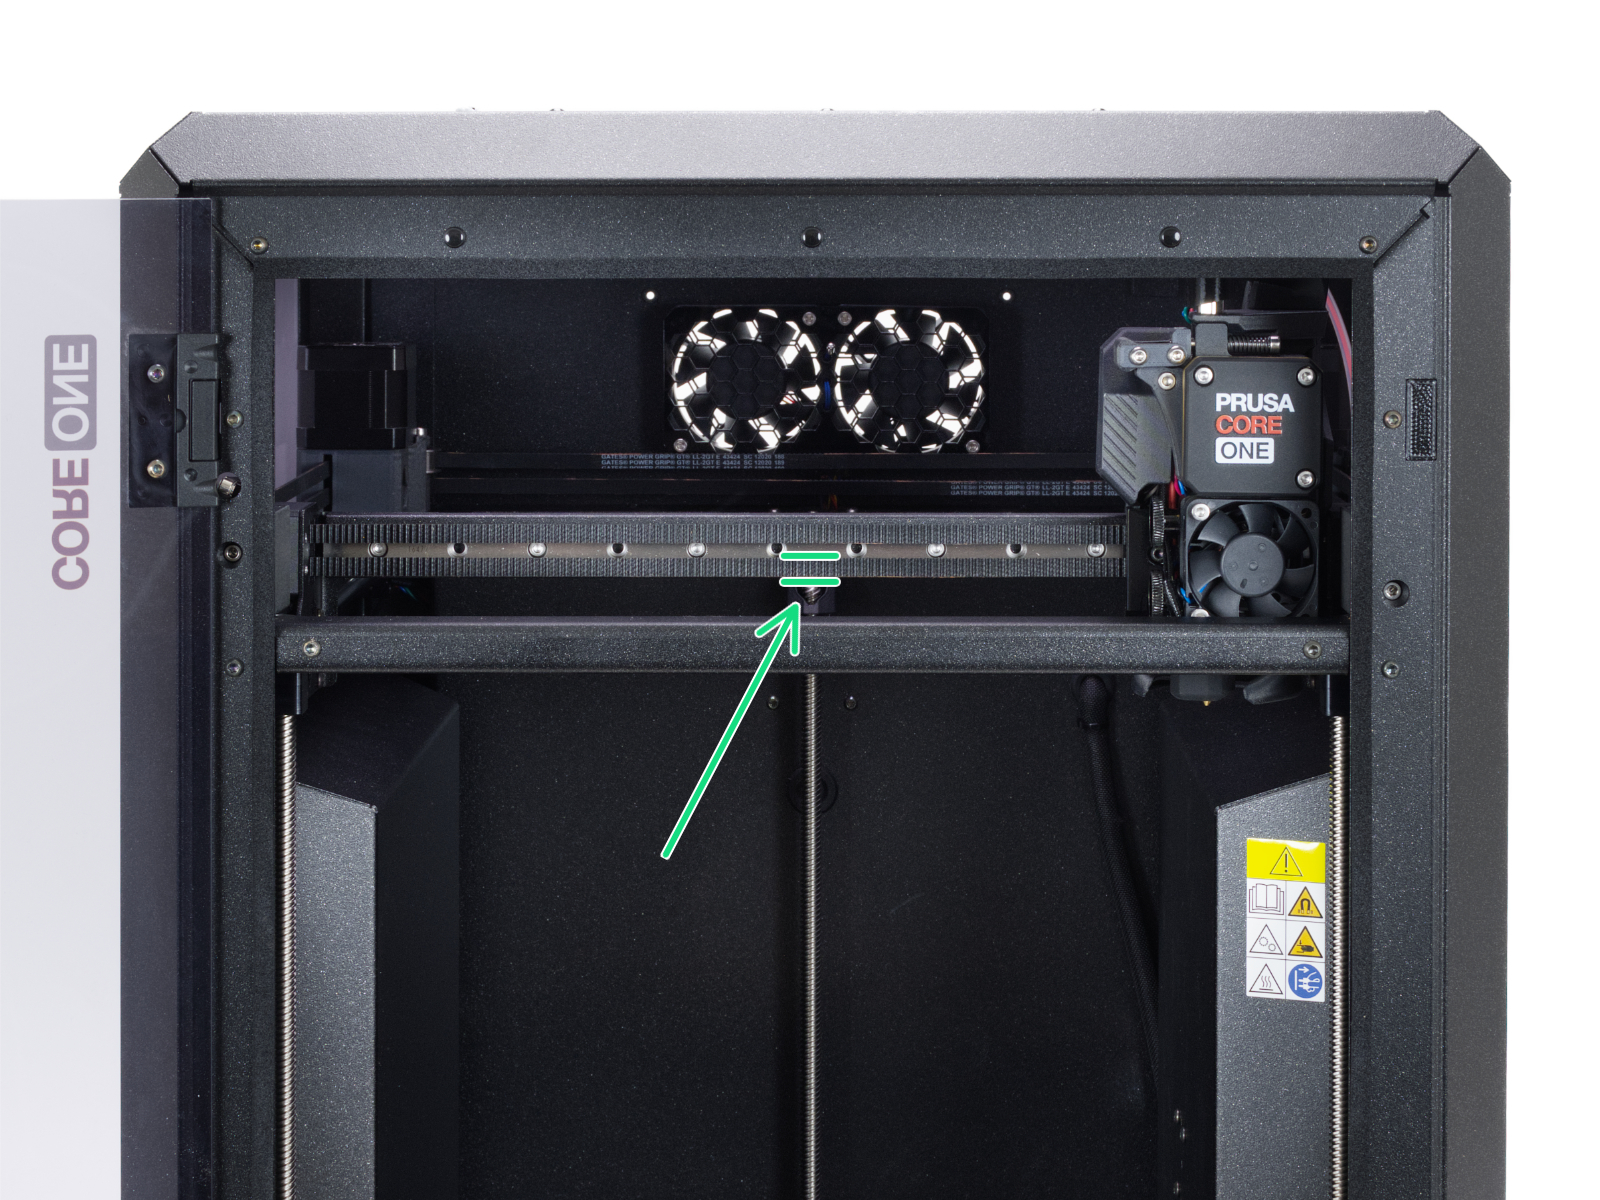
- On the front of the gantry, strum the middle of the lower belt. Place your device next to the belt during this step, to measure the frequency in Hz of the belt sound. The ideal frequency for the lower belt is 92Hz.
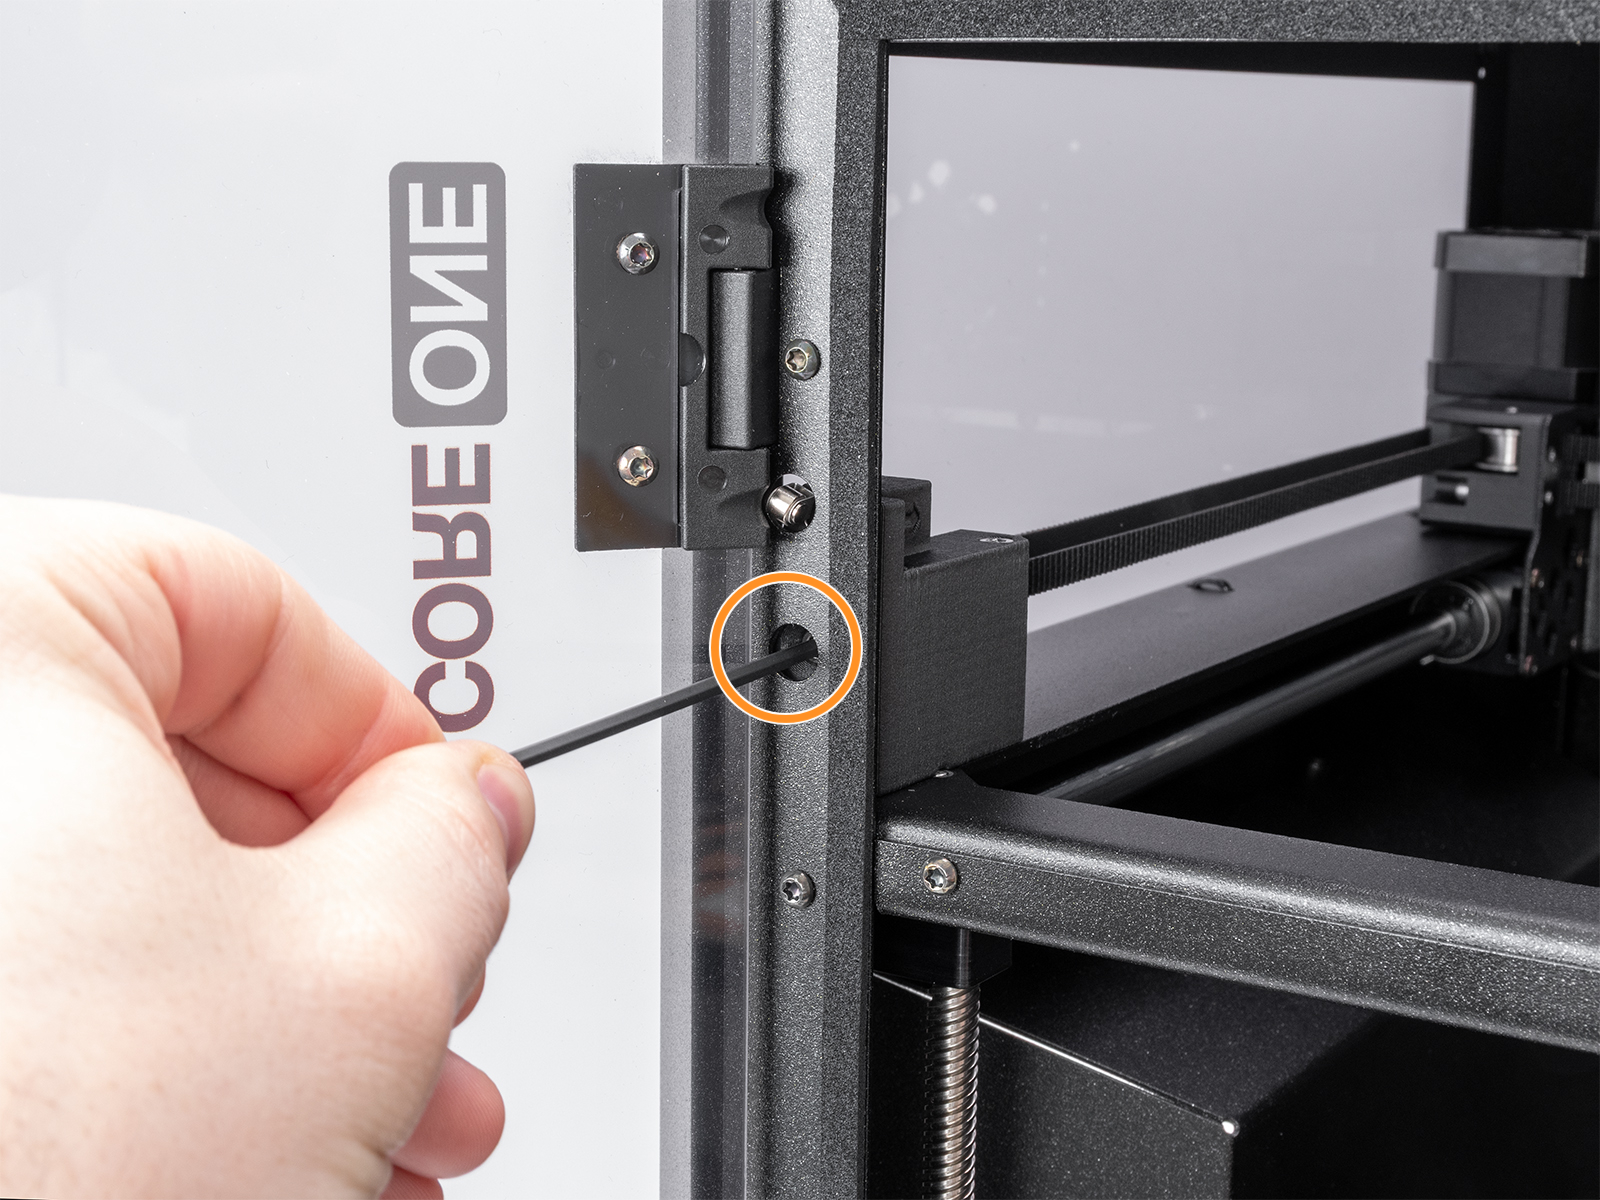
- Adjust the belts by tightening or loosening the belt tensioner screws by the same amount. A tighter bolt causes a higher frequency, and vice versa.
 |  |
Extensive adjustment of gantry and belts (CORE One)
The belt tensioners should be able to solve most belt issues. However, if you need to make a larger adjustment because of a really out-of-alignment gantry or a belt that has slipped from the holder, follow the steps below to access the belt.
- Manually move the Nextruder to the front and position it in the center to allow access from both sides.
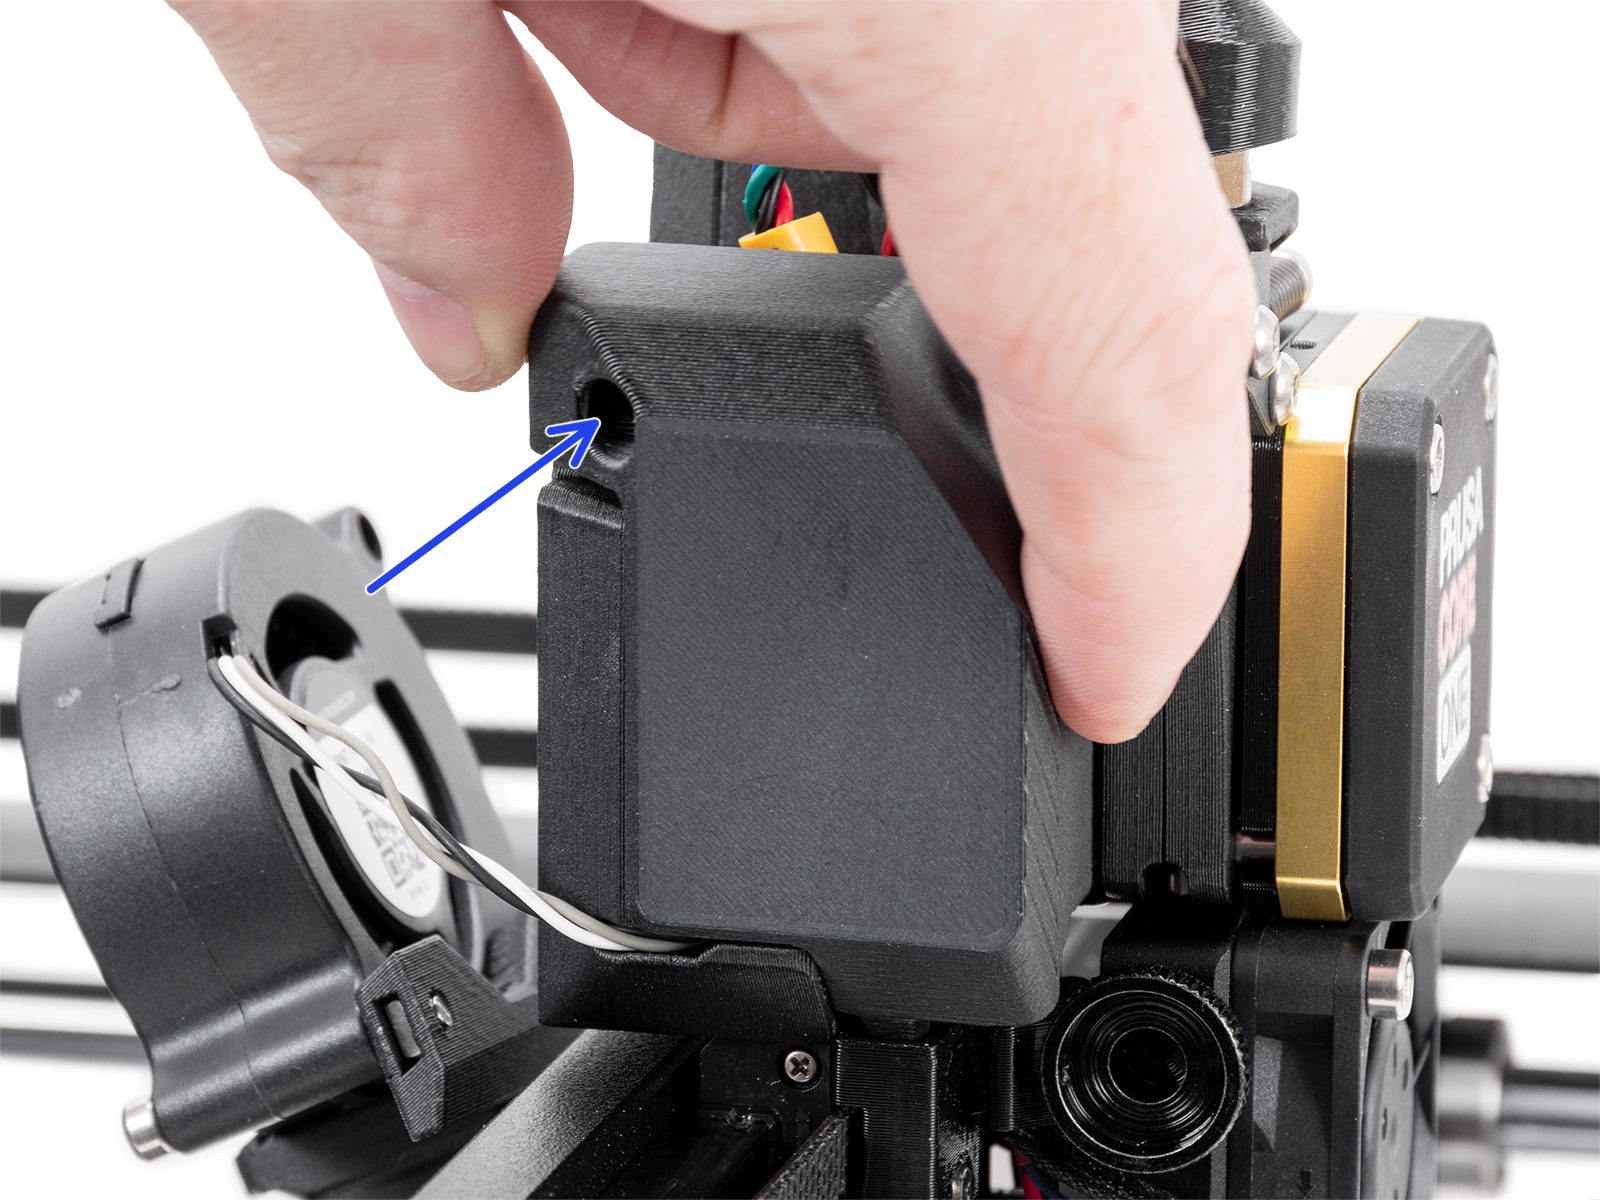
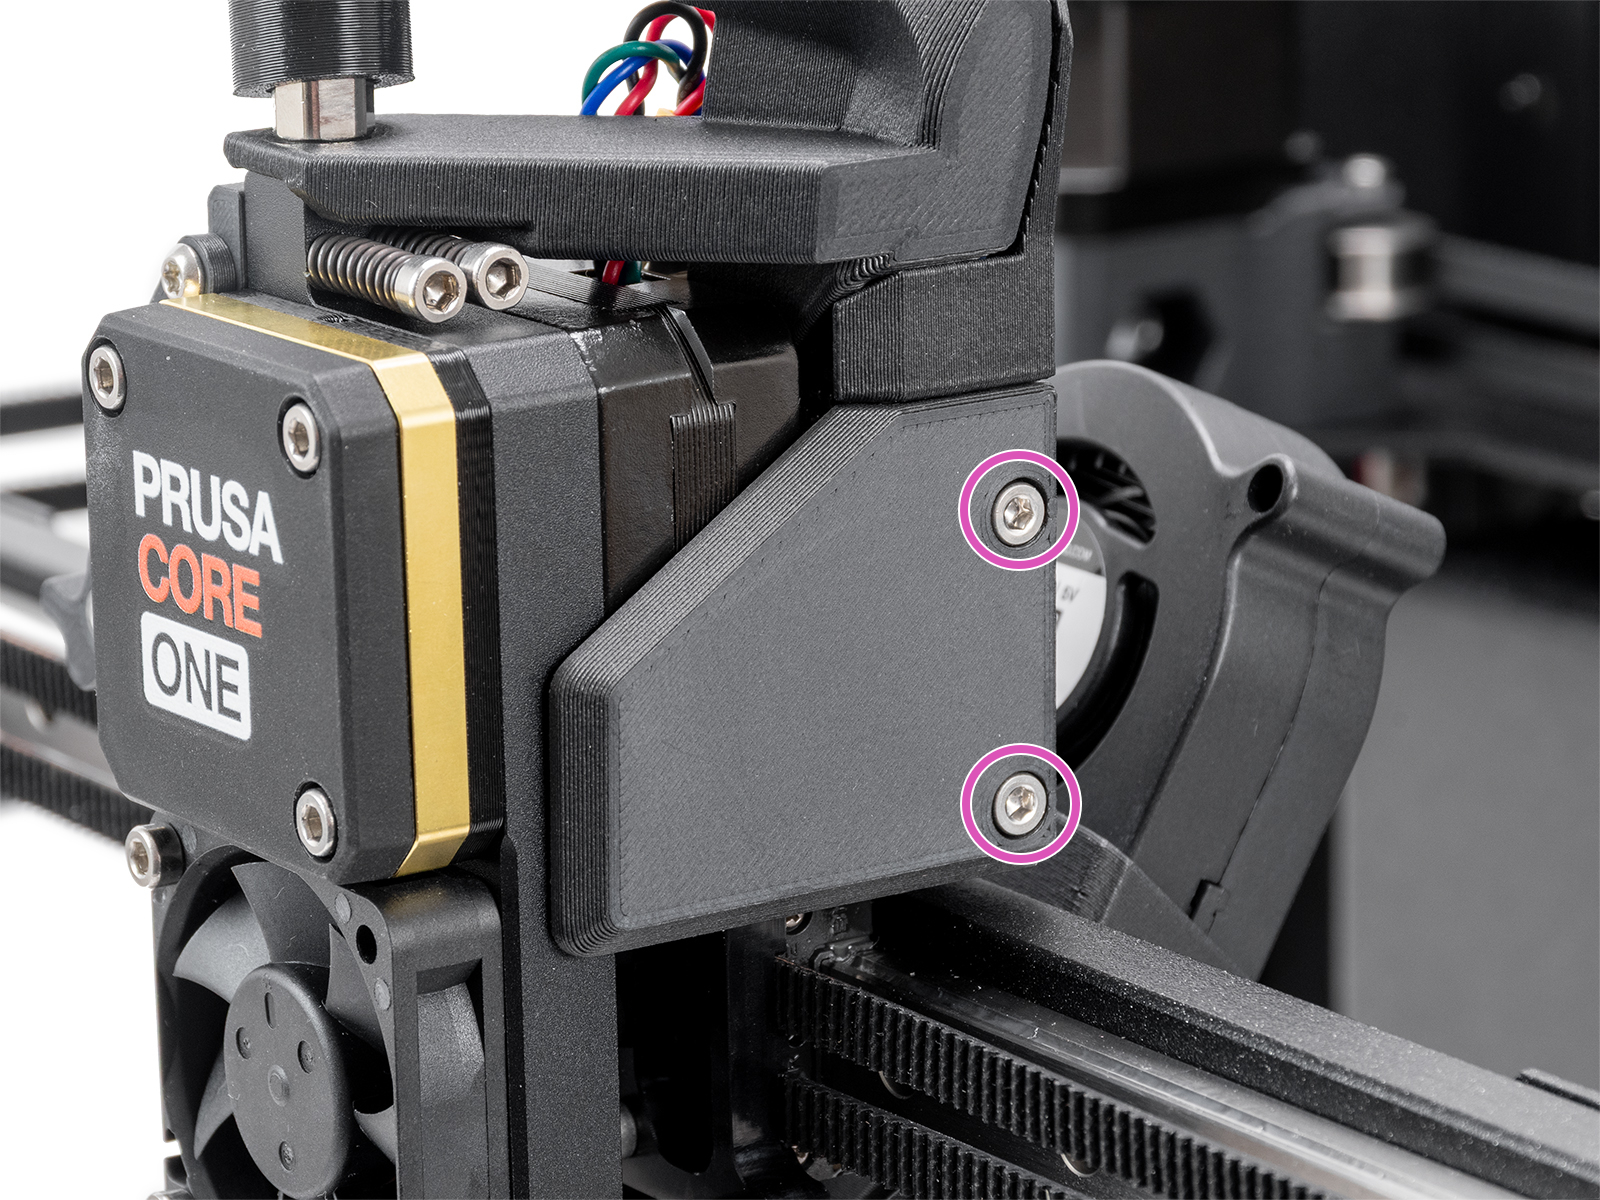
- Remove the print head cover left and print head cover right by removing the M3x10 screws shown below.
 |  |
- Disconnect all connectors from the LoveBoard, except the main cable.

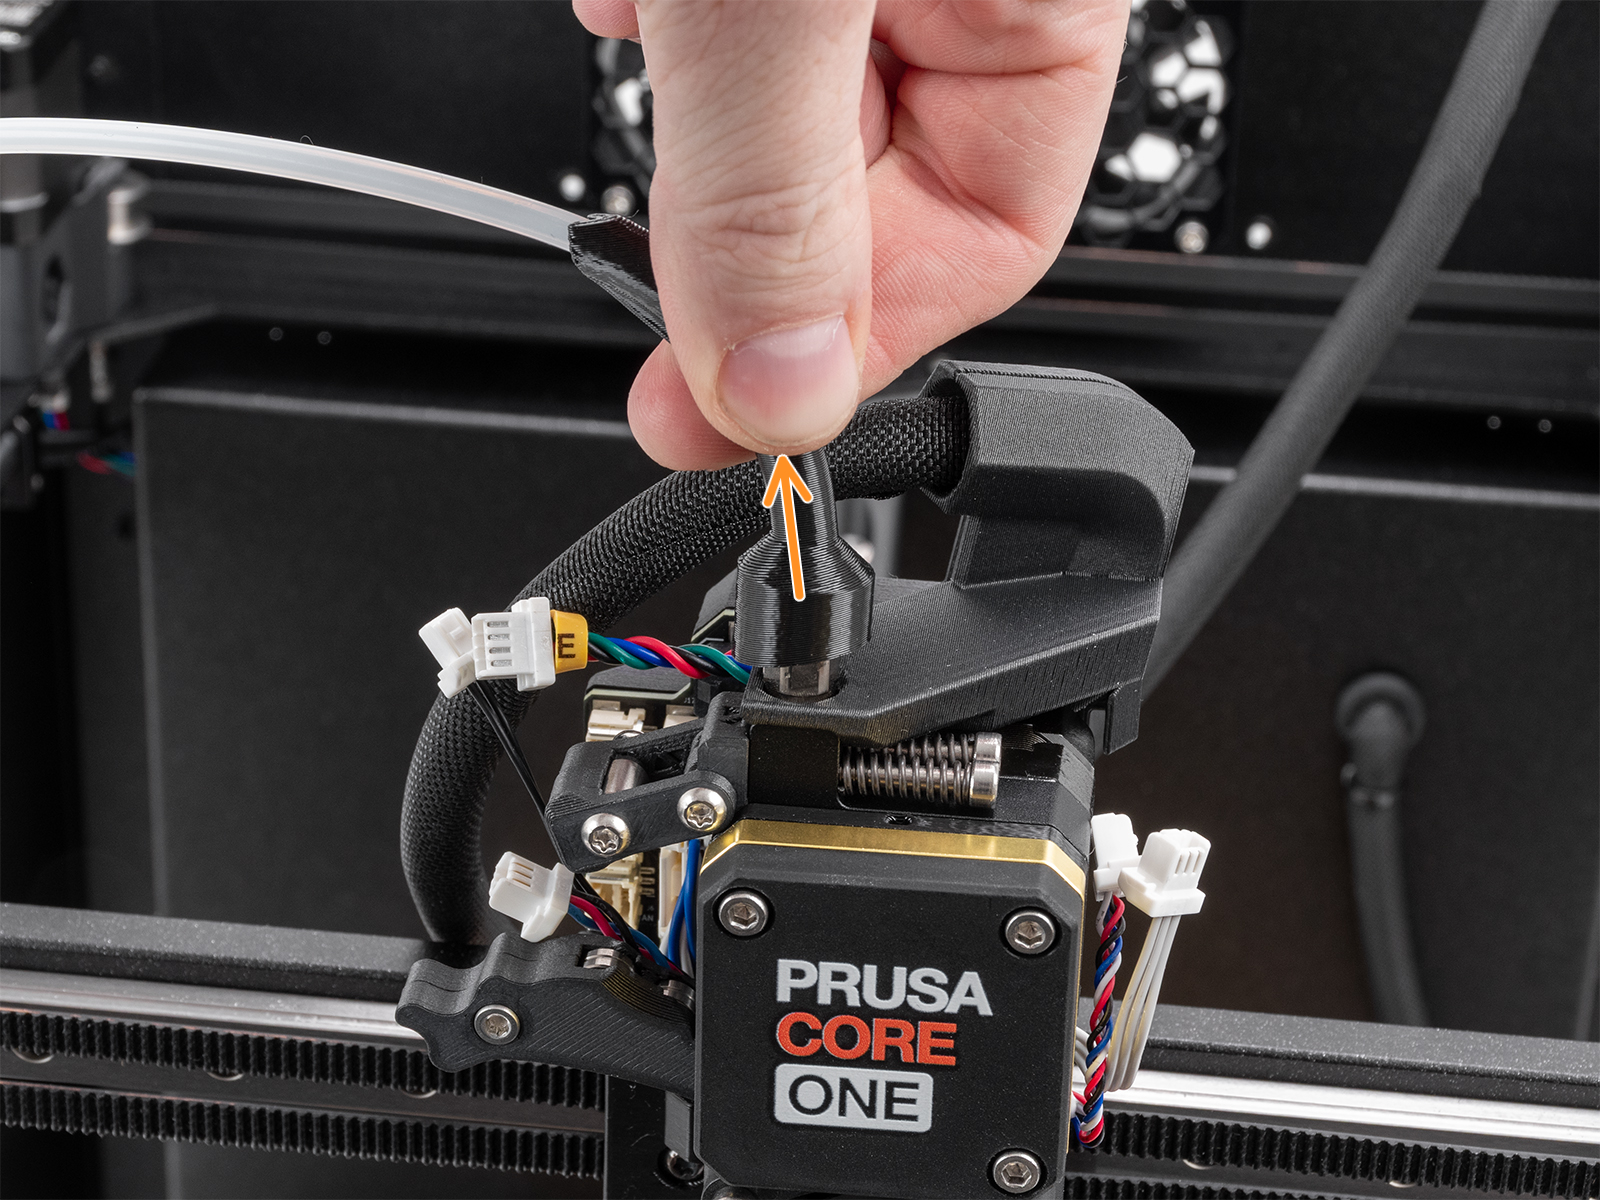
- Pull up the Bowden-bend from the fitting on top of the extruder, and unscrew the fitting. Then, open the M3x10 screws that hold the LoveBoard assembly.
 | 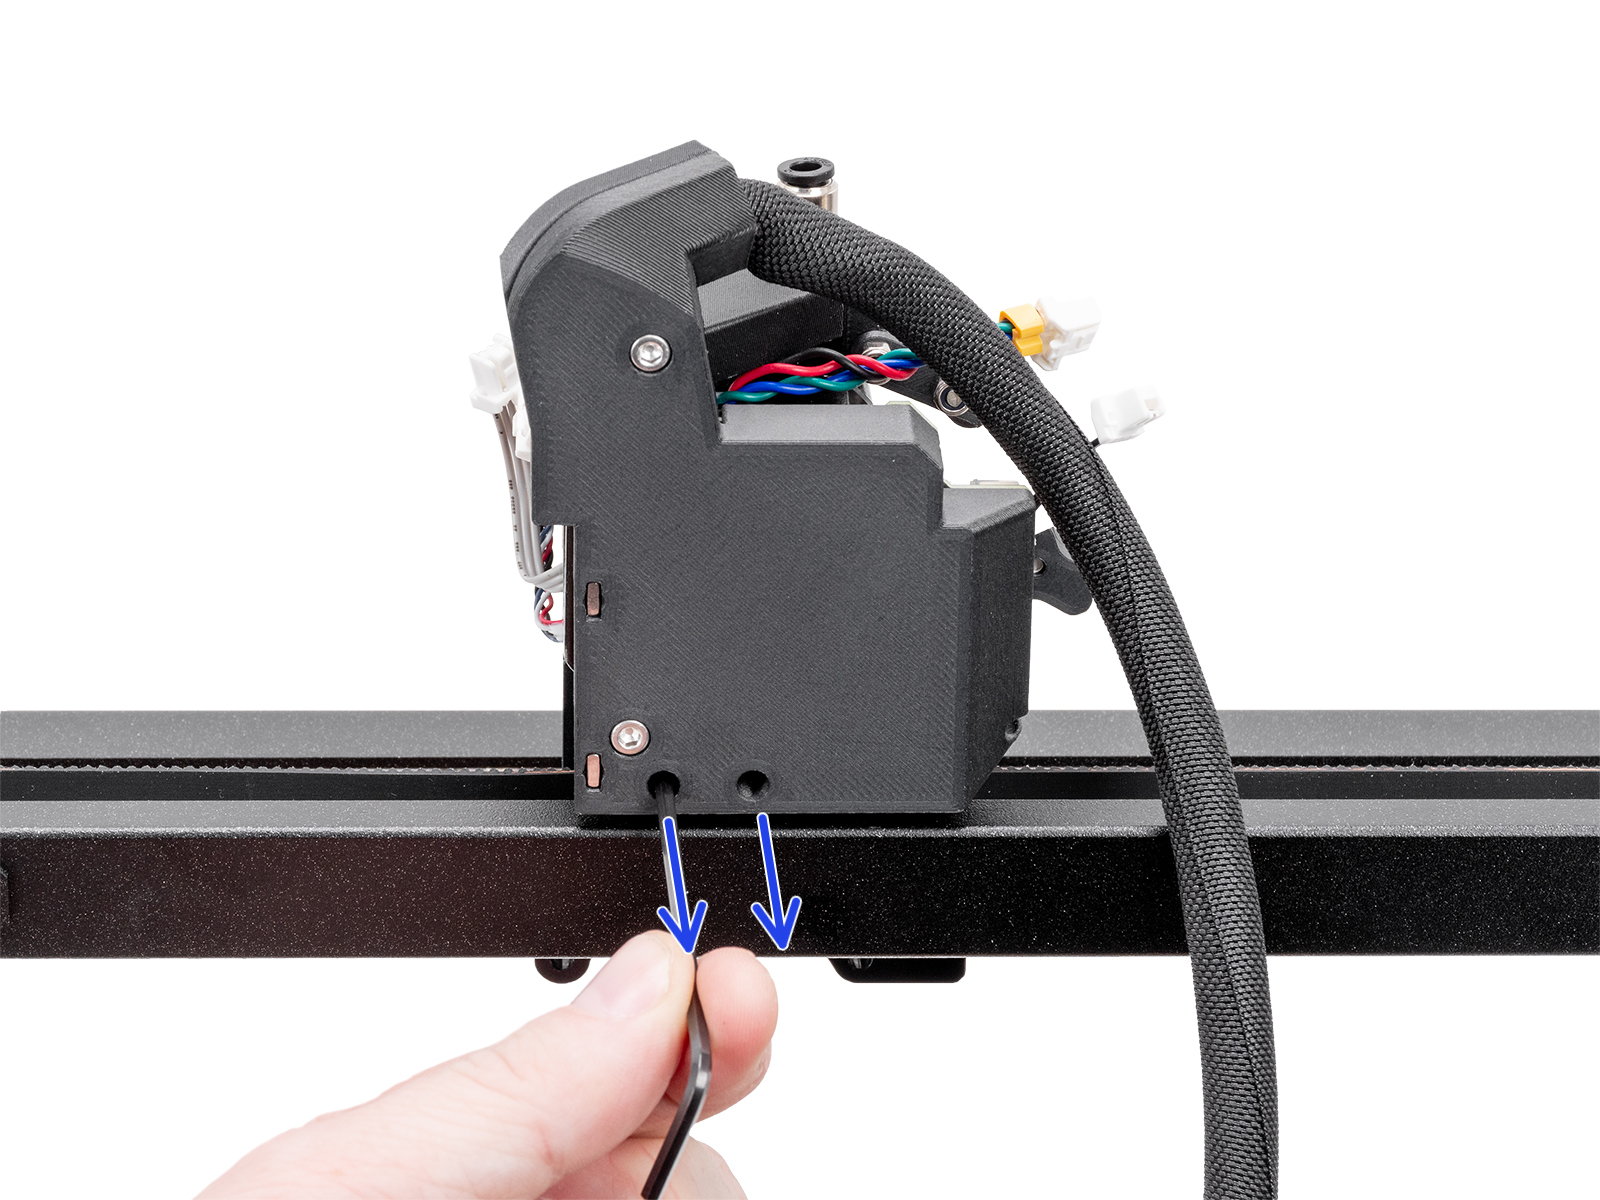 |
- Remove the hotend thermistor and heater cables from the cable clip. Open the thumb screws and remove the hotend, being careful with the cables.
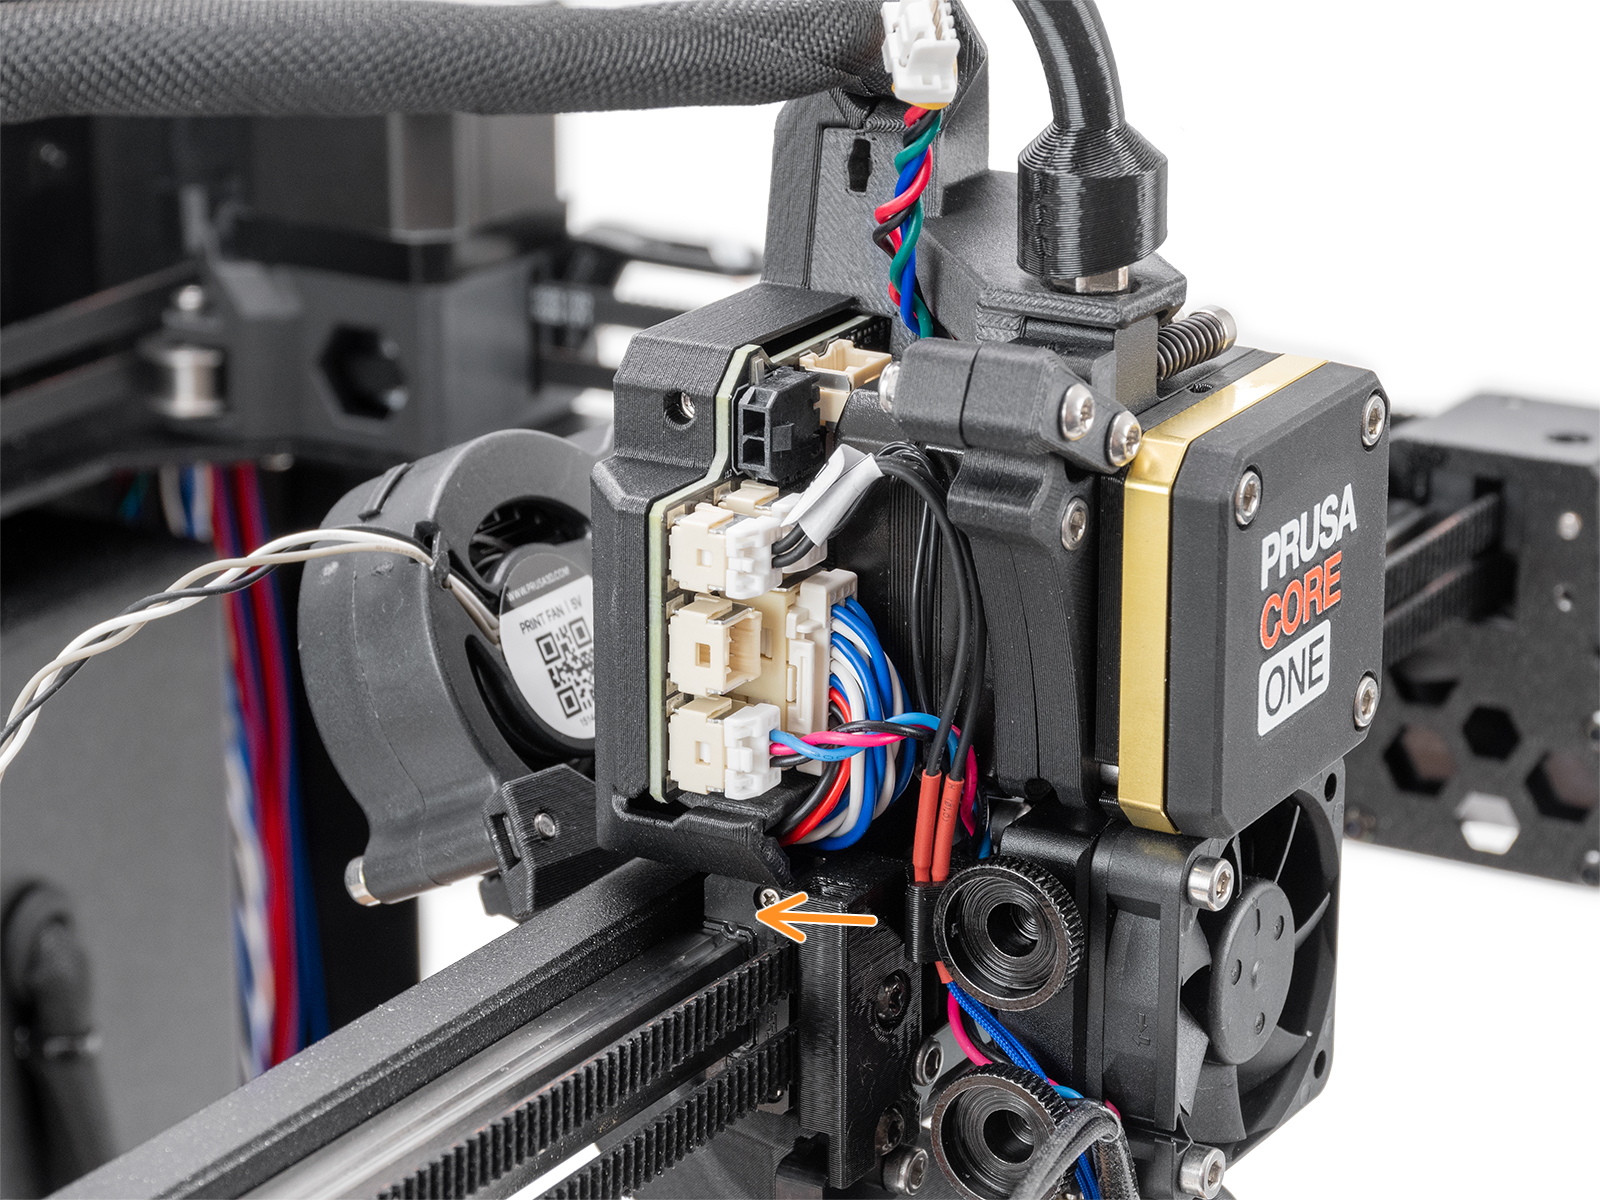 | 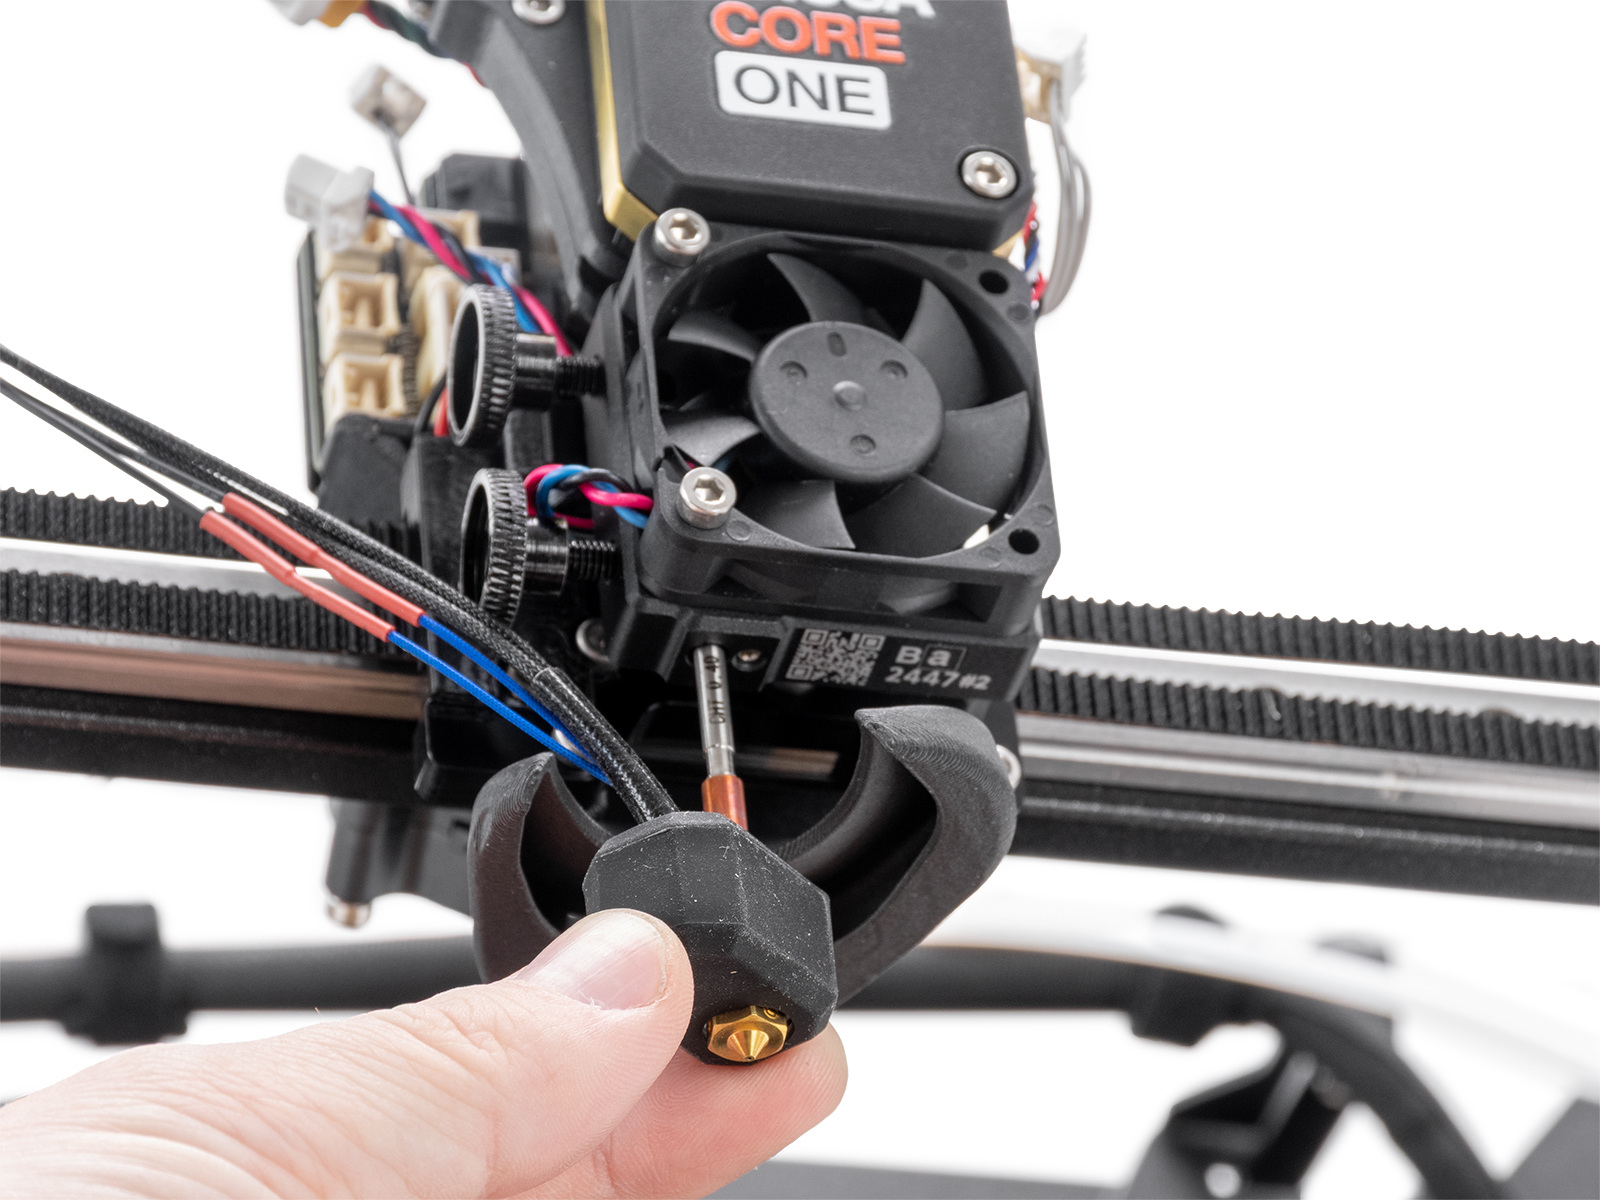 |
- Unscrew the two M3x4rT screws on the hotend cable clip, and pull it to remove the heatsink fan and heatsink thermistor cables.
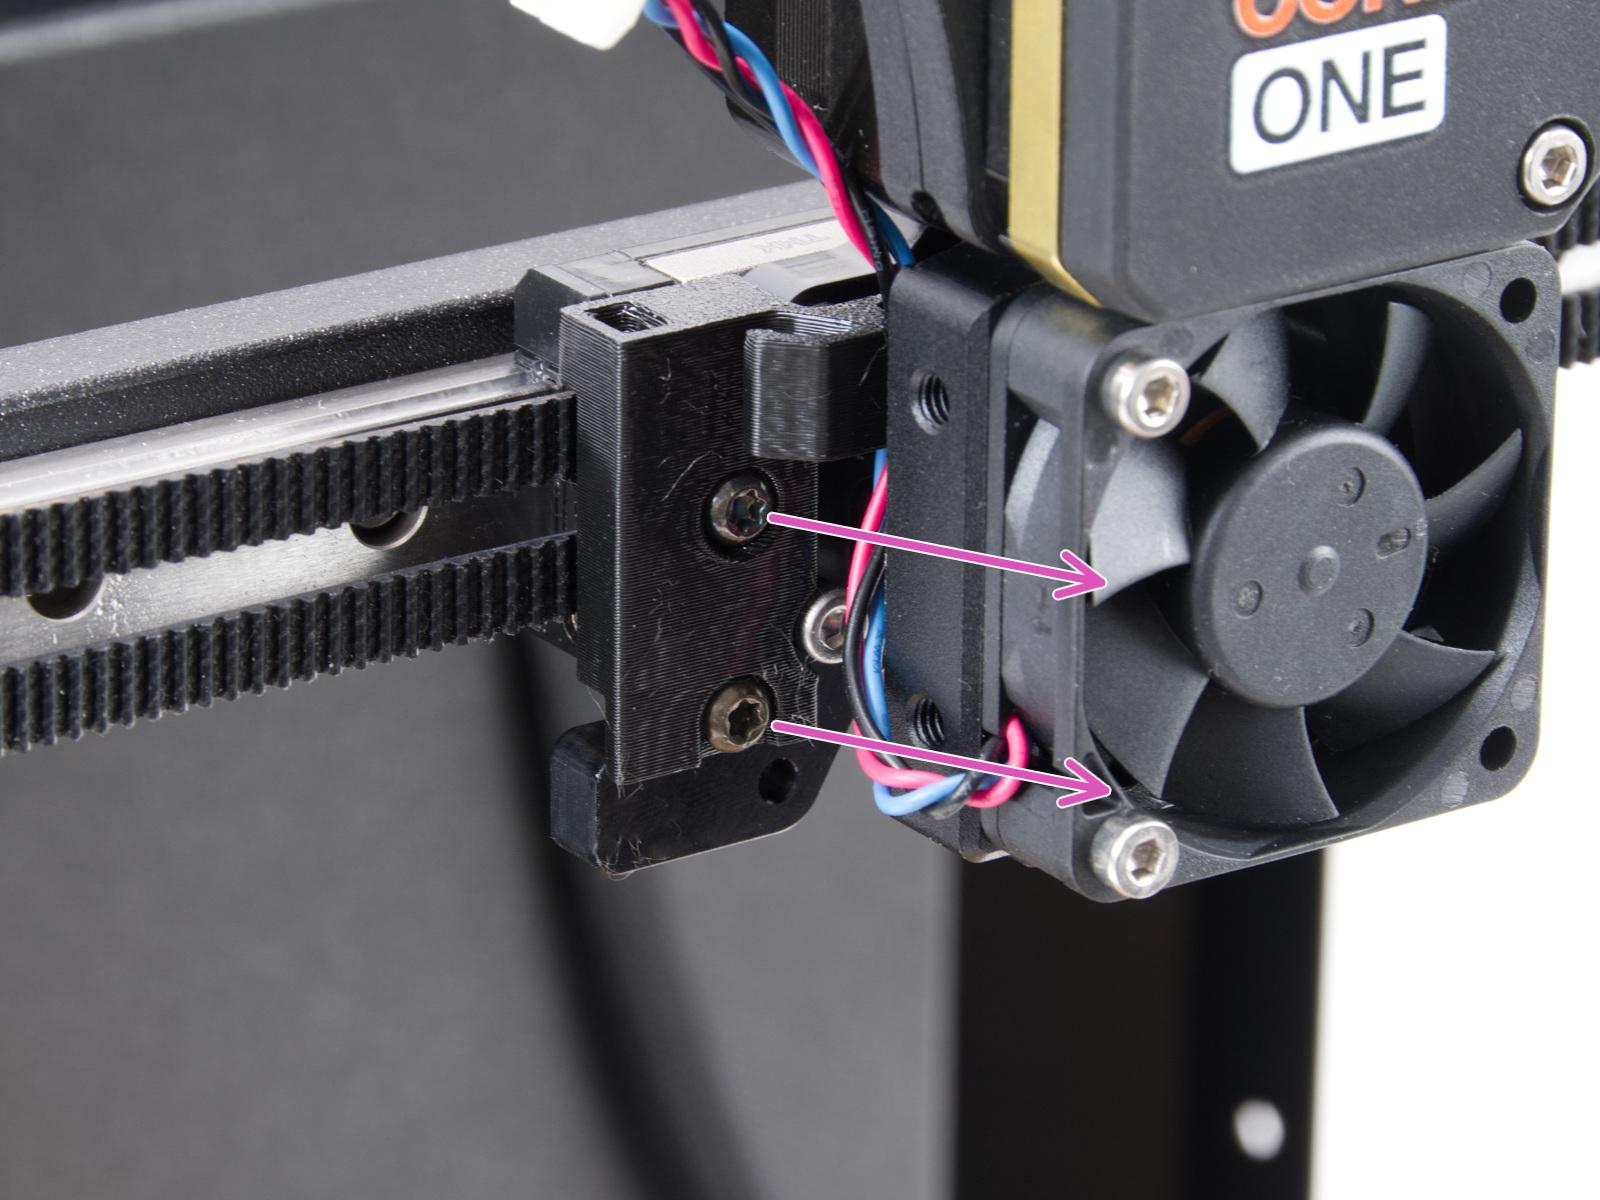 | 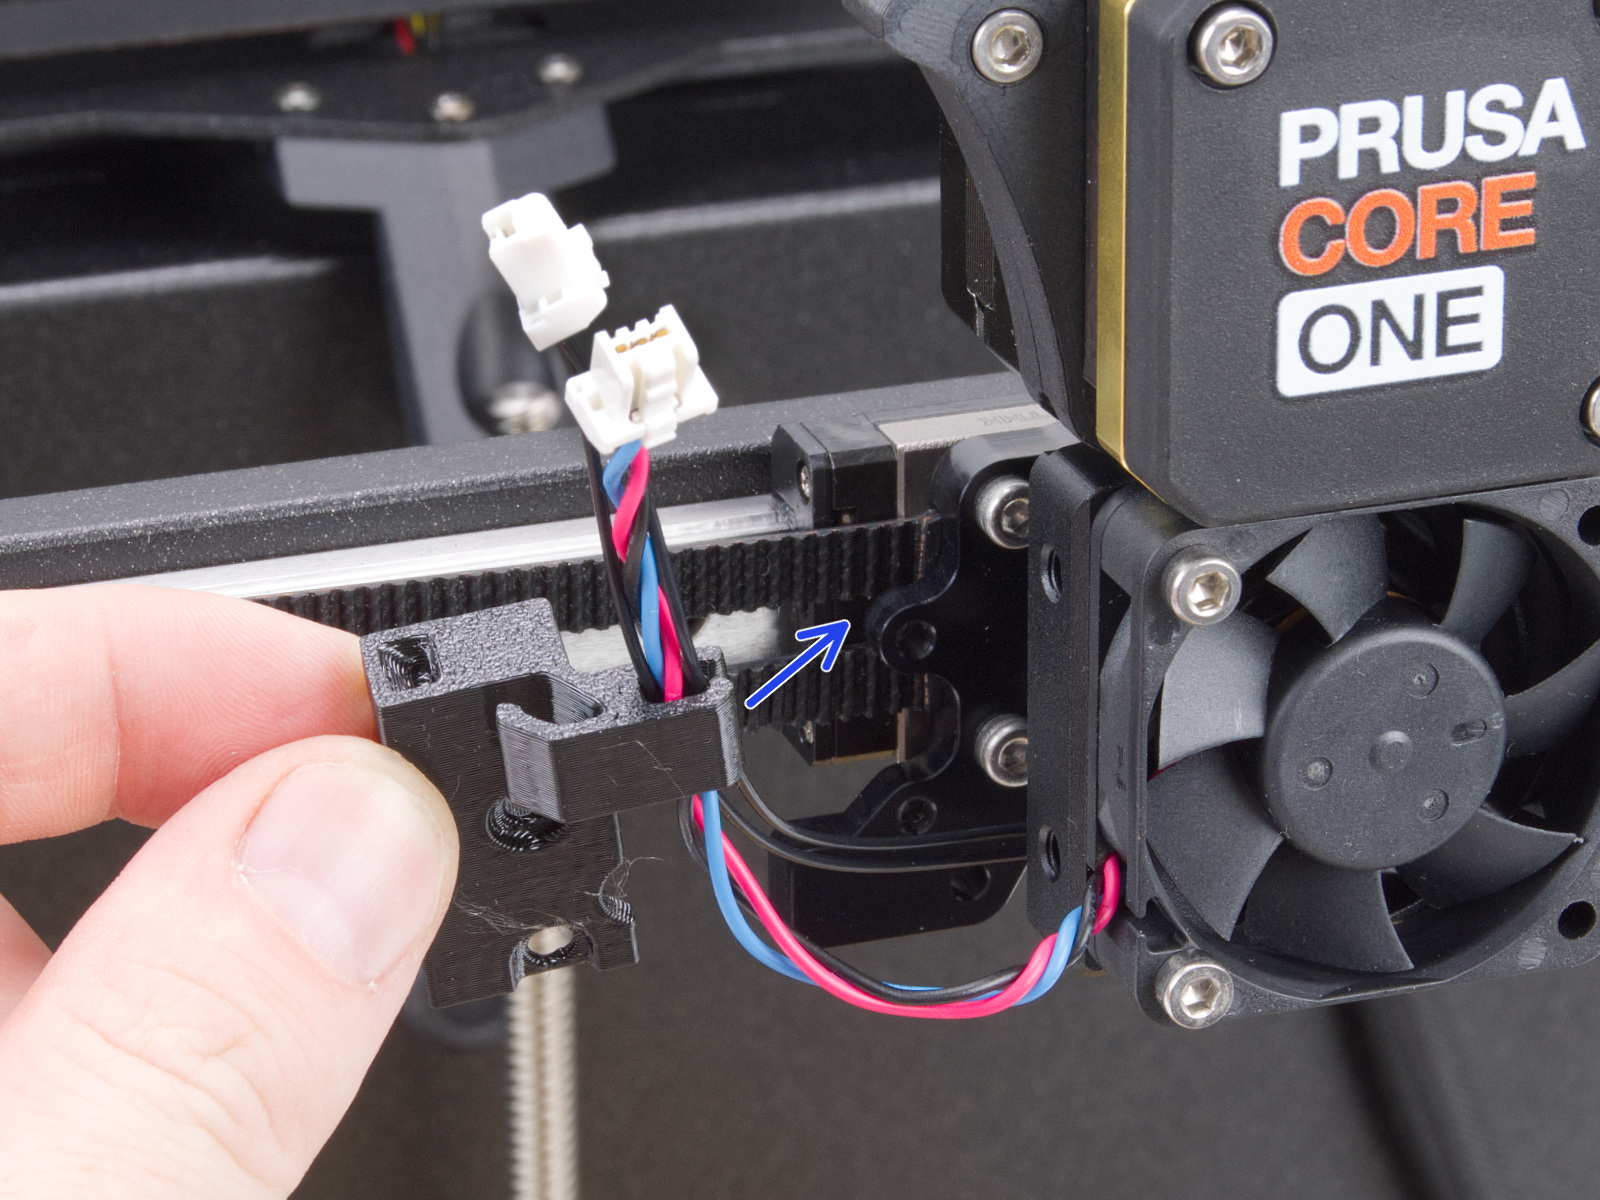 |
- Unscrew the M3x18 screws from the heatsink fan to remove it.
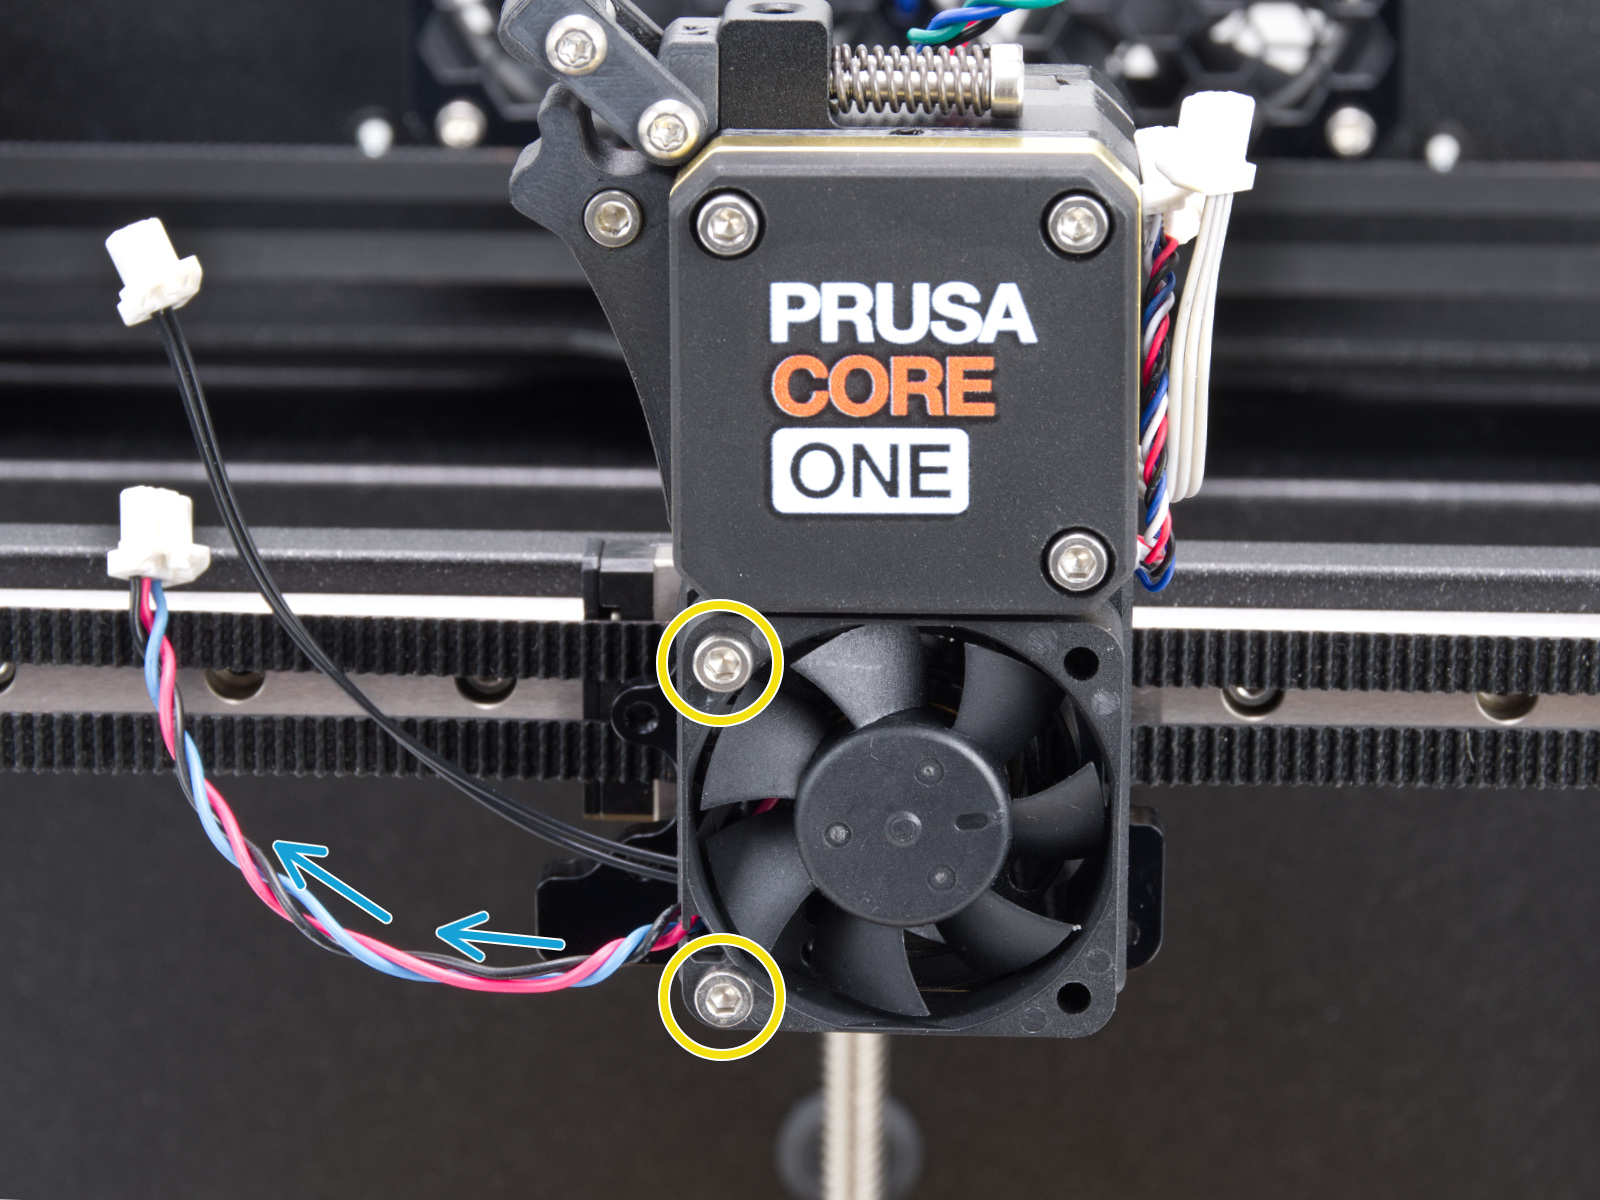
- Unscrew and remove the three M3x10 screws holding the heatsink and pull it out. Be careful with the cables.
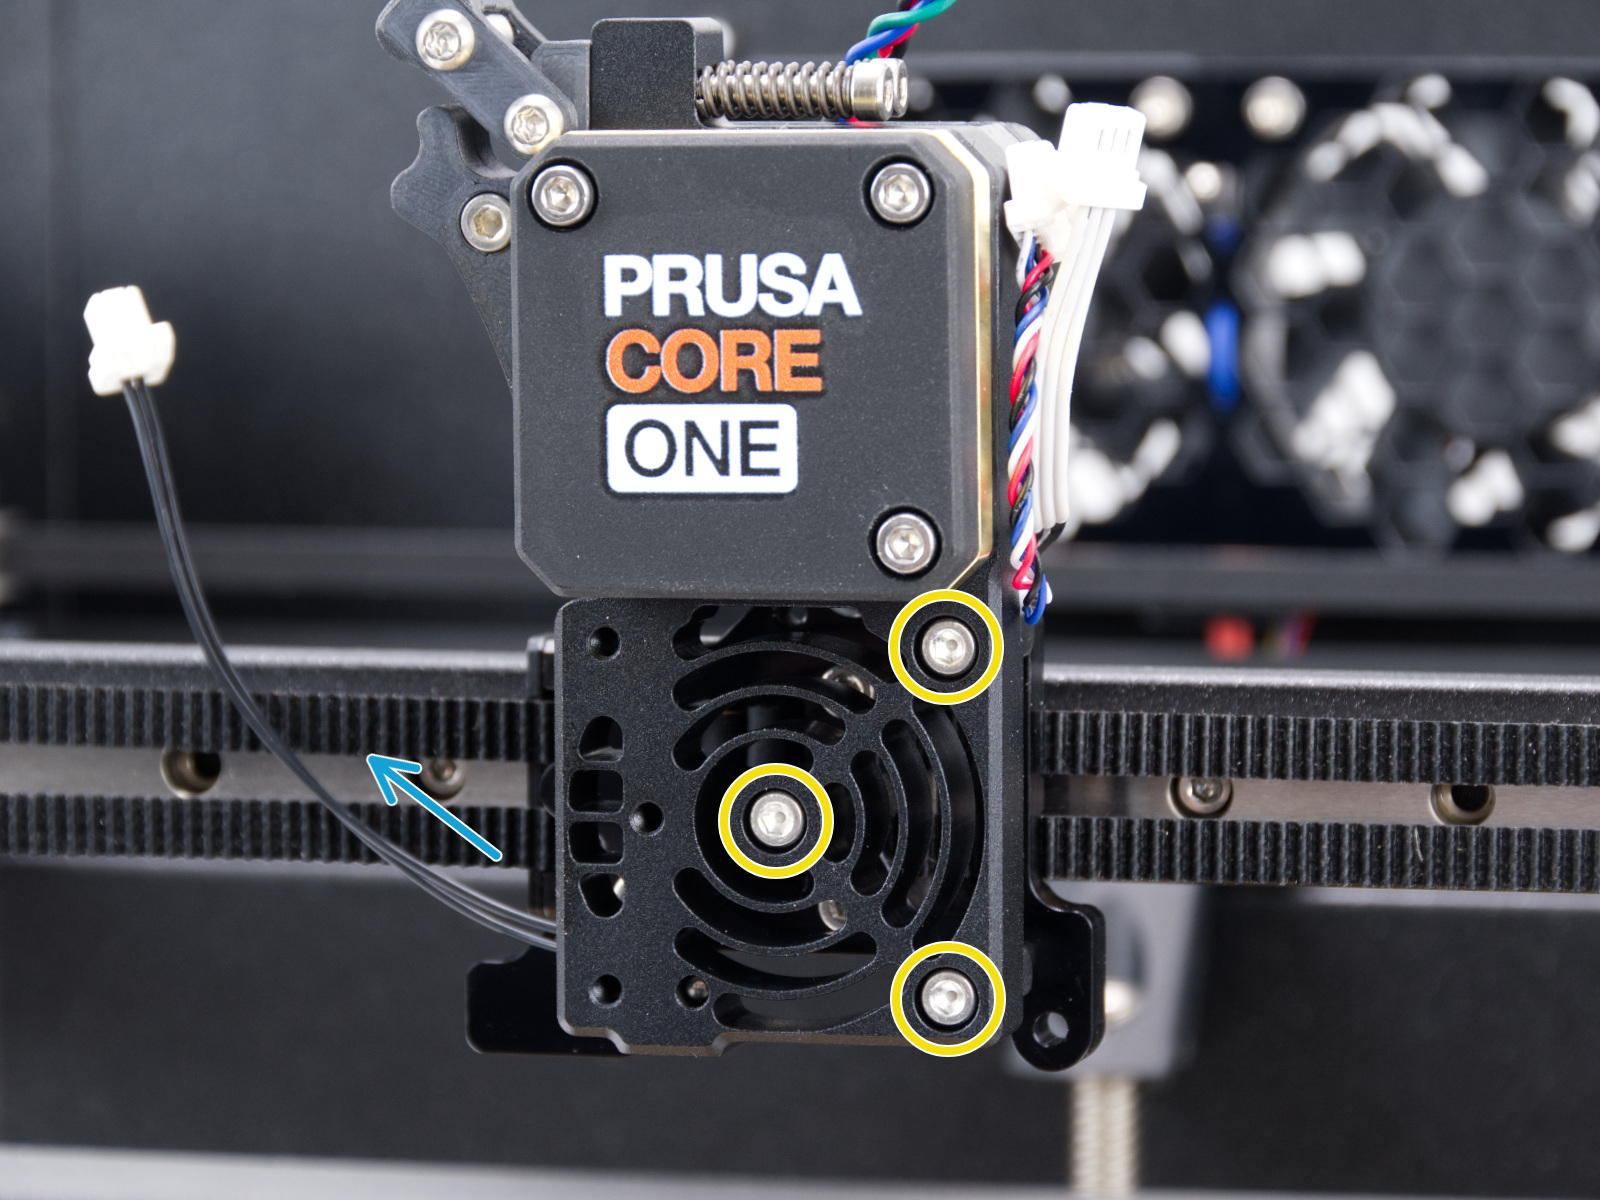 | 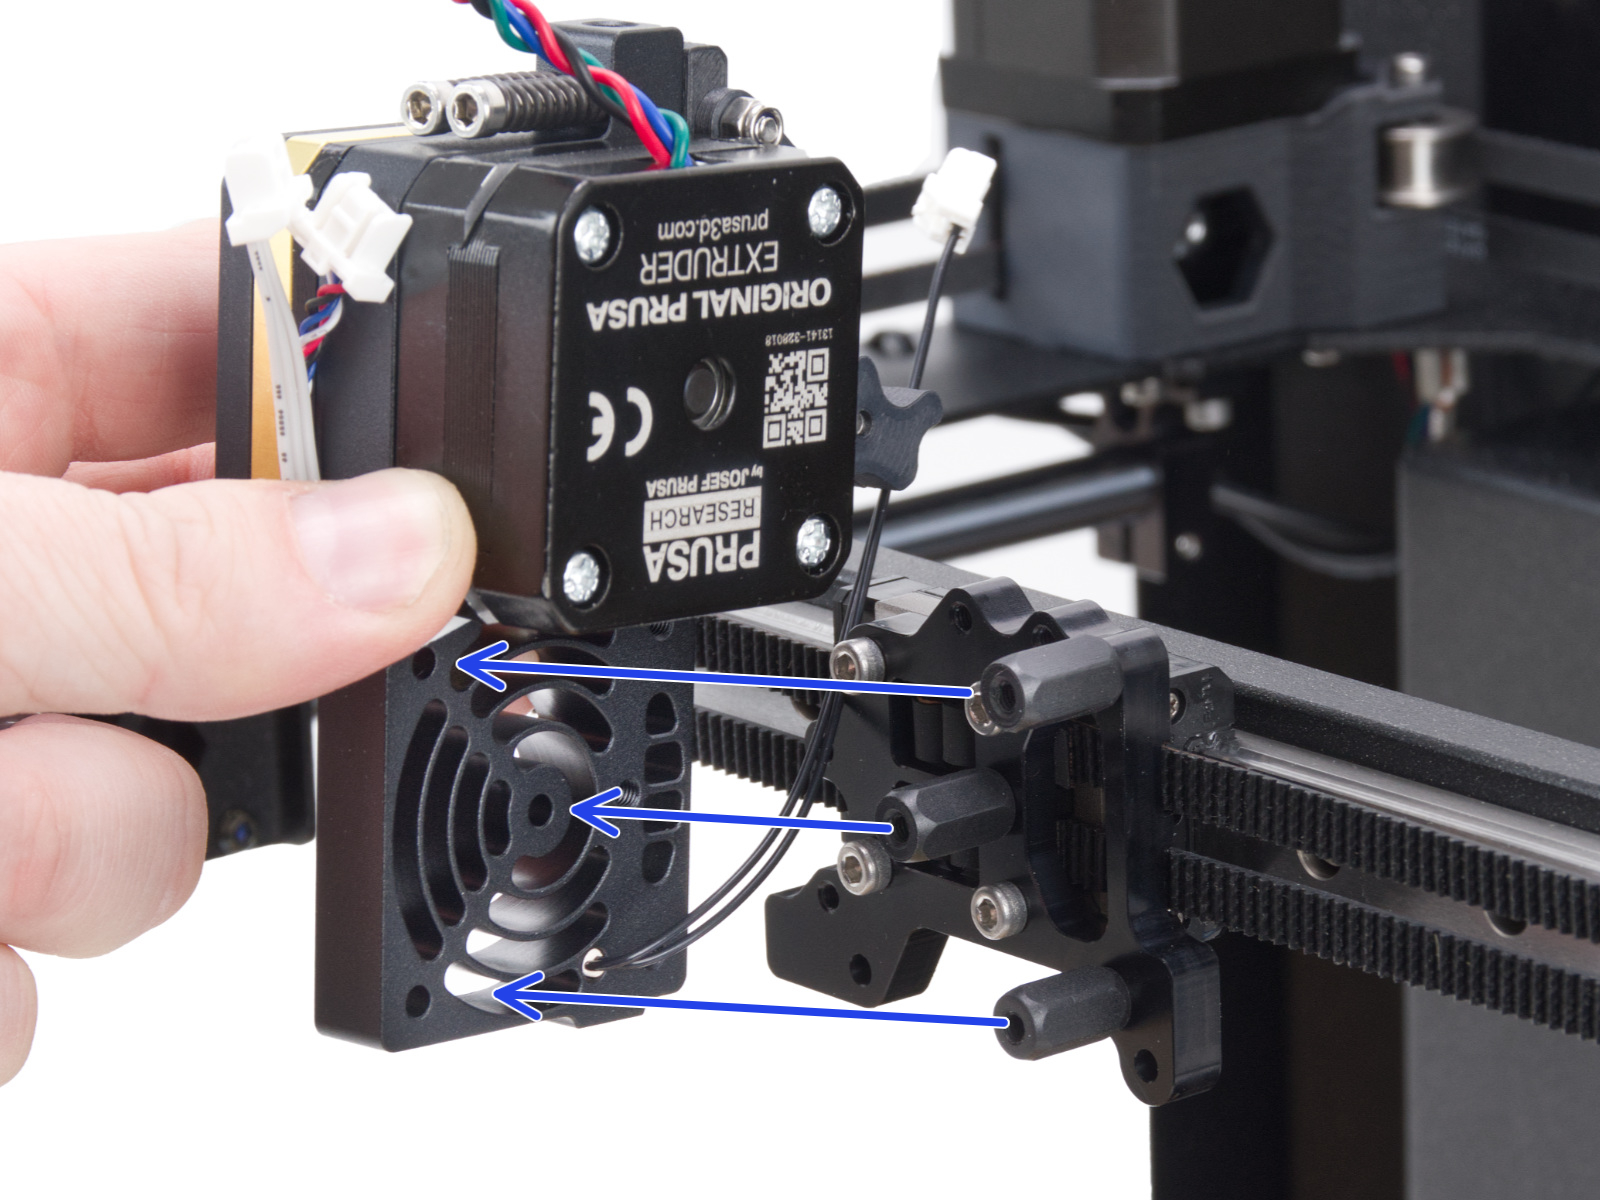 |
- Now you have access to the Nextruder holder with the belts. Make sure to add the belts that slipped out, or move the belt that is too loose. If the belt is too difficult to reattach, try loosening the belt tensioner bolts. If you need more access, unscrew the four screws that attach the holder to the carriage.
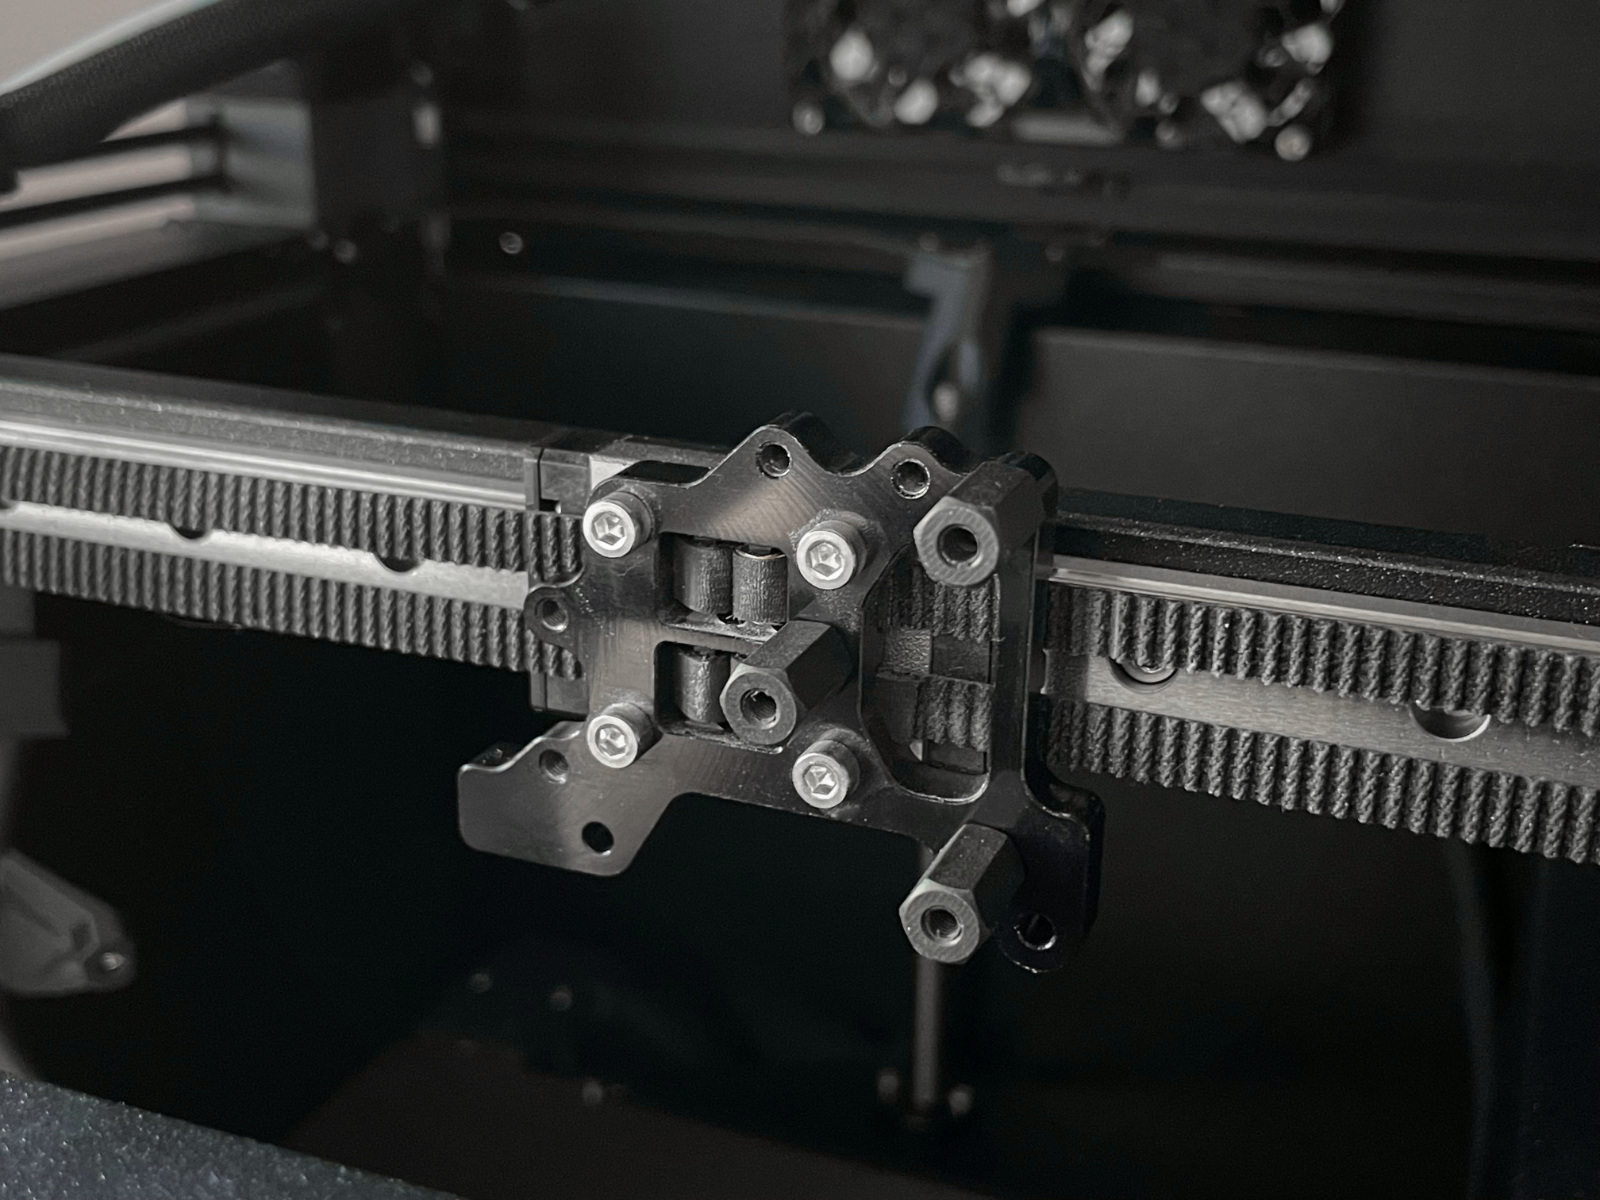
- To reassemble, follow the Assembly manual and redo the belt adjustment with the belt tuner app.
82 comments
Thank @PrusaSupport for hinting me to this video, please implement it in the article!
-Loosen the belts completely. Carefully, as the square nuts can fall off the belt tensioner if the screw is removed completely.
-Check which side sits against the front end (tight side) and which one has to be pushed towards it to touch it (loose side)
-Put an uniwrench or something that is thick enough between the tight side and the front end and slightly push on the loose side to correct the skew.
- Do the belt tuning (consider using a dedicated app for the measurement, e.g for iOS "Schall")
- check the gantry alignment again, if off !carefully! use the uniwrench
při kalibraci se mi hýbe pouze vrchní řemen může té mi prosím poradit kde dělám chybu.
Děkuji
I continued to turn, because I didn’t know any better and broke my pulleys this way.
Support kindly sent me new ones. I shortened the belts by around 1-1.5cm, redid the calibration and now the belts were visibly moving during calibration, even above the recommended 95Hz.
Also I used Augendocs method of tuning, IMO it is easier. His comment is further down, but TL;DR: set the calibration frequency to the desired value and tension until you see movement.
You can also tension, then check the frequency, then tension again until you hit the spot.