A 'cold pull' is a technique for cleaning your printer’s nozzle and hotend from any material that may be stuck or burnt inside. You can also use it to clean your hotend during your usual maintenance routine.
The cold pull should be made if your nozzle is only partially clogged, and some filament is still being extruded. If the nozzle is completely clogged, please check the Clogged nozzle guide.
Automatic cold pull
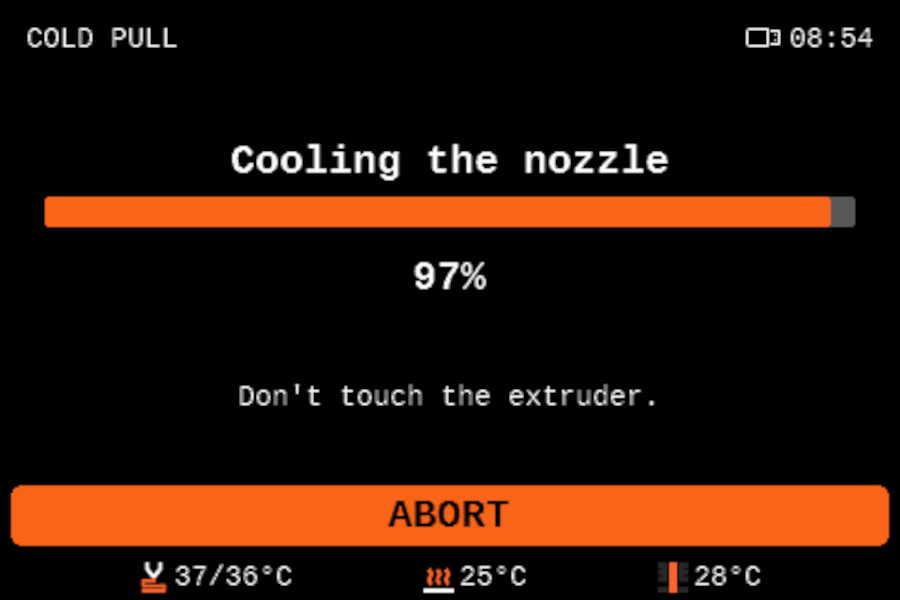
Have at least 30cm of PLA available when making this procedure. Then, navigate to LCD Menu -> Control -> Cold Pull.
If the nozzle is heated, the printer will wait until it cools to 36 ºC. Then it will heat the printer to 80 ºC. After that, the printer will unload the filament automatically at that temperature.
 |  |
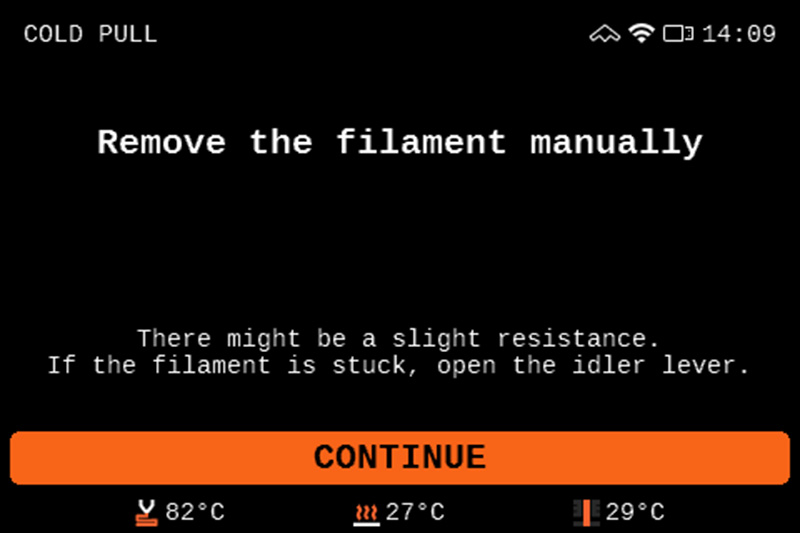
To finalize the procedure, remove the filament by hand, pulling it upwards. There might be a slight resistance, if the filament is stuck, open the idler lever.
Manual cold pull
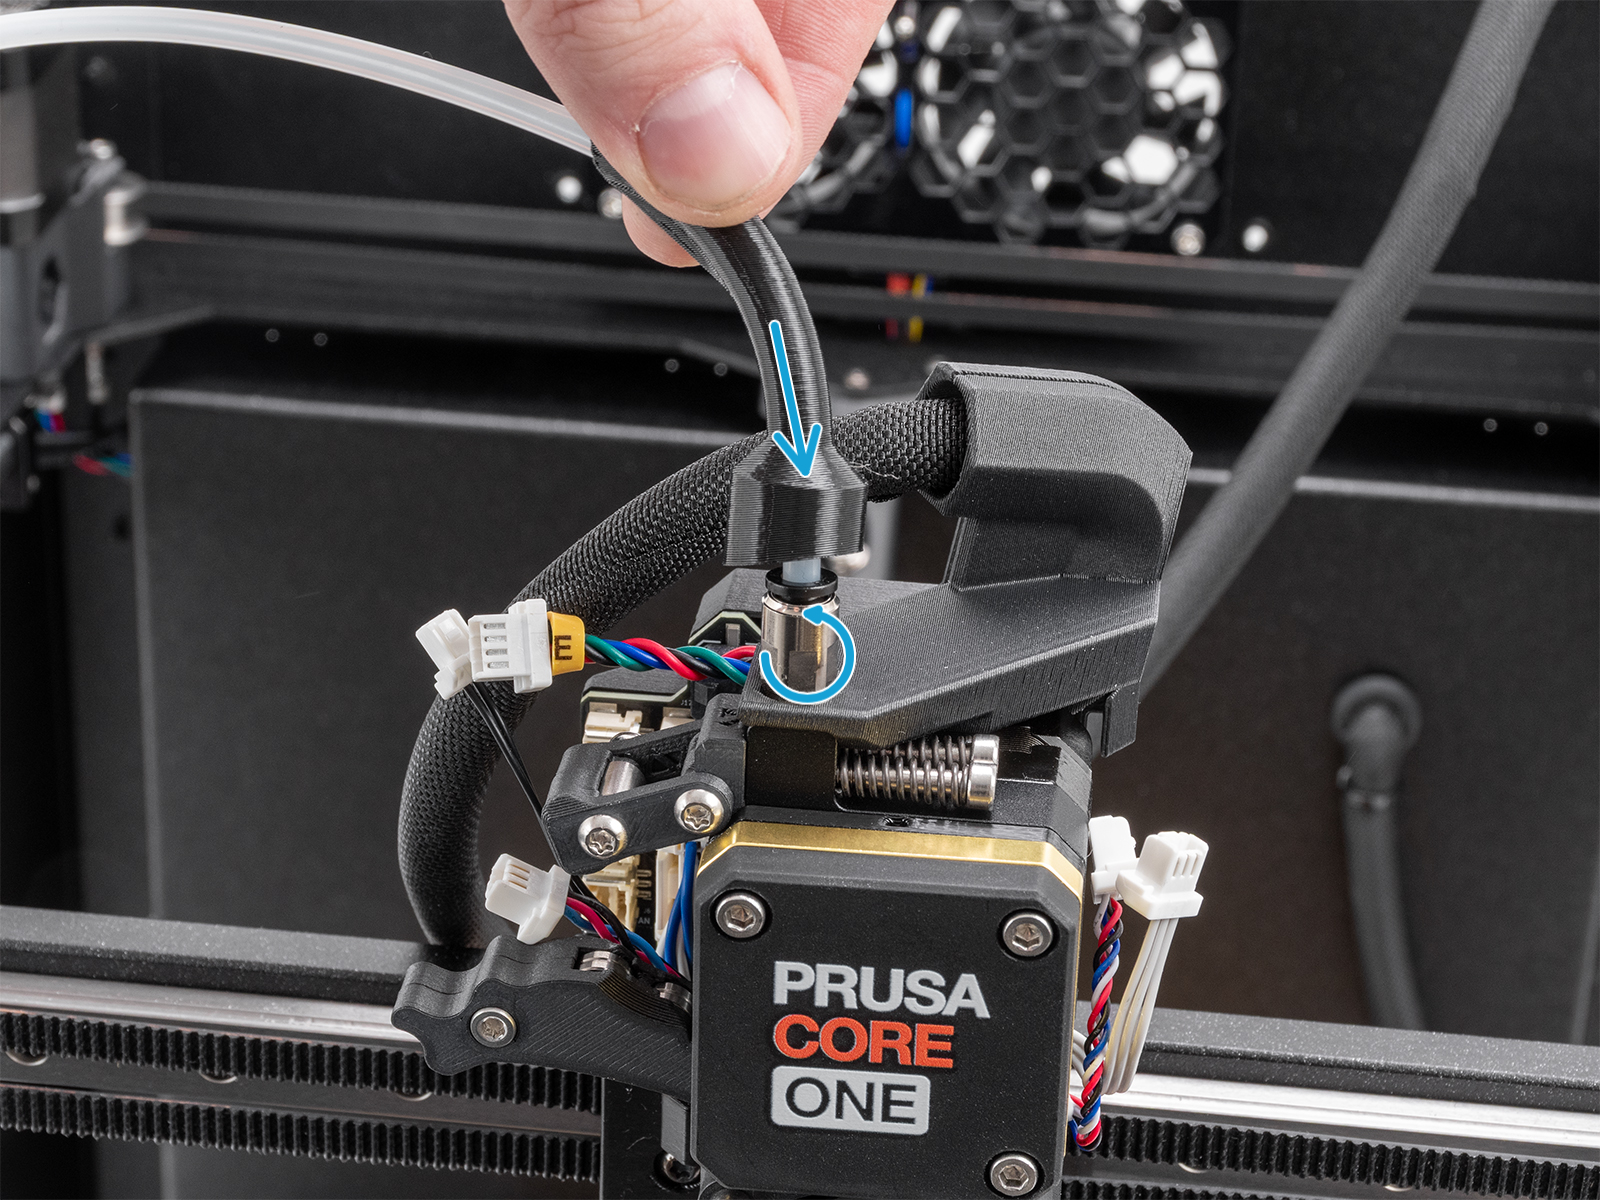
- To access the top of the extruder, push up the bowden bend and unscrew the metal fitting.

- Go to the printer menu in Settings -> Filament Sensing and toggle off the Filament Sensing.
- Go to the printer menu in Filament -> Load Filament -> PLA, and load the PLA filament from above the extruder.
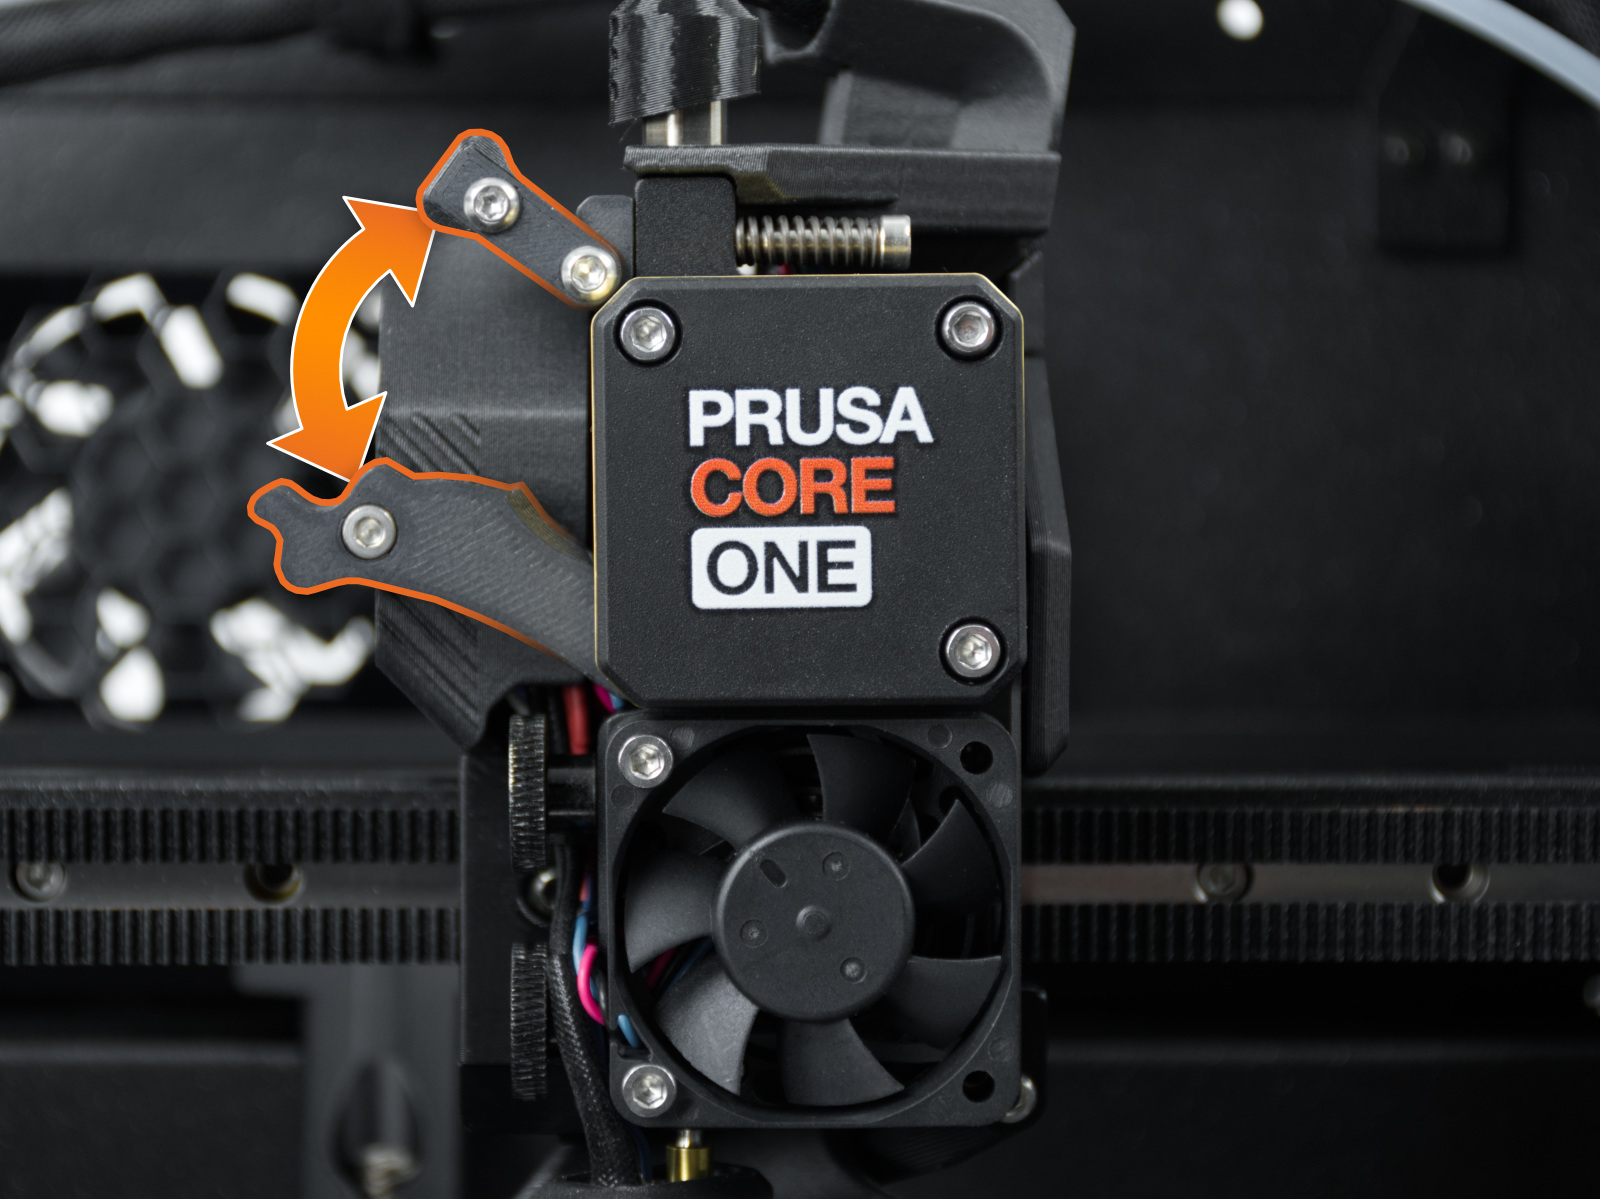
- Open the Idler Swivel.
- Go to LCD Menu -> Control -> Temperature -> Nozzle Temperature and set the temperature to 270 °C.
- Once it has reached 270 °C, push the PLA filament in until it starts pouring out of the nozzle.
- Stop heating by pressing Cooldown in the LCD Menu -> Control -> Temperature -> Cooldown, or by pressing the reset button.
- Continue manually pushing the filament down until the temperature is too low for it to melt and come out (around 170 °C for PLA). The nozzle has to be filled for the cold pull to be successful. Grabbing the filament with pliers and carefully pushing it down can help.
- Pick away any extruded material from under the nozzle so nothing is obstructing the pull later on.
- Wait for the temperature to reach 100 °C. As soon as it reaches 100 °C, grab the filament with pliers and pull it slowly but steadily out of the extruder. Make sure to pull straight upwards, not sideways, or the filament can break inside. Hold the extruder with your other hand.
- Don't stop until the filament is completely pulled out from the extruder.
- Close the Idler and the Idler Swivel.
- Screw back the metal fitting and push the bowden bend back down.
Results
On the tip of the filament that has been pulled out, you may see remnants of the previous material(s) you have been using or some burnt dirt that has settled in the nozzle. You might want to repeat this procedure several times until the filament comes out clean.
10 comments
why do you advise to unscrew the fitting? I only remove PTFE from fitting to make cold pull. I do not tweak sensor detection, only set manually high temp if I need to push a partial clog.
This is excellent technique also when you switch from black PETG to orange : there is much less purge to be done to get real orange. I apply reasonable but steady vertical pressure with plier starting from 50°. It come around 70 with PLA on the MK4. I did not checked T°C with Core.
Indeed, I regret Core to disengage filament to make the nice tip. This is probably for MMU users. In my case it is highly counter productive as it requires manual purge, cool down, then cold pull. An option to skip nice tip would be great,
thx guys for your work