What happened?
On the Original Prusa XL, communication with the peripheral boards (e.g. Dwarf board) is achieved using the MODBUS protocol. In MODBUS, there are two types of devices: the master and the slave, also known, respectively, as client and server. On Original Prusa XL firmware, the master is the XLBuddy, and each slave is called puppy.
In this context, the word discovery refers to the process of identifying each puppy, and determining their available functions and communication parameters. In case none of the puppies respond to the XLBuddy requests in this phase, the printer will show the message: "Puppy discovery error. No puppy found".
Error name: Puppy discover err
Error code: #17513
The error most likely indicates an issue with a loose, broken, or incorrect connection.
How to fix it?
Re-flash firmware
Download the firmware, and transfer it to your USB drive. Make sure to unmount the drive from your operating system before physically removing it.
Insert the USB drive back into the printer and reboot the printer using the reset button directly next to the knob to initiate the flashing procedure. In case the procedure does not start, reboot the printer again by pressing the same reset button, and while the printer is booting up, press once the rotating knob.
A visual inspection
From the rear of the printer, loosen the indicated four screws. It is not necessary to remove them completely. Then, slide up the electronics cover to remove it. This will expose the XLBuddy board, part of the Sandwich board, and if present, the XL-Splitter.
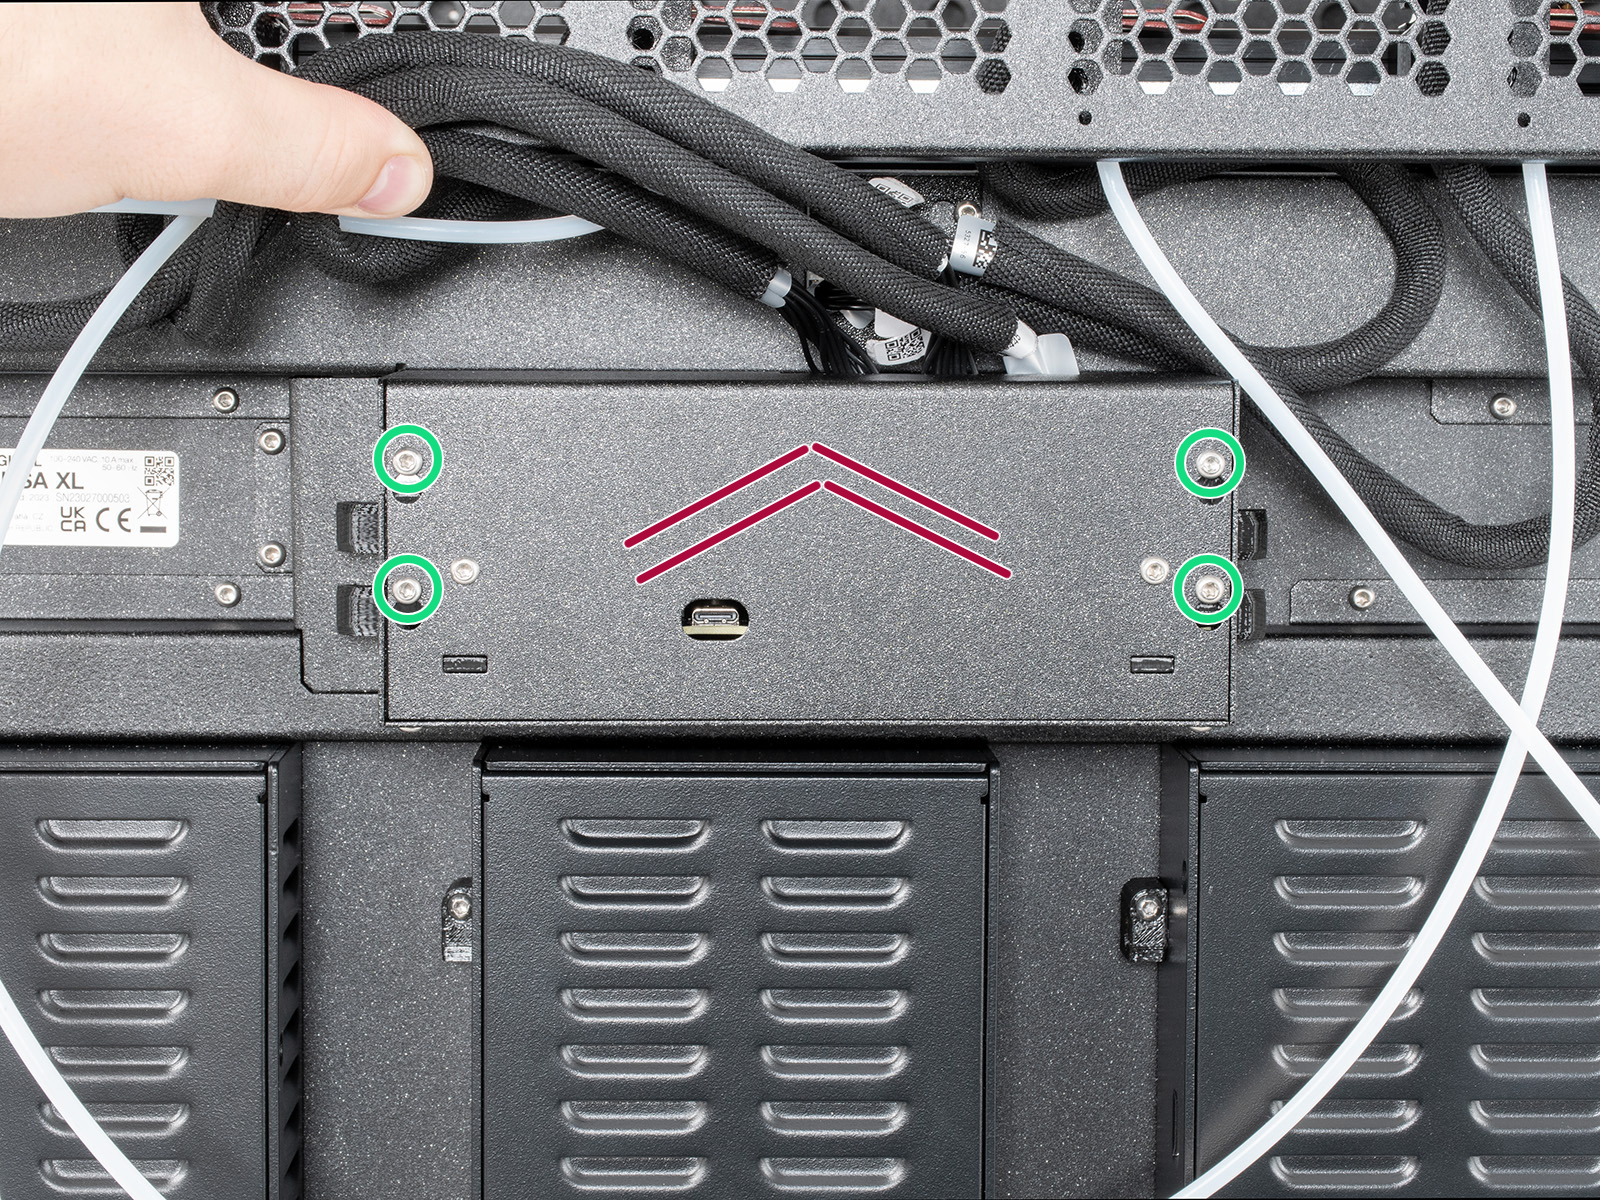 | 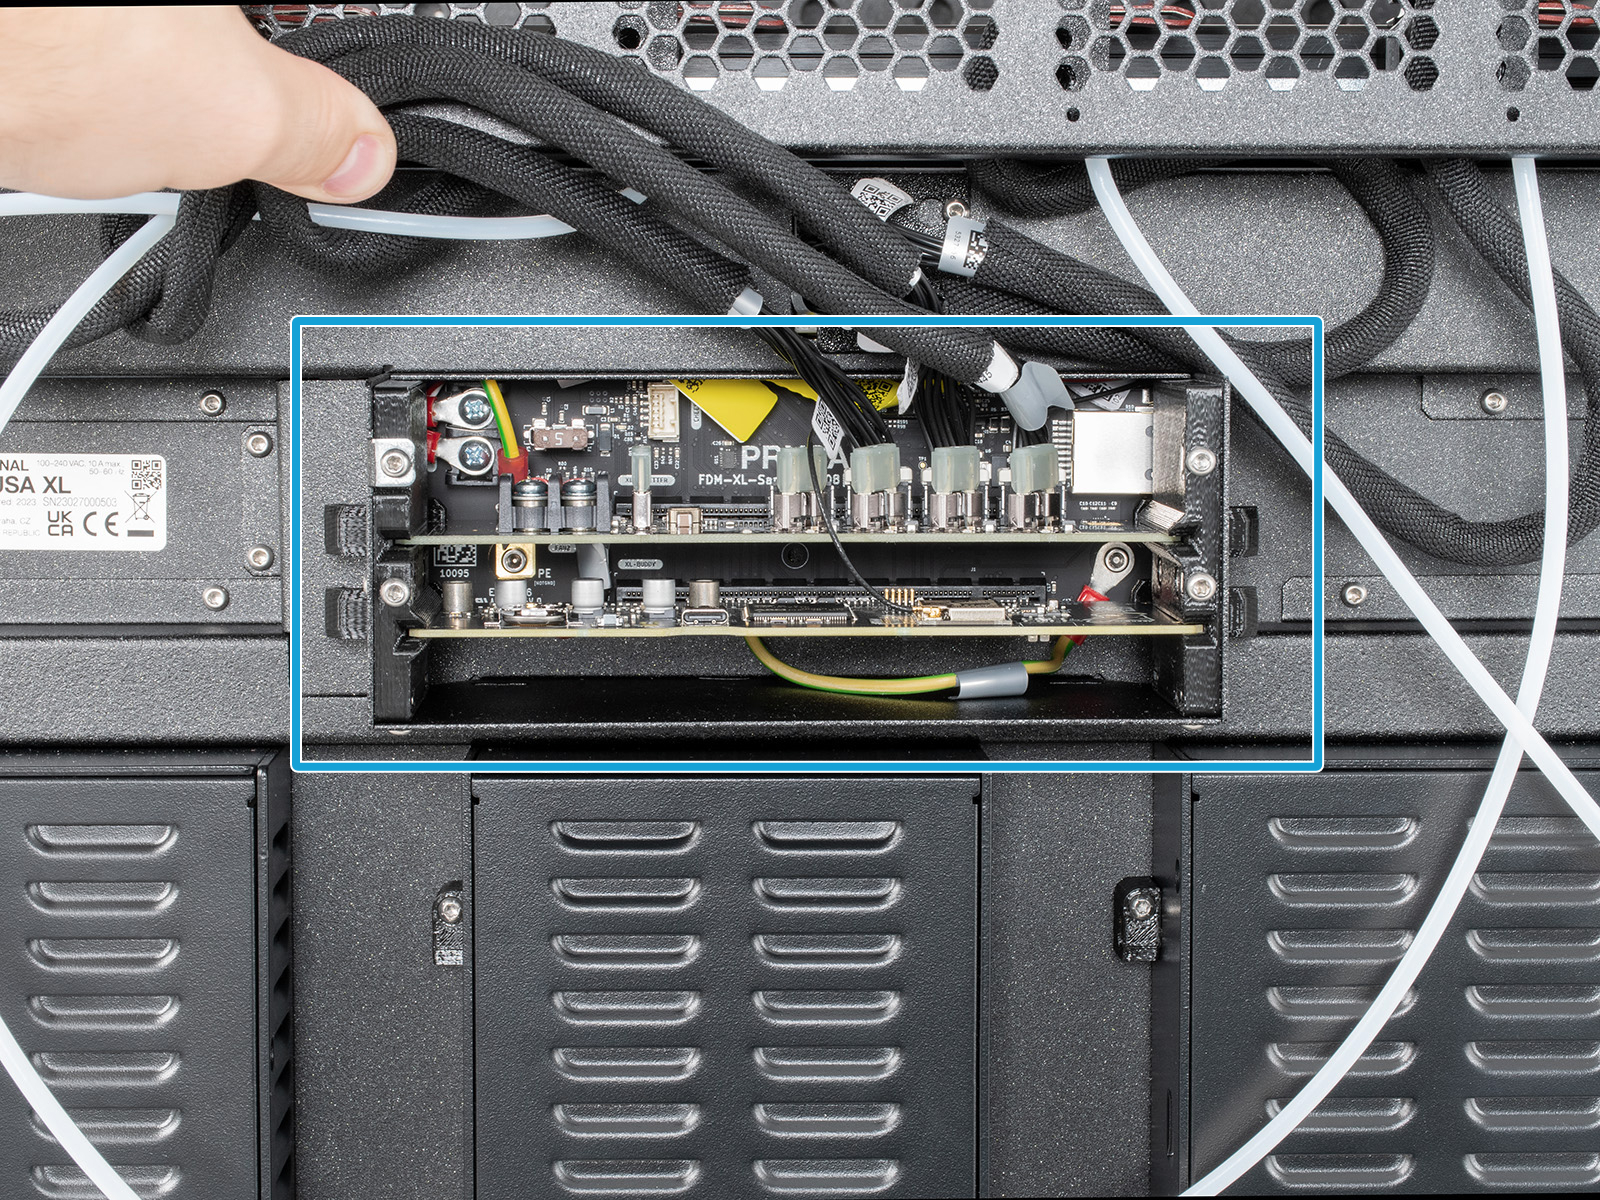 |
Inspect the boards, in particular the XLBuddy. Check for defects or damage on the surface, such as a detached component, or a visibly burnt spot.
If needed, disconnect the antenna cable from the XLBuddy board, and extract the XLBuddy board, using the two lower ejectors. Touch any electronic board only from its edges to avoid damaging its components.
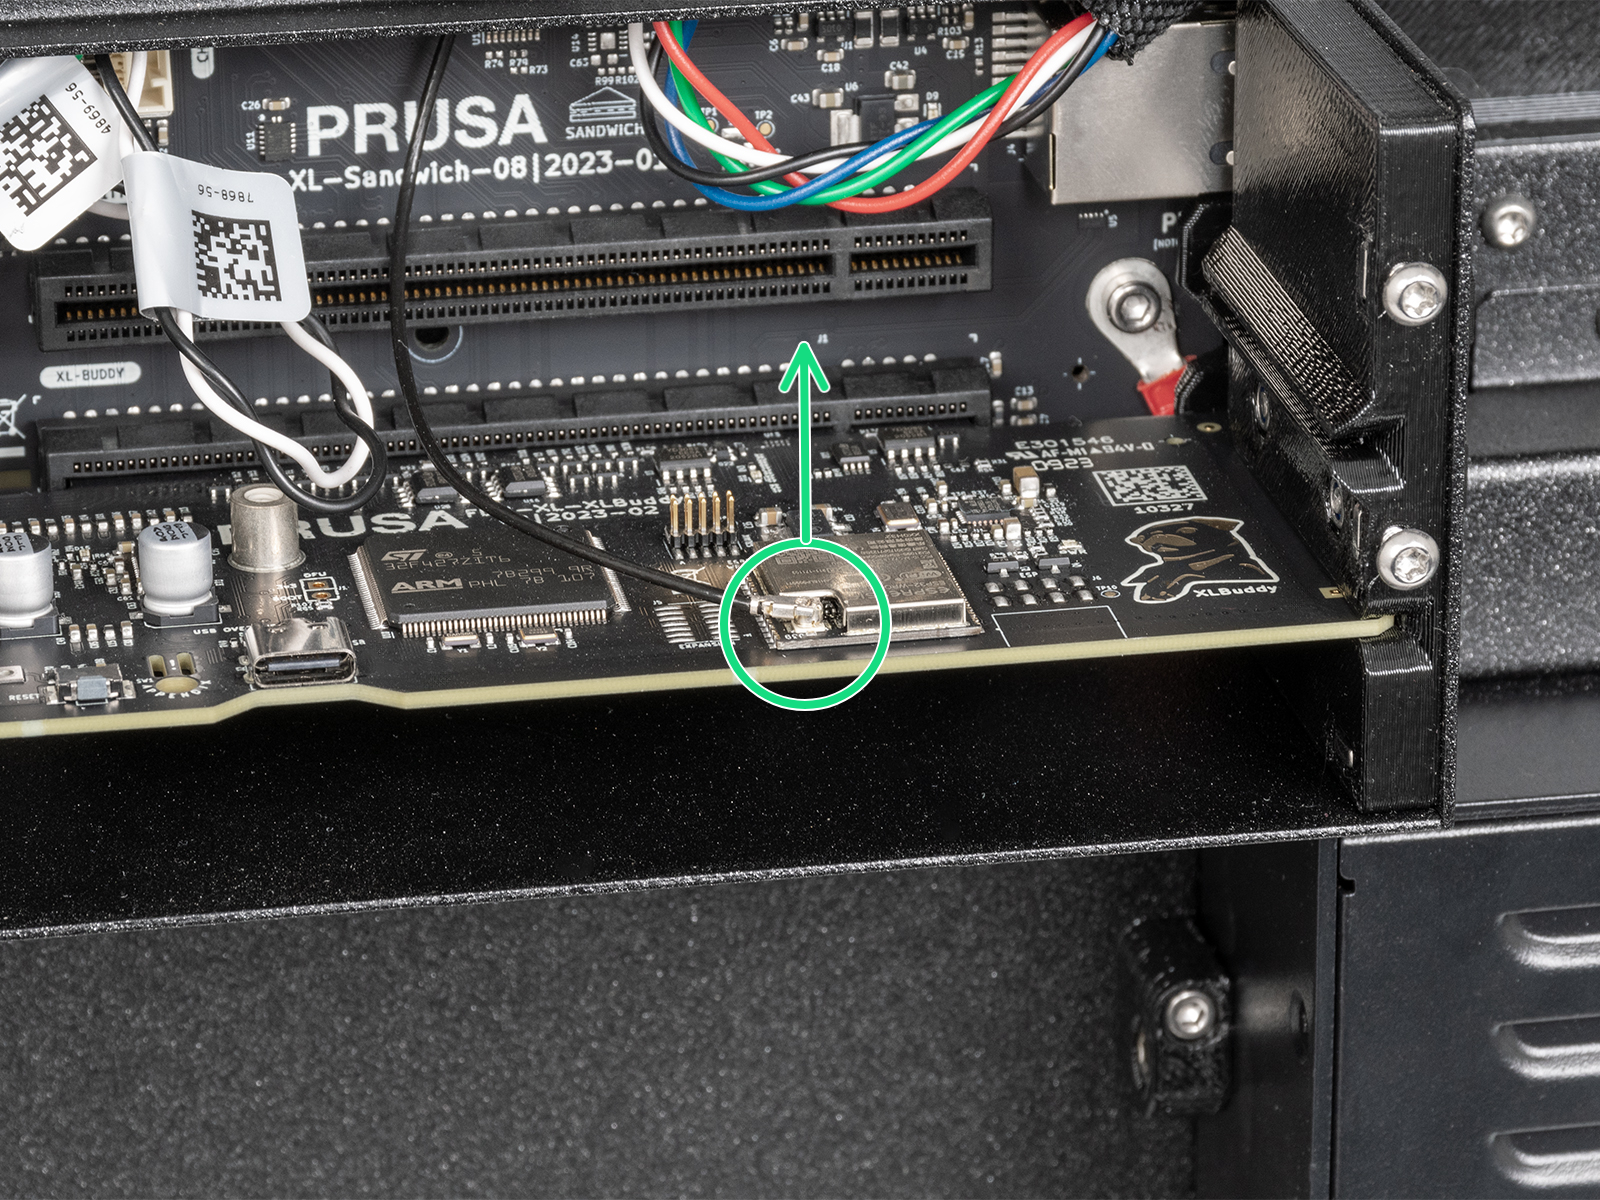 | 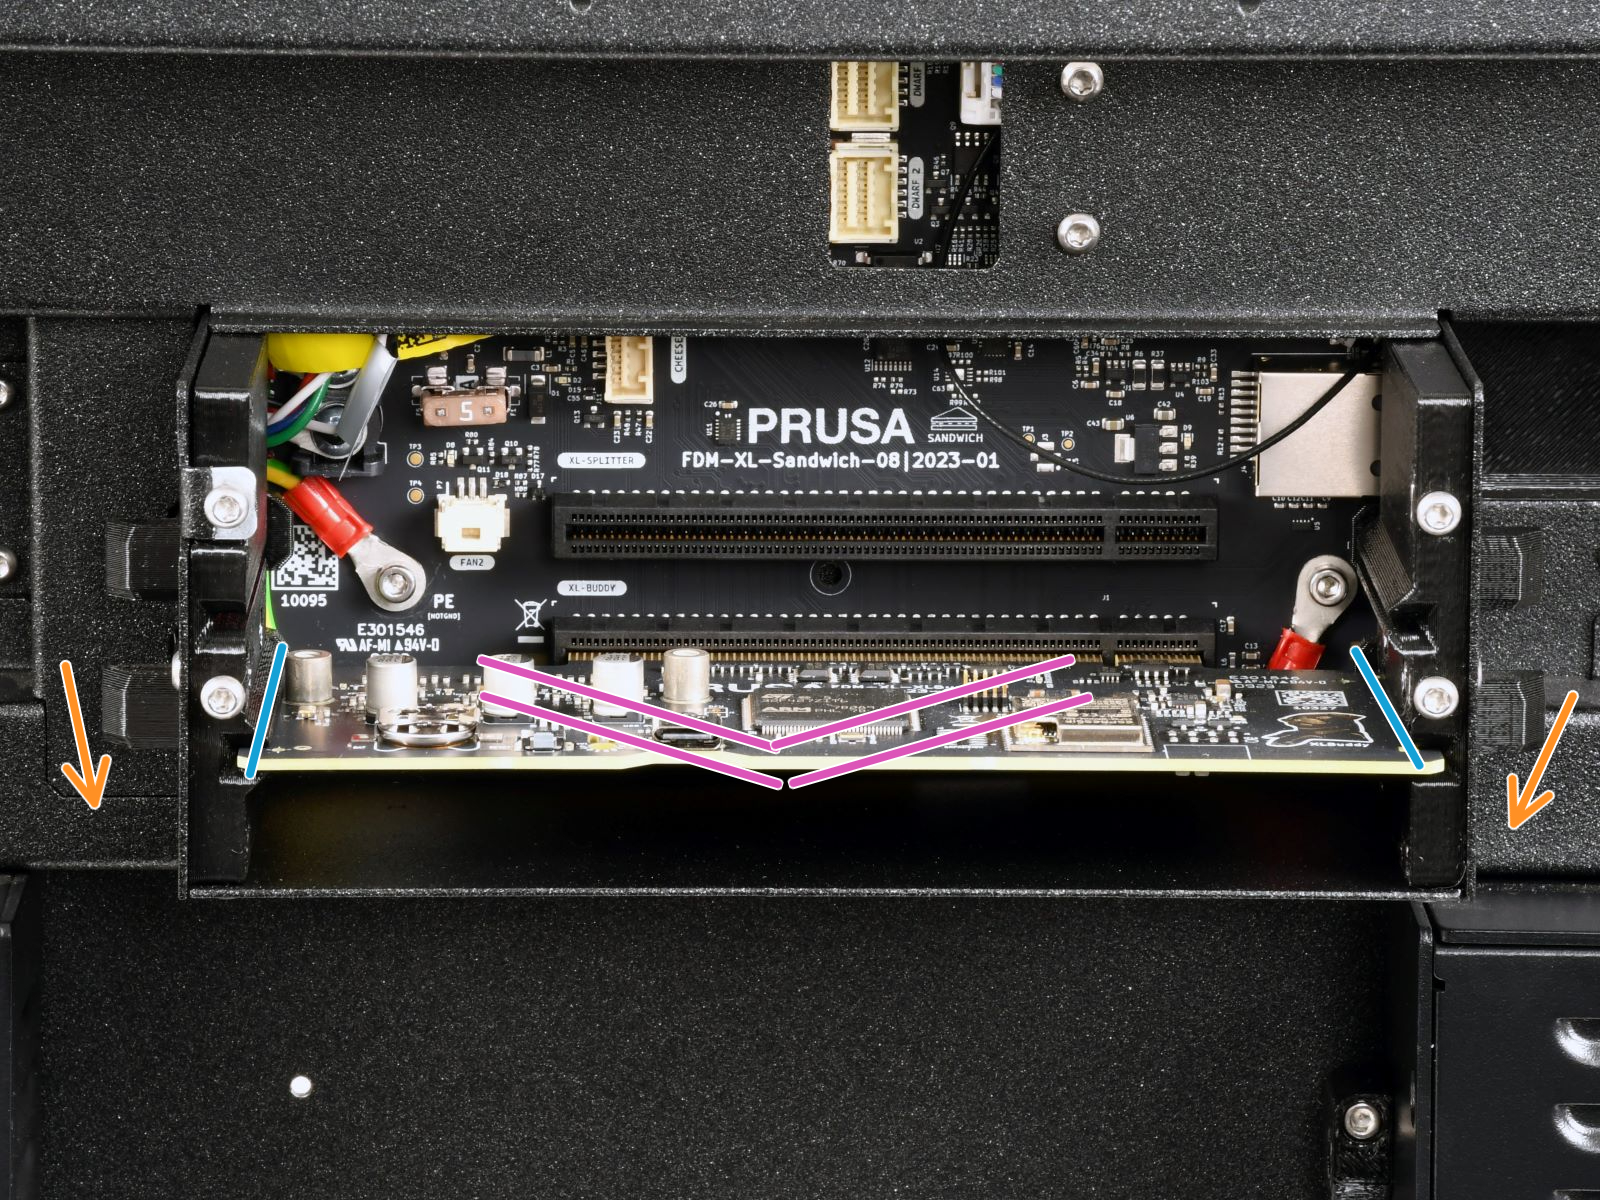 |
Sandwich/XL-Spitter - Nextruder cables
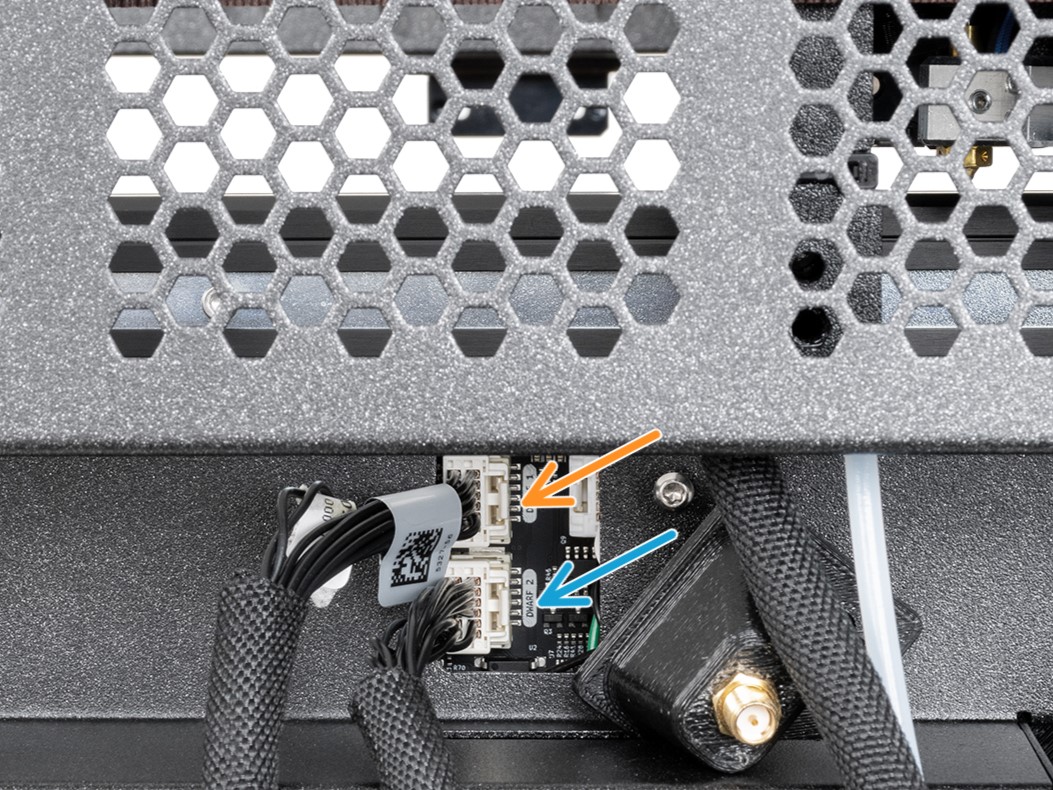
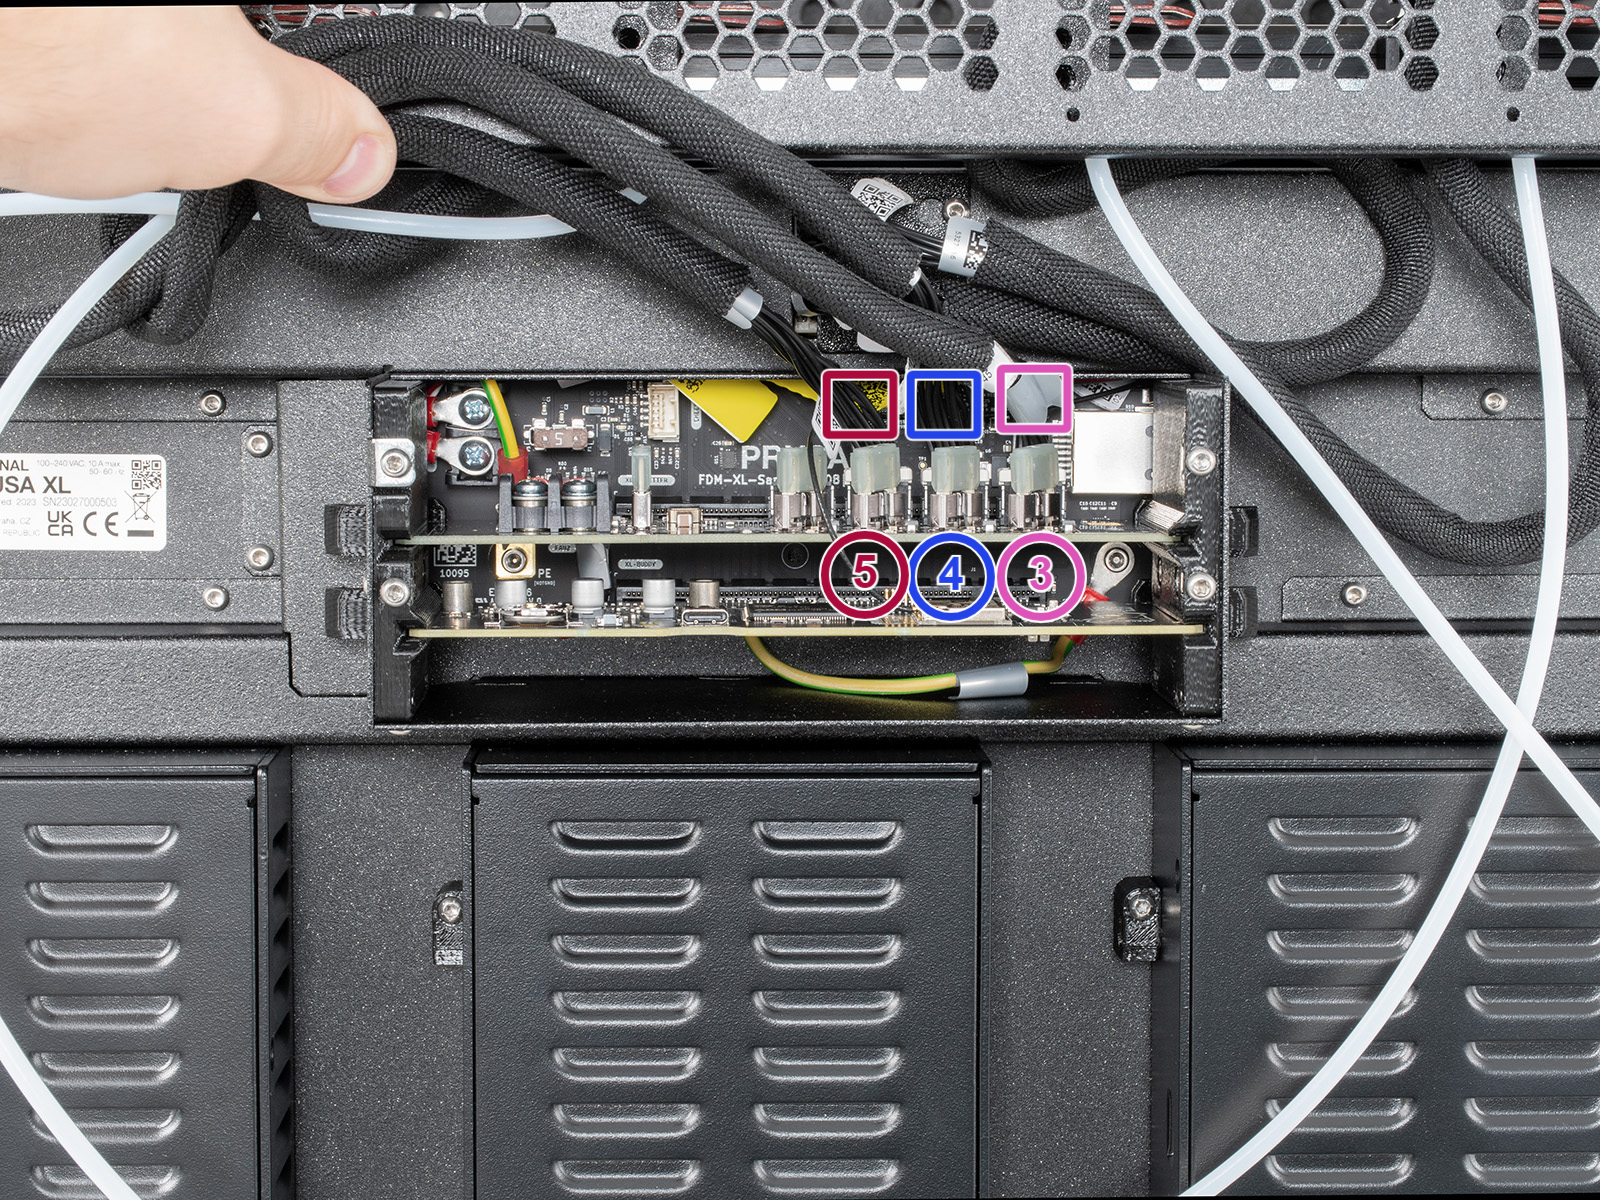
Inspect the Nextruder cables and their connectors, both from the electronic board side and from the Dwarf board side on each Nextruder. Check for any incorrect or loose connections or damage on the cables and connectors.
For Nextruder 1 and 2, the cables are connected to the top center of the Sandwich board. More reference is on the linked guide, for printers with rear antenna, and printers with side antenna.
For Nextruder 3, 4, and 5, the cables are connected to the XL-Splitter board.
 |  |
2 comments
Hello, thank you for your feedback! We will make a review on this article to add the replug of the Nextruder cables.