What happened?
If your Original Prusa XL fails to heat correctly one of the heatbed tiles, the printer will show the message "Heatbed tile no. #: Preheat error".
Error name: MB heater disconnected
Error code: #17256
The error message includes the number of the affected heatbed tile. The error might indicate an issue with the cable connecting the indicated heatbed tile with the modular bed electronics, or with the heatbed tile itself.
How to fix it?
A visual inspection
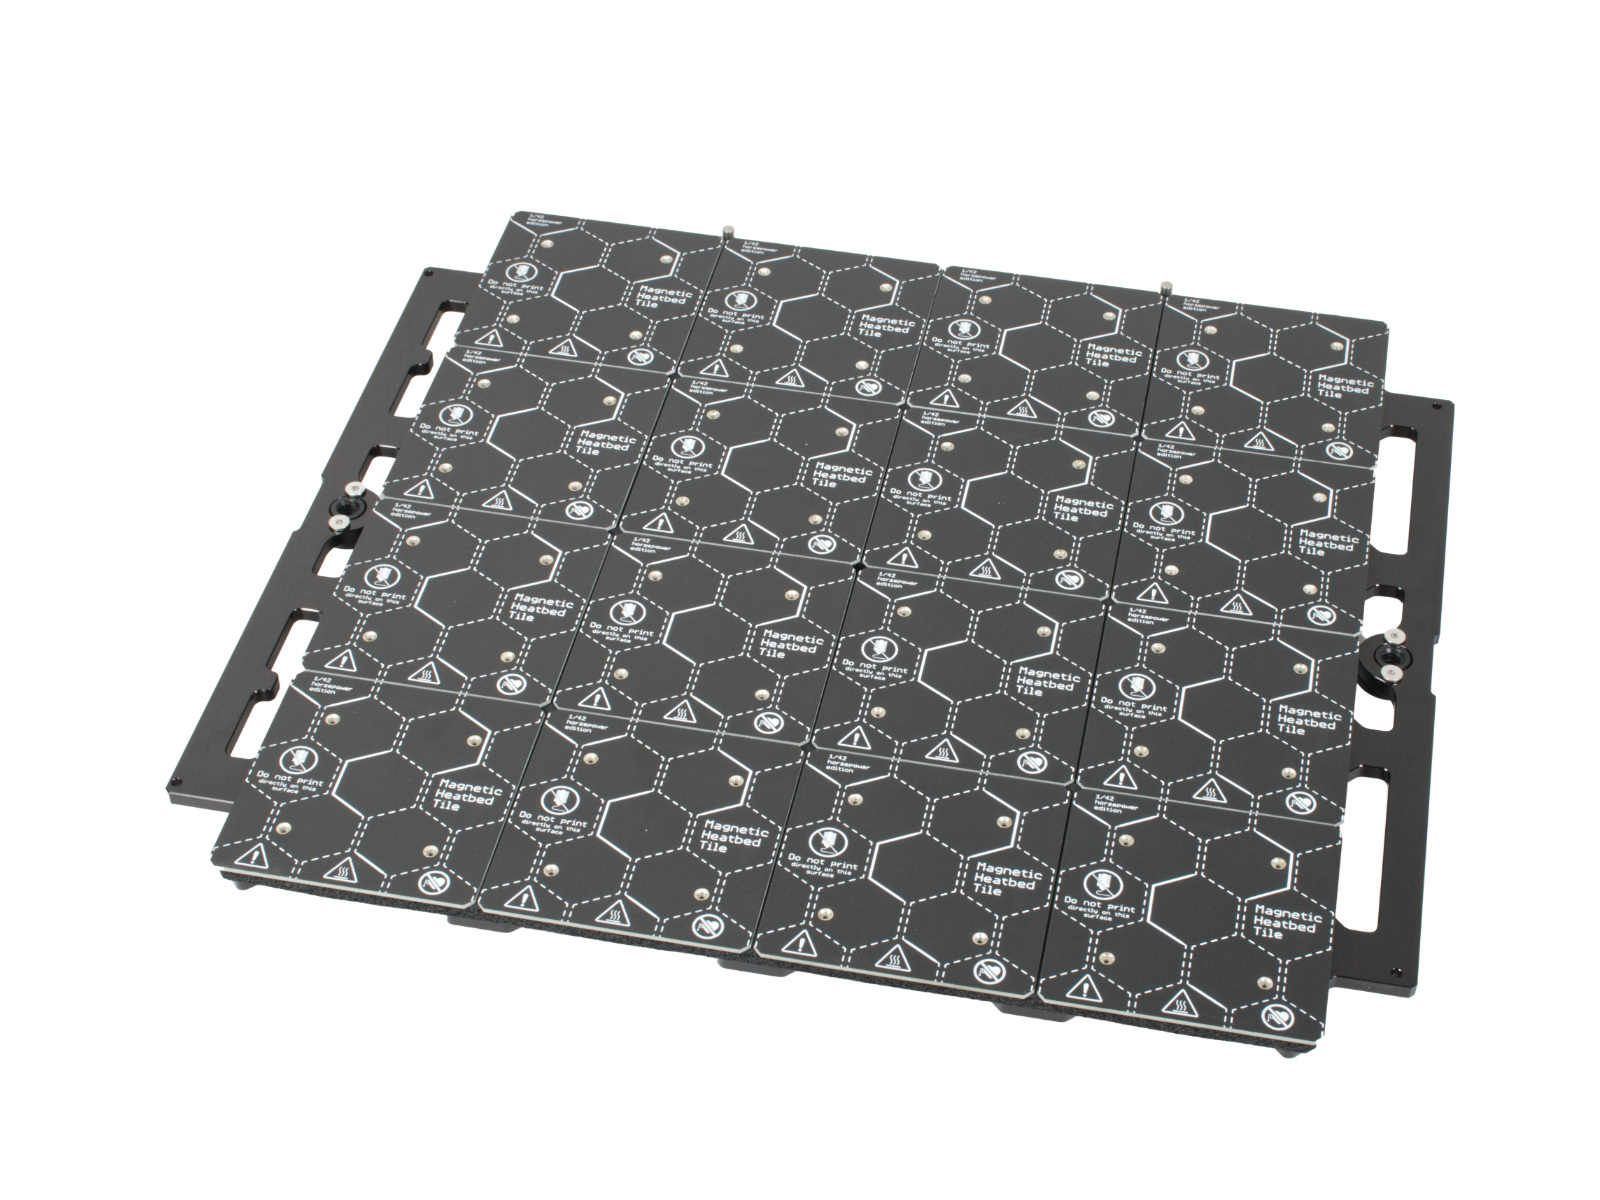
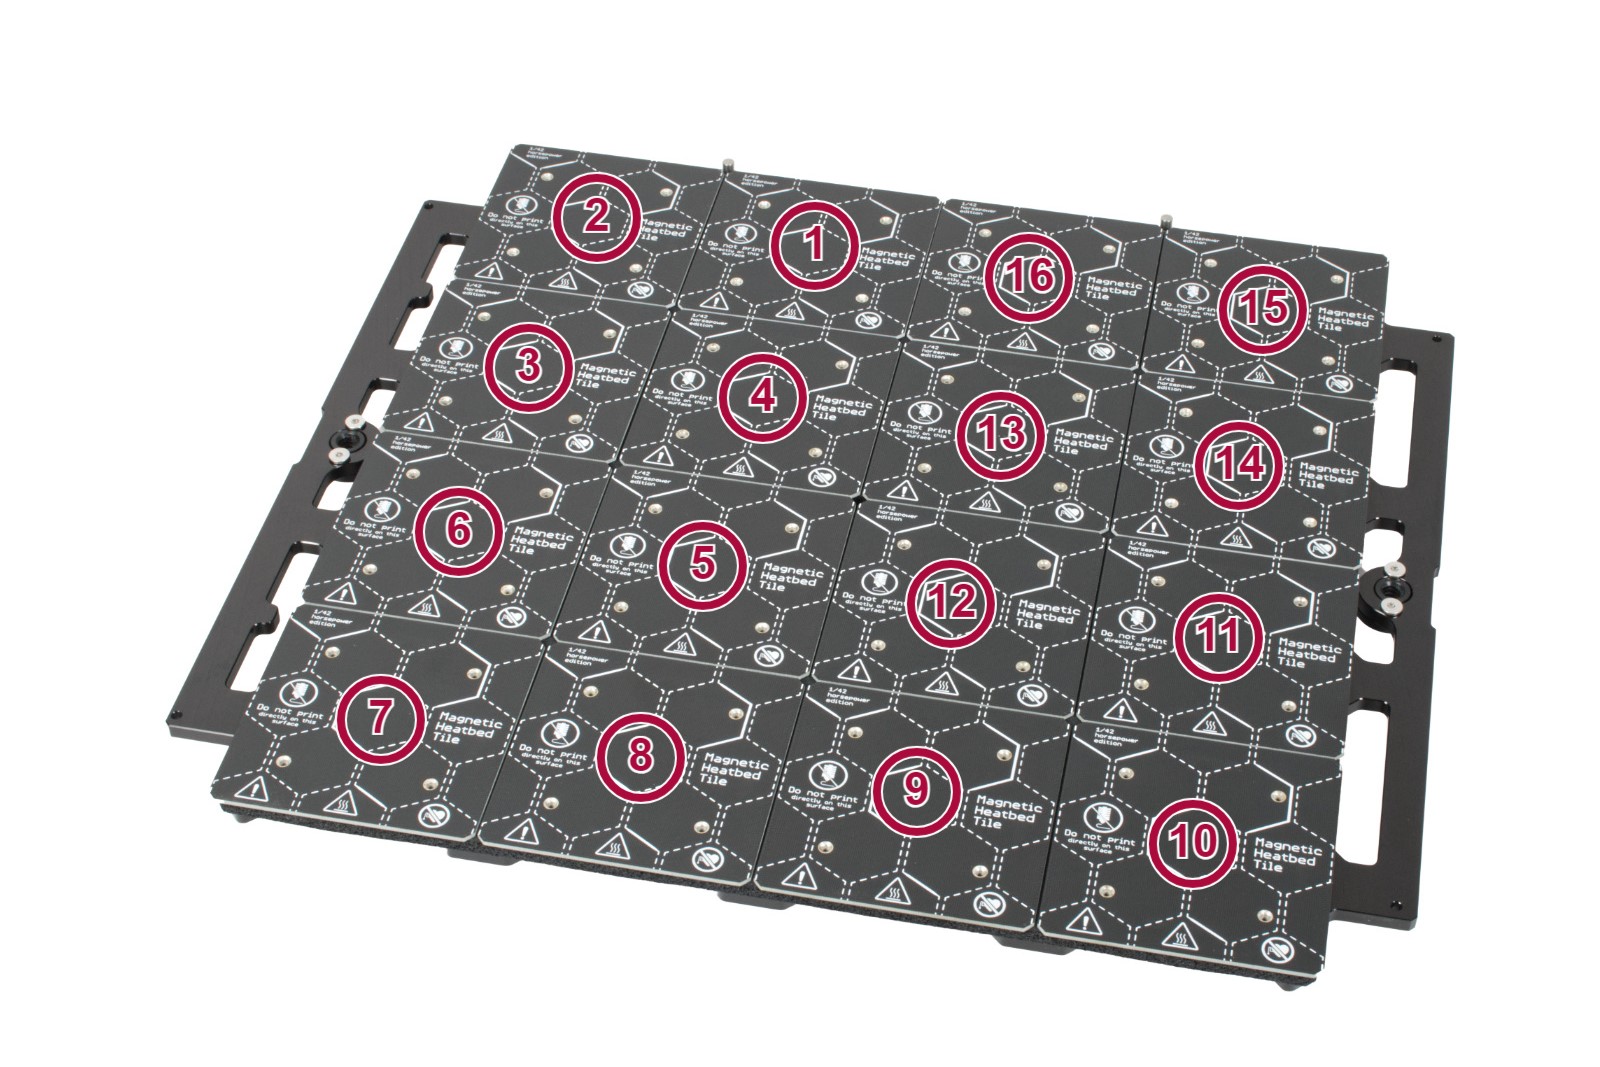
Check the heatbed tile for physical damage, for example, a scratch on any heatbed tile surface, or a cable in bad status on the bottom of a heatbed tile. Identify the heatbed tile number.
 |  |
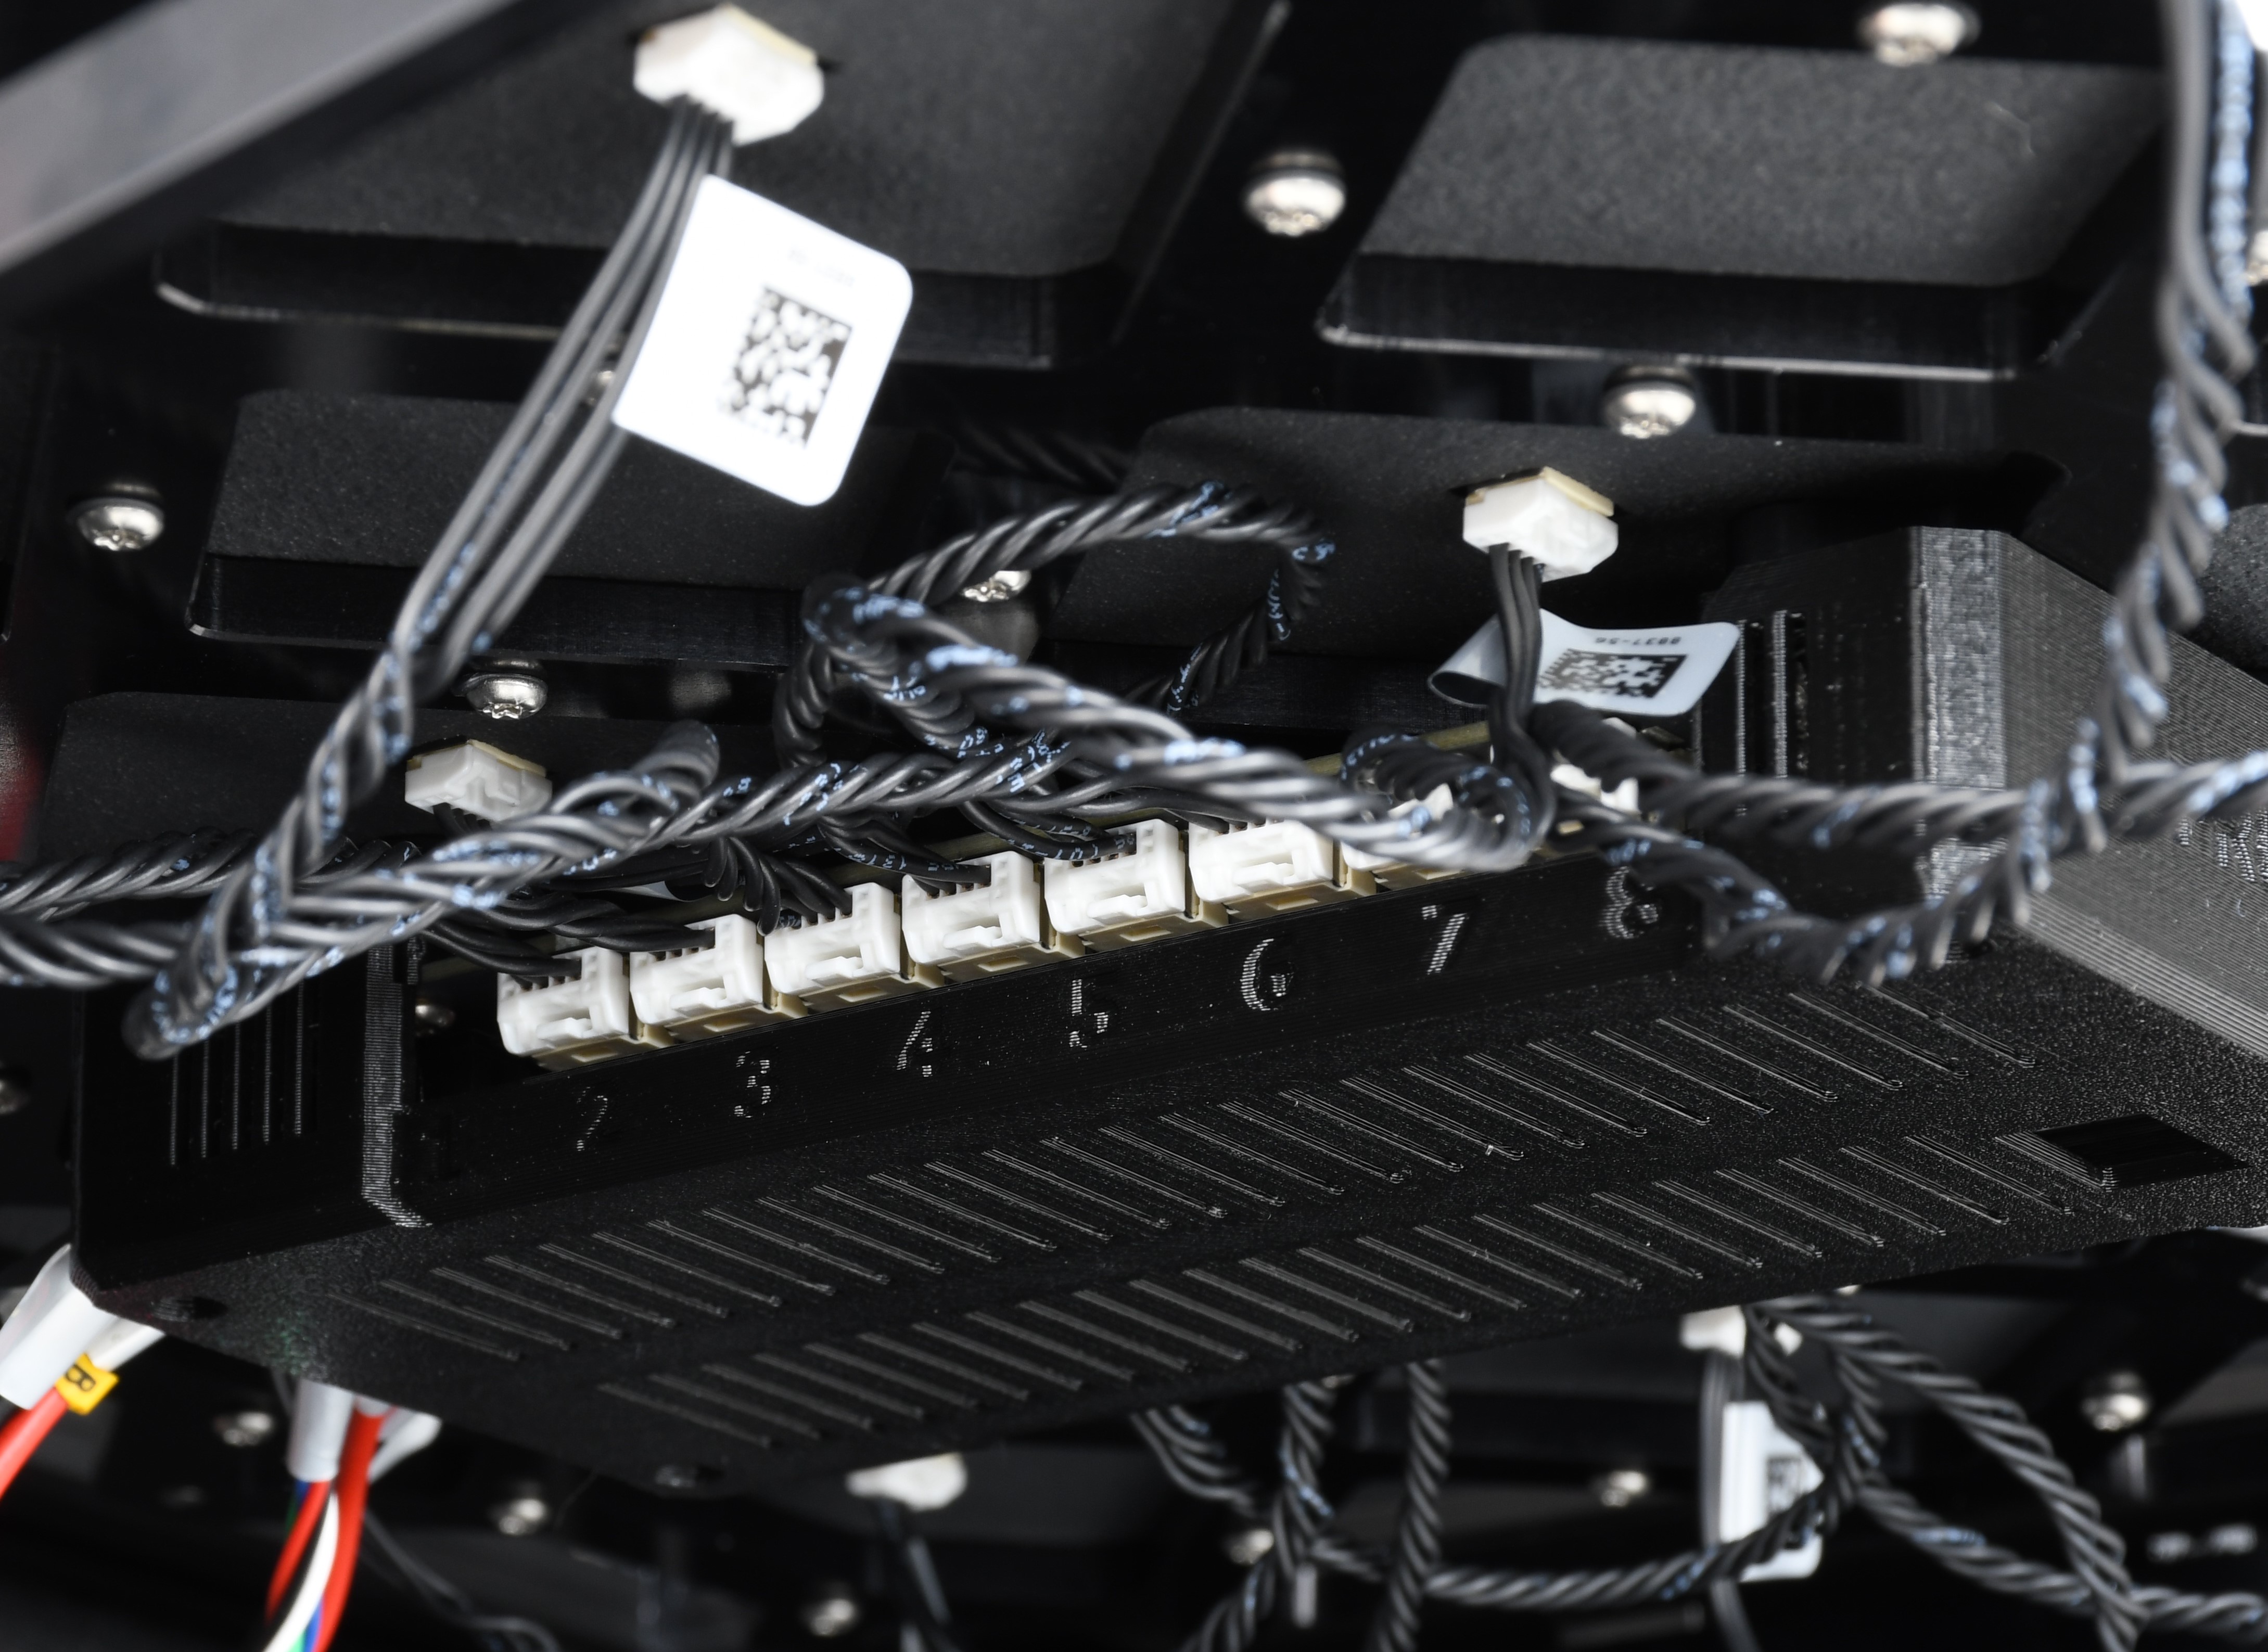
Check that the indicated heatbed cable is correctly connected with the modular bed electronics, and with the heatbed tile, and reseat the connection.
Error on heatbed tiles 1 or 7
In case of an error specifically on heatbed tile 1 or heatbed tile 7, it is possible that one of the PSUs could be faulty. Before attempting the cable swaps in the below flowchart, attempt the following steps:
- Switch the printer off, make sure it is cold and disconnected from the mains.
- Looking at the rear side of the printer, apply the following steps to the left PSU for an error on heatbed tile 1, and to the right PSU for an error on heatbed tile 7.
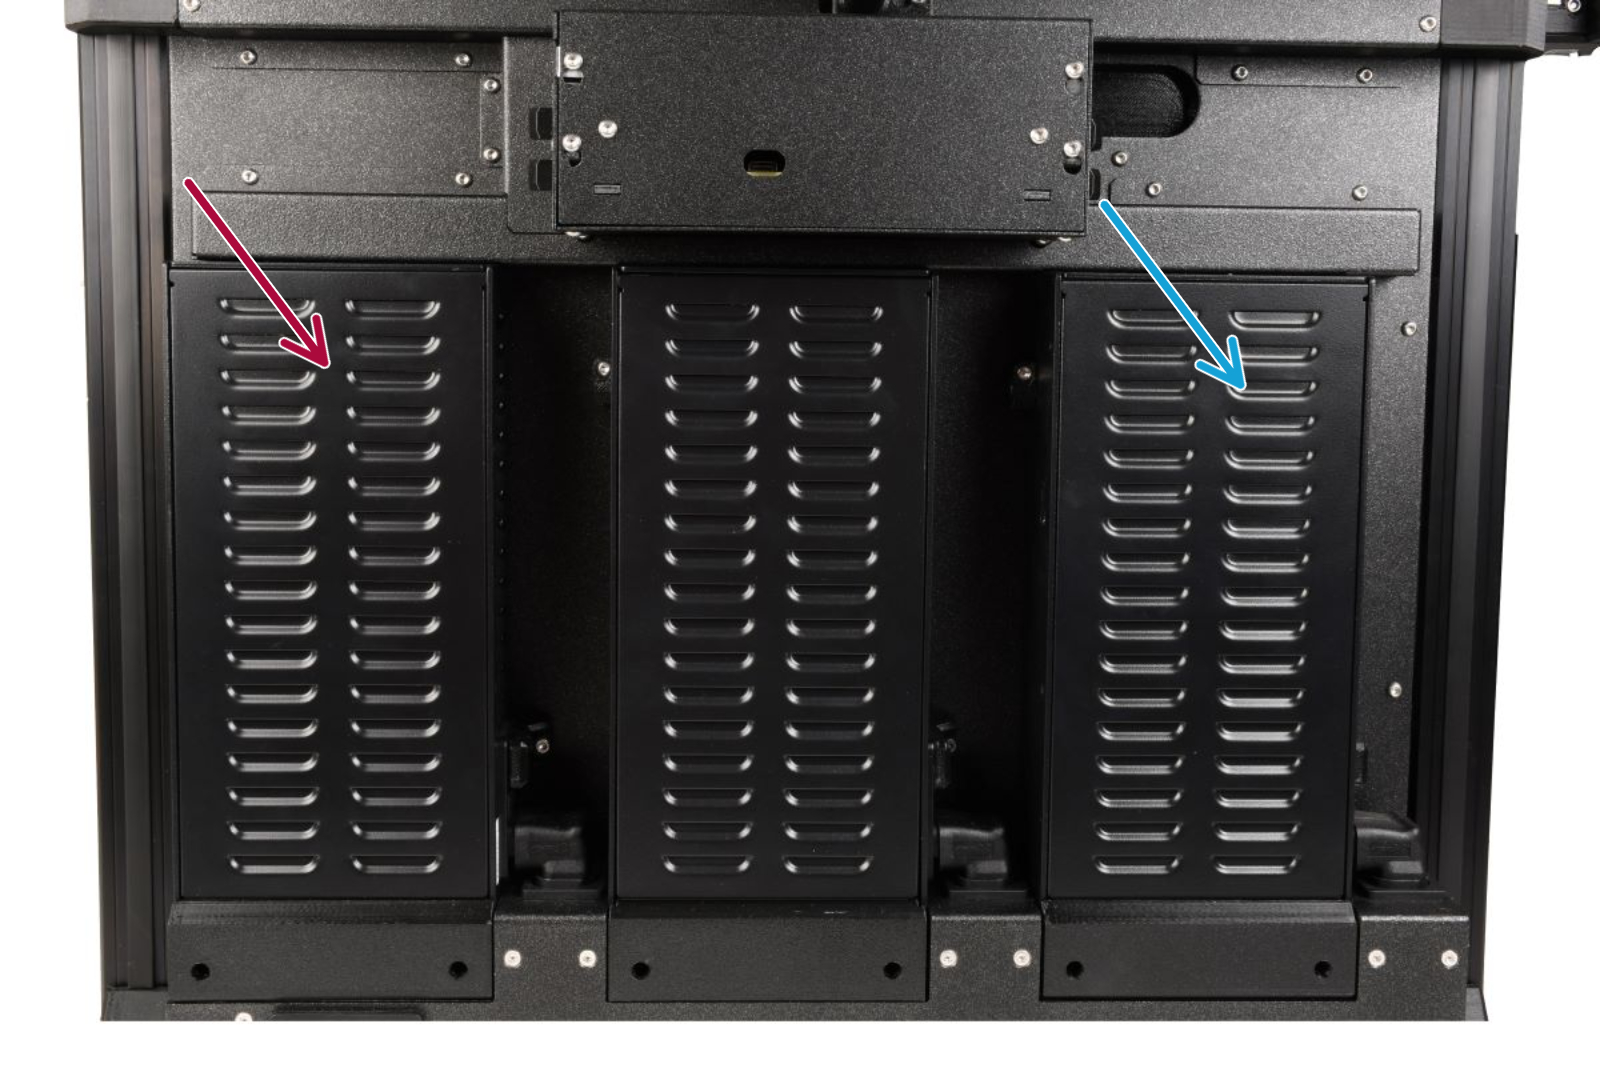
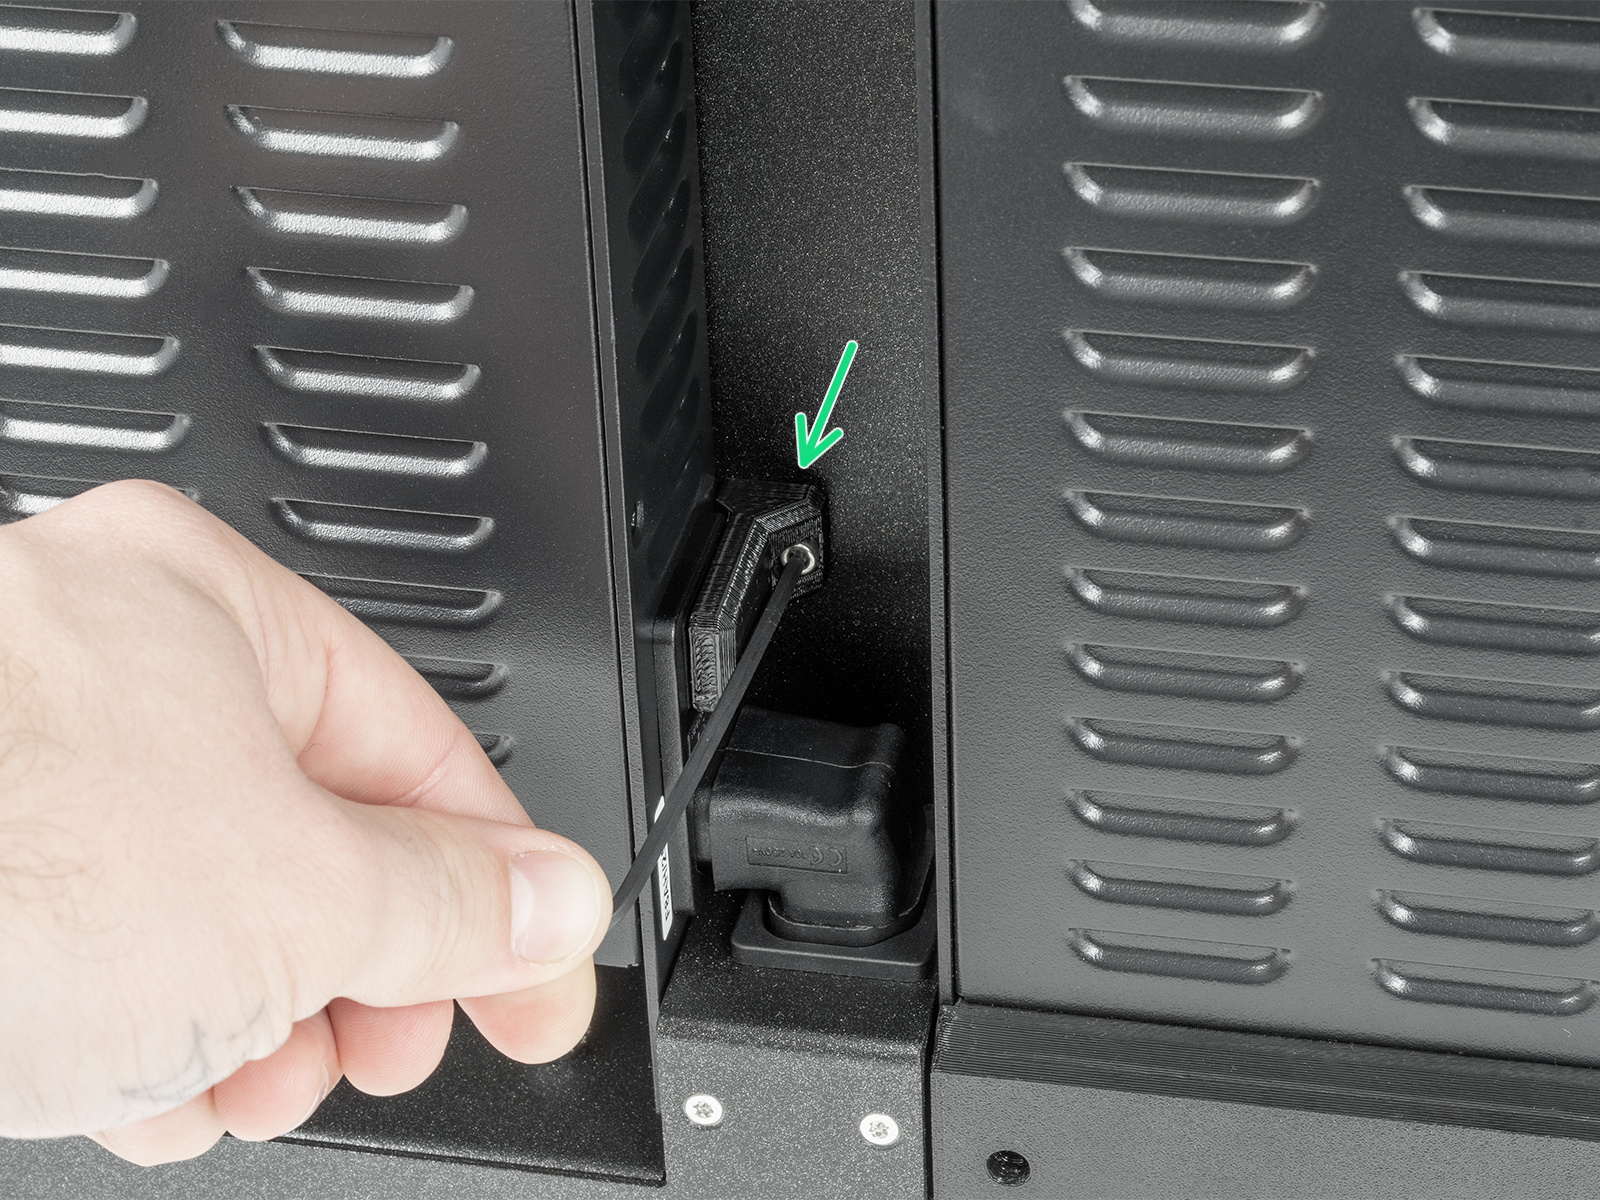
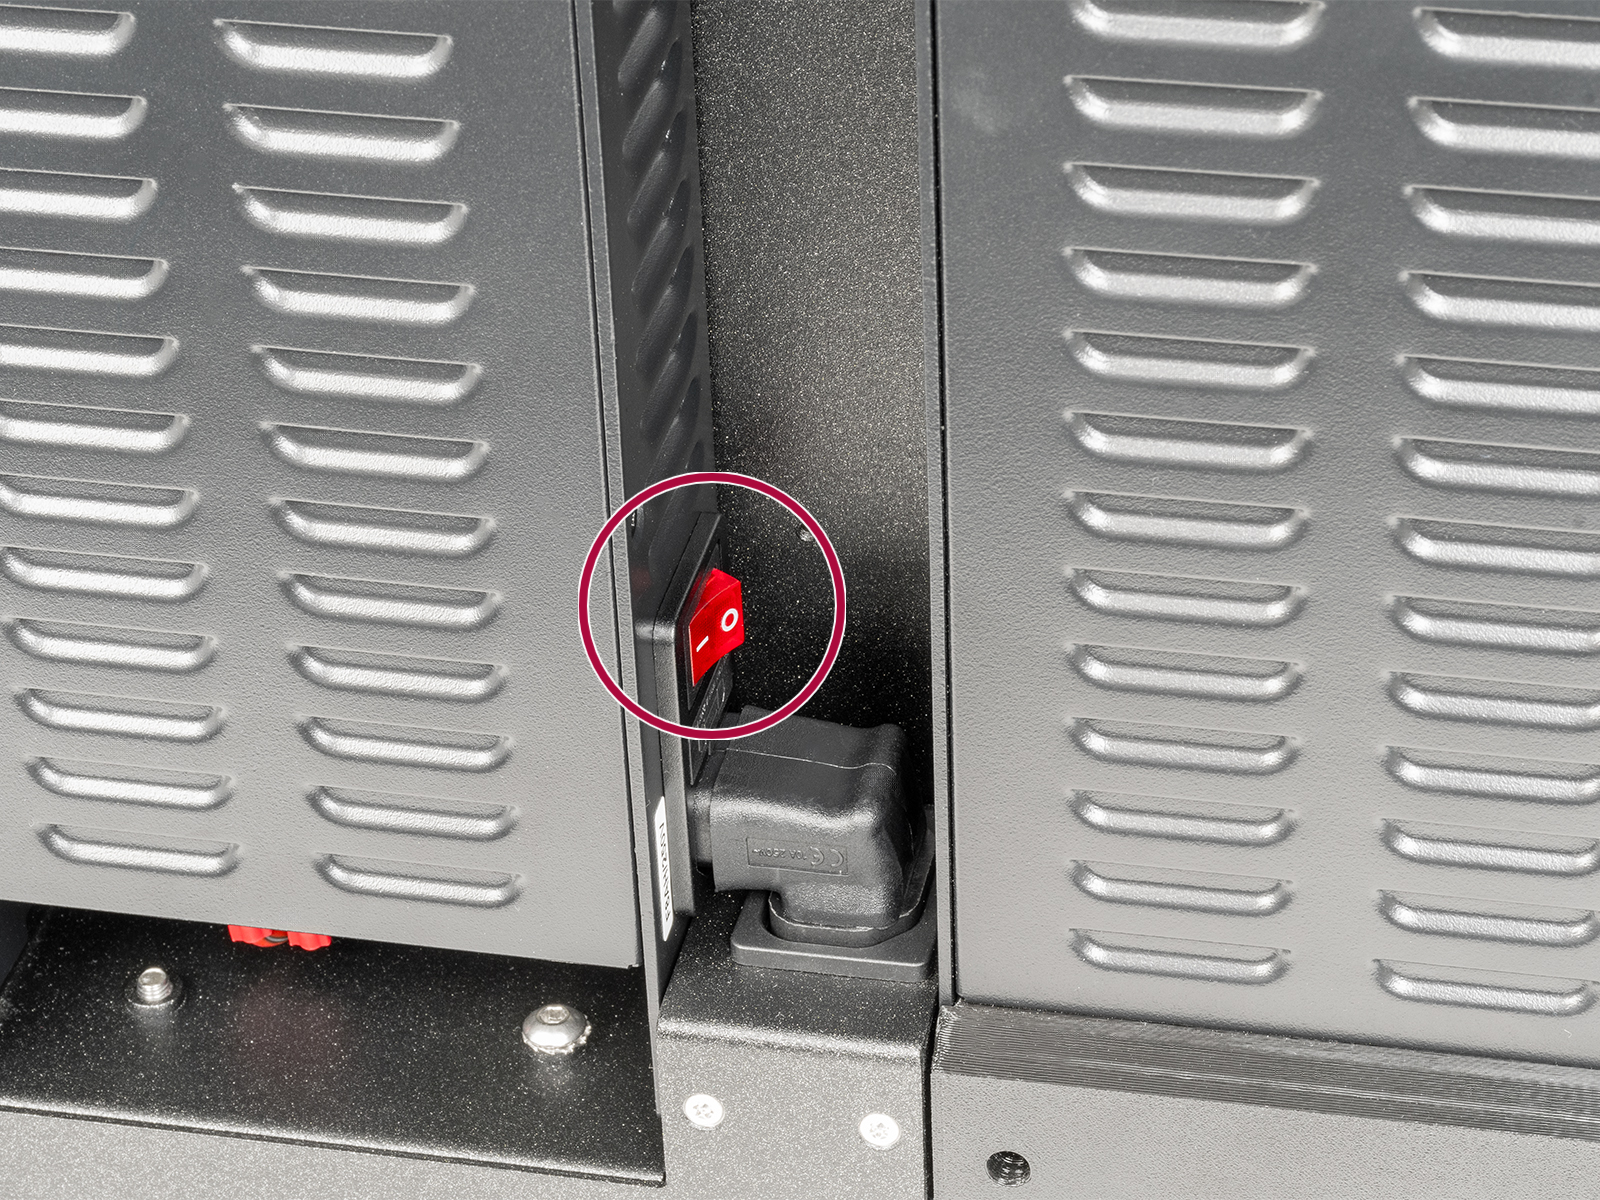
- Using a 2.5mm Allen key, remove the bolt holding the switch-cover. Once removed, check if the PSU is switched on (symbol "I").
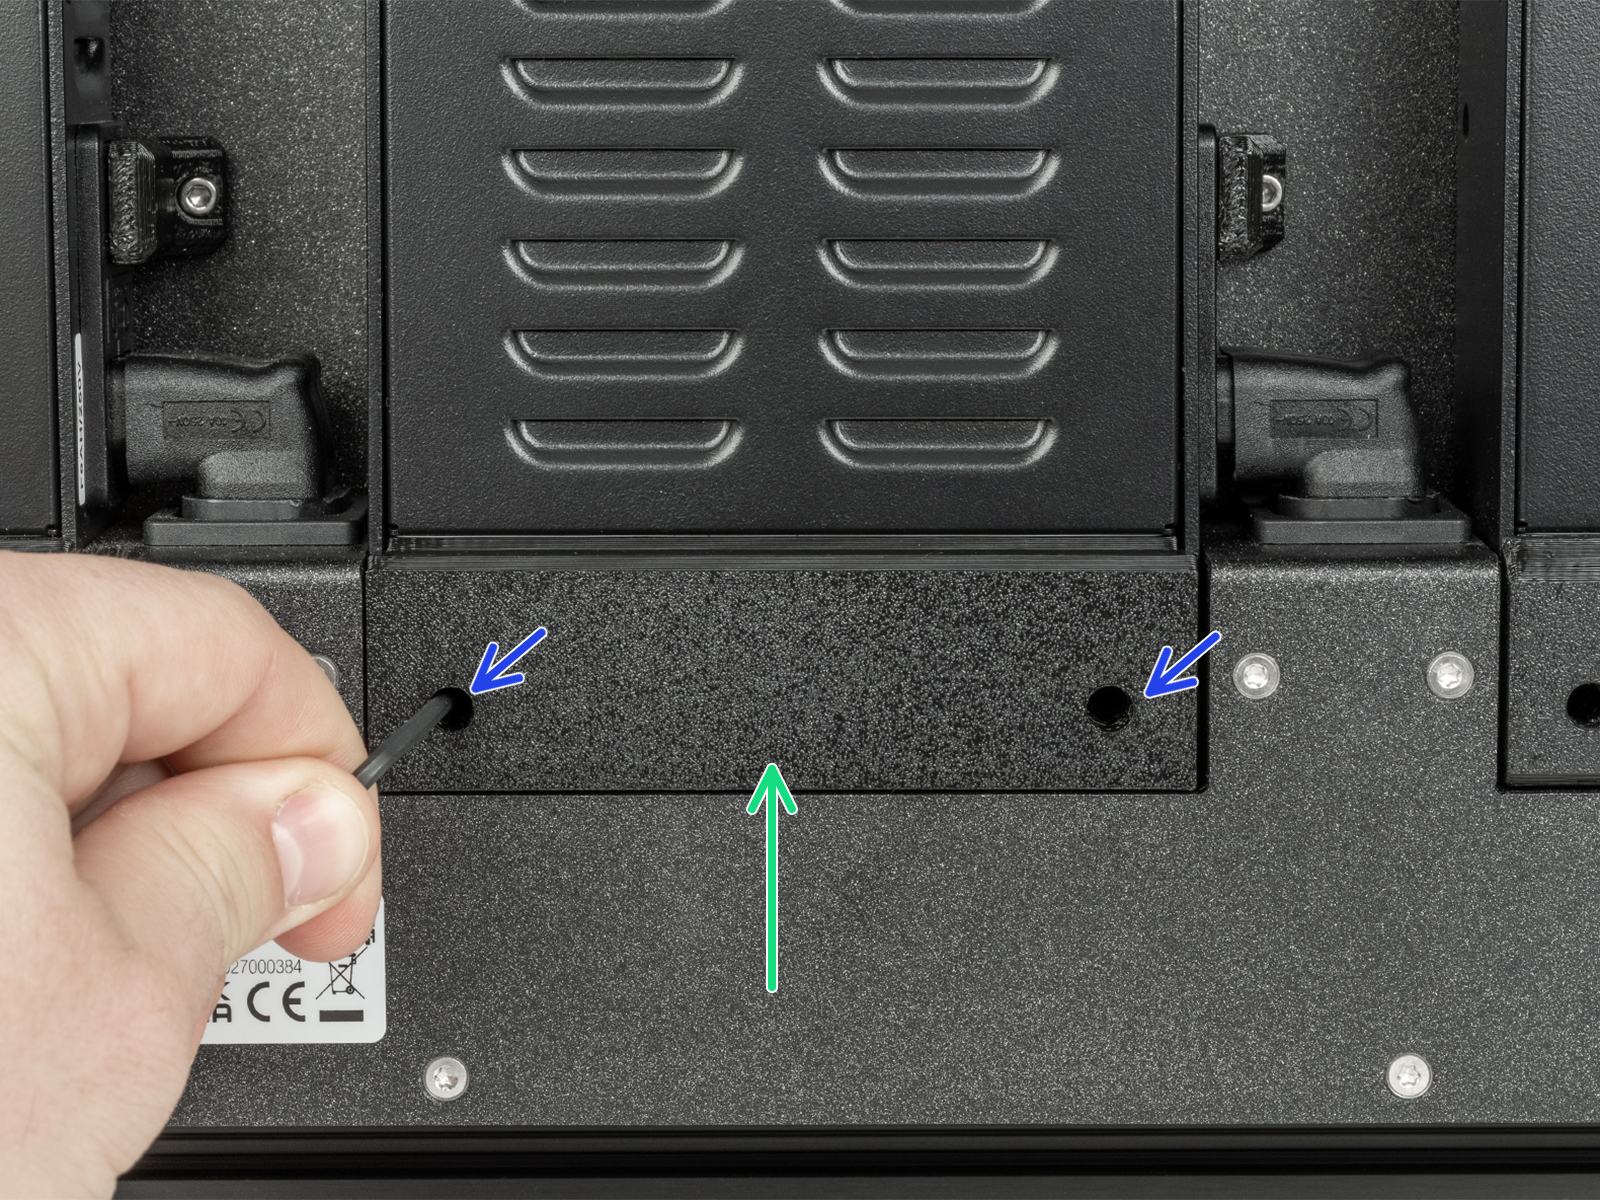
- Using a 2.5mm Allen key, remove the two bolts holding the PSU cover. Then, remove the PSU cover.
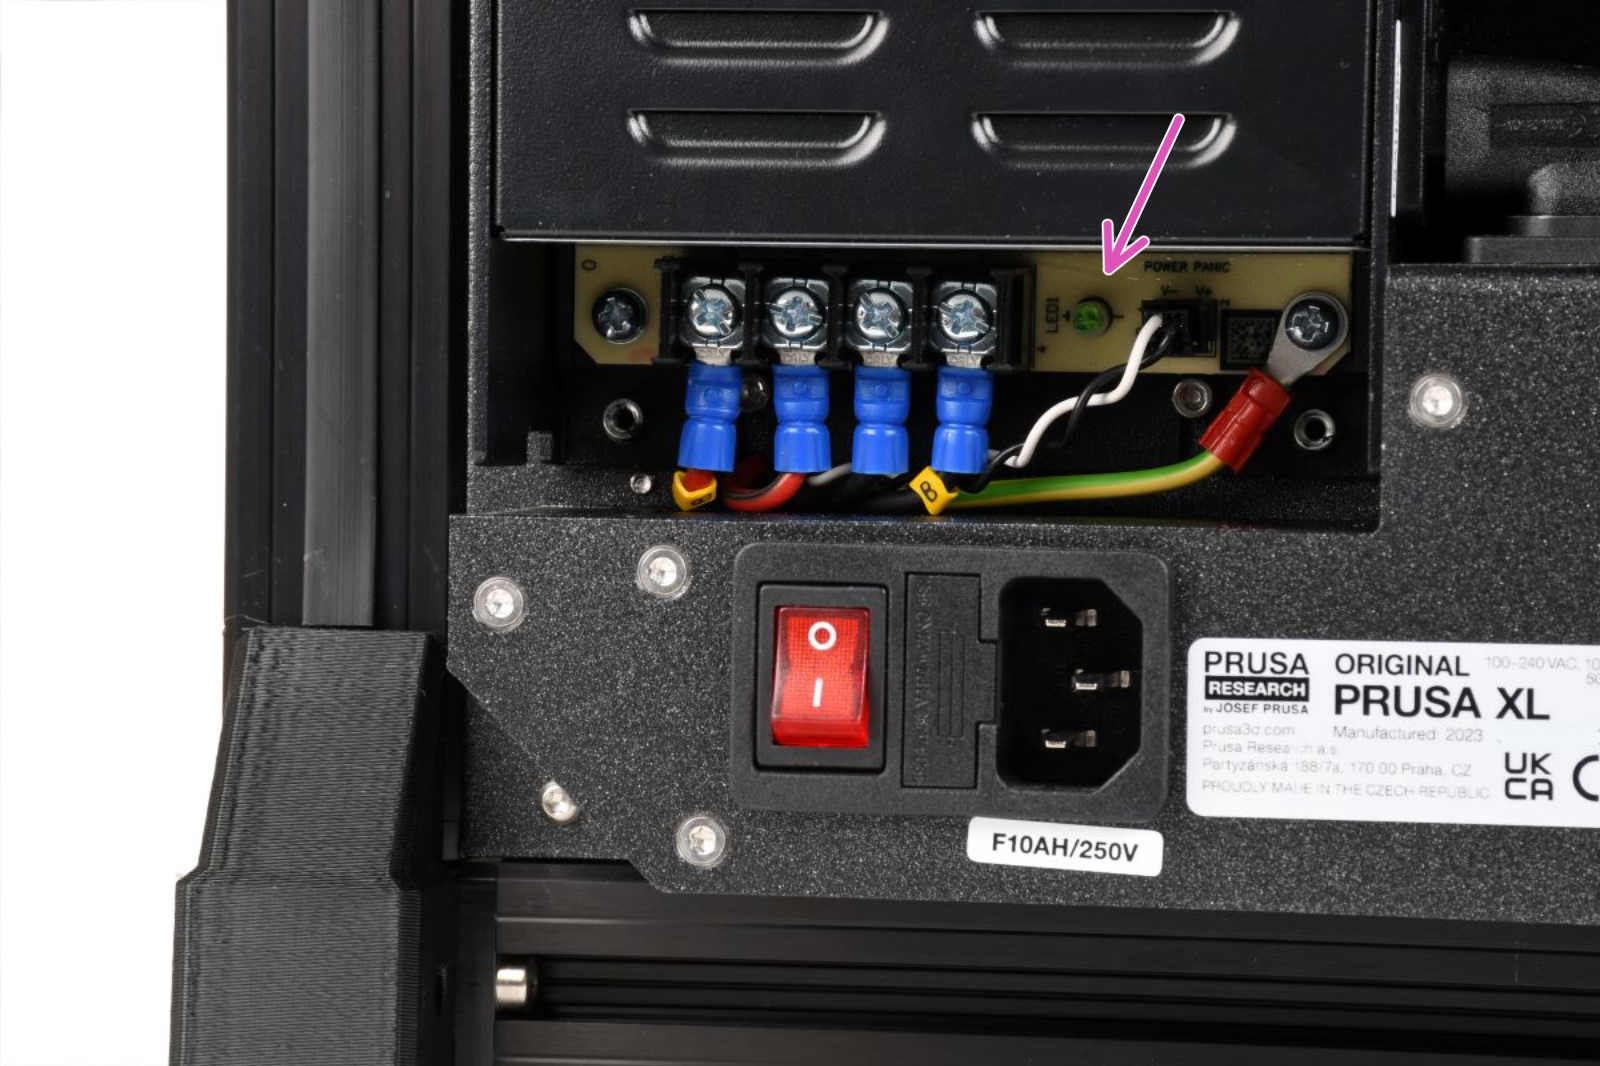
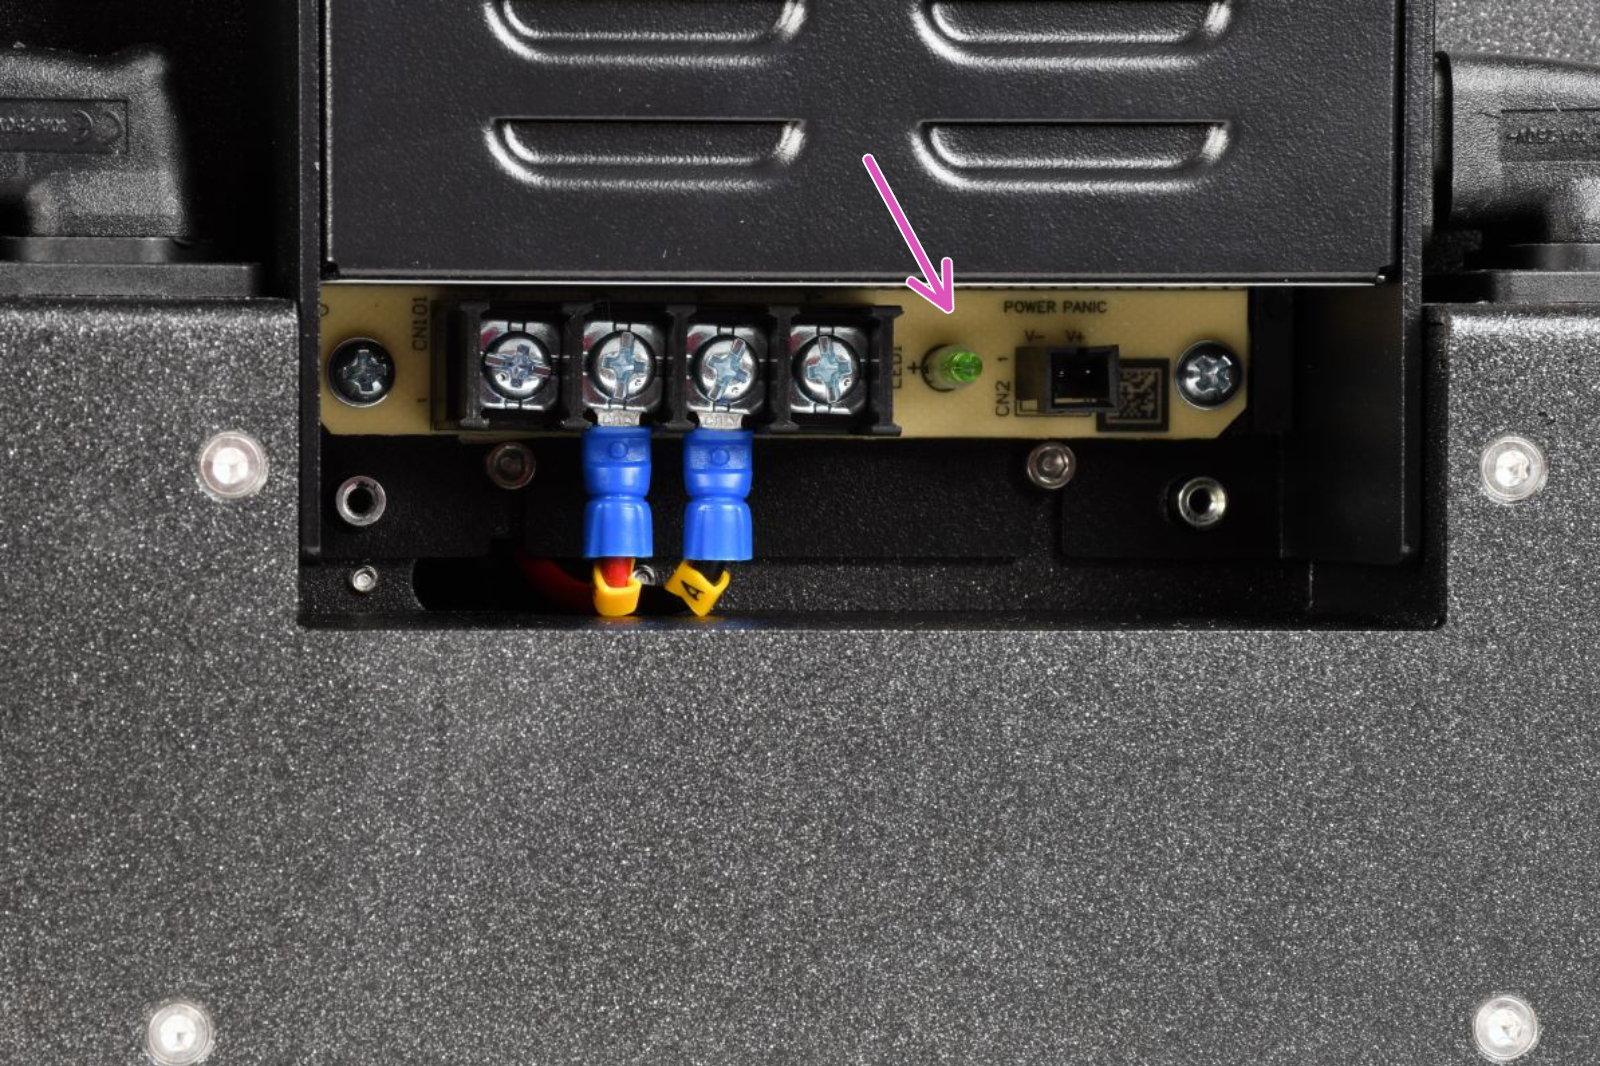
- Switch on the printer. Observe if the green light switches on, or remains off. A green PSU light that remains off upon powering on the printer indicates an issue with the PSU.
Left PSU Right PSU
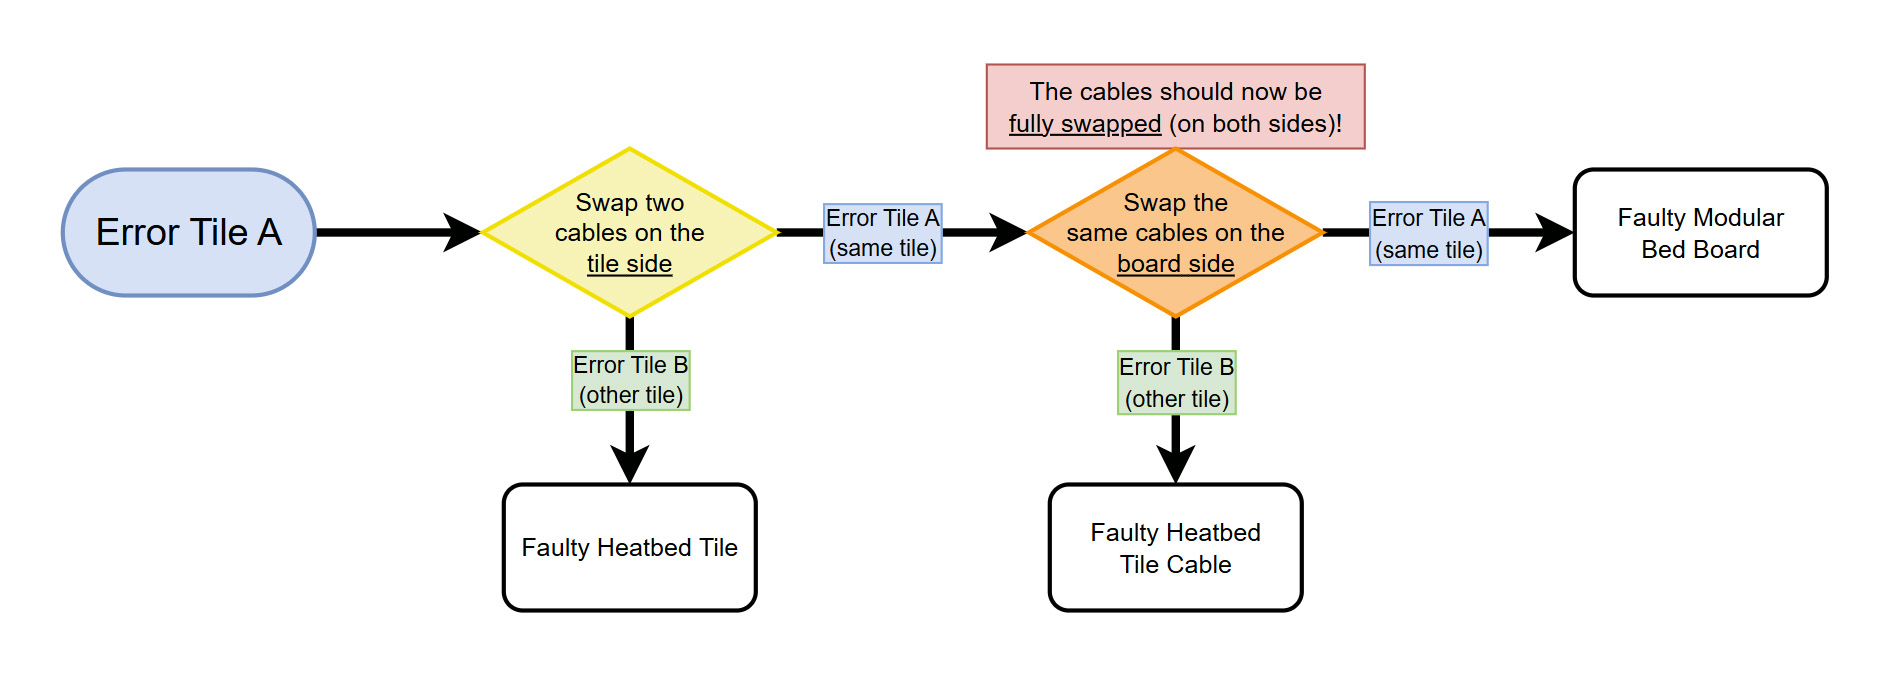
Troubleshooting flowchart
Follow the procedure indicated in the below flowchart to help diagnose the faulty component. As a first step, swap the cable on the tile side connected with the erroring tile with any other cable on the tile side.
Each connector has a safety latch. It is necessary to press the latch before disconnecting. Otherwise, the connector may get damaged.
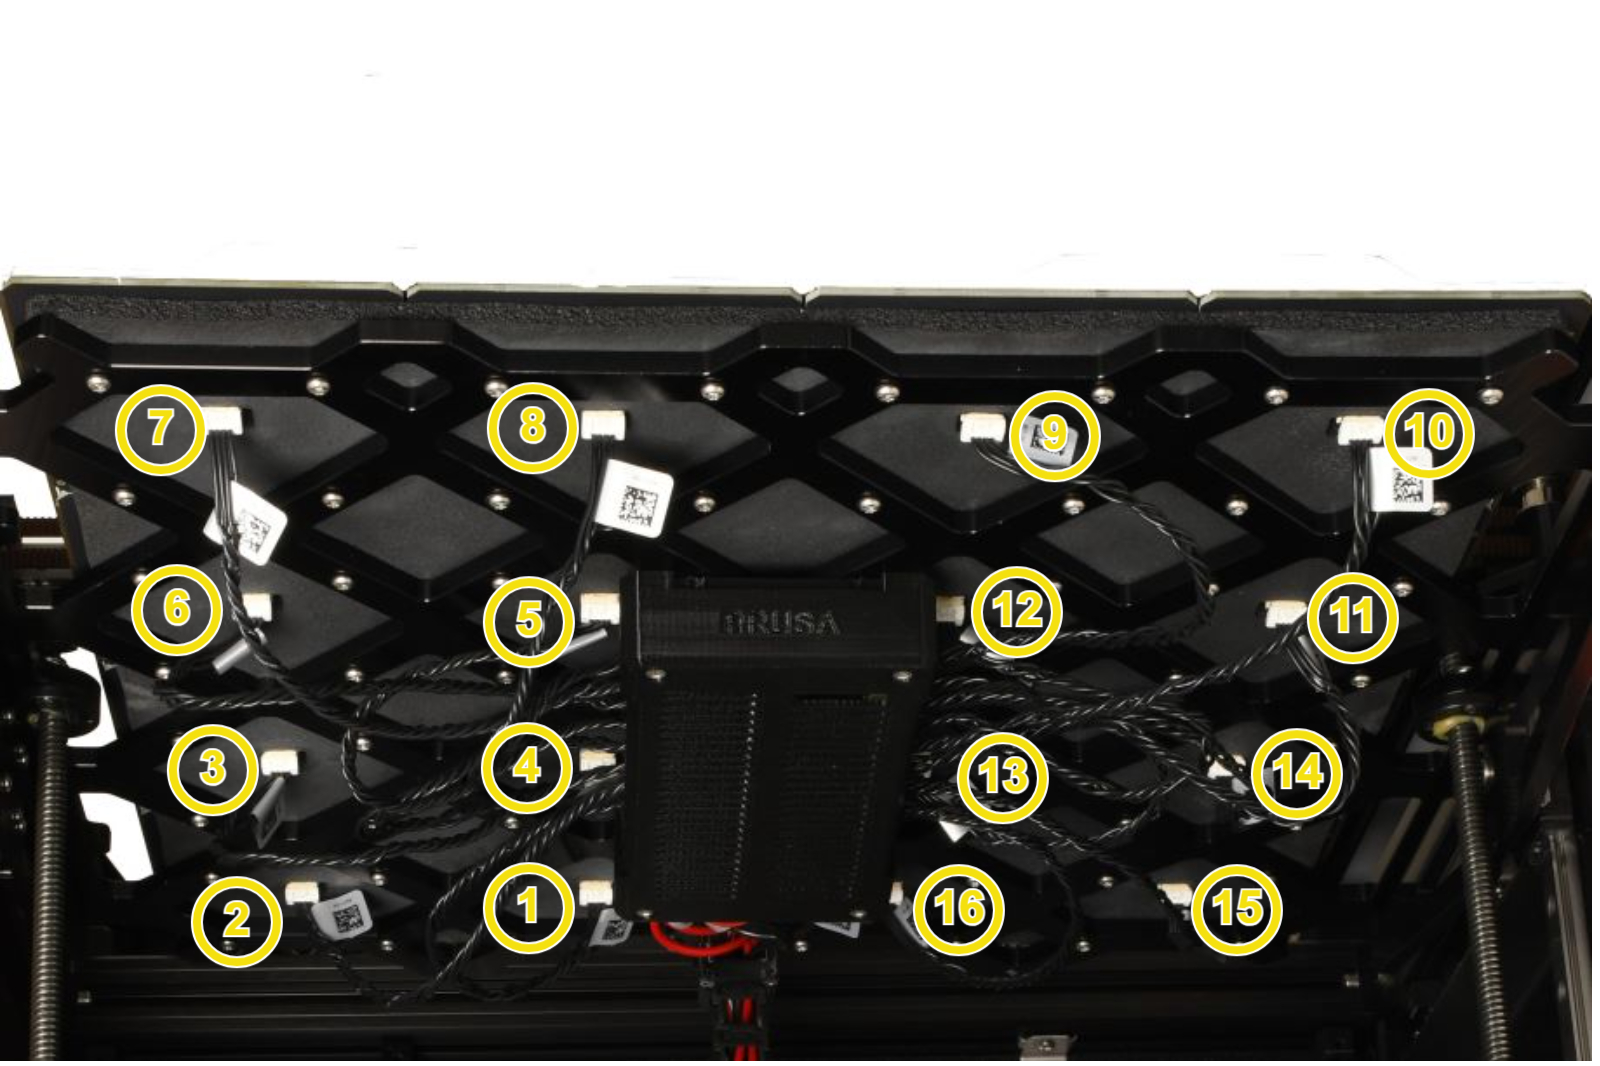 | 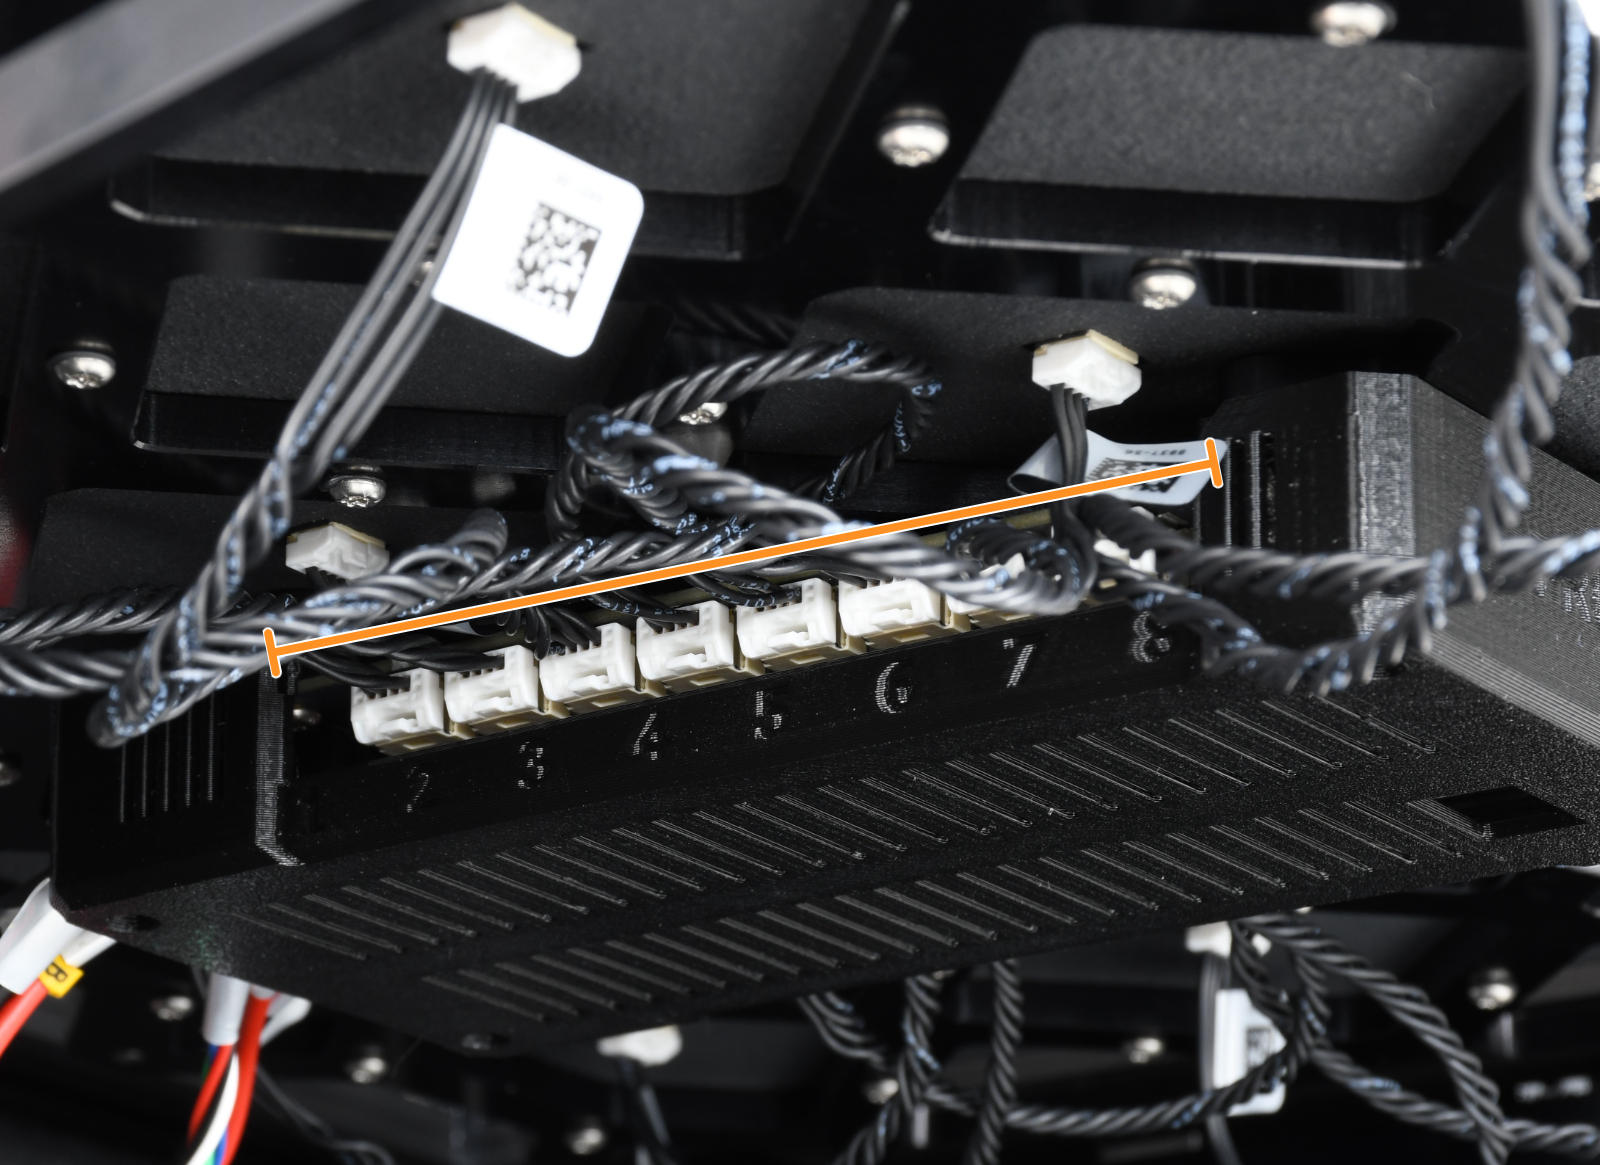 |
| Cable connectors on the heatbed tiles side. | Cable connectors on the board side. |
3 comments