Pronterface is an application where you can monitor and send commands to your printer. It is also possible to use it to start prints over USB, however, performance may vary.
Pronterface is part of the Printrun, a suite of 3D printer software, you can download the latest release on GitHub.
Pronterface used to be part of the Drivers & Apps package until the version 2.5. If you have this old version intalled, you likely already have Pronterface installed as well.
Setting up USB connection and Pronterface
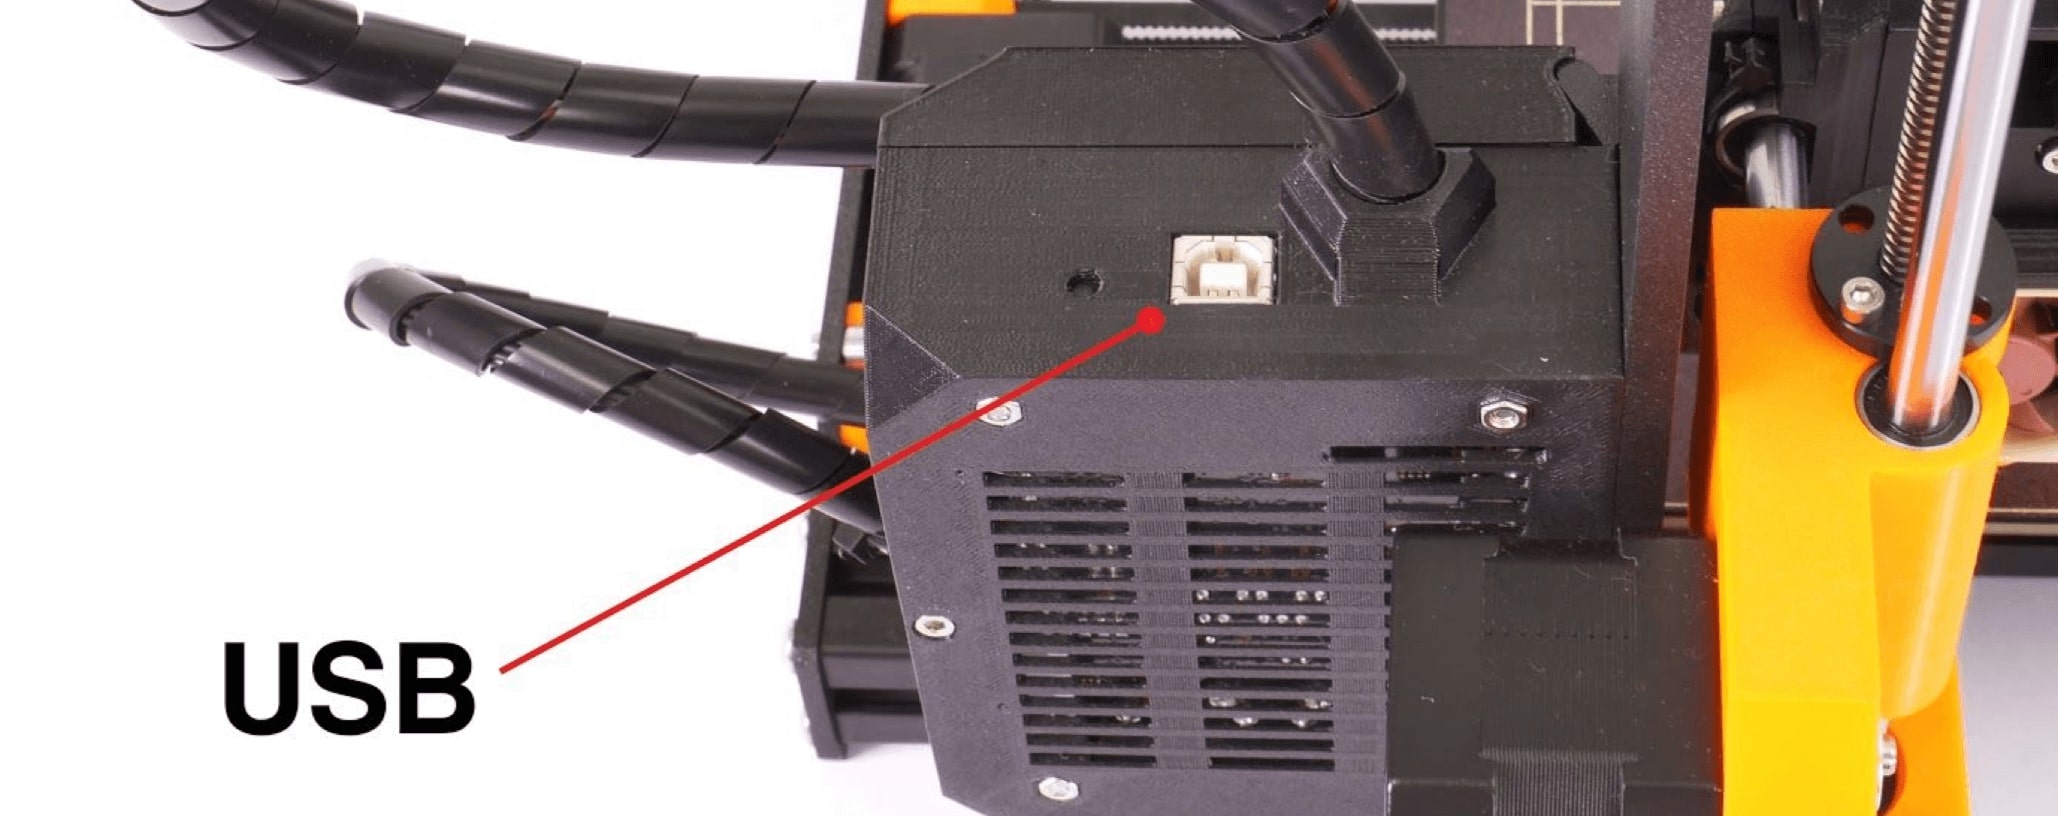
- Connect the printer to your computer with the USB type B cable that you have received with your printer.
- Choose the connection port in Pronterface. Mac users use /usbmodem port, PC Windows ports are COM1, COM2, etc.; the correct port is displayed in the device manager, Linux users connect the printer using the virtual serial port. When the printer is connected, click the Connect button. The right column displays the connection information.
'RPi port' must be set to OFF within Settings, in the printer's LCD menu, to be able to connect to the printer by USB.
- The next step is to load the model with the Load model button and to choose the file name.gcode (no special symbols are allowed in the file name).
- You can control the movement of all printer axes in the control area.
- Next, you can preheat the printer and prepare it for printing. Set the temperature for the nozzle (heater) and heatbed (bed) and click the Set button. The printer will start heating immediately. Always make sure that the temperature set in Pronterface is correct for the given material.
- You can check the actual temperatures of the nozzle and the bed in Pronterface.
- When the model is loaded, the right column shows the estimated print duration: Estimated duration (pessimistic).
Keep in mind that when printing through Pronterface, the computer must be connected to the printer during the entire printing process - the computer must be prevented from going into sleep mode, hibernation, or shut down. Disconnecting the computer during the print ends the printing process without the option to finish the object.
How to operate Pronterface
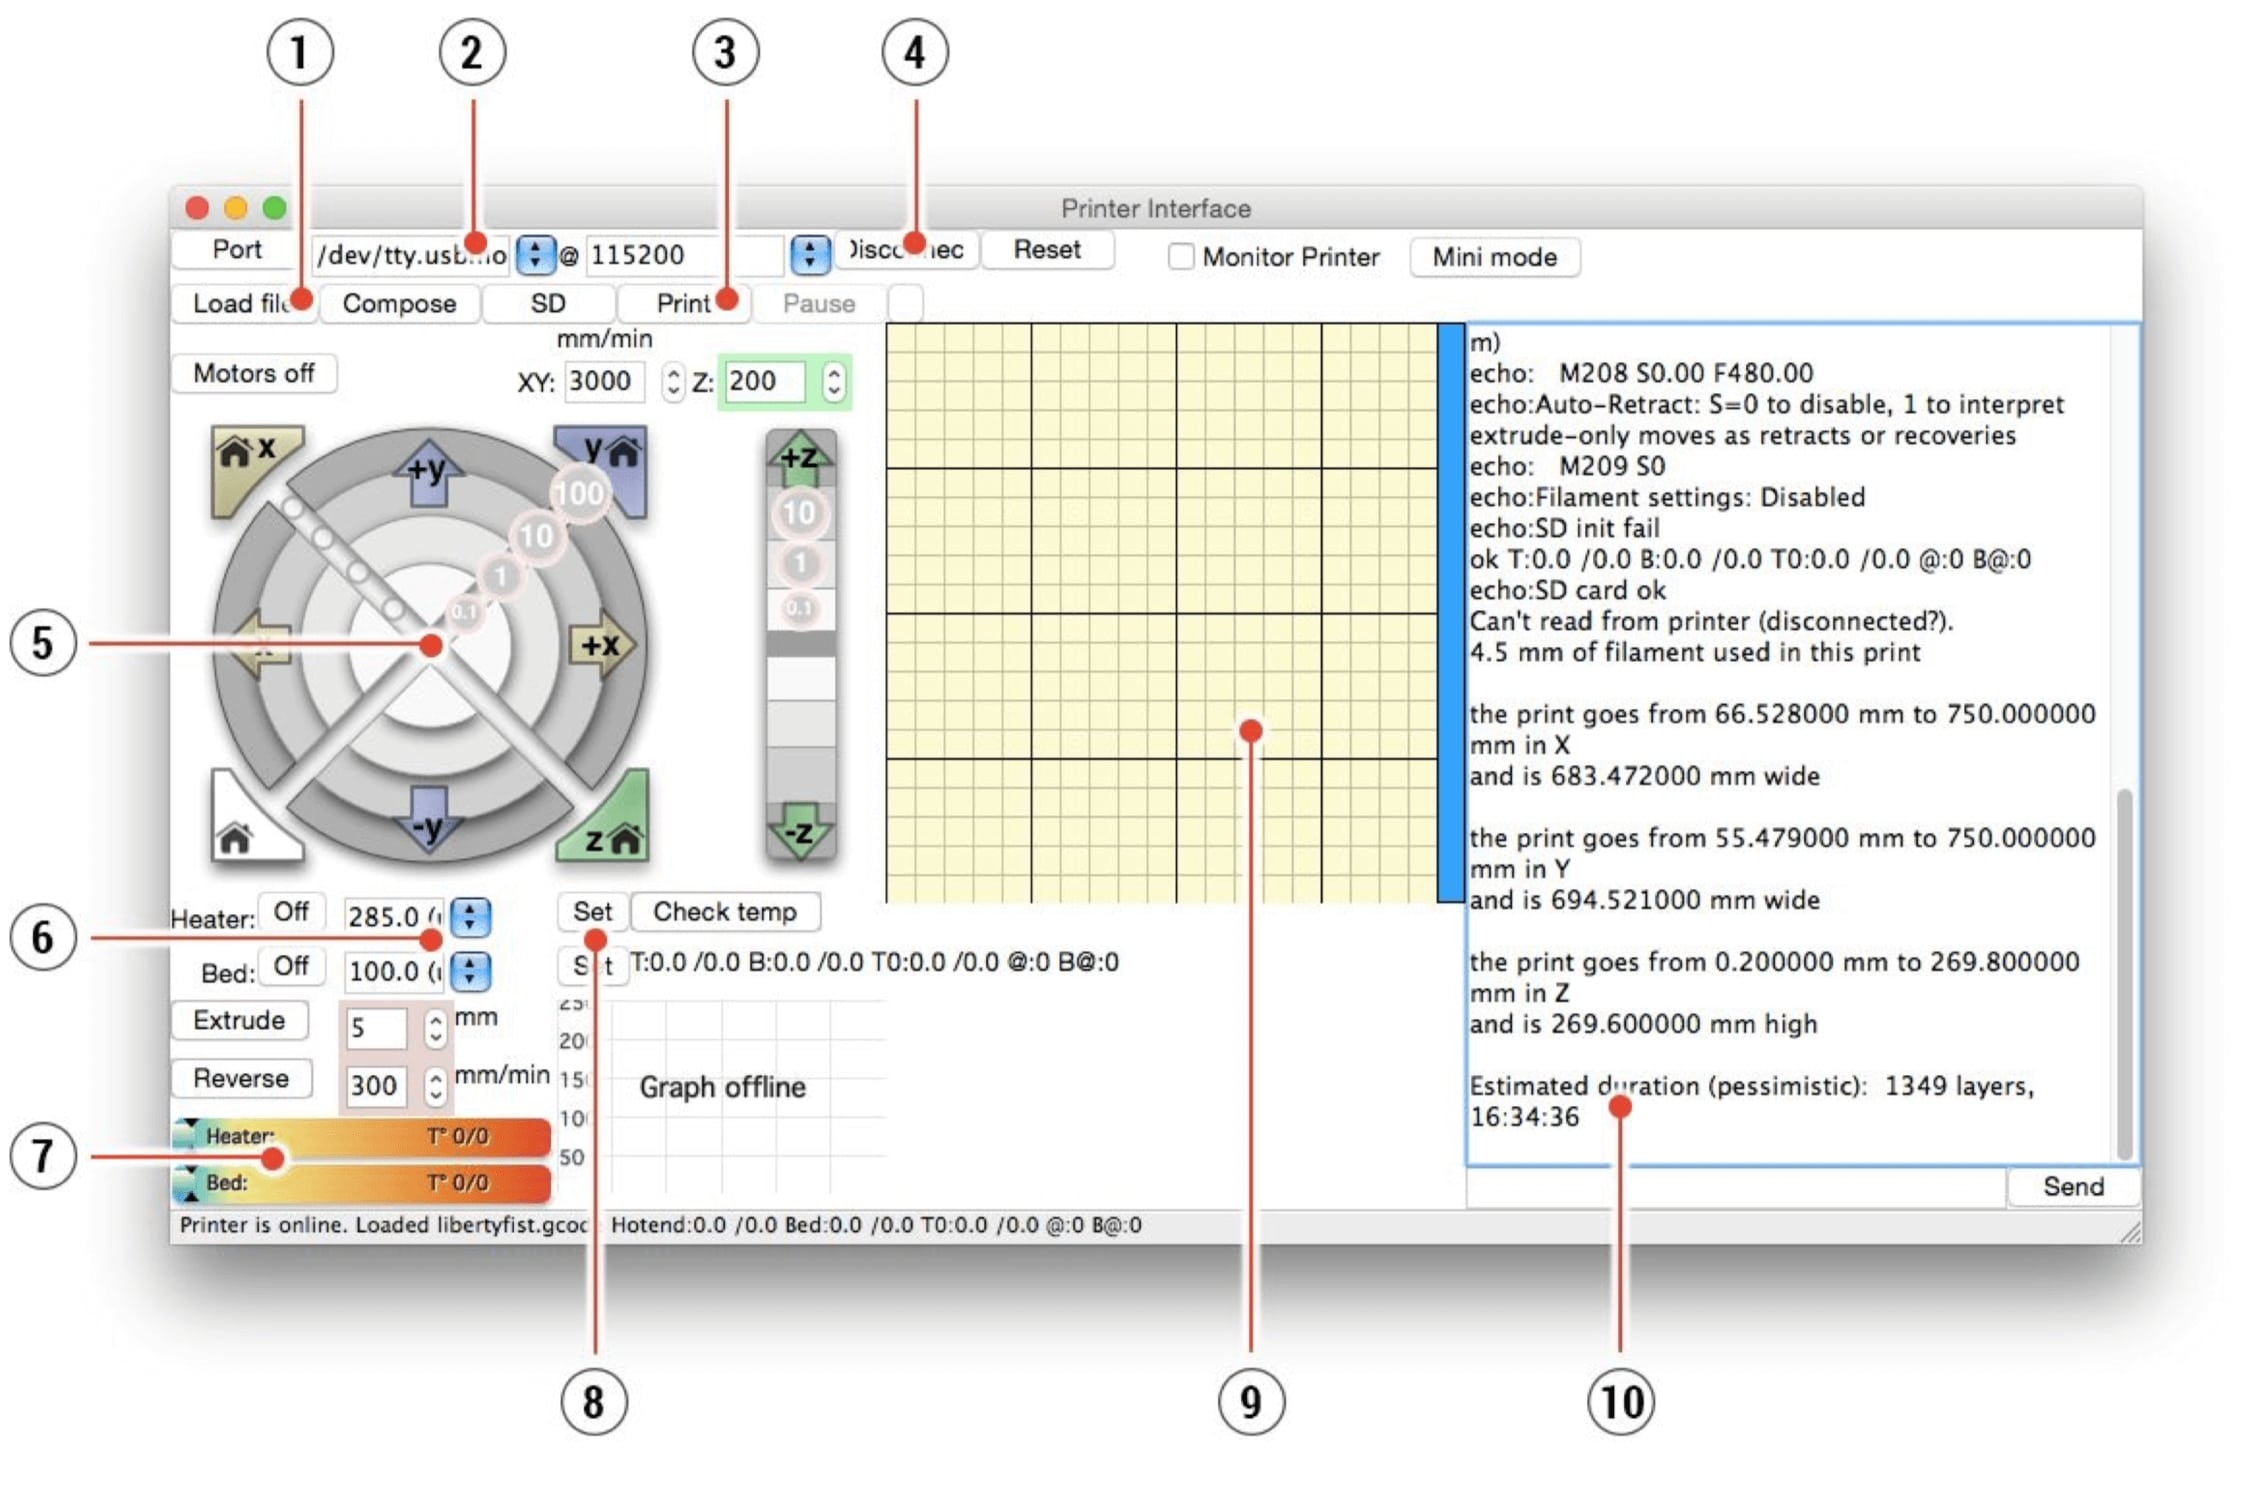
- The Load file button is used to load the desired model. The model must be in .gcode file format.
- Choose the port to which the printer is connected to the computer. (mostly /usbmodem for Mac, COM1, COM2, etc. for Windows PC).
- The Print button starts the printing process.
- The Disconnect button disconnects the printer from the computer.
- The printer controls give you the ability to manipulate the printer axes.
- Setting the nozzle and bed temperatures.
- Thermometer.
- Confirming the set temperatures, heating starts.
- 2D print process preview.
- Info panel. Estimated print time, axis position, and other info show up after loading the model.
Was this article helpful?
This action is available only to registered users. Please log-in.
15 comments
[ERROR] Could not connect to COM3 at baudrate 115200:
Serial error: could not open port COM3: [Error 5] Access is denied.
Connecting...
[ERROR] Could not connect to COM1 at baudrate 115200:
Serial error: could not open port COM1: [Error 2] The system cannot find the file specified.
Connecting...
[ERROR] Could not connect to COM4 at baudrate 115200:
Serial error: could not open port COM4: [Error 5] Access is denied.
Did you install the driver for the printer? Also, tried some different usb ports/cables?