Loose belts would cause a printer malfunction and prevent proper printing. The easiest way to check is printing a round object - if any of the belts are not tightened properly the result is an irregular shape instead of a perfect circle. Y-axis belt is located under the heatbed, X-axis belt moves the print head.
Checking the belt tension
Belt tuner
We have our own belt tuner app. The application determines the belt tension by measuring the frequency of the vibration generated by strumming it.
Follow the instructions in the linked belt tuner app to adjust the belt tension.

Belt tension test
If you move each axis to the far right or left, use a finger push the belt down in the center of the axis. Some force should be needed for bending the belt. Careful when pushing so you do not overstretch the belt, as you might damage the printer. Belts should be tight enough to sound like a low bass note when plucked.
Adjusting the X-axis belt
Slight adjustments
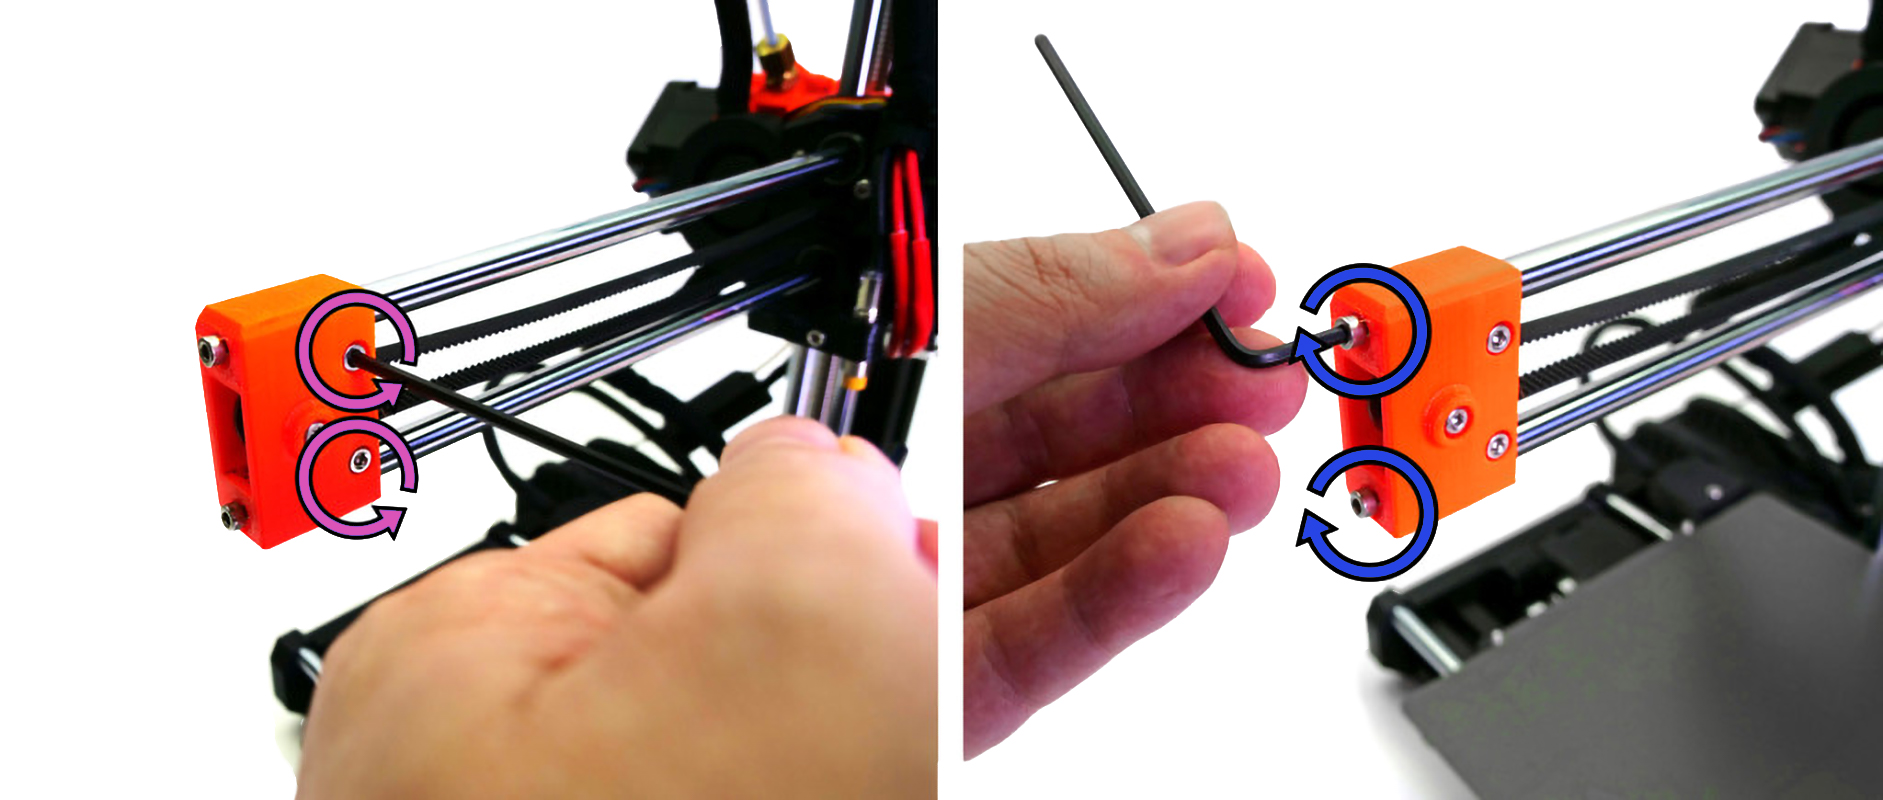
Get out your 2.5 mm Allen key:
- Loosen the two screws as depicted below by turning them counterclockwise (left picture).
- Tighten the two screws at the very end of the X-axis by turning them clockwise (right picture). These push directly onto the ends of the smooth metal rods, moving the plastic part with the belt idler, tightening the belt.
- Once the belt is tight, turn the two side screws clockwise to fix the plastic part holding the belt idler, in place.
Large adjustments
To access the X-axis belt holder you must remove the heat sink of the print head. This requires some disassembly.
- Loosen the belt by following the method described above.
- Follow the guide How to replace a heatsink (MINI/MINI+) to Step 10 to remove the heat sink.
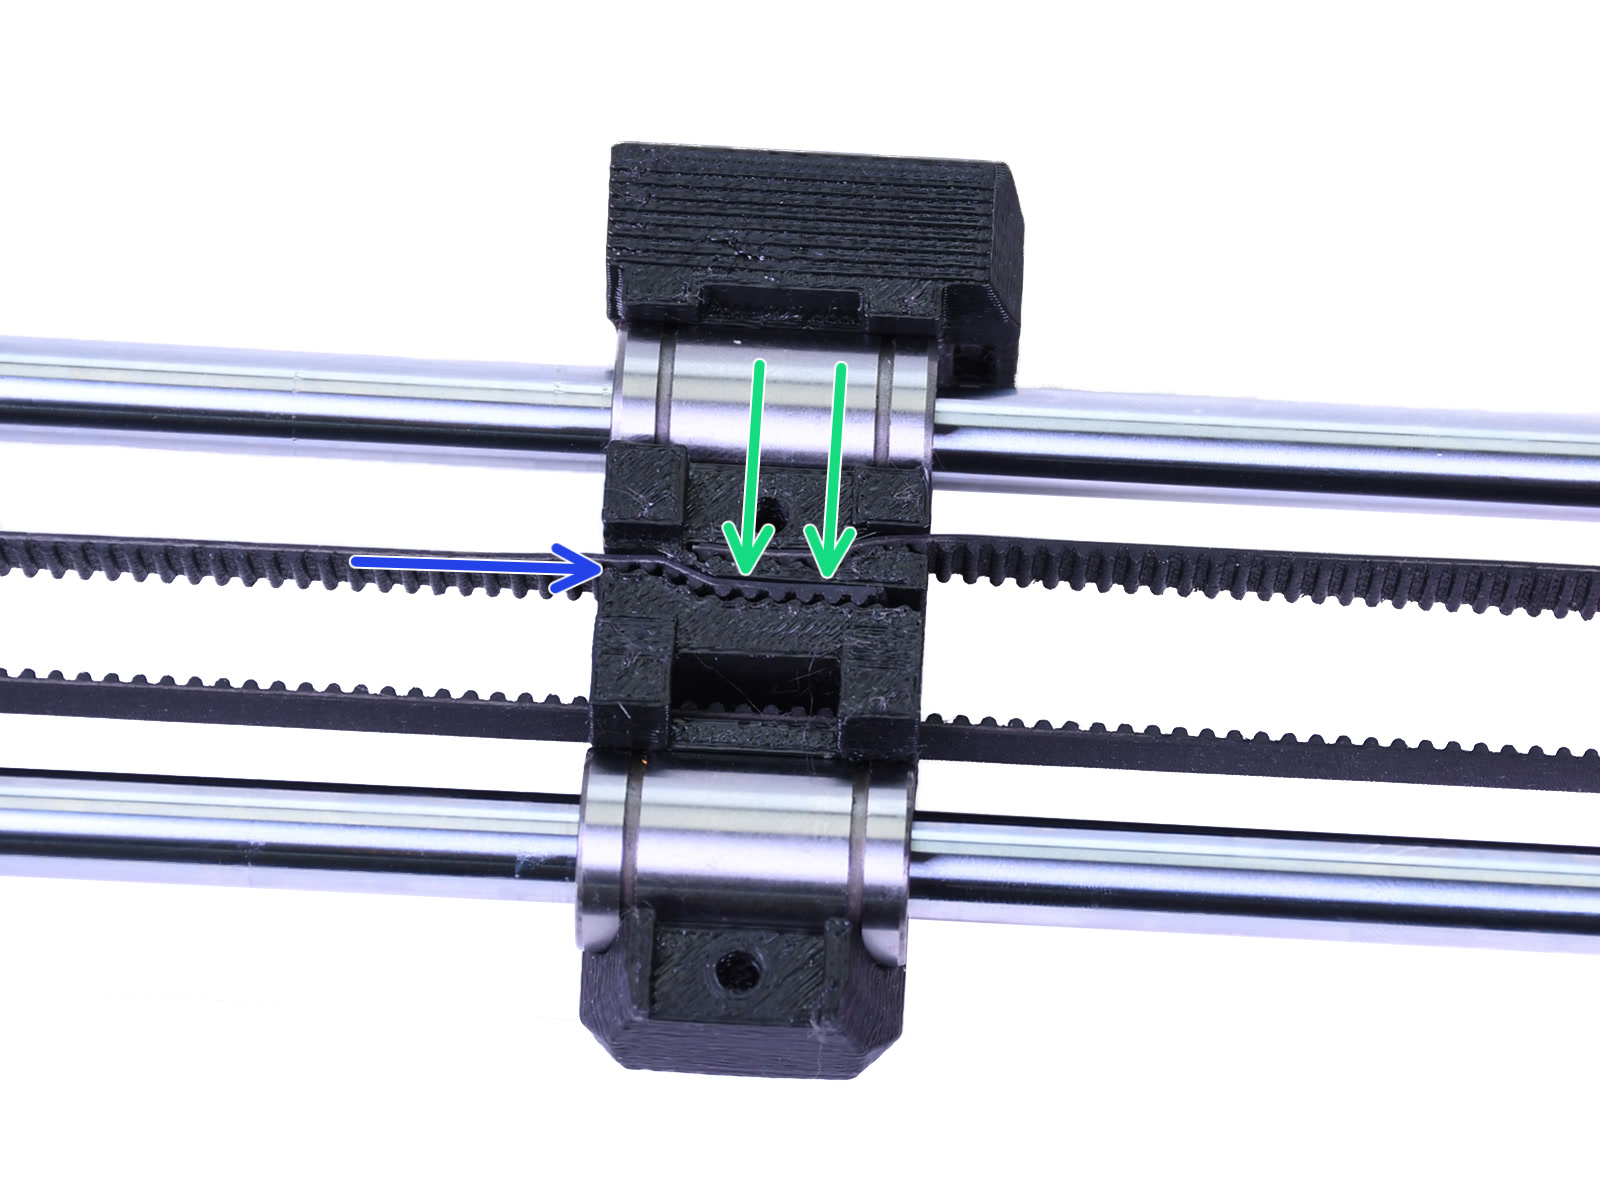
- Remove the belt from the middle slot (green arrows), move it in 2 - 3 'teeth' (blue arrow), and push it back into the slot, using a 1.5 mm Allen key.
- Follow the guide How to replace a heatsink (MINI/MINI+) backward from Step 10 to reassemble the print head.
- Adjust the tension of the belt following the method above.
Adjusting the Y-belt
Slight adjustments
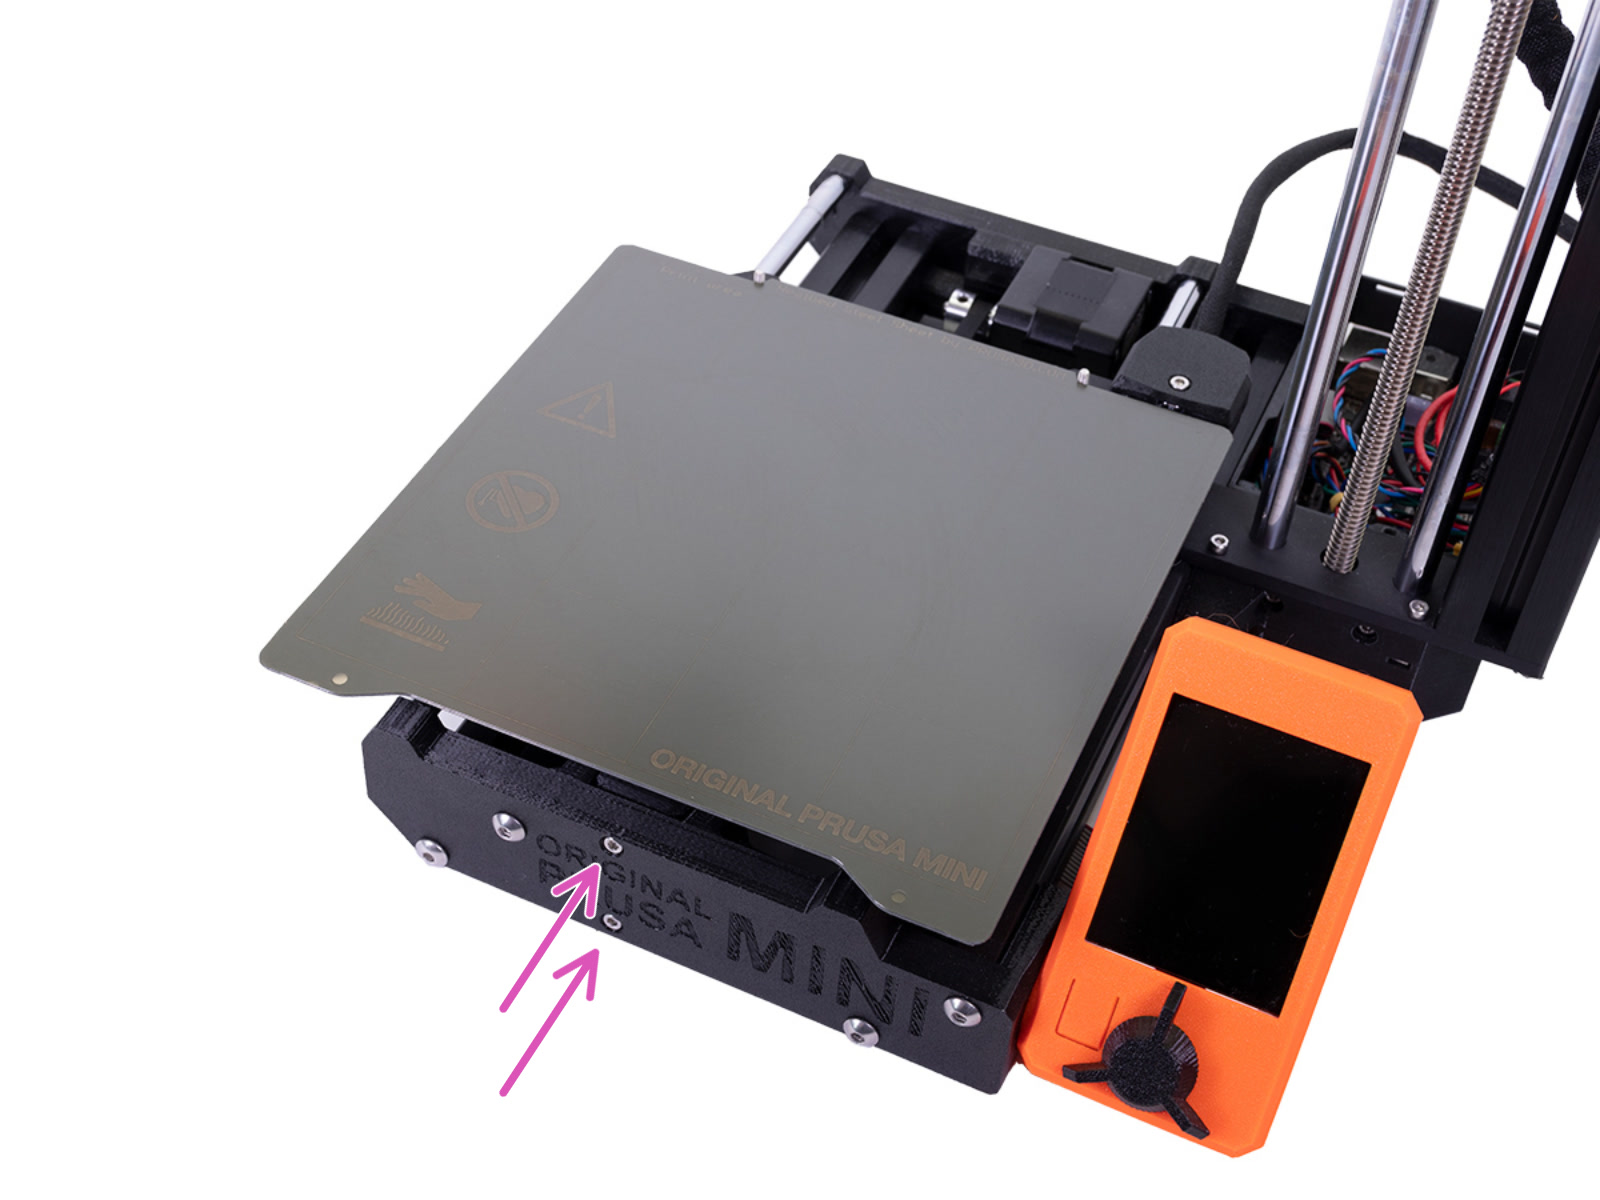
In the middle of the front plate of the heat bed assembly (purple arrows), you will find two screws that will adjust the tension of the Y-axis belt. Use the 2.5 mm Allen key and by turning them clockwise you will tighten the Y-axis belt.
Large adjustments
If the Y-axis belt is very loose you must move it in the Y-axis belt holder found beneath the bed carriage.
- Loosen the 2 screws in the picture above by turning them counterclockwise. Do not unscrew them completely.
- Turn the whole printer over to its side to access the bottom of the printer (left picture).
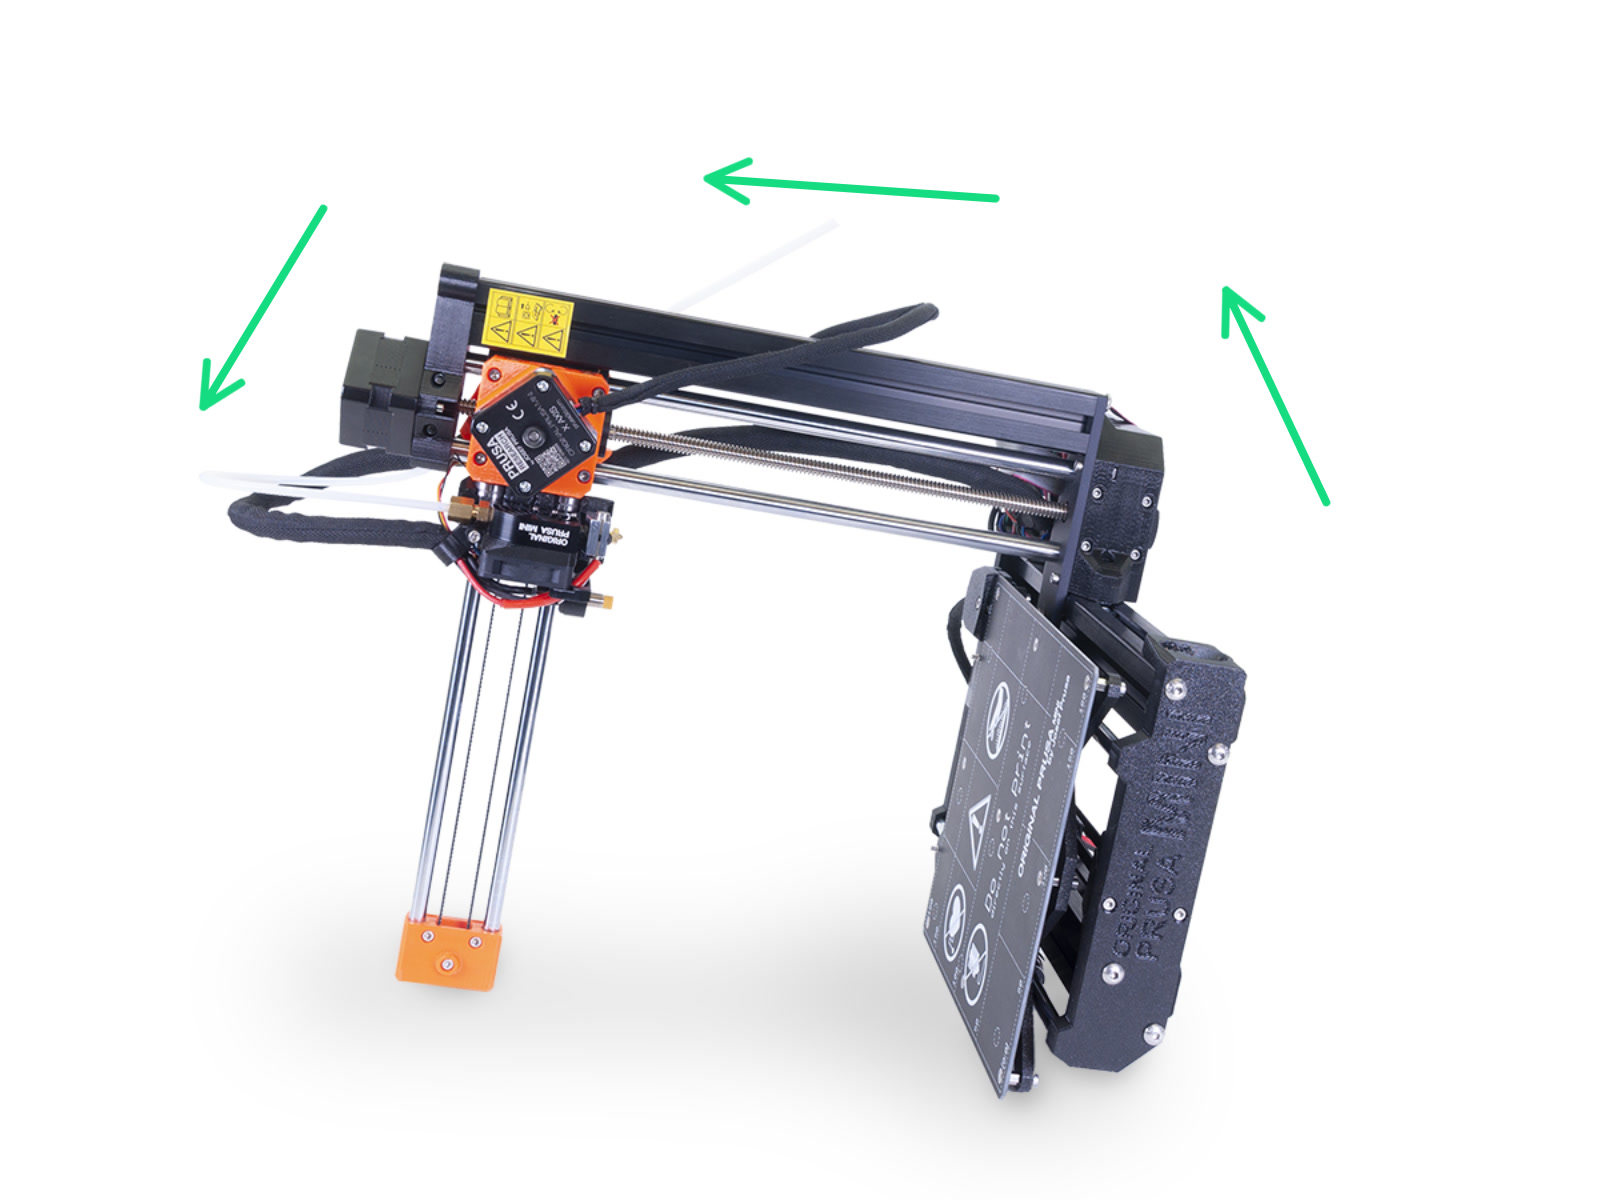 | 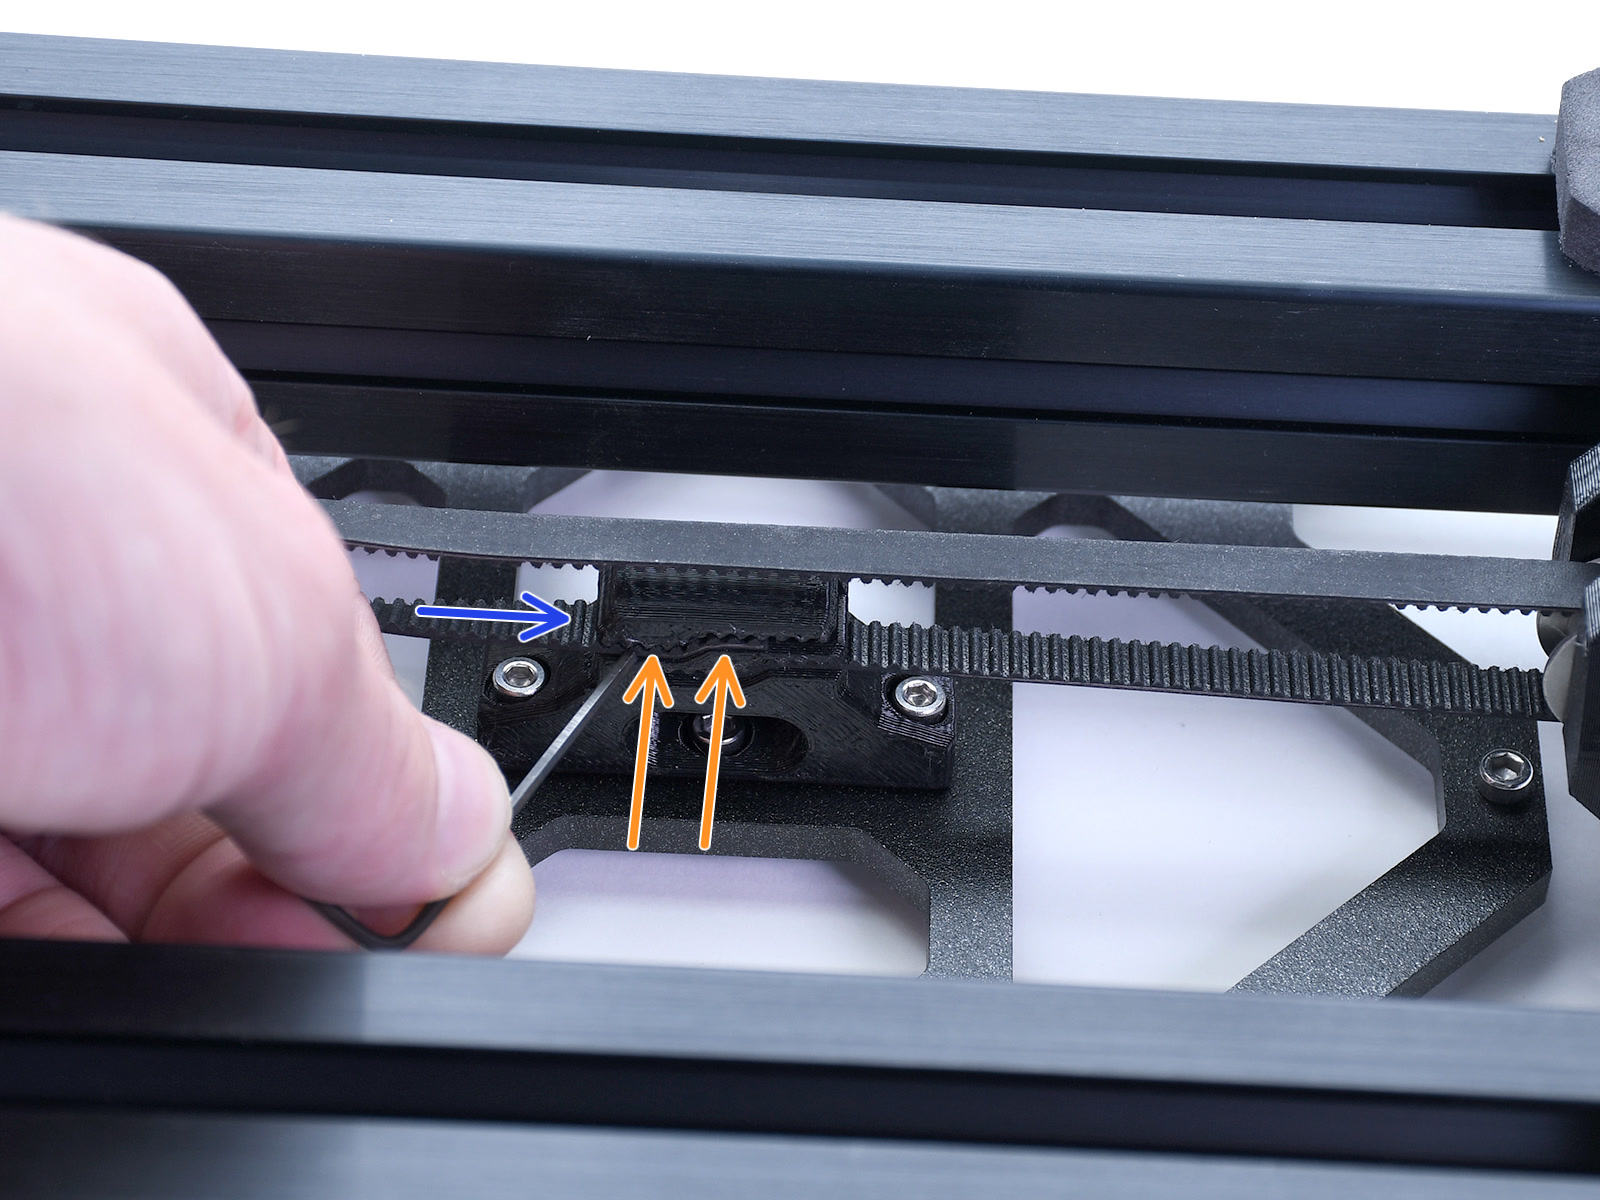 |
- Slide one end of the belt out from the belt holder (right picture), move the belt in 2-3 'teeth'(blue arrow), and push it back into the slot using the 1.5 mm Allen key (orange arrows).
- Turn the printer back right side up and fine adjust the belt tension with the two front screws (as described in the previous method).
9 comments
Switching to running the Belt Tuner on my PC and using a headset microphone produced much more consistent results. I use the Belt Tuner in conjunction with the Prusa Belt Tension meter, available on Printables: https://www.printables.com/model/46639-tension-meter-for-the-gt2-belts-of-i3-mk3s-or-prus
When they both agree, that seems to be as close to "right" as I get.
However, if the motor turns freely by hand, then the issue is indeed with the belt tension. You don't have to use the Belt Tuner if you're not comfortable with it. You can try to fine-tune it by "feel" with the help of test prints to see if you're still getting layer shifts. There are also various printable tools available, like the "Tension Meter for the GT2 belts," which can help you set the tension. It's a slightly slower process, but it lets you dial it in exactly to your needs.
This solved layer shifting at my printer whereas I originally thought the cause is wrong belt tension.