This article will guide you through the replacement of the nozzle on your Original Prusa MINI printer. Note that this requires you to have some tools available and also be careful while changing the nozzle as you might damage the printer or burn yourself.
Why change the nozzle?
There might be two reasons, why you need to replace the nozzle:
- The nozzle is worn out and needs a replacement.
- You want to print using a different nozzle diameter.
Preparation
- Get hold of a 16mm spanner, or an adjustable wrench to secure the heater block, plus a pair of pliers or a 7mm socket to unscrew the nozzle. A very large spanner or an adjustable wrench can quickly drain heat from the heater block and may cause a Thermal runaway error, depending on how it grips the block.
- Get a non-flammable surface to place the used hot nozzle on (i.e. plate or aluminum foil).
- Unload the filament. Optionally, do a coldpull.
Procedure
- Preheat the nozzle to 280 °C. Navigate to LCD Menu -> Control -> Temperature -> Nozzle. If your printer firmware version is up to 4.4.1, navigate to LCD Menu -> Settings -> Temperature -> Nozzle. Heating the nozzle is essential for this process!
- Gain better access to the nozzle by moving the extruder axis as high as possible. Navigate to LCD Menu -> Control -> Move Axis -> Move Z. If your printer firmware version is up to 4.4.1, navigate to LCD Menu -> Settings -> Temperature -> Nozzle.
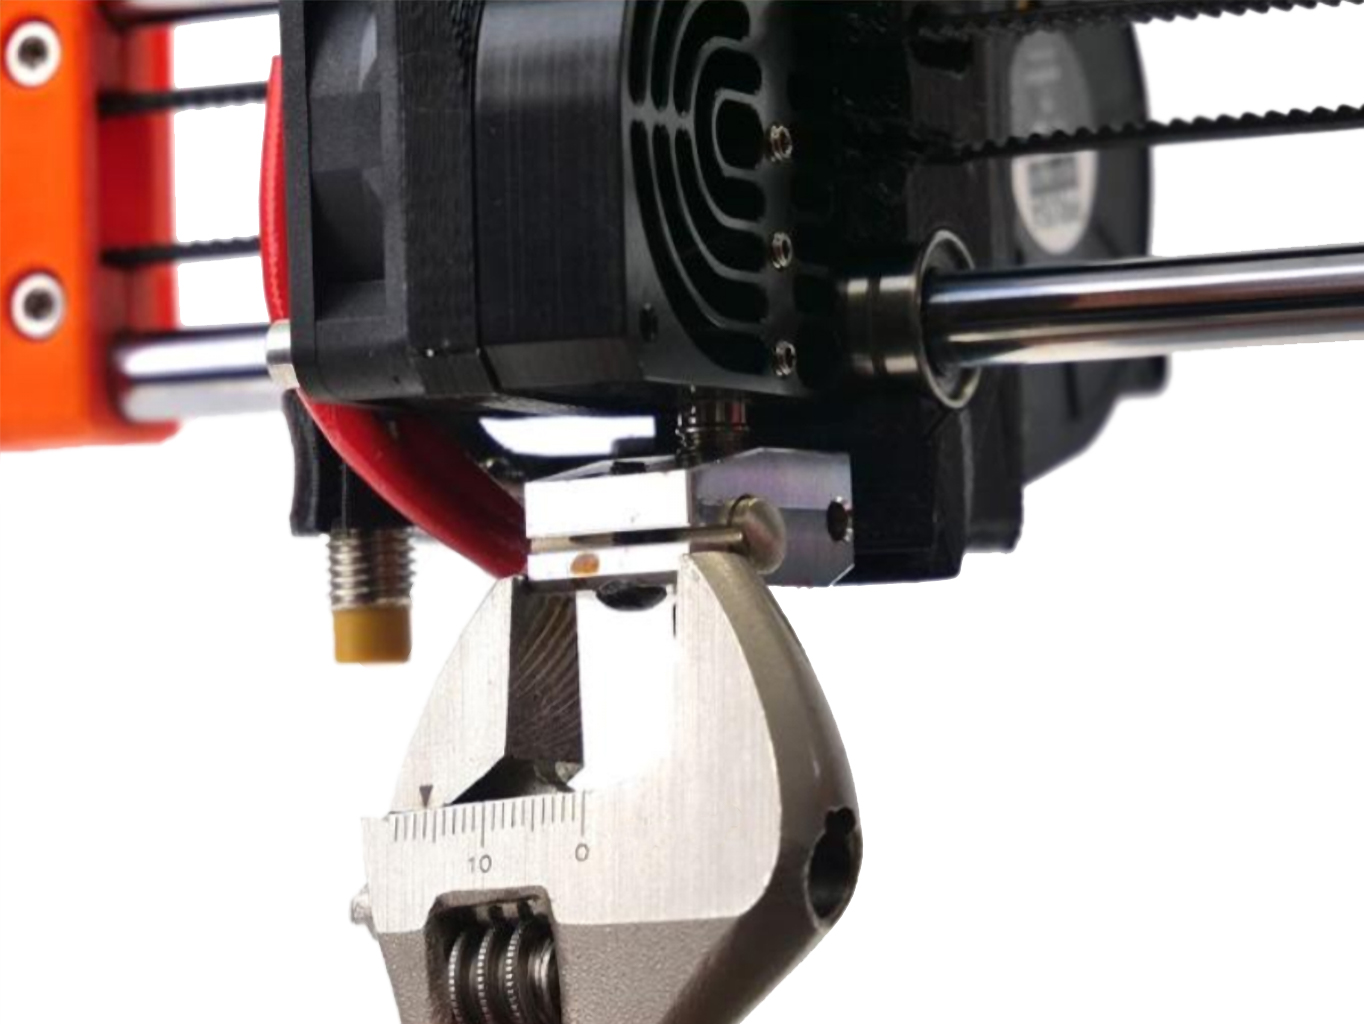
- Hold the heater block with a 16mm spanner (or an adjustable wrench).
- Use pliers, or preferably a 7mm socket, to unscrew the nozzle. Be careful, the nozzle is still hot!
- Place the extracted hot nozzle on your non-flammable surface and put it out the way so you don't accidentally touch or lean on it.
 | 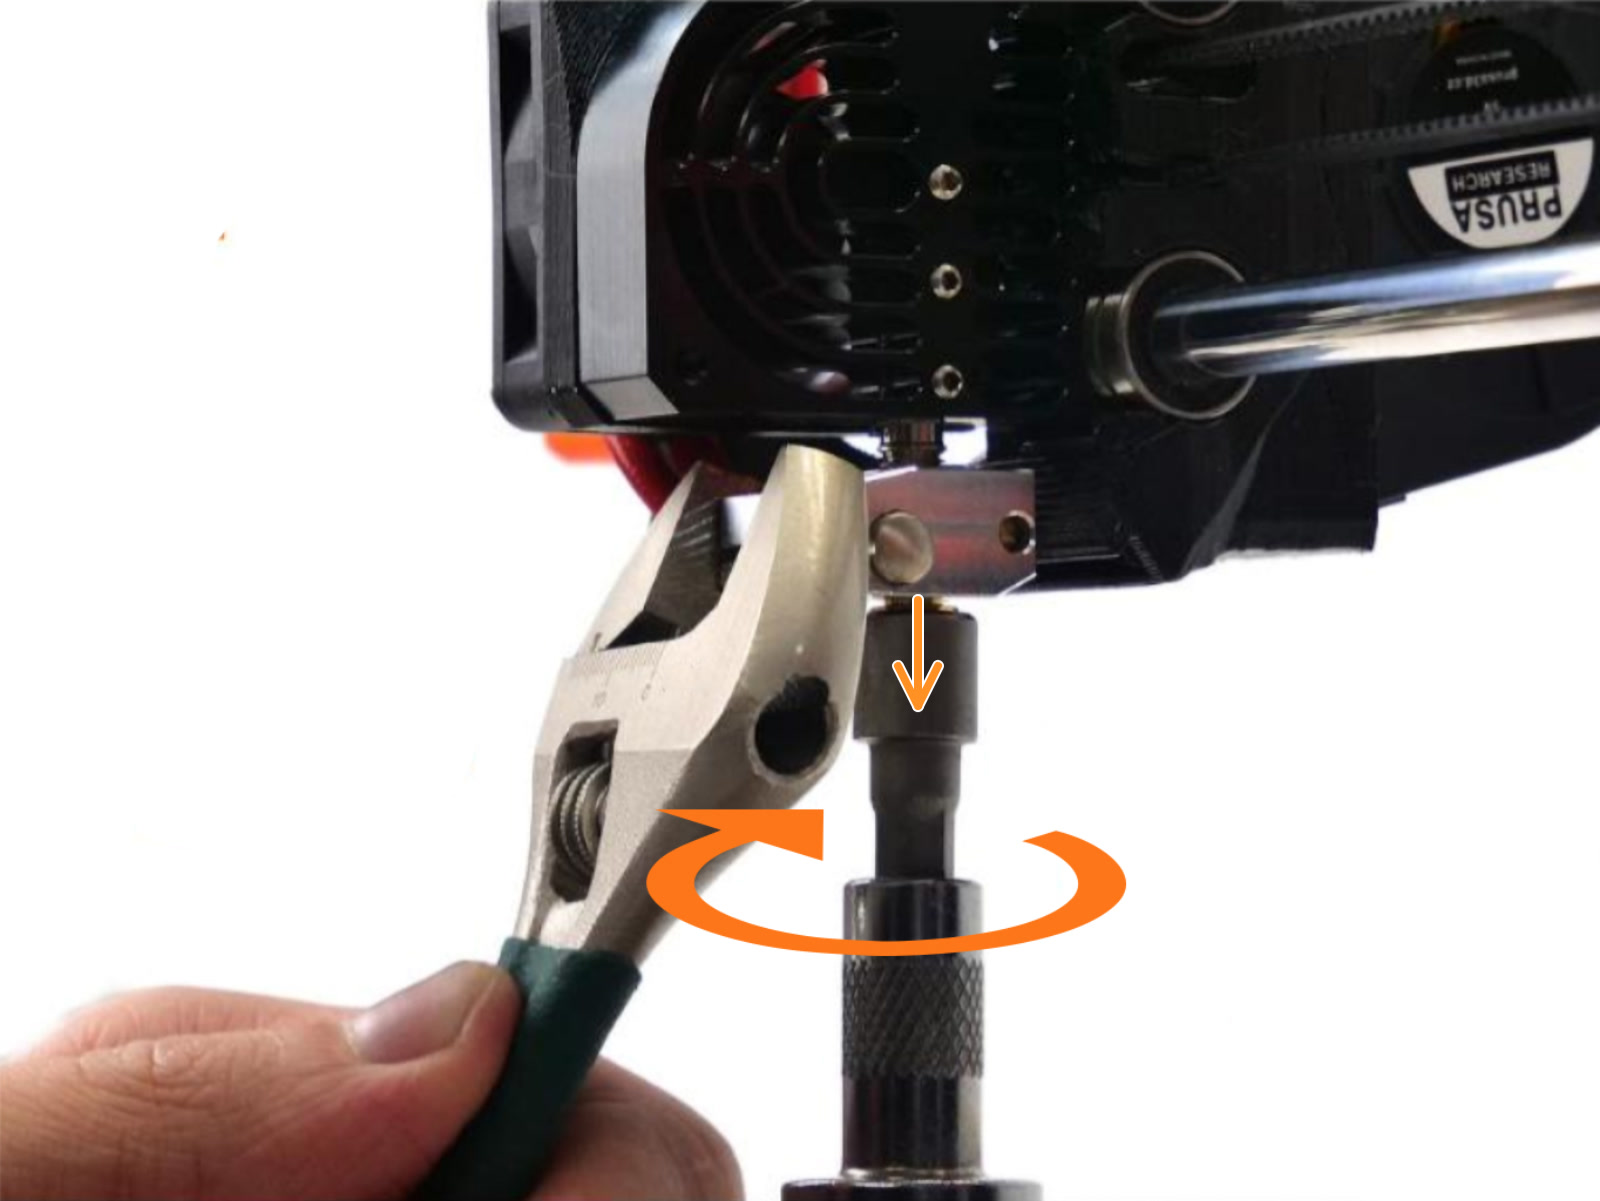 |
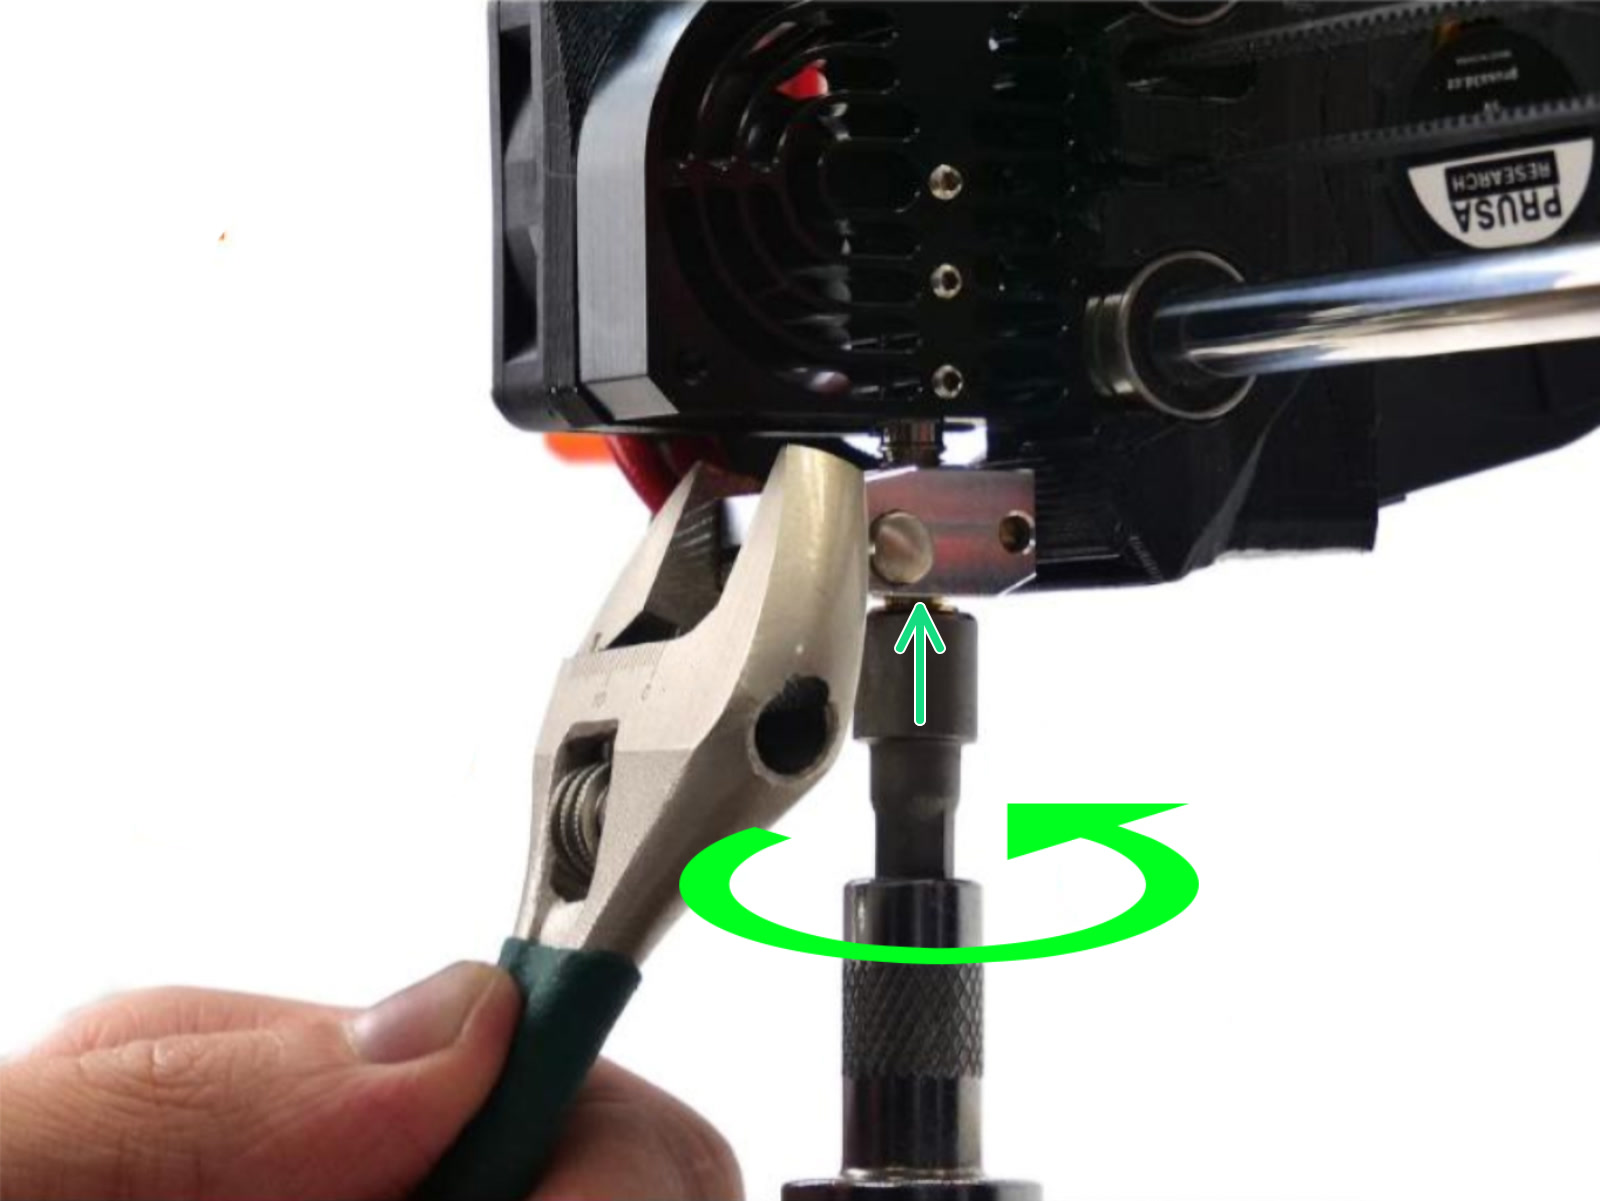
- While the print head is still heated and holding the heater block in place with the spanner, insert the new nozzle and tighten it gently, but firmly. Do not use excessive force!
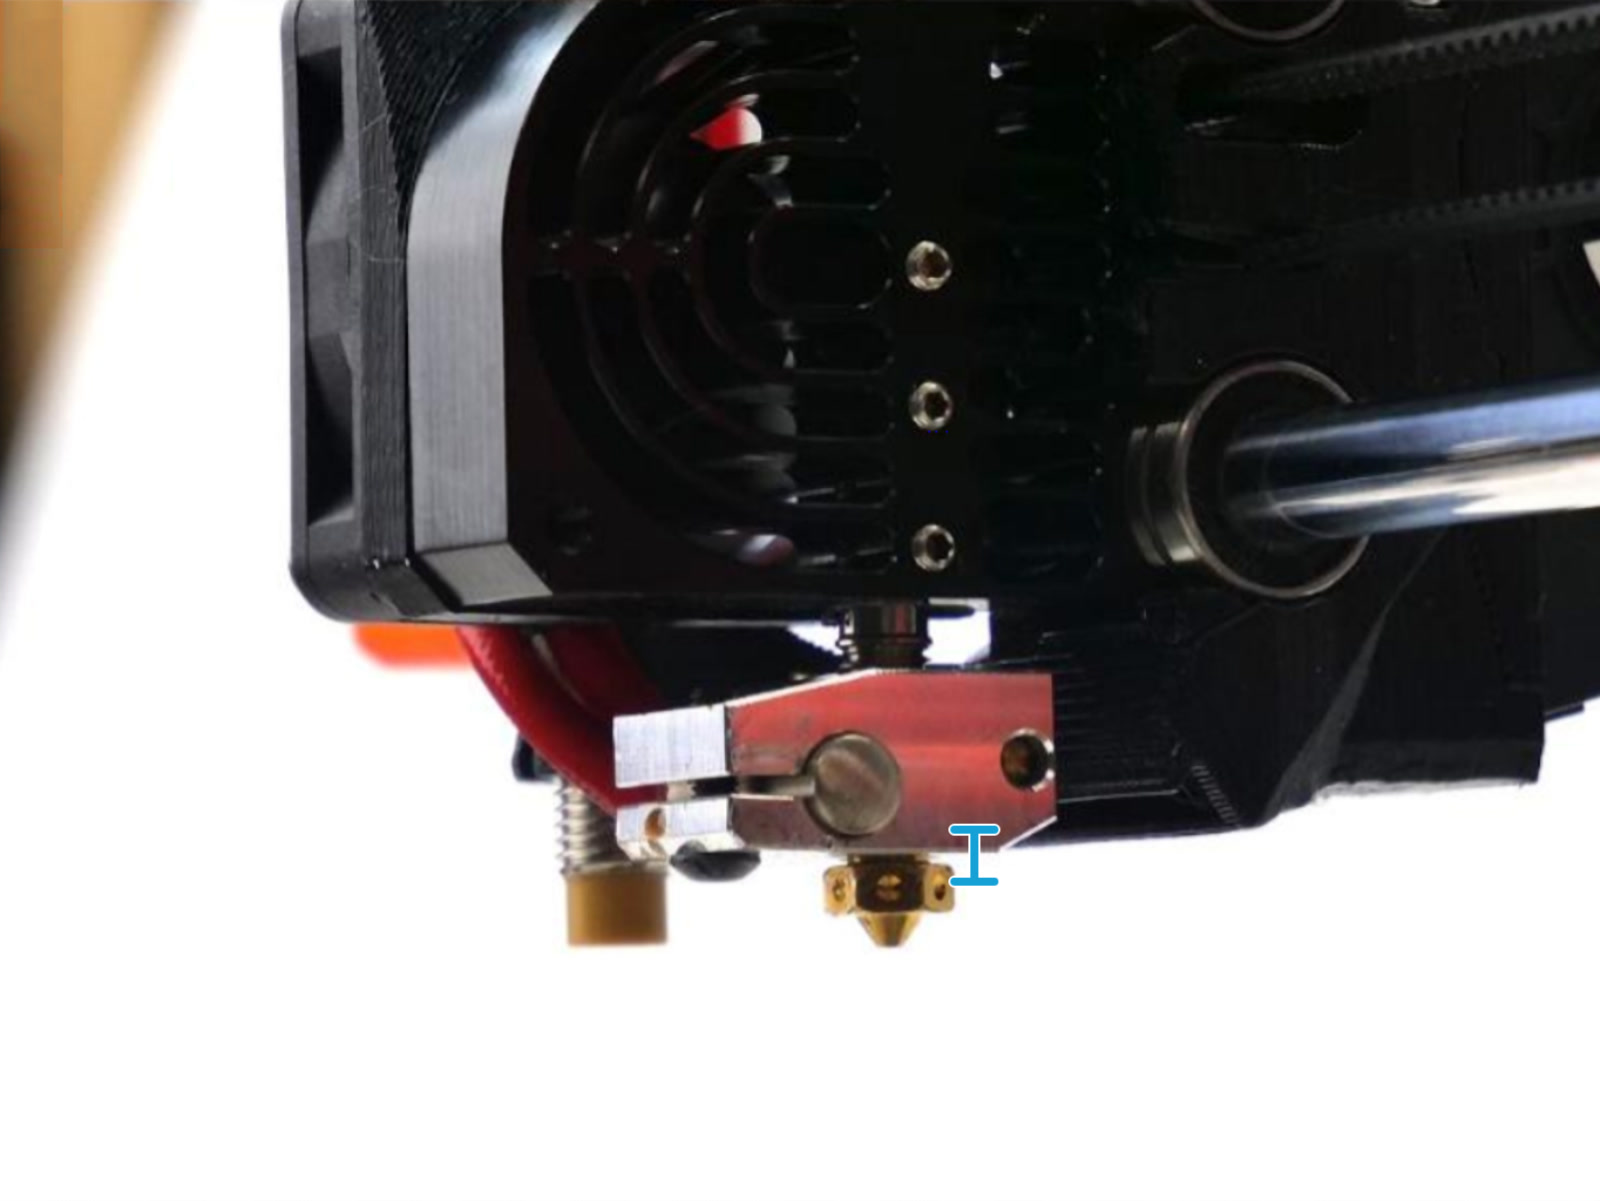
- As soon as you can't screw the nozzle in anymore, check if there is a slight gap between the nozzle and the heater block (blue marker). More details are explained below.
 |  |
Final inspection
There must always be a gap (~0.5 mm) between the nozzle and the heater block (blue marker/Green arrow). This is important to make sure the nozzle is 'locked' against the heatbreak, creating a seal. If there is no visible gap between the nozzle and the heater block, it can indicate that the nozzle didn't reach the heatbreak, which can lead to leaks and clogs (red arrows).
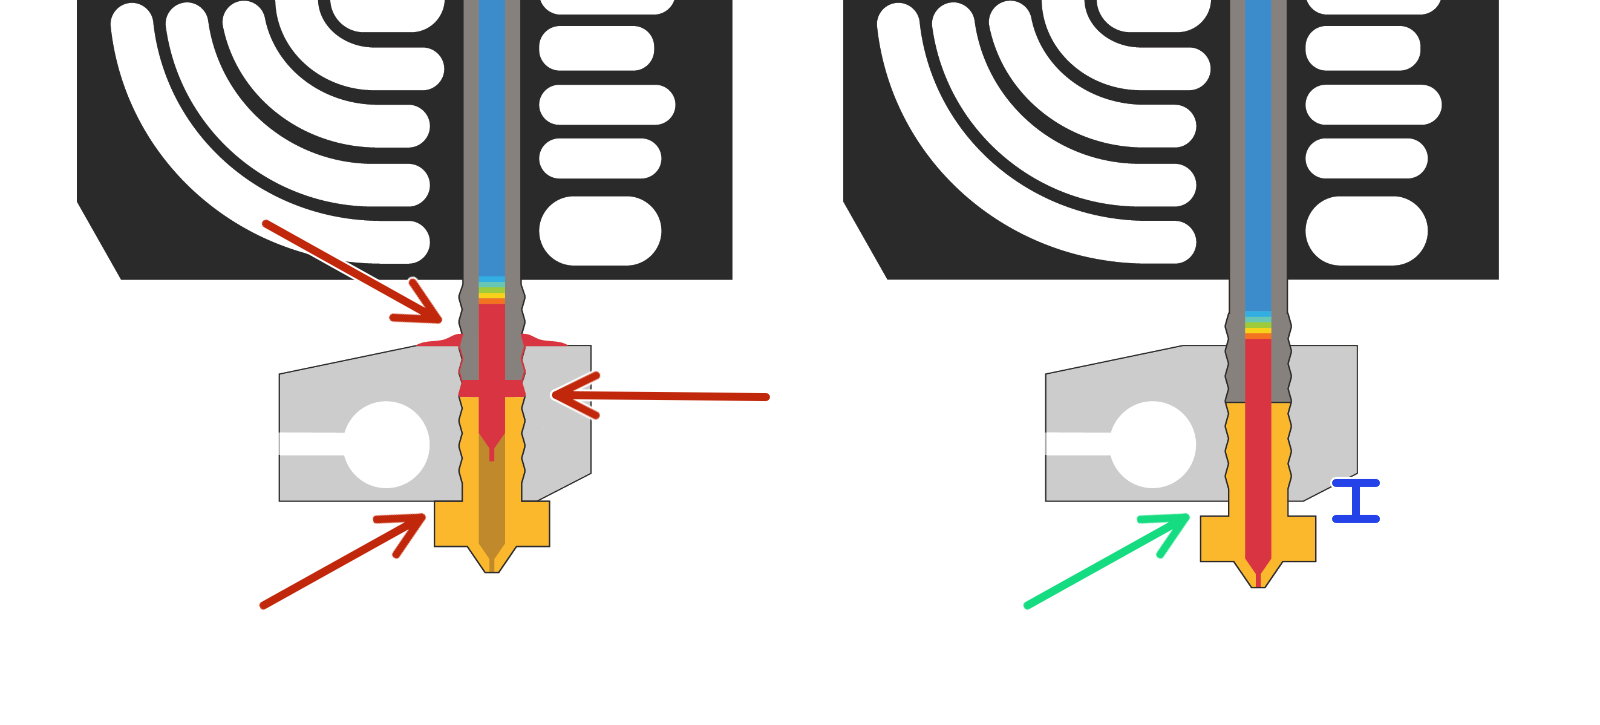 Oppositely, if the outside gap is too large (several millimeters), it can change the thermal properties of the hotend, and the printer will struggle to reach and hold the set temperature.
25 comments
"The stock 0.4mm Nozzle installed on the Original Prusa MINI can be found in the eshop. The printer is also compatible with E3D V6 nozzles."
The same ranges are used for the MK3 can be applied for the MINI+
It required a switch off and restart before I could do the 1st Layer Calibration.
I suspect (can anyone confirm?) that the sudden drop in temperature from 280C to whatever the new nozzle reduced it to, made the software panic.