A cold pull is a technique used to clear the printer’s hotend and nozzle of possible obstructions such as filament and other debris. It is also recommended to be part of the regular printer maintenance routine. A cold pull can usually only be used if the filament is able to reach the nozzle. If there is an obstruction, a cold pull will most likely not be able to resolve this. Please see Clogged nozzle/hotend (MINI/MINI+) instead.
If you are using a Nozzle X, only use cleaning filament. Do not use the cold-pull method as this can damage the nozzle.
We recommend using regular PLA or specific cleaning filaments for this procedure. Using a different color from what you were recently printing with can make it easier to see if the nozzle is clear.
Procedure
- Unload any filament that is loaded by going to Filament -> Unload filament -> [PLA, PETG, ABS etc.] on the LCD-menu
- Move the hotend to the right side of the X-axis to reduce strain on the X-axis during the following steps.
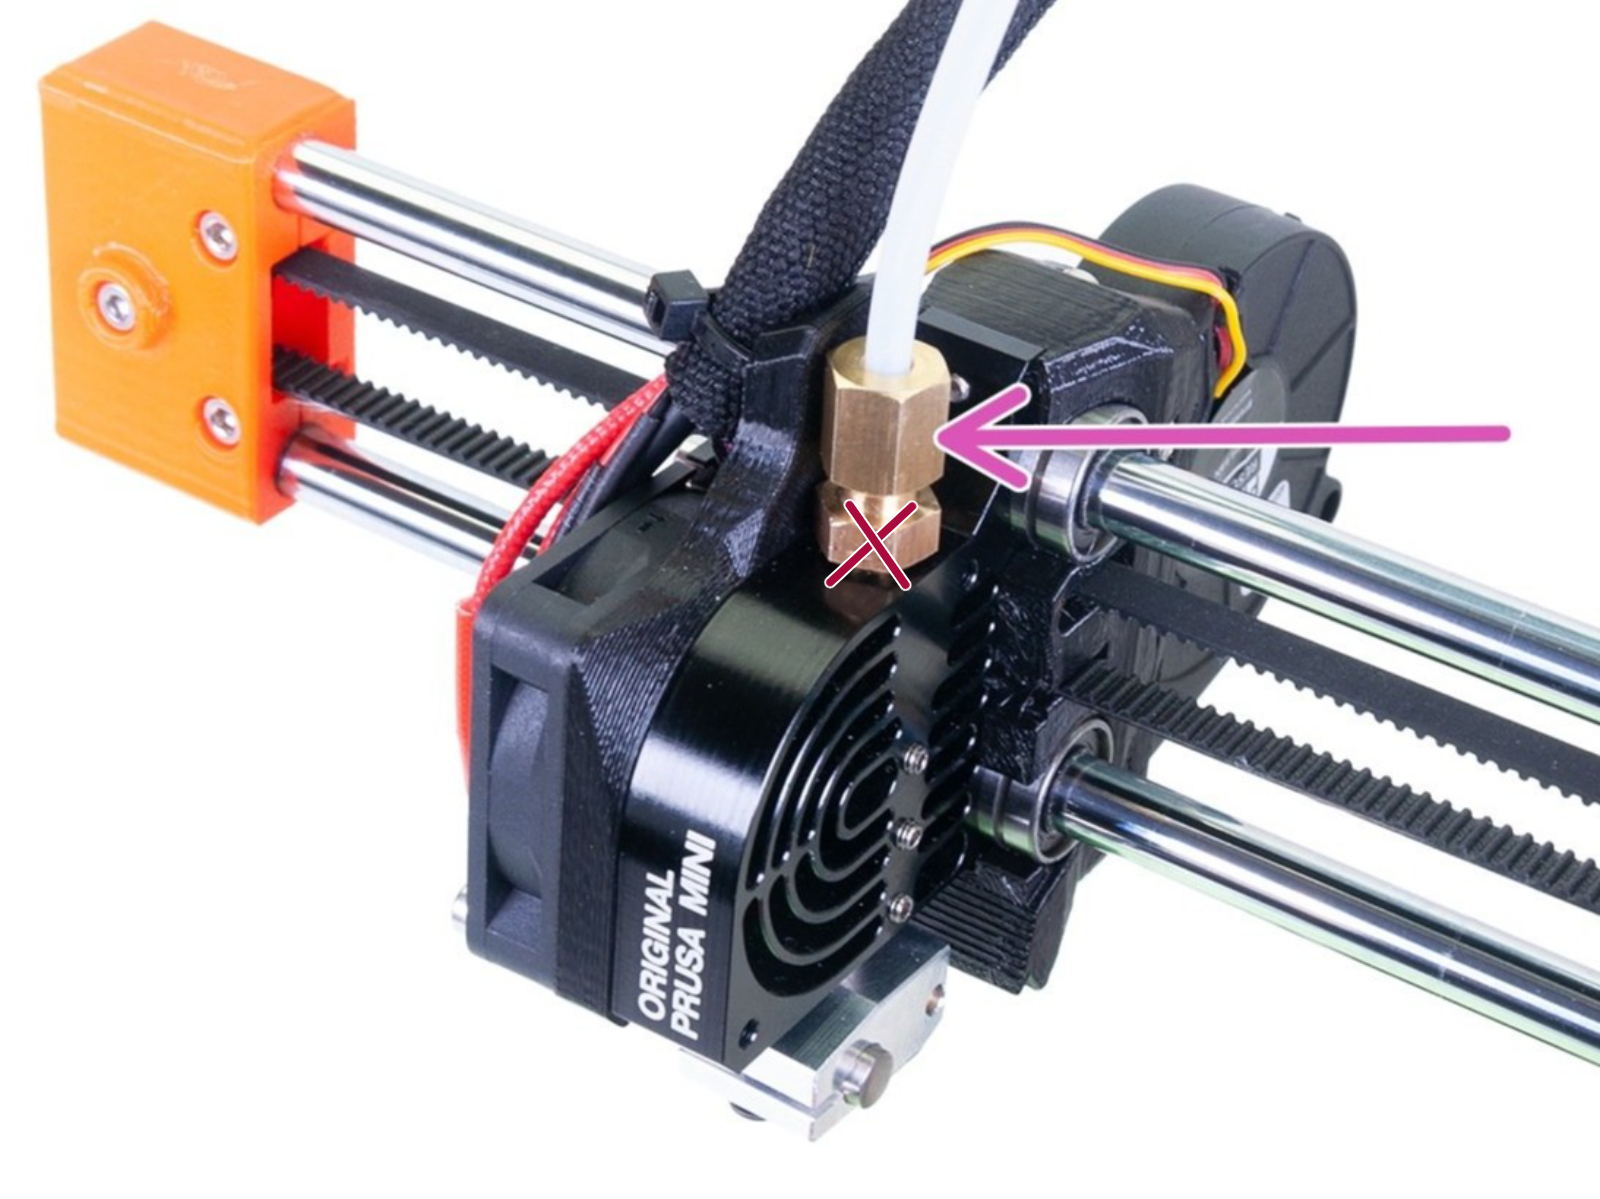
- Unscrew the large brass nut (purple arrow) holding the long PTFE tube by using a 10mm spanner and rotating it anticlockwise. The lower portion of the brass fitting should not be unscrewed and removed!
- On the printer display, go to Settings -> Temperature -> Nozzle, and set the value to 270 °C (or as indicated for your cleaning filament) to start heating the nozzle.
The nozzle is now very hot! Don't burn yourself.
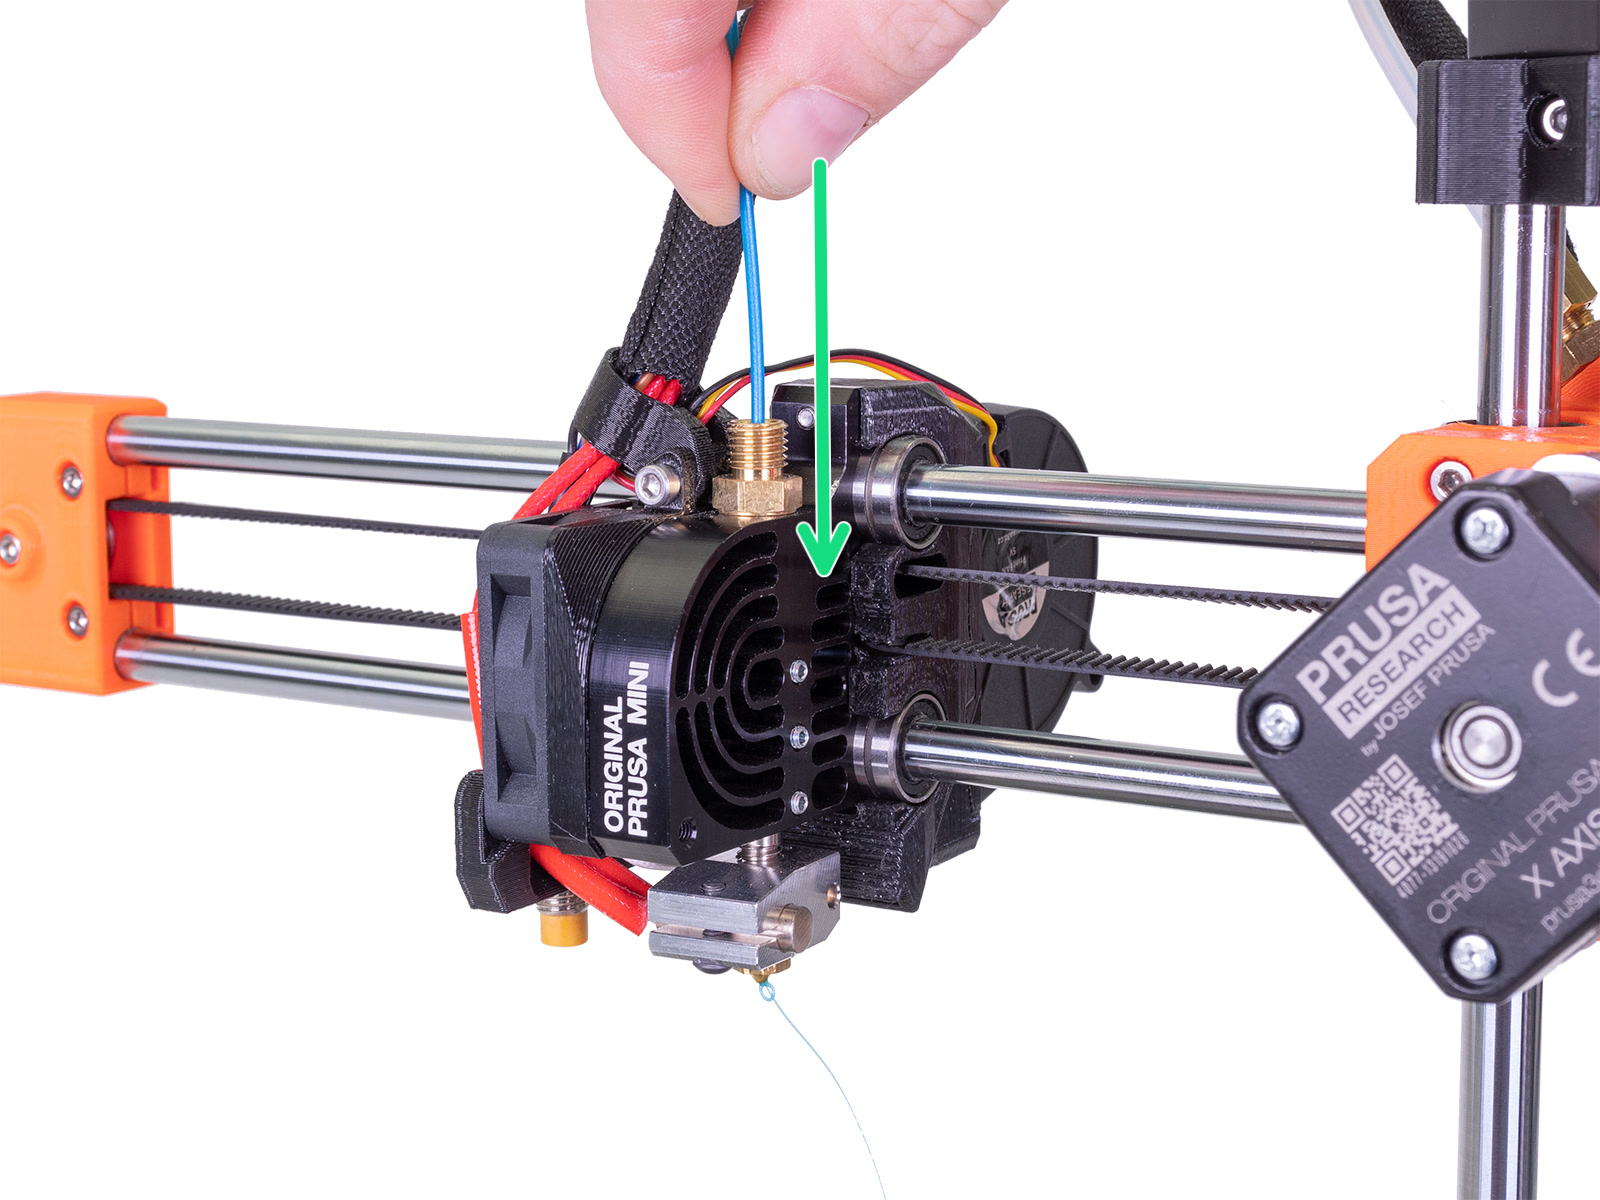
- Insert the filament into the hotend from the top that was exposed in step 3. Make sure that the filament tip is cut to make inserting it easier.
- From the printer display, select Cooldown from either the Temperature or Preheat menu, or simply hit the Reset button on the printer.
- While the hotend is cooling down, continuously push the filament down so that it extrudes from the nozzle. Do so until it cools down to the point where you can’t push anymore through (around 160 - 170 °C).
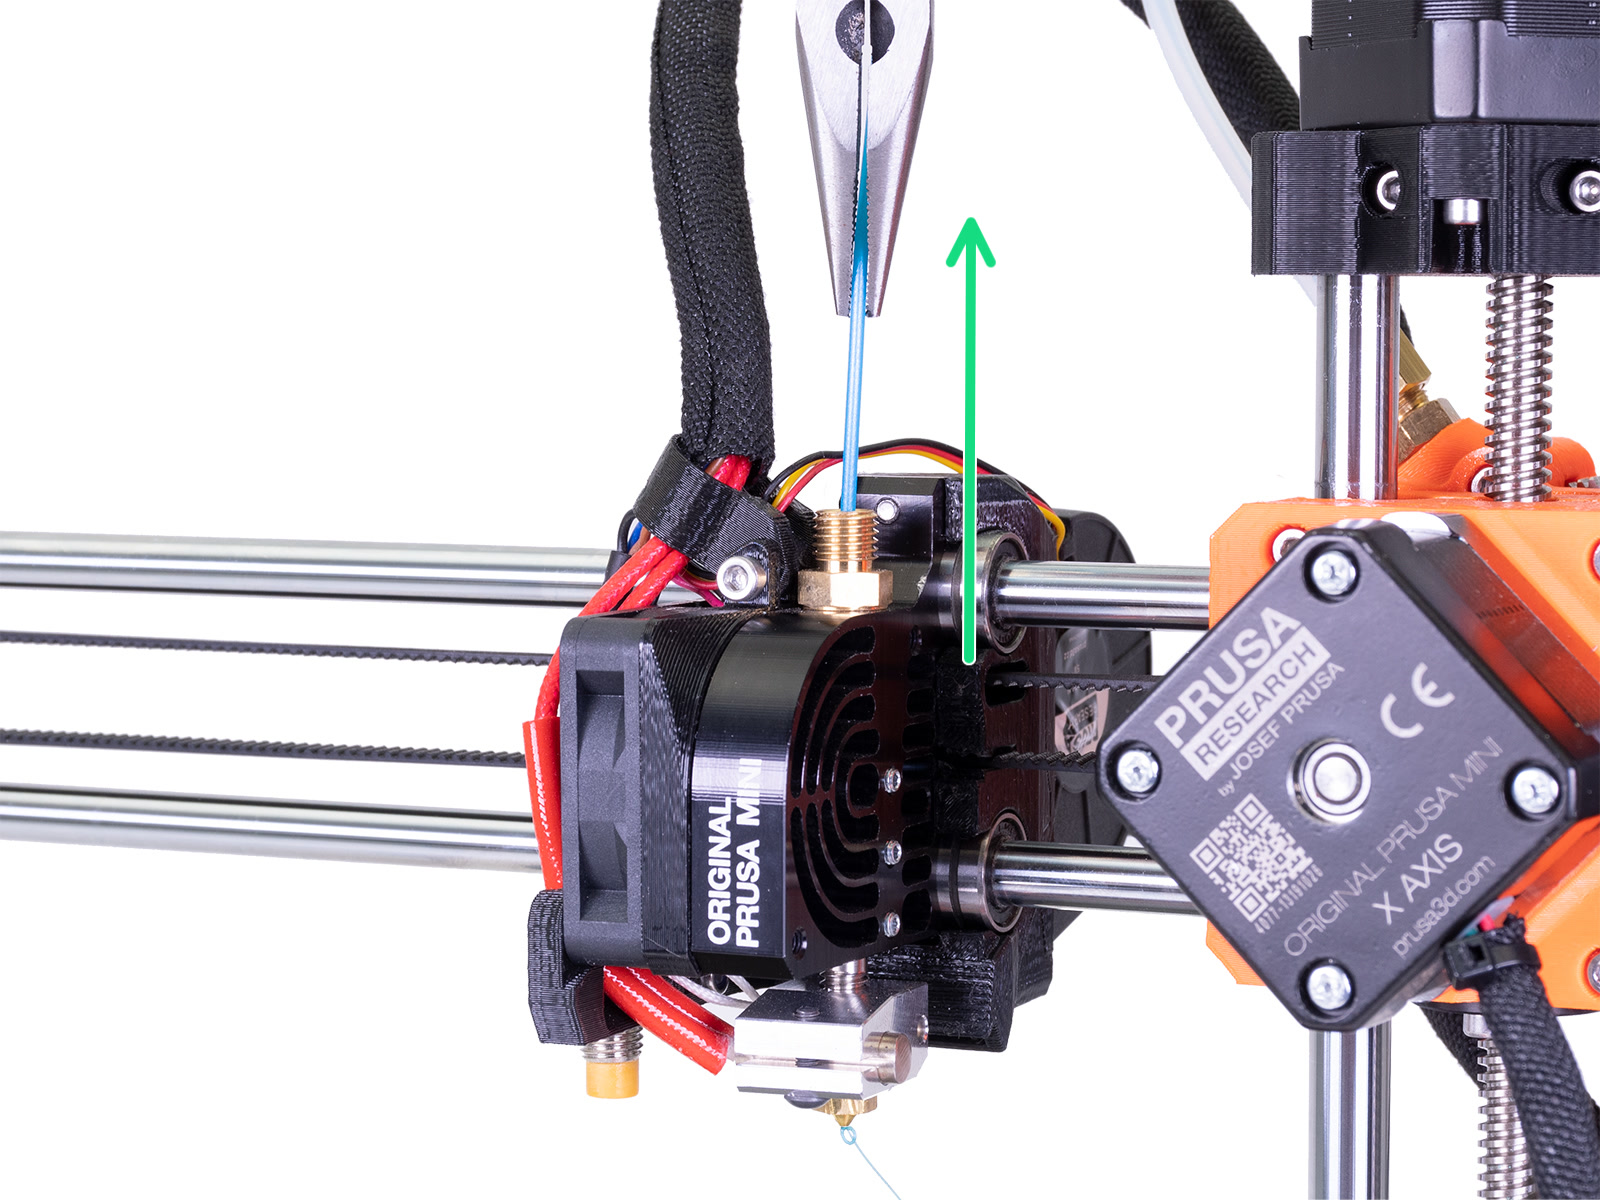
- When the temperature is near 90 °C (95-90 °C), hold the X-axis arm to support it, and pull the filament straight up using your hands or pliers, out of the extruder. Pull it firmly and steadily.
Be careful! Harshly jerking the filament out can cause it to break inside the hotend or even damage the printer. Make sure to pull straight upwards, not at an angle.
- Inspect the filament tip once pulled out to confirm that it’s clear of any old filament or burn marks; if it’s still not clean, repeat the process again.
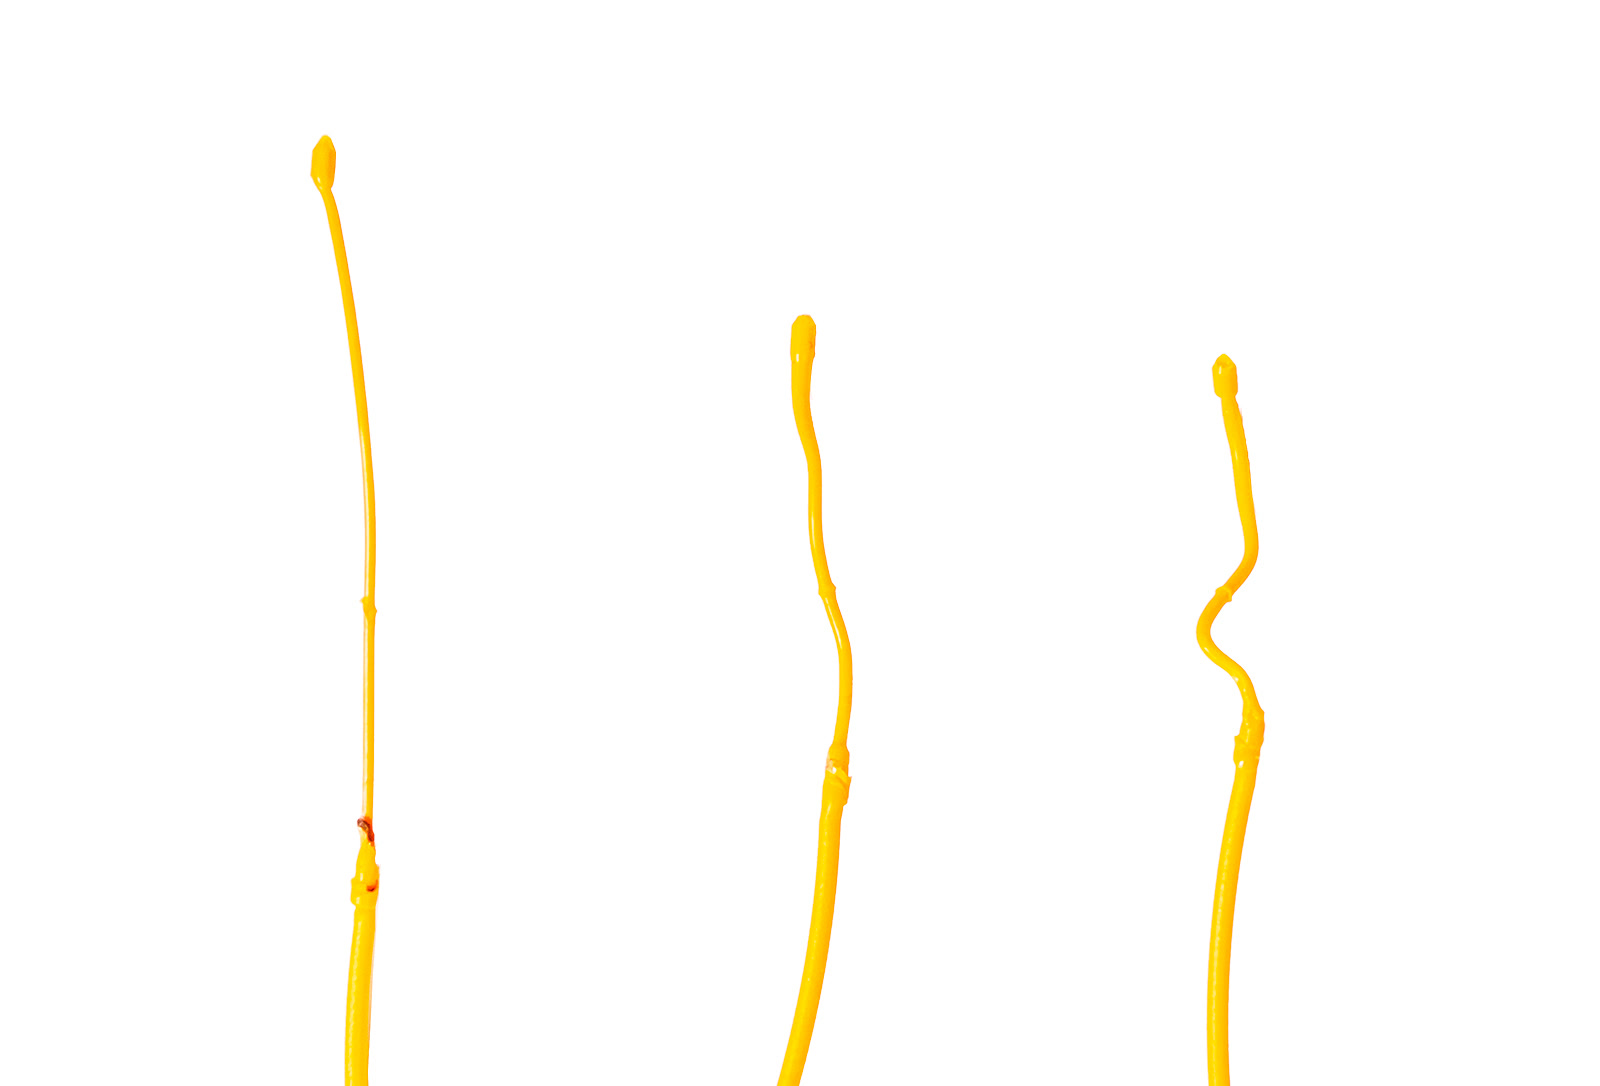
Three cold pulls in a row, presented from left to right.
- Repeat steps 4 to 8 at least one more time to ensure that the nozzle is clear and clean of any remaining filament.
- Resecure the brass fitting from step 3 firmly, using the 10 mm spanner to tighten it. After removing the extruded filament from the heatbed, the printer is ready for use.
Was this article helpful?
This action is available only to registered users. Please log-in.
12 comments
Use Menu: Settings / temp
Well the NozzleX is not a standard part, so you would have to have installed it beforehand. NozzleX nozzles are black instead of a brass color.
The procedure can be stopped when you see that the filament comes out with no remains from other filaments.
I have seen a better process, slightly more lengthy but IMHO works better. Heat to 200, push in the PLA and turn off nozzle heater, keep pushing fimanent down till it stops, let the extruder totally cool down, heat up to 2oo and gently keep pulling till it comes out, keep repeating till the white filament shows zero dirt, this could take many attempts. continue even if clean as later pulls come out dirty
You should not remove the whole fitting, only the top part securing the Bowden tube. Have a look at the pictures above again. If you can see the hotend PTFE you have removed too much;)