Do you need to send your Multi Material upgrade back for a refund or repair? Unlike in the case of a return shipment of a single part, when returning an assembled Multi-material upgrade we would like you to follow some guidelines to prevent any damage during the transport.
Return for refund
If you are returning the MMU2S for a refund, you must include everything that came with the MMU2S Upgrade Kit. This includes:
- Power cable, signal cable, USB cable
- All PTFE tubes
- Spool Holders (base, bearings, shafts, and endstops)
- Filament buffer
- Pliers, screwdriver, Allen keys
Return for repair
Since the MMU2S relies on an Original Prusa MK3S/MK2.5S for its operation, the MMU2S can only be sent to repair accompanied by the printer. Since we can not guarantee a working system without the printer, any standalone MMU2S we receive will be returned without inspection or repair.
In the package for repair, you do not have to include everything. You can keep the tools (pliers, screwdriver, Allen key), as well as the cables, buffer, and the spool holder, but please include the flexible magnetic steel sheet (if you have more sheets, always include the one that you are using when the problem happens).
We also need you to send us a 1 m sample of each filament that was giving you a hard time, and the SD card with the G-code that you had trouble printing. Please include a copy of the original STL file too.
List of packaging material
Cardboard box
For packing the printer, follow the procedure outlined in Packing i3 printer for return. The MMU2S is packed in the printer's box, so please see this guide to the end before sealing up the box.
For the MMU you need an additional box. You can use the accessories box that comes with the printer, or if you do not have it, use a box at least 23 x 21 x 10 cm / 9 x 8 x 4 in.
Packaging material
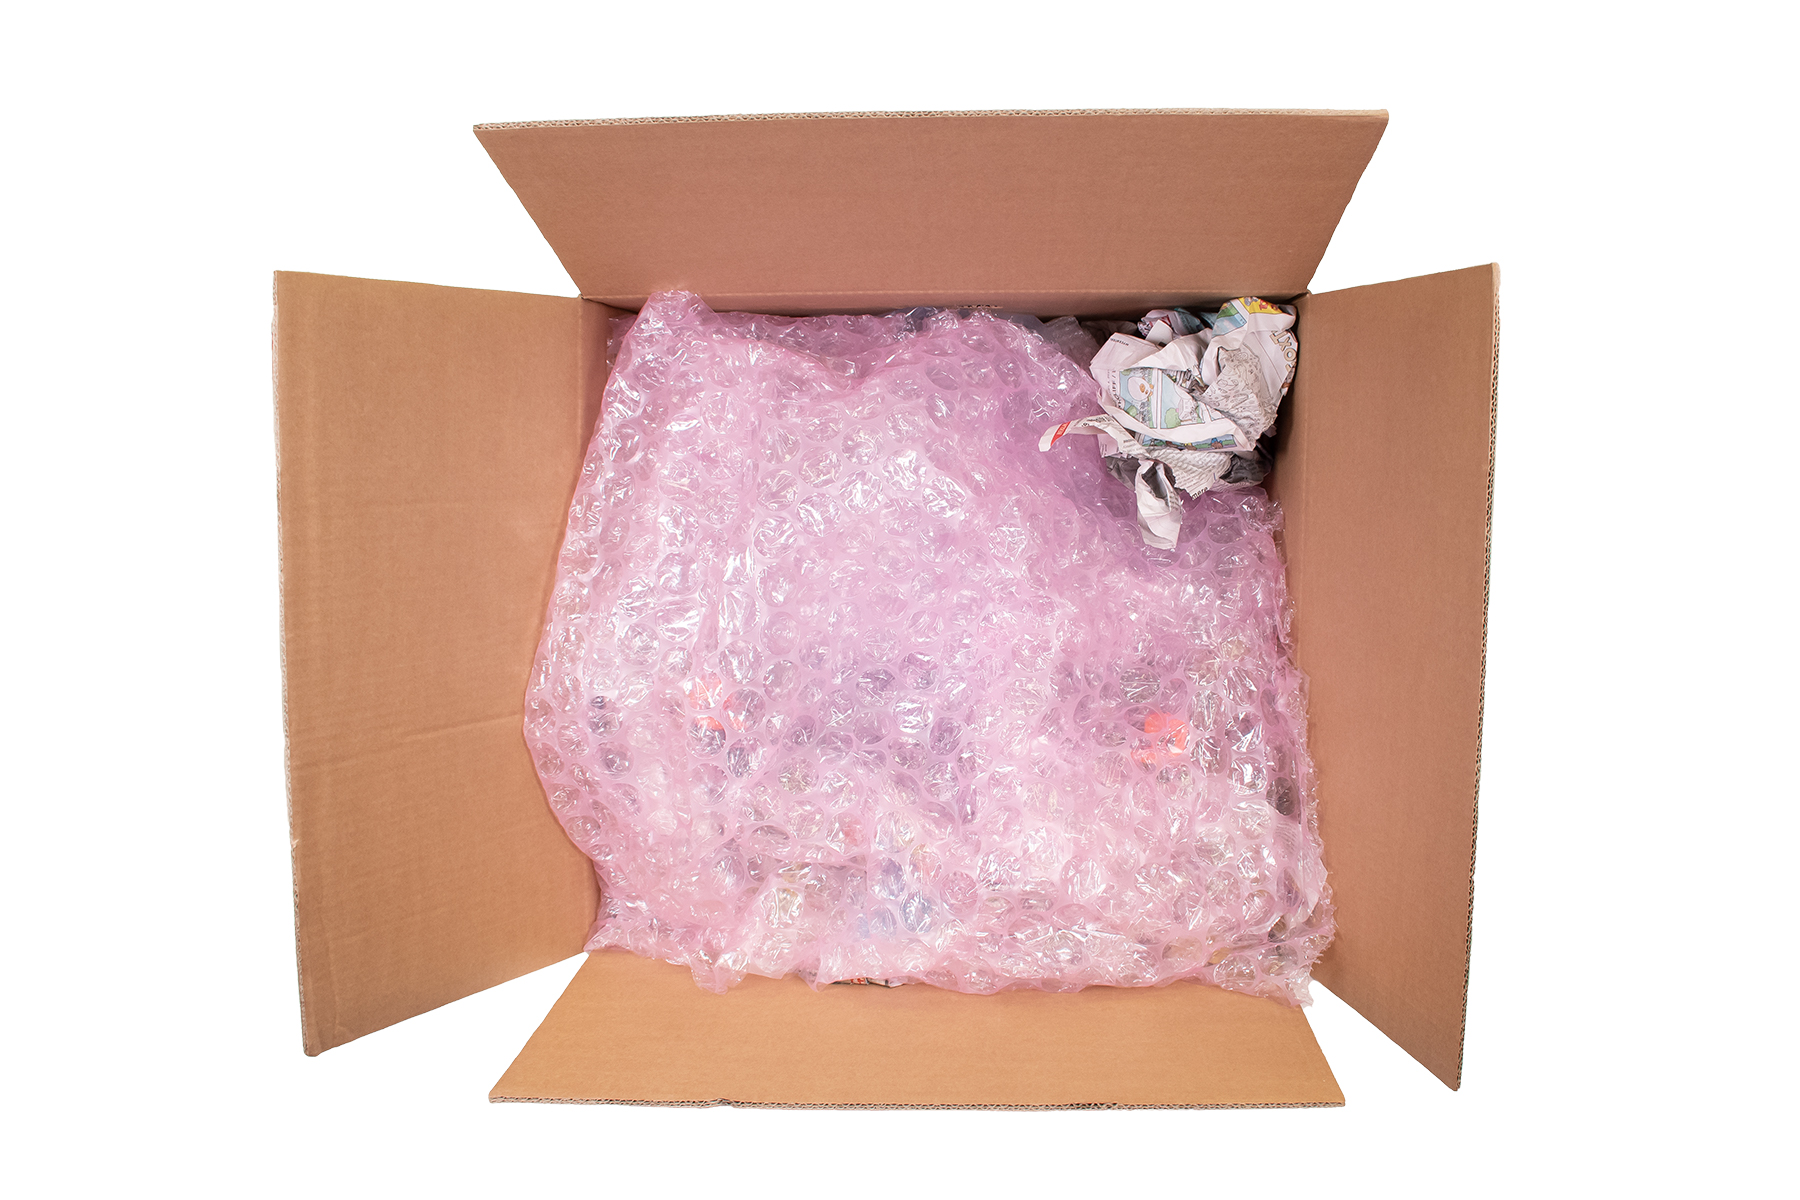
The MMU needs to be packed in a way that it is secured, and does not move inside the box. For that, you can use bubble wrap, crumpled-up paper, old newspaper, or ads. Do not use foam peanuts or shredded paper.
How to pack the Multi Material upgrade
Before you start packing it down, get out your phone or camera to take pictures of the printer before and during the packing process.
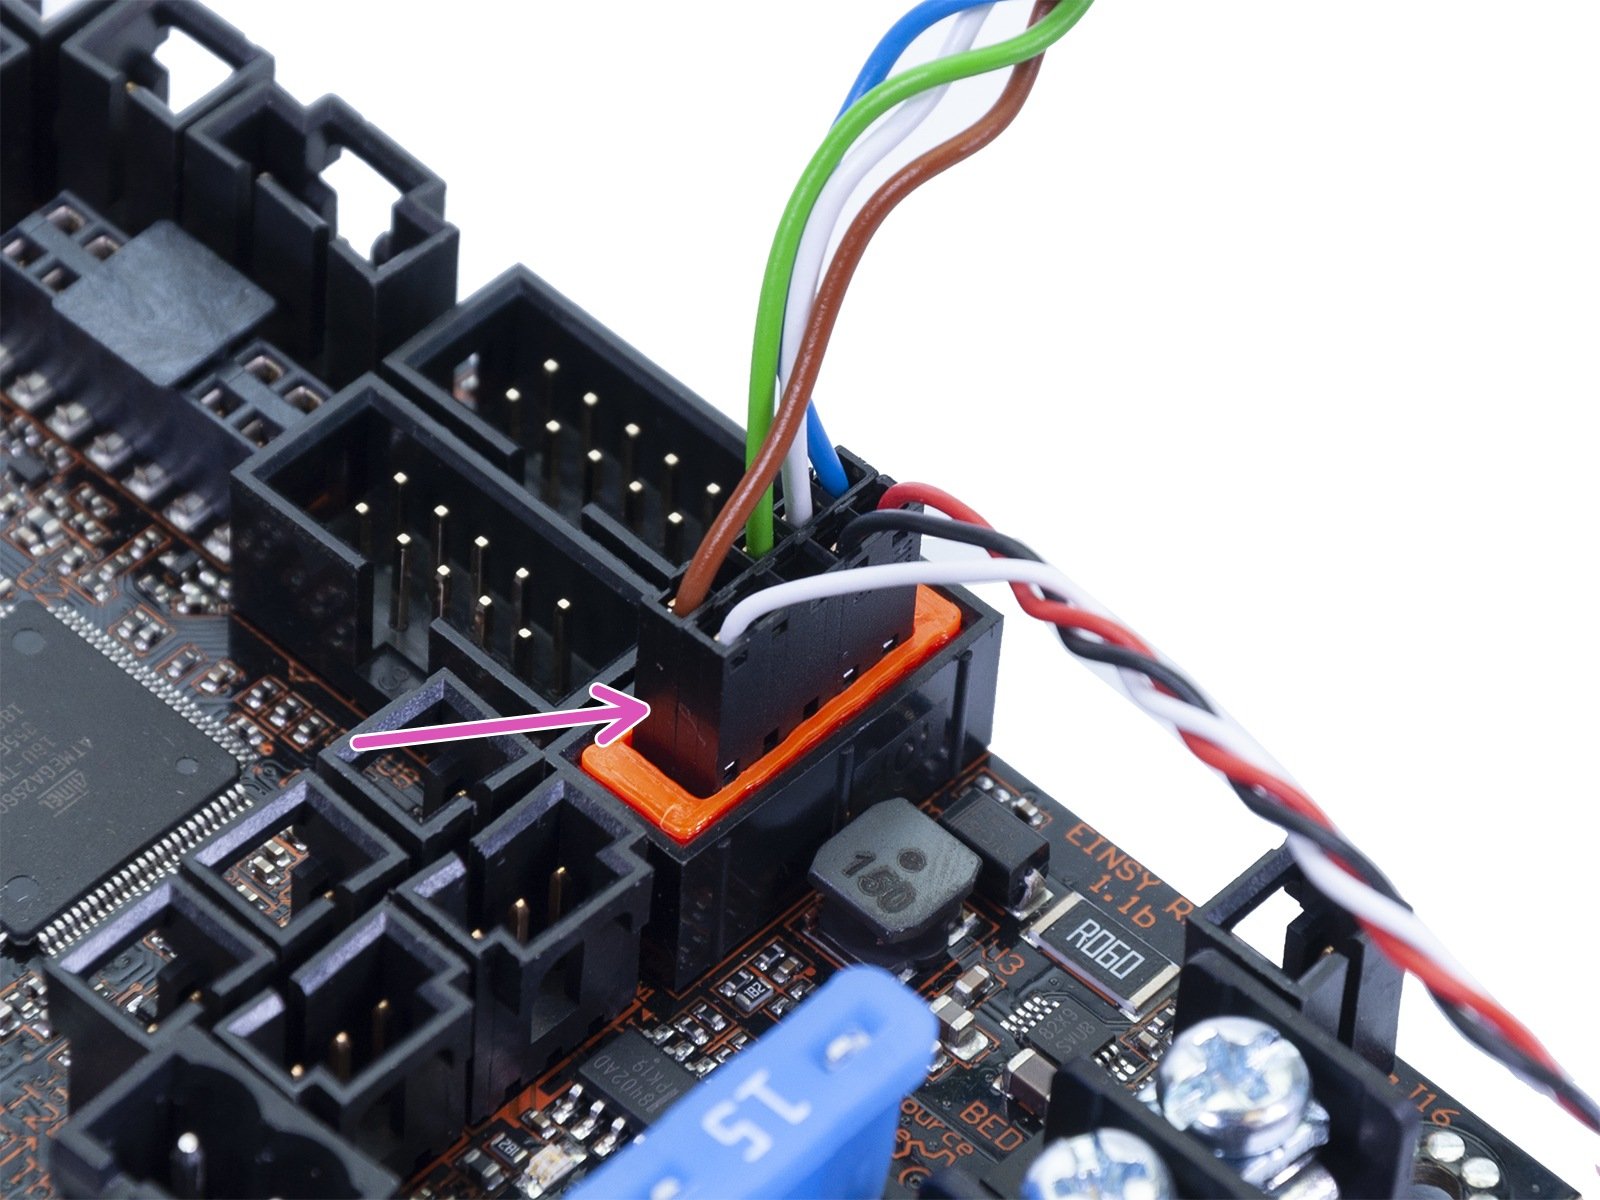
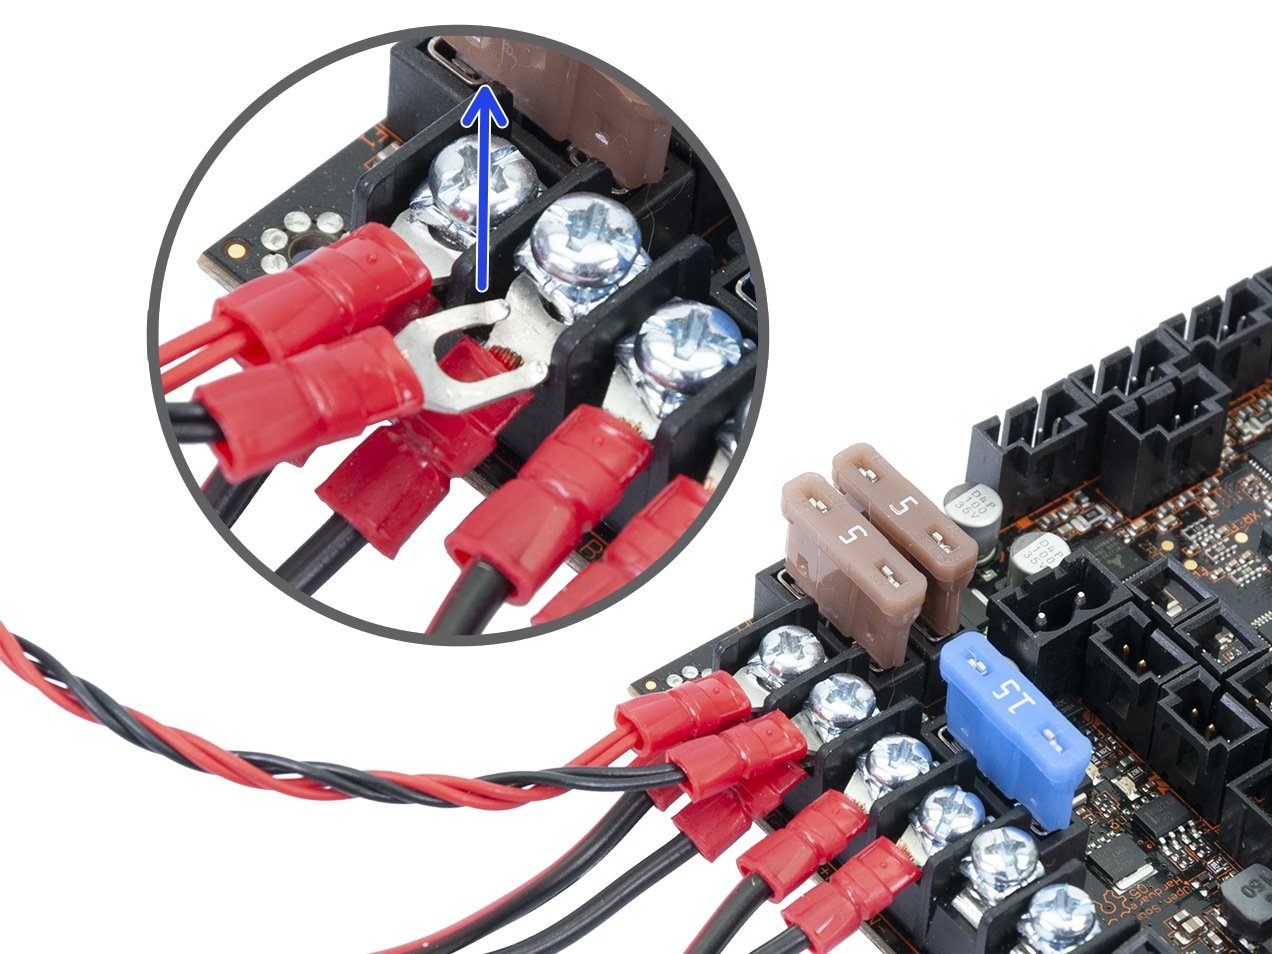
- Remove the MMU signal cable (left picture) and the MMU power cable (right picture) from the Einsy Rambo. Re-tighten the terminal screws on the Einsy Rambo after removing the MMU power cables.
 |  |
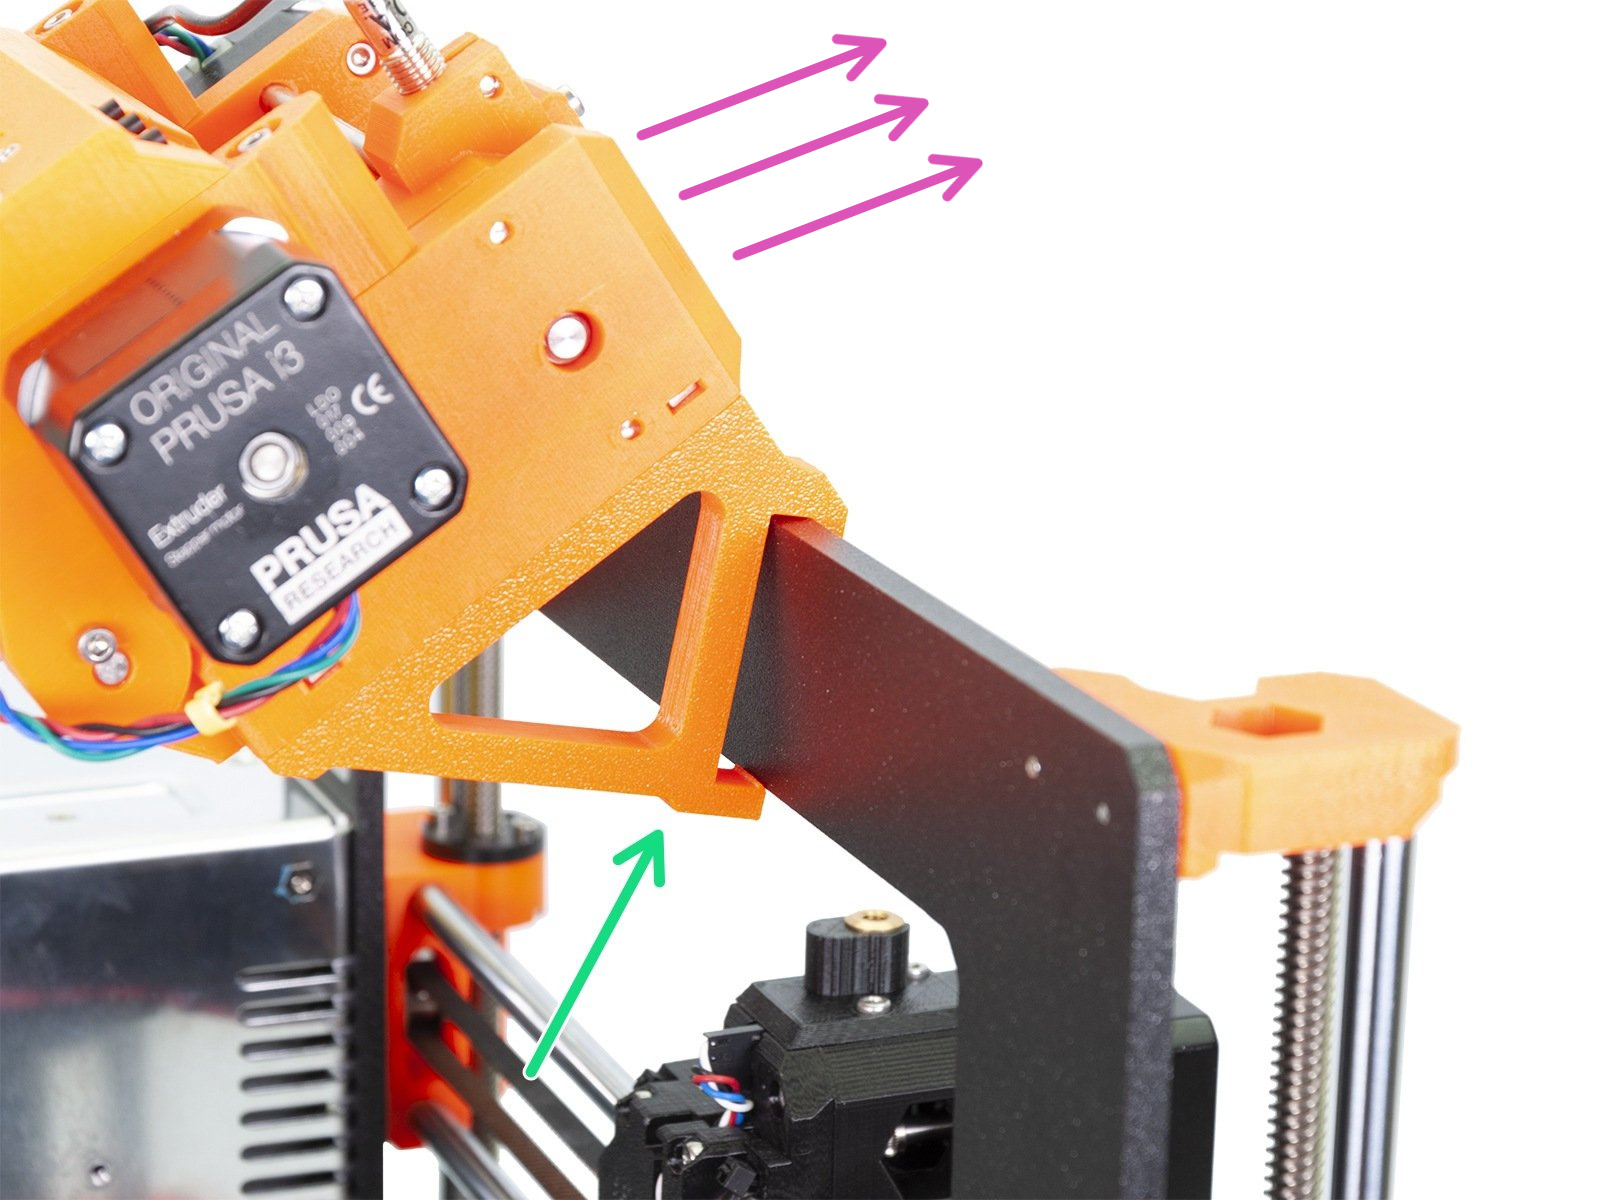
- Remove the MMU unit from the printer's frame by tilting it forward (purple arrows), releasing the latch below (green arrow).
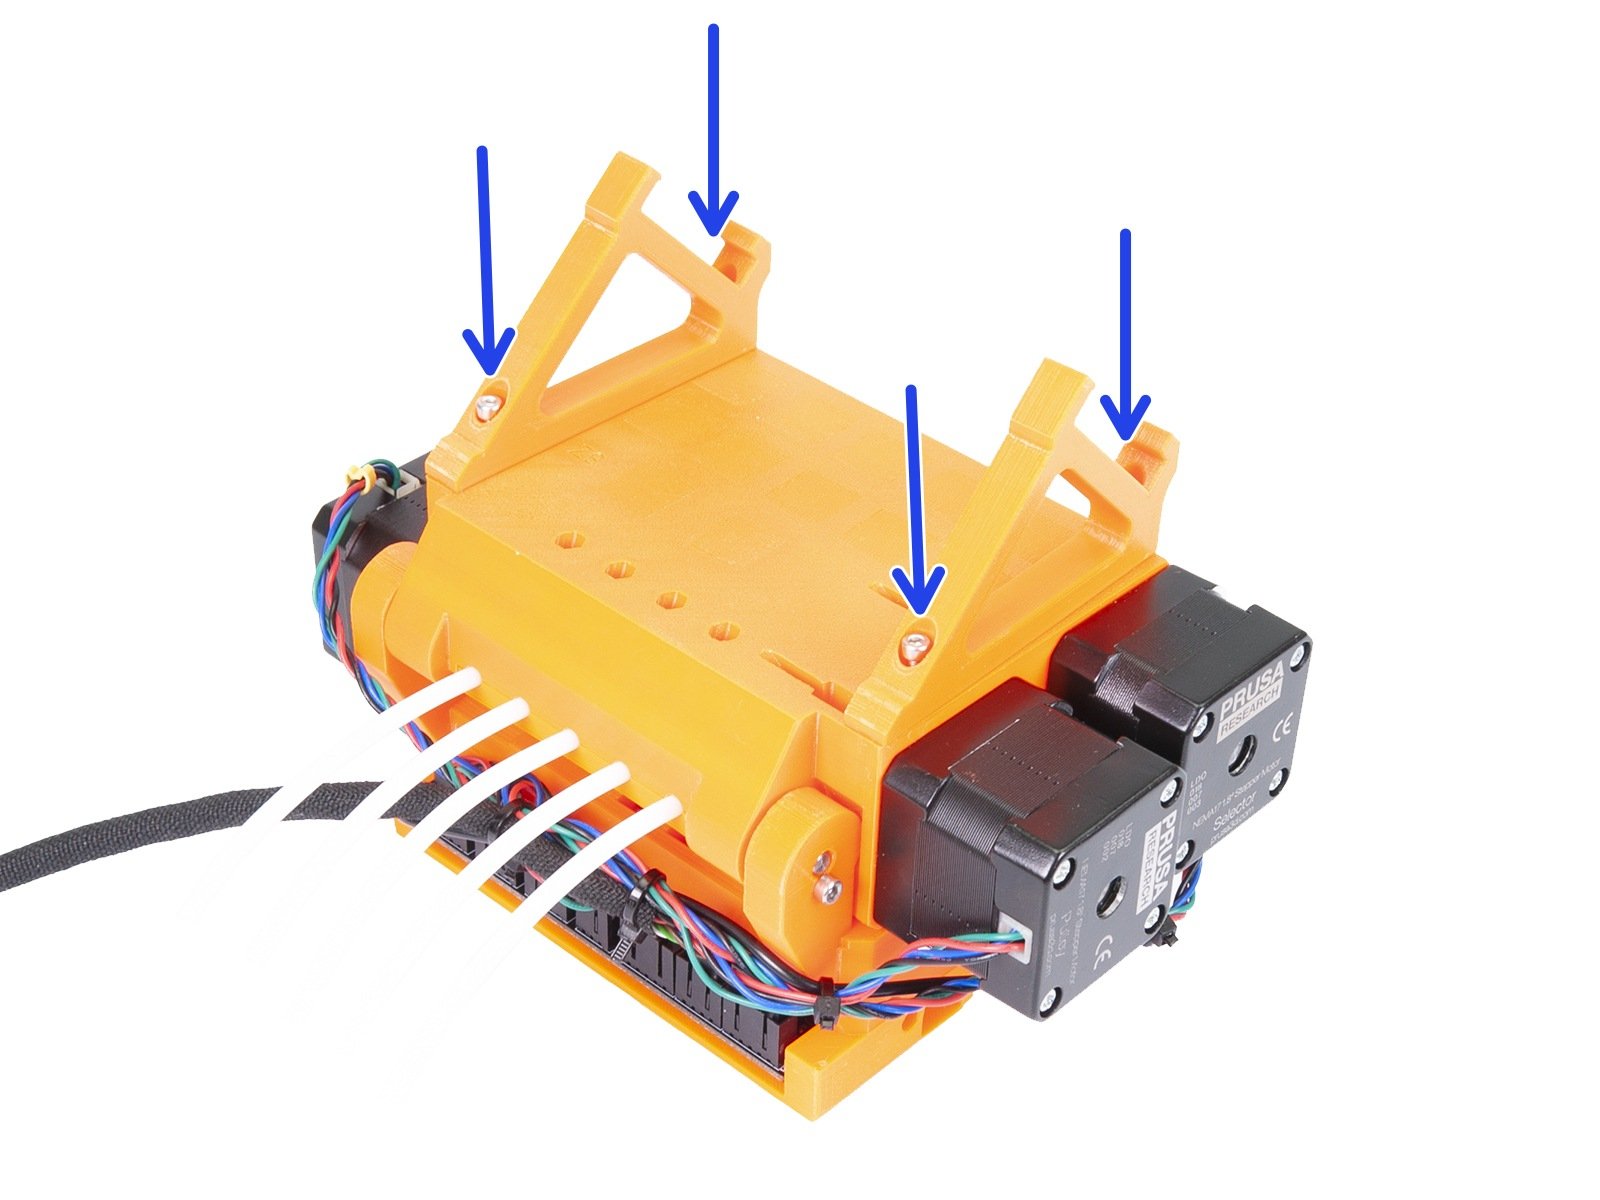
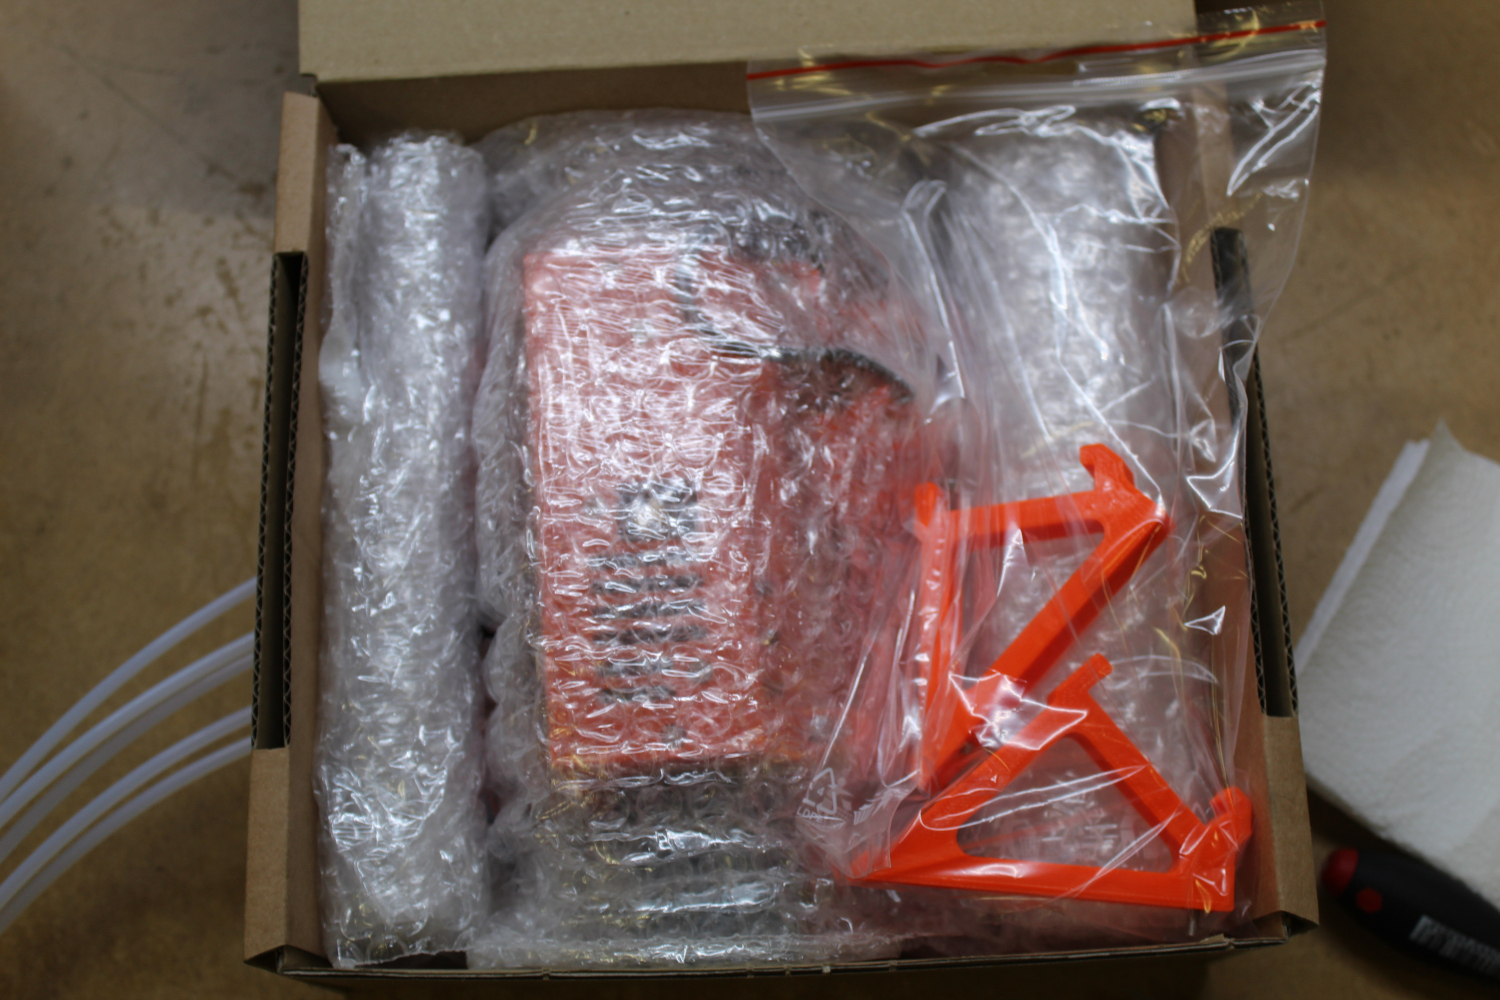
- Unscrew and remove the MMU2S frame holder, and separate it into a bag (blue arrows right picture).
 |  |
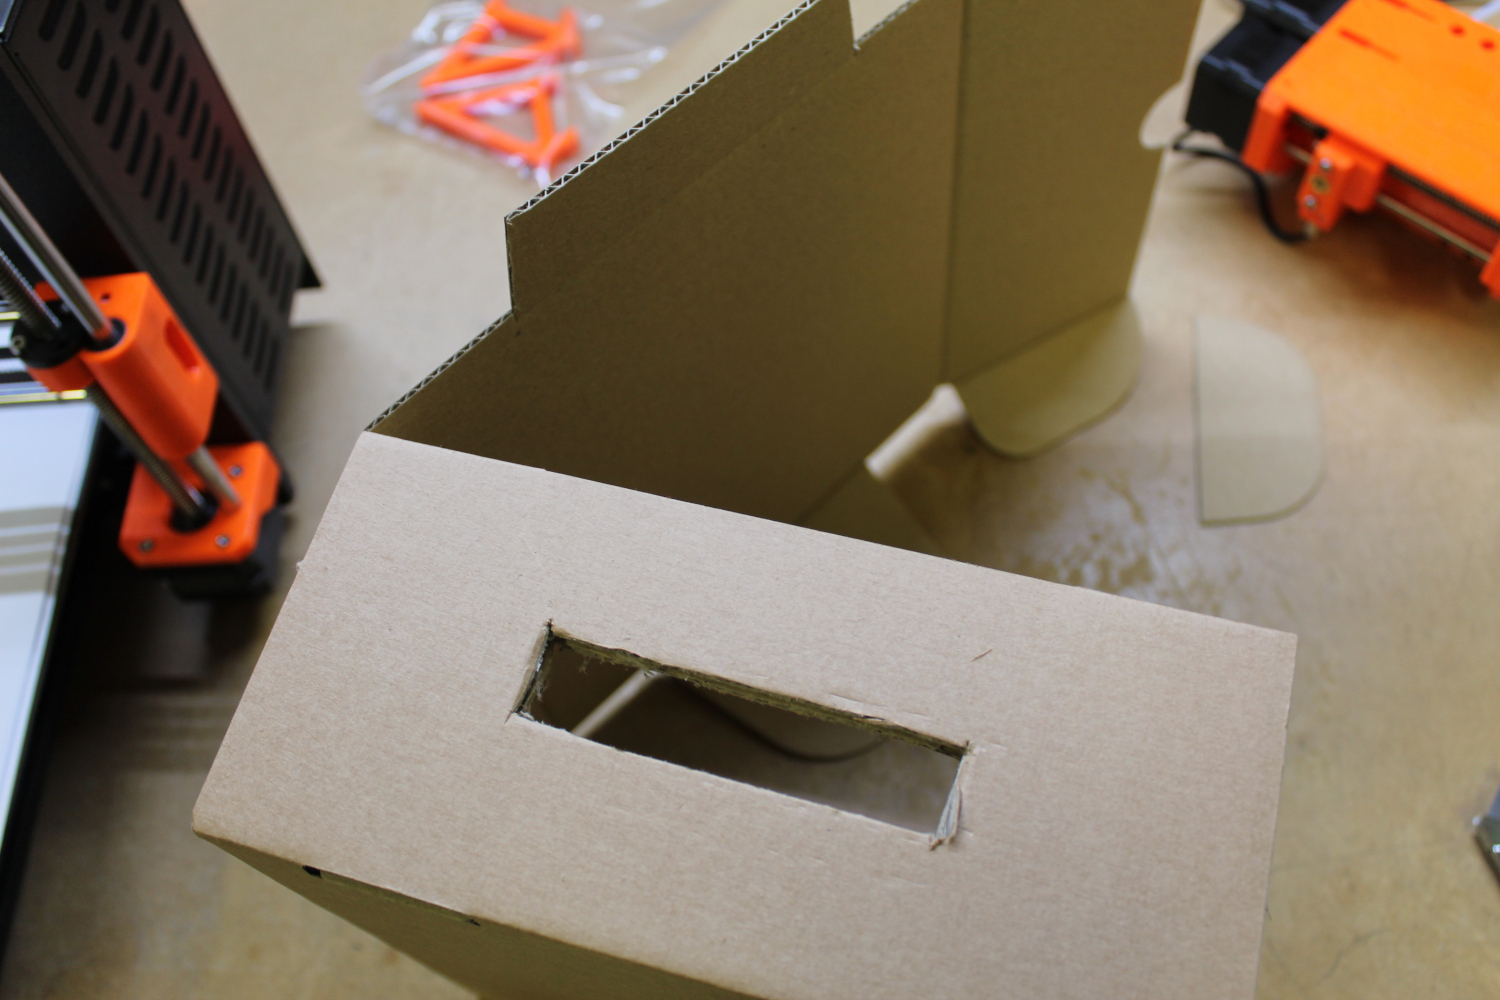
- Take the box you will place the MMU unit in, and cut a hole for the PTFE tubes on the left side of the box (left picture).
- Line the box with packing material that will protect the parts from damage, and wrap the MMU in the packing material as well. Make sure that the PTFE tubes are free for the next step.
- Push the PTFE tubes through the side that was cut from the box in step 3 (right side picture).
 | 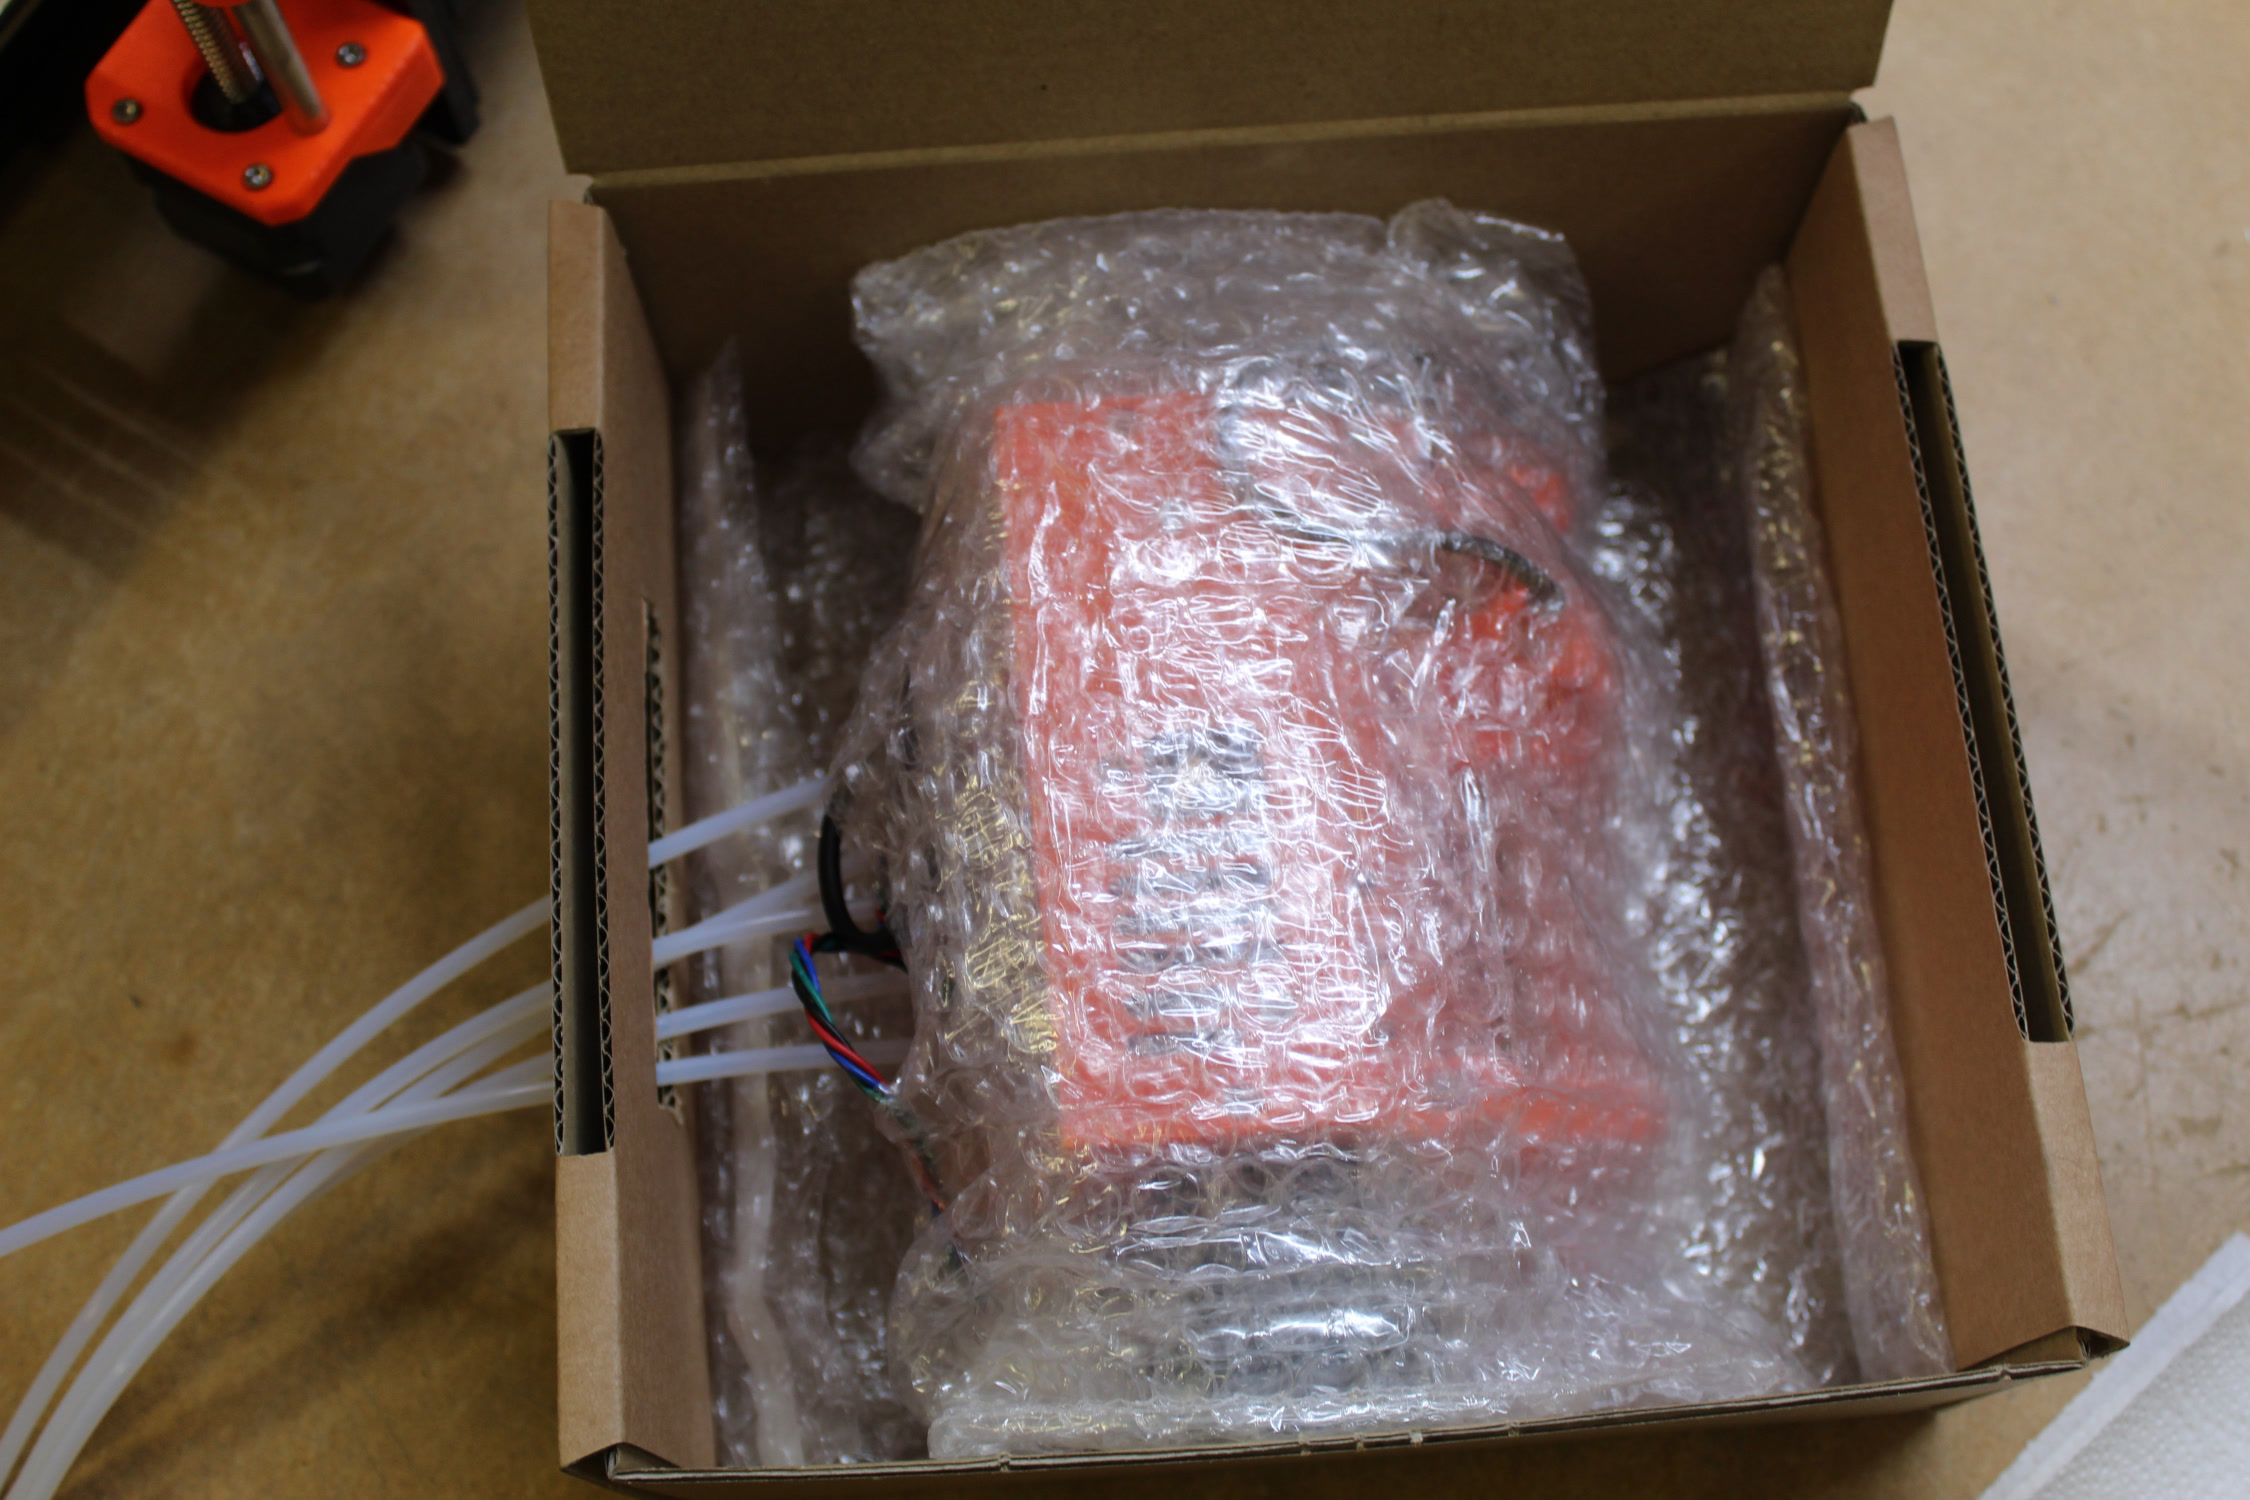 |
- Add packing material on the sides of the MMU unit so it does not move around the box during transport.
- Add the bag with the frame holders on top of the packing material (left side picture). Fill all empty space!
- Close the box and secure it with tape (right side picture).
 | 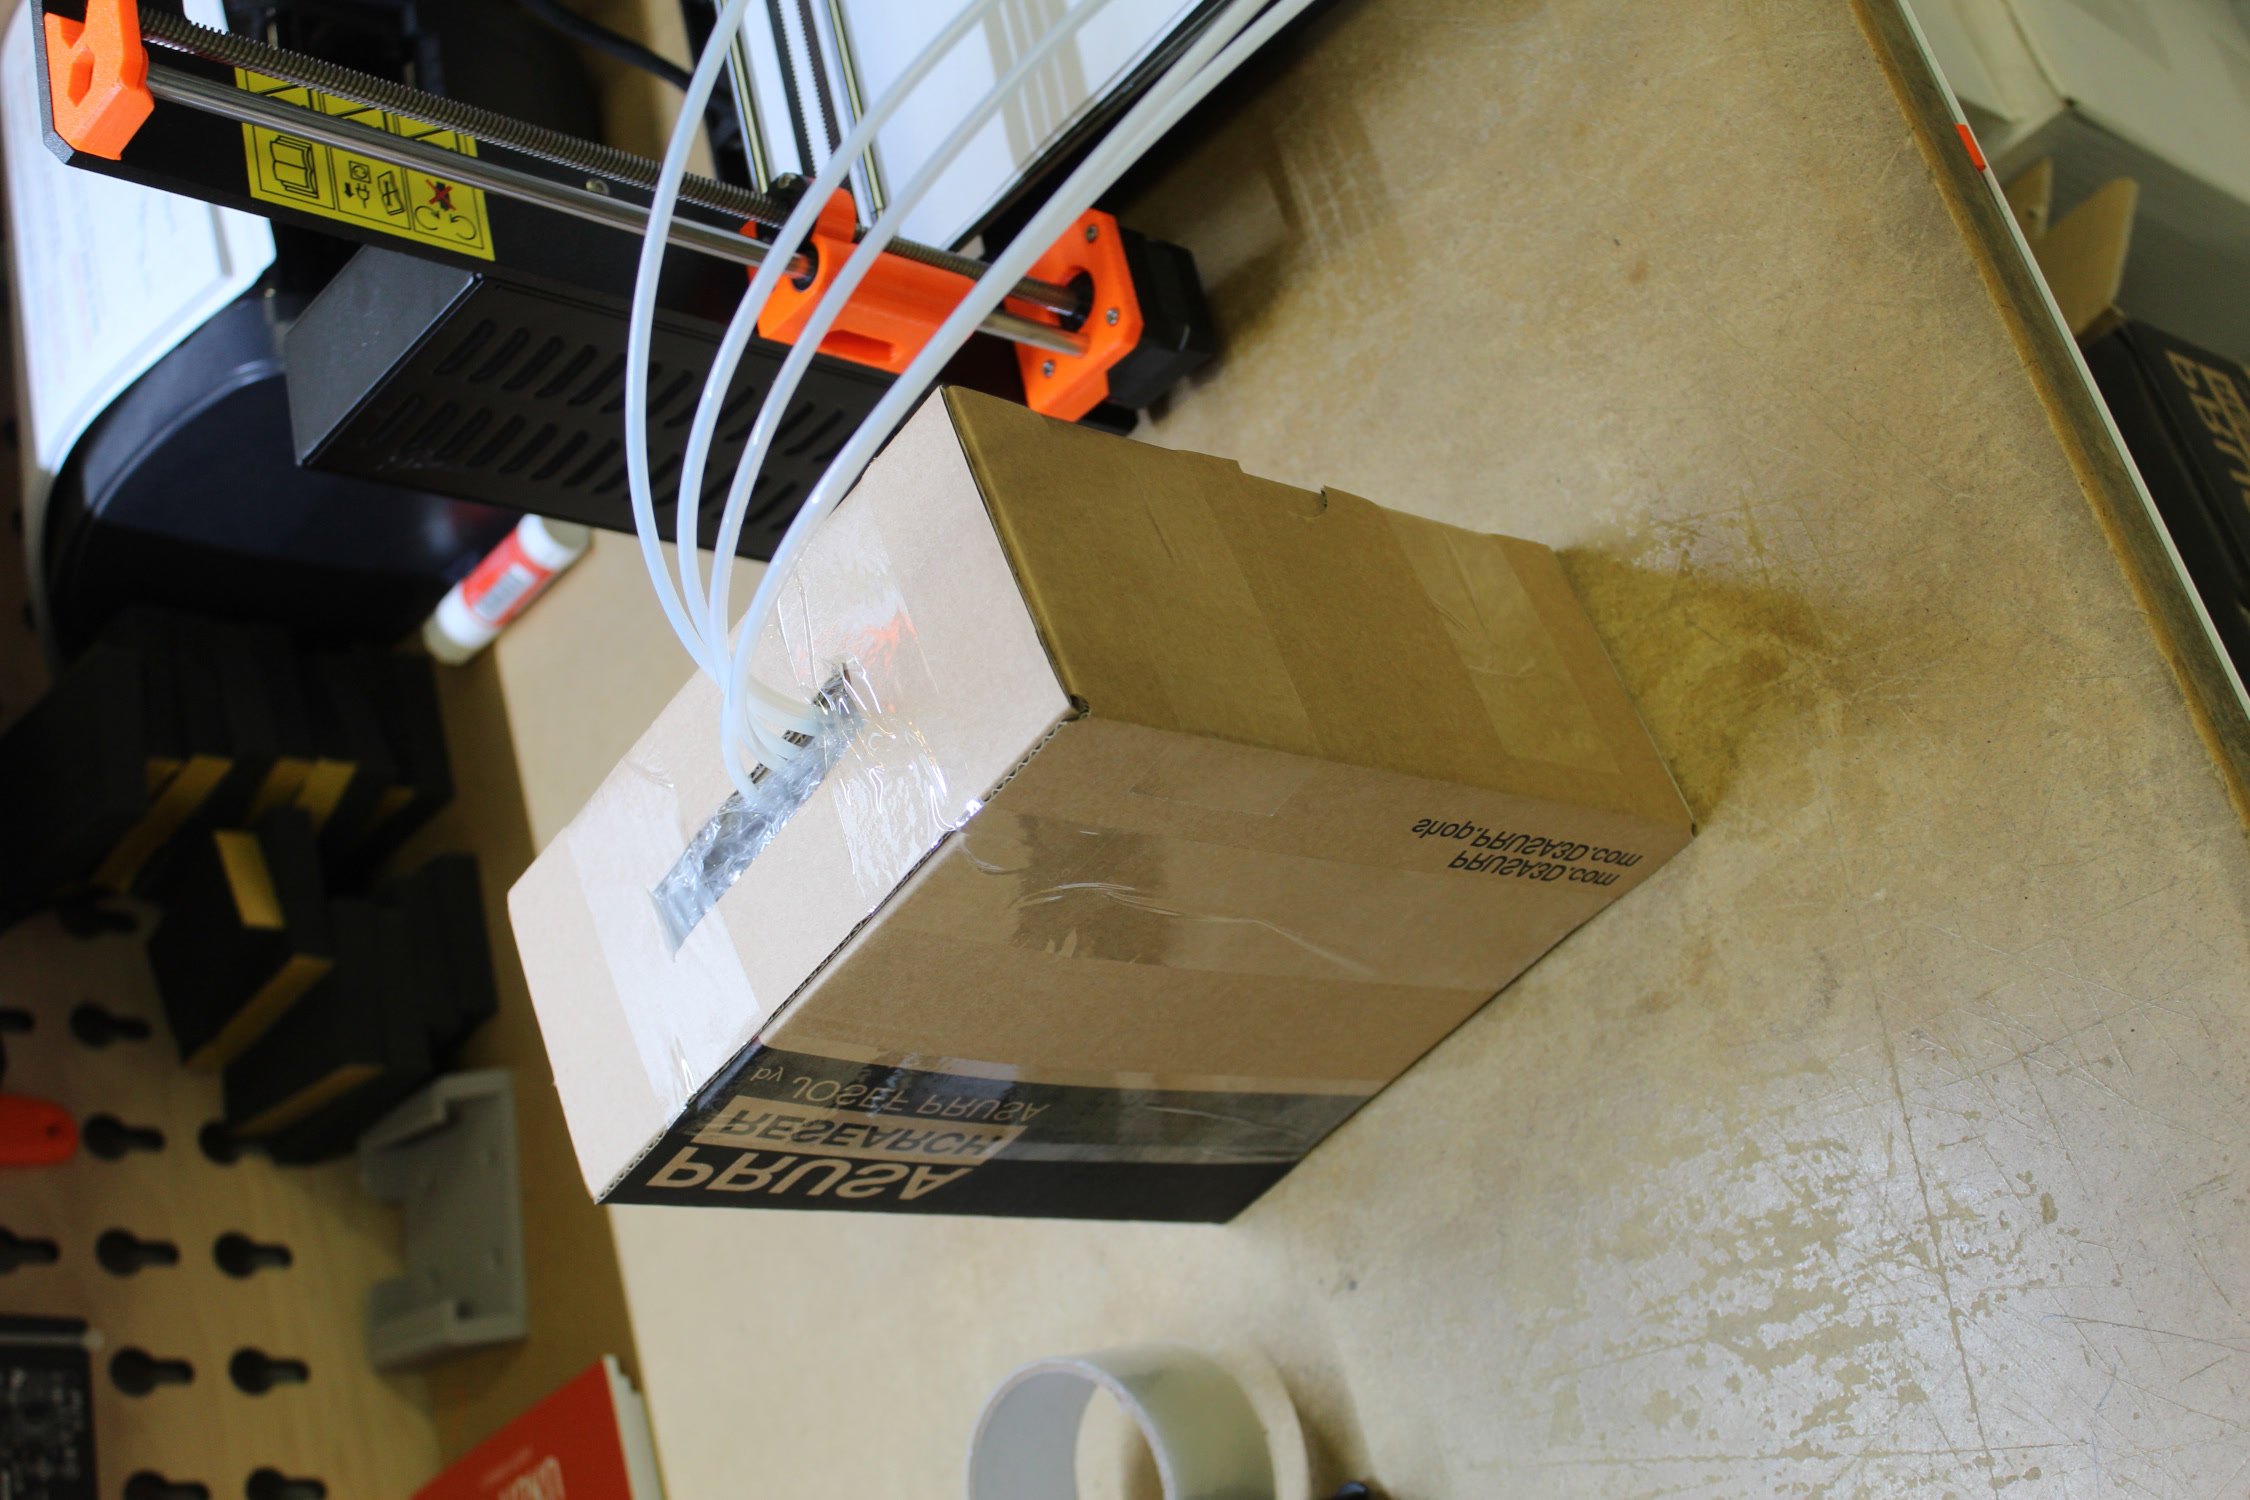 |
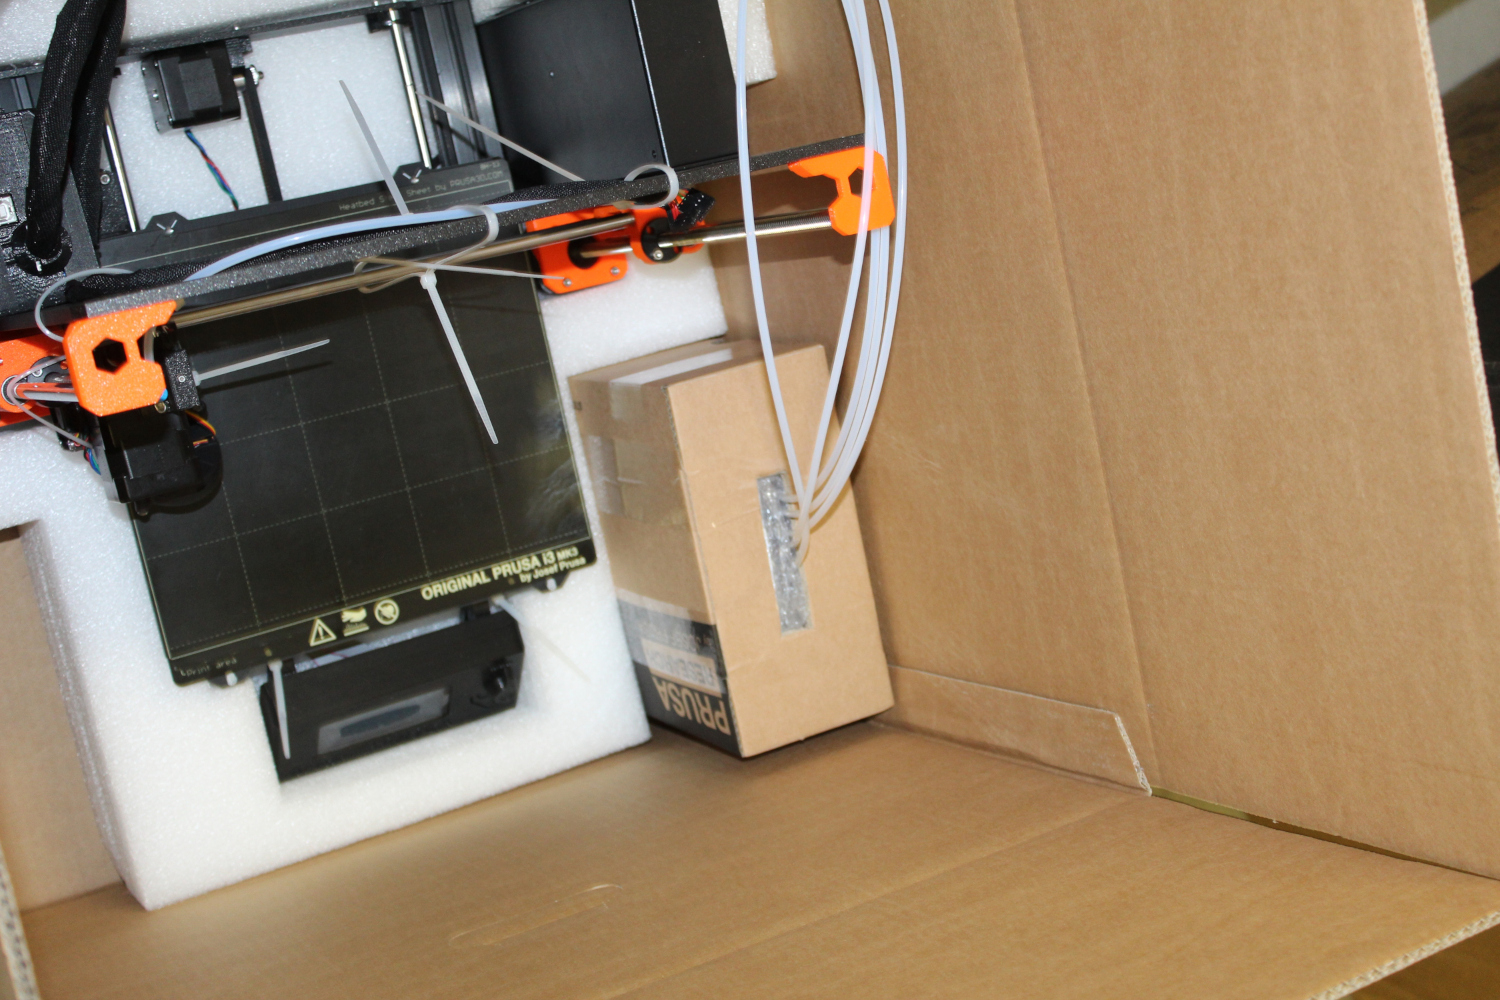
- Place the packed MMU2S in a corner of the printer's box, after the printer is placed in the box (left picture). Isolate it from the printer by packing material (right picture). If you are using the box that came with the pre-assembled printer, there is a space for it where the accessories were located.
 |  |
- Head back to the article Packing i3 printer for return to finish up the packing of the printer.