- English
- Čeština
- Español
- Italiano
- Deutsch
- Polski
- Français
- Home
- あなたのプリンターについて
- プリンターの機能
- Internet connection (SL1/SL1S)
Internet connection (SL1/SL1S)
- プリンターの説明
- プリンターの機能
- Accelerometer (MK4/S, MK3.9/S)
- Brightness adjustment (SL1)
- Buddy firmware-specific G-code commands
- オブエジェクトのキャンセル (MK4, MK3.9, XL, MINI/+)
- 衝突検知
- クラッシュダンプ
- Creating a resin calibration object (SL1/SL1S)
- Dump memory (MK3/S/+ and MK2.5/S)
- Experimental menu (MK3/S/+)
- 実験的なメニュー (MK4/S, MK3.9/S, MK3.5/S, XL, MINI/+)
- フィラメントセンサー (MK4/S, MK3.9/S, XL)
- Filament sensor MK3 (non-S)
- Flashing custom firmware (CORE One, MK4/S, MK3.9/S, MK3.5/S)
- 柔軟性のあるスチールシート(ガイドポスト)
- GPIO Module
- High flow print head (HT90)
- High temperature print head (HT90)
- ハードウェアセットアップ (MINI/MINI+)
- ハードウェアセットアップ (MK2.5/S & MK3/S/+)
- Internet connection (SL1/SL1S)
- Ethernet cable
- Wireless connection
- Finding the printers IP address
- Troubleshooting
- IR フィラメントセンサー (MK2.5S, MK3S/+, MK3.5/S))
- IRフィラメントセンサーの検出(MK3S)
- LCD brightness adjustment (MK3S)
- LCD screen contrast adjustment (i3)
- ロードセル (MK4/S, MK3.9, XL)
- Menu structure (SL1/SL1S)
- MMU3における PrusaノズルとCHTノズル
- Model preview
- Network Connection (CORE One, MK4S, MK3.9S)
- Nextruder silicone sock (XL, MK4, MK3.9)
- NFC antenna
- フィラメントセンサーのノイズ(MINI)
- ワンクリックプリント
- Pouring resin and starting print
- パワーパニック
- パワーモード
- PP steel sheet
- Print Profile (SL1/SL1S)
- プリンタの統計情報
- Printer statistics and system information (SL1/SL1S)
- PronterfaceとUSBケーブル
- Prusa firmware-specific G-code commands
- Prusa Pro Filament Drybox
- Resin Calibration (SL1/SL1S)
- Resin Tank Cleaning (SL1/SL1S)
- 艶消しパウダーコートシート
- SDカードのデータのソート
- スムースPEIシート
- サウンドモード (MINI/MINI+)
- Special PA Nylon steel sheet
- スプールジョイン機能 (MMU2S)
- スチールシートプロファイル
- フィラメントスタックの検出 #31101 (CORE One) #26101 (MK4S) #13101 (MK4) #27101 (MK3.9S) #21101 (MK3.9) #17108 (XL)
- Support menu (MK3/S/+)
- XLにおけるサポート材の設定
- テクスチャーパウダーコートシート
- 温度管理機能のキャリブレーション
- ツールマッピング (XL)
- ツールマッピングとフィラメントマッピング (XL, MMU3)
- Top-bar Notifications (SL1/SL1S)
- タッチスクリーン機能 (CORE One, MK4/S, MK3.9/S, MK3.5/S, XL)
- チューニングメニュー
- Water-soluble materials (PVA/BVOH)
- 一般情報
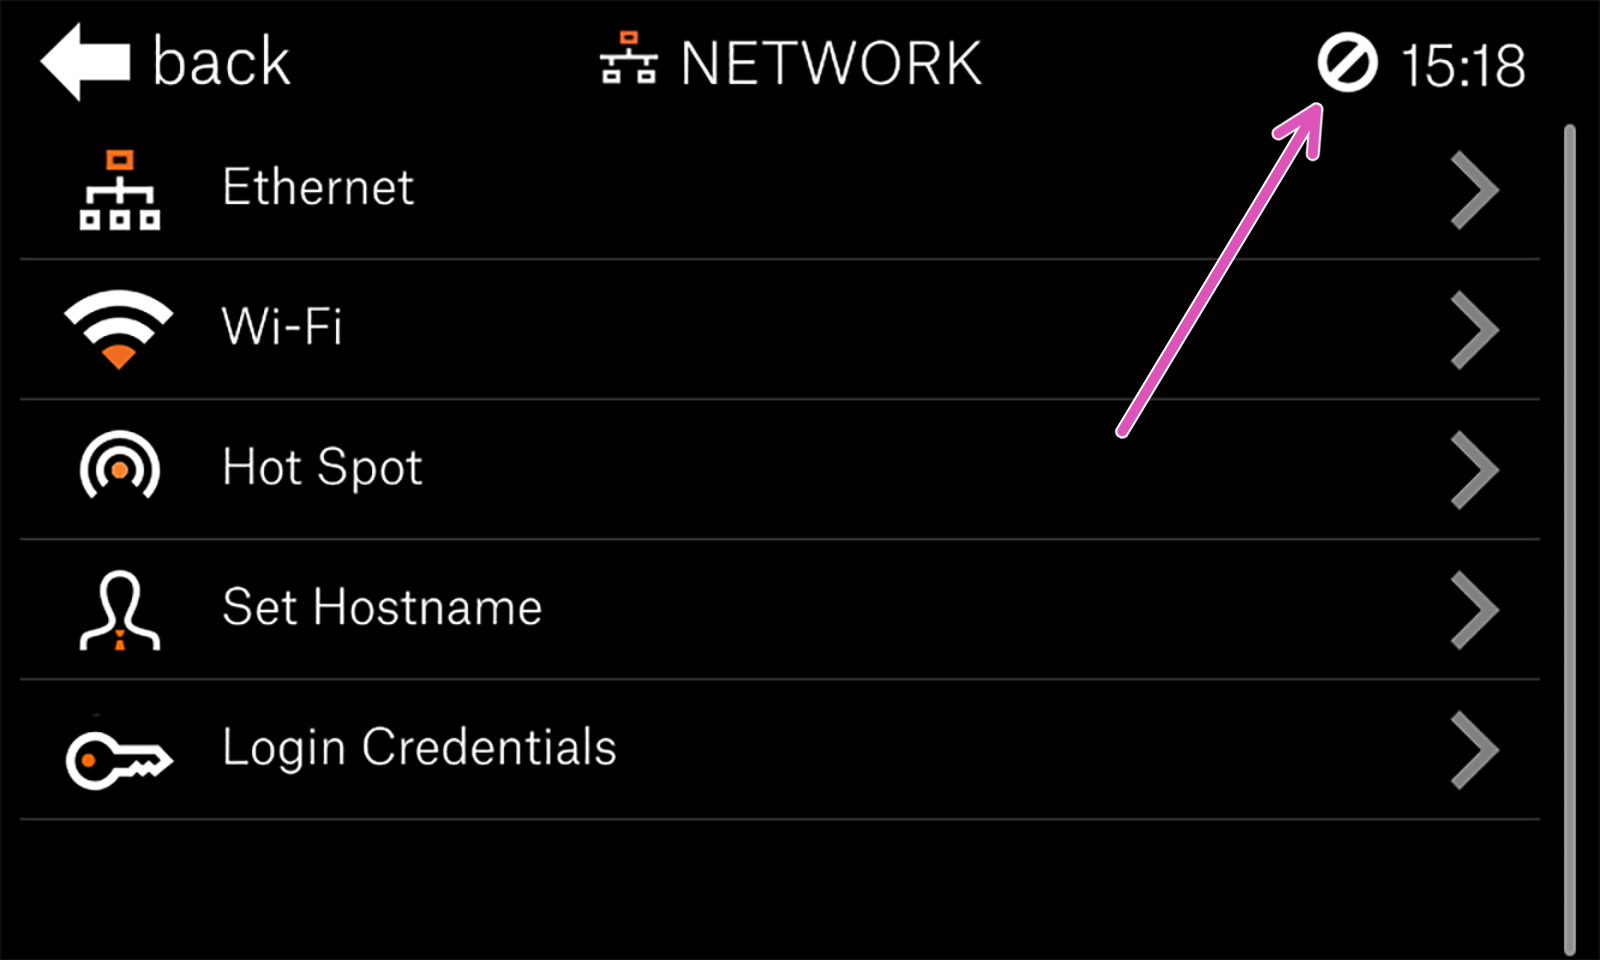
Before you start the calibration process, it is advised to connect the printer to the internet, so that it can download updated firmware files (if they are available). There are two ways how to connect the printer to the internet and once you are connected you will either get an ethernet or Wi-Fi symbol in the top-right corner, next to the clock.
Printer not yet connected to a network (purple arrow).
Ethernet cable
You can use a standard RJ-45 ethernet cable. Connect it to your router, and the printer should obtain an IP address automatically - however, this may depend on your network configuration. Since every network is different, please refer to your router’s instructions or your internet provider’s tech support in case you run into trouble.
Wireless connection
The SL1 3D printer has a built-in Wi-fi network card compatible with 2.4GHz networks. To open the Wi-Fi network browser, go to Main Menu -> Settings -> Network -> Wi-Fi. A list of all available networks will be displayed. Select your Wi-Fi network and connect to it by typing your password using the on-screen touch keyboard.
Finding the printers IP address
Once your printer is connected to the network, you will find its IP address in Main Menu-> Settings -> Network, under Wifi or Ethernet, depending on how you are connected.
You can also use a wifi-scanner app, like Fing to find the printer on your network and its assigned IP. The name of the device will be the Hostname of the printer, default "prusa64-sl1".
Troubleshooting
Since every network is different, we cannot provide exact instructions on how to connect to your wireless/wired network. If you encounter any trouble, please refer to your router’s manual, or contact your internet provider’s tech support. Moreover, the quality of your wireless connection depends on many factors - such as the type/configuration of the router, the distance of the printer from the router, or wireless interference in your area.
Comments
Still have questions?
If you have a question about something that isn't covered here, check out our additional resources.
And if that doesn't do the trick, you can send an inquiry to [email protected] or through the button below.
