Prusa
  • SHOP
    • Latest products
    BY CATEGORY
    • 3D printersnew
    • 3D printer upgradesnew
    • Materials
    • Accessories
    • Spare parts
    • Courses
    • Merch
    • Get a price quote
    QUICK LINKS
    • Shipping & delivery
    • Returns & refunds
    • Payment & financing
    • Warranty
    • VAT & Customs fees
    • FAQ

    0 item in your cartitems in your cart

    Your cart is empty

    Go to cartShop 3D printers

    My profile

    Log in to see orders, saved items

    My profile

    Signed in as

    • Orders
    • Logout
  • 3D PRINTING
    • Explore 3D printing
    FOR BEGINNERS
    • 3D printing 101
    • How FDM printing works
    • Buying your first printer
    • 3D model catalog
    BY APPLICATION
    • Rapid prototyping
    • Manufacturing
    • Engineering
    • Research
    • Arts & design
    GO DEEPER
    • Materials guide
    • Courses
    • Webinars
    • Case studies
    • Custom 3D printing
  • 3D PRINTERS
    • All 3D printers
    FOR
    • Home or garageHobbyists, tinkerers and home printing
    • BusinessIn-house production for small teams
    • EnterpriseFleets, security and scale
    • Which Prusa is right for me
    SHOP & BROWSE
    • CORE One+new
    • CORE One+ INDXnew
    • CORE One L+new
    • CORE One L+ INDXnew
    • XL+new
    • MK4S
    • Prusa Pro HT90
    • Prusa Pro AFS
    • Prusa Pro SLX
    MORE FROM PRINTERS
    • Parts & upgradesnew
    • Critical infrastructure
    • Case studies
    • Signature Oak
    • Kits
  • MATERIALS
    • All materials
    BY USE
    • Every-day & design
    • Functional engineering
    • Composites
    • Pro speciality
    • SLA resins
    PRUSAMENT
    • PLA
    • PETG
    • ASA
    • PC
    • PA11
    • Flex
    • TPU
    MORE FROM MATERIALS
    • Materials guide
    • We make material in house
    • Sustainability
    • Order on the store
  • SOFTWARE
    • All software
    PREPARE THE PRINT
    • PrusaSlicer 3.0New
    PRINT & MONITOR
    • Prusa Connect
    • EasyPrint
    • iOS & Android app
    • Prusa Farm
    GET STARTED
    • Download & install
    • Knowledge base
    MORE FROM SOFTWARE
    • 3D model catalog
  • SUPPORT
    • Explore support
    FIND ANSWERS
    • Knowledge base
    • Troubleshooting
    • Courses
    • Webinars
    GET HELP
    • Contact us
    • Livechat
    • Shipping & delivery
    • Warranty
    • Returns & refunds
    • Service & spare parts
    • Service & Repair
    COMMUNITY
    • Forum
    • Reddit
    • Printables
  • TRUST CENTER
    • Trust Center overview
    BY TOPIC
    • GDPR
    • Certificates
    • Security
    • Compliance
    COMMITMENTS
    • Sustainability report
    TALK TO US
    • Contact the security team
  • COMPANY
    • About Prusa
    GET TO KNOW US
    • Our story
    • How we make printers
    • Open source
    • Brand & media kit
    NEWS
    • Blog
    • Newsroom
    • Events
    TRUST & PARTNERS
    • Sustainability
    • Resellers & distributors
    • Affiliate program
    • Contact
    • English
    • Čeština
    • Deutsch
    • Español
    • Français
    • Italiano
    • Polski
    • 日本語
  • Signed in as

    • Orders
    • Address
    • In-stock Alerts
    • My Courses
    • Subscription
    • Edit Account
    • Logout

Log in to see orders, saved items

Signed in as
  • Orders
  • Address
  • In-stock Alerts
  • My Courses
  • Subscription
  • Edit Account
  • English
  • Čeština
  • Deutsch
  • Español
  • Français
  • Italiano
  • Polski
  • 日本語
Shop

0 item in your cartitems in your cart

Your cart is empty

Go to cartShop 3D printers

My profile

Log in to see orders, saved items

My profile

Signed in as

  • Orders
  • Logout
SHOP
  • Latest products
BY CATEGORY
  • 3D printersnew
  • 3D printer upgradesnew
  • Materials
  • Accessories
  • Spare parts
  • Courses
  • Merch
  • Get a price quote
QUICK LINKS
  • Shipping & delivery
  • Returns & refunds
  • Payment & financing
  • Warranty
  • VAT & Customs fees
  • FAQ

Featured products

    Popular categories

      Trending searches

        Articles

          Blog

            Products

              Categories

                Suggested searches

                  Searching…
                  No results
                  Something went wrong.
                  ↑↓ Select↵ OpenEsc Close search
                  1. Support
                  2. Printer troubleshooting
                  3. Squaring your MINI
                   

                  Contents

                  • Procedure
                  • Initial checks
                  • Checking each axis
                  • XZ-axis correction
                  • Fine-tuning the XZ-axis

                  Blog

                  • Prusament Pellets: Raw material batches for large-format 3D printing or small-scale polymer research & development
                  • Print colorful and glowing Halloween decorations with our spooky offer
                  • Factorio Has Arrived on Printables

                  Newsletter

                  Signup and get our monthly squeeze on updates, blog, printables and much more.

                  By clicking, you agree to receive our newsletter.

                  This site is protected by reCAPTCHA Enterprise and the Google Privacy Policy and Terms of Service apply.

                  Heavy Duty Keyboard Holder (No Supports)
                  E-shop
                  • 3D Printers
                  • Printer Upgrades
                  • Filaments
                  • Accessories
                  • Prusa Merchandise
                  Prusa

                  © Prusa Research a.s.

                  Printables
                  • 3D Models
                  • Store
                  • Clubs
                  • 3D Design Contests
                  • Brands
                  Community
                  • World Map
                  • Forum
                  • User Groups
                  • Events
                  Help
                  • Prusa Help
                  • Prusa Academy
                  • 3D Printing Calculators
                  Software
                  • PrusaSlicer
                  • Prusa.app
                  • Prusa Connect
                  • Drivers and Software
                  Company
                  • About Us
                  • Blog
                  • Official Prusa Resellers
                  • Contact Us
                  • Certified for ISO 9001, ISO 14001, ISO 45001
                  • General Terms and Conditions
                  • General Terms and Conditions of Use of the PRUSA Websites
                  • Privacy Policy
                  • Information about cookies
                  • Customer Complaints Policy
                  • Status Page
                  • Do Not Sell or Share My Personal Information
                  • Supplemental Statements
                  Prusa
                  • General Terms and Conditions
                  • General Terms and Conditions of Use of the PRUSA Websites
                  • Privacy Policy
                  • Information about cookies
                  • Customer Complaints Policy
                  • Status Page
                  • Do Not Sell or Share My Personal Information
                  • Supplemental Statements

                  © Prusa Research a.s.

                  JOSEF PRUSA®, PRUSA RESEARCH®, PRUSA POLYMERS®, PRUSA ORANGE®, PRUSA 3D ® AND PRUSAMENT® are registered trademarks of Prusa Development a.s. used by Prusa Research a.s. under licence from Prusa Development a.s.

                  Squaring your MINI

                  Relevant for

                  MINI
                  MINI+
                  36 comments
                  Article is also available in following languages
                  English
                  Čeština
                  Polski
                  Deutsch
                  Français
                  Español
                  Italiano
                  日本語

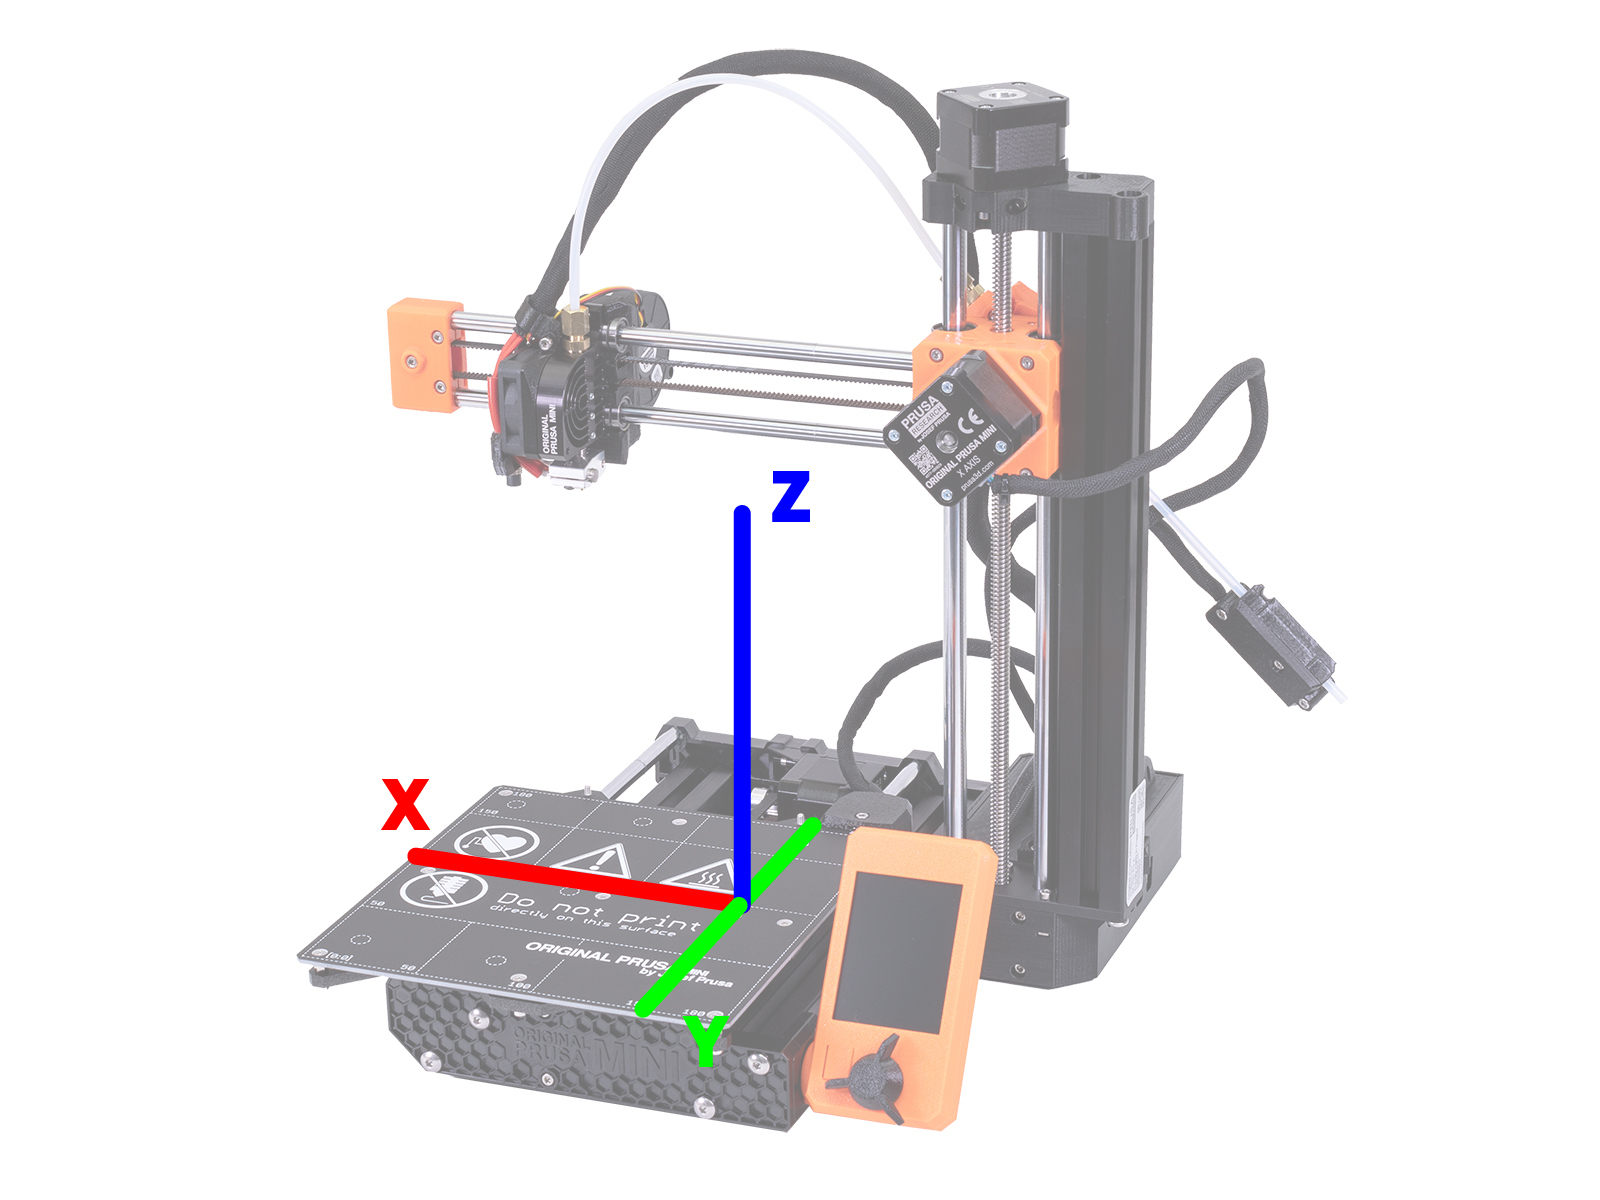
                  During transport, assembly, or maintenance (like adjusting the belt tension) the printer can become slightly skewed, where one axis may not be perpendicular (90-degree angle) to another. The firmware compensates for some deviation, but the best is to get your hardware squared from the beginning.

                  This procedure is ONLY for fully working printers! If you have any issues with the self-test or filament extrusion you must correct this before proceeding. It is crucial that your printer is assembled according to our instructions. Especially important is the alignment of the bed assembly (Y-axis) and buddy case (XZ-axis) and how they are joined together.

                  Here we will use no special tool, only the parts of the printer and your eyes. There is no need for advanced engineering tools, like feeler gauges or a machinist square. However, the order in which you check and make any adjustment is crucial as you will be squaring the machine against itself.

                  Procedure

                  We will be checking the height of the nozzle above the bed after homing at different X and Y-axis positions on the bed. We will do this for one axis at a time and perform any necessary corrections between each test. Do not deviate from the order outlined below.

                  We will inspect and correct the printer in the following order:

                  1. Initial checks
                  2. Y-axis
                  3. YZ-Axis
                  4. XZ-axis

                  Initial checks

                  Check the following:

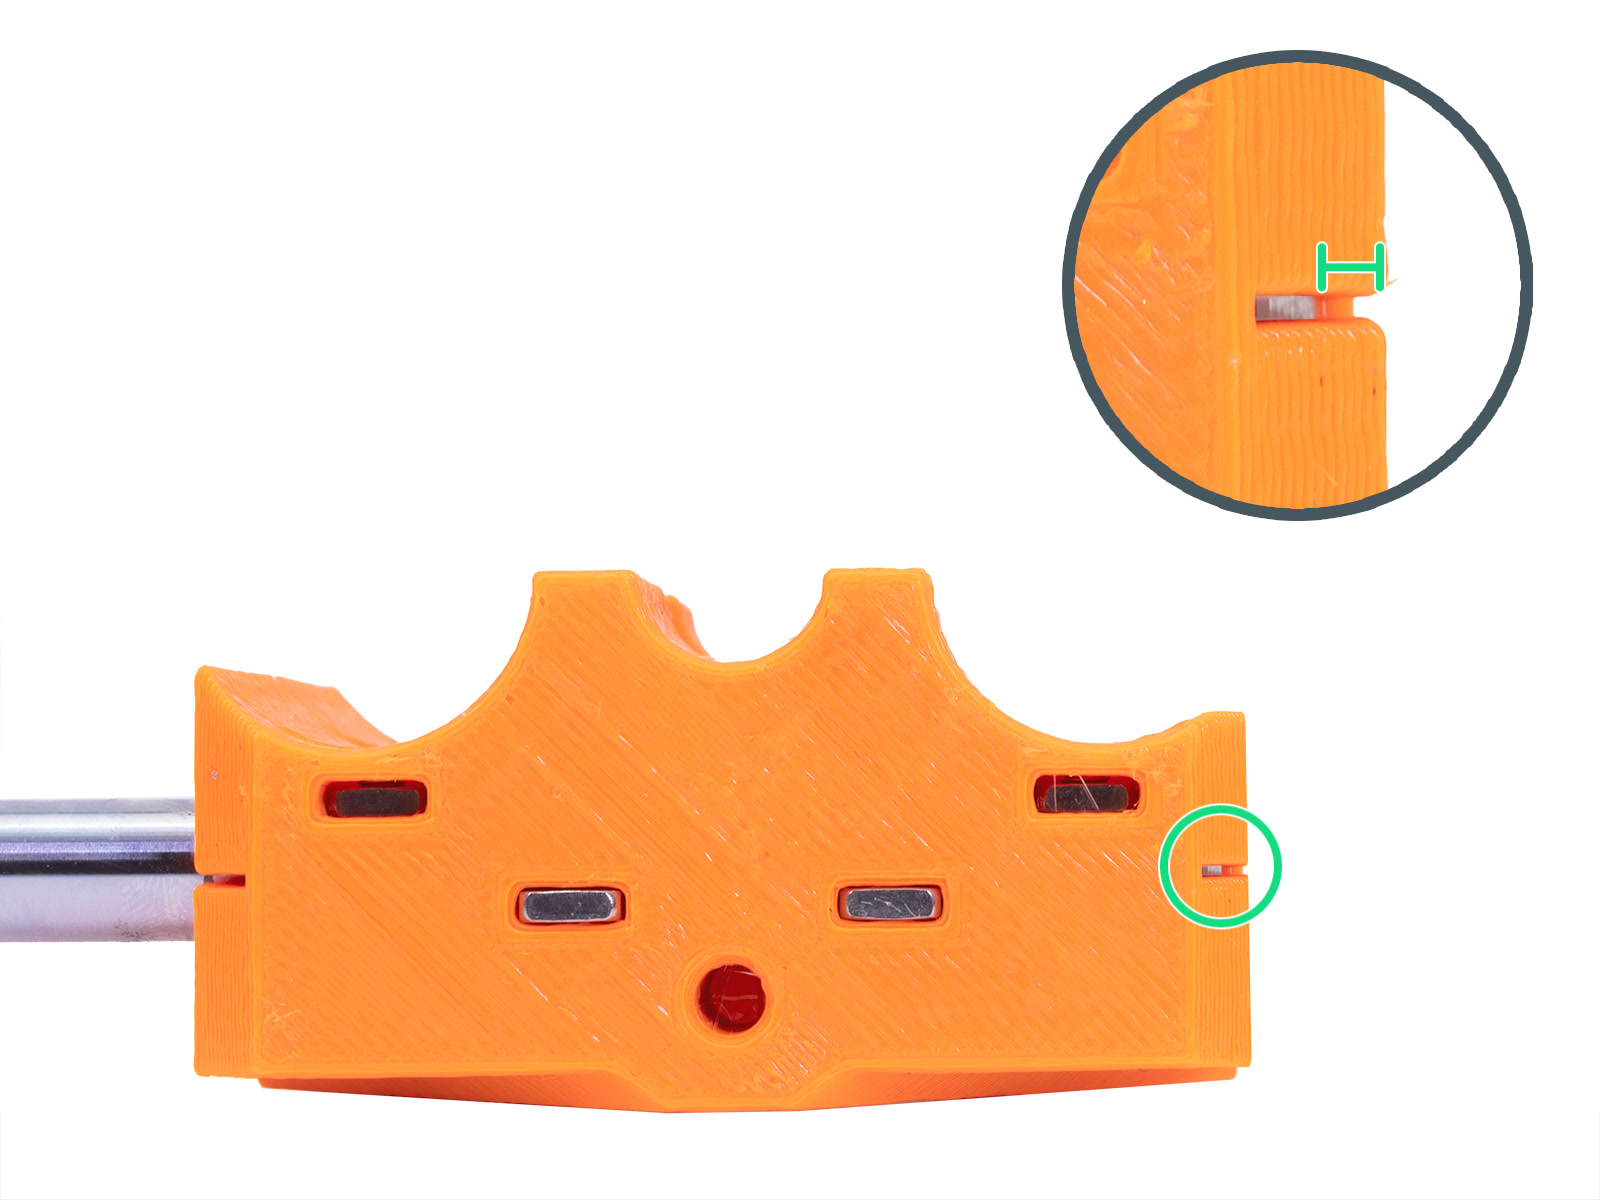
                  • The smooth rods of the X-axis are inserted all the way to the extruder plastic parts (left picture). X-end and extruder parts have inspection holes to check (green circle).
                  • The 10mm linear bearings of the Z-axis are slightly below the plastic parts (~0.75 mm) that secure them and equal on both bearings.
                  • The foam pad legs are stuck only to the aluminum extrusions, and not to the plastic front/back plate.
                  • Make sure the heatbed and nozzle are cooled down to room temperature! 

                  Checking each axis

                  Start by removing the flexible steel sheet. This is a laser-cut square and we will use it for a later step. Then home the printer from Calibration -> Auto home, on the LCD menu and Disable steppers by restarting the printer using the button on the LCD module or by navigating to Settings -> Disable Steppers.

                  DO NOT turn the printer off. Moving the axis fast while the printer is off can damage the TMC stepper drivers.

                  Y-axis

                  Any noticeable deviation in this step is very rare but ensures following tests and done on a flat surface. If you do find any deviation above ~0.5-1 mm, continue through the whole procedure, then do this check again before contacting support.

                  1. With the steppers disabled, slide the tip of the nozzle to the center dotted line with the printed "100" mm mark.
                  2. Turn the threaded rod of the Z-axis by hand to move the nozzle closer to the bed (~1mm), so it is almost touching it (purple ruler). 
                  1. While looking at the distance between the nozzle and heat bed, slide the bed from one extreme to another (green arrows) and see if there is any deviation. Make sure you do not push down on the bed while sliding it!
                   Be careful not to adjust the nozzle too close. It might scratch the heatbed when it is moved.

                  YZ-axis

                  This checks the bed (Y-axis) against the Z-axis, ensures the smooth X-rods are parallel, and perpendicular to the Z-axis with the nozzle pointing directly down.

                  1. While steppers are still disabled, move the print head to the right of the X-axis.
                  2. Move the heatbed to the front of the printer.
                  3. Navigate the LCD menu to Settings -> Move axis -> Move Z and turn to knob clockwise until the print head/X-gantry is roughly 100-150 mm above the bed.
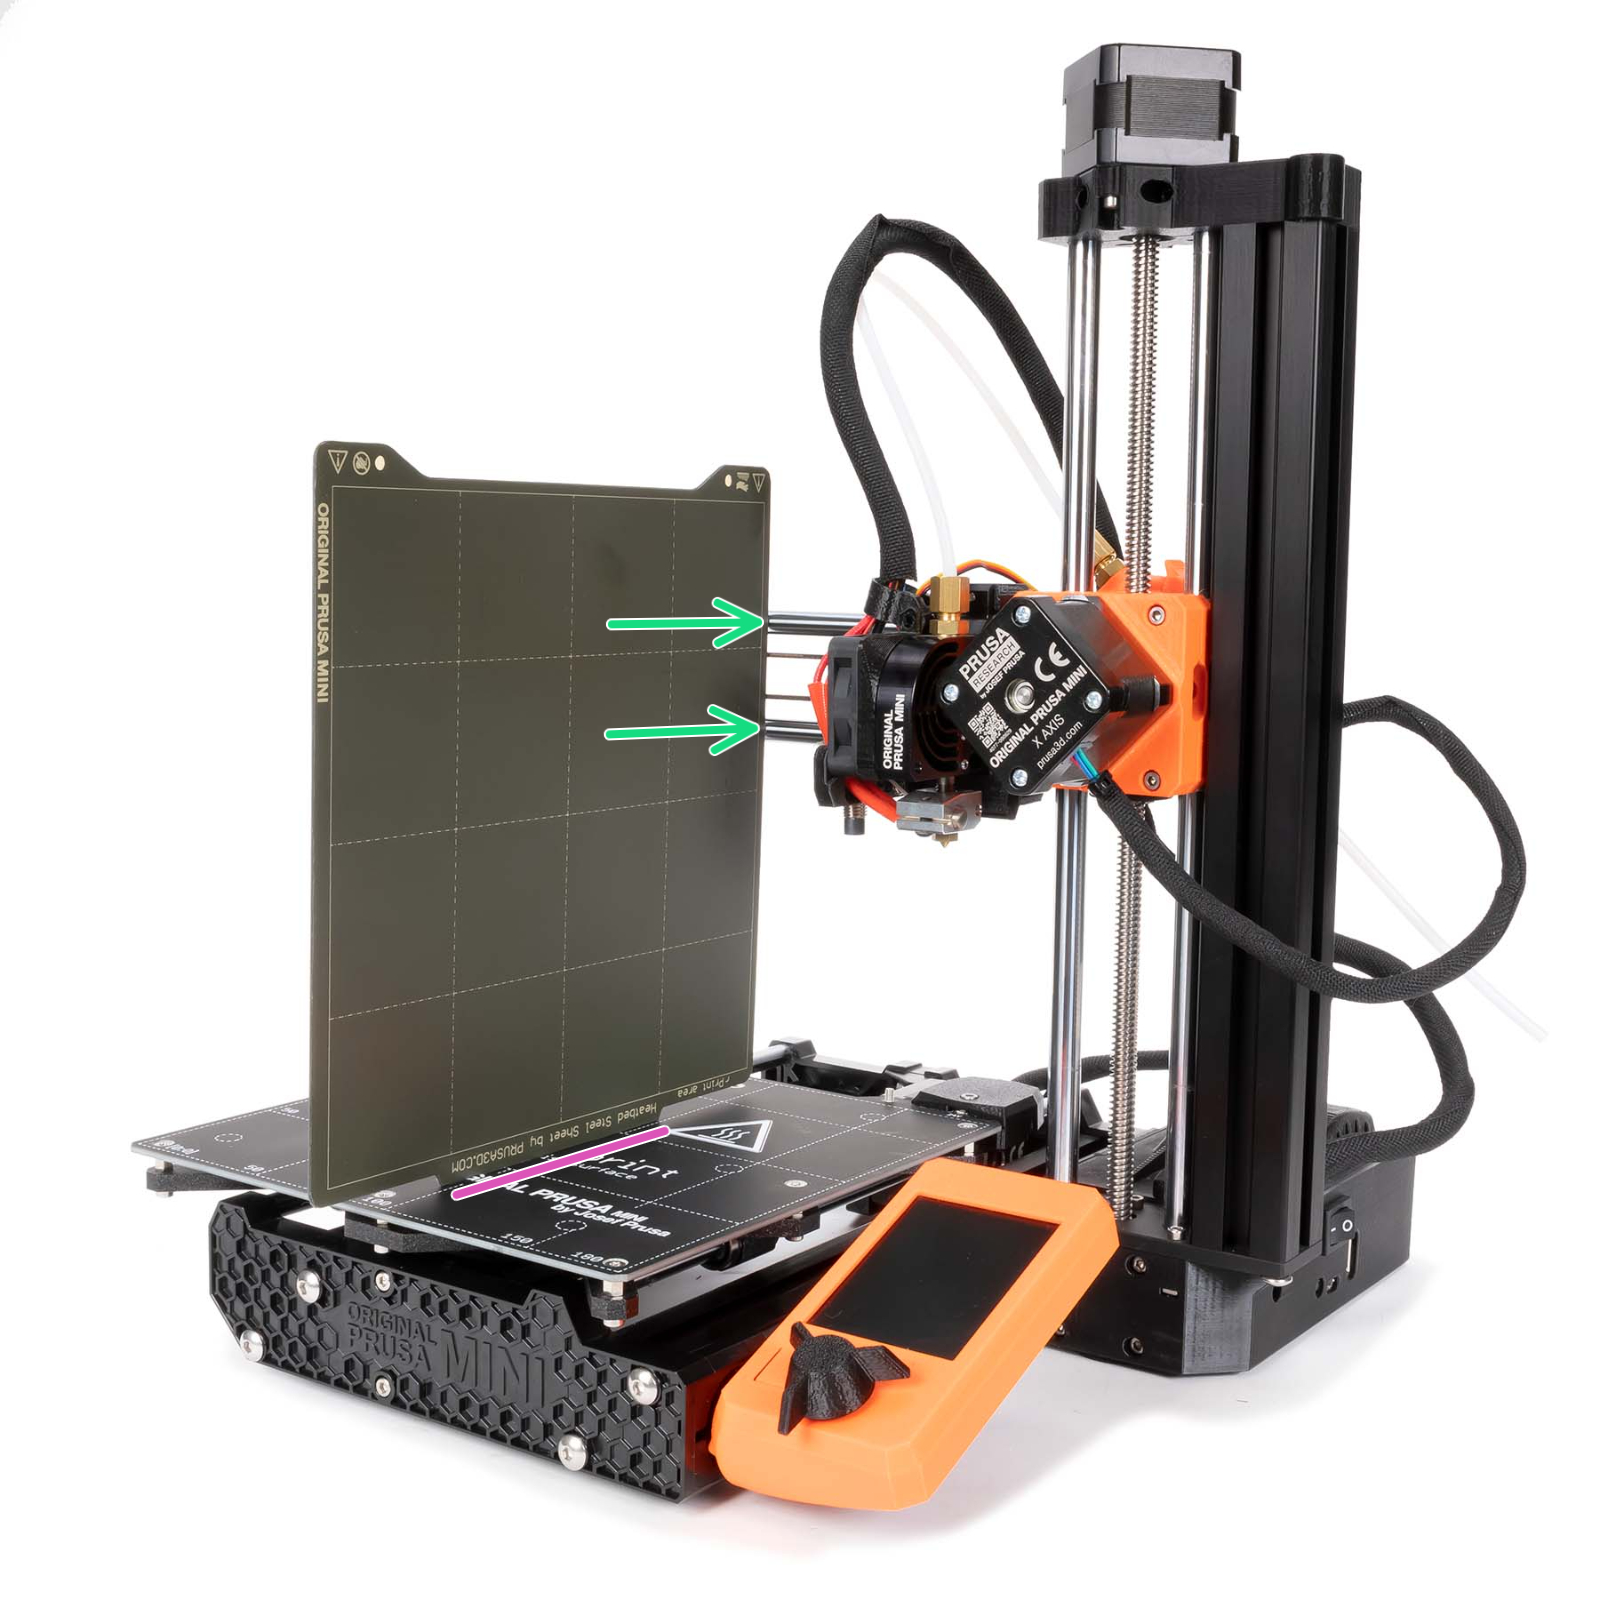
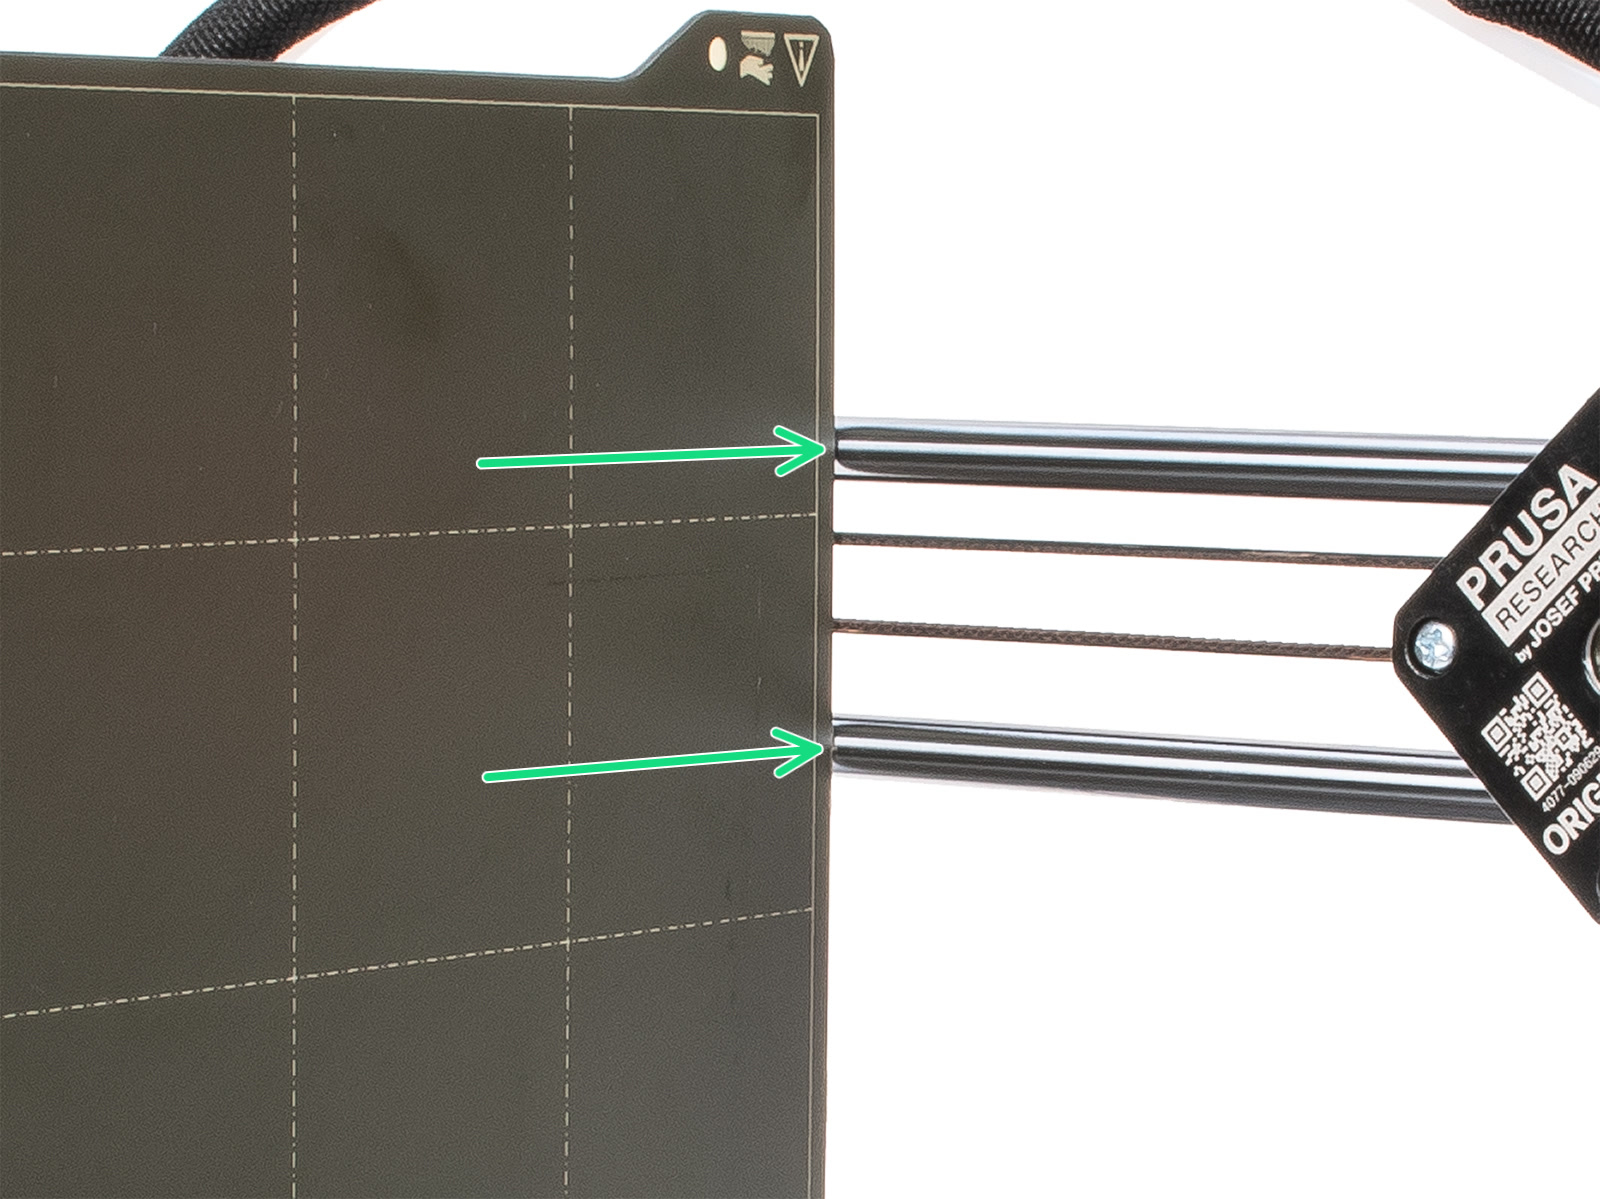
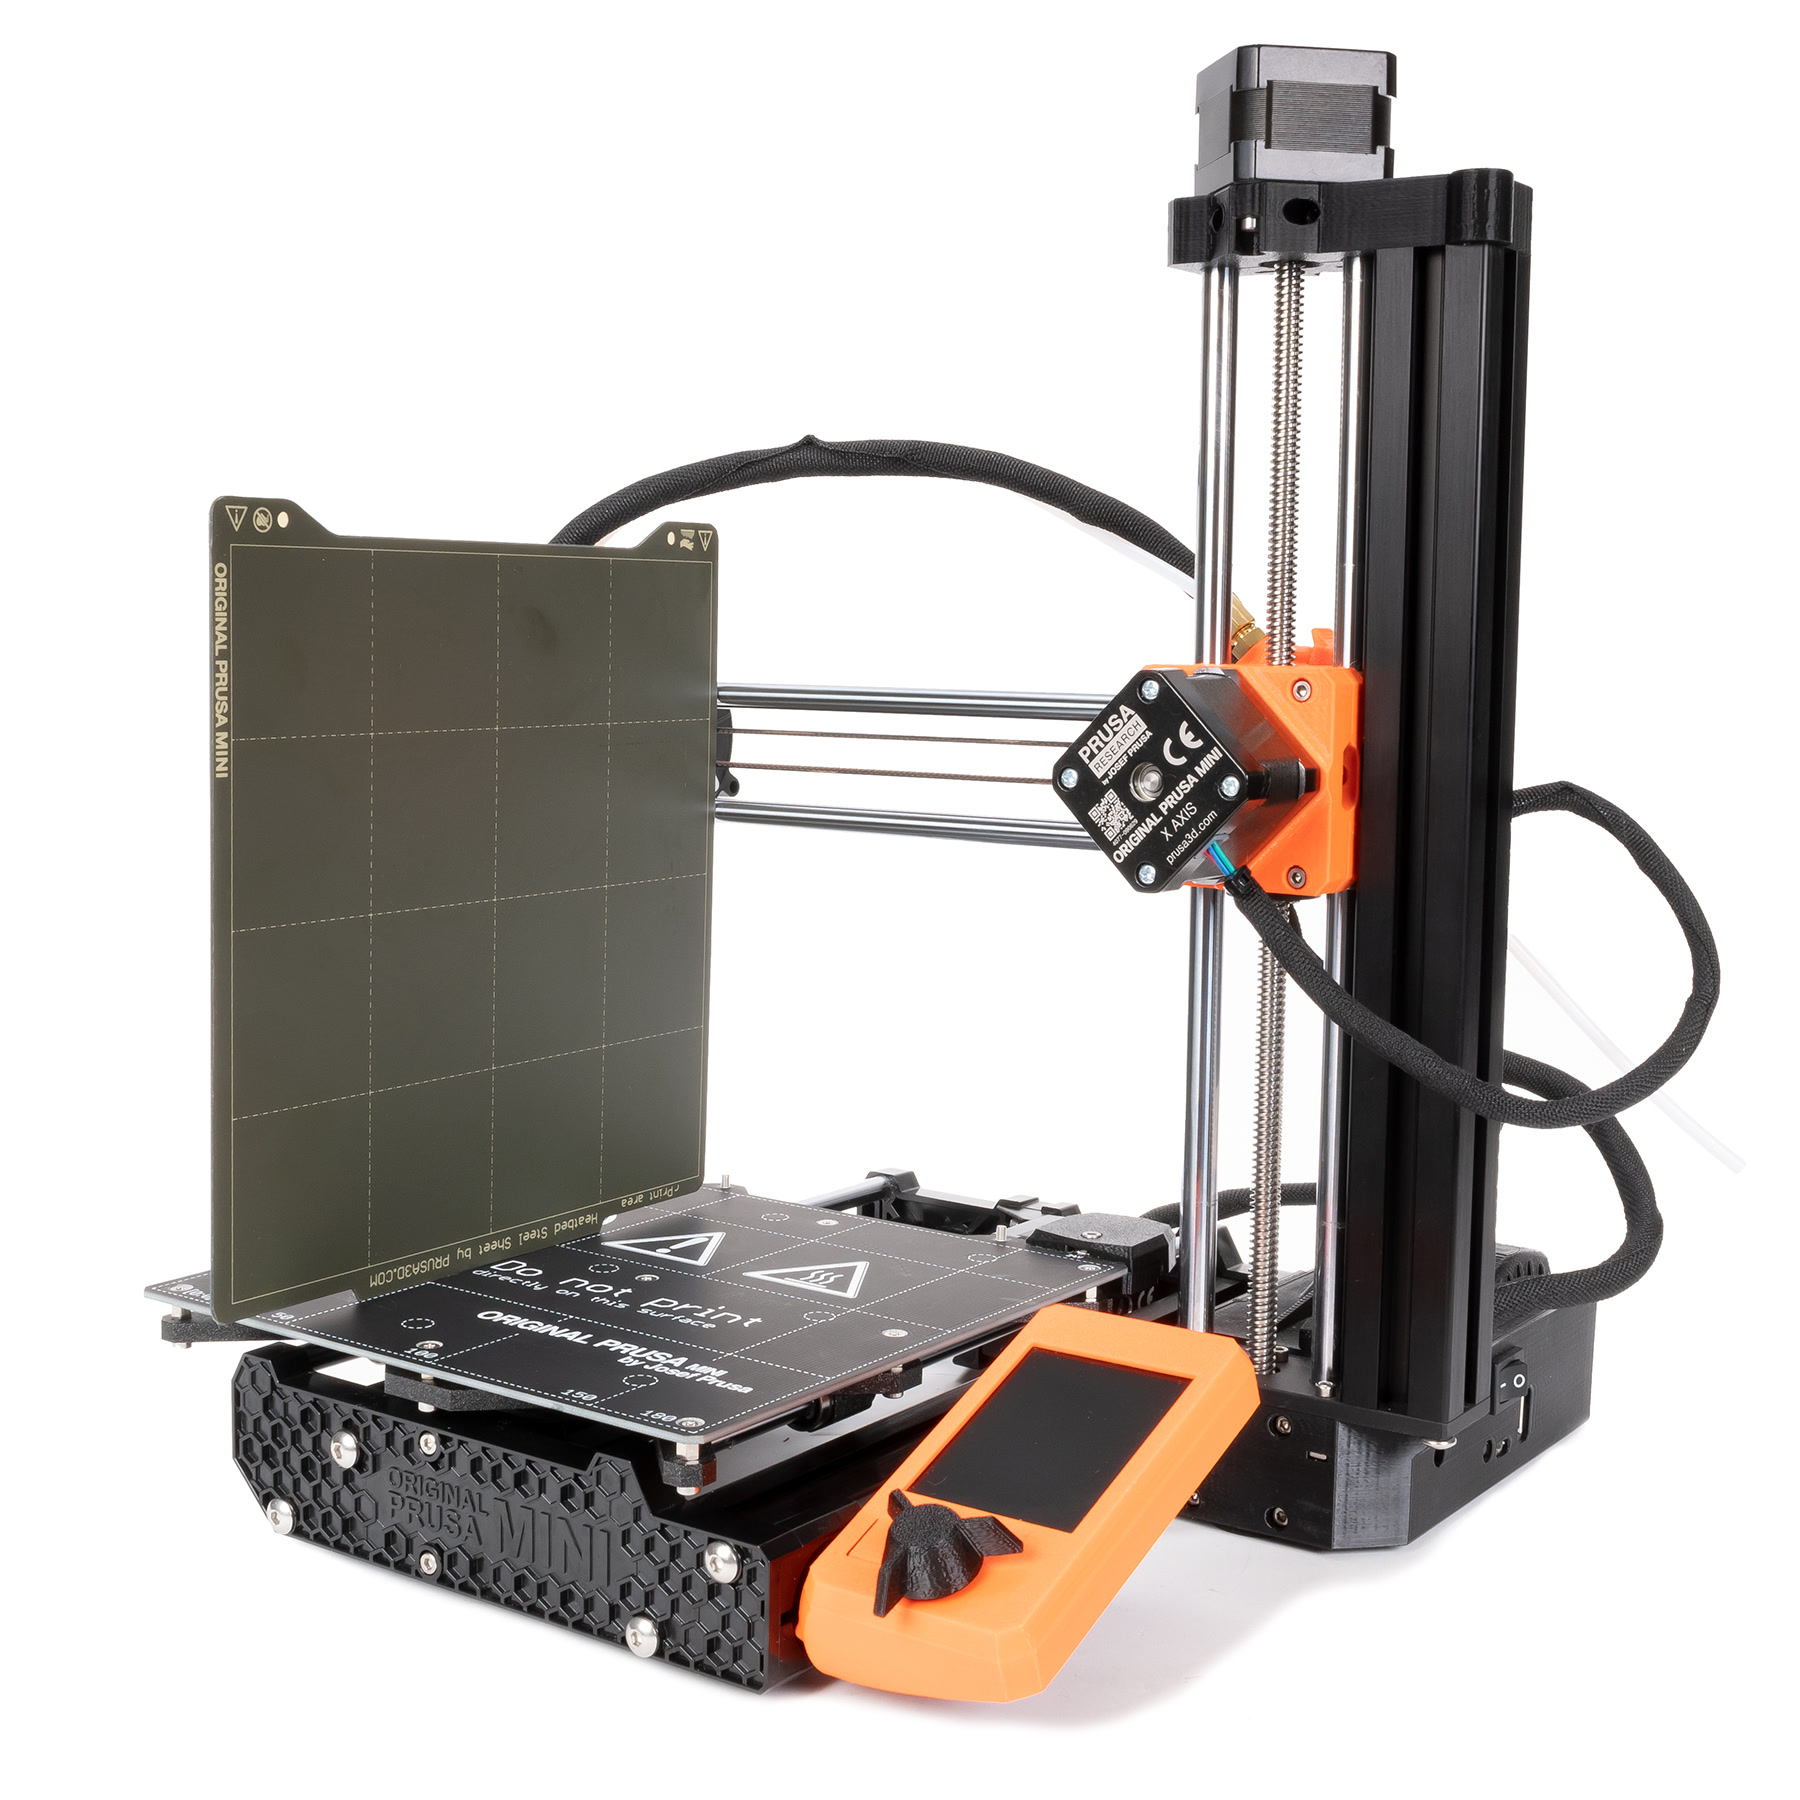
                  4. Place the steel sheet vertically on the bed, with the rear notch facing down. When pushed against the X-axis rods, the steel sheet should touch both smooth rods simultaneously.

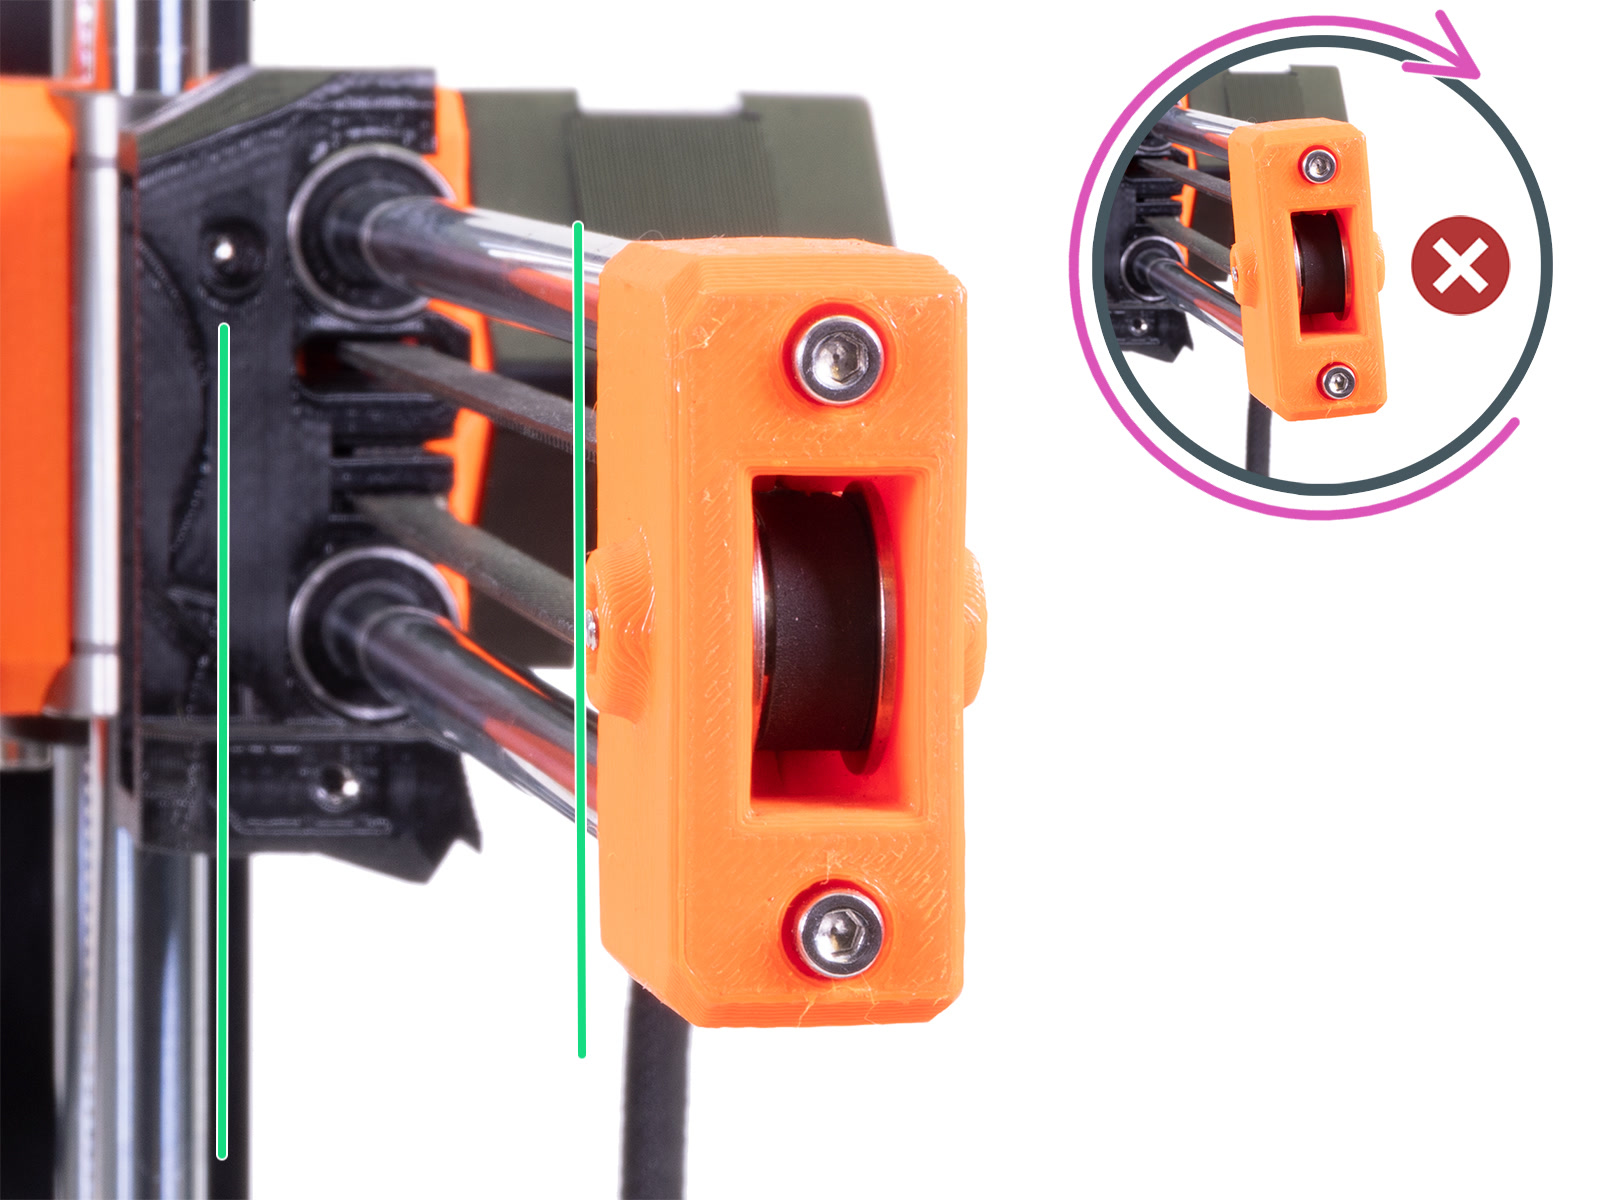
                  1. If they do not touch simultaneously, carefully twist the X-end plastic part so they do. You may have to loosen the two screws on the side of the X-end, securing it to the rods, to smoothly twist it.
                  1. Navigate to Settings -> Disable Steppers, and move the print head to the left of the X-axis.
                  2. Confirm this two more times with the steel sheet on the printed dotted line next to "50" and "150".

                  XZ-axis 

                  Here we will make sure the nozzle holds the same distance to the heatbed across the full length of the X-axis. First Layer Calibration (MINI/MINI+) will also not have an even thickness across its entire length and be flatter/more squished on one side of the bed and the other.

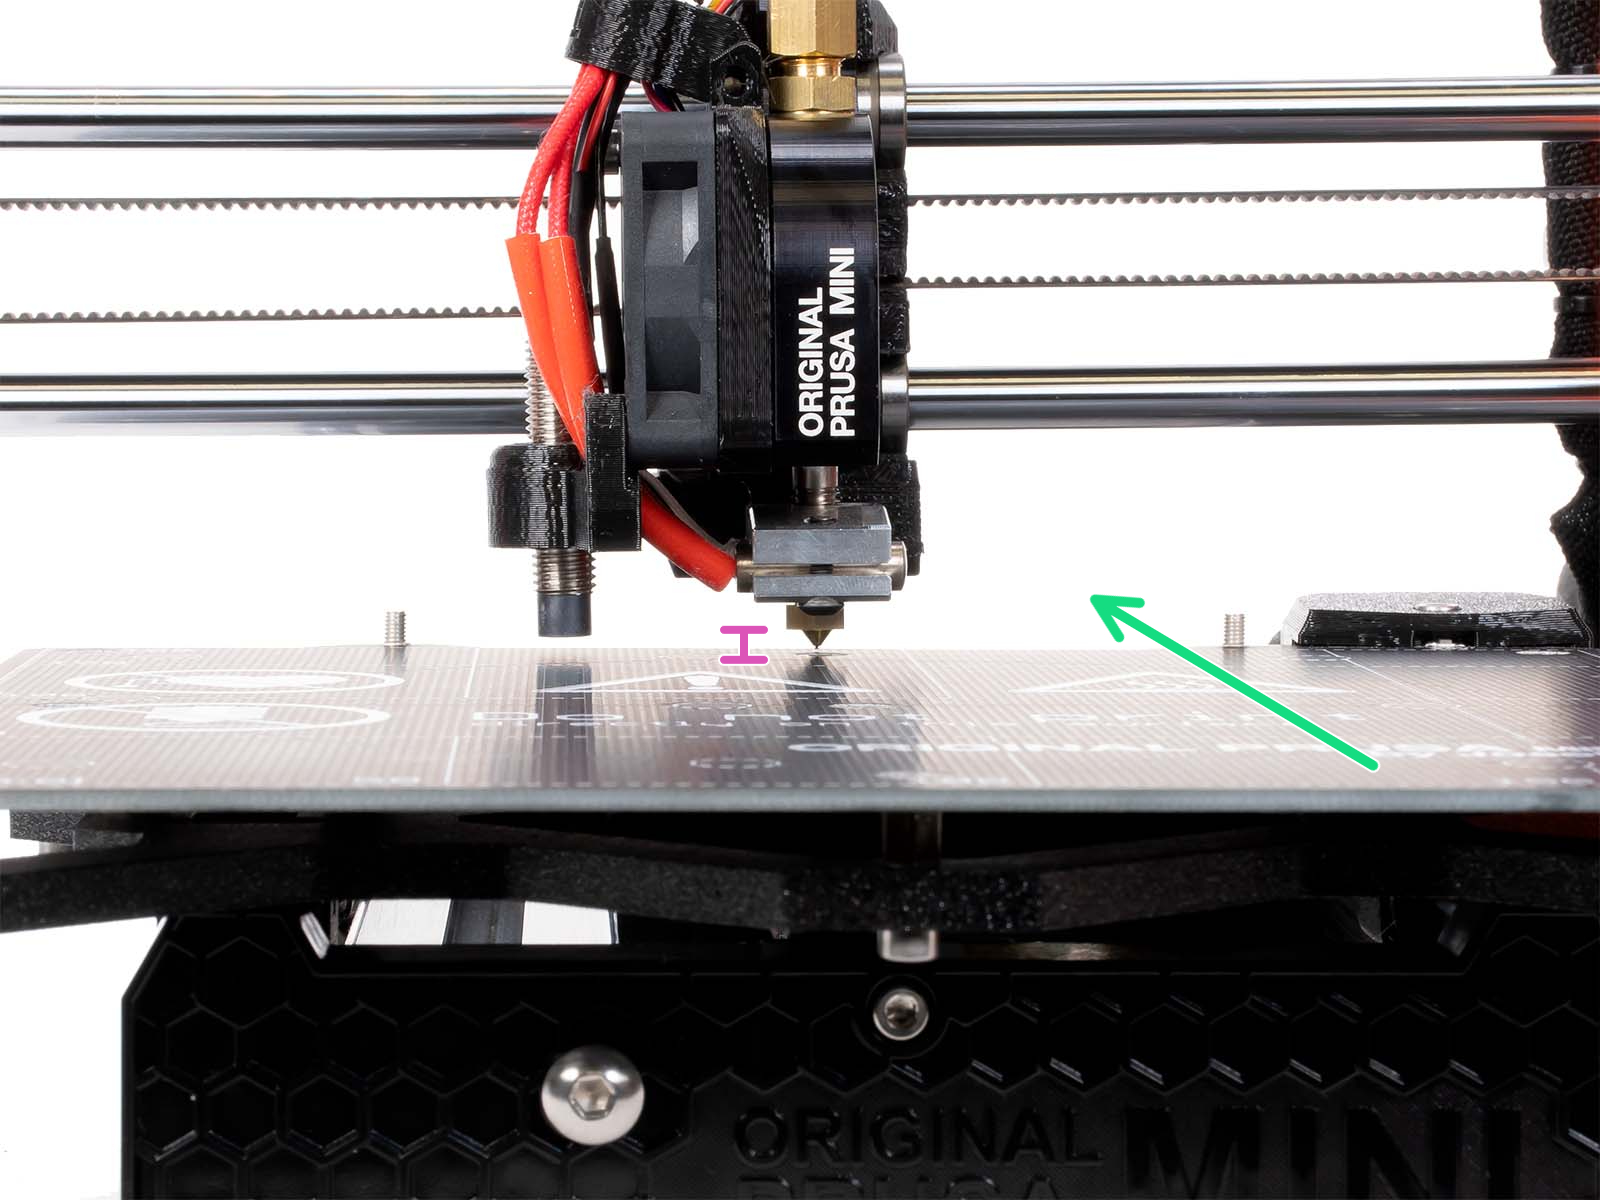
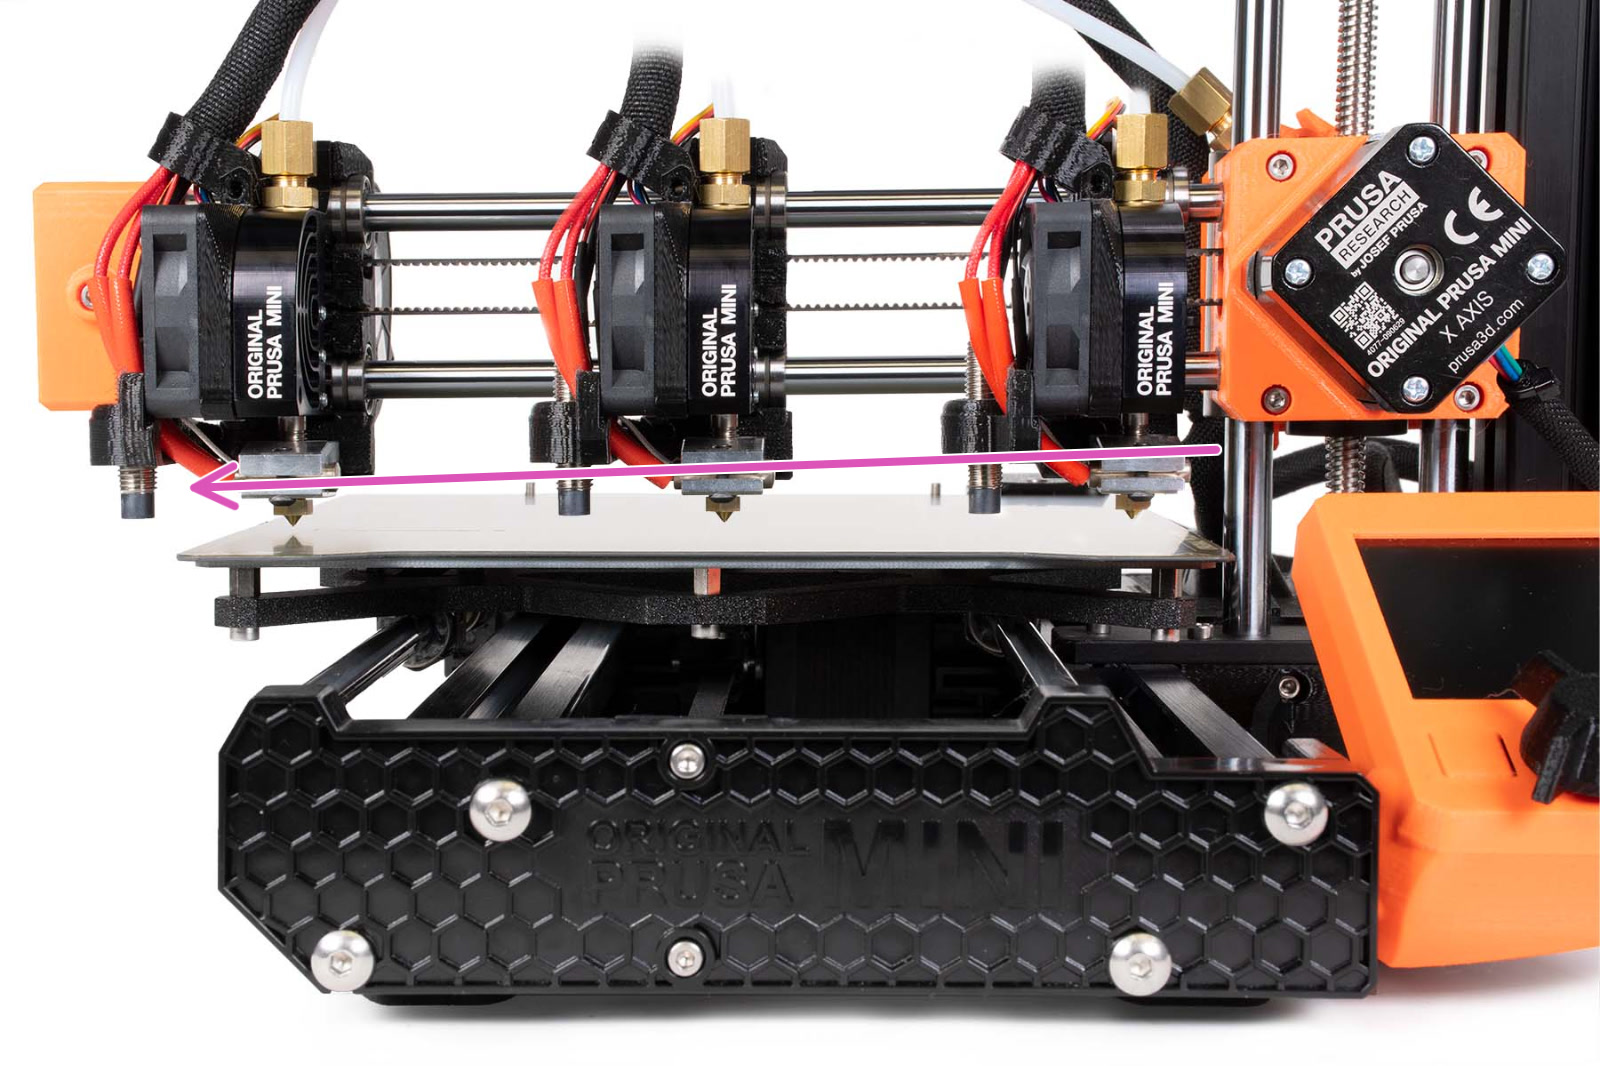
                  1. Home the printer (LCD menu -> Calibration -> Auto home) which moves the print head to the far right and close to the bed (left picture). Notice the distance between the heatbed and the tip of the nozzle (purple ruler left picture). 
                  2. Disable steppers by restarting the printer or navigating to Settings -> Disable Steppers.
                  DO NOT turn the printer off. Moving the axis fast while the printer is off can damage the TMC stepper drivers.
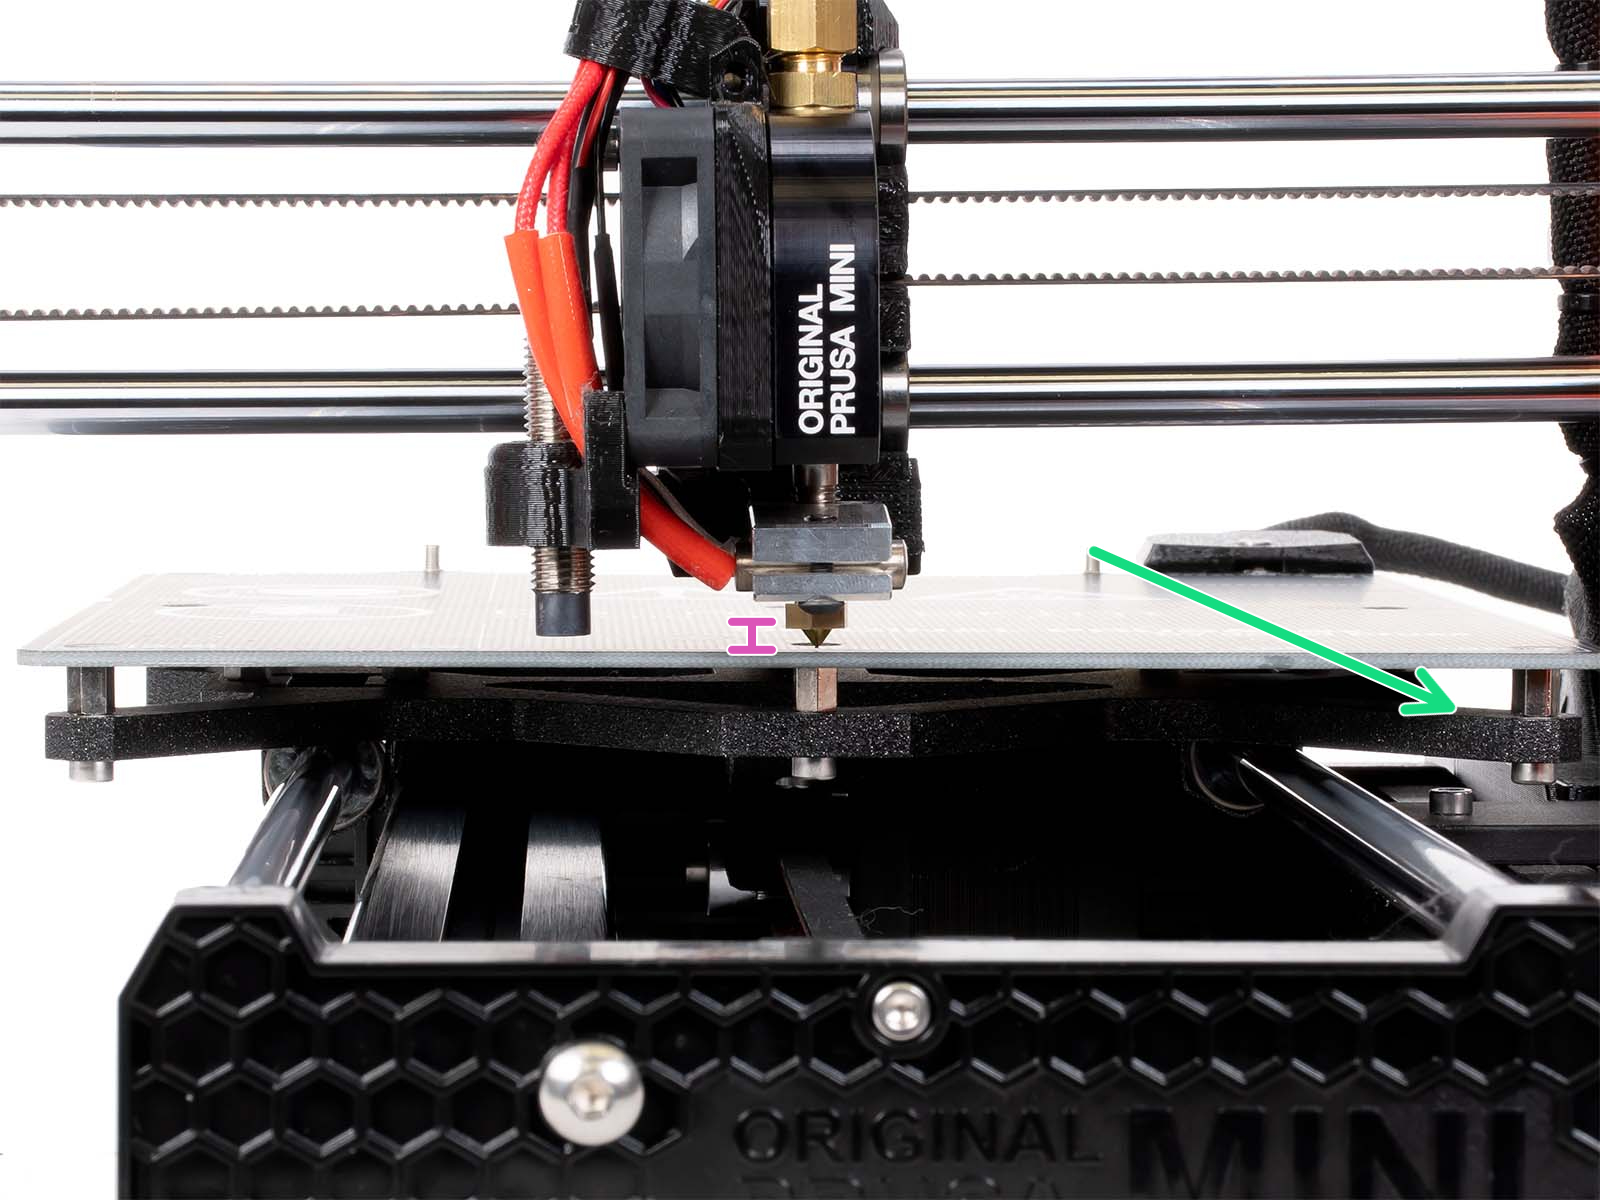
                  1. Slide the print head across the bed by hand to the left and see if there is any change in the distance. The tip of the nozzle should have the same distance to the print surface across the entire length of the X-axis.
                  Using a shim/paper/ thin cardboard to assess the distance between the nozzle and the heatbed can make it easier to spot the difference.

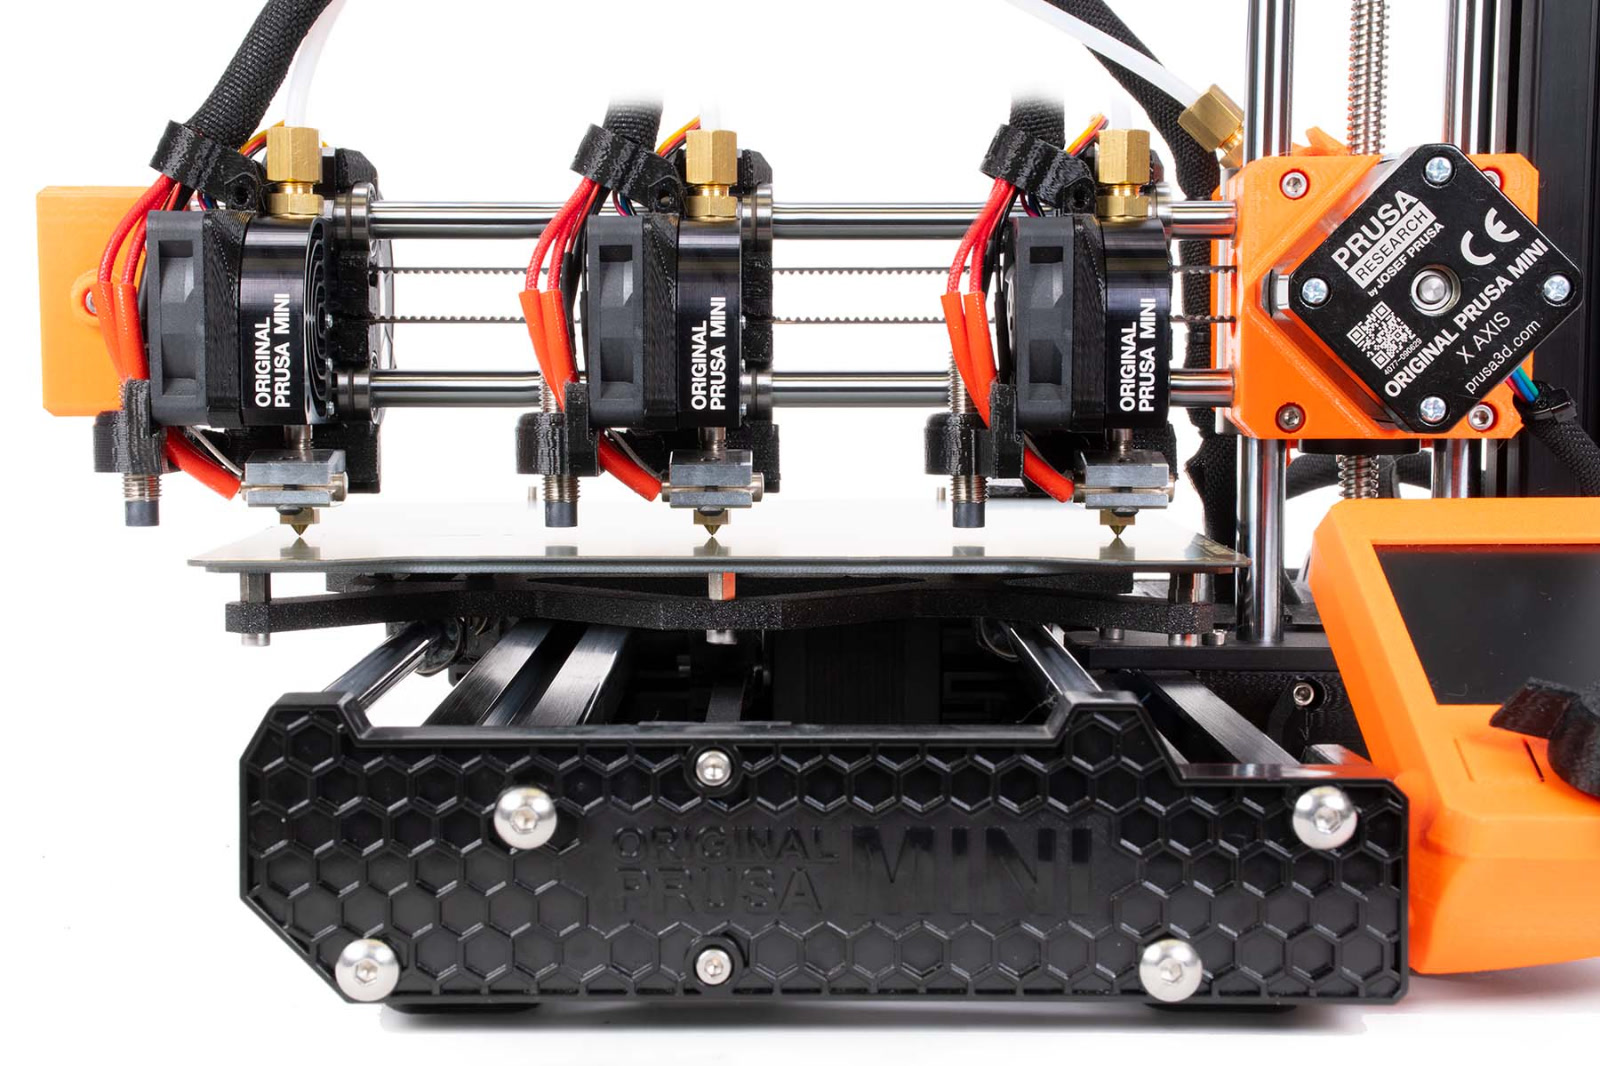
                  Printer with an XZ skew to the left.

                  XZ-axis correction

                  We will correct this skew by resetting the Y-axis extrusion. This requires a 3mm Allen key.

                  1. Home the printer, by navigating to Calibration -> Auto home, on the LCD menu.
                  2. Disable steppers by restarting the printer or navigating to Settings -> Disable Steppers. 
                  DO NOT turn the printer off. Moving the axis fast while the printer is off can damage the TMC stepper drivers
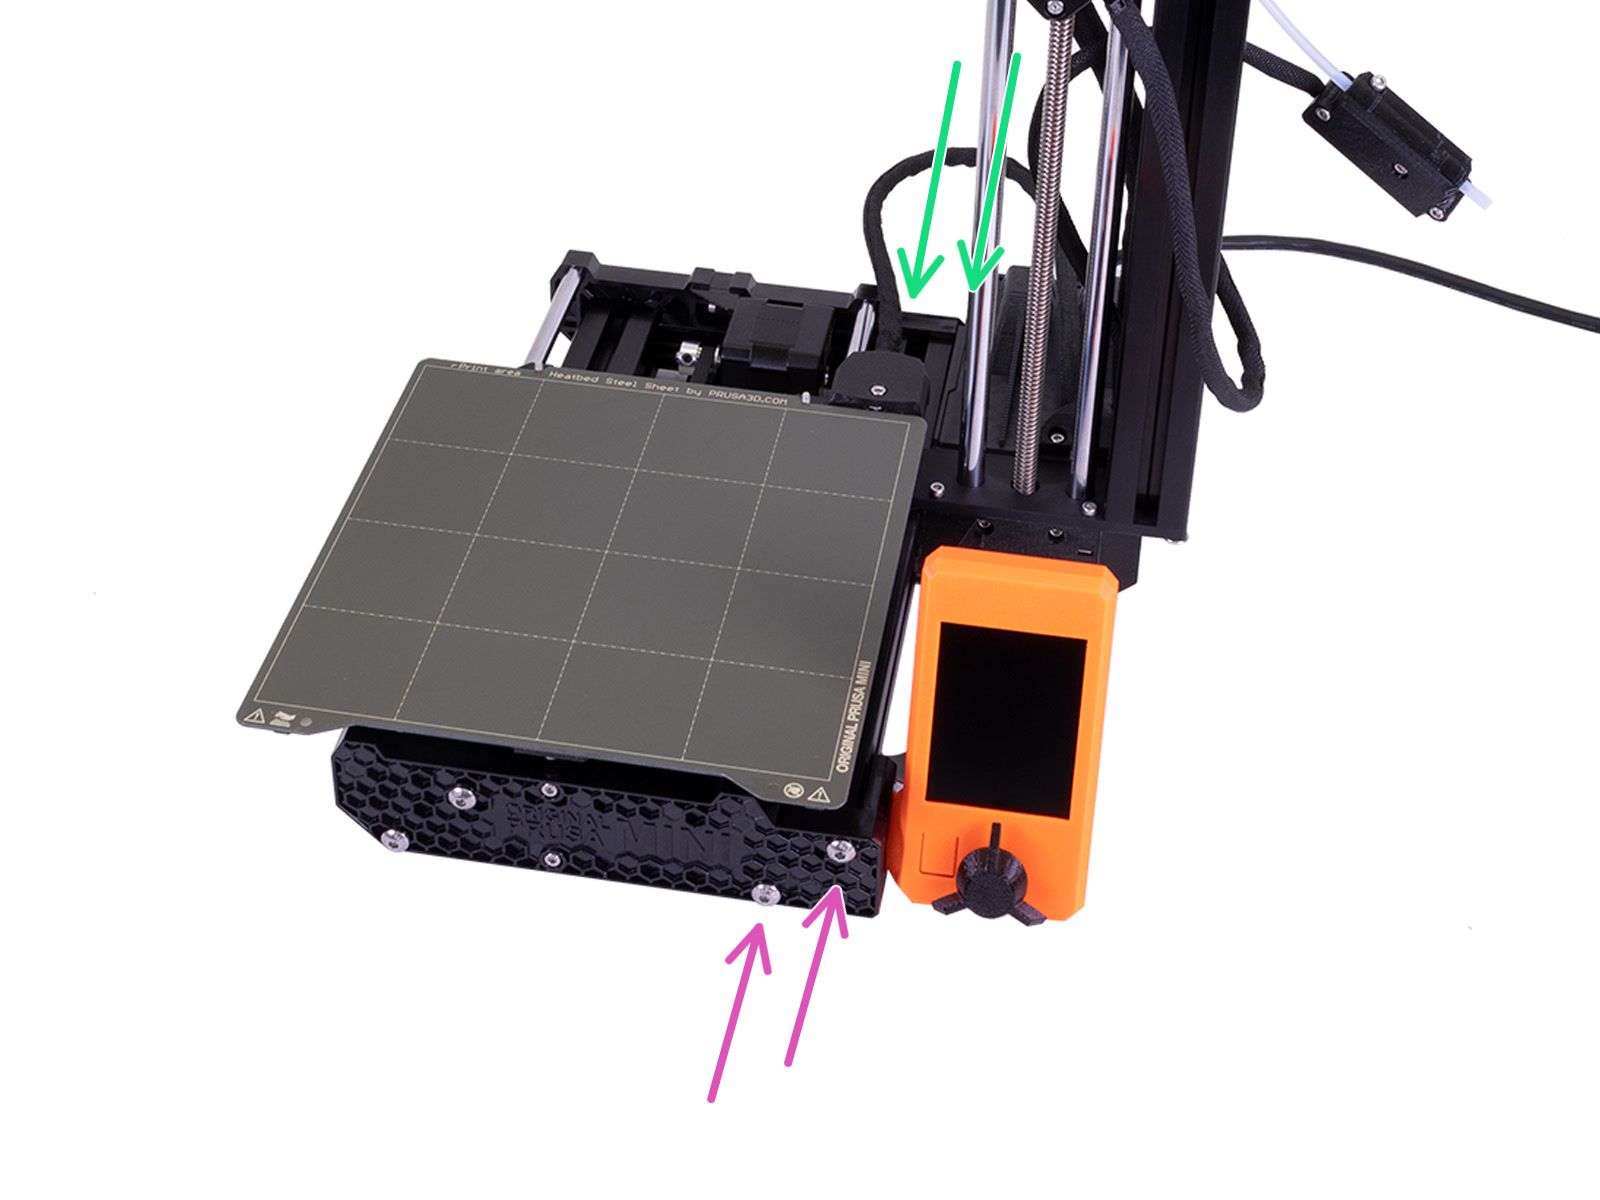
                  1. Using a 3 mm Allen key, loosen the two screws closest to the Z-axis, on the front and backplate (purple and green arrows). Do not remove the screws, just loosen them roughly a quarter turn.


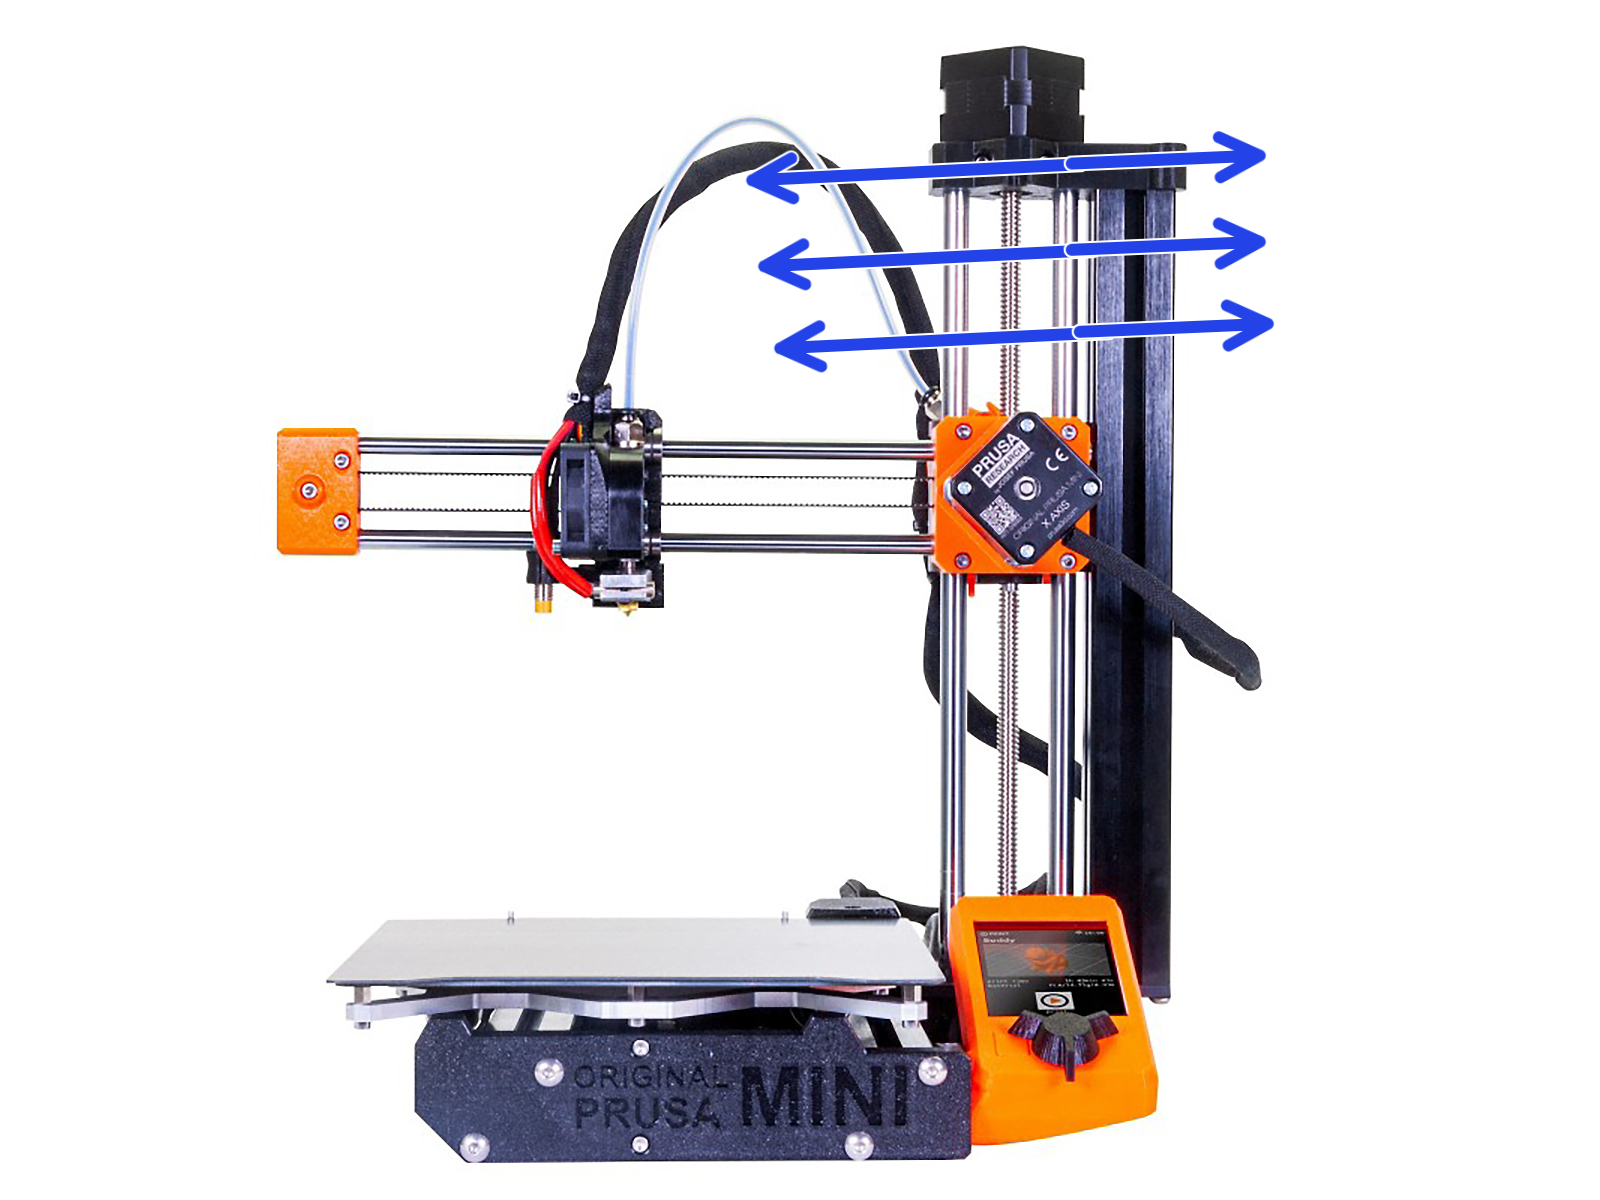
                  1. Carefully press/tap the Z-tower towards or away from the bed (blue arrows) depending on the direction of the skew. You can damage the printer if you use too much force.

                  1. Move the nozzle across the bed to make sure it has the same distance to the bed across the whole X-axis (green arrow).

                  Corrected printer with no skew.

                  1. Once satisfied, secure the 4 screws on the front/backplate again, which you loosened in Step 3.
                  After completing this procedure you must run the First Layer Calibration again from zero before you start printing!

                  Fine-tuning the XZ-axis

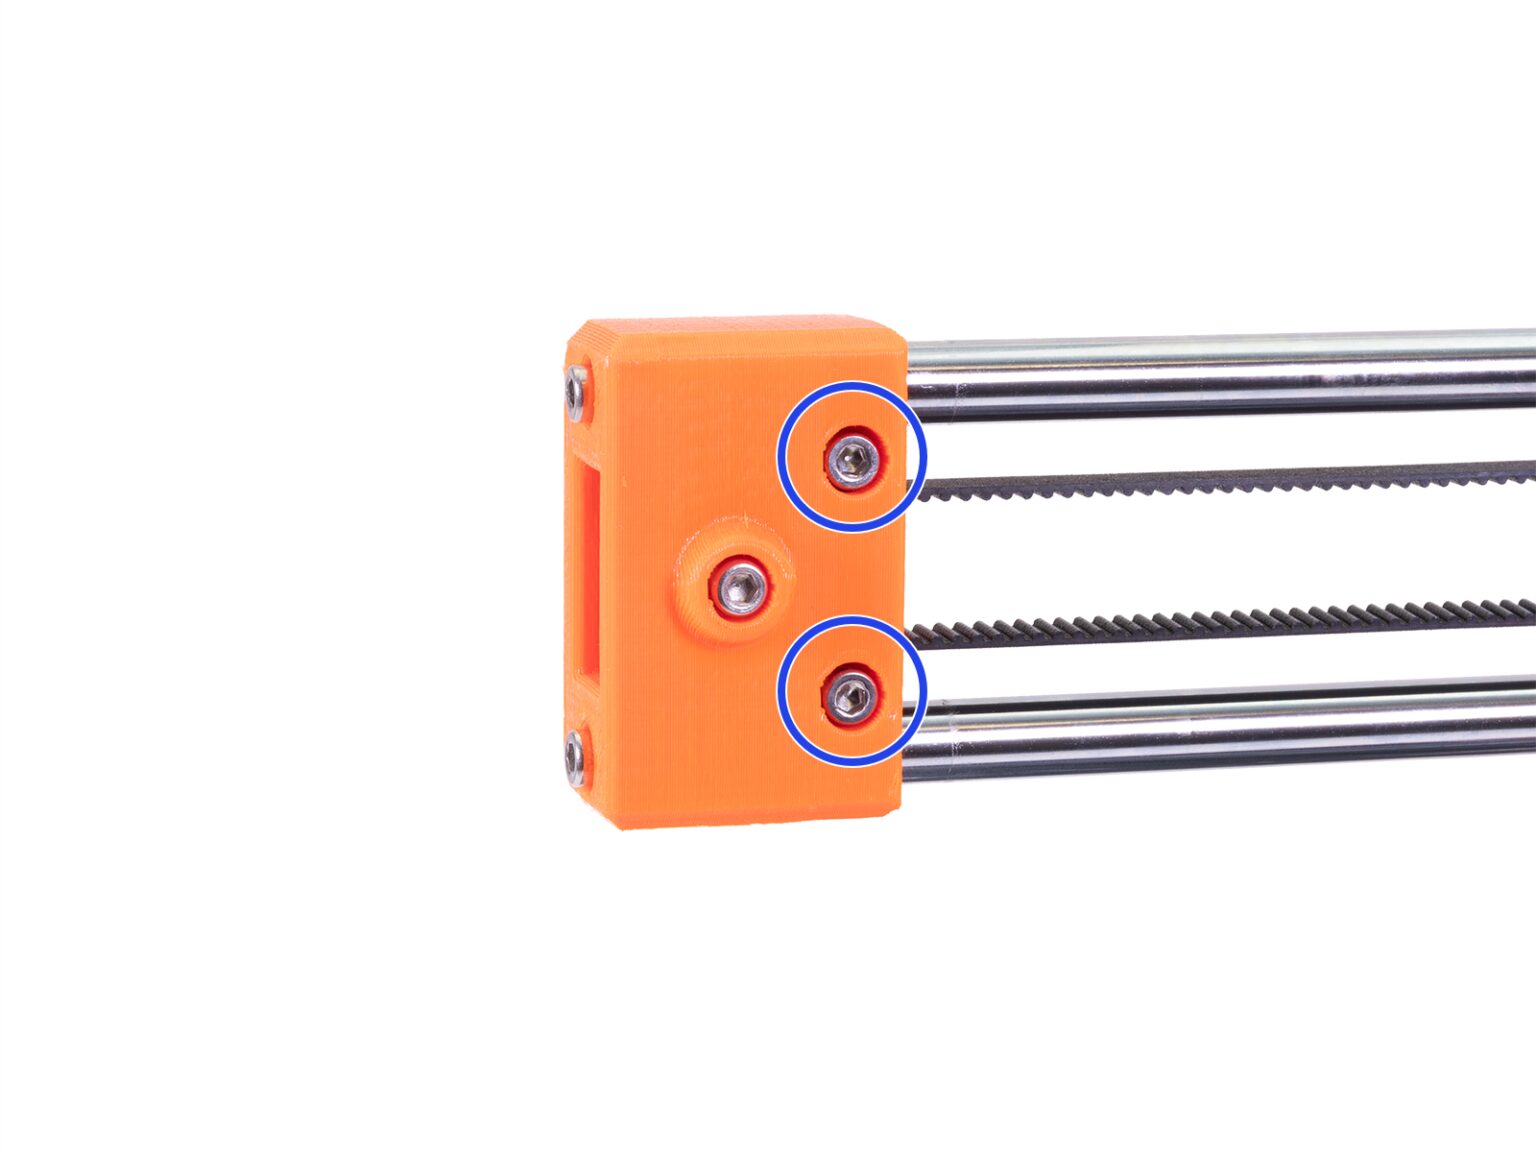
                  With a very small deviation (0.5 - 1 mm / 0.02 - 0.04 in), it can be difficult to dial it in using the method above. Use this method to fine-tune, but it is important that the two end screws do not differ more than 0.5-1mm in how much they protrude.

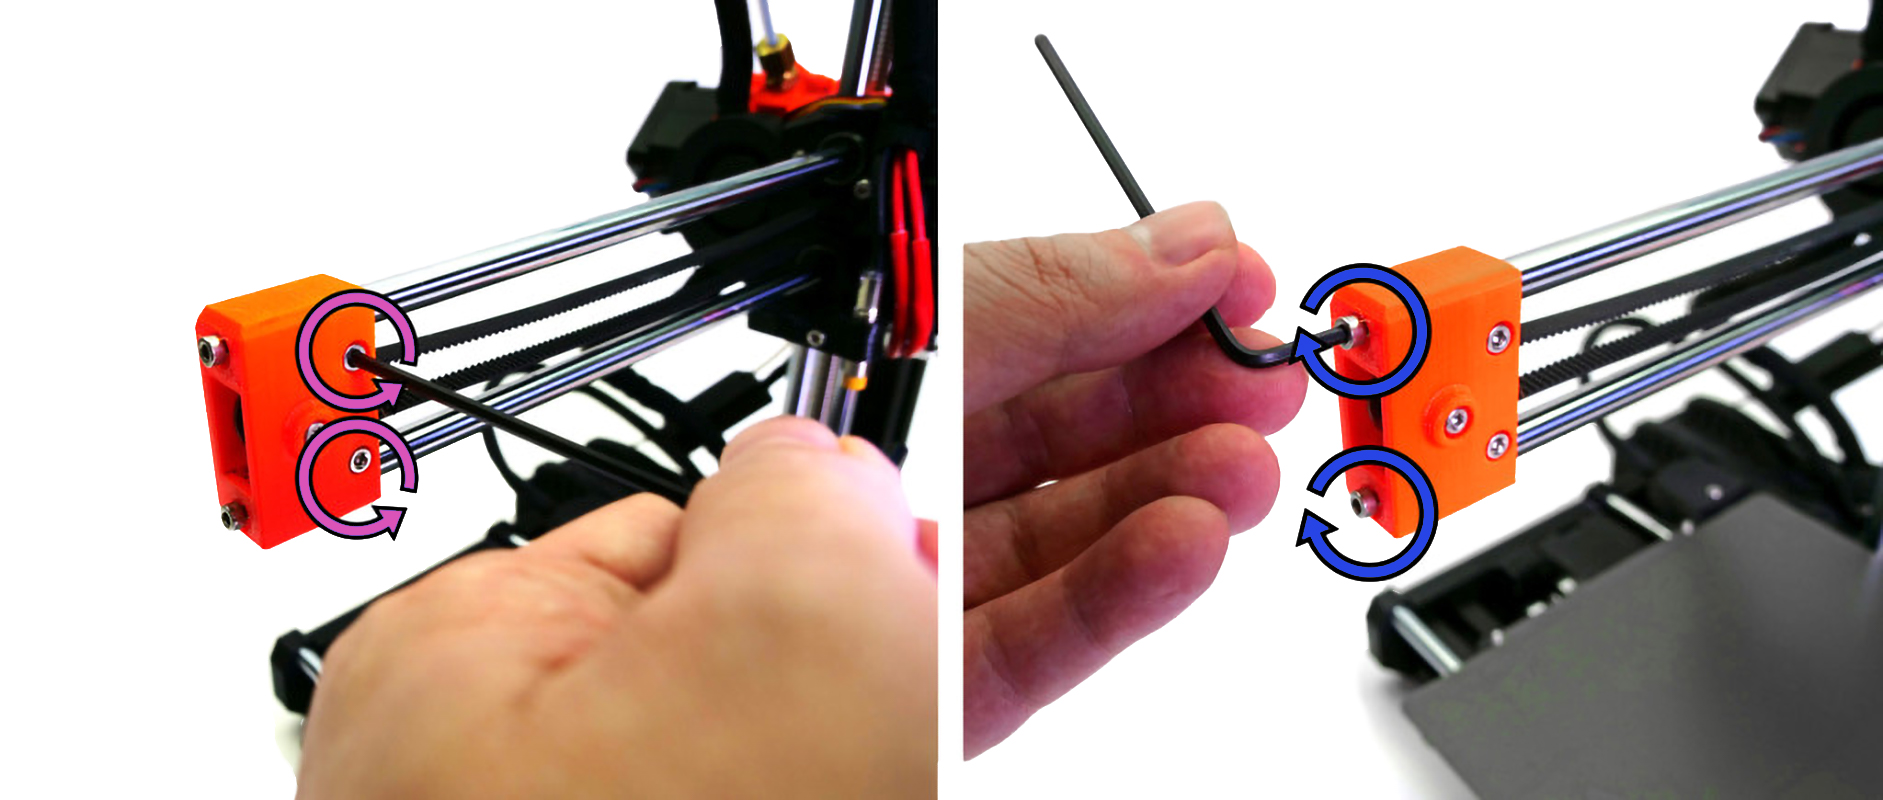
                  Downward adjustment

                  1. Turn the two screws on the side of the idler-holder (purple arrows) counterclockwise.
                  2. Turn the top screw on the end clockwise (top blue arrow). This will bring the X arm down, correcting the skew.
                  3. Secure the idler-holder again by turning the screws on the side clockwise.
                  Half to a full turn of the end screw is most often enough but will depend on your specific case. Tightening it too much can crack the plastic part.

                  Upwards adjustment

                  1. Loosen the two screws on the side of the idler-holder (purple arrows) by turning them counterclockwise.
                  2. Turn the bottom screw on the end clockwise (bottom blue arrow). This will bring the X arm up, correcting a slight skew in this direction.
                  3. Secure the idler-holder again by turning the screws on the side clockwise.

                  Your belt may change tension during the minor skew adjustment procedure. Adjusting the other screw in the opposite direction may counter this. Follow Adjusting belt tension (MINI/MINI+) to correct it if needed.
                  Was this article helpful?
                  This action is available only to registered users. Please log-in.

                  Topics

                  • Troubleshooting
                    • Printer troubleshooting
                      • Spaghetti monster
                      • Extruder blob
                      • Extruder noises
                      • Print fan is not spinning
                      • Clogged nozzle/hotend (MINI/MINI+)
                      • Preheat error bed #12201 (MINI)
                      • M.I.N.D.A./SuperPINDA sensor testing (MINI/MINI+)
                      • Preheat error print head #12202 (MINI)
                      • Thermal runaway bed #12203 (MINI)
                      • Thermal runaway print head #12204 (MINI)
                      • Maxtemp error bed #12205 (MINI)
                      • Maxtemp error print head #12206 (MINI)
                      • Mintemp error bed #12207 (MINI)
                      • Mintemp error print head #12208 (MINI)
                      • Squaring your MINI
                      • Factory reset (MINI)
                      • Blown Fuse (MINI)
                      • IR Filament Sensor Troubleshooting (MINI/MINI+)
                      • Filament failed to unload (MINI/MINI+)
                      • Temp not matching print head #12210 (MINI/MINI+)
                      • PrusaLink Troubleshooting
                      • Homing Error #12301 (MINI)
                      • USB not connected #12602 (MINI/MINI+)
                      • No file on USB #12604 (MINI/MINI+)
                      • Signature verification failed #12606 (MINI/MINI+)
                      • Hash verification failed #12607 (MINI/MINI+)
                      • Unsupported printer type #12610 (MINI/MINI+)
                      • Unsupported printer version #12611 (MINI/MINI+)
                      • Flash erase error #12605 (MINI/MINI+)
                      • Temp not matching heatbed #12209 (MINI/MINI+)
                      • No FW in internal flash #12612 (MINI/MINI+)
                      • Invalid FW size on USB #12603 (MINI/MINI+)
                      • File system error #12613 (MINI/MINI+)
                      • Unsupported BBF version #12614 (MINI/MINI+)
                      • Tangled filament
                      • Emergency stop #12510 (MINI)
                      • Connect Registration Failed
                      • Connect Registration Failed #12401 (MINI)
                      • Blue Screen of Death (BSOD) #31538 (CORE One) #35538 (CORE One L) #36538 (CORE One INDX) #26538 (MK4S) #13538 (MK4) #27538 (MK3.9S) #17538 (XL) #21538 (MK3.9) #28538 (MK3.5S) #23538 (MK3.5) #12538 (MINI)
                      • Homing error Y #12305 (MINI/MINI+)
                      • Homing error X #12304 (MINI/MINI+)
                      • Troubleshooting the MINI/MINI+ assembly
                      • Firmware in the internal flash corrupted! #12608 (MINI)
                      • SD cards and USB drives
                    • Diagnostics
                    • Print Quality Troubleshooting
                    • QR Error codes
                    • Print Error Messages

                  17 comments

                  Log in  to post a comment
                  John
                  •
                  How shall I fix a X-Y axes issue? It would be really cool to make this article complete. That's the only correction I need.
                  Reply
                  Dave Schinkel
                  •
                  If Prusa would just make a freakin youtube video for this, it would sure help. I get it now but without prusa support explaining in more detail what some of the bullet points actually mean and where on my machine, I'd be lost still. The images aren't enough, an only relying on a doc for this kind of this is not helpful at all no matter how carefully they think they documented this.
                  Reply
                  Francesco C. Vel
                  •
                  Hi everyone.
                  I've been trying to validate the X axis test for 2/3 days, I've tried everything but it keeps failing.
                  I noticed that the axis is slightly inclined, because the extruder head, moving along the X axis, tends to get closer to the printing bed. I'm following the steps in point 6, but the test keeps failing.
                  I'm very sad and disappointed about this, because assembling the printer has been very tiring and I still can't even do a "regular" print test...
                  Reply
                  Shane
                  •

                  for cases like this, it is best to contact support either by pressing the chat now button in the lower right corner of the page, or send an email to [email protected] so you can show them photos and they can walk you through steps to resolve this issue. 

                  Reply
                  tokifung
                  •
                  Hello, Are there any method to check/adjust the XY axis? My X axis seems moved anti-clockwise looking
                  Reply
                  Johegy
                  •
                  I had the same problem and solved myself: the screw in the long pocket of the bottom part of the XZ column was loose. I thigtened it and the XY plane became nearly perfect. The screw with the green arrow on the picture at Mini build step 13: https://help.prusa3d.com/guide/building-your-mini_6384#6752
                  Reply
                  aneel
                  •
                  Thank you! This seems to have fixed my XY problem.
                  Reply
                  merryprinter
                  •
                  Y-axis: "3. While looking at the distance between the nozzle and heat bed, slide the bed from one extreme to another (green arrows) and see if there is any deviation."
                  My Y-axis has 1,1mm deviation but this tutorial do not describe how to compensate it. Any tips? I'm truing to square my MINI+ as much as possible.
                  Reply
                  Marina Curzi
                  •

                  Try retigntening the heatbed screws according to the assembly manual. If this does not solve the issue, make pictures and videos and share with out technical support.

                  Reply