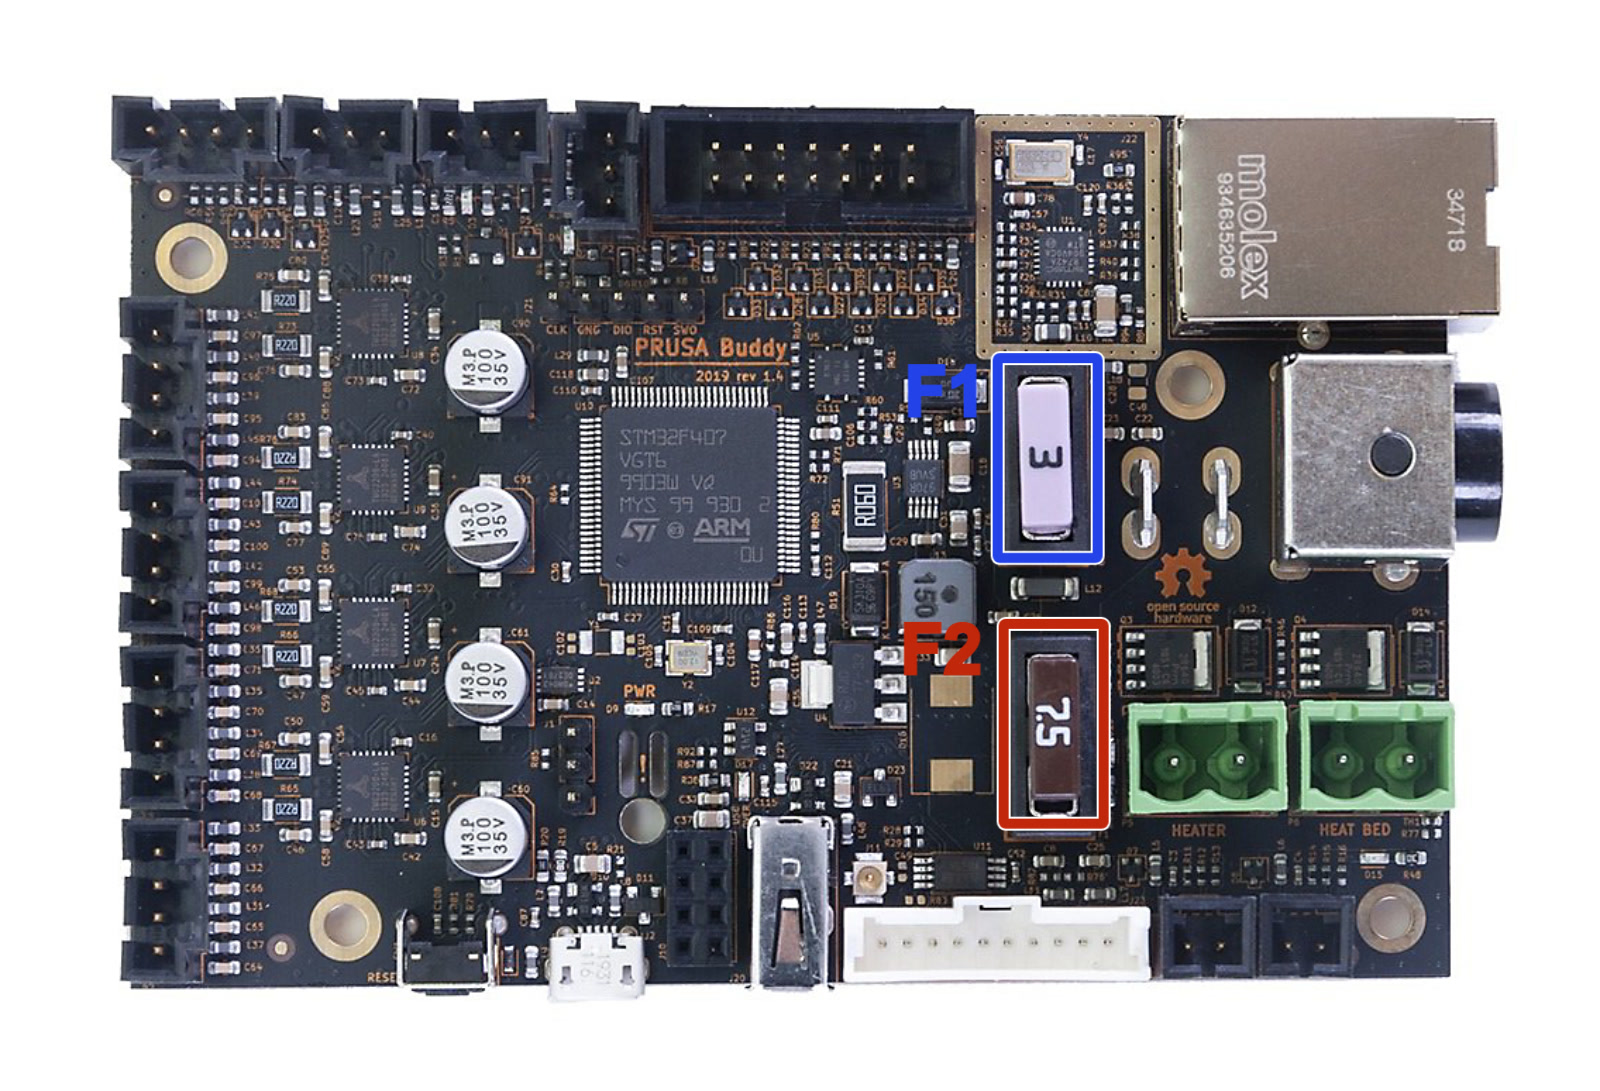
The Original Prusa MINI is equipped with a 24V Buddy mainboard. This 32-bit logic board has two removable automotive fuses protecting the crucial components. If your printer or some of its components suddenly stopped working, it is recommended to check these fuses and replace them if necessary.
Each fuse protects a different part of the board:
- F1 (3A fuse) - Stepper drivers (motors) and logic.
- F2 (7.5A fuse) - Heatbed heater and hotend heater.
Unlike the miniRAMBo and Einsy RAMBo, the Buddy board only has two fuses.
Checking the Buddy fuses
- Turn the printer off and disconnect the power cord.
- Open the electronics cover by removing the M3 screw holding the cover door closed. You may refer to Step 10 of the assembly manual for more details.
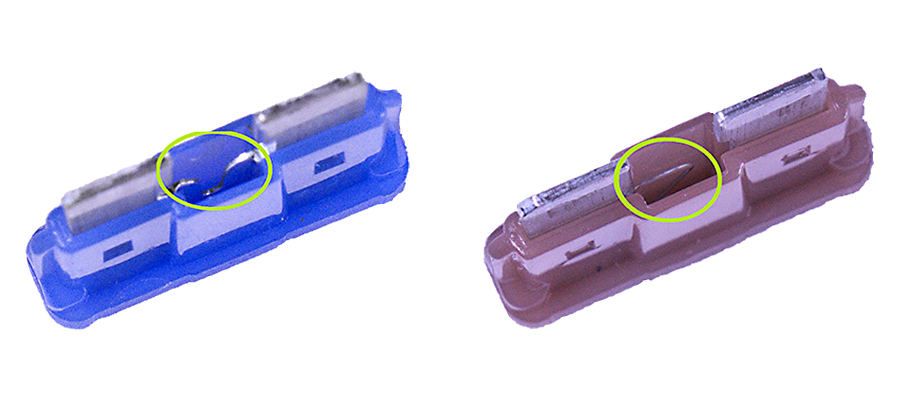
- Now you have access to the Buddy board. Pull the fuses out and inspect them. The photos below show what intact fuses look like. Inspect them from this angle and see if the little wire inside is not broken.
If you own a multimeter, you can check the components for a potential short. Multimeter usage will show you how.
Replacing blown fuses
If you find out that any of the fuses are blown, you can easily replace them. The fuses we use are known as ATO blade fuses for automotive applications and can be found at any local car parts/hardware store or ordered online. It's a good practice to bring the blown fuse with you so that you can get the exact same one.
- Turn the printer off, disconnect the power and remove the blown fuse(s) from their sockets.
- Place the new fuse in the correct slot - Double check that you are replacing 3A for 3A or 7.5A for 7.5A.
- Unplug any components connected to the previously blown fuse and try to turn on your printer. Check for any kind of unwanted behavior.
- Once again, turn off the printer and remove the power cord. Then reconnect all the disconnected components.
Was this article helpful?
This action is available only to registered users. Please log-in.
2 comments