What happened?
The printer will display "Mintemp error" for the print head if the printer's hotend temperature goes below 15 ºC at any point. In this case, the printer will stop the heating and display the message on the screen. The printer then waits for the user to inspect all parts and if needed fix the issue.
Error name: Mintemp error print head
Error code: #12208
How to fix it?
The error might indicate some issue with the wiring, either the heater or the thermistor cables are possibly damaged.
A visual inspection
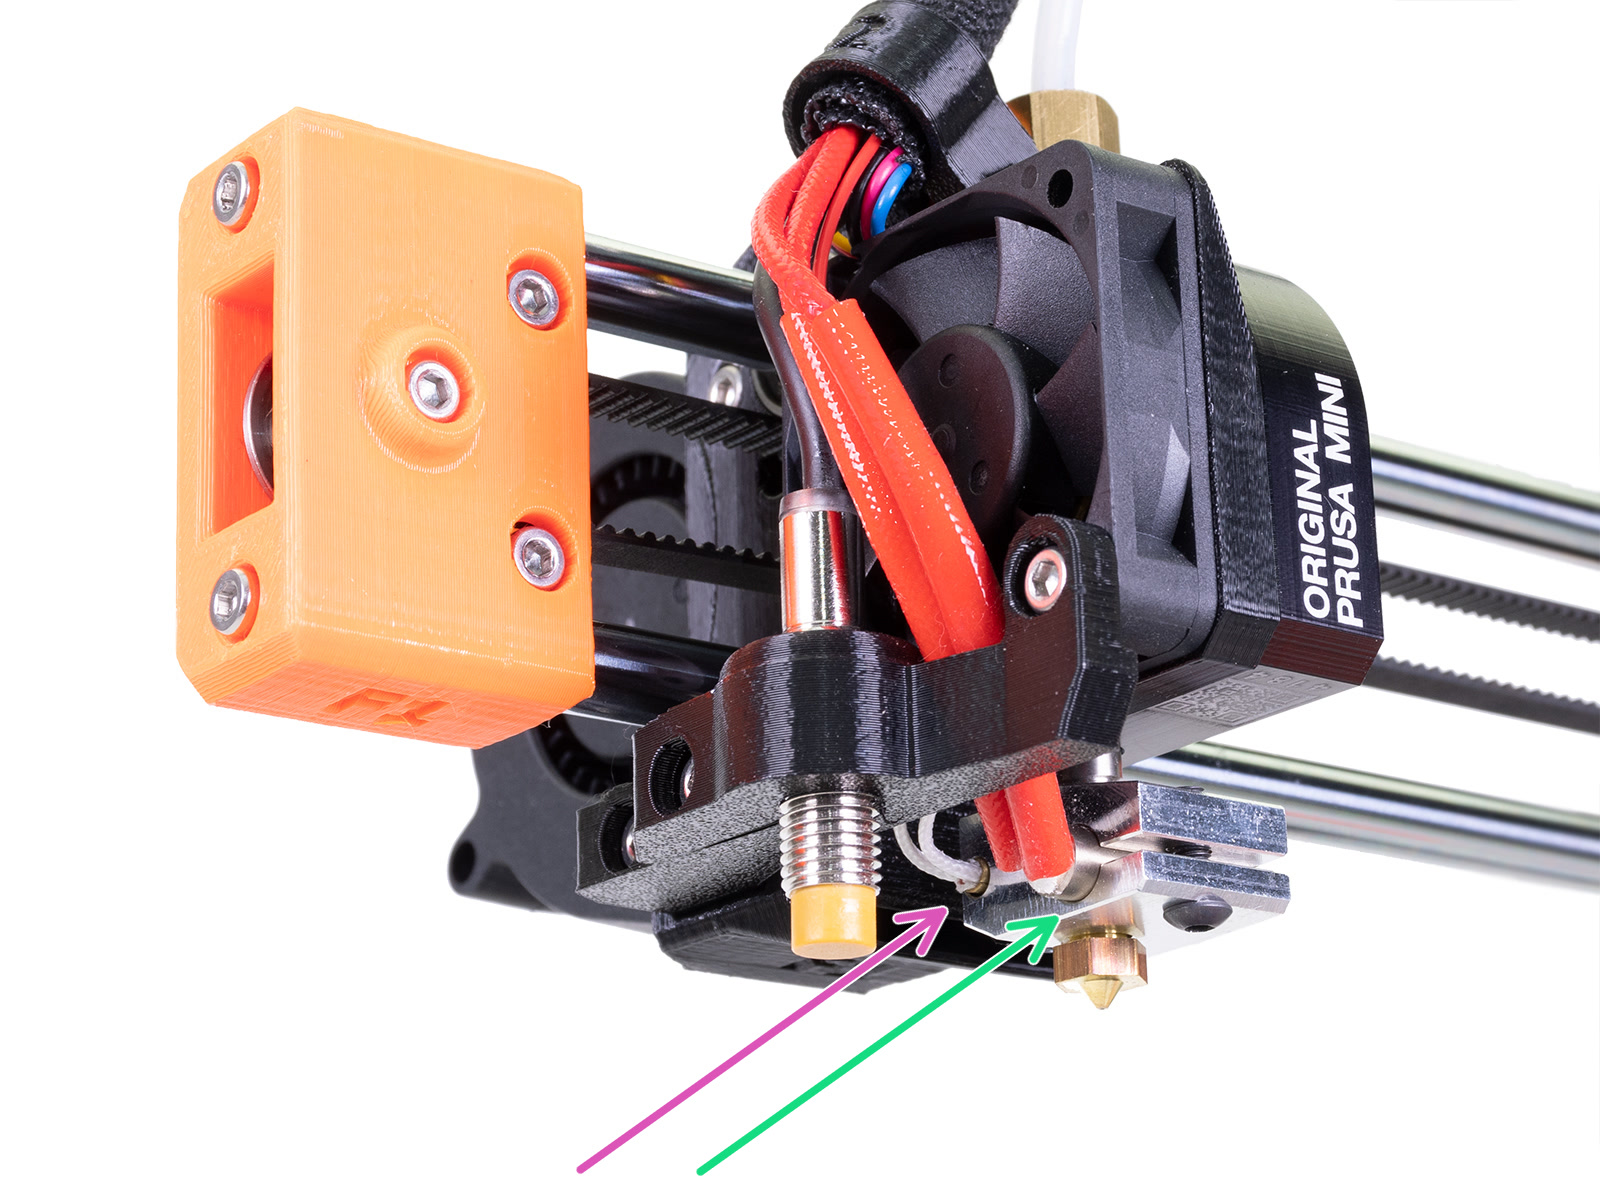
Check on the hotend, where the thermistor (purple arrow) and heater (green arrow) reside, that no wires have broken off the sensor or heater themselves. While the printer is turned off, carefully try to move the wires by hand. If any of them have come detached your search is over and the part needs to be changed. It is not recommended to solder these wires, moreover, for the thermistor, it will change its resistance and thus readings. Spare parts can be found in our e-shop, or you can contact Support for assistance.
Try preheating the hotend in LCD-menu -> Settings -> Temperatures -> Nozzle to 250 ºC. After the temperature is reached, move the cables behind the print head by hand to see if the error will appear. In case the LCD main screen shows 0/0 in the hotend temperature, check the cable connections to the Buddy board.
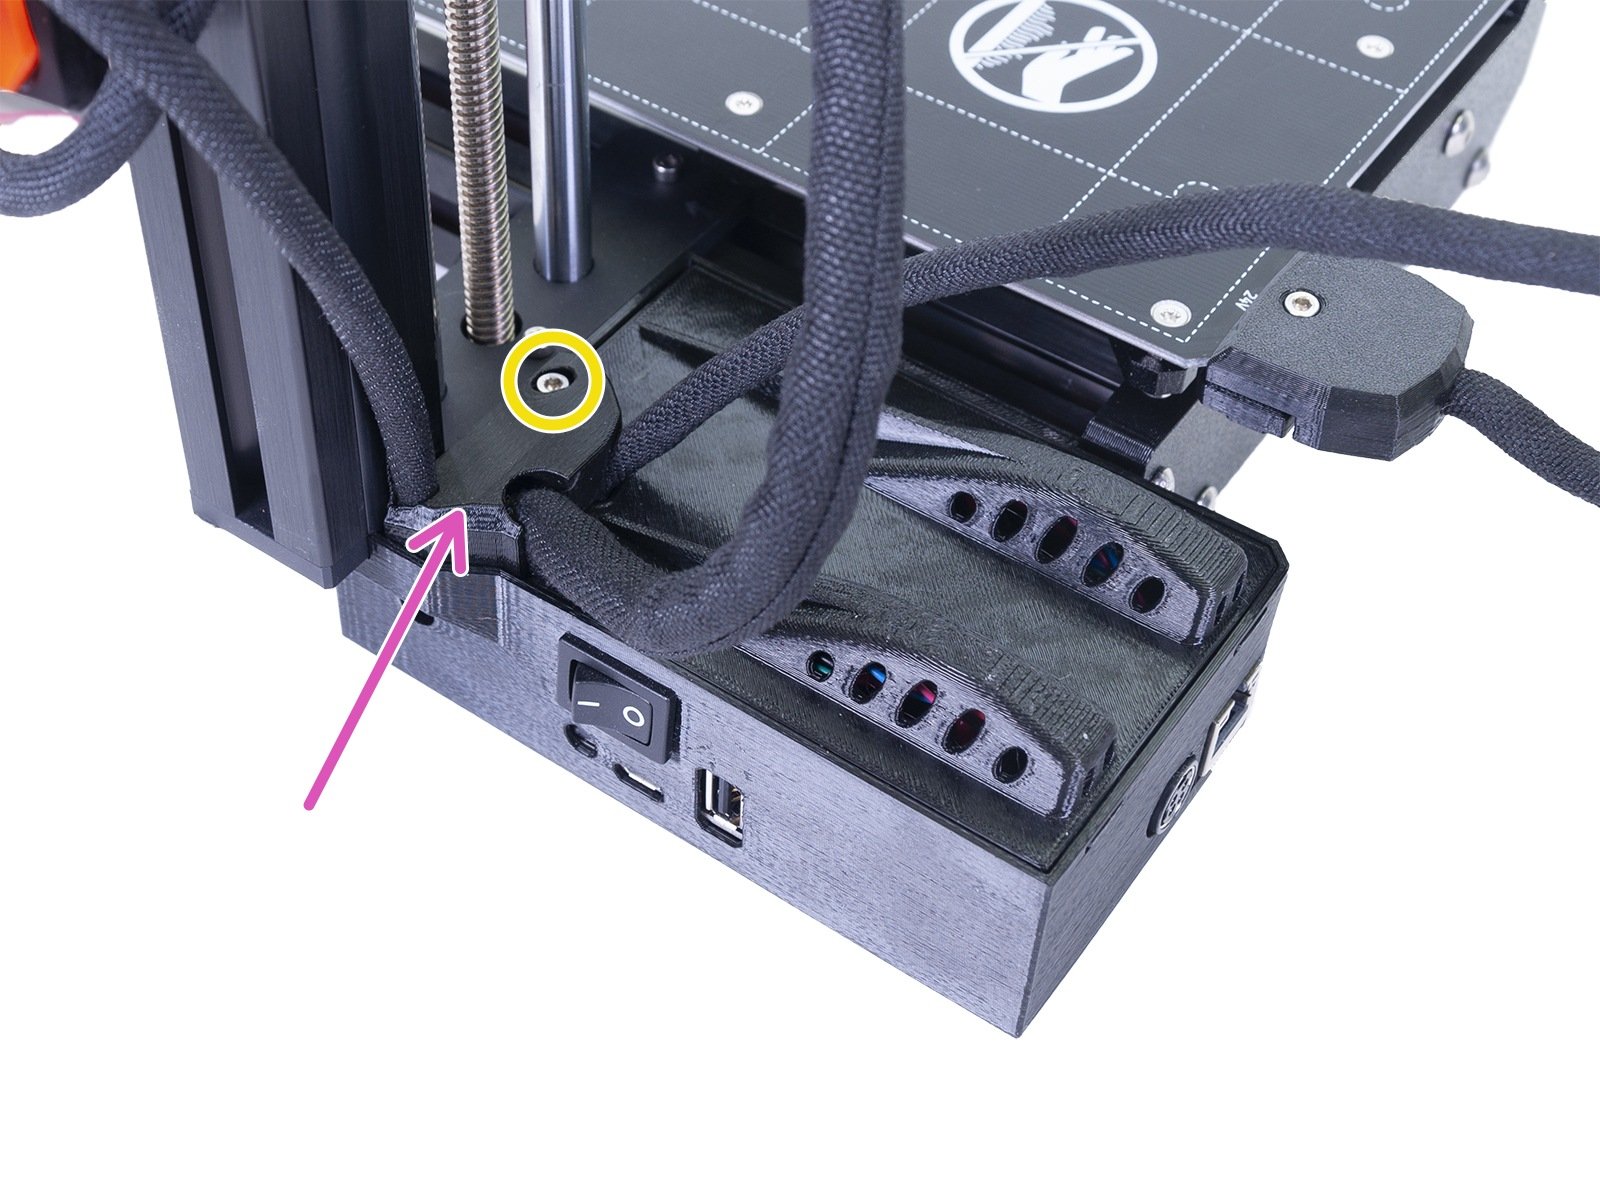
Loosen the one screw securing the cover (circled in the picture below) and flip it open to reveal the board.
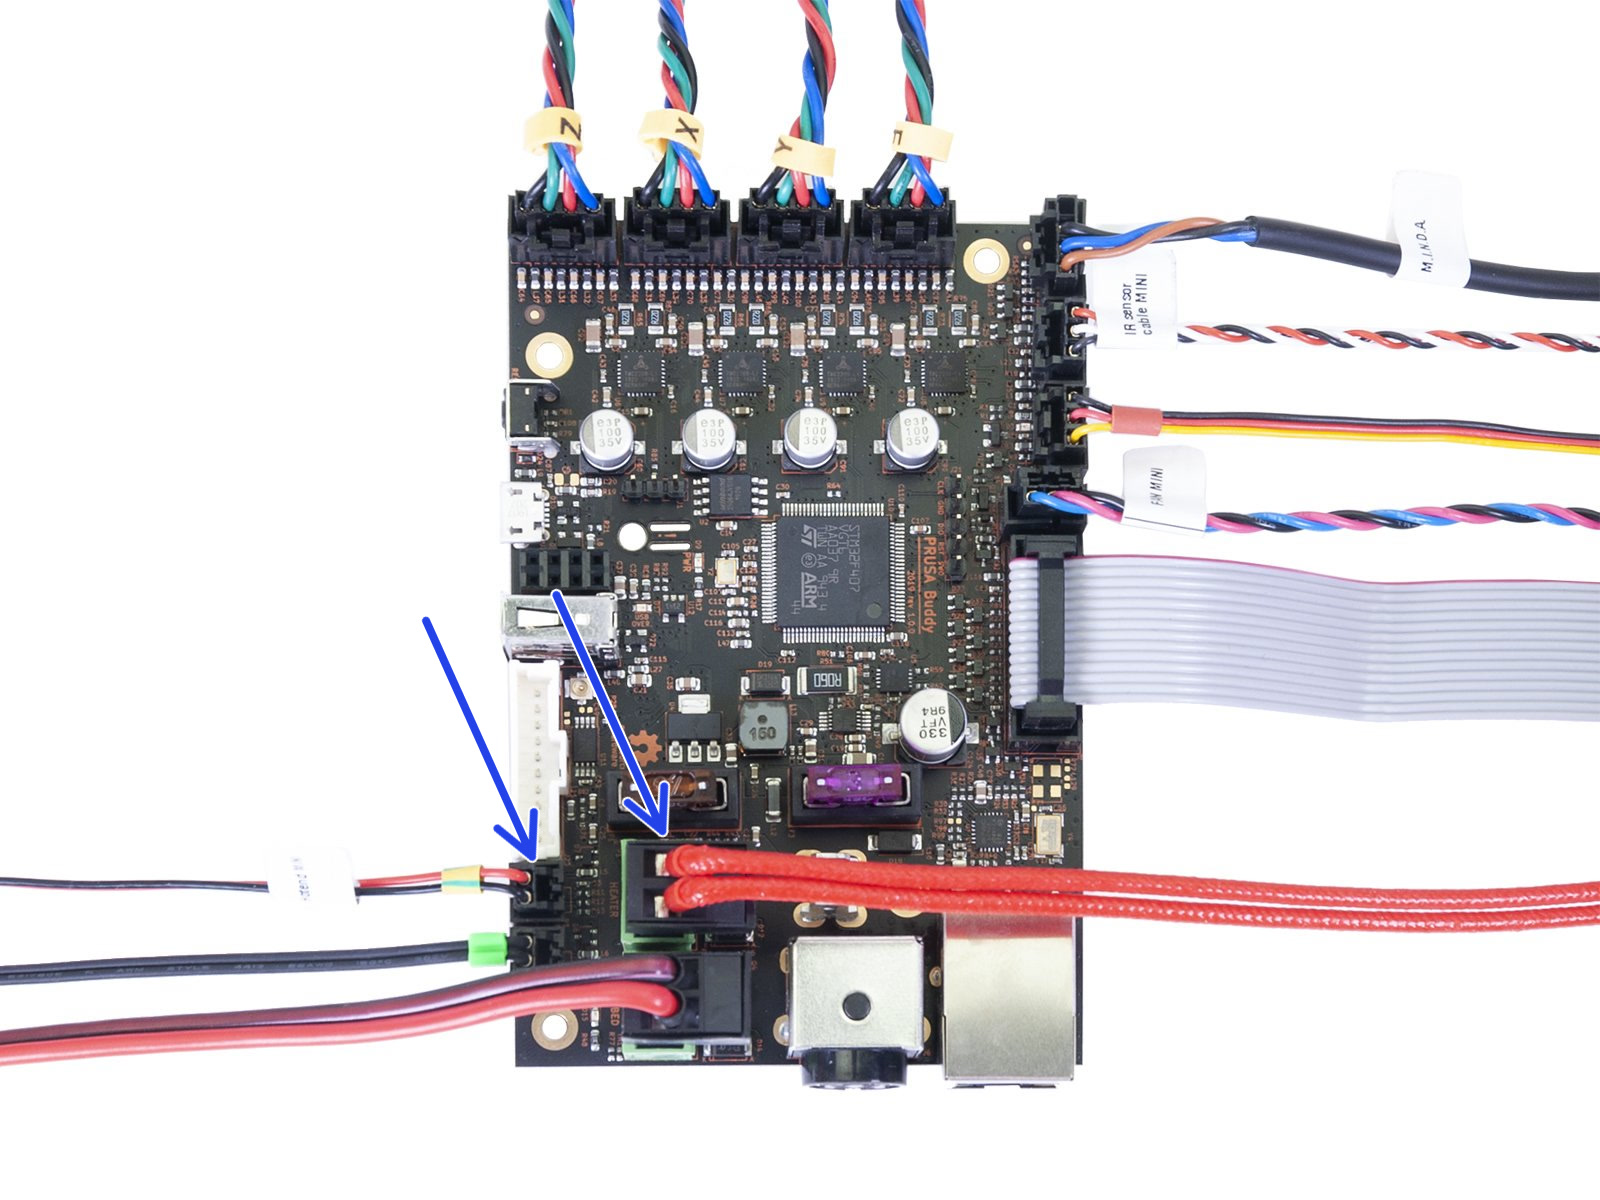
Check that all the connectors are secure in their sockets, according to the picture below. Focus on the thermistor and heater cables (blue for the print head). Though unlikely, rough shipping or handling could have shaken the heater or thermistor cables loose.
Checking the resistance
The table below describes the correct resistance for each part, as well as what scale you should set your meter to. We have another more in-depth guide on Multimeter usage. All thermistors are rated to be 100 kΩ at 25 °C. To be realistic, with a varying temperature between 20 °C and 30 °C, you can expect a wider range of readings (~85-125 kΩ) than with the heater.
Part |
Resistance |
Multimeter scale |
|
Thermistors (Bed and hotend) |
[80 kΩ - 125 kΩ] |
200 kΩ |
| Hotend heater |
[12.3 Ω - 15.1 Ω] |
200 Ω |
Where to measure
For every component, there are several options, our main focus will be on the connectors. The measurement appears on the multimeter LCD as soon as the measurement probes touch the component. To obtain the correct and relevant values, this is where you need to apply the probes:
- Thermistors: metal inserts in plastic connectors

- Heater cables: screws holding the cables in the connector

Parts replacement guide(s)
In case you find some parts are faulty, please order them using our e-shop, then follow the service guide(s):
4 comments
Hi, please get in touch with our support (you can use the "Chat now" button). Temperature "jumps" shouldn't be this high.
If the MINTEMP error persists even after replacing the thermistor, chances are the board might indeed be damaged. The easiest way to confirm this would be to check if the error will still stay on MINTEMP after plugging the heatbed thermistor cable into the hotend thermistor socket on the board and vice versa. If it stays at MINTEMP after the swap, it would be an issue with that thermistor's socket on the Buddy board. You can also unplug everything from the board except for the power, LCD, and thermistors, to see if perhaps some other component isn't interfering with the connection.
Room temperature was around 0 deg C. Heated the room to a cosy temp and no problem printing again.
For winter we need an ice printer.
It is possible to pre-heat the printer with a hairdryer. Heating the bed to only for a while with the nozzle in the middle of it can also help. However, the threshold is set where it is for both safety reasons and the properties of molten polymers.
additional details can be found here
https://forum.prusaprinters.org/forum/hardware-firmware-and-software-help/nozzle-temperature-issue-with-brand-new-mini-12208/#post-595498