AA

Featured products

    Popular categories

      Trending searches

        Articles

          Blog

            Products

              Categories

                Suggested searches

                  Searching…
                  No results
                  Something went wrong.
                  ↑↓ Select↵ OpenEsc Close search
                  • English
                  • Čeština
                  • Deutsch
                  • Español
                  • Français
                  • Italiano
                  • Polski
                  • 日本語
                  • Orders
                  • Address
                  • In-stock Alerts
                  • My Courses
                  • Subscription
                  • Edit Account
                  • 3D printers9+▾

                    3D printersnew

                    newPrusa CORE One L+Learn more
                    newPrusa CORE One+ (Gen 2)Learn more
                    newPrusa CORE One L+ INDX 8-ToolnewPrusa CORE One+ (Gen 2) INDX 8-ToolPrusa CORE One L+: Critical InfrastructureOriginal Prusa MK4SnewOriginal Prusa XL+Original Prusa XL+: Critical Infrastructure

                    Printer upgrades

                    newINDX Conversion KitsnewPrusa CORE One L to CORE One L+ upgradenewPrusa CORE One+ to Prusa CORE One+ (Gen 2)newPrusa XL to Prusa XL+ Upgrade
                    Prusa Reward ProgramLove your Prusa printer? Share your experience and earn $30 Prusa e-shop vouchers.
                    How to Choose a 3D Printer?We’ll walk you through the basics to find the exact machine for your space, budget, and ideas.
                    Free E-bookDownload a free e-book Basics of 3D Printing with Josef Prusa and make your first steps in 3D printing world
                    Original Prusa Printable PartsCollections of printable spare parts for Original Prusa 3D printers and upgrades.
                    Shipping informationRegularly updated info about the current manufacturing capacity and delivery times of our printers.
                    Custom 3D PrintingProfessional custom 3D printing from various materials according to your requirements.
                  • Materials▾

                    Filaments

                    PrusamentPLAPETGASA / ABSPC (Polycarbonate)PA (Nylon)FlexCompositesSpecialMaterials clearance sale

                    Resin

                    Prusament ResinResin Cleaner
                    Filament GuideCheck my Prusament Spool
                    Prusament.com
                  • Parts & Accessories▾

                    Accessories

                    EnclosuresNozzlesPrint SheetsEssential AccessoriesCameras & AddonsTools & CraftingAdhesives

                    Spare parts

                    Merchandise

                    Spare parts - All PrintersCORE OneMK4/S & MK3.9/SMK3/S/+XL
                    Merch
                  • For Business▾
                    Prusa Pro HT90Prusa Pro SLXPrusa Pro AFSPrusa Pro Medical OneOriginal Prusa XLOriginal Prusa XL: Critical Infrastructure
                    Prusa CORE One+Learn more
                    Prusa CORE One LLearn more
                    Prusa CORE One L: Critical Infrastructure Edition

                    3D Printing for

                    Manufacturing and R&DAutomotive IndustryHealthcareEducation and Academic ResearchArchitects and DesignersFilm IndustryCritical Infrastructure

                    3D Printing Stories

                    • How 3D printing started: About Rep-rap and open-source with Adrian Bowyer
                    • Teaching mathematics redefined with 3D printing at JKU Linz
                    • The story behind the LTT screwdriver
                    • Victoria Hand Project: Changing Prosthetic Care with 3D Printing
                    Official Prusa Resellers
                    Sustainability
                    Prusa Education
                    Contact and Inquiry
                    Custom 3D Printing
                    ISO Certified
                  • Software▾
                    PrusaSlicer

                    PrusaSlicerPrusaSlicer

                    PrusaSlicer is an open-source, feature-rich, frequently updated tool that contains everything you need to export the perfect print files for your 3D printer.

                    WindowsMacOSLinux
                    Prusa Connect

                    Prusa Connect

                    Prusa Connect is a cloud service enabling remote control and monitoring of your 3D printers, offering secure data handling, easy setup, and support for managing multiple printers from anywhere.

                    Log in to Connect
                    Prusa.app

                    Prusa.app

                    Control your printer/s remotely from anywhere using the Prusa Connect technology behind. Prusa.app brings a new level of Prusa printer experience to Android and iOS phones.

                    Try it now!
                    Drivers & FirmwareDownload the latest firmware and drivers for your 3D printer.
                    PrusaSlicer Support
                    Prusa Connect Support
                  • 3D Models▾
                    3D PrintersArt & DesignHobby & MakersHouseholdTabletop MiniaturesToys & GamesPrintables Store

                    Popular 3D models

                    • Strong garden hose holder
                    • Prusa Spool Bot
                    • Build Tray — Modular Organizer for Assembly, Disassembly and Maintenance
                    • Broom Holder
                    • Octagon Fabric
                    • Prusa CORE One ? (Mimic Skin)

                    Design Contests

                    • Framework Laptop 12 Mainboard Re-Use9/1/2026 – 9/30/2026
                    • 🏆 Designer Challenge: Magic tricks!9/1/2026 – 9/22/2026
                    • Od prototypu k produktu: Příslušenství ke kamerám8/1/2026 – 9/14/2026
                  • Community▾

                    Upcoming Events

                    • Maker Faire Tokyo 20269/5/2026 – 9/6/2026 · Tokyo, Japan · Prusa Team
                    • IFA 20269/4/2026 – 9/8/2026 · Berlin, Germany · Prusa Team
                    • 3D Printopia 20269/26/2026 – 9/27/2026 · Pennsylvania, United States · Prusa Team
                    • Maker Faire Bay Area9/25/2026 – 9/27/2026 · Kalifornie, United States · Prusa Team

                    Prusa Forum

                    • Vent doesn't close for an ASA print
                    • Alignment tool?
                    • Is this spam?
                    Prusa World MapPrusa World MapFind local 3D printing users and explore the community around you.
                  • Help▾
                    Guides & TutorialsPrusaSlicerPrusa ConnectMaterials

                    Printer Model

                    CORE One INDXCORE One LCORE One+CORE One

                    Hardware Troubleshooting

                    • Selftest failed (CORE One/+)
                    • Clogged nozzle (CORE One, CORE One L, XL, MK4/S, MK3.9/S)
                    • Adjusting belt tension (CORE One/+, CORE One INDX, CORE One L/+)
                    • Prusa Connect and PrusaLink explained

                    Drivers & Firmware

                    INDX familyCORE One familyMK4 familyXL familyMMU familyPRO family
                  • Courses▾

                    Become an expert in 3D printing

                    Prusa Academy offers online courses on various 3D printing related topics. Each course features:

                    • easy-to-read text with many pictures and short videos
                    • links for inspiration and further study
                    • quizzes for testing your knowledge along the way
                    • certificate of completion
                    Browse all coursesMy courses library
                    • 3D Modeling in Autodesk Fusion
                    • PrusaSlicer Masterclass – Beginner to Advanced
                    • Complete Guide to 3D Print Postprocessing, Painting, and Detailing
                    • Airbrush Your 3D Prints: From Basics to Advanced Tricks
                  • Blog▾
                    • PrusaSlicer 3.0 Preview – Built for the Future of 3D Printing
                    • Prusa CORE One+ (Gen 2) INDX, Shipping Has Started, Complete Printers Open for Orders
                    • Better Prints, Easier Use: Prusa XL+, CORE One L+ and CORE One+ (Gen 2), Our Big Product Upgrade
                    E-Book: Basics of 3D Printing
                  • Company▾

                    About Prusa Research

                    We are the largest maker of 3D printers in Europe and the United States.

                    Founded as a one-man startup in 2012 by Josef Prusa, a Czech hobbyist, maker, and inventor. In just 15 years, we've grown into a company of more than 1,200 people. Every month, we design, build, and ship over 10,000 innovative and secure 3D printers from our headquarters in Prague, Czech Republic, and Delaware, USA, to users in more than 160 countries.

                    Watch a video and find out how Prusa Research was born and what we achieved within only 10 years!

                    About UsTimelineSustainabilityOpen-source
                    About Us
                    Contact Us
                    Logo and Photos
                    ISO Certified
                  1. Support
                  2. Printer troubleshooting
                  3. Adjusting belt tension (CORE One/+, CORE One INDX, CORE One L/+)
                   

                  Contents

                  • Assembly reminder - lubricate tensioner screws (CORE One kit)
                  • Alignment (CORE One/+, CORE One L)
                  • Alignment (CORE One INDX)
                  • Belt tuning wizard
                  • Belt tuner (CORE One/+)
                  • Adjusting the belts

                  Blog

                  • PrusaSlicer 3.0 Preview – Built for the Future of 3D Printing
                  • Prusa CORE One+ (Gen 2) INDX, Shipping Has Started, Complete Printers Open for Orders
                  • Better Prints, Easier Use: Prusa XL+, CORE One L+ and CORE One+ (Gen 2), Our Big Product Upgrade

                  Newsletter

                  Signup and get our monthly squeeze on updates, blog, printables and much more.

                  By clicking, you agree to receive our newsletter.

                  This site is protected by reCAPTCHA Enterprise and the Google Privacy Policy and Terms of Service apply.

                  Strong garden hose holder
                  E-shop
                  • 3D Printers
                  • Printer Upgrades
                  • Filaments
                  • Accessories
                  • Prusa Merchandise

                  © Prusa Research a.s.

                  Printables
                  • 3D Models
                  • Store
                  • Clubs
                  • 3D Design Contests
                  • Brands
                  Community
                  • World Map
                  • Forum
                  • User Groups
                  • Events
                  Help
                  • Prusa Help
                  • Prusa Academy
                  • 3D Printing Calculators
                  Software
                  • PrusaSlicer
                  • Prusa.app
                  • Prusa Connect
                  • Drivers and Software
                  Company
                  • About Us
                  • Blog
                  • Official Prusa Resellers
                  • Contact Us
                  • Certified for ISO 9001, ISO 14001, ISO 45001
                  • General Terms and Conditions
                  • General Terms and Conditions of Use of the PRUSA Websites
                  • Privacy Policy
                  • Information about cookies
                  • Customer Complaints Policy
                  • Status Page
                  • Do Not Sell or Share My Personal Information
                  • Supplemental Statements
                  • General Terms and Conditions
                  • General Terms and Conditions of Use of the PRUSA Websites
                  • Privacy Policy
                  • Information about cookies
                  • Customer Complaints Policy
                  • Status Page
                  • Do Not Sell or Share My Personal Information
                  • Supplemental Statements

                  © Prusa Research a.s.

                  JOSEF PRUSA®, PRUSA RESEARCH®, PRUSA POLYMERS®, PRUSA ORANGE®, PRUSA 3D ® AND PRUSAMENT® are registered trademarks of Prusa Development a.s. used by Prusa Research a.s. under licence from Prusa Development a.s.

                  Adjusting belt tension

                  (CORE One/+, CORE One INDX, CORE One L/+)

                  Relevant for

                  CORE One
                  CORE One L
                  CORE One+
                  CORE One INDX
                  CORE One L+
                  170 comments
                  Article is also available in following languages
                  English
                  Čeština
                  Polski
                  Deutsch
                  Français
                  Español
                  Italiano
                  日本語

                  On the Prusa CORE One, CORE One+, CORE One INDX, and CORE One L/+, adjusting the belt to optimal tension is crucial for achieving high-quality prints. A loose belt can cause Layer shifting, Ghosting, or other print abnormalities, like getting an irregular shape instead of a perfect circle. An over-tightened belt can cause an irregular movement in the X and Y axes.

                  The images are from the CORE One printer, but the adjustment is the same in the CORE One L/+

                  Assembly reminder - lubricate tensioner screws (CORE One kit)

                  The following check applies exclusively to CORE One and CORE One+ kits. Pre-assembled CORE One, CORE One+, and CORE One L have this step done at the factory. 

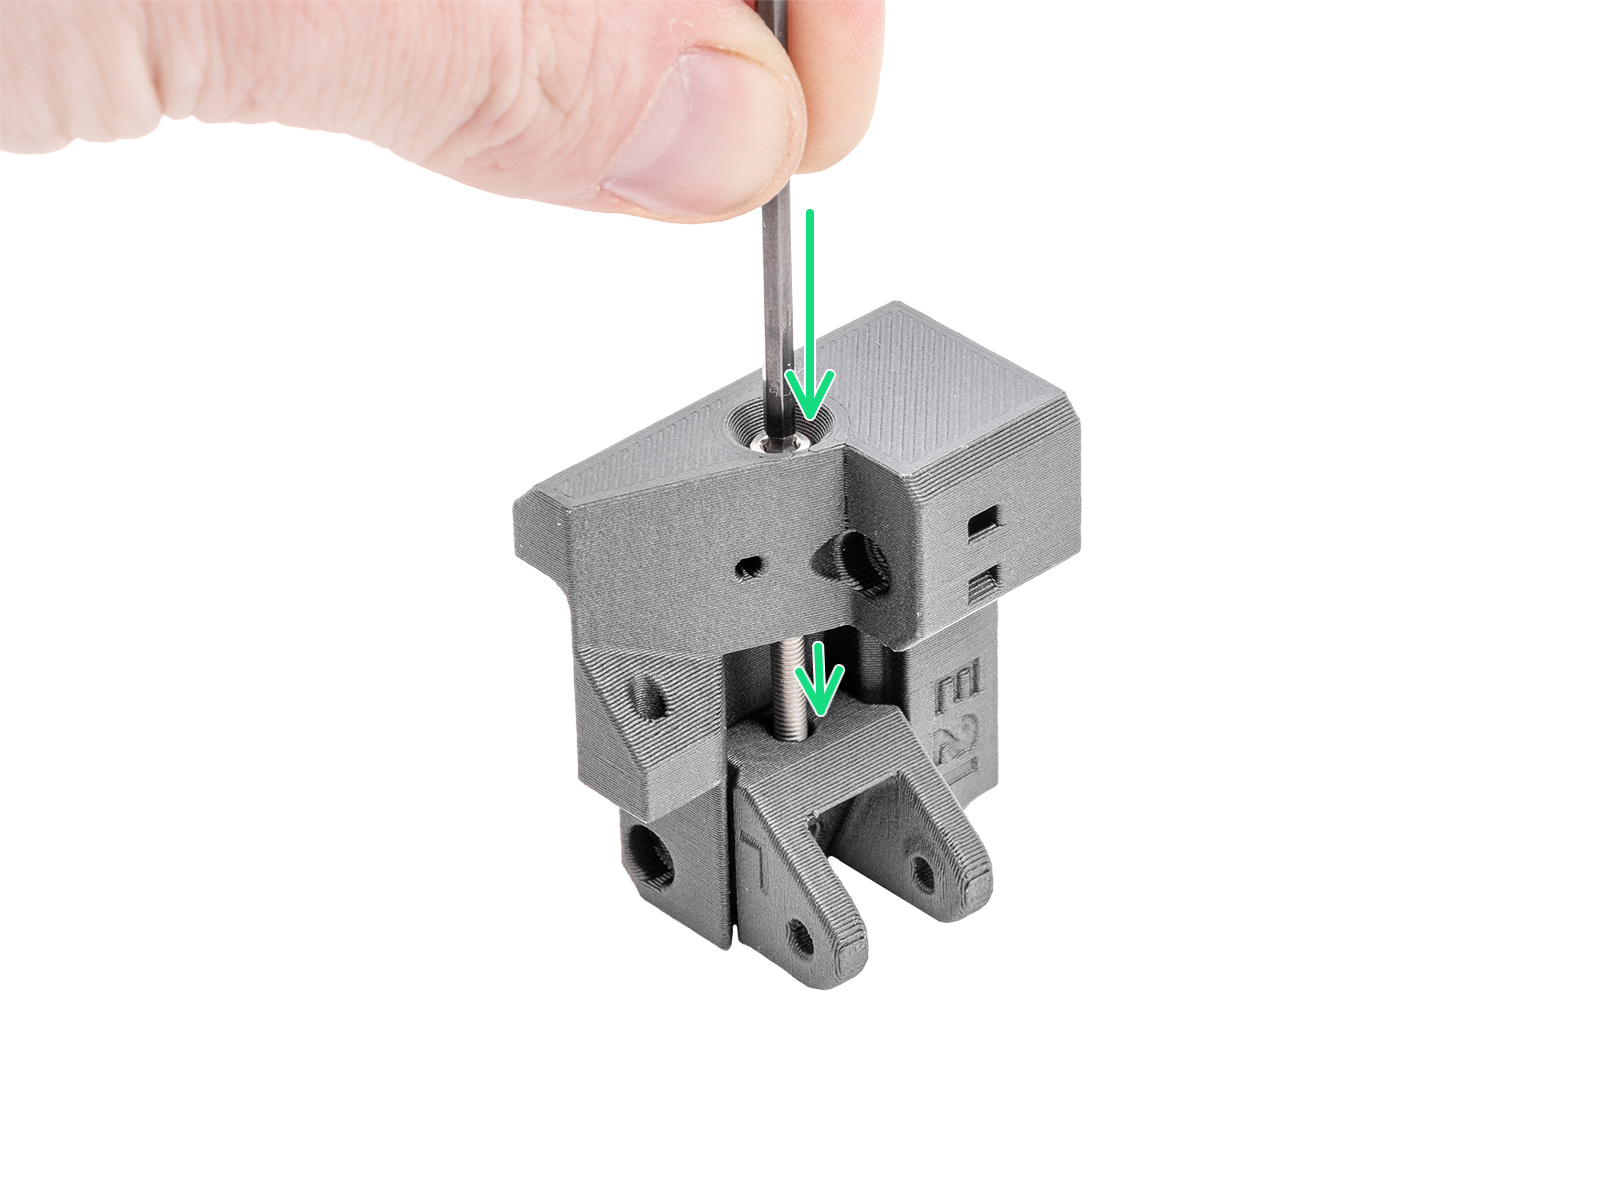
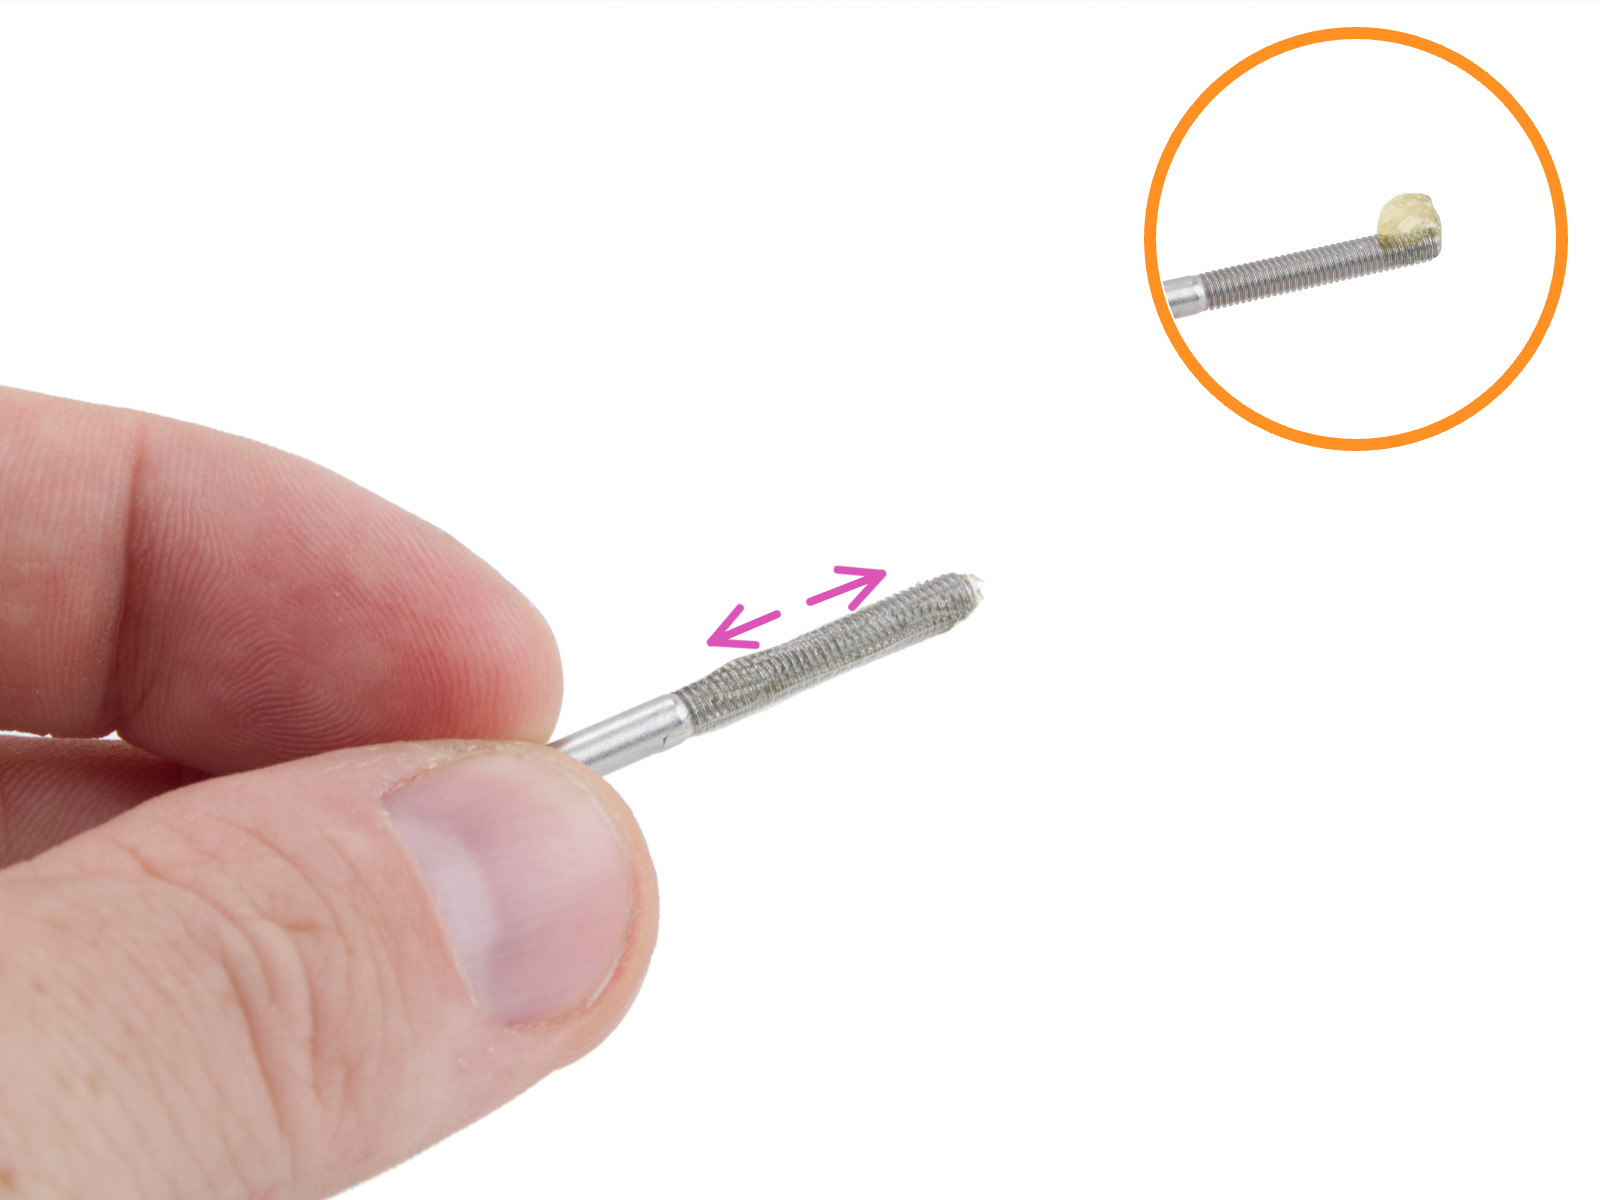
                  During the assembly process, we instruct you to apply a small amount of Prusa lubricant to the tips of both M3x30 screws for the belt tensioner parts. If this was done during the assembly of the kit, there is no need to redo it. Proceed directly to the next steps. 

                  However, early CORE One kits did not have this step recommended in our manual. If this is the case, and other steps have not worked, the belt tensioner right/left and their attached belt tensioner pulleys might need to be replaced. 
                  • How to replace the Belt Tensioner Left (CORE One)
                  • How to replace the Belt Tensioner Right (CORE One)
                  • How to replace the Belt Tensioner Pulley (CORE One)

                  Alignment (CORE One/+, CORE One L)

                  For printers equipped with INDX upgrade, skip to the next paragraph Alignment (CORE One INDX).

                  Before adjusting the belt, ensure the proper alignment of the CoreXY structure. 
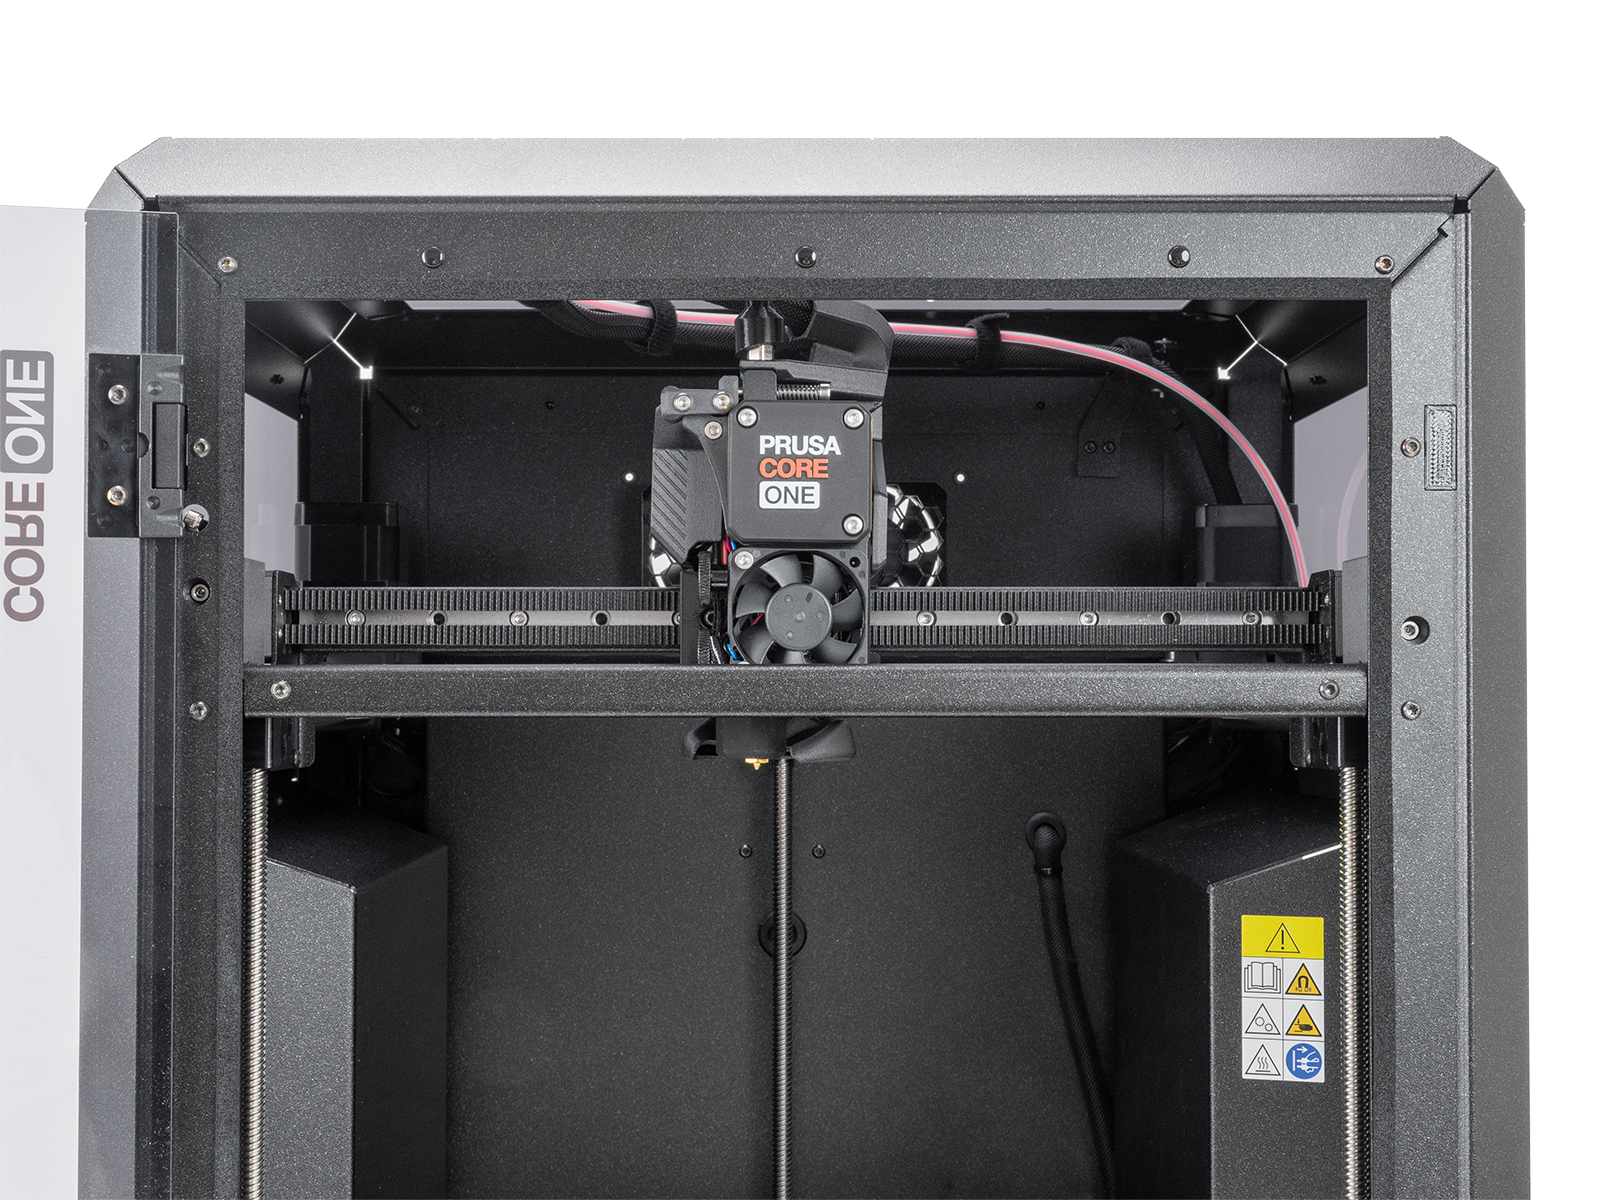
                  1. Ensure the stepper motors are disabled. This can be done by switching the printer off, or through the LCD Menu -> Control -> Disable Motors. 
                  2. By hand, move the Nextruder to the frontmost Y-axis position and to the center of the X-axis. 
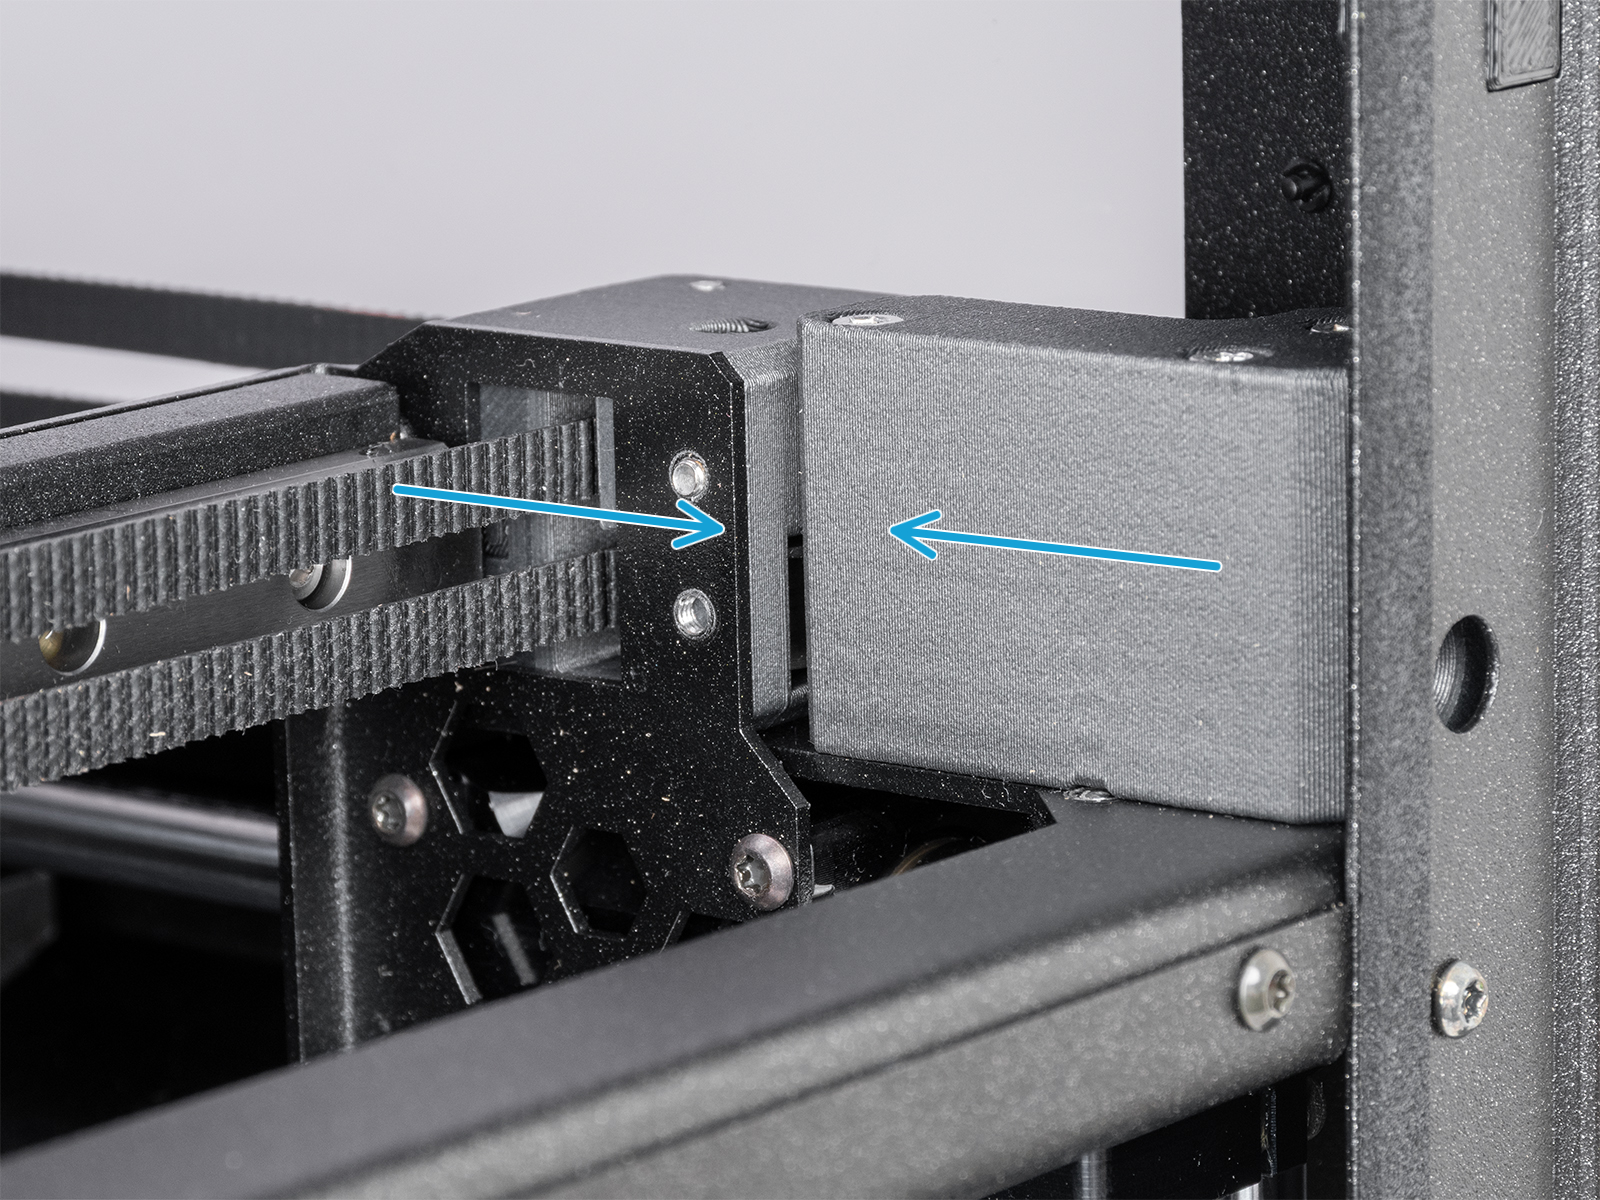
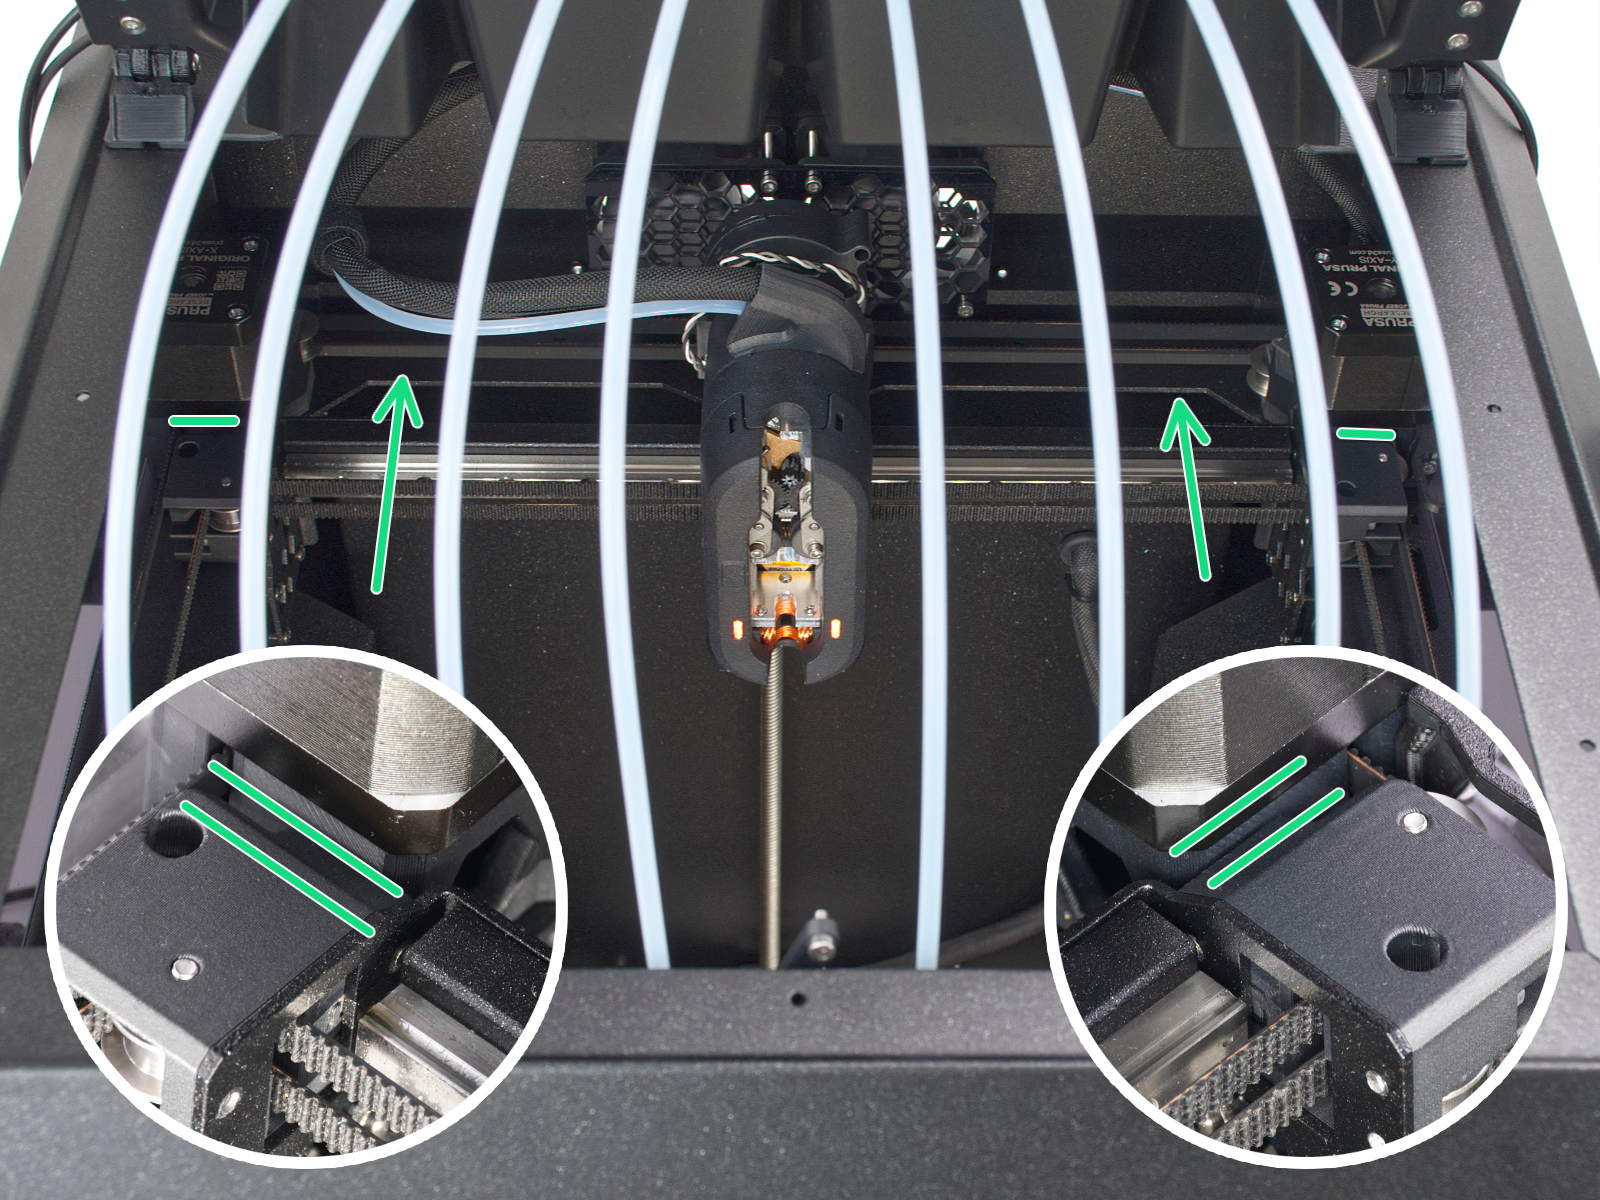
                  3. Press the gantry corner against the front of the CoreXY, and make sure there is no play. Do this procedure on both sides. If there is any play in either side, perfect alignment is not achieved yet. 


                    Quick gantry alignment
                    If there is a gap in either side of the gantry, you can try to force it in the opposite direction manually:

                    1. Fully loosen both tensioner bolts; this will allow free gantry movement.
                    2. Move the gantry halfway back along the rails.
                    3. Grip the gantry firmly on both ends and apply a gentle counter-force in the opposite direction of the tilt until it straightens.
                    4. Check the alignment with the belts still loose, and carefully push the gantry forward. Since the loose belts will not pull it all the way, you may need to guide it by hand. Verify that there is no gap on either side at the front position.
                    5. Tighten both tensioner bolts gradually, alternating between them, tightening each by the same amount to keep the gantry straight. You may hold the gantry in place with your hand while tightening. After tightening both belts, make sure no gap has reappeared.

                    Note: Apply force carefully to avoid damaging belts or bearings.

                  4. Slightly loosen both the belt tensioner bolts. Loosen the bolt on the corner with less play than the other. 
                  5. Repeat steps 3 and 4 until a perfect alignment is reached. Do not worry if the belt is loose at this stage; adjusting the belt tension is done at a later step. 

                  Alignment (CORE One INDX)

                  Before adjusting the belt, ensure the proper alignment of the CoreXY structure.
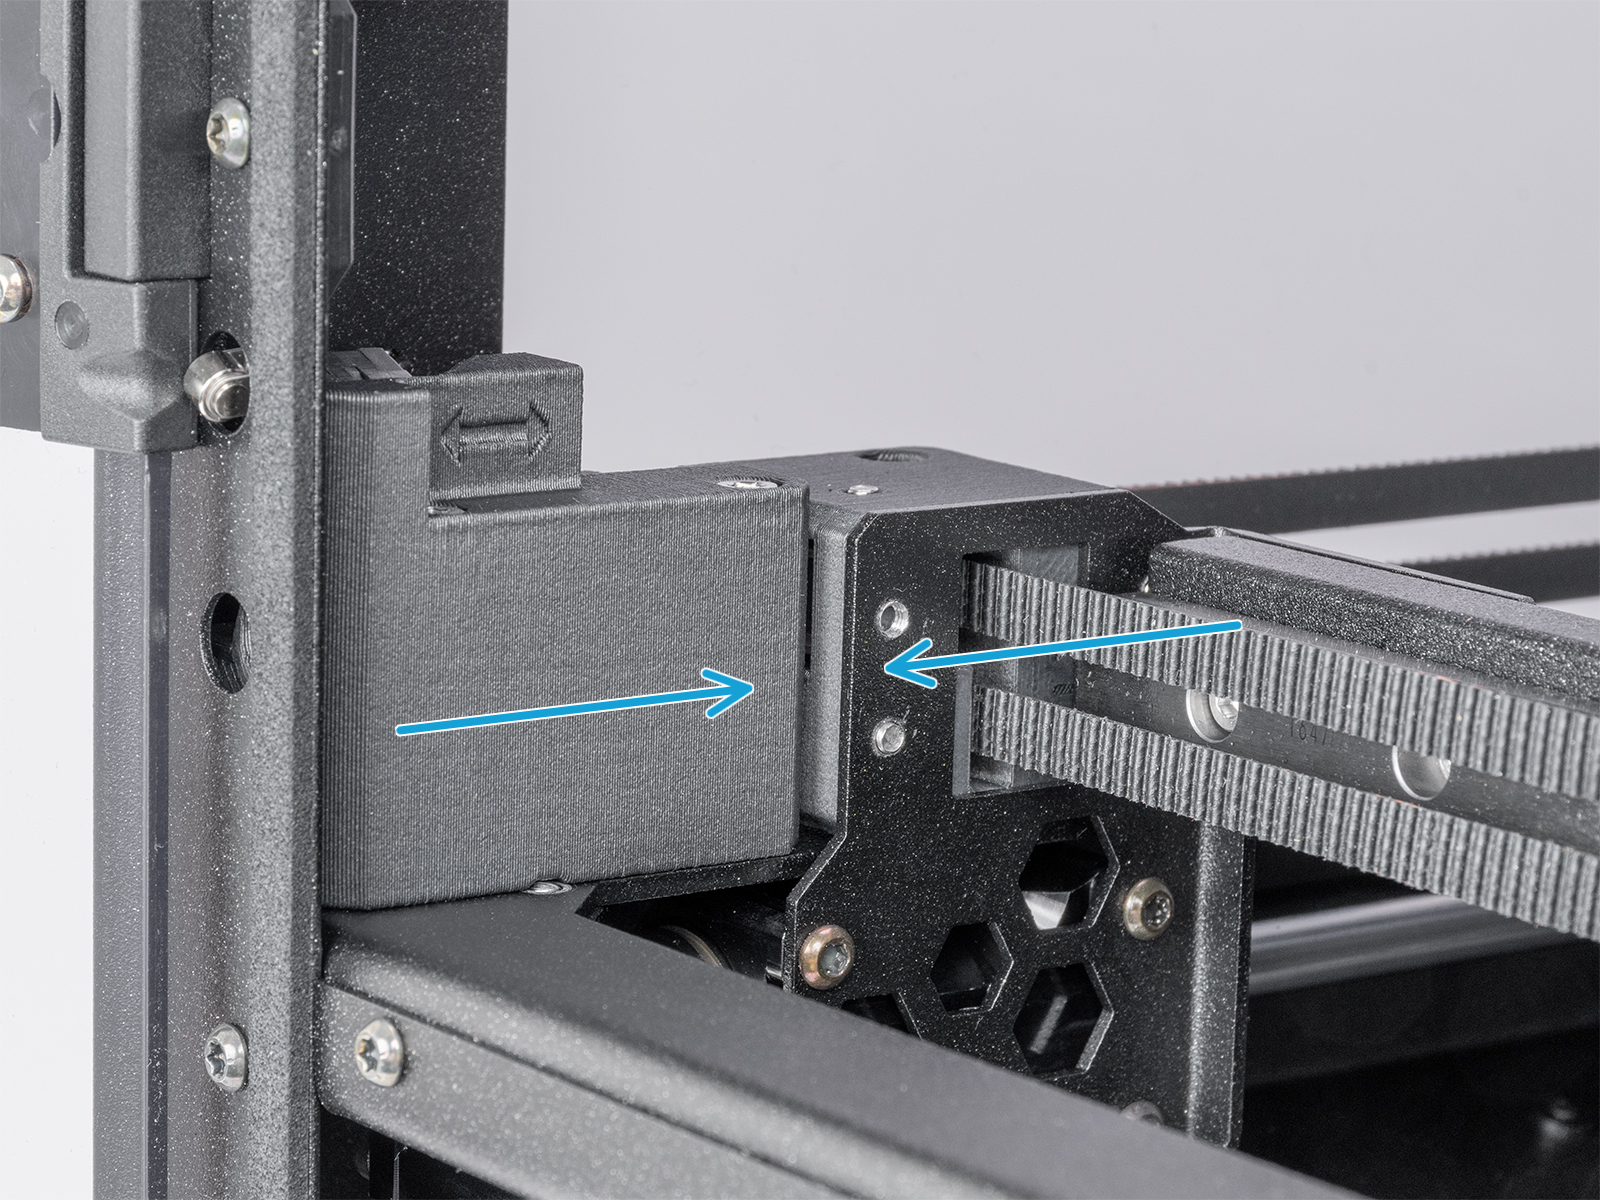
                  1. Ensure the stepper motors are disabled. This can be done by switching the printer off or through the LCD Menu -> Control -> Disable Motors.
                  2. By hand, move the Nextruder to the back Y-axis position and to the center of the X-axis.
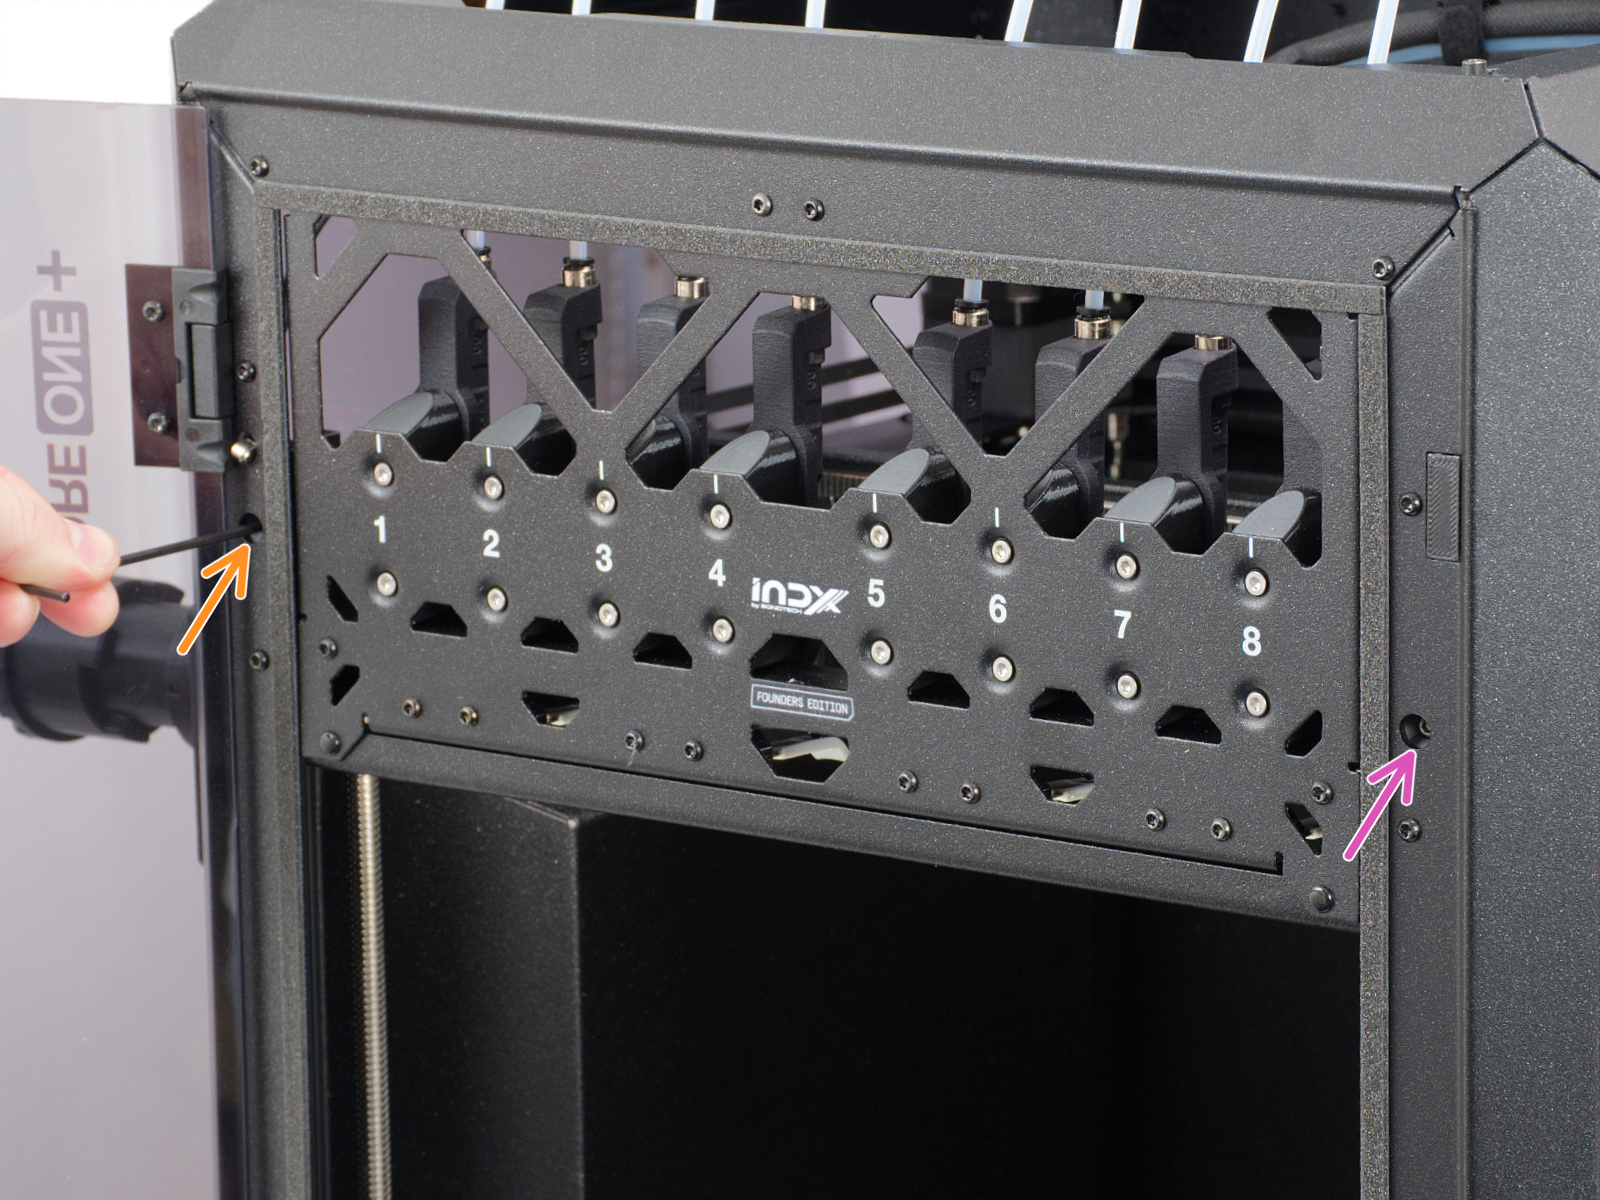
                  3. Press the gantry corner against the back of the CoreXY, and make sure there is no play. Do this procedure on both sides. If there is any play on either side, perfect alignment is not yet achieved.

                  Quick gantry alignment
                  If there is a gap on either side of the gantry, you can try to force it in the opposite direction manually:

                  1. Fully loosen both tensioner bolts; this will allow free gantry movement.
                  2. Move the gantry halfway back along the rails.
                  3. Grip the gantry firmly on both ends and apply a gentle counter-force in the opposite direction of the tilt until it straightens.
                  4. Check the alignment with the belts still loose, and carefully push the gantry forward. Since the loose belts will not pull it all the way, you may need to guide it by hand. Verify that there is no gap on either side at the front position.
                  5. Tighten both tensioner bolts gradually, alternating between them, tightening each by the same amount to keep the gantry straight. You may hold the gantry in place with your hand while tightening. After tightening both belts, make sure no gap has reappeared.

                  Note: Apply force carefully to avoid damaging belts or bearings.
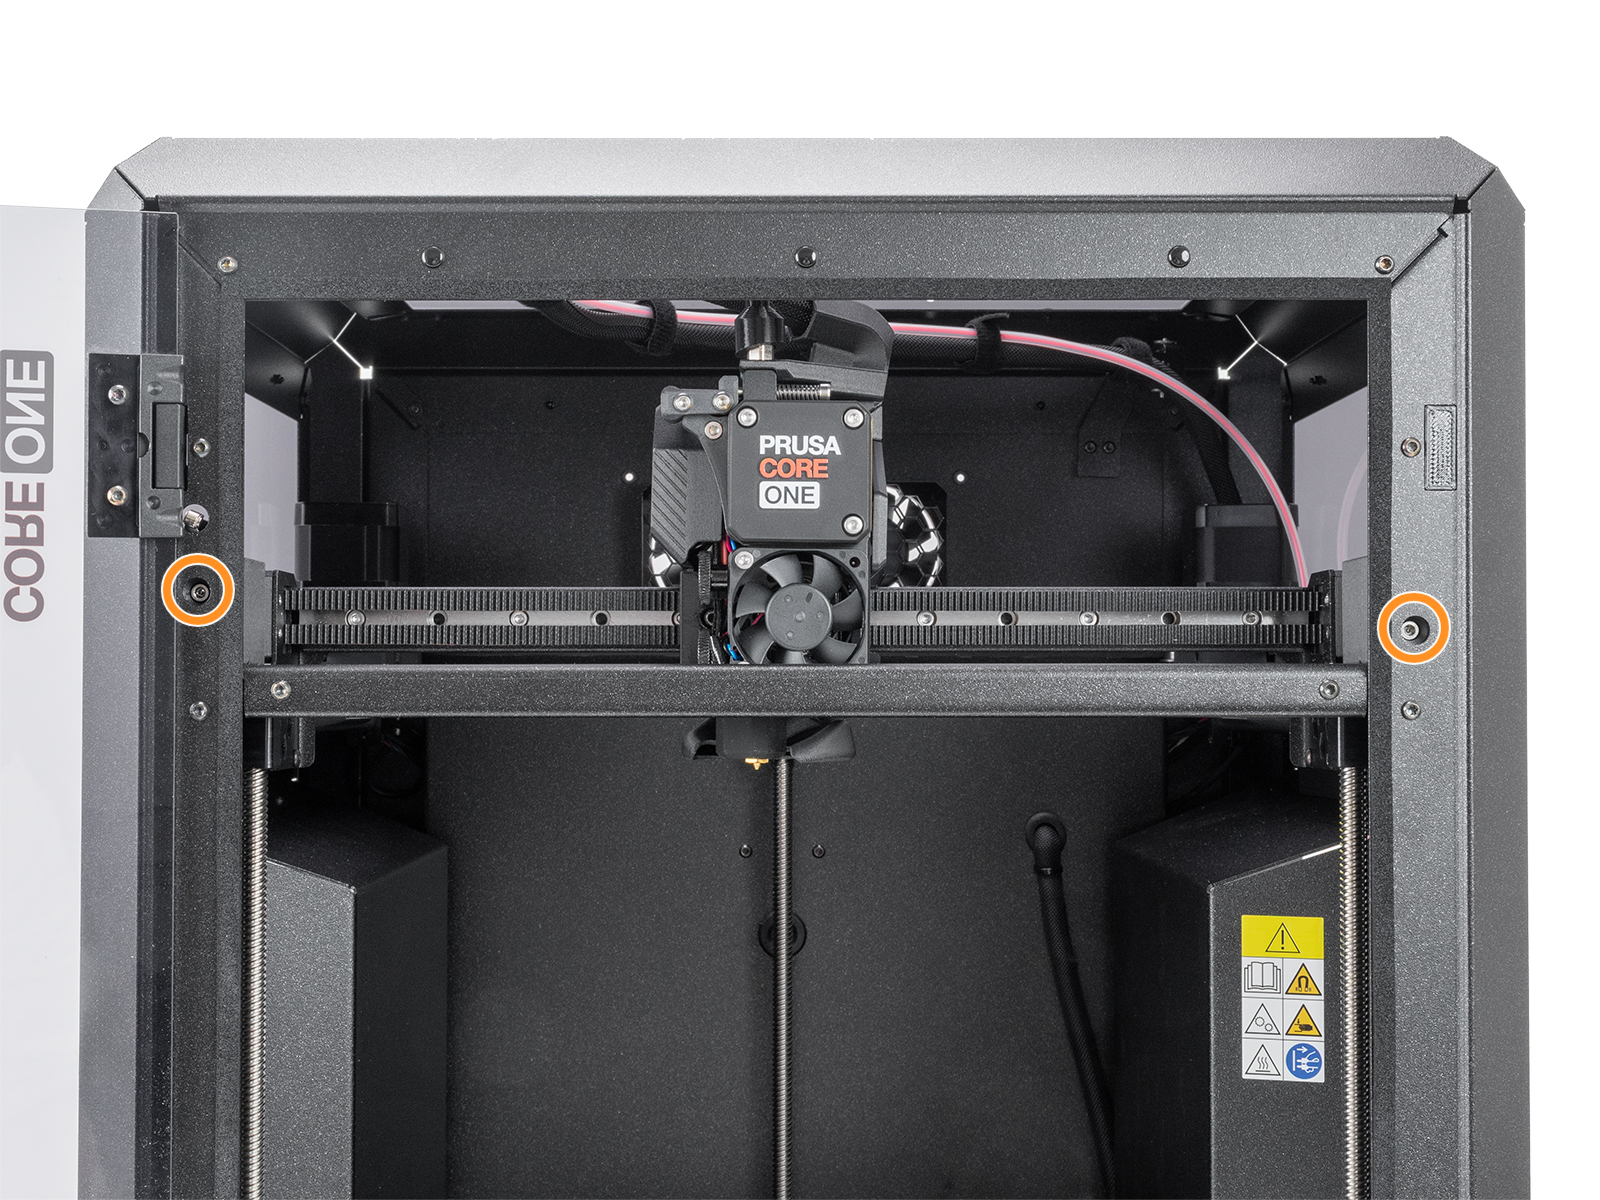
                  1. Slightly loosen both the belt tensioner bolts. Loosen the bolt on the corner with less play than the other.

                  1. Repeat steps 3 and 4 until a perfect alignment is reached. Do not worry if the belt is loose at this stage; adjusting the belt tension is done at a later step.

                  Belt tuning wizard

                  Were you redirected here from our assembly manual? Skip this paragraph temporarily, as we did not start the printer yet, and the procedure requires accessing to the printer's menu.
                  Feel free to jump to the belt tuner paragraph, you can come back to this later on. 


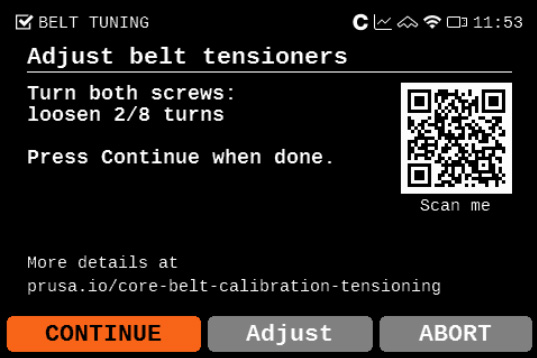
                  Starting from firmware 6.4.0, a belt tuning wizard is available in the printer menu, navigating to LCD Menu -> Settings -> Manual Belt Tuning. The printer uses controlled belt excitation combined with stroboscopic feedback to visualize belt resonance.

                  The wizard begins by prompting the user to check that the gantry is properly aligned, as misalignment can affect measurement accuracy. Follow the in-screen instructions to verify the gantry alignment, and in case of misalignment, follow the steps in the previous alignment paragraph.
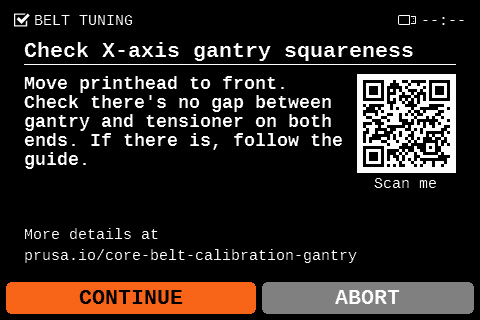
                  The wizard then measures the vibration frequency of both belts and recommends whether to tighten or loosen them. Follow the in-screen instructions to turn the encoder to vary the vibration frequency, and at the same time, observe the vibrating movement made by the selected belt as the frequencies are changed.
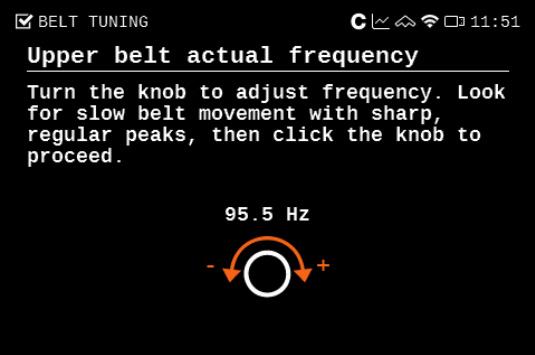
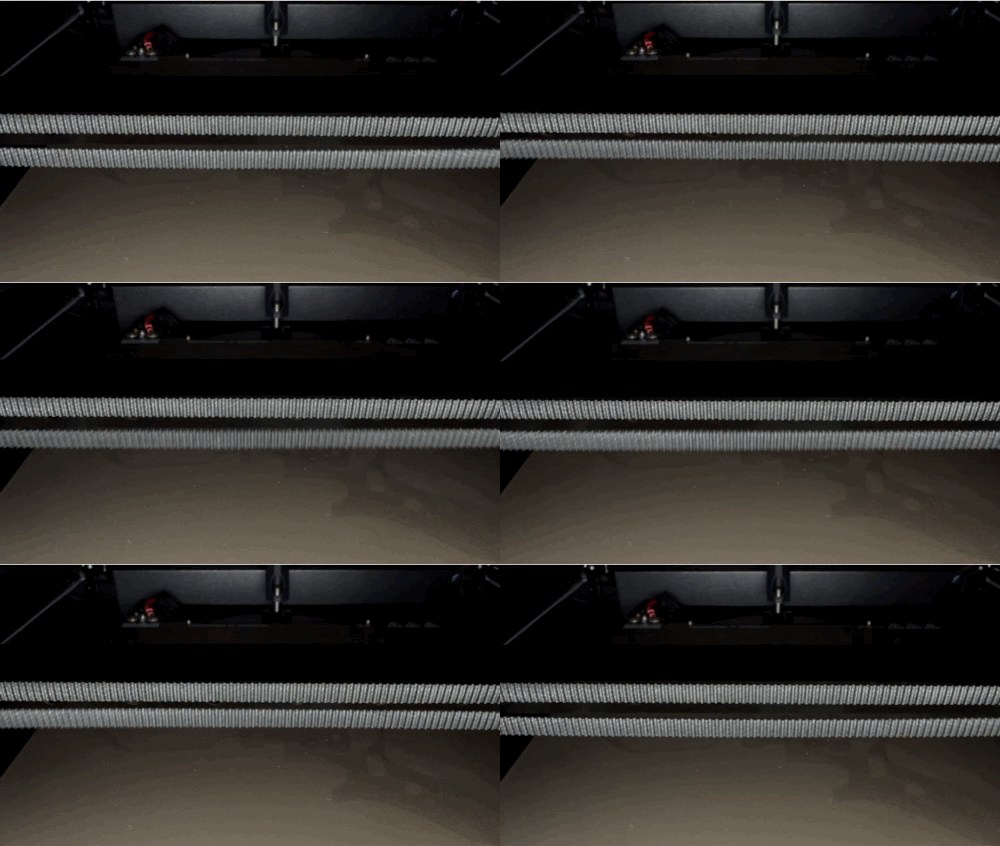
                  Look for a slow, extended, and steady resonating movement of the selected belt. Once you see that movement on the selected belt, select the current frequency on the printer screen.
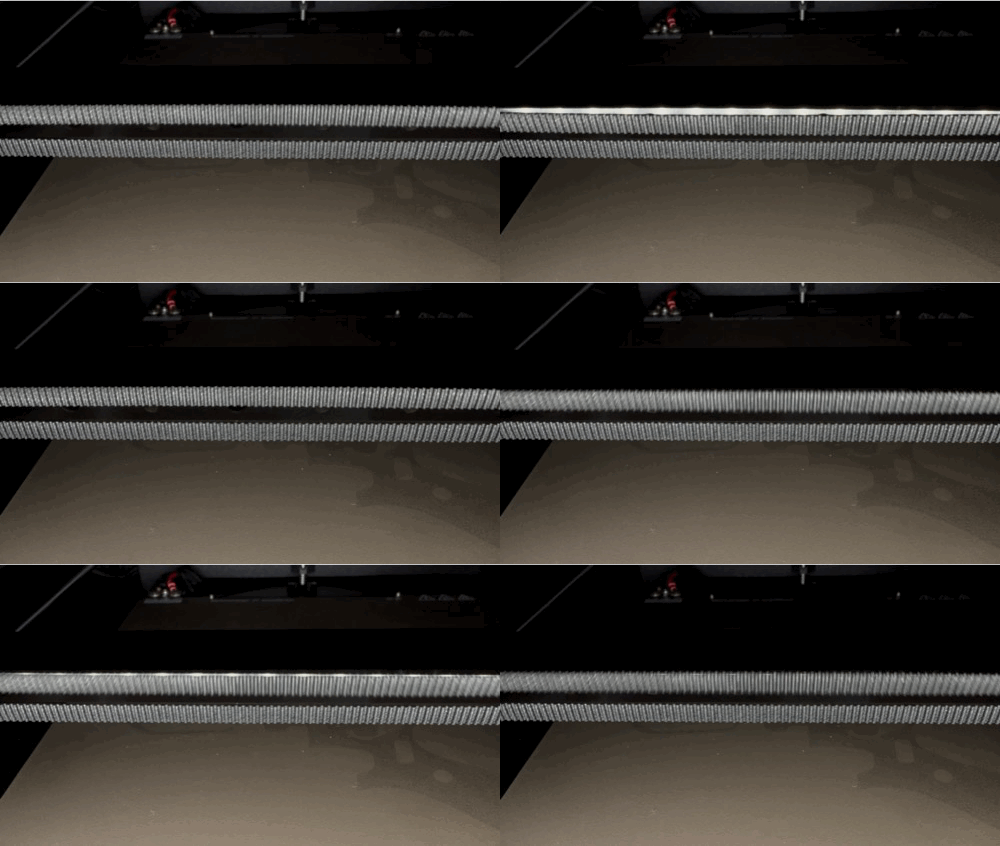
                  Upper belt resonating movementLower belt resonating movement

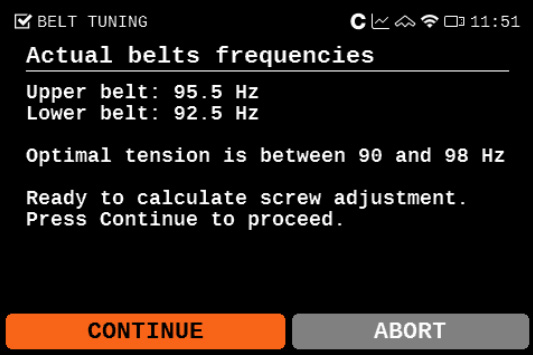
                  On CORE One, the ideal target frequency range is a maximum of 98 Hz for the upper belt and a minimum of 90 Hz for the lower belt.

                  On CORE One L, the ideal target frequency range is a maximum of 95 Hz for the upper belt and a minimum of 85 Hz for the lower belt.

                  Once the resonance test is completed, the printer dialog shows the found resonating frequencies and the suggested adjustment.

                  Important: always tighten both tensioner bolts evenly and alternately. This ensures that the gantry stays square during adjustment.
                  Belt tuner (CORE One/+)

                  We have our own belt tuner, available on our belt tuner webpage. The belt tuner can also be accessed in our Prusa App, navigating to >Menu >Belt Tuner. 

                  The belt tuner uses your device's microphone and determines the belt tension by measuring the frequency of the vibration generated by strumming it. 

                  Select CORE One, then select XY-belt, and follow the instructions shown on your device. When ready to measure the belt frequency, tap on Start listening to use your device's microphone.

                  Adjusting the belts

                  On CORE One, the ideal target frequency range is a maximum of 98 Hz for the upper belt and a minimum of 92 Hz for the lower belt.

                  On CORE One L, the ideal target frequency range is a maximum of 95 Hz for the upper belt and a minimum of 85 Hz for the lower belt.

                  If your gantry is out of alignment, you may not be able to reach these exact values. In some cases, the lower belt can even show a slightly higher frequency than the upper belt. This is acceptable as long as the difference between the two does not exceed 8 Hz, and both values remain within the 90–98 Hz range (CORE One) and within the 85-95 Hz range (CORE One L). 

                  If you cannot achieve this, you will need to square the gantry manually before adjusting the belt tension. See the instructions in “Quick Gantry Alignment” above or “Extensive Adjustment of gantry and belts” at the bottom of this article.

                  Important: Always tighten both tensioner bolts evenly and alternately. This ensures that the gantry stays square during adjustment.
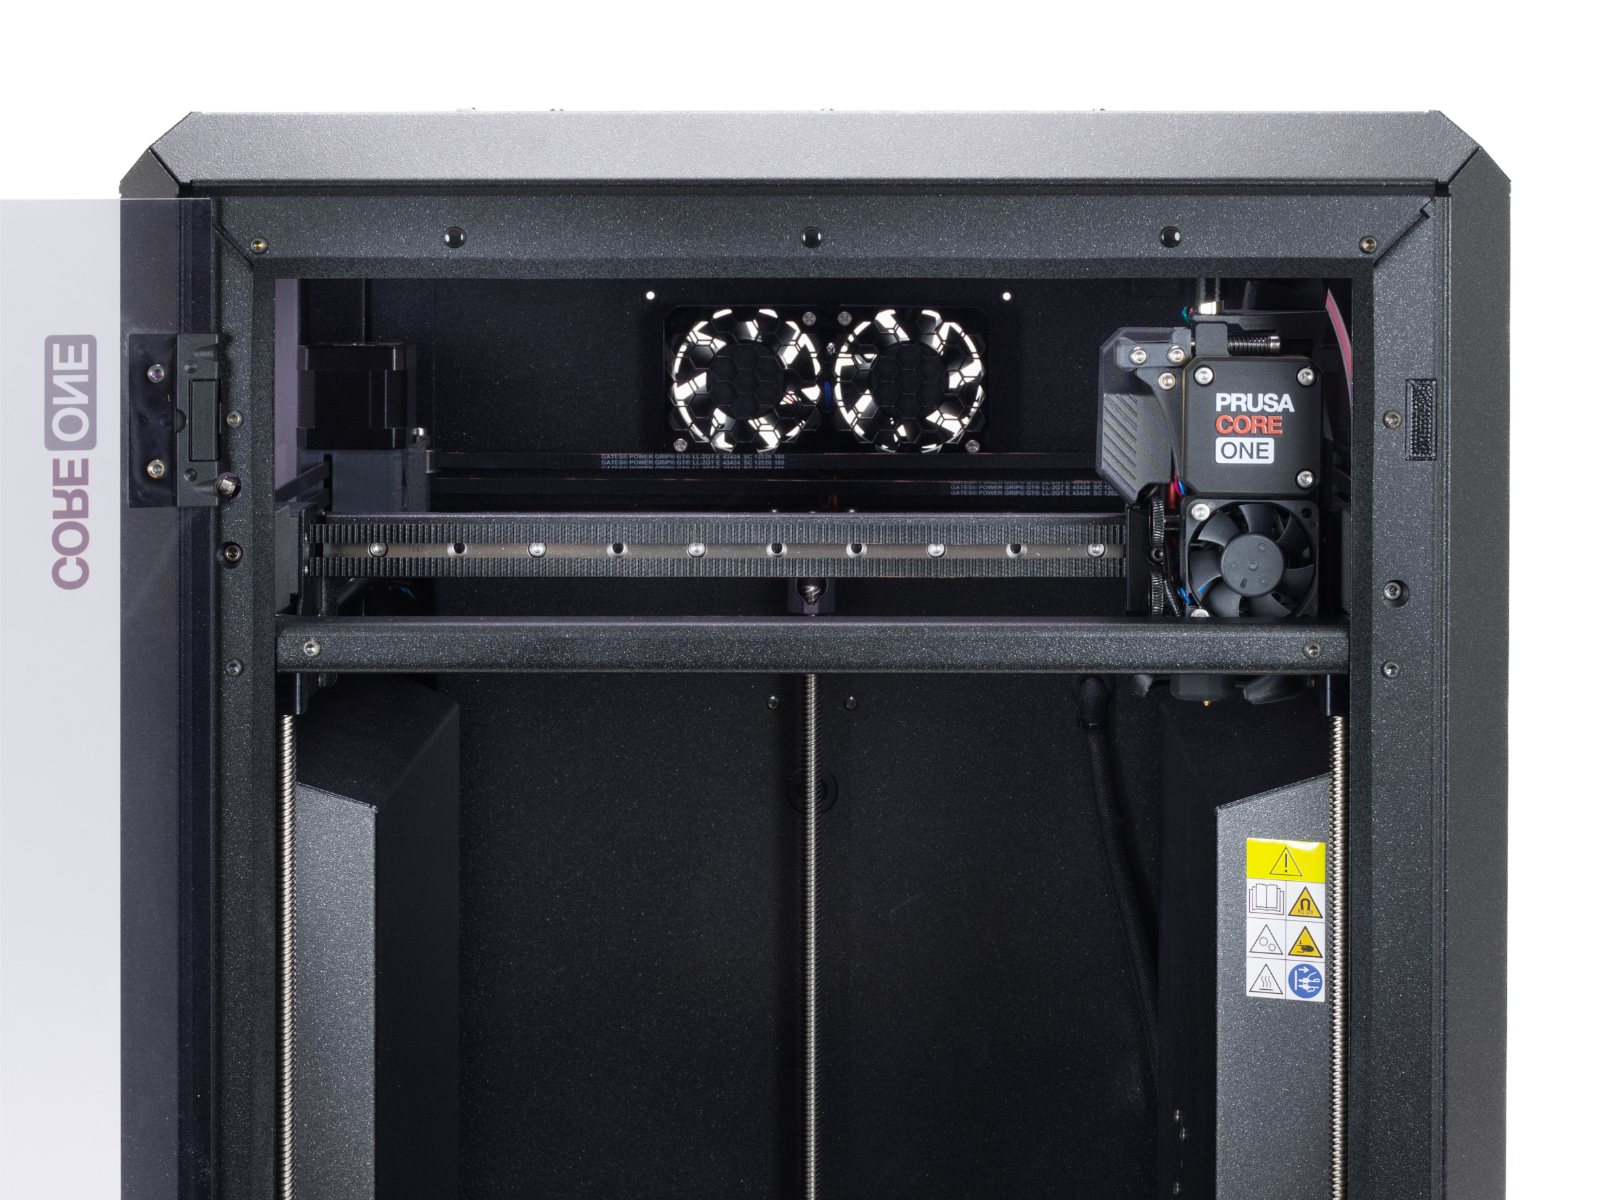
                  Small adjustment

                    1. Ensure the stepper motors are disabled. This can be done by switching the printer off, or through the LCD Menu -> Control -> Disable Motors. 
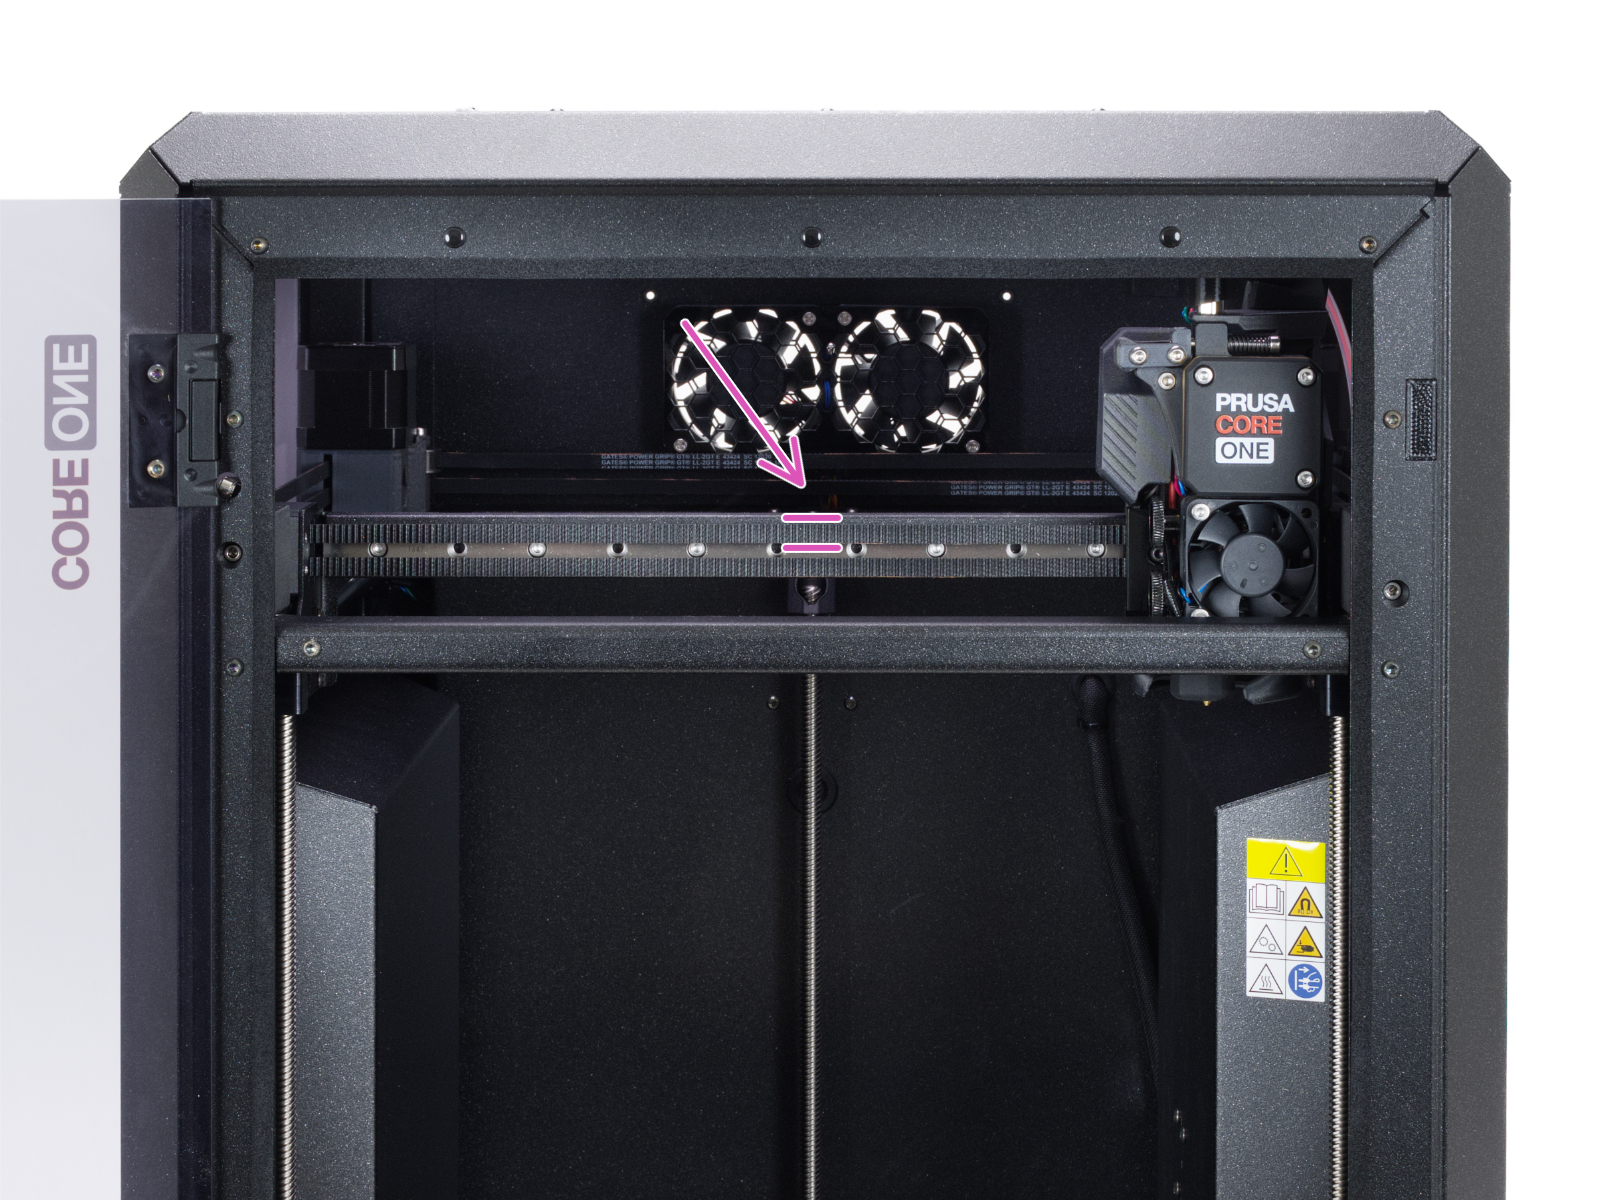
                    2. By hand, move the Nextruder to the frontmost Y-axis position, and to the rightmost X-axis position. 
                    3. On the front of the gantry, strum the middle of the upper belt. Place your device next to the belt during this step, to measure the frequency in Hz of the belt sound.
                      On CORE One/+, the ideal frequency for the upper belt is 98Hz. For CORE One L and INDX, it is a range shown on the belt turning wizard.
                    4. On the front of the gantry, strum the middle of the lower belt. Place your device next to the belt during this step to measure the frequency in Hz of the belt sound.
                      For CORE One/+, the ideal frequency for the lower belt is 92Hz. For CORE One L and INDX, it is a range shown on the belt tuning wizard. 
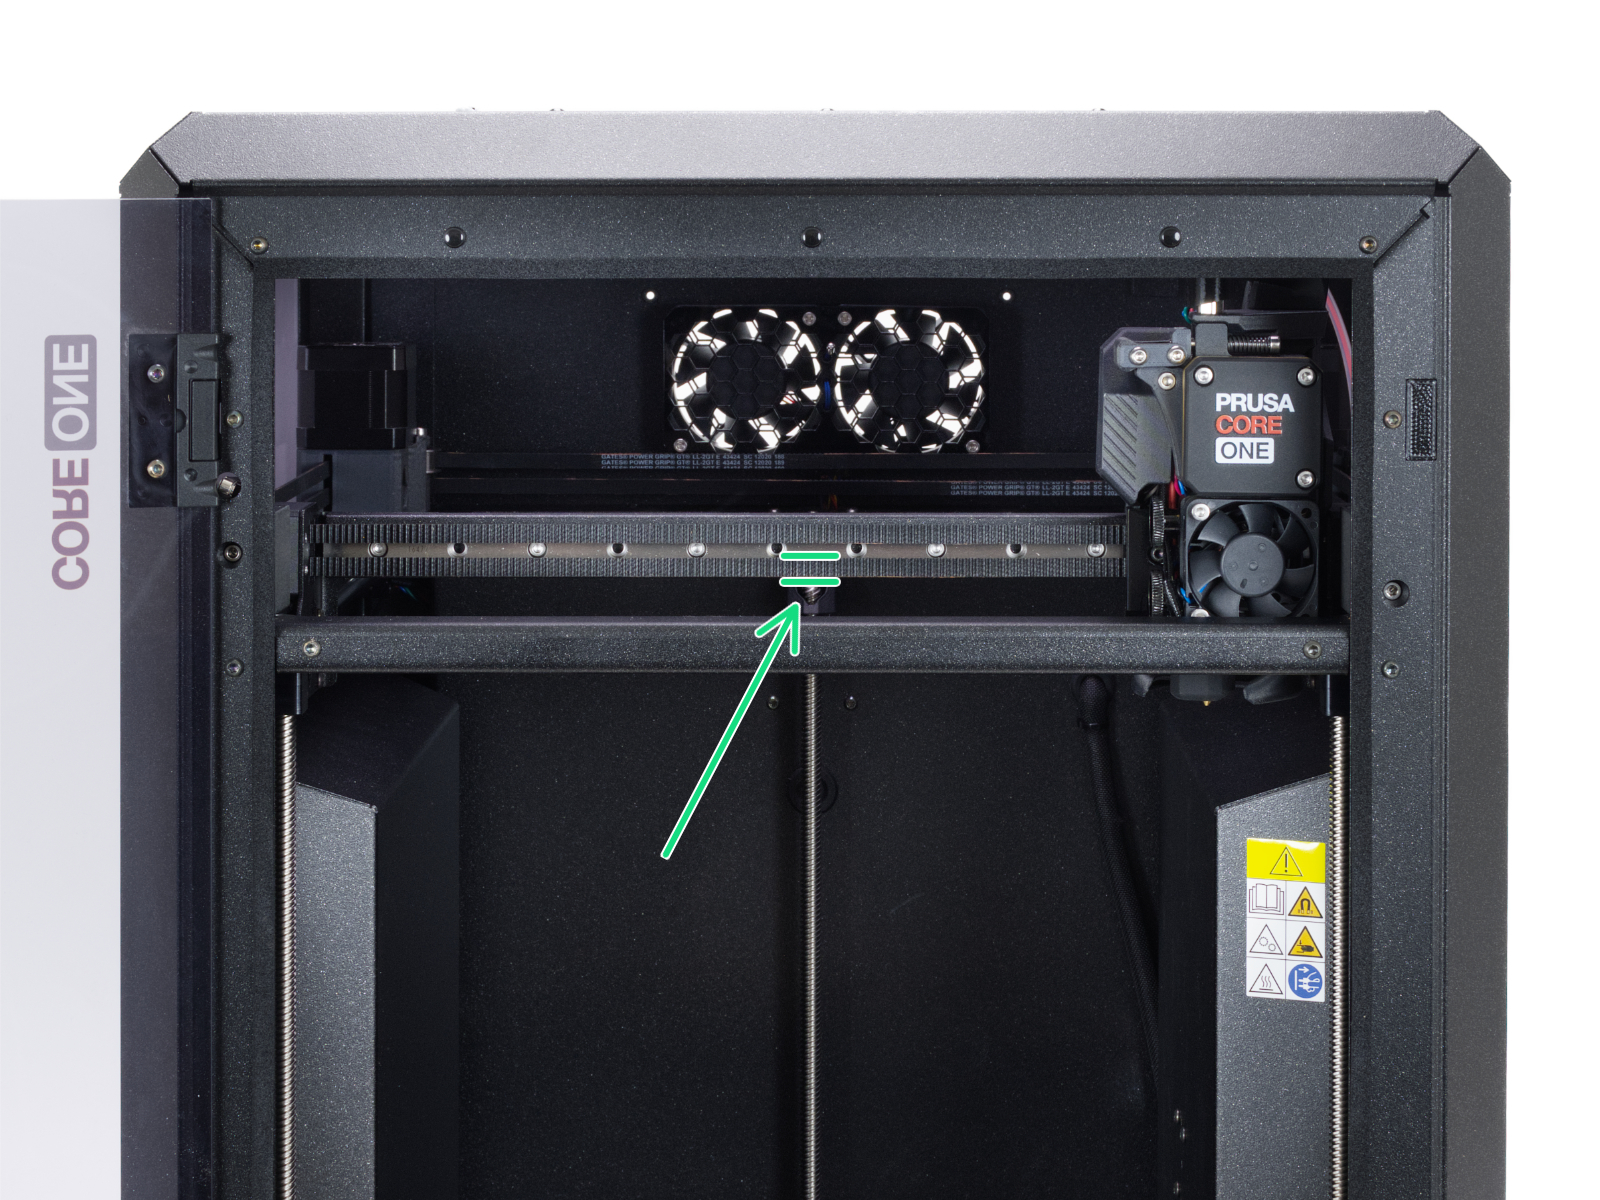
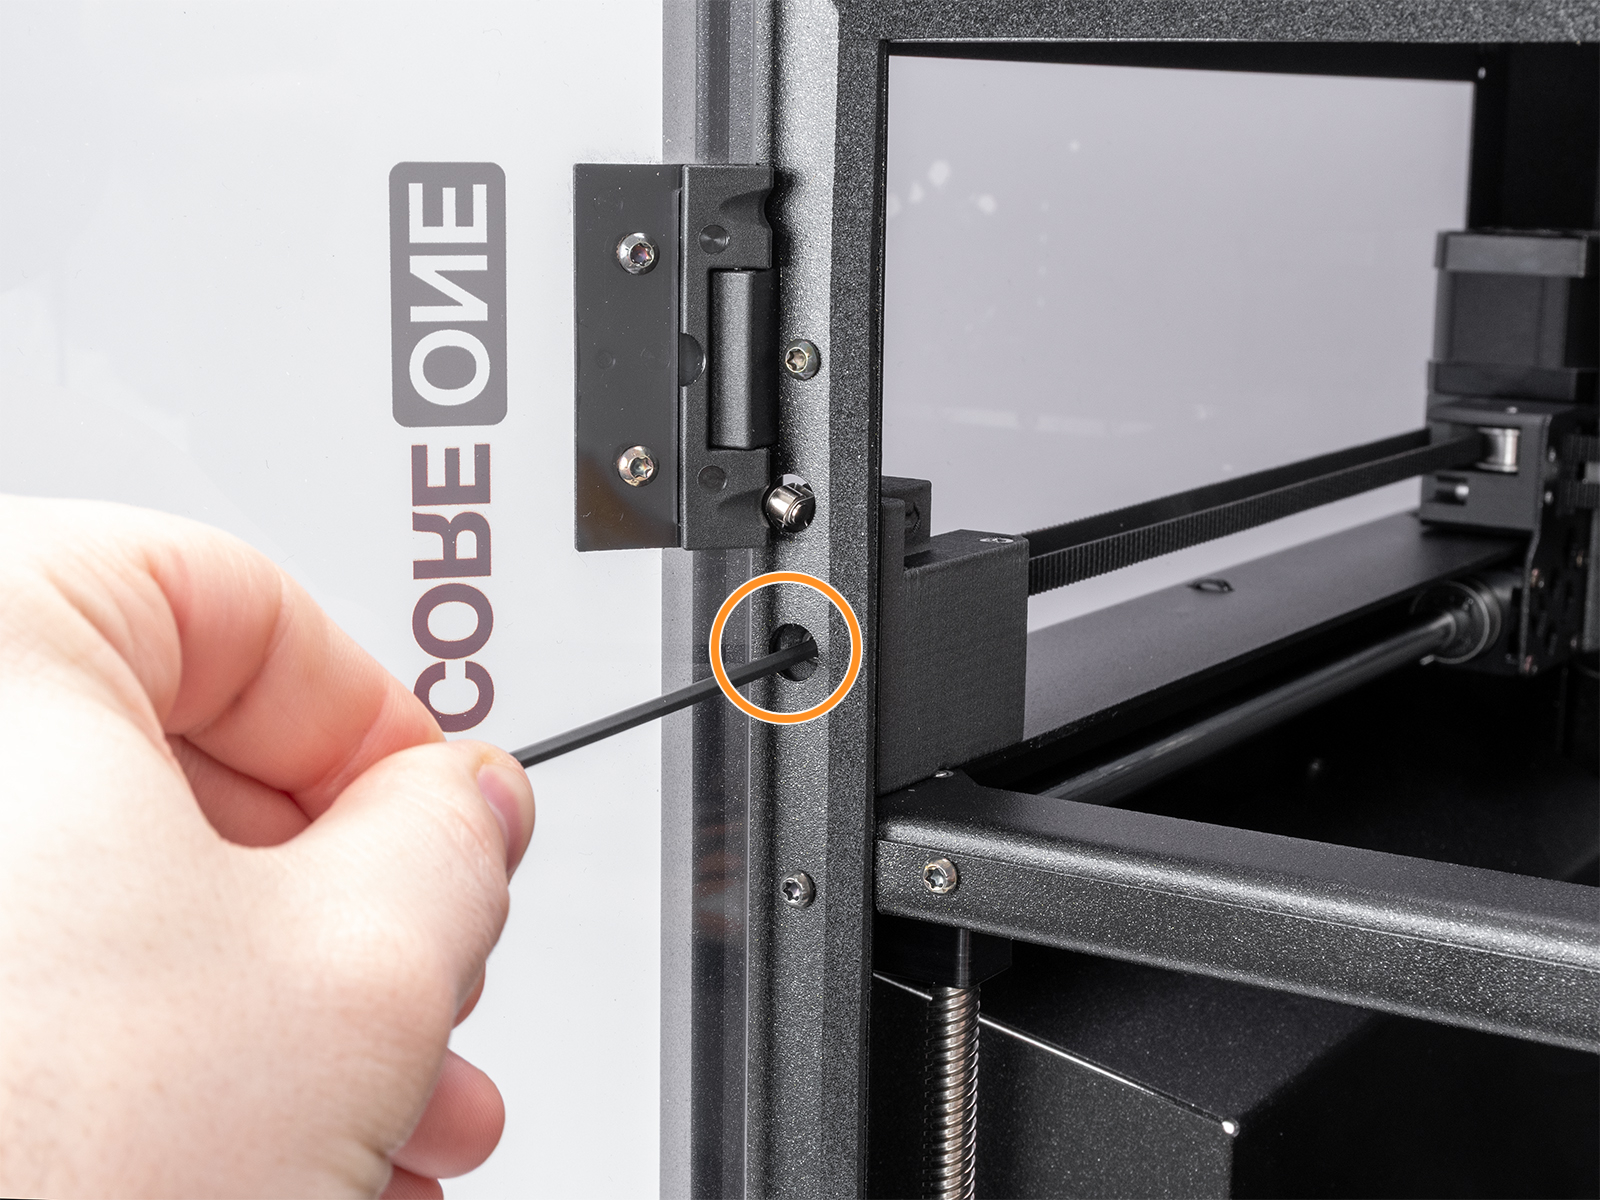
                    5. Adjust the belts by tightening or loosening the belt tensioner screws by the same amount, each 1/2 turn at a time, to equalize the tension in the system. Then measure the frequency again.
                      A tighter bolt causes a higher frequency, and vice versa. 
                      The left screw controls the upper belt, the right screw controls the lower belt.
                      Important: If a gap appears on one of the front corners when tightening, both tensioner screws must be loosened, and the gantry alignment must be started again (Alignment section above). 

                  Extensive adjustment of gantry and belts (CORE One/+)

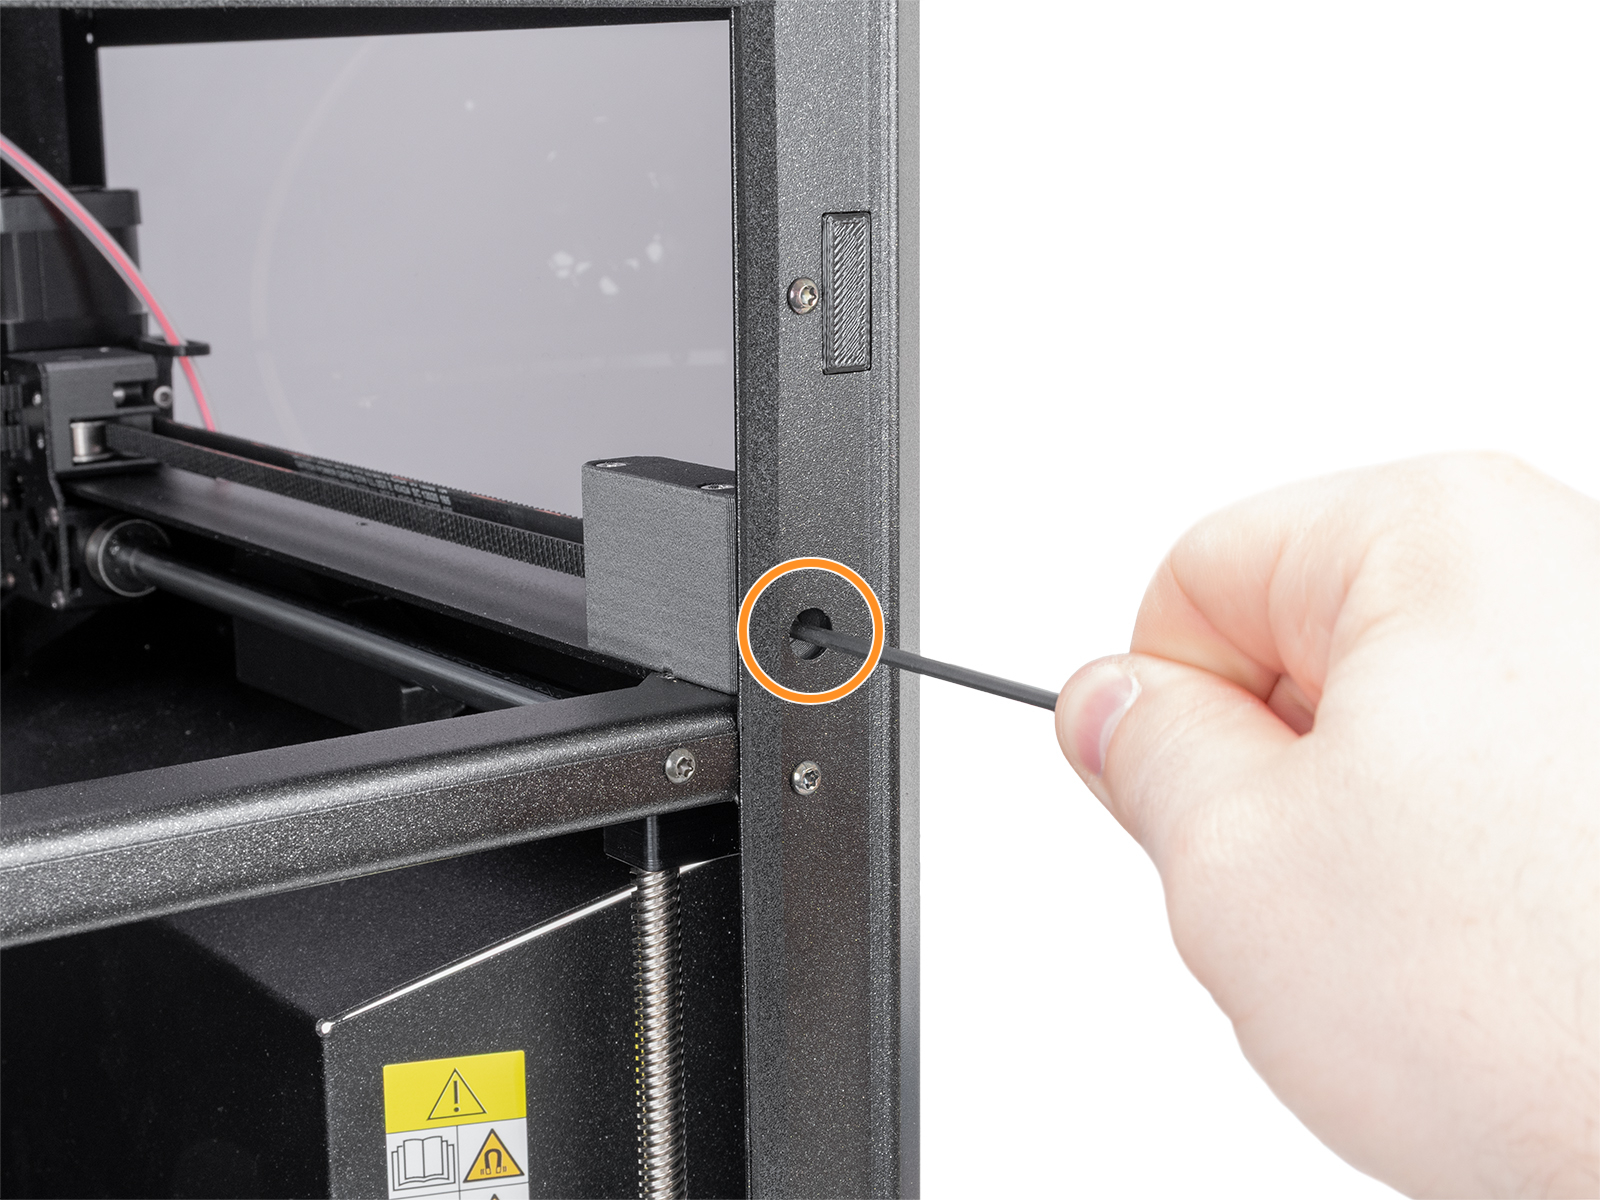
                  The belt tensioners should be able to solve most belt issues. However, if you need to make a larger adjustment because of a really out-of-alignment gantry or a belt that has slipped from the holder, follow the steps below to access the belt.
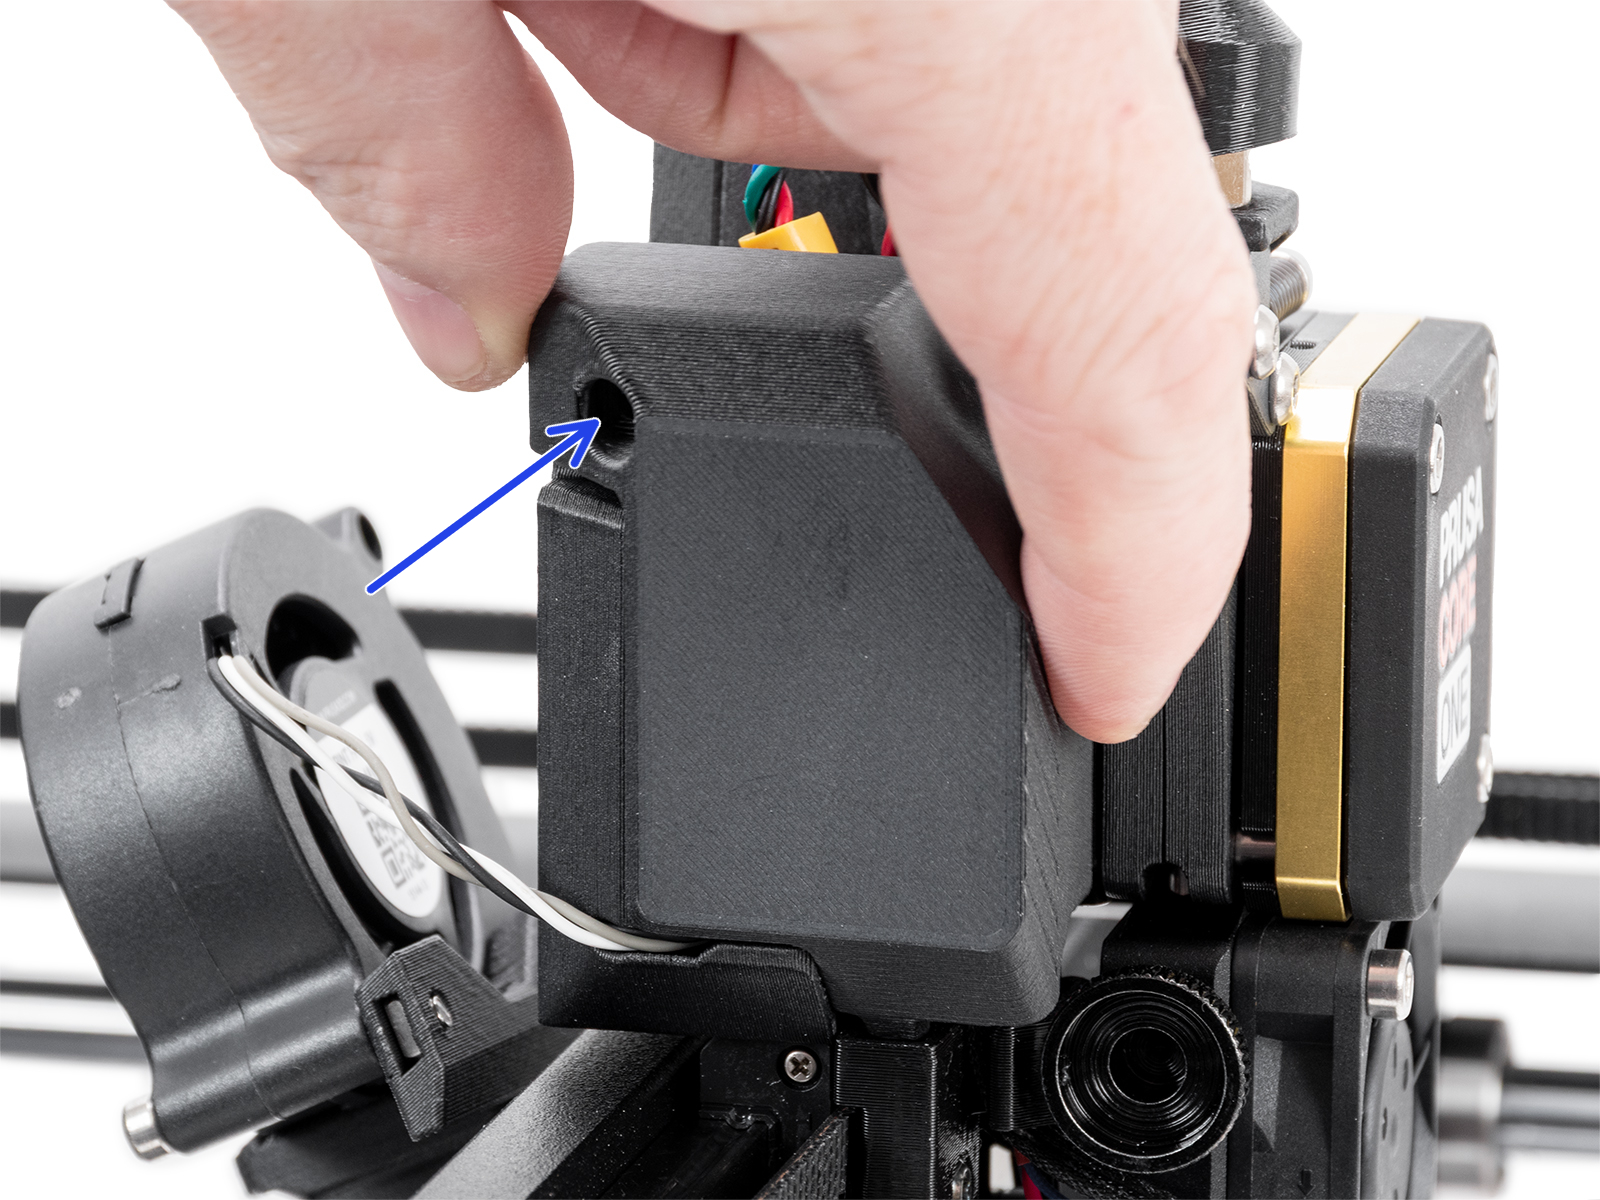
                  1. Manually move the Nextruder to the front and position it in the center to allow access from both sides.
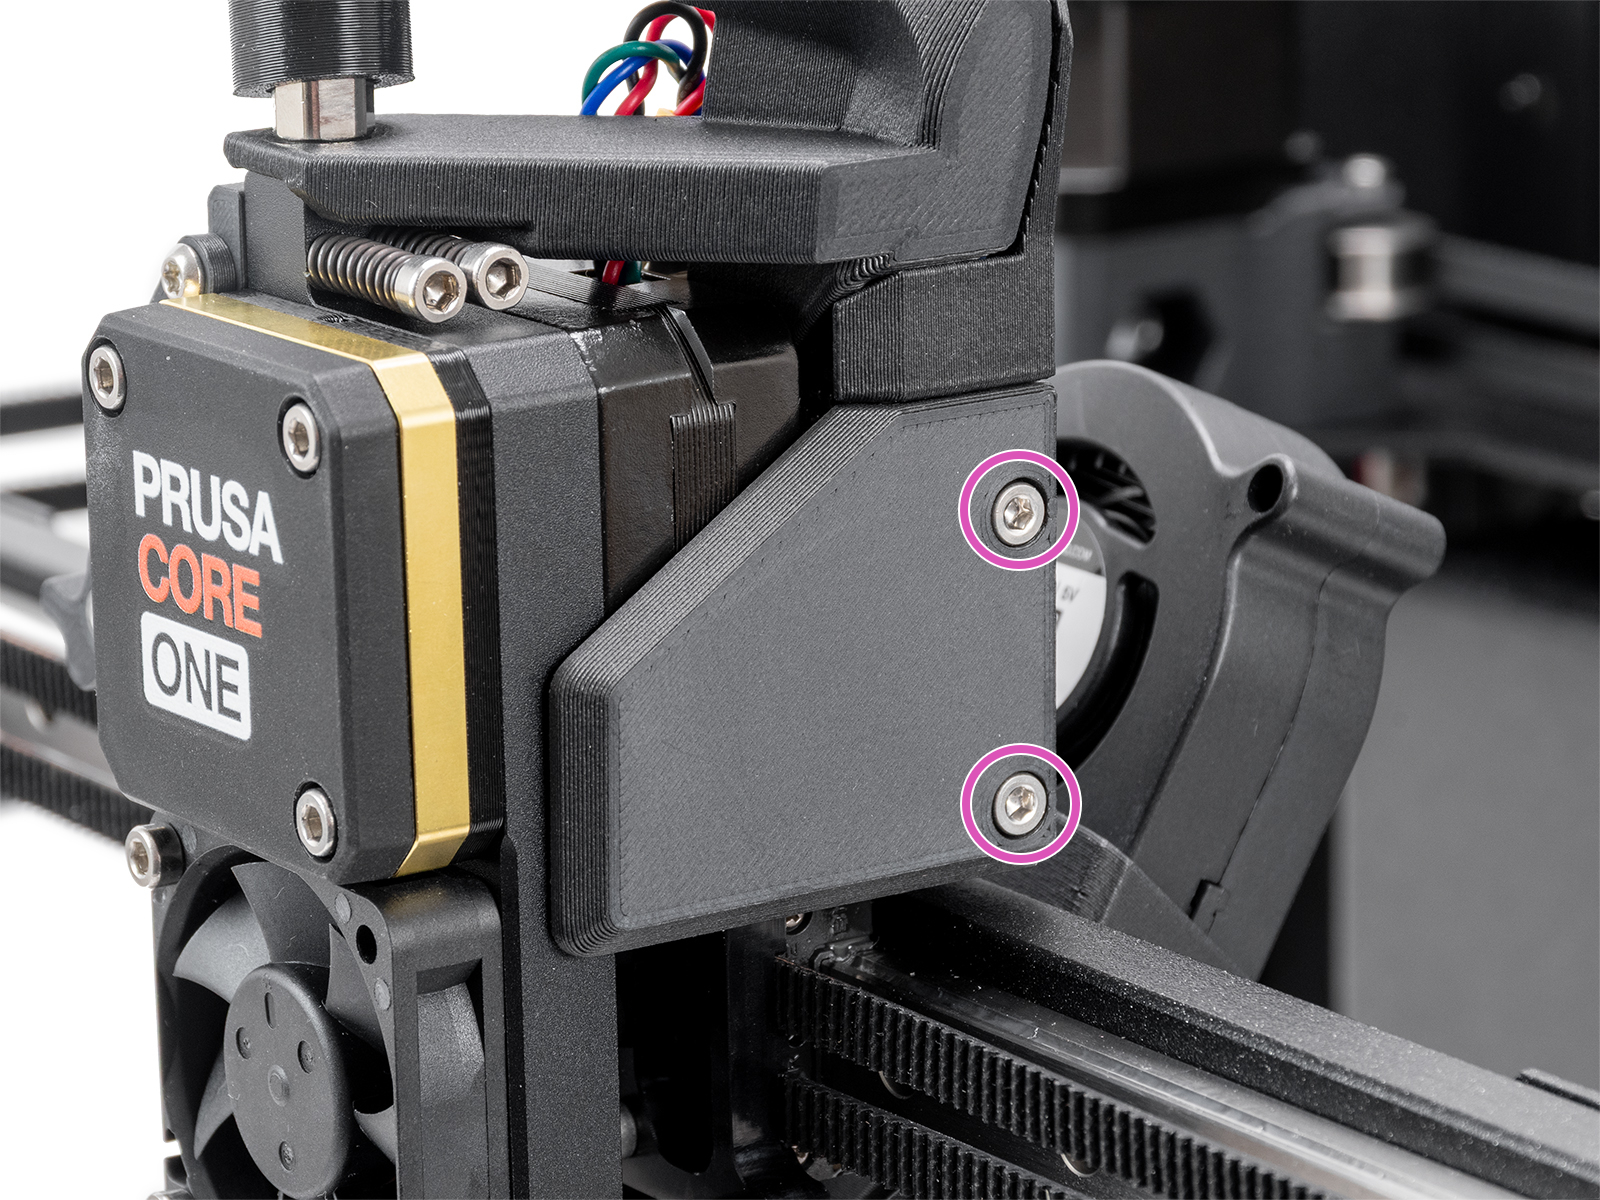
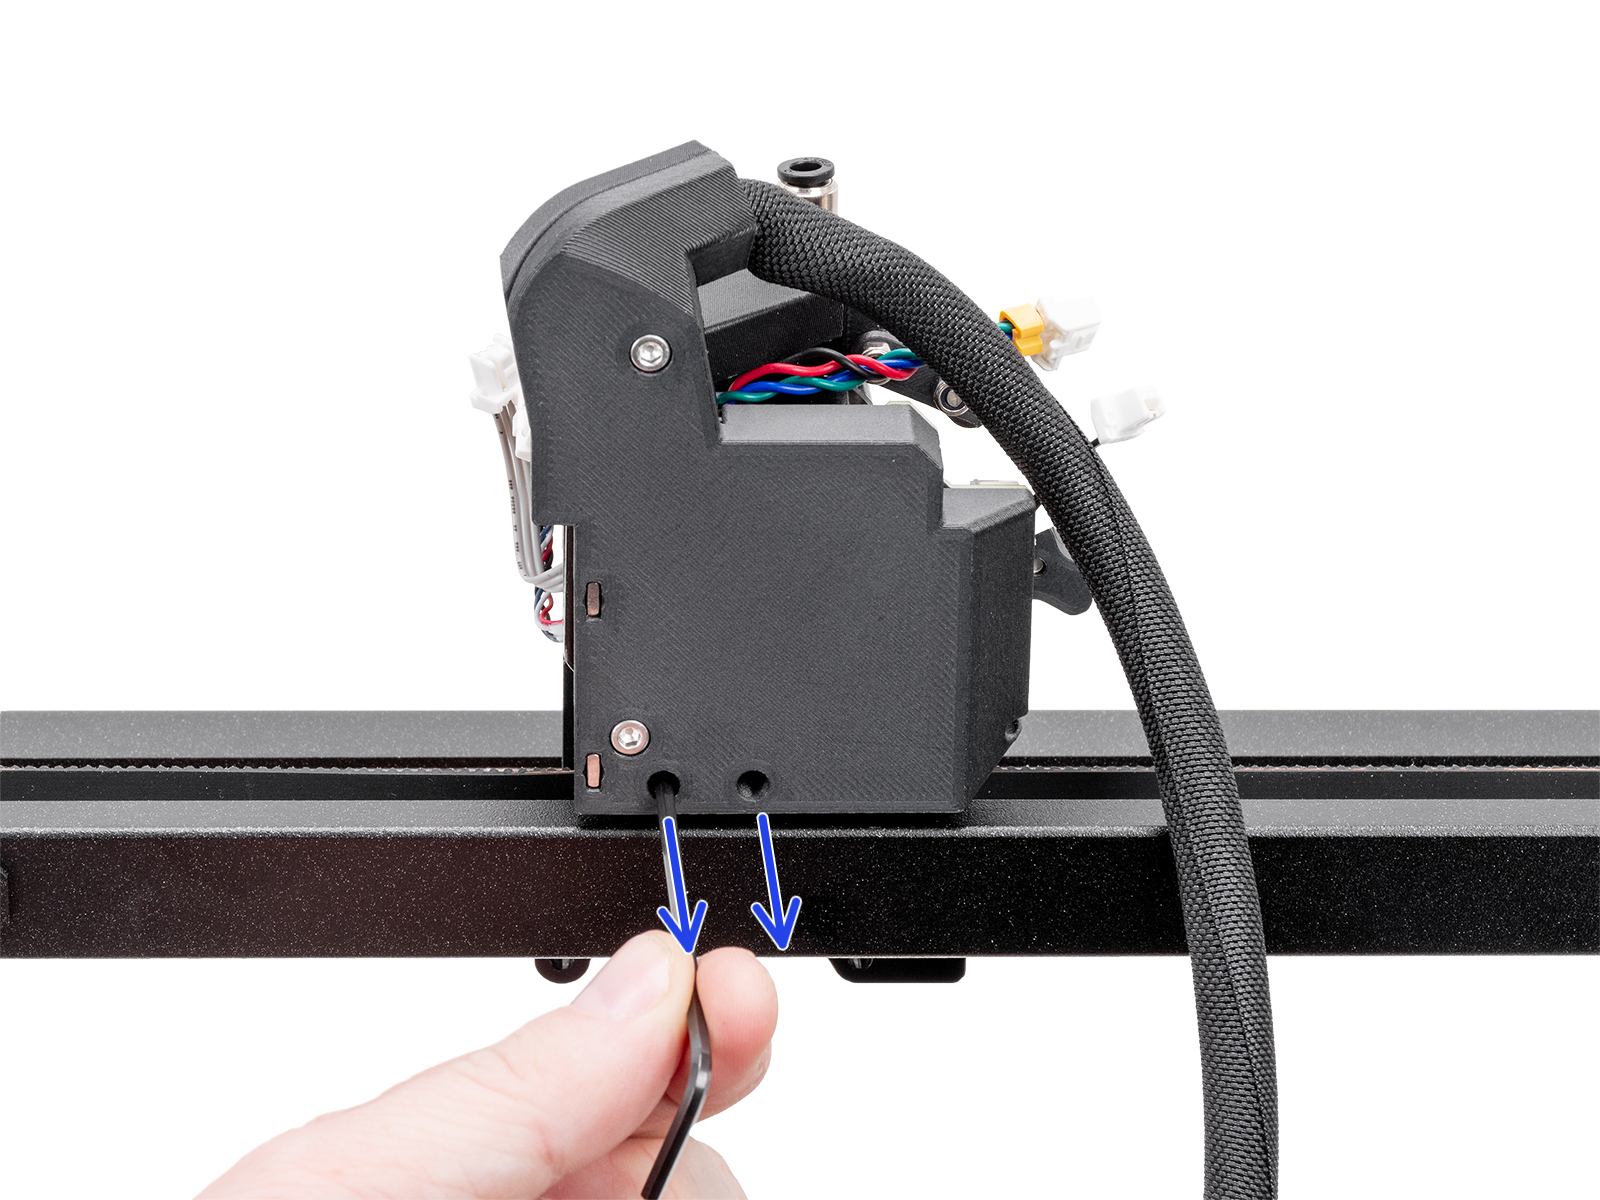
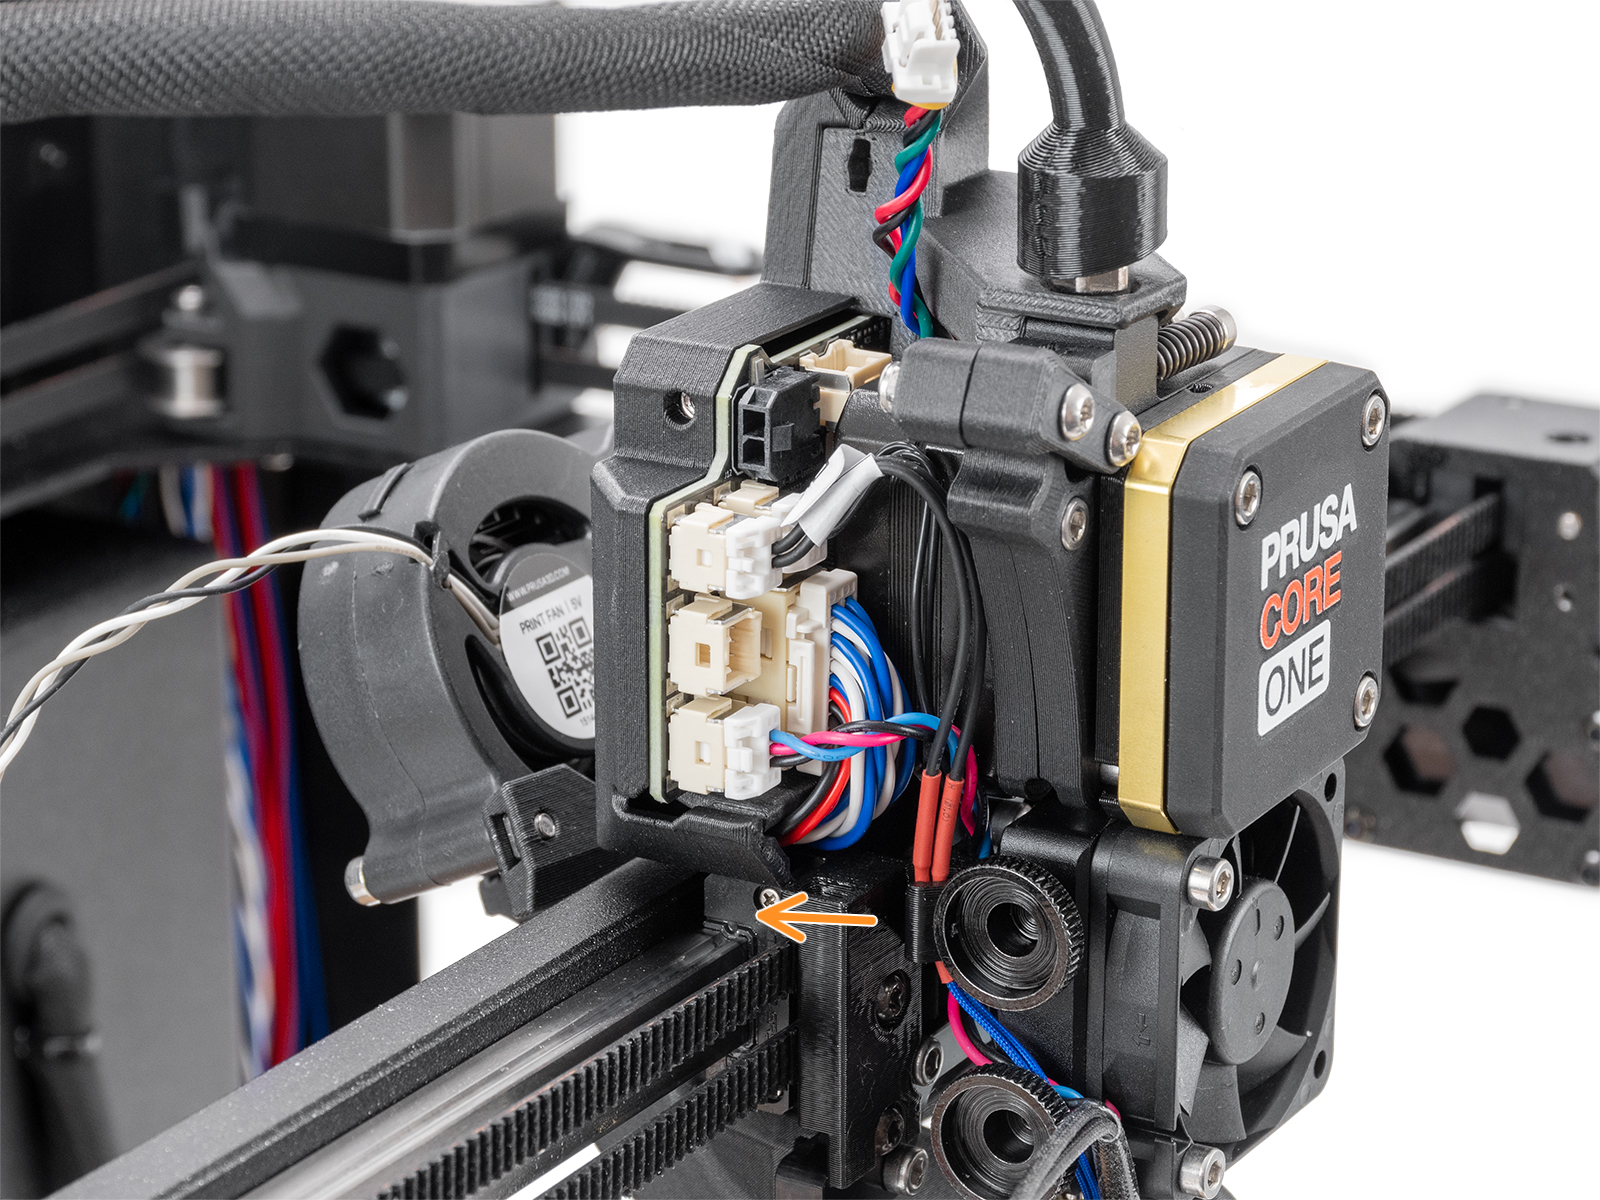
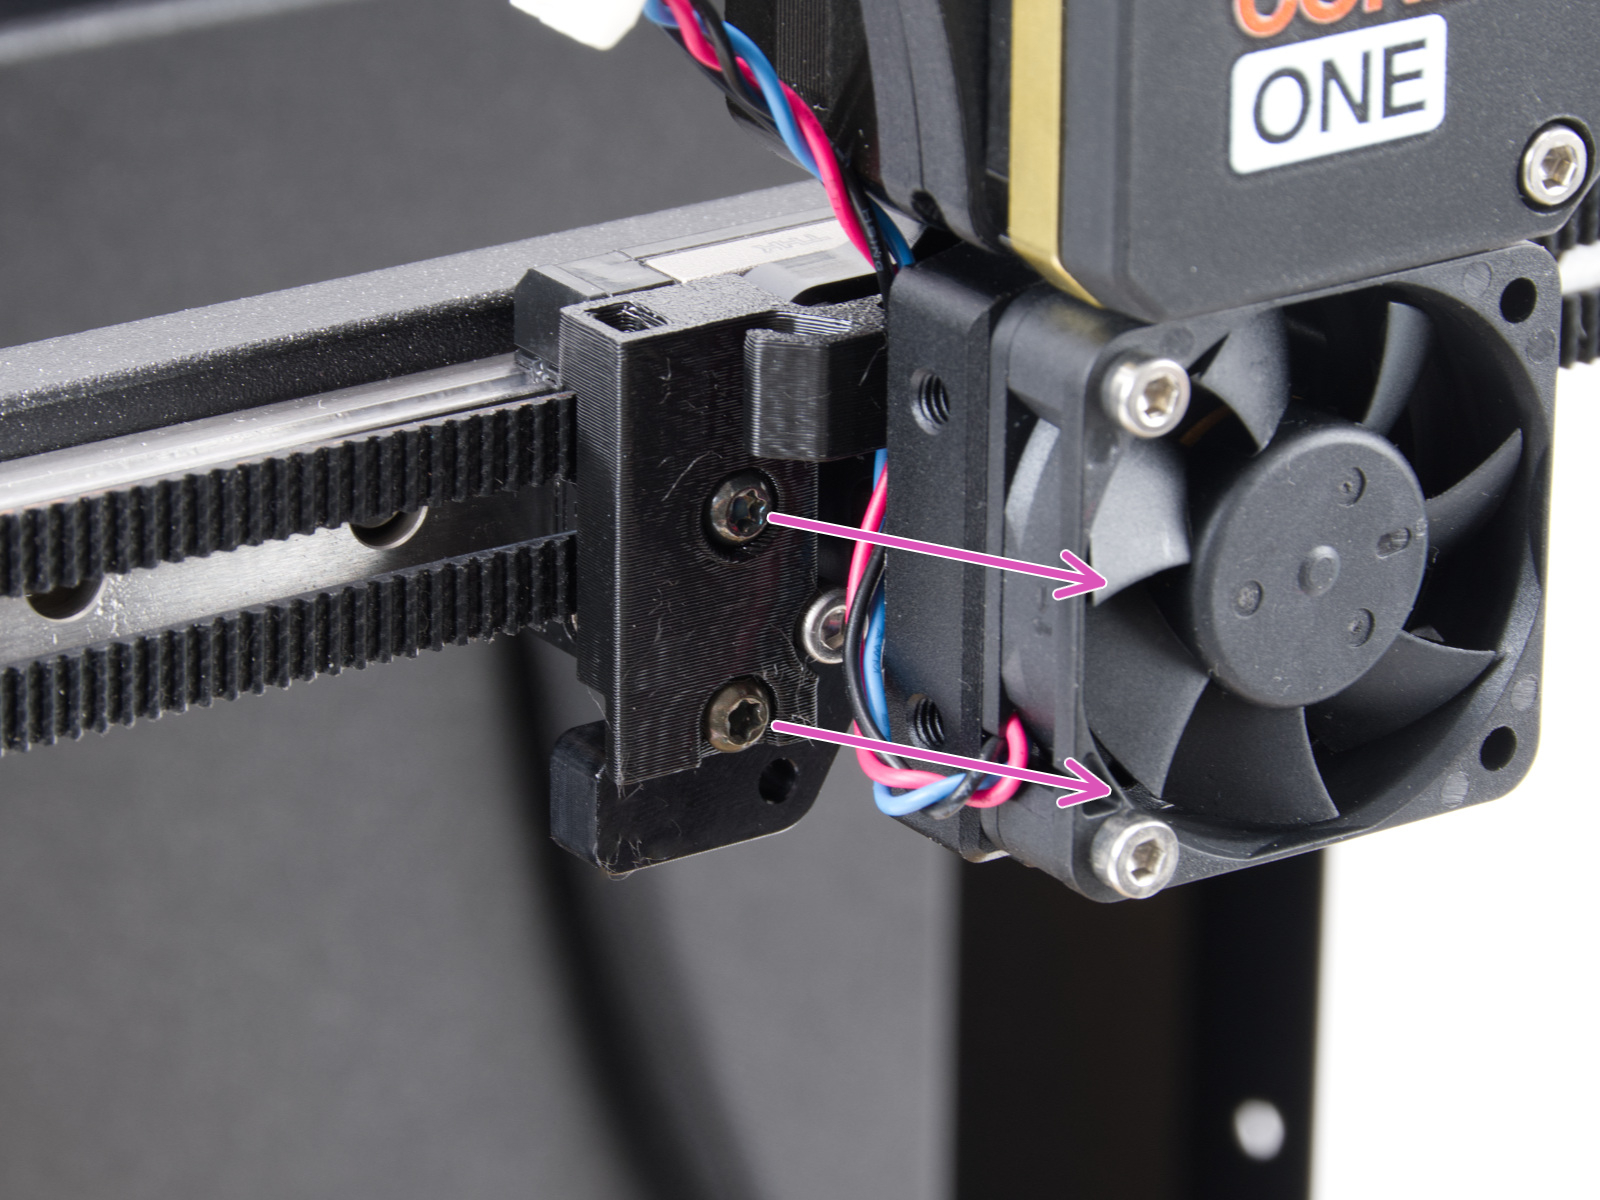
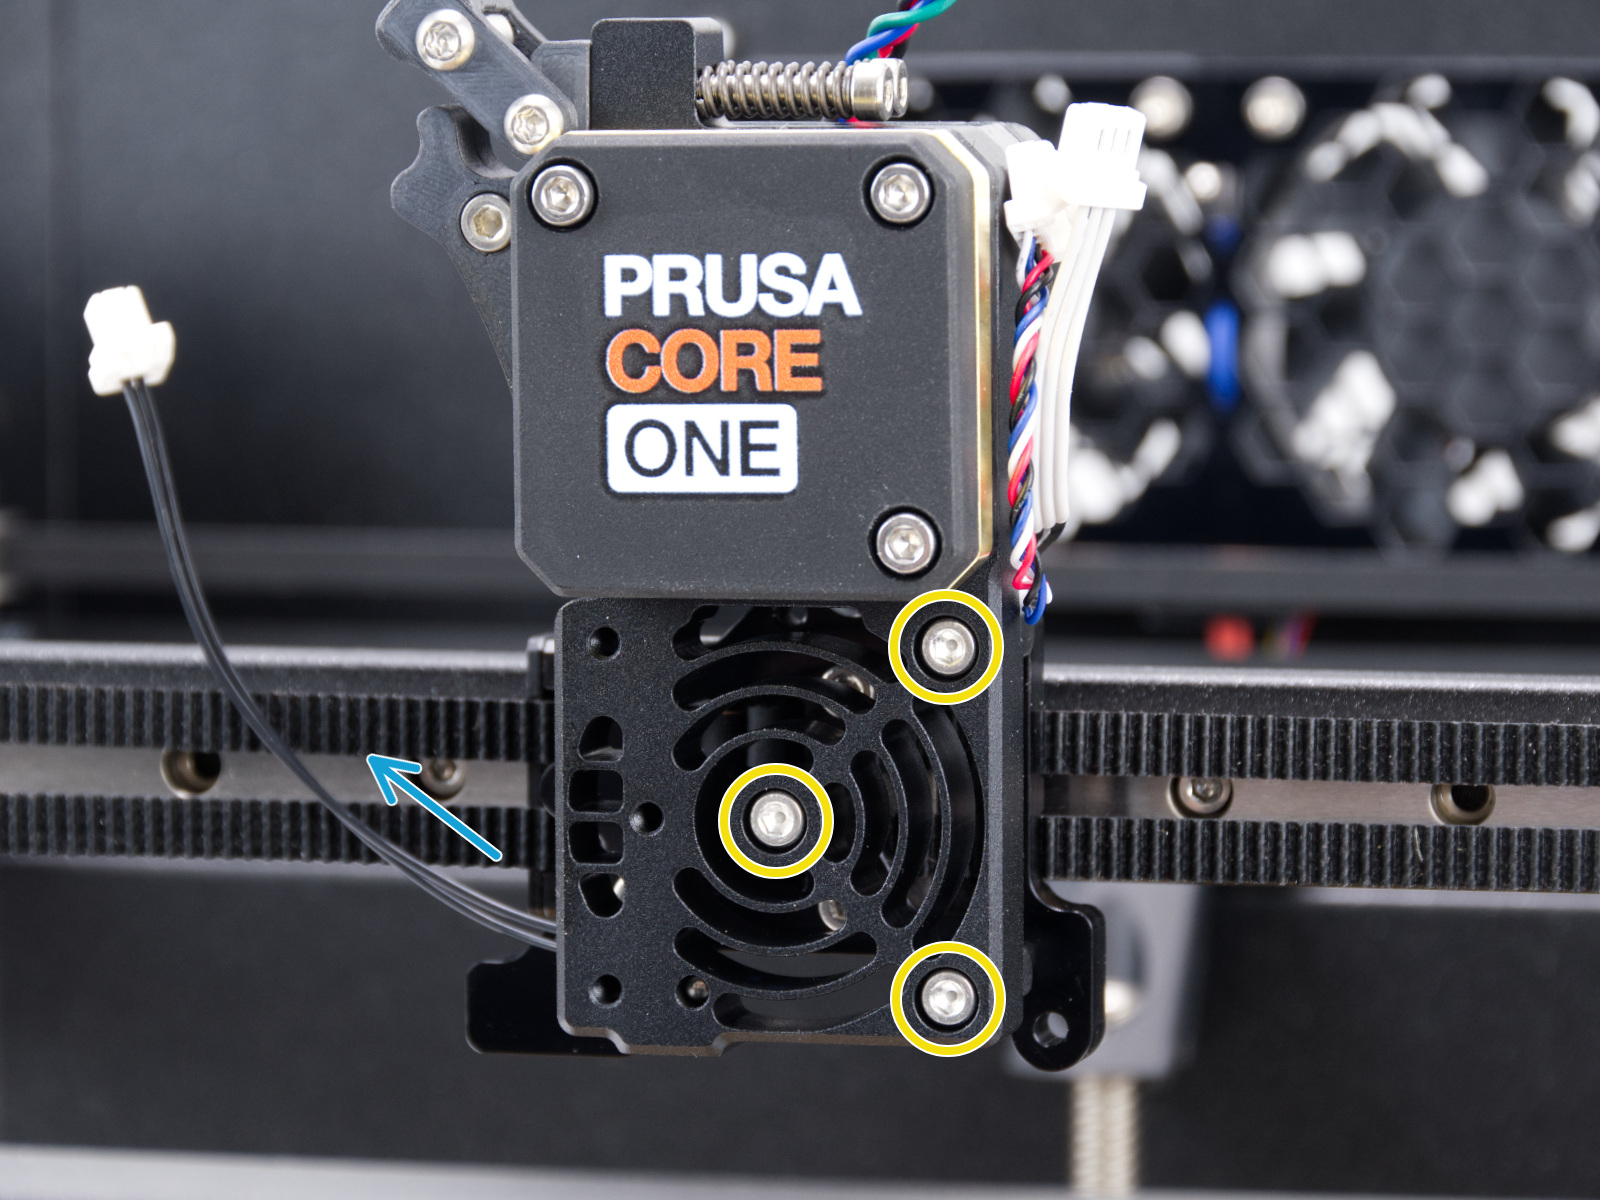
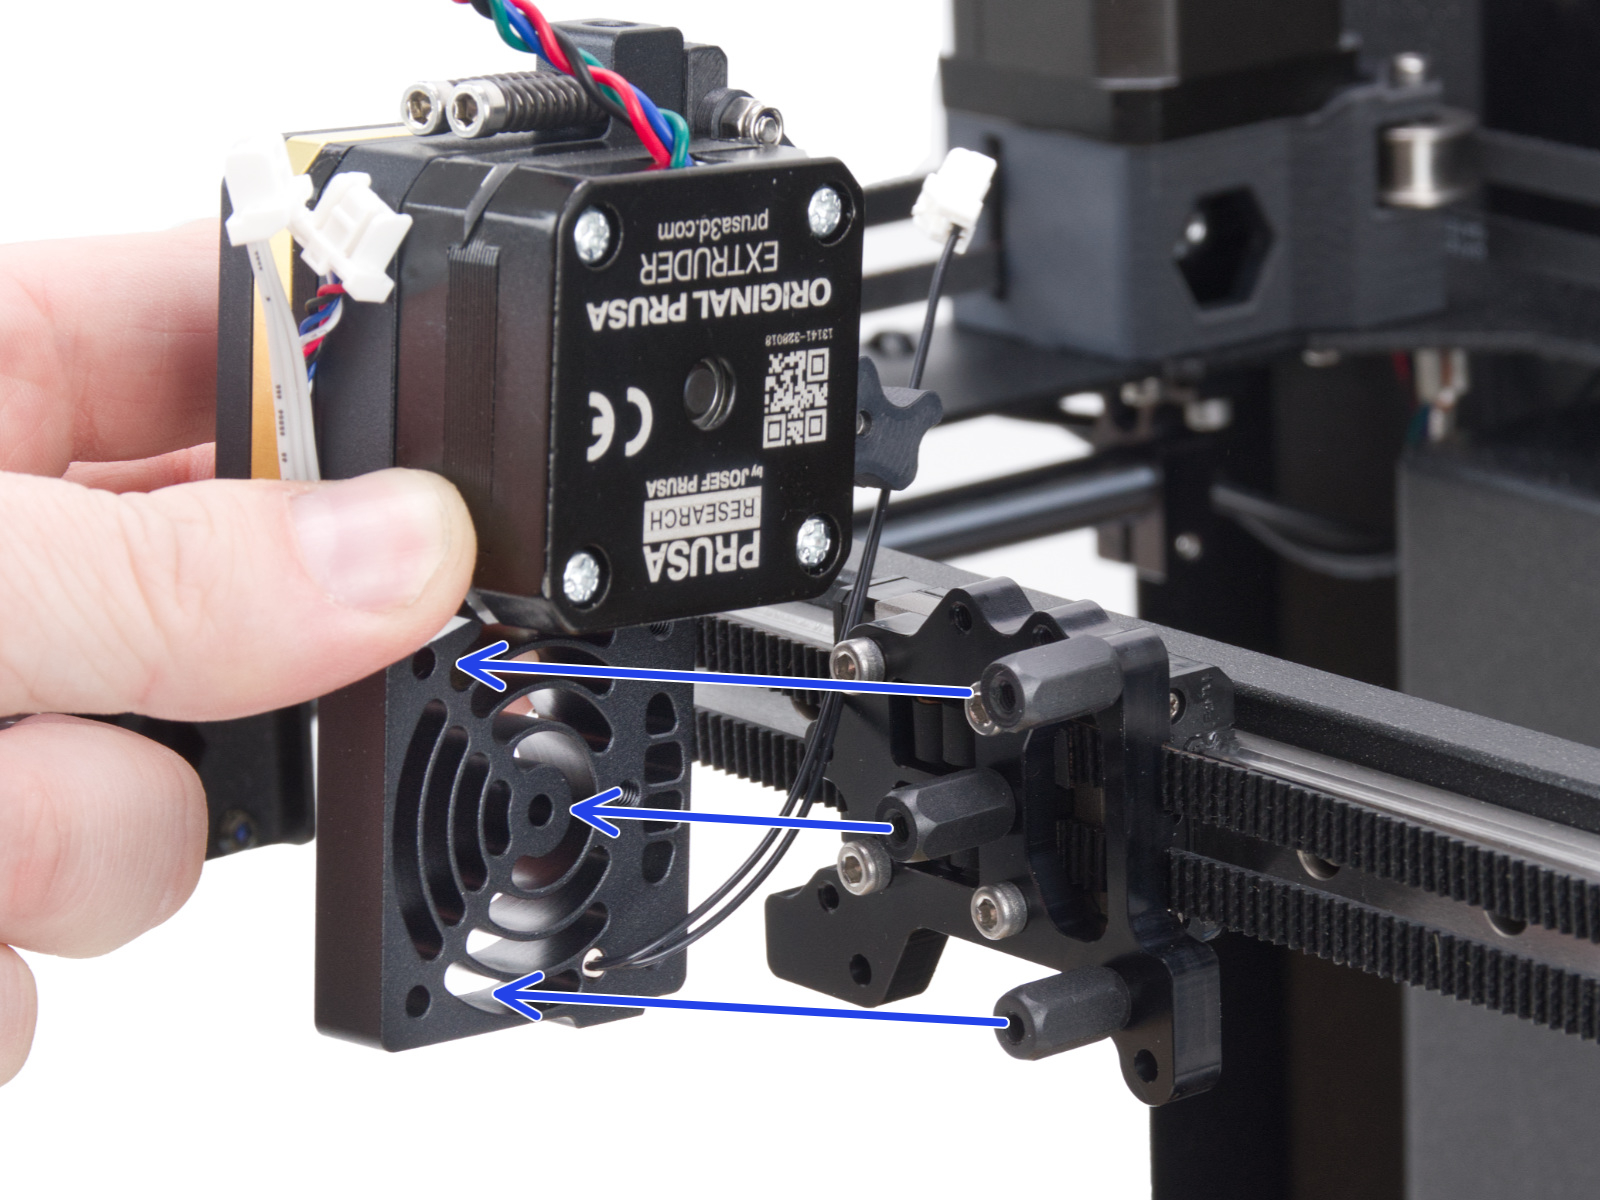
                  2. Remove the print head cover left and print head cover right by removing the M3x10 screws shown below.
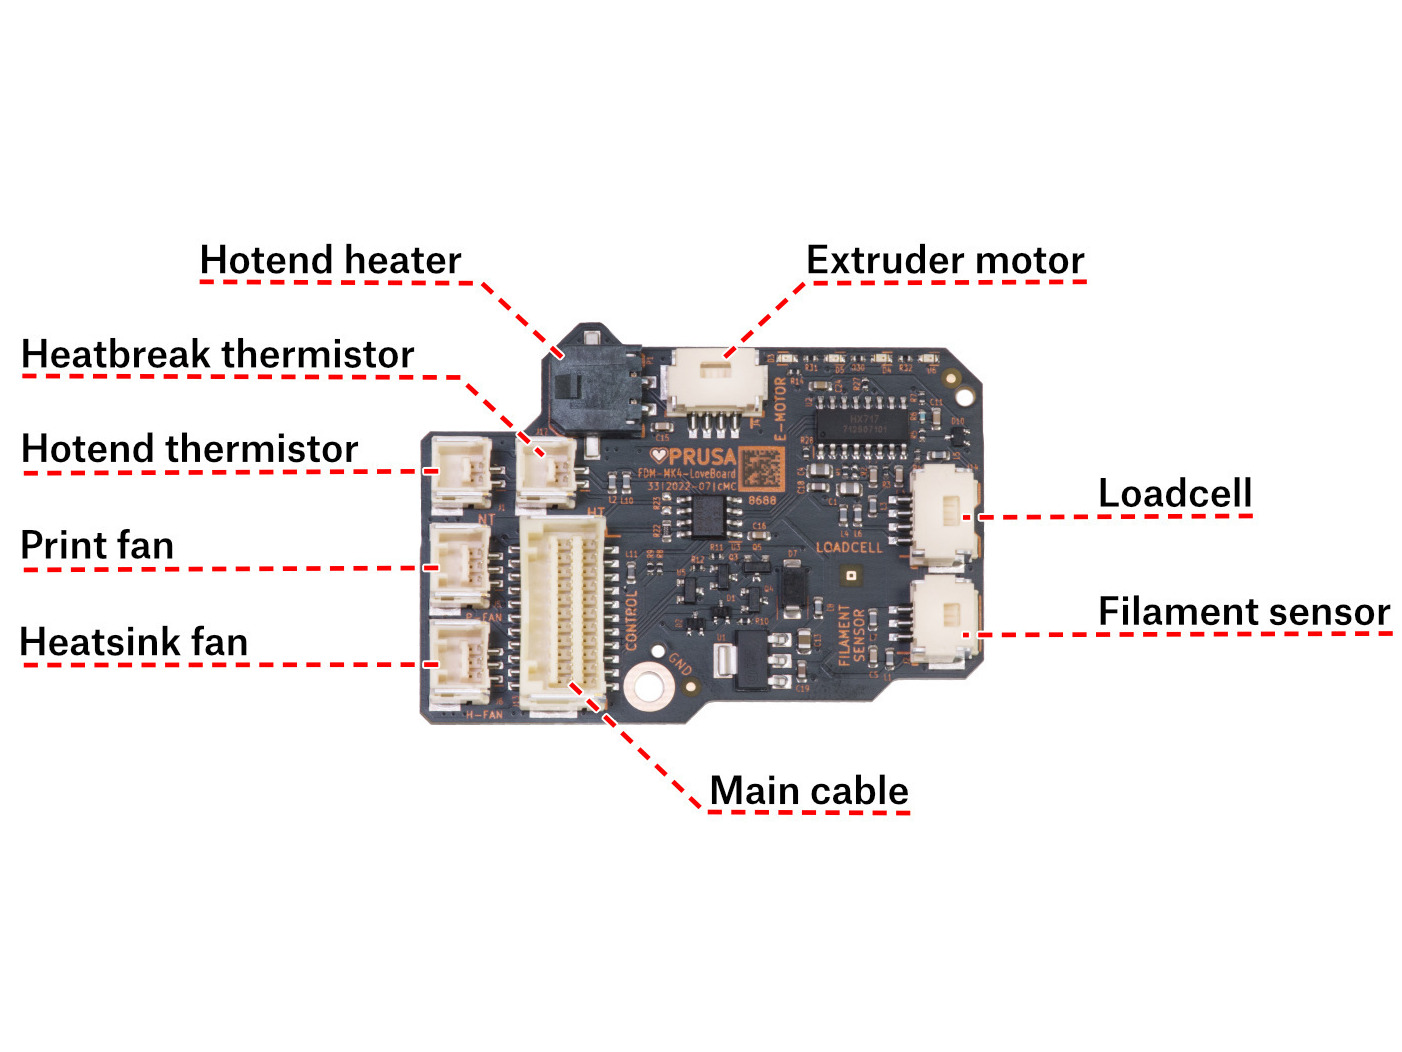
                  1. Disconnect all connectors from the LoveBoard, except the main cable.

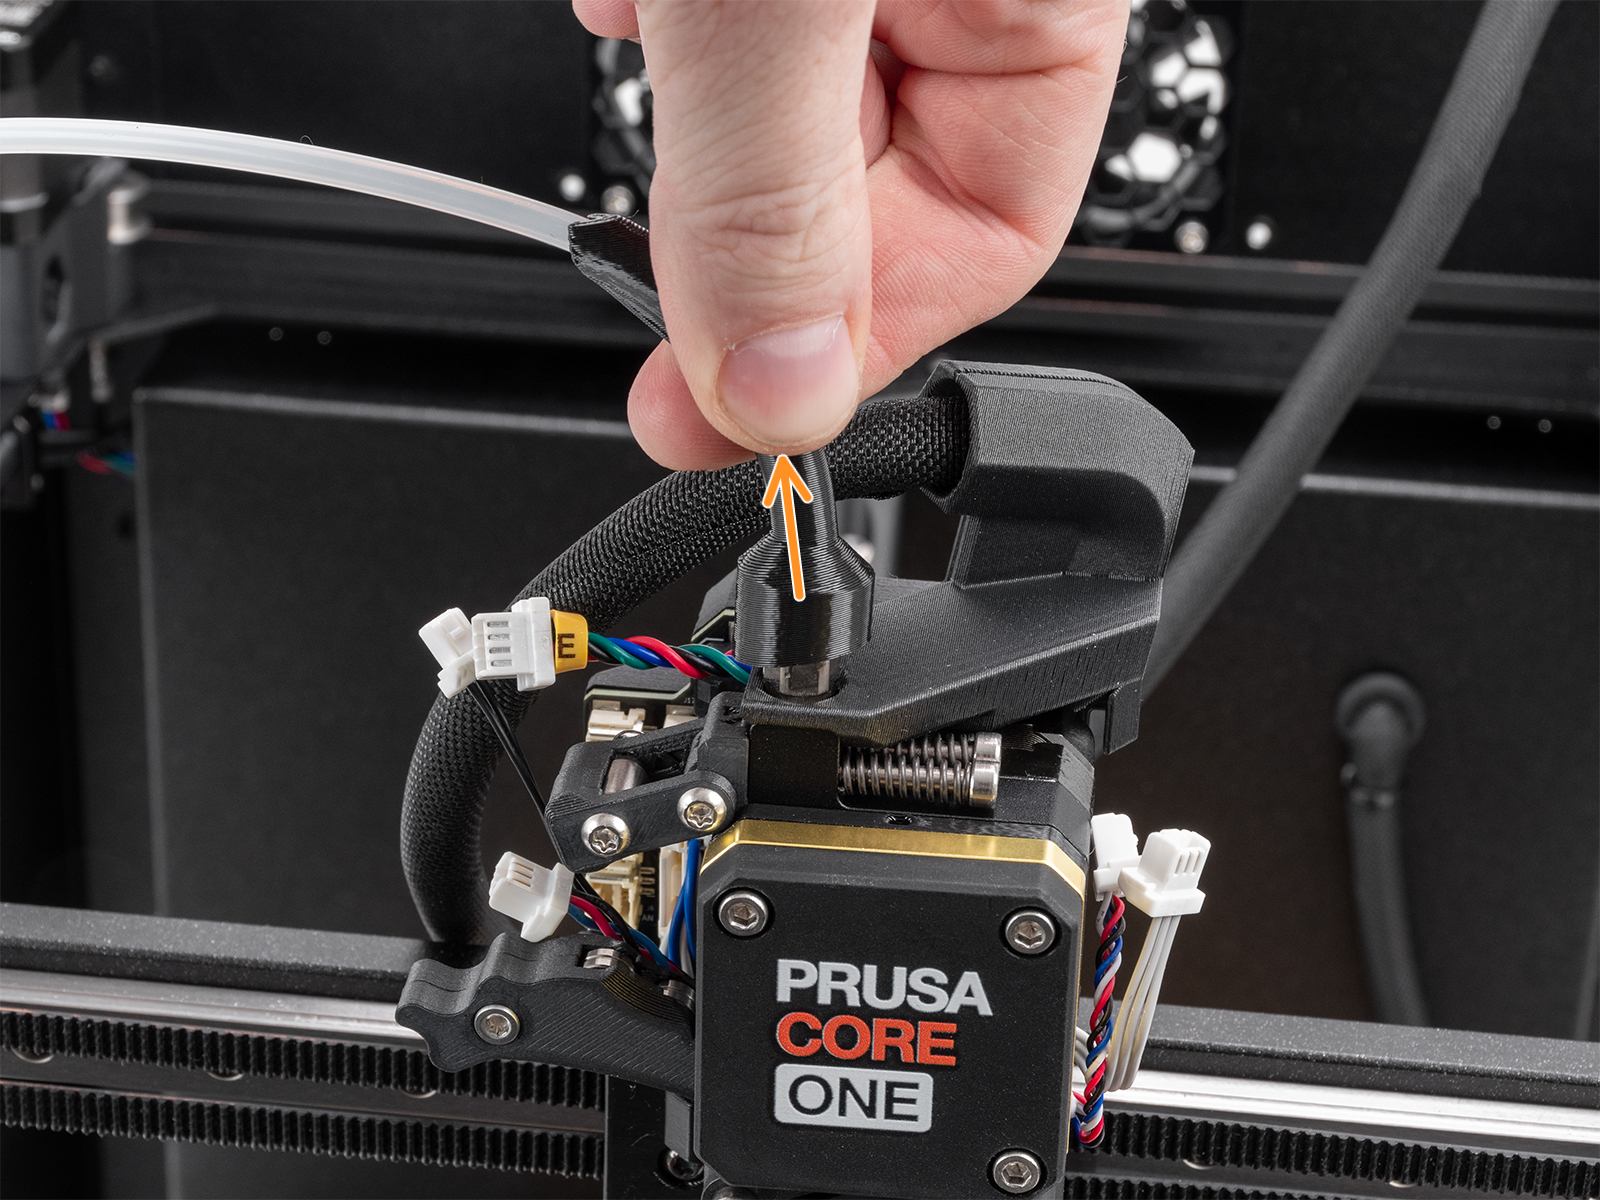
                  1. Pull up the Bowden-bend from the fitting on top of the extruder, and unscrew the fitting.

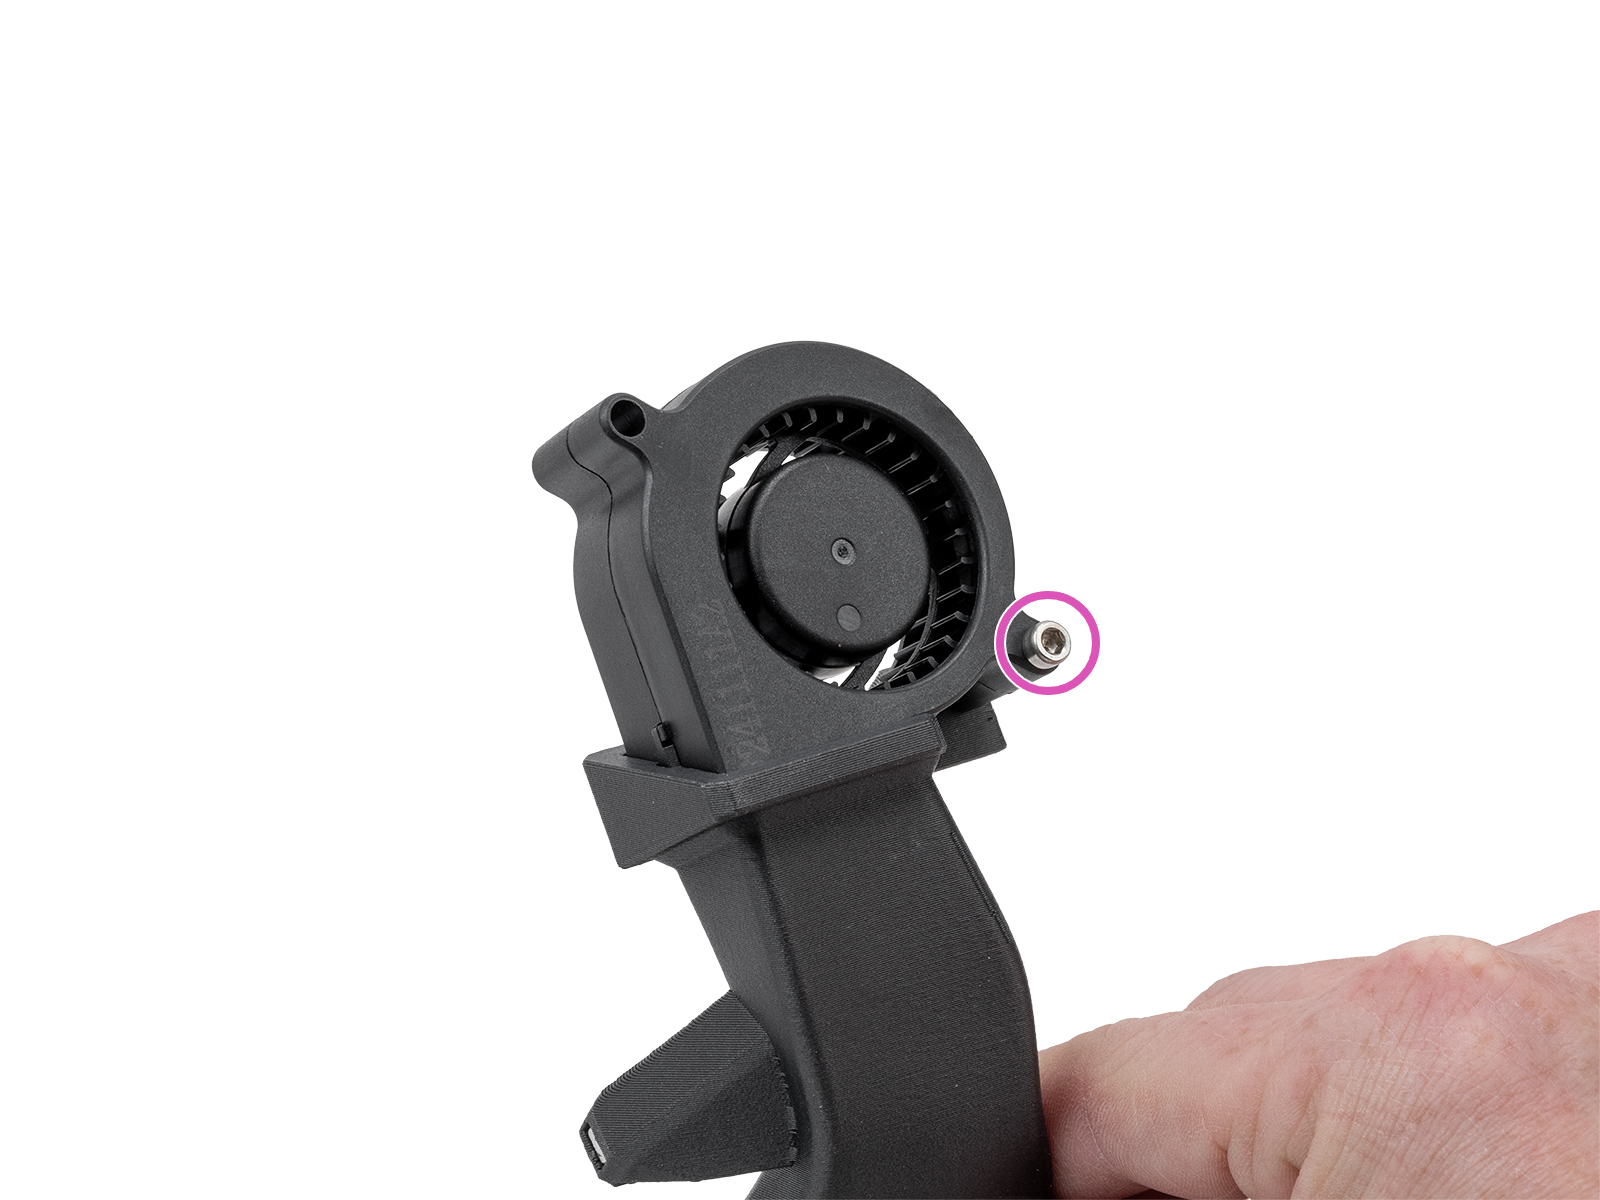
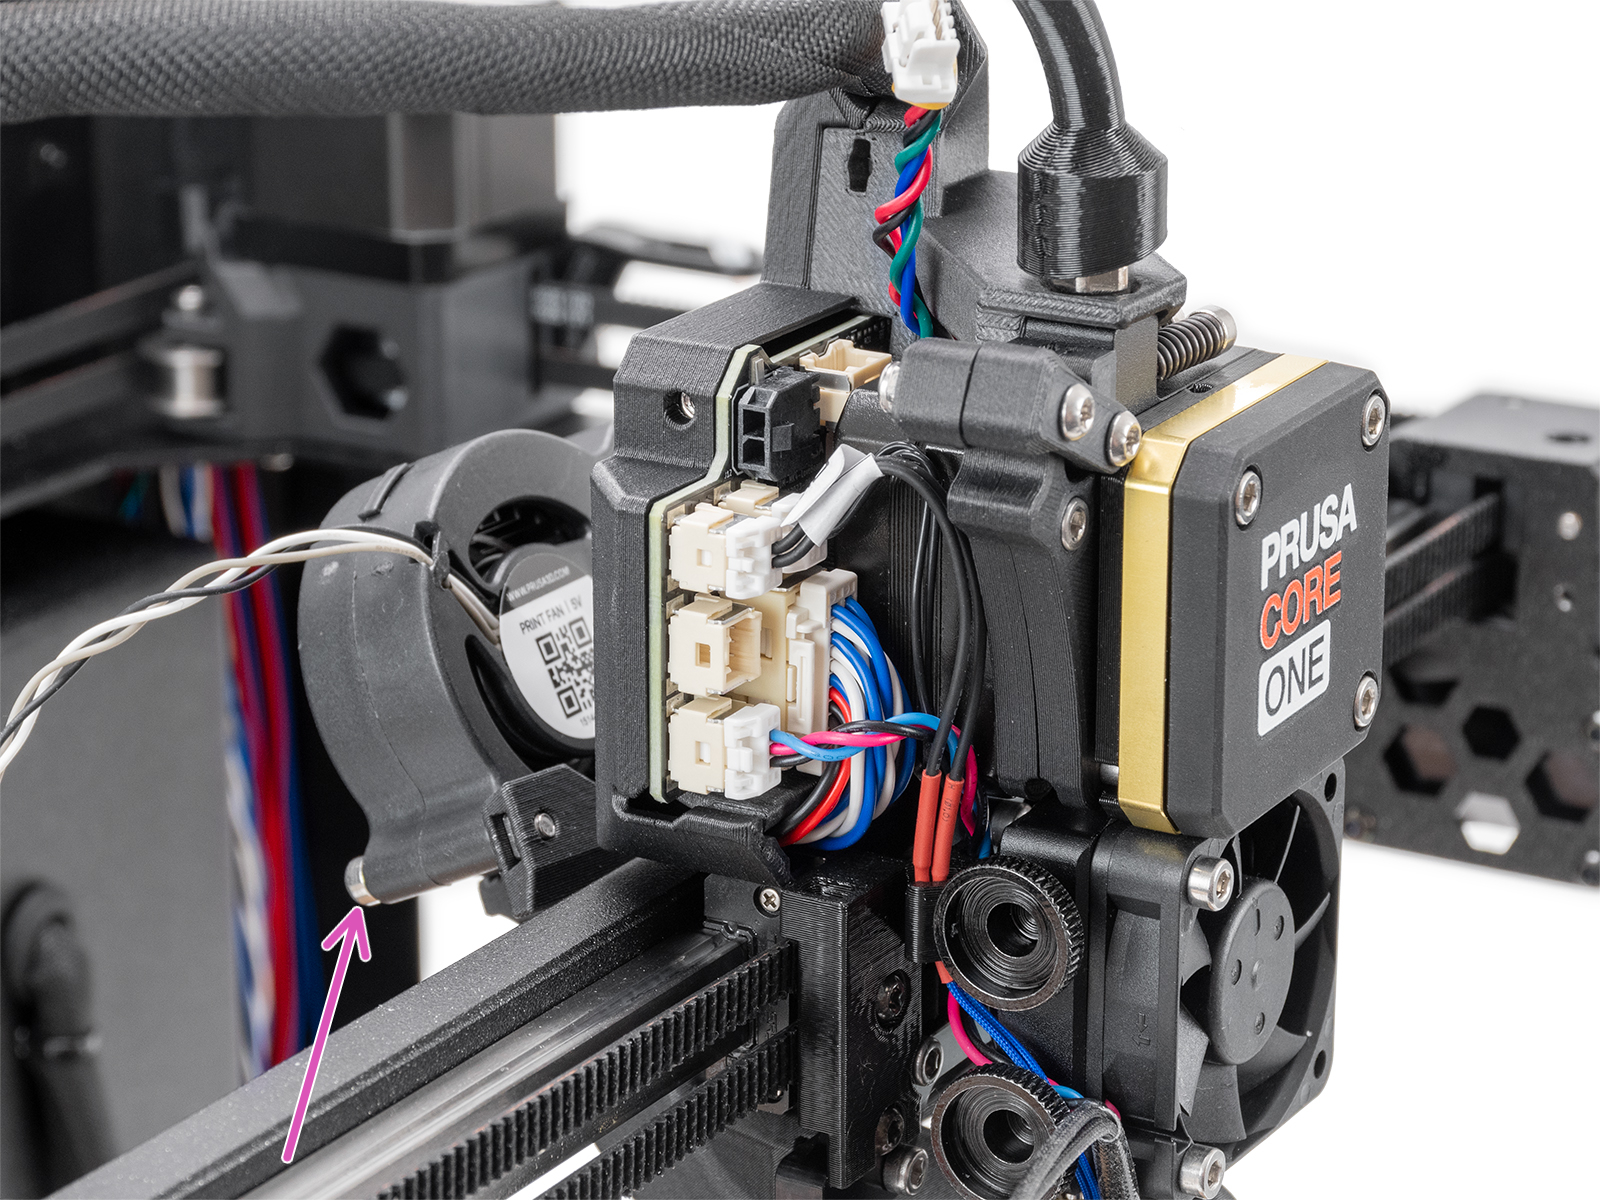
                  1. Untighten the M3x25 screw to temporarily release the fan shroud, and have enough space to release the M3x10 screws that hold the LoveBoard assembly. 

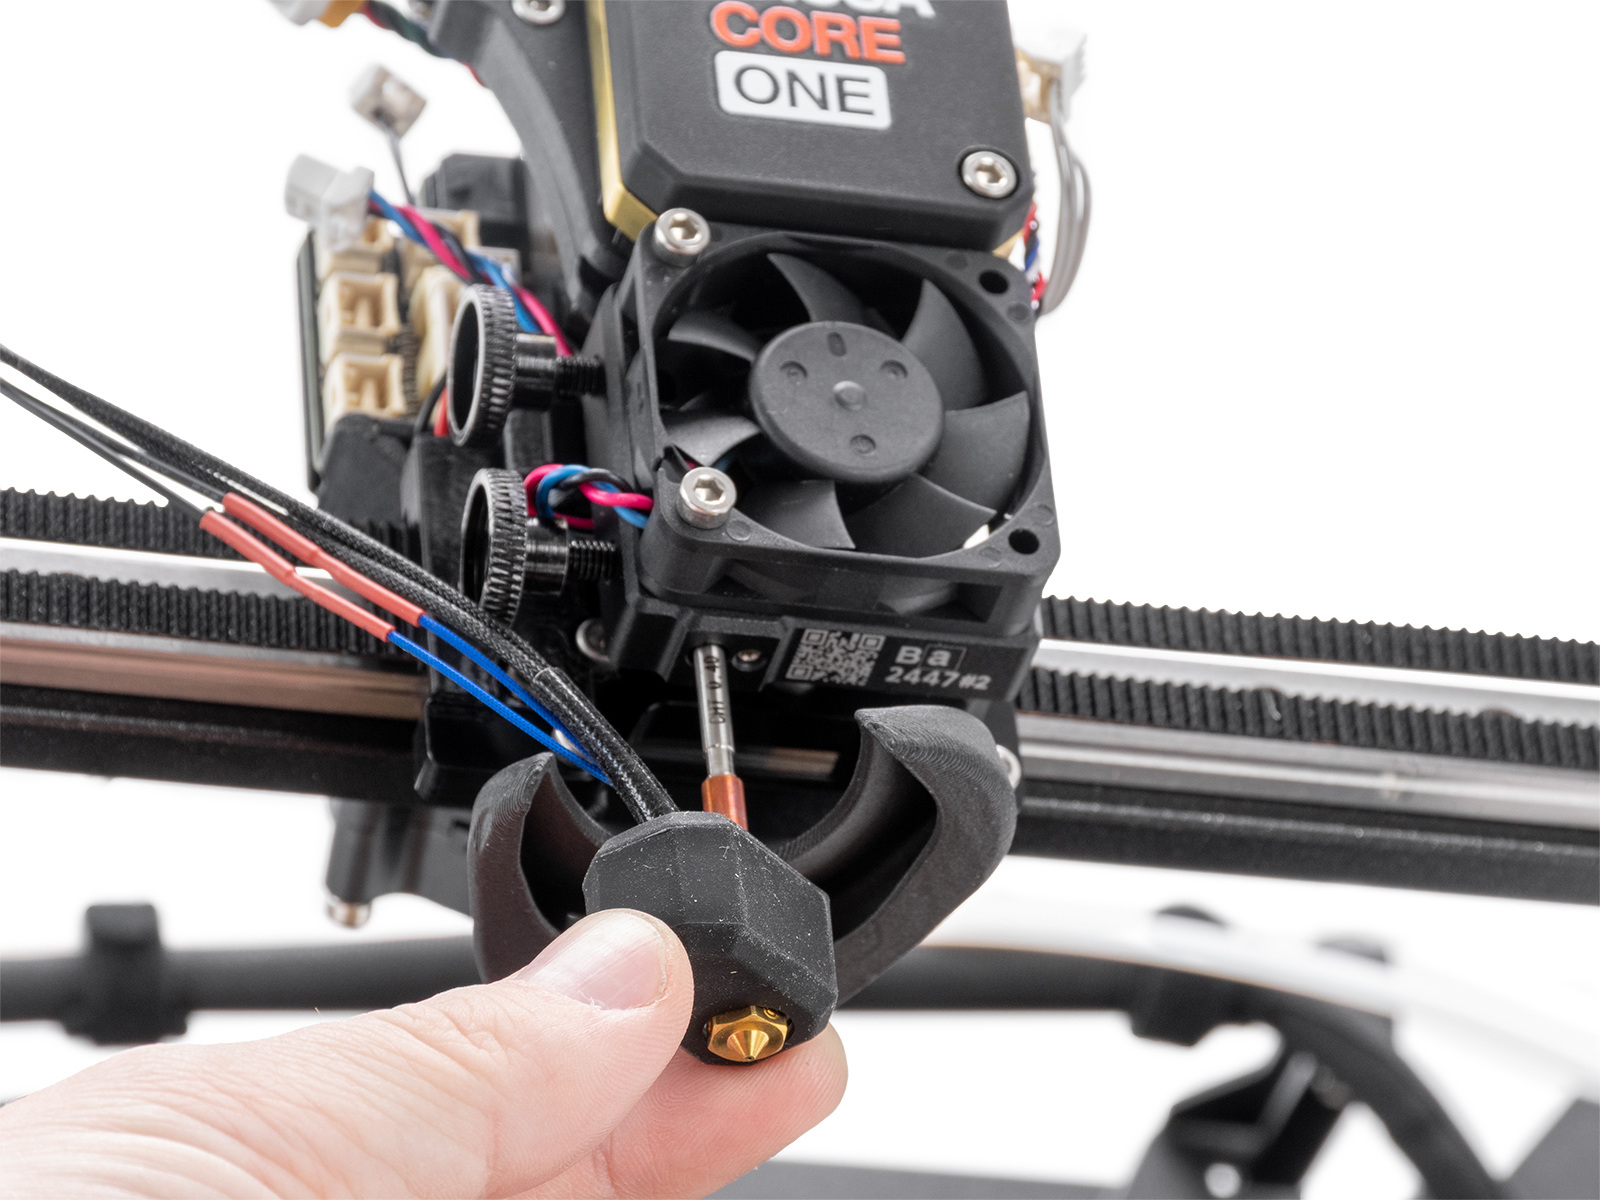
                      1. Remove the hotend thermistor and heater cables from the cable clip. Open the thumb screws and remove the hotend, being careful with the cables.
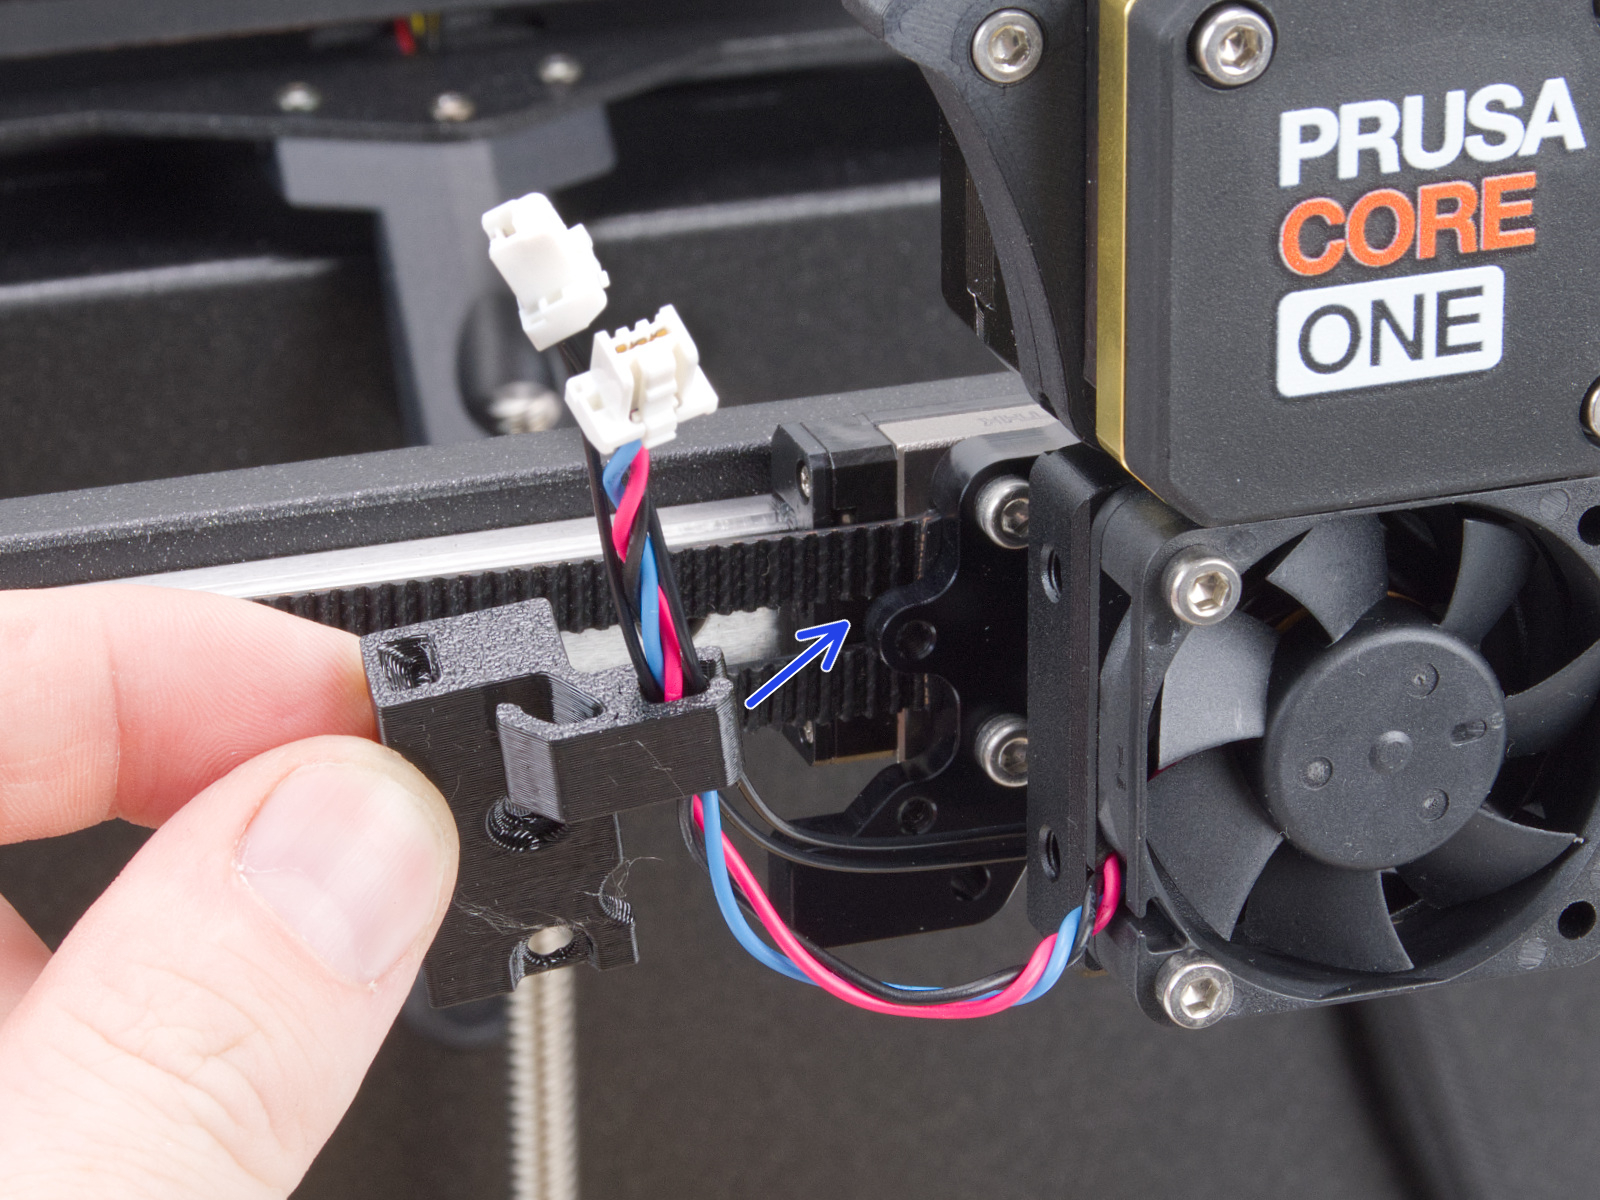
                      1. Unscrew the two M3x4rT screws on the hotend cable clip, and pull it to remove the heatsink fan and heatsink thermistor cables.
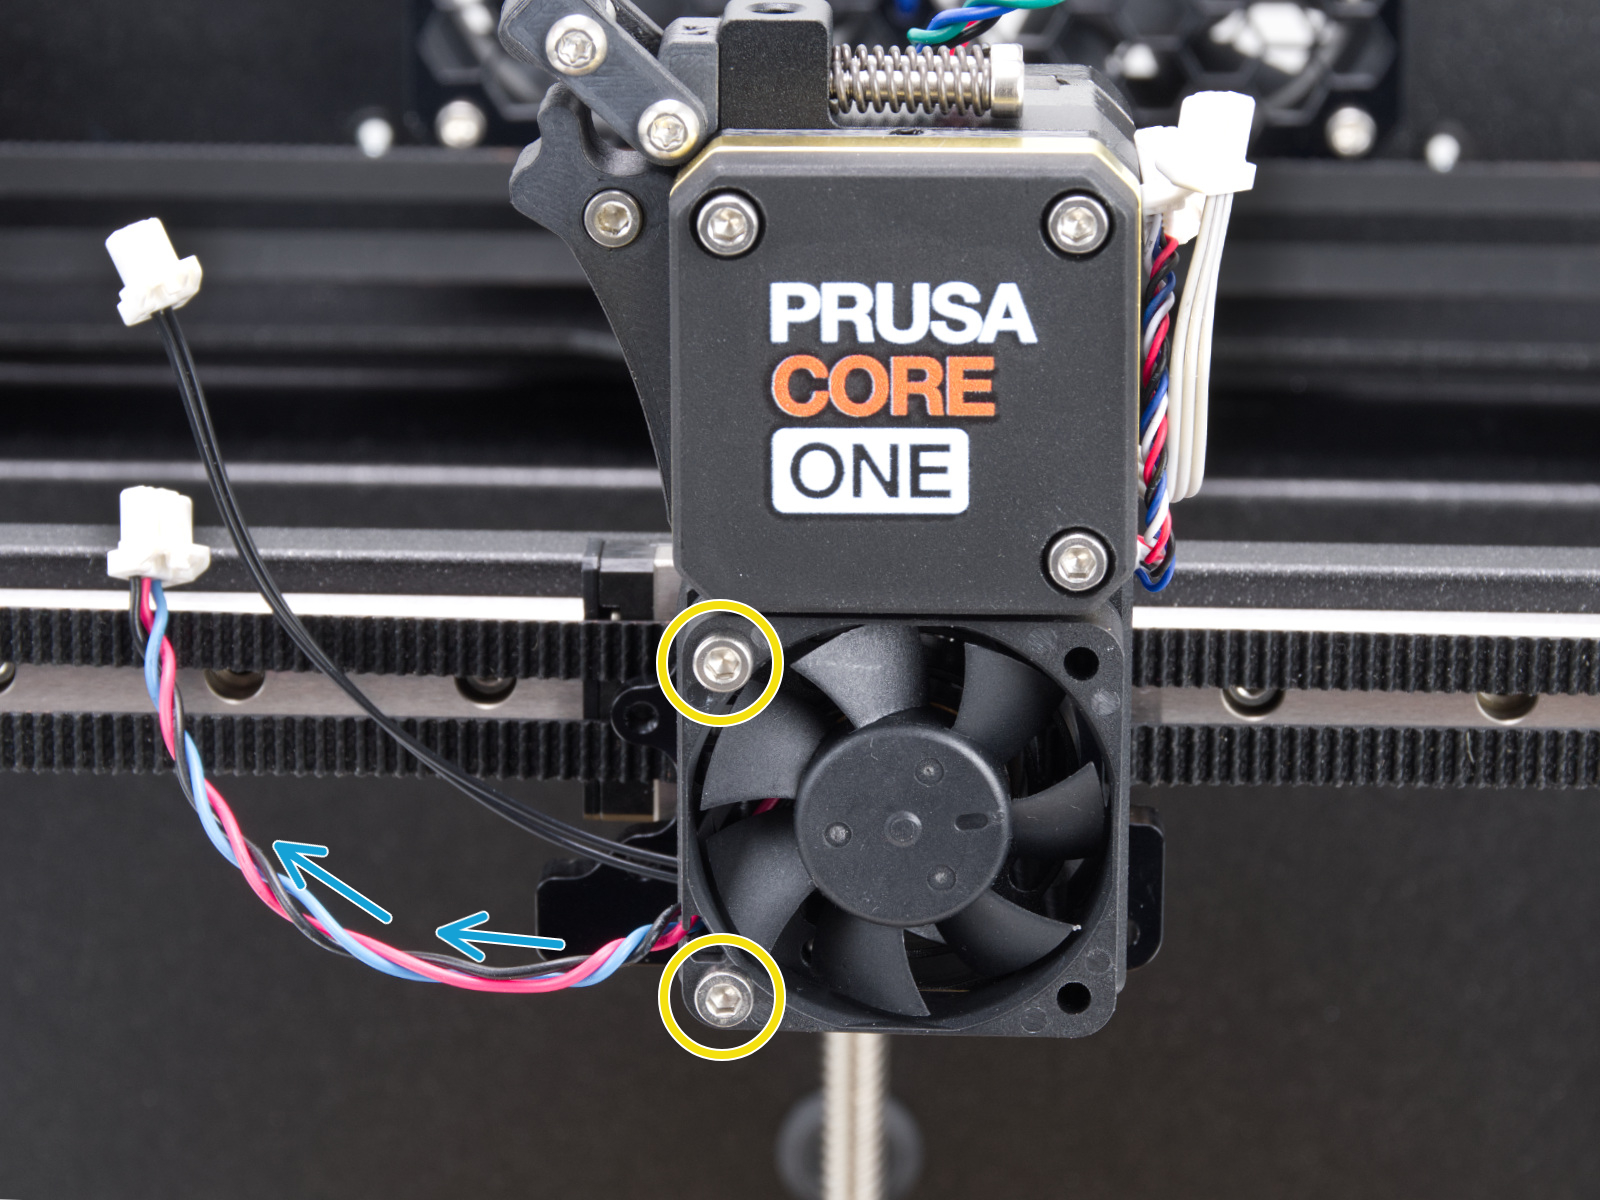
                      1. Unscrew the M3x18 screws from the heatsink fan to remove it.

                      1. Unscrew and remove the three M3x10 screws holding the heatsink and pull it out. Be careful with the cables.
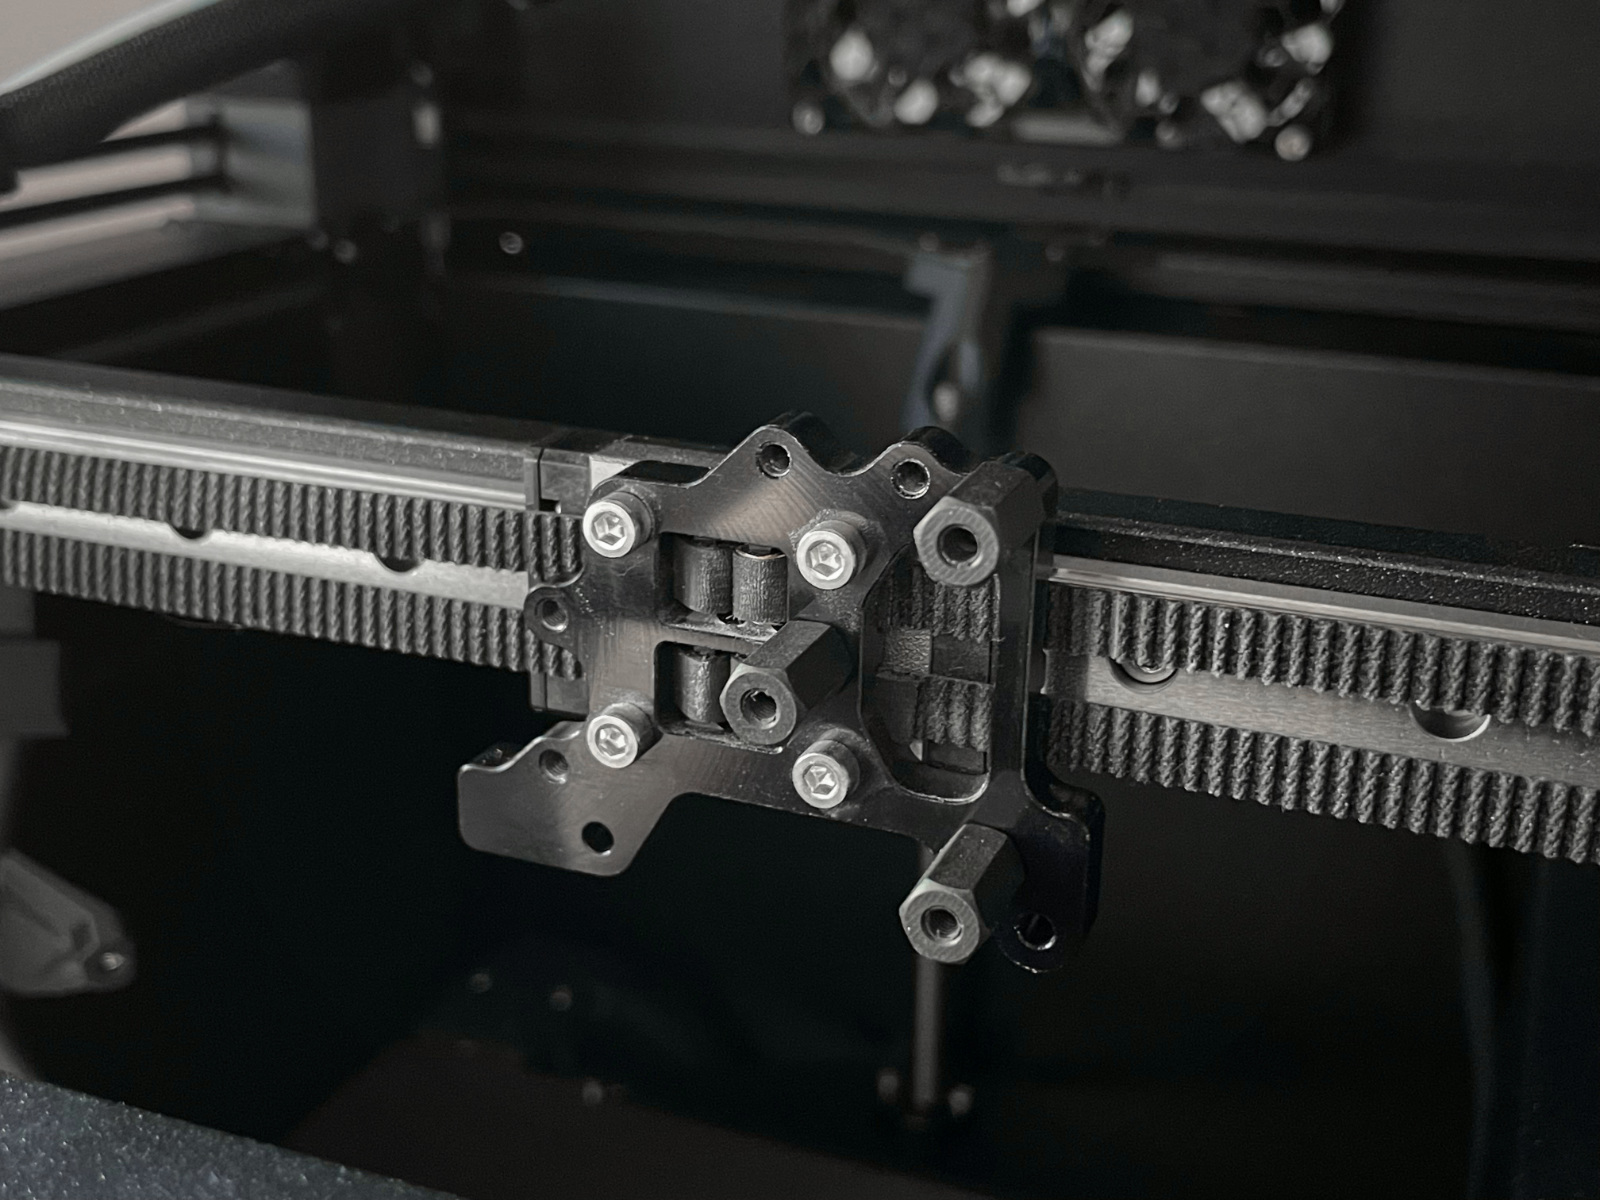
                      1. Now you have access to the Nextruder holder with the belts. Make sure to add the belts that slipped out, or move the belt that is too loose. If the belt is too difficult to reattach, try loosening the belt tensioner bolts. If you need more access, unscrew the four screws that attach the holder to the carriage.

                    1. To reassemble, follow the Assembly manual and redo the belt adjustment with the belt tuner app.
                  Was this article helpful?
                  This action is available only to registered users. Please log-in.

                  Topics

                  • Troubleshooting
                    • Printer troubleshooting
                      • Multimeter usage
                      • Toolchanger error #17135 (XL) #36135 (CORE One INDX)
                      • Bed preheat error #31201 (CORE One) #35201 (CORE One L) #36201 (CORE One INDX) #26201 (MK4S) #13201 (MK4) #27201 (MK3.9S) #21201 (MK3.9) #28201 (MK3.5S) #23201 (MK3.5) 
                      • Hotend preheat error #31202 (CORE One) #35202 (CORE One L) #26202 (MK4S) #13202 (MK4) #27202 (MK3.9S) #21202 (MK3.9) 
                      • Bed thermal runaway #31203 (CORE One) #35203 (CORE One L) #36203 (CORE One INDX) #26203 (MK4S) #13203 (MK4) #27203 (MK3.9S) #21203 (MK3.9) #28203 (MK3.5S) #23203 (MK3.5) 
                      • Hotend thermal runaway #31204 (CORE One) #35204 (CORE One L) #26204 (MK4S) #13204 (MK4) #27204 (MK3.9S) #21204 (MK3.9)
                      • Hotend mintemp error #31208 (CORE One) #35208 (CORE One L) #26208 (MK4S) #13208 (MK4) #27208 (MK3.9S) #21208 (MK3.9)
                      • Hotend maxtemp error #31206 (CORE One) #35206 (CORE One L) #26206 (MK4S) #13206 (MK4) #27206 (MK3.9S) #21206 (MK3.9) #28206 (MK3.5S) #23206 (MK3.5)
                      • Bed mintemp error #31207 (CORE One) #35207 (CORE One L) #36207 (CORE One INDX) #26207 (MK4S) #13207 (MK4) #27207 (MK3.9S) #21207 (MK3.9) #28207 (MK3.5S) #23207 (MK3.5)
                      • Bed maxtemp error #31205 (CORE One) #35205 (CORE One L) #36205 (CORE One INDX) #26205 (MK4S) #13205 (MK4) #27201 (MK3.9S) #21201 (MK3.9) #28201 (MK3.5S) #23201 (MK3.5)
                      • Homing error Y #31305 (CORE One) #35305 (CORE One L) #36305 (CORE One INDX) #17305 (XL)
                      • Heatbed Port Overcurrent #31309 (CORE One) #35309 (CORE One L) #26309 (MK4S) #13309 (MK4) #27309 (MK3.9S) #21309 (MK3.9) #28309 (MK3.5S) #23309 (MK3.5) #12309 (MINI) #36309 (INDX)
                      • MMU Overcurrent #31310 (CORE One) #35310 (CORE One L) #26310 (MK4S) #13310 (MK4) #27310 (MK3.9S) #21310 (MK3.9) #28310 (MK3.5S) #23310 (MK3.5)
                      • I2C Send failed #31311 (CORE One) #35311 (CORE One L) #36311 (CORE One INDX) #26311 (MK4S) #13311 (MK4) #27311 (MK3.9S) #21311 (MK3.9) #28311 (MK3.5S) #23311 (MK3.5) #12311 (MINI/+)
                      • Loadcell Not Calibrated #31523 (CORE One) #35223 (CORE One L) #26523 (MK4S) #13523 (MK4) #27523 (MK3.9S) #21523 (MK3.9)
                      • Loadcell Tare Error #31524 (CORE One) #35524 (CORE One L) #26524 (MK4S) #13524 (MK4) #27524 (MK3.9S) #21524 (MK3.9)
                      • Loadcell Tare Failed #31525 (CORE One) #35525 (CORE One L) #26525 (MK4S) #13525 (MK4) #27525 (MK3.9S) #21525 (MK3.9)
                      • Loadcell Bad Configuration #31527 (CORE One) #35527 (CORE One L) #36527 (CORE One INDX) #26527 (MK4S) #13527 (MK4) #27527 (MK3.9S) #21527 (MK3.9)
                      • Loadcell Timeout #31528 (CORE One) #35528 (CORE One L) #26528 (MK4S) #36528 (CORE One INDX) #13528 (MK4) #27528 (MK3.9S) #21528 (MK3.9)
                      • Heatbreak MINTEMP Error #31211 (CORE One) #35211 (CORE One L) #26211 (MK4S) #13211 (MK4) #27211 (MK3.9S) #21211 (MK3.9)
                      • Heatbreak MAXTEMP Error #31212 (CORE One) #35212 (CORE One L) #26212 (MK4S) #13212 (MK4) #27212 (MK3.9S) #21212 (MK3.9) 
                      • Nextruder filament sensor (CORE One, CORE One L, MK4/S, MK3.9/S, XL/+)
                      • Blue Screen of Death (BSOD) #31538 (CORE One) #35538 (CORE One L) #36538 (CORE One INDX) #26538 (MK4S) #13538 (MK4) #27538 (MK3.9S) #17538 (XL) #21538 (MK3.9) #28538 (MK3.5S) #23538 (MK3.5) #12538 (MINI)
                      • Stuck filament detection #31101 (CORE One) #35101 (CORE One L) #26101 (MK4S) #13101 (MK4) #27101 (MK3.9S) #21101 (MK3.9) #17108 (XL)
                      • Heatbed temp not matching #31209 (CORE One) #35209 (CORE One L) #26209 (MK4S) #13209 (MK4) #27209 (MK3.9S) #21209 (MK3.9) #28209 (MK3.5S) #23209 (MK3.5)
                      • Hotend temp not matching #31210 (CORE One) #35210 (CORE One L) #26210 (MK4S) #13210 (MK4) #27210 (MK3.9S) #21210 (MK3.9)
                      • Under-extrusion (Nextruder printers)
                      • Nozzle Timeout #31819 (CORE One) #35819 (CORE One L) #36819 (CORE One INDX) #26819 (MK4S) #13819 (MK4) #27819 (MK3.9S) #21819 (MK3.9) #28819 (MK3.5S) #23819 (MK3.5) #17819 (XL) #12819 (MINI)
                      • Uneven bed #31111 (CORE One) #35111 (CORE One L) #36111 (CORE One INDX)
                      • Filament sensor stuck #31113 (CORE One) #35113 (CORE One L) #36113 (CORE One INDX) #17113 (XL) #26113 (MK4S) #13113 (MK4) #27113 (MK3.9S) #21113 (MK3.9) #28113 (MK3.5S) #23113 (MK3.5) #12113 (MINI/+)
                      • Chamber MAXTEMP error #31214 (CORE One) #35214 (CORE One L) #36214 (CORE One INDX)
                      • Homing error X #31304 (CORE One) #35304 (CORE One L) #36304 (CORE One INDX) #17304 (XL)
                      • Puppy error #31511 (CORE One) #35511 (CORE One L) #36511 (CORE One INDX)
                      • Puppy error #31513 (CORE One) #35513 (CORE One L) #36513 (CORE One INDX)
                      • Fil. sensor troubleshooting #31114 (CORE One) #26114 (MK4S) #13114 (MK4) #27114 (MK3.9S) #21114 (MK3.9) #28114 (MK3.5S) #23114 (MK3.5)
                      • Chamber Mintemp error #31215 (CORE One) #35215 (CORE One L) #36215 (CORE One INDX)
                      • MCU in Buddy is overheated #31825 (CORE One) #35825 (CORE One L) #26825 (MK4S) #27825 (MK3.9S) #28825 (MK3.5S) #13825 (MK4) #21825 (MK3.9) #23825 (MK3.5) #17825 (XL) #12825 (MINI)
                      • The heatbed cooled down during the power outage #31808 (CORE One) #35808 (CORE One L) #26808 (MK4S) #27808 (MK3.9S) #28808 (MK3.5S) #13808 (MK4) #21808 (MK3.9) #23808 (MK3.5) #17808 (XL) 
                      • The G-code isn't fully compatible #31803 (CORE One) #26803 (MK4S) #27803 (MK3.9S) #28803 (MK3.5S) #13803 (MK4) #21803 (MK3.9) #23803 (MK3.5) #17803 (XL) #12803 (MINI)
                      • Filament not detected #31804 (CORE One) #35804 (CORE One L) #26804 (MK4S) #27804 (MK3.9S) #28804 (MK3.5S) #13804 (MK4) #21804 (MK3.9) #23804 (MK3.5) #17804 (XL) #12804 (MINI)
                      • Print preview unfinished selftest #31801 (CORE One) #35801 (CORE One L) #26801 (MK4S) #27801 (MK3.9S) #28801 (MK3.5S) #13801 (MK4) #21801 (MK3.9) #23801 (MK3.5) #17801 (XL) #12801 (MINI)
                      • Crash recovery axis long #31809 (CORE One) #35809 (CORE One L) #26809 (MK4S) #13809 (MK4) #27809 (MK3.9S) #21809 (MK3.9) #28809 (MK3.5S) #23809 (MK3.5) #17809 (XL) #12809 (MINI)
                      • Crash recovery repeated crash #31811 (CORE One) #35811 (CORE One L) #26811 (MK4S) #13811 (MK4) #27811 (MK3.9S) #21811 (MK3.9) #28811 (MK3.5S) #23811 (MK3.5) #17811 (XL) #12811 (MINI)
                      • Crash recovery axis short #31810 (CORE One) #35810 (CORE One L) #26810 (MK4S) #13810 (MK4) #27810 (MK3.9S) #21810 (MK3.9) #28810 (MK3.5S) #23810 (MK3.5) #17810 (XL) #12810 (MINI)
                      • Crash recovery home fail #31812 (CORE One) #35812 (CORE One L) #26812 (MK4S) #13812 (MK4) #27812 (MK3.9S) #21812 (MK3.9) #28812 (MK3.5S) #23812 (MK3.5) #17812 (XL) #12812 (MINI)
                      • Loading obstruction #31119 (CORE One) #35119 (CORE One L) #17119 (XL)
                      • Homing calibration needed #31118 (CORE One) #35118 (CORE One L) #36118 (CORE One INDX)#17118 (XL)
                      • Calibrate homing from menu #31120 (CORE One) #35120 (CORE One L) #36120 (CORE One INDX) #17120 (XL)
                      • MCU overheat #35270
                      • PCB overheat #35271
                      • Data Timeout #35330
                      • AC Controller Fault #35273
                      • AC controller fault #35333 (CORE One L)
                      • AC controller fault #35335 (CORE One L)
                      • AC controller fault #35336 (CORE One L)
                      • Selftest failed (CORE One L)
                      • Bed fan is not spinning #35849 (CORE One L)
                      • PSU fan is not spinning #35850 (CORE One)
                      • Nozzle tool remains attached to the print head (CORE One INDX)
                      • Selftest failed (CORE One/+)
                      • Clogged nozzle (CORE One, CORE One L, XL, MK4/S, MK3.9/S)
                      • Adjusting belt tension (CORE One/+, CORE One INDX, CORE One L/+)
                    • Print Quality Troubleshooting
                    • QR Error codes
                    • Print Error Messages

                  97 comments

                  Log in  to post a comment
                  TheMeltrax
                  •
                  So I'm stuck in a loop here. My new kit build is failing Y axis calibration. It's a little frustrating when this happens - you don't know why, it just "red X's" and that's it. Searching around led me to this page. So, I followed the first few steps, found some play in the gantry, fixed it by loosening and adjusting and slowly re-adjusting the belts. But then, it tells you to do Belt Tuning (which, by the way, has moved to the list of Calibration Tests). You can't run belt tuning if the Y axis test has failed, you have to do the Calibration Tests in order. But I can't pass the Y axis calibration because my belts are not set correctly.
                  Reply
                  Spring
                  •
                  Hi, did you change in the menu to Core one + (gen 2 ) or core one L +? I didn't got the kit yet, but I did factory reset and its set automatically to Core one L + and something like that happen to me when I did the self test then I notice the printer moved to Core one L + automatically with I didn't install yet , It is under Model in the printer menu.
                  Reply
                  Joylessly7905
                  •
                  Belt Tuning (formerly Manual Belt Tuning) moved from Settings into Control → Calibrations & Tests https://github.com/prusa3d/Prusa-Firmware-Buddy/releases/tag/v6.8.1
                  Reply
                  Jacob weisel
                  •
                  ty
                  Reply
                  dimonf
                  •
                  for Core One + Homing Calibration test has failed after seemingly proper tensioning done with wizard. Obviously, I have failed to read the belts vibration properly. Belt tuner webpage app made my day: it just reads frequency, pure number, no guessing. I used the wizard after, and only then I was able to comprehend the work of the wizard.
                  Reply
                  Talinseven
                  •
                  What the F-?
                  Reply
                  ramarik
                  •
                  I find the sentence, **“On CORE One, the ideal target frequency range is a maximum of 98 Hz for the upper belt and a minimum of 90 Hz for the lower belt,”** technically unclear and potentially misleading.

                  The main problem is that it mixes two different concepts: a **target frequency** and an **acceptable frequency range**. A target frequency is normally a single nominal value, whereas a frequency range must be defined by lower and upper limits. Therefore, wording such as *“the ideal target frequency range is a maximum of 98 Hz”* is ambiguous and does not clearly tell the user what value should actually be targeted.

                  Based on values commonly mentioned in technical discussions and user reports, the intended target frequencies appear to be approximately **98 Hz for the upper belt** and **92 Hz for the lower belt**. If acceptable tolerances around these values also exist, then two separate ranges should be specified: one for the upper belt and one for the lower belt.

                  I would therefore recommend reformulating the documentation so that it clearly distinguishes between the **two nominal target frequencies** and the **two acceptable frequency ranges**. For example:

                  **“For the CORE One, the recommended target belt frequencies are approximately 98 Hz for the upper belt and 92 Hz for the lower belt. Each belt also has its own acceptable frequency range: [upper-belt range] and [lower-belt range].”**

                  Prusa has a strong reputation for technical competence, which is precisely why this sentence stands out. In its present form, the terminology is imprecise and could easily confuse users attempting to tune the belts correctly. I would suggest revising it using standard technical terminology and explicitly separating nominal target values from acceptable ranges.
                  Reply
                  m.frank
                  •
                  I completely agree.
                  Reply
                  zanglerecke
                  •
                  Yes - nominal and +-values or % would be helpful...

                  Also for the wizard... Give some option for... Values are in range -finish OR... with xyz turning you can reach the perfect spot... So the user can decide if he/she will invest more time to calibrate
                  Reply