Although INDX is the go-to multi-material option for most CORE One L users, the MMU3 remains as a community-supported alternative for those preferring an efficient, classic multi-color system requiring fewer printer modifications.
Because the CORE One L is very similar to its smaller sibling, CORE One+, you can use the MMU3 Lite kit for CORE One+ and install it on the CORE One L.
Complete chapters 1–11 of the MMU3 Assembly guide (including the Nextruder rebuild!), incorporating the additional adjustments below.
Buffer
The biggest difference from the standard CORE One+ setup is the buffer. The larger CORE One L should use a longer MMU→Extruder PTFE tube, necessitating the use of a larger buffer body consisting of:
⬢ Specific printed parts. (Available from respective Printables page).
⬢ Additional fasteners. (22x M3x30, 22x M3nS nuts, and 12x M3x8).
⬢ The large buffer plates. These may be manufactured individually by cutting from a 1mm thick PETG/ABS/HIPS plastic sheet. (DXF file resources on Printables) This is achievable for example via online laser-cutting services.
⬢ The longer PTFE tubes. (4x2.5x710mm between the MMU and the Buffer. 4x2.5x940mm tubes between the spool holders and the buffer) All PTFE tubes must be cut to length individually.

⬢ Start from the bottom: secure 3 plates to the holders, attach the remaining 3, then fix them into the upper holders and finally install the side holders.
⬢ Insert 22 M3nS nuts into the big plate holders.
⬢ Attach the 11 big plate holders onto the plates using the 22 M3x30 screws.
⬢ Attach the four smaller plate holders.
⬢ Insert the magnets into the profile holders.
⬢ Attach the profile holders using the 12 M3x8 screws.
⬢ The large buffer accommodates the standard Prusa buffer cassettes.
MMU Connection
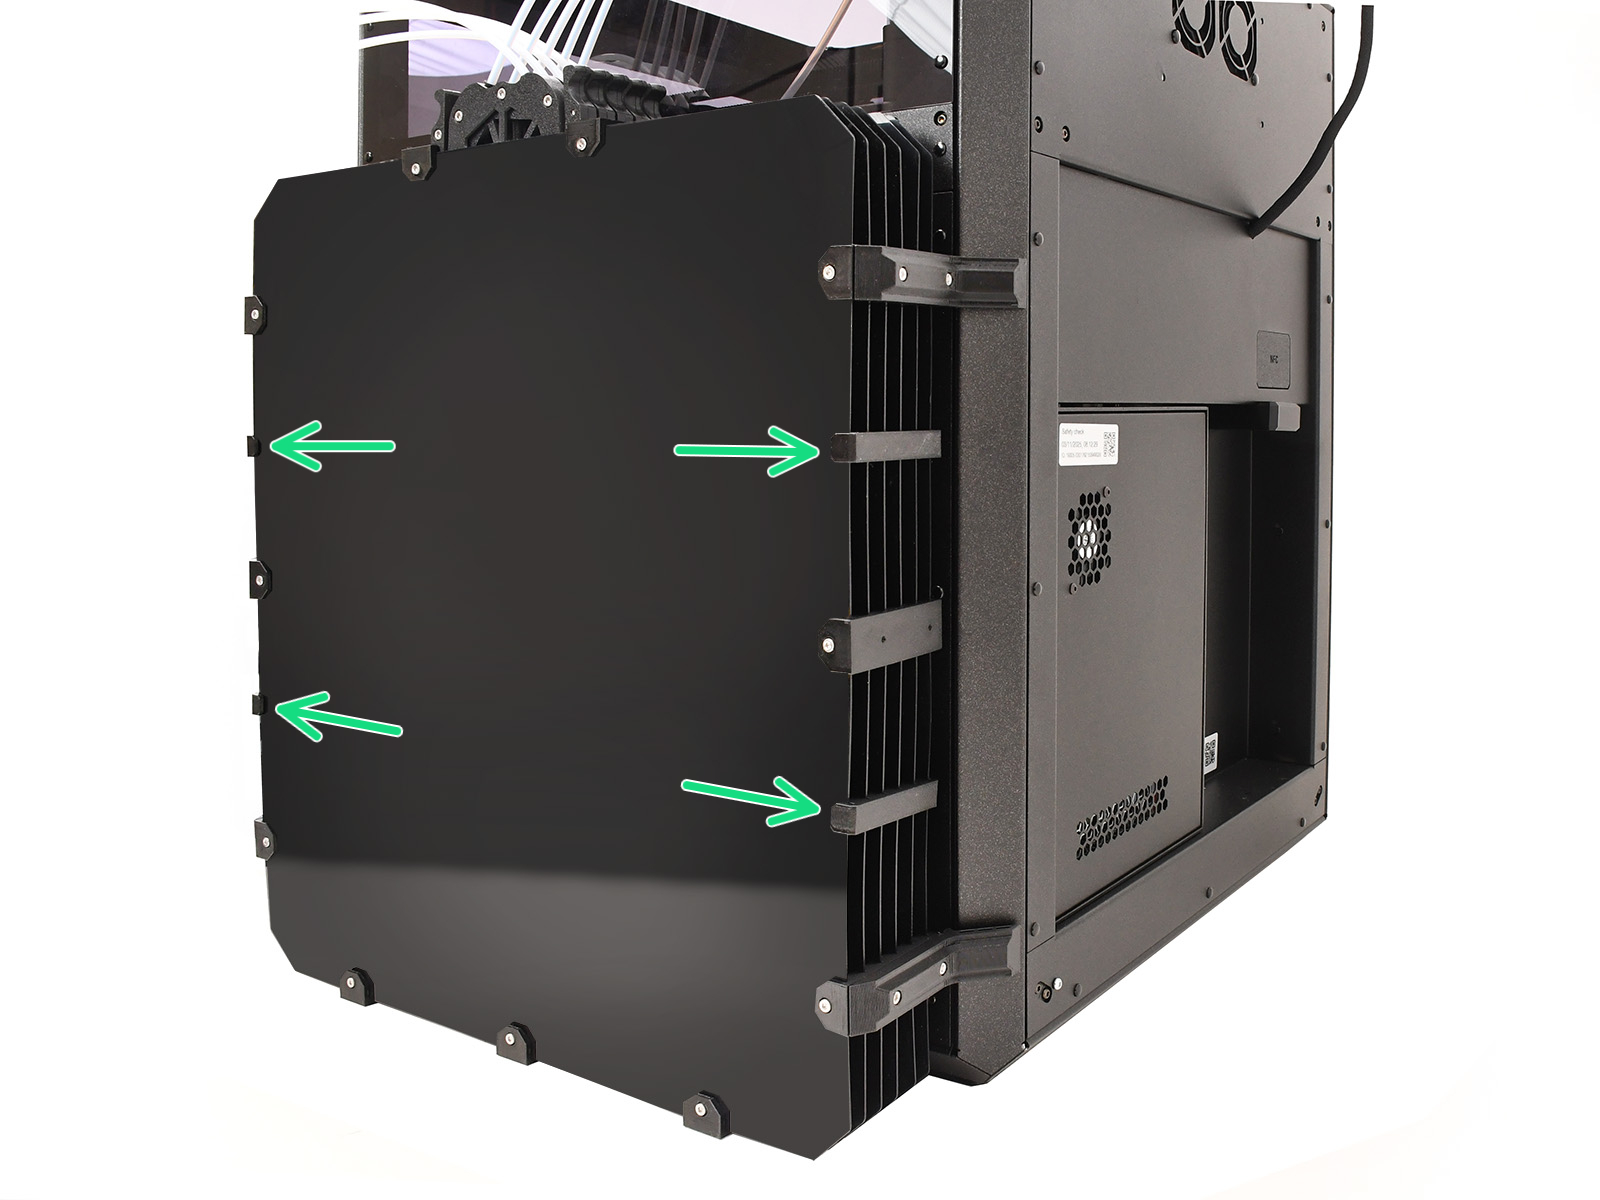
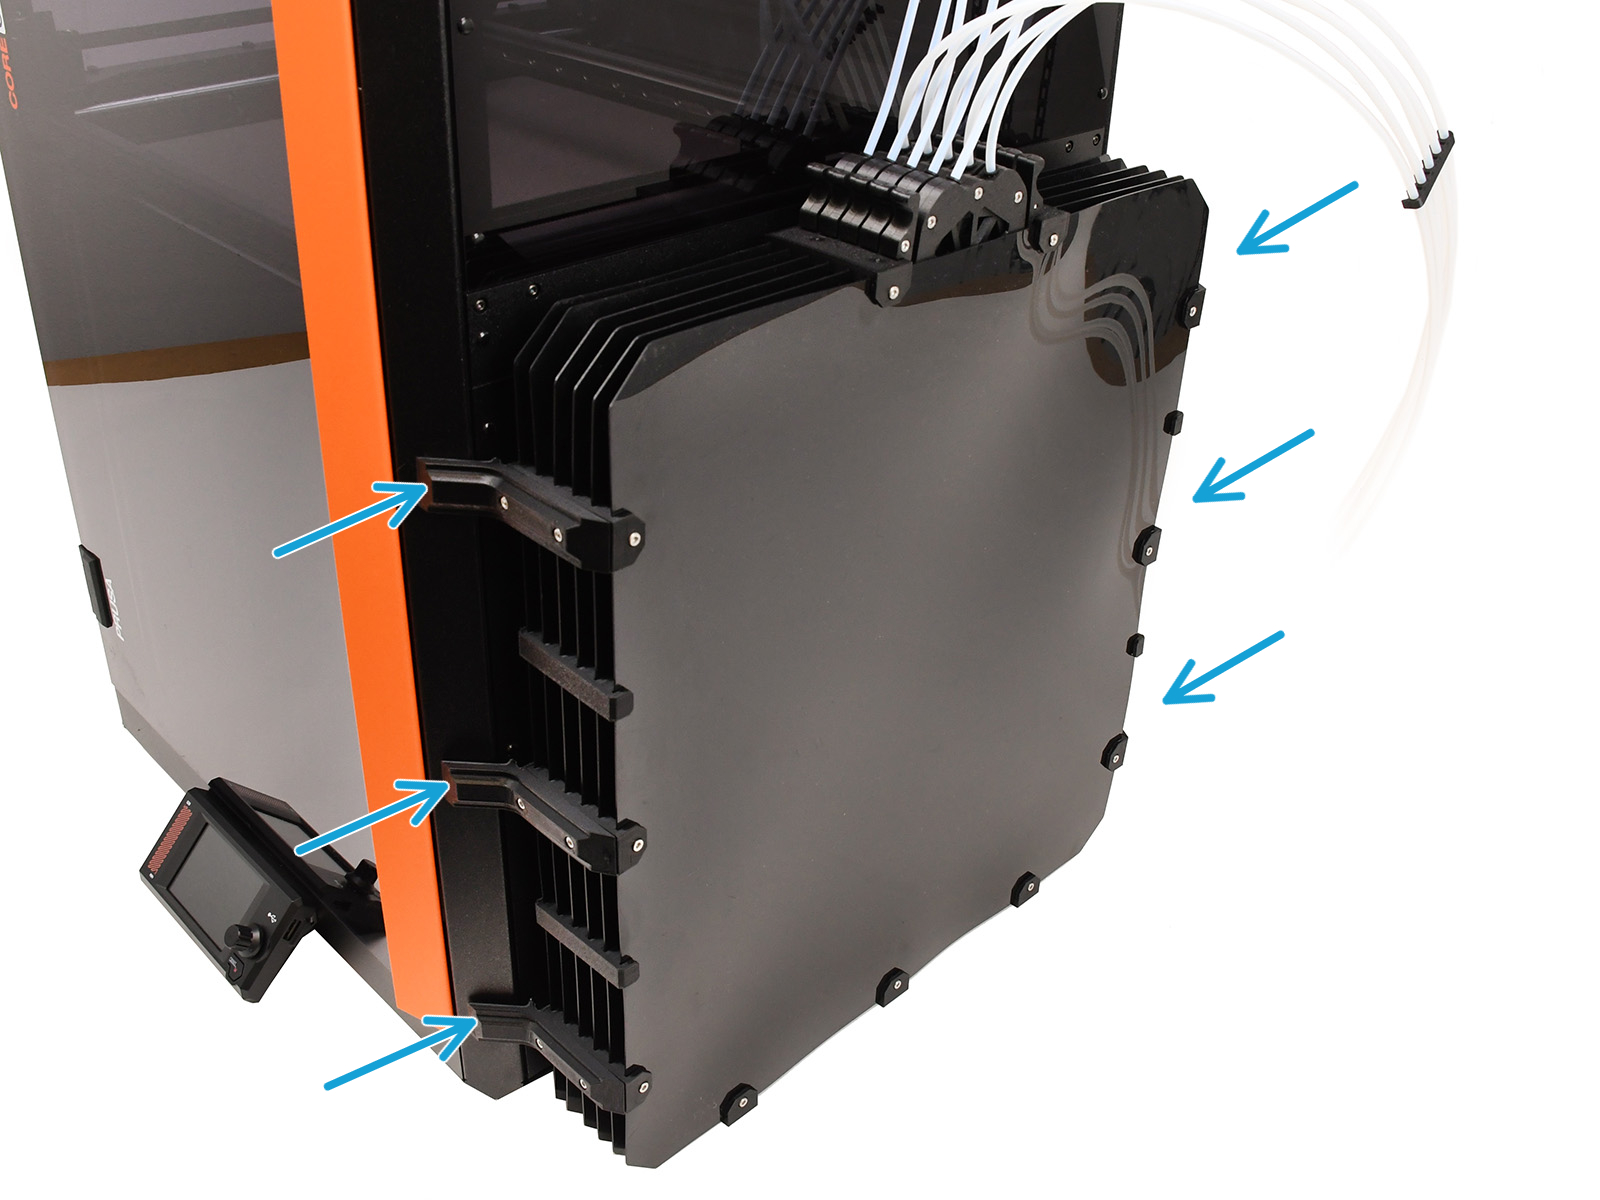
The MMU3 unit connects into the dedicated port on the xBuddy Extension board. The access to it differs slightly to the CORE One+.
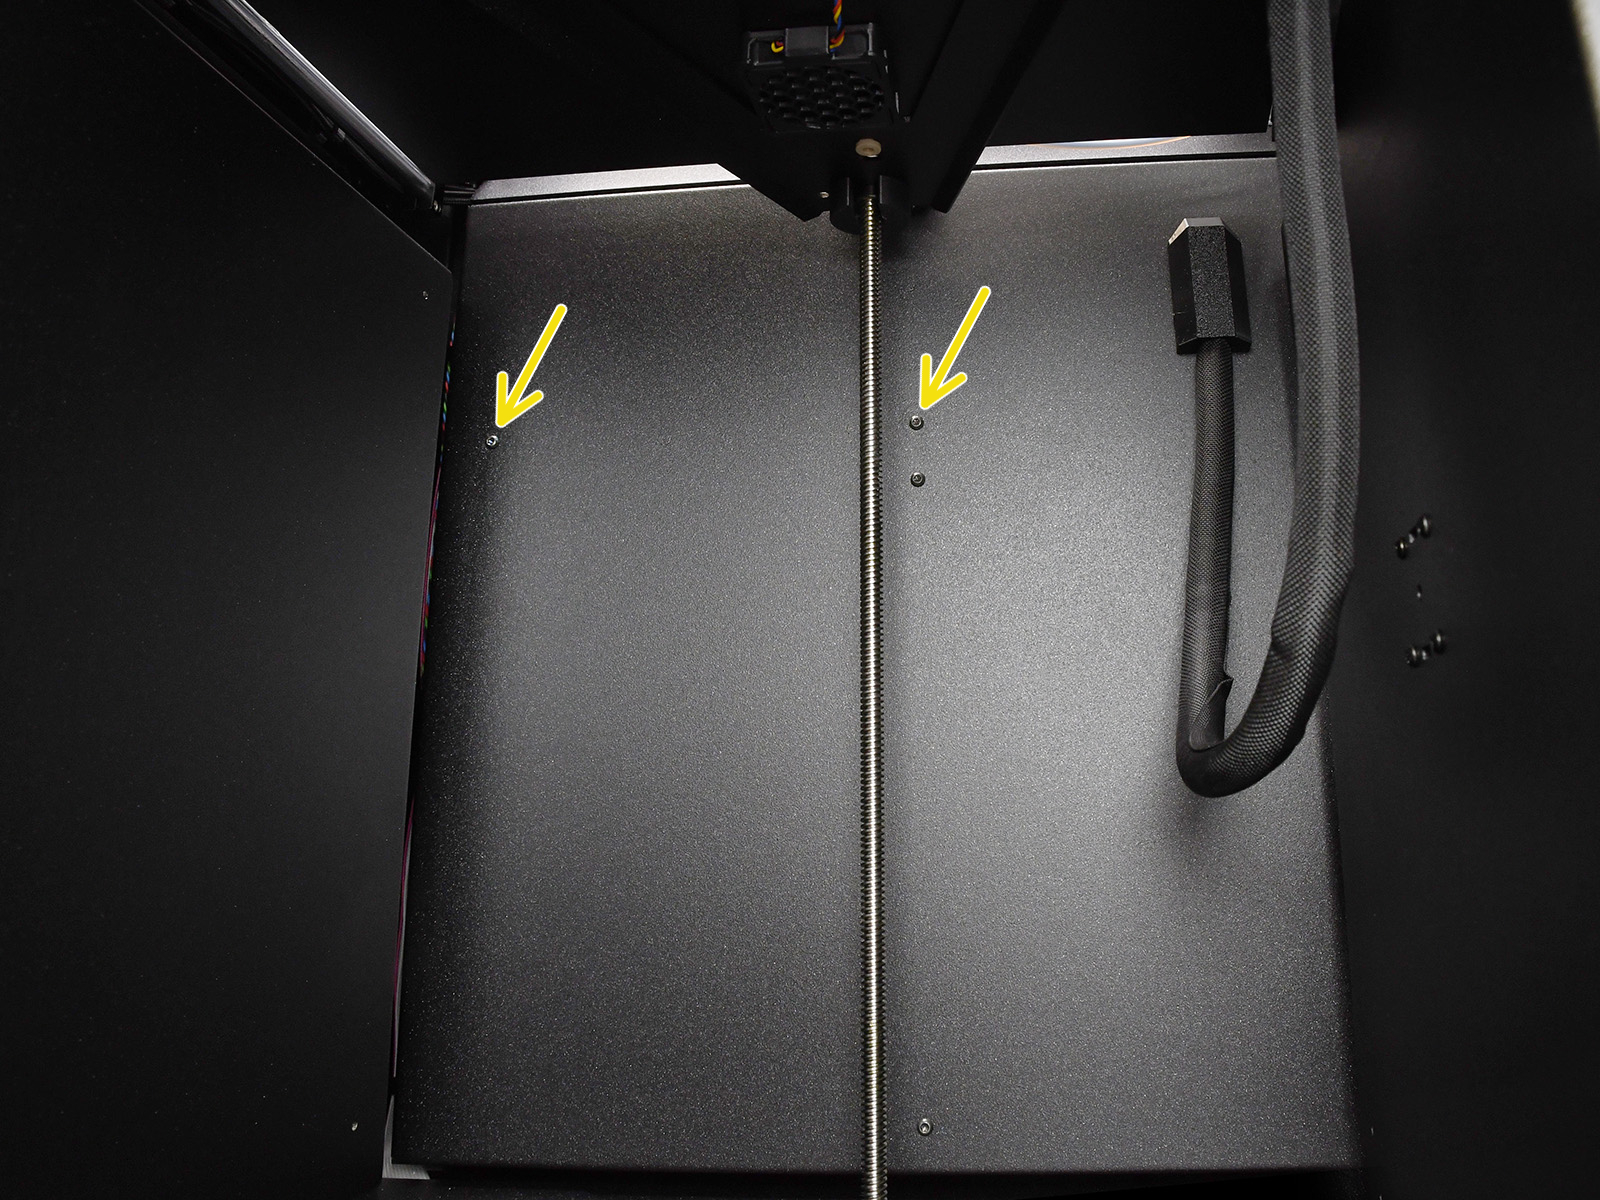
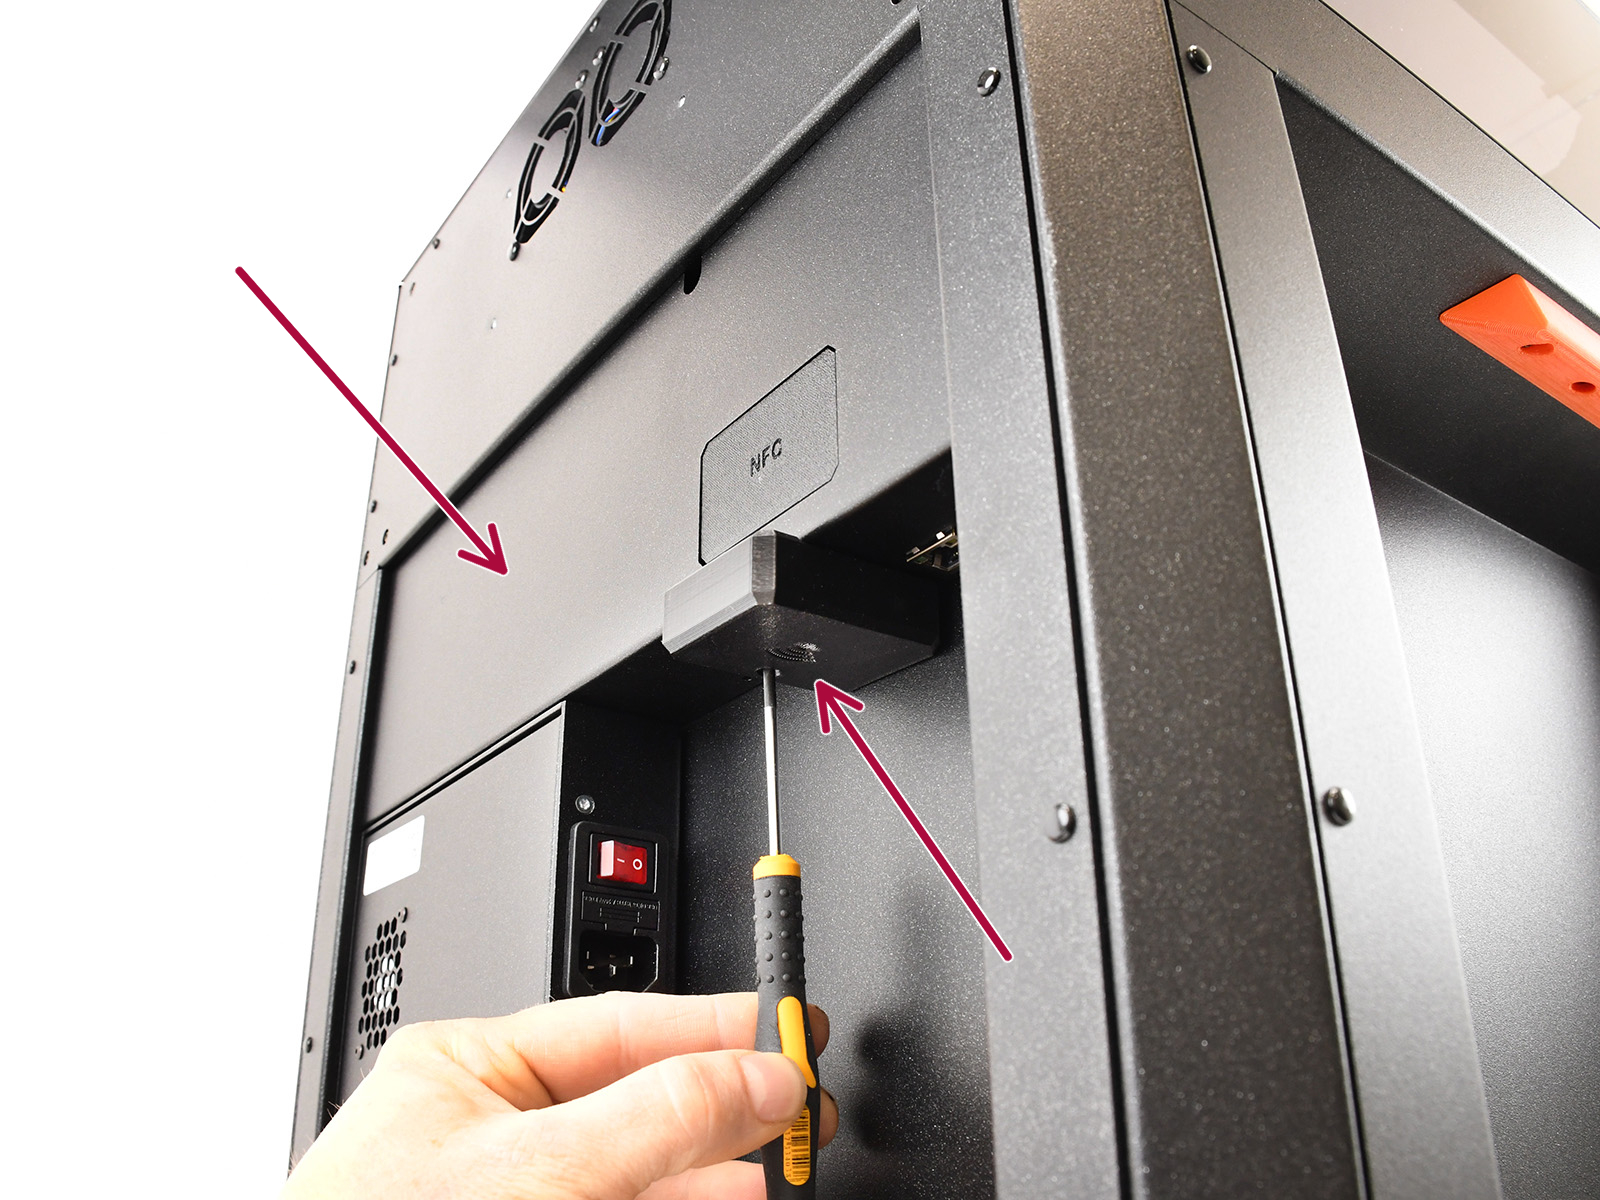
⬢ Remove the two marked M3x4bT screws inside the printer.
⬢ Remove the Wi-Fi module and the rear cover.
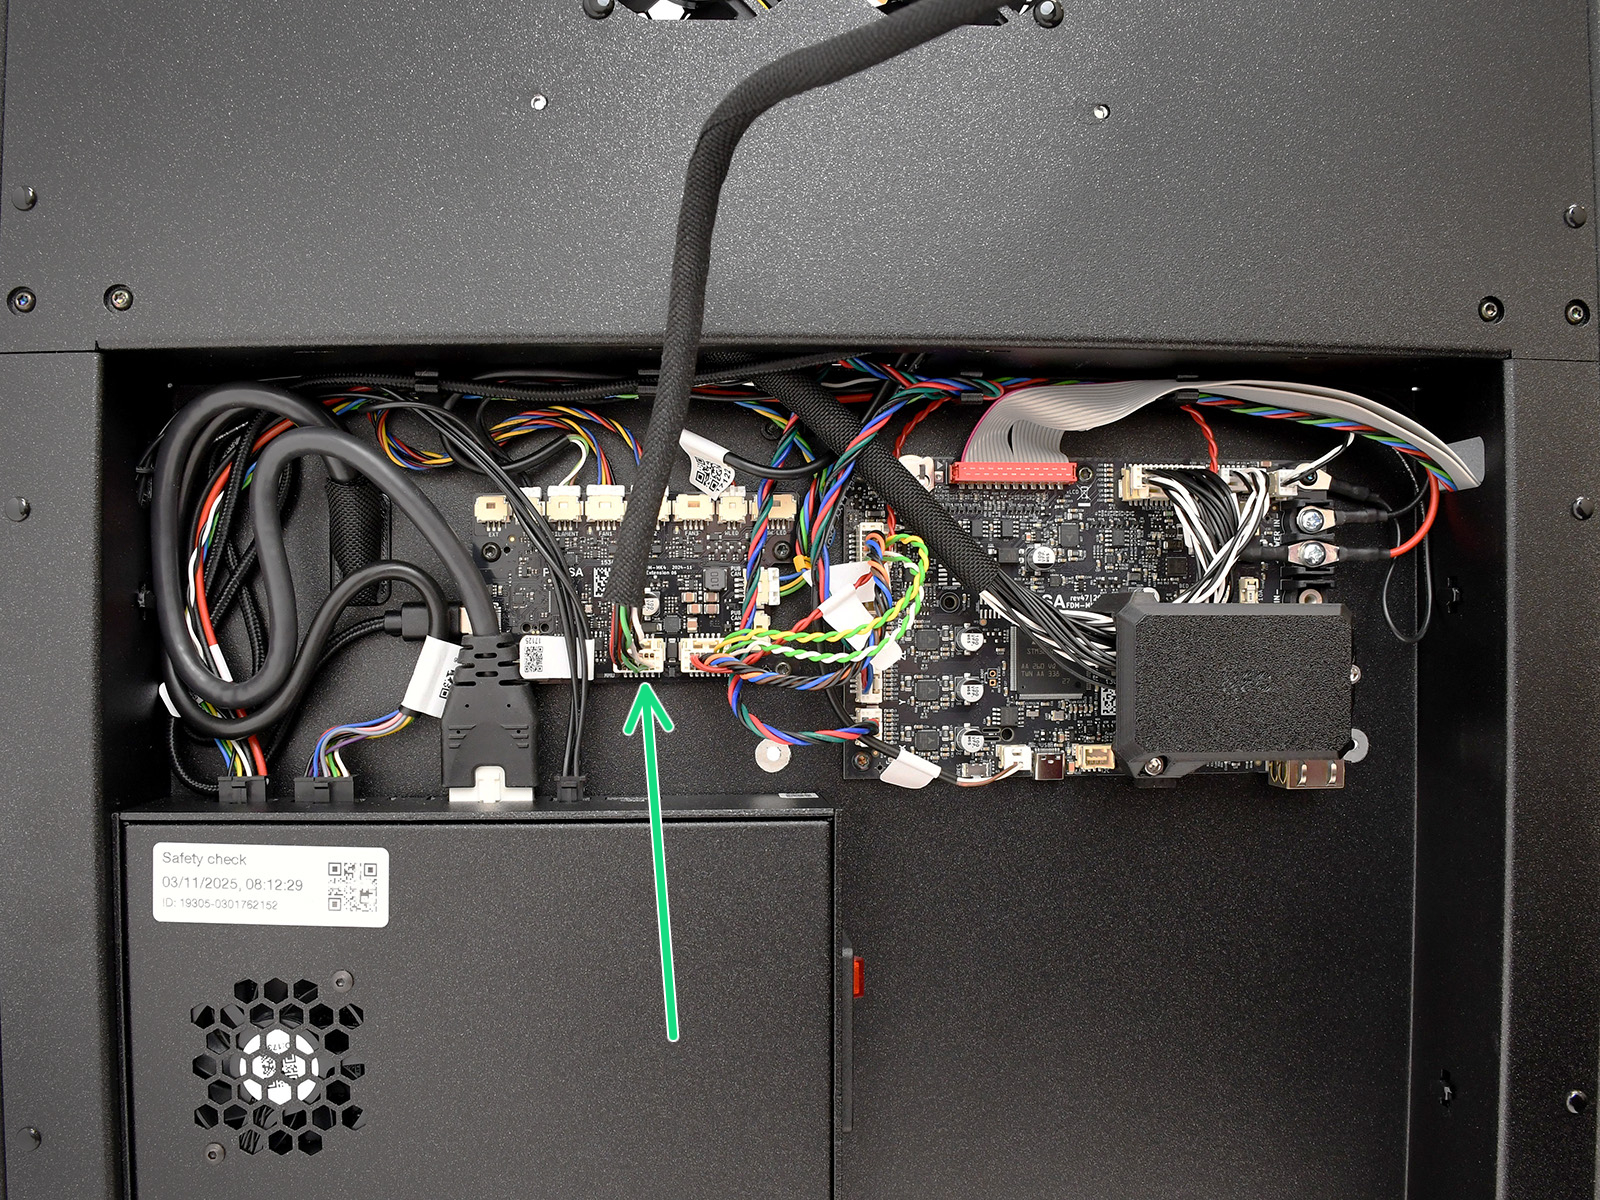
⬢ Connect the MMU into the dedicated port.
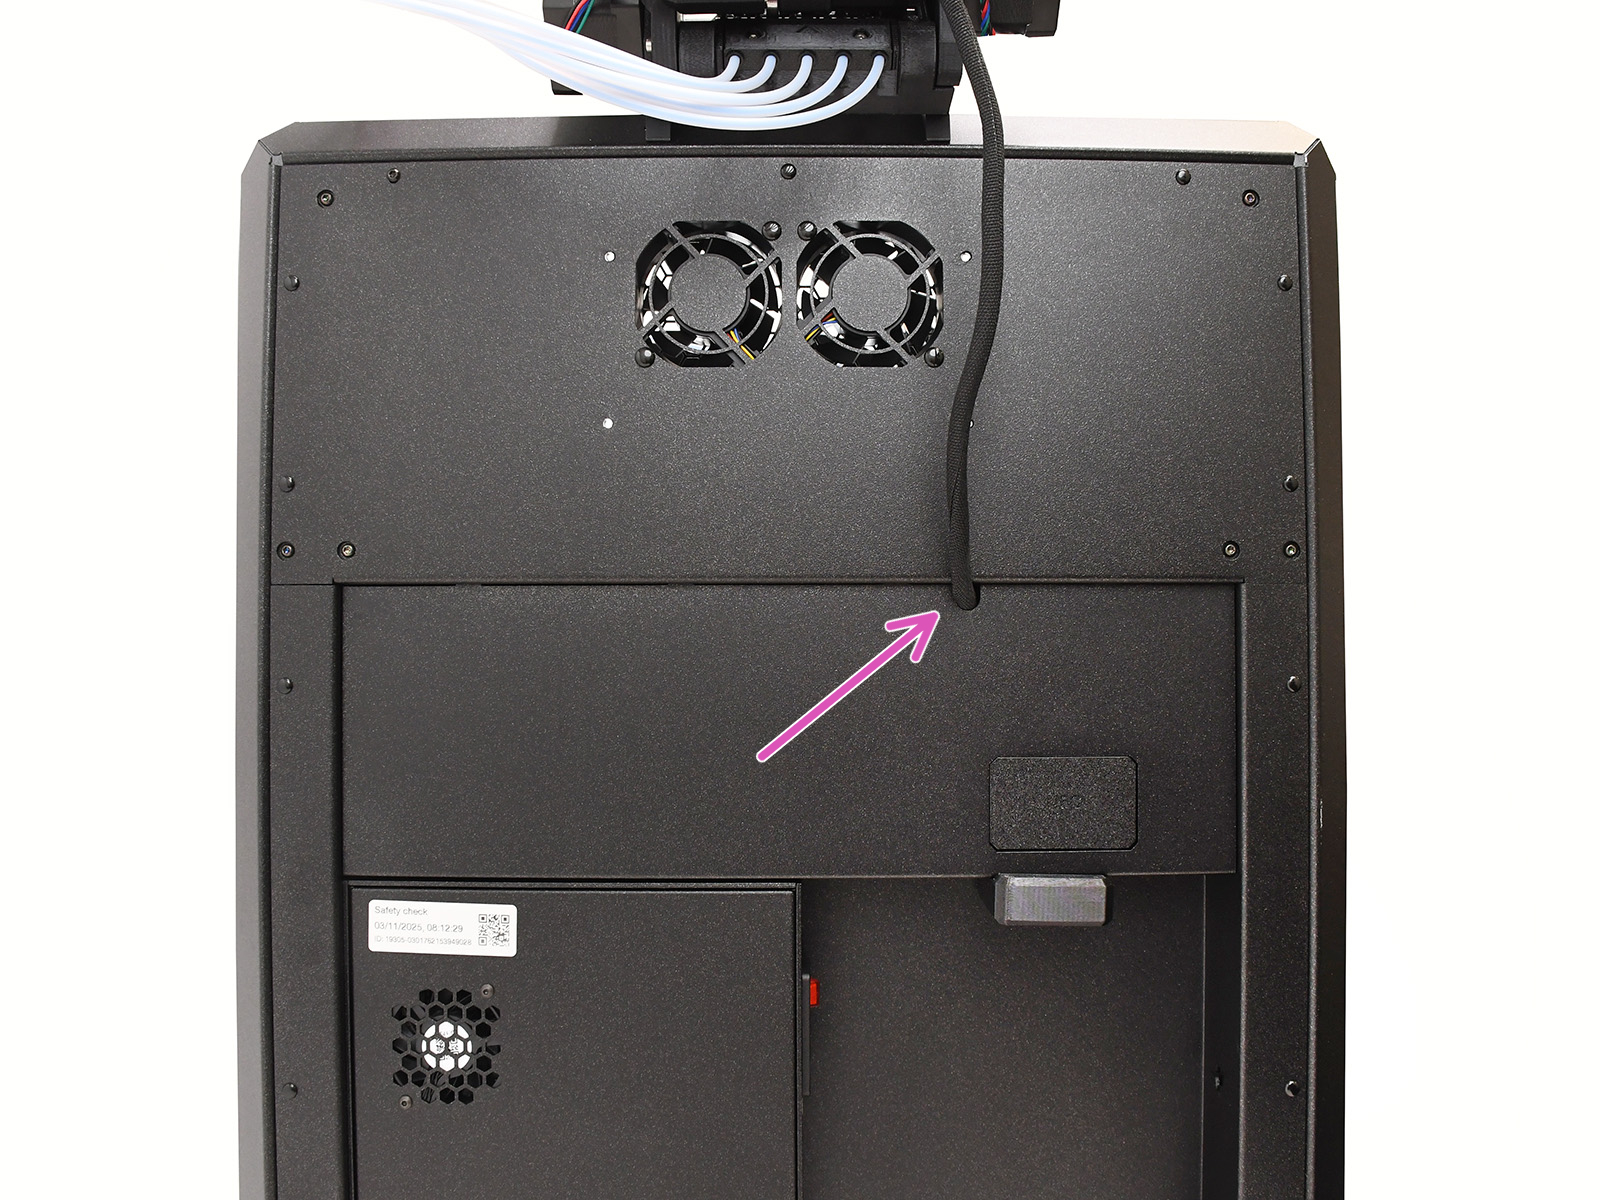
⬢ Guide the cable through the mouse hole opening and re-assemble the printer.
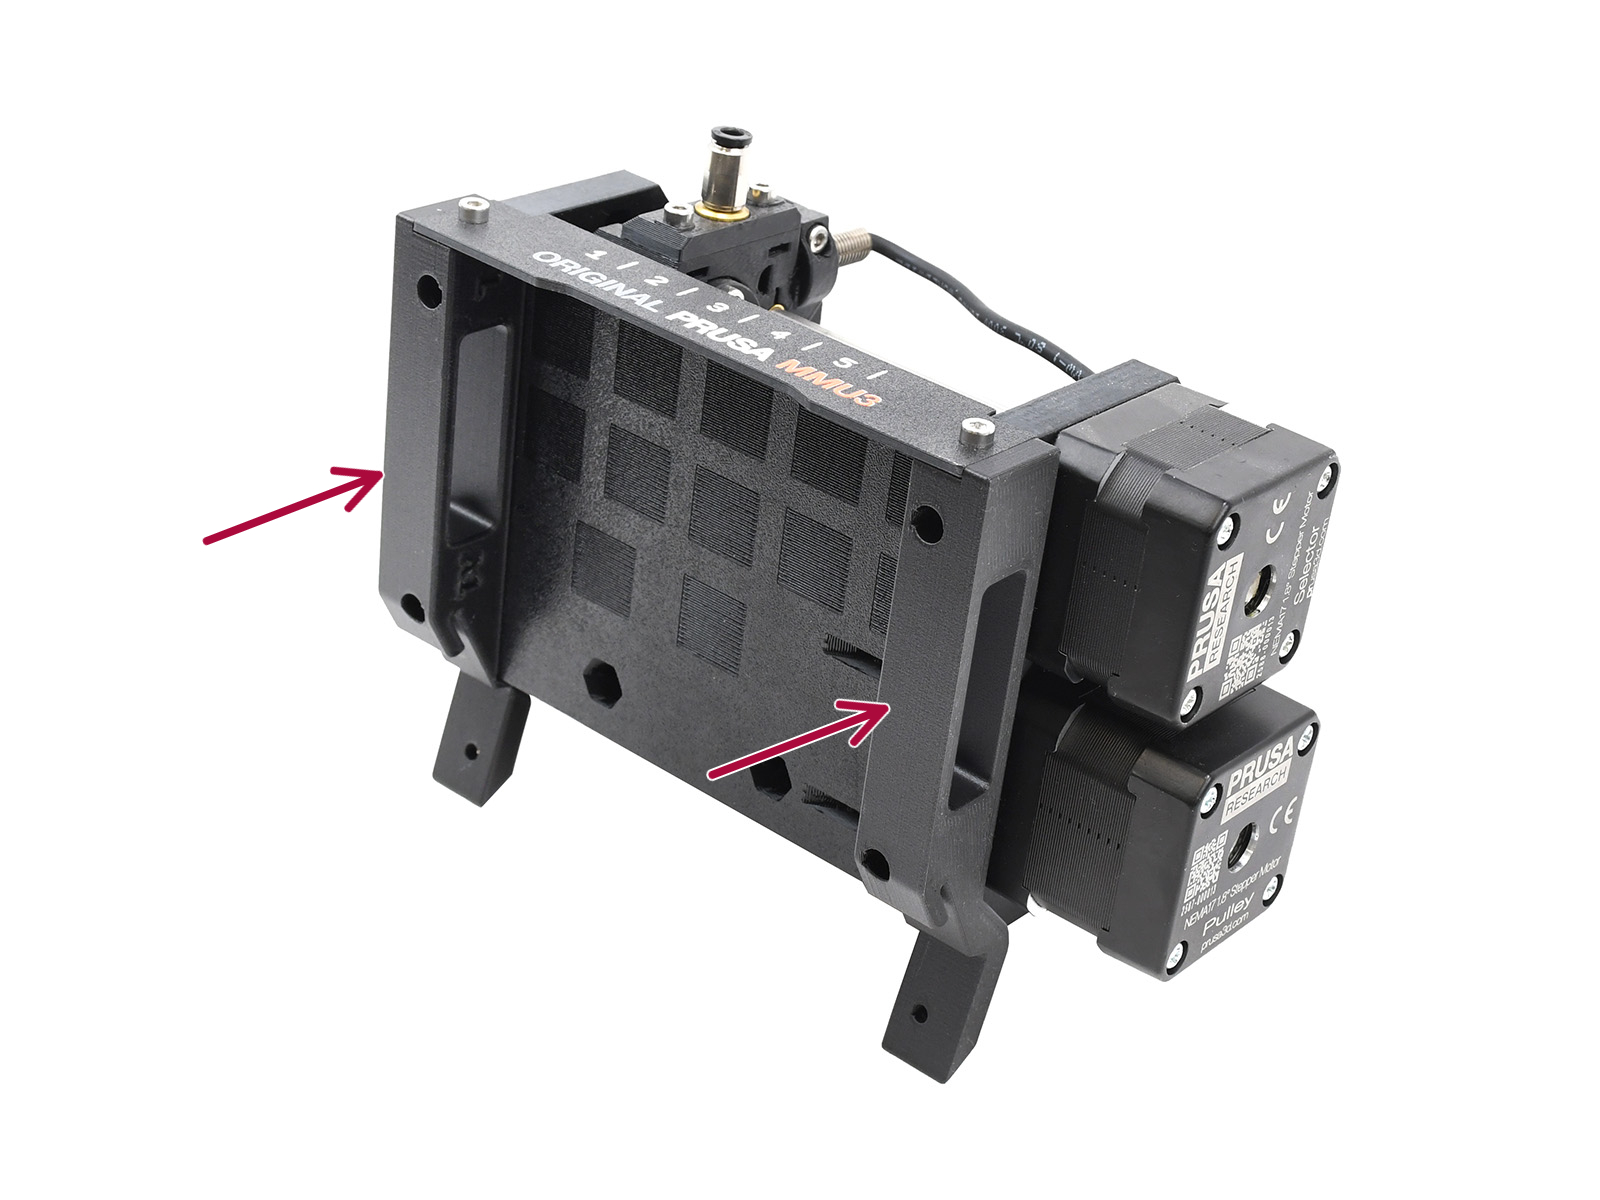
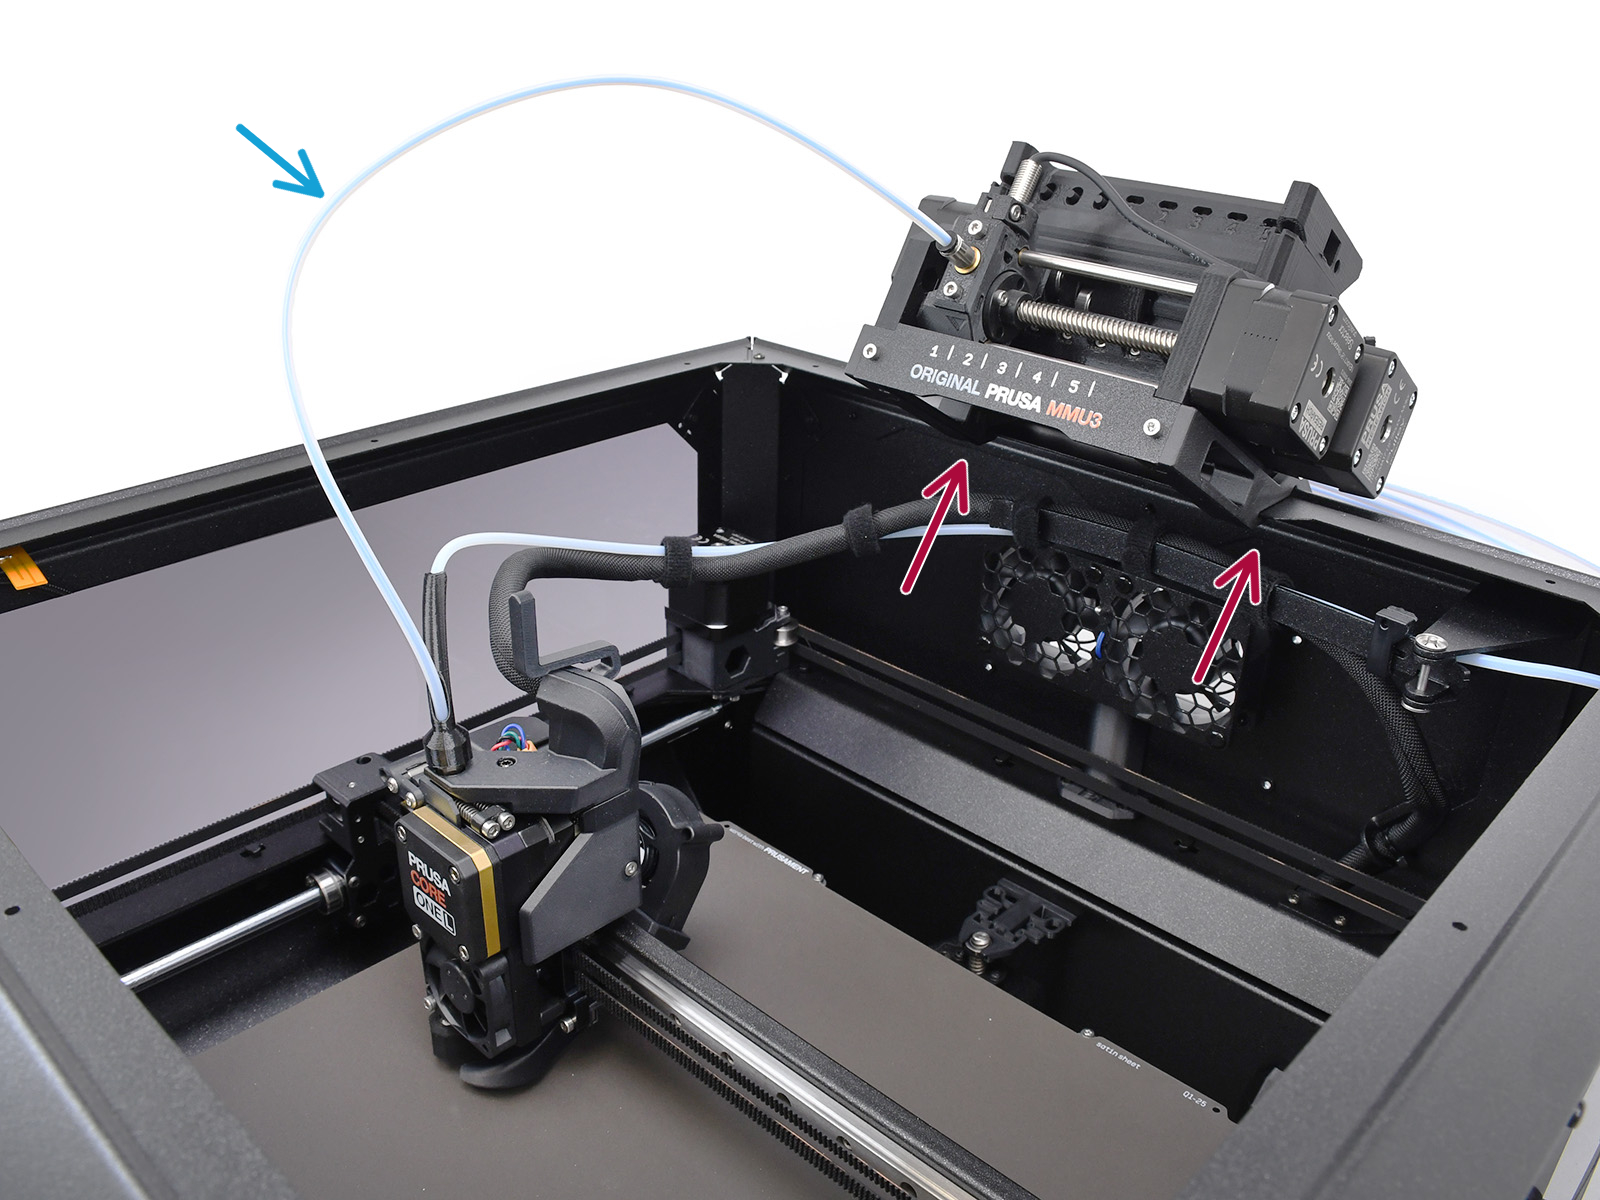
⬢ The MMU unit attaches to the top profile using the CORE L-specific holders and two M3x10 screws.
⬢ The required MMU to Extruder PTFE tube should be a tad longer (4x2,5x460mm, may be manufactured from the 650mm tubes available in the kit).
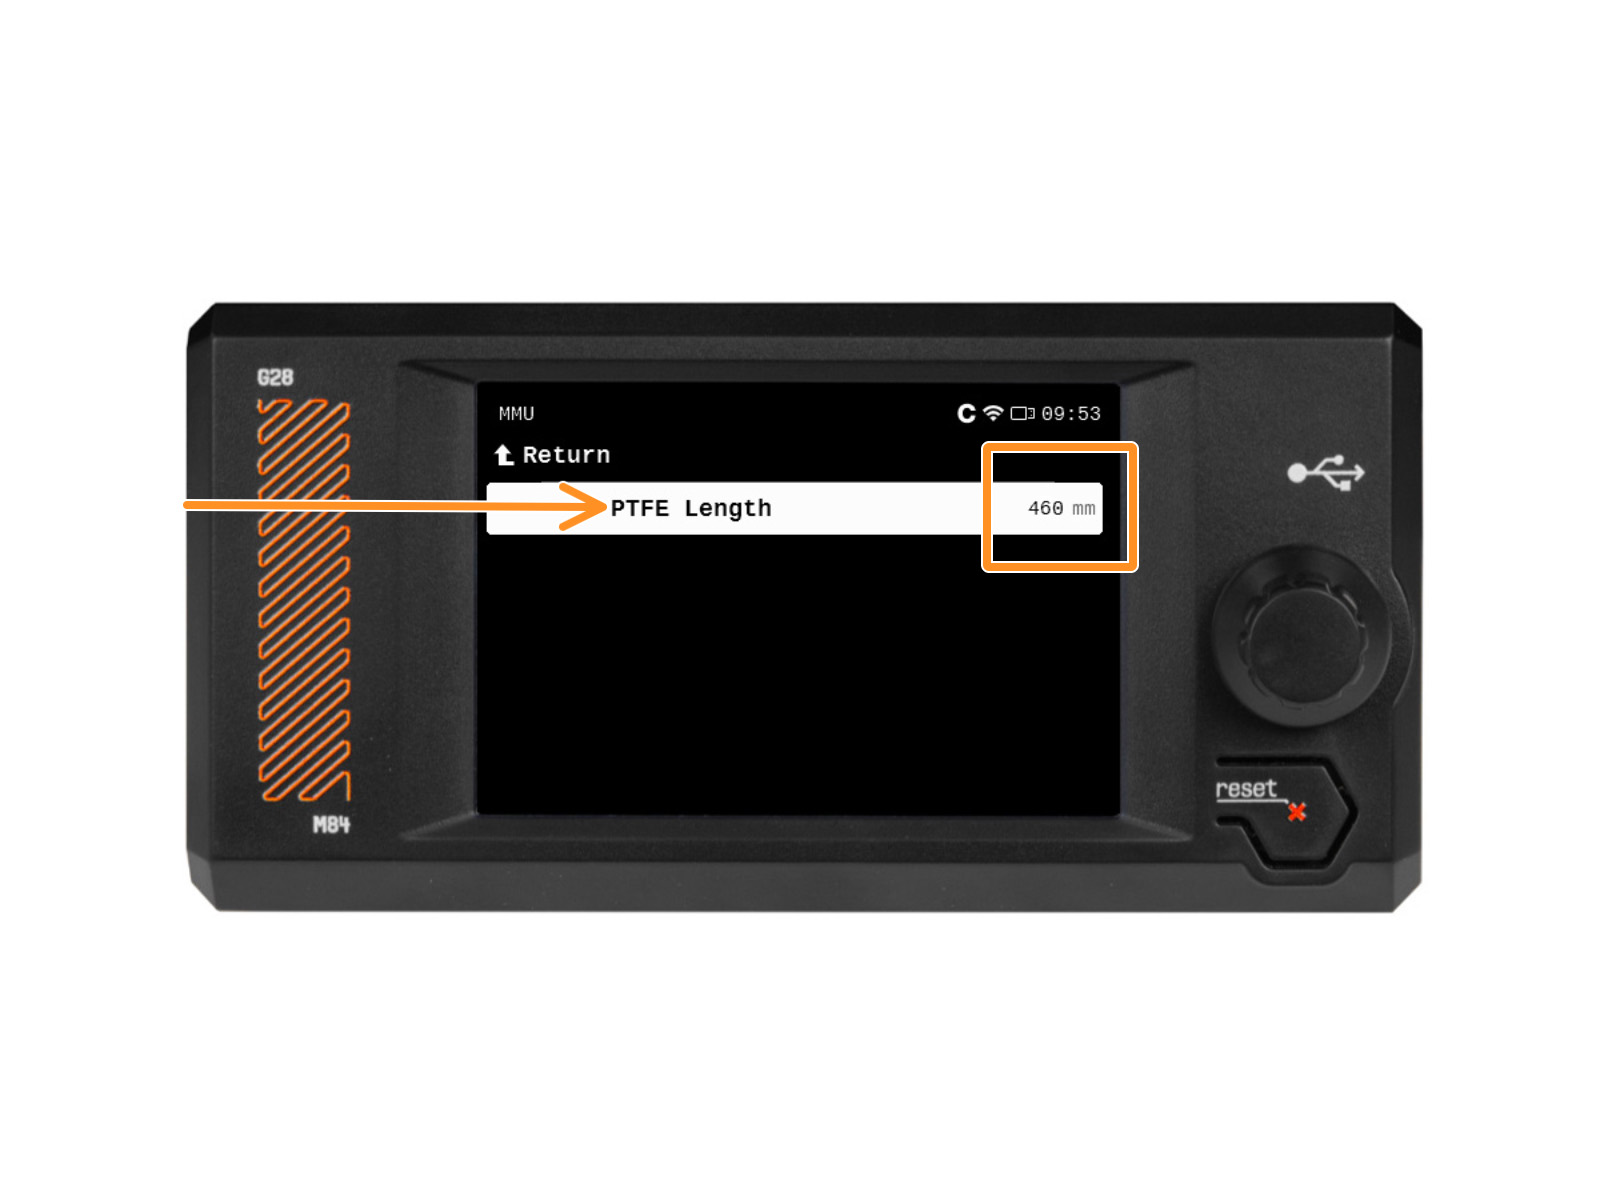
⬢ The PTFE tube length used has to be later set in the printer’s menu.
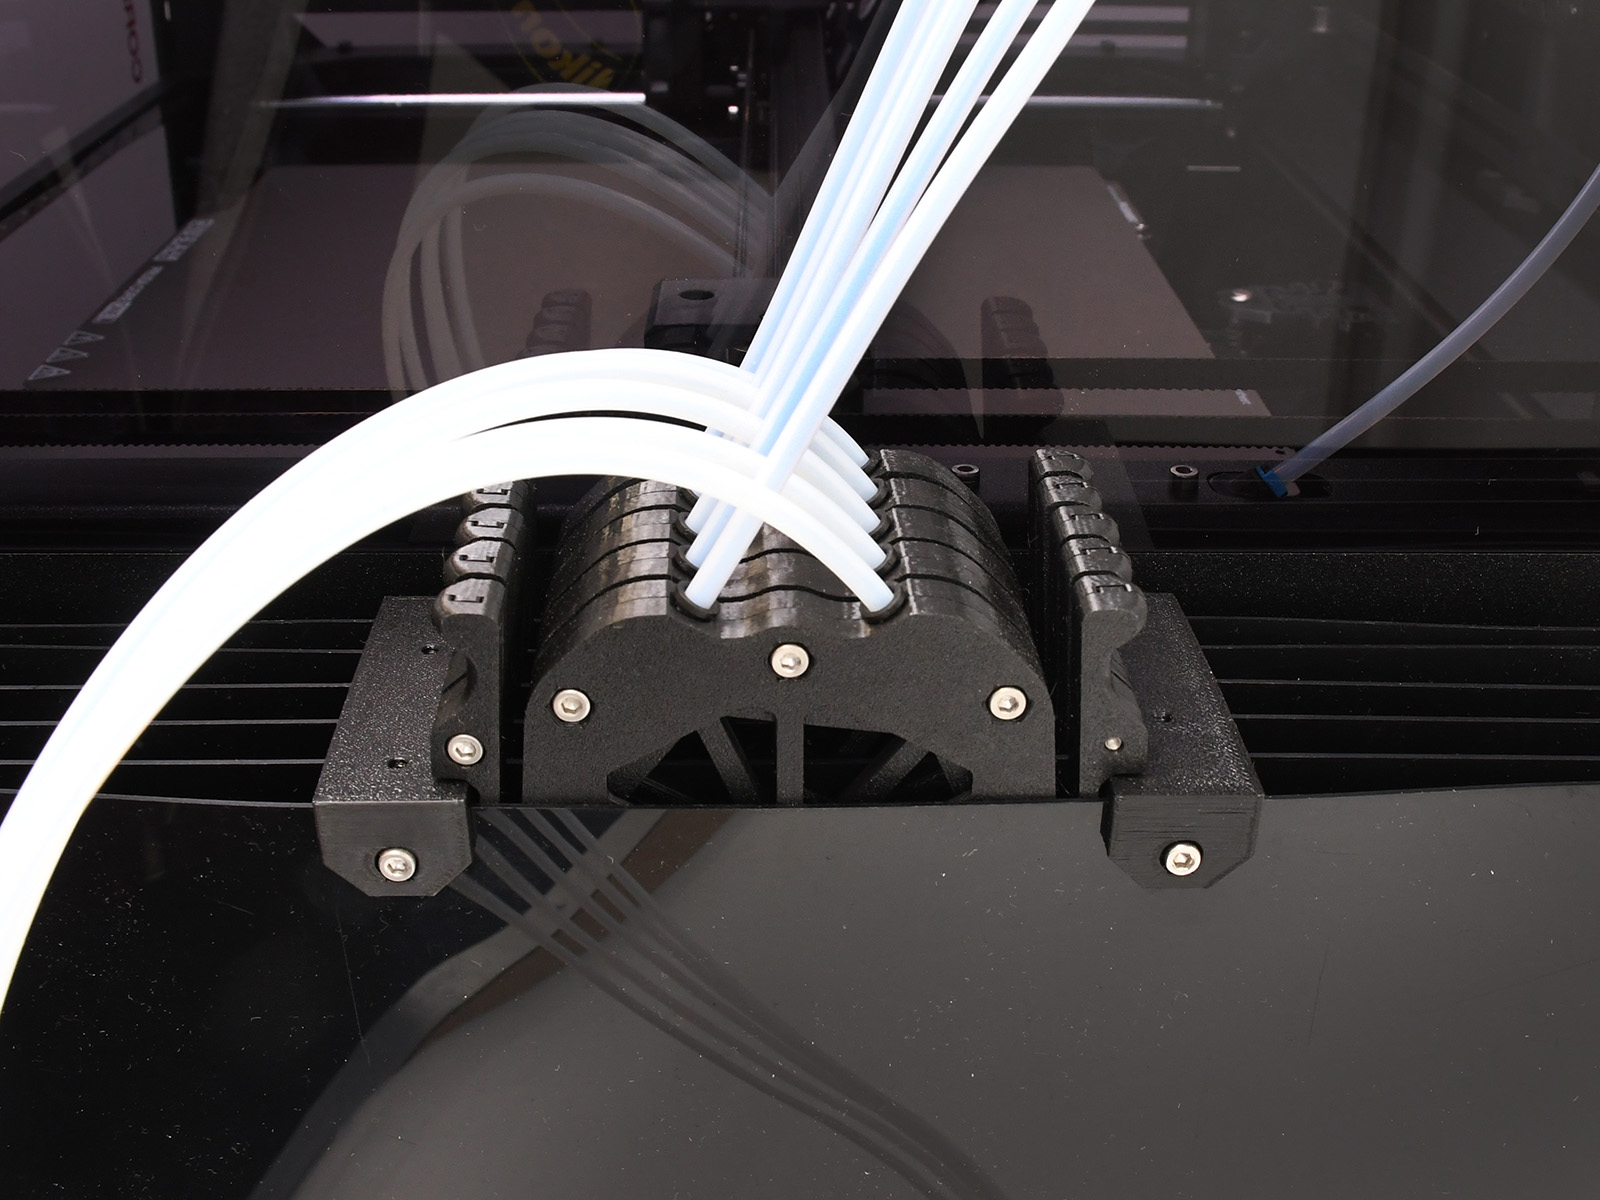
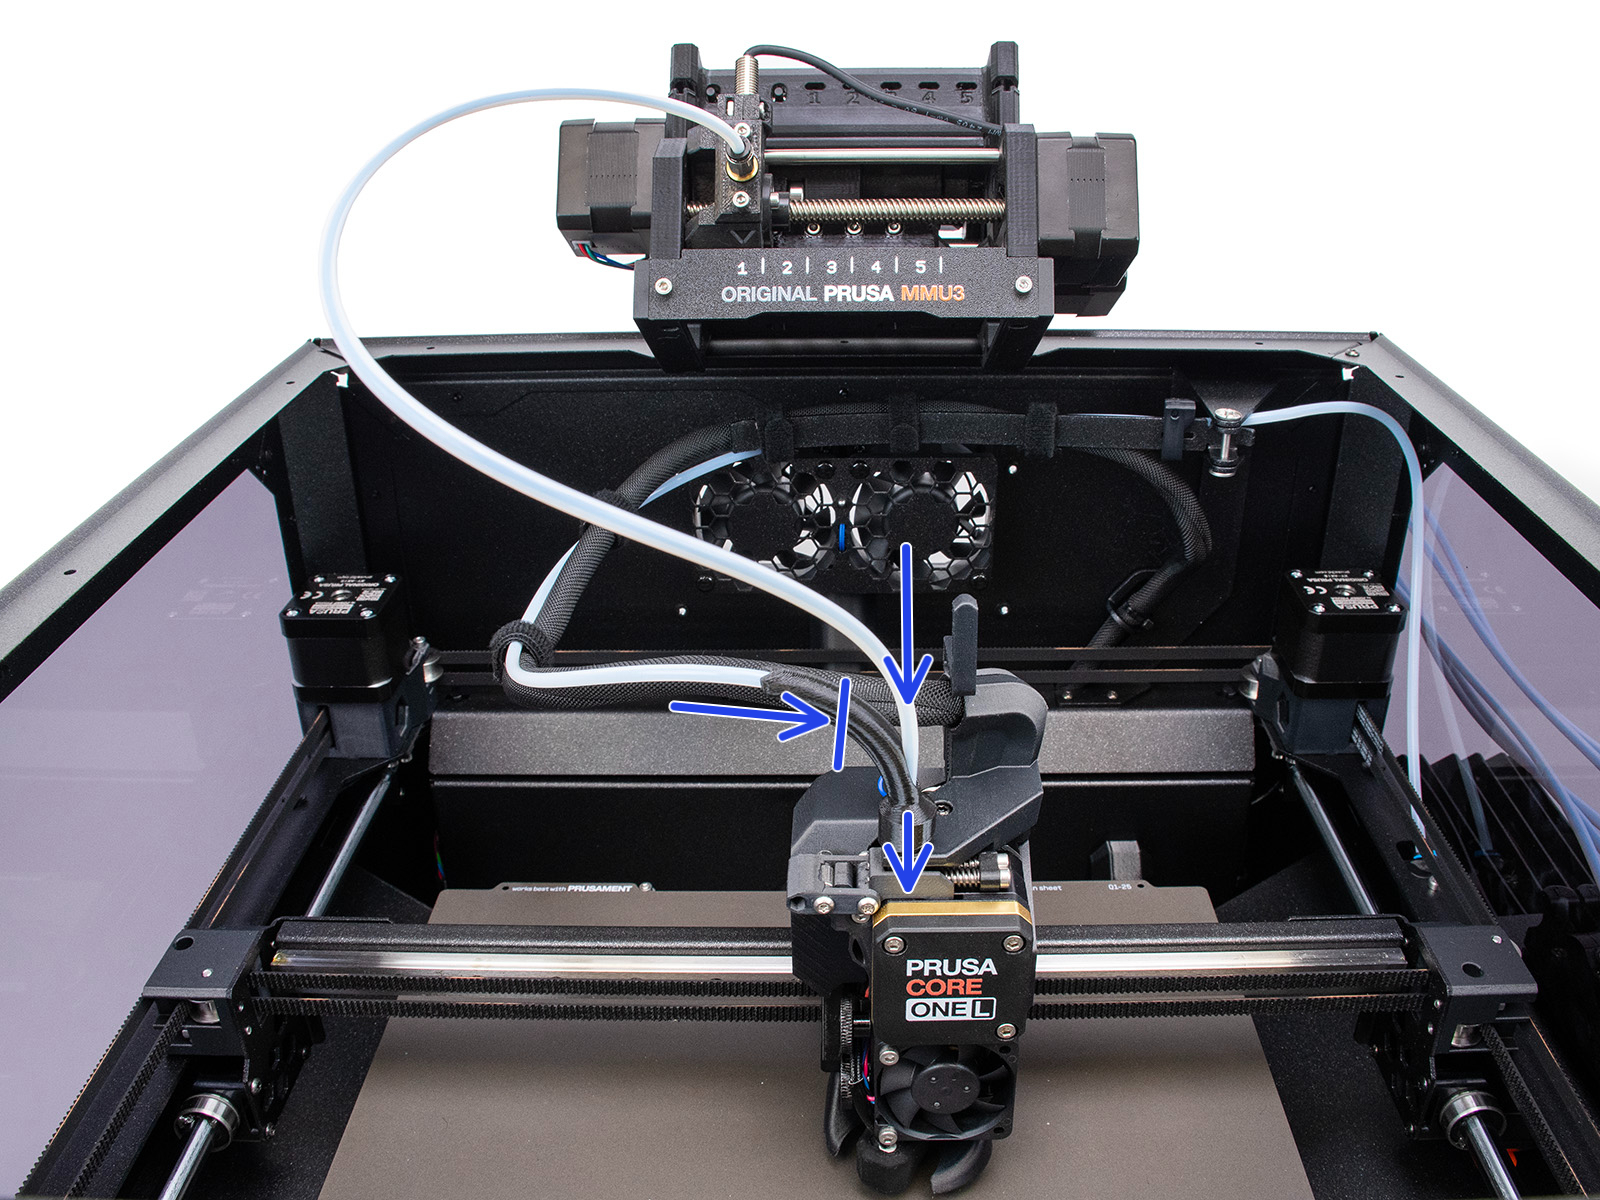
⬢ The original single-material PTFE tube and the MMU PTFE tube are joined in the "Bowden Bend" part, while only the MMU PTFE continues to the extruder.
MMU3 Final Resurrection
Despite minor visual differences, the remaining requirements match the MMU3 for CORE One+ installation guide.
Required Firmware combination is the printer FW 6.5.3 or newer and the MMU FW 3.0.4 or newer.
Shopping List
⬢ MMU3 Kit for CORE One/+ Lite (Contains the majority of parts also used for CORE L)
⬢ CORE L - specific printed parts (Printables)
⬢ CORE L - specific Buffer Plates (Printables)
⬢ 16x M3x30 screws (Used 22x in Buffer)
⬢ 16x M3nS nuts (Used 22x in Buffer)
⬢ 12x M3x8 screws
⬢ 6x Magnet 20x6x2 (Used 18x in Buffer)
⬢ 1x 4x2.5x460mm PTFE tube (MMU→Extruder) (May be adapted from the included 650mm PTFE)
⬢ 5x 4x2.5x710mm PTFE tube (Buffer→MMU)
⬢ 5x 4x2.5x940mm PTFE tube (Spool holder→Buffer) (Alternatively, adapt the 1275mm PTFE)
Enclosed version
While both the Lite and Enclosed MMU3 versions for the CORE One are technically achievable the CORE One L too, the lack of an official kit means the Enclosed setup is strictly for experienced makers, as it necessitates manufacturing the intricate parts, such as the larger vacuum-formed top cover and the bent & threaded aluminum sheet metal plate. For the tech-savvy makers requiring an enclosed setup, the necessary parts are included as STEP files on Printables.
1 comment