A 'cold pull' is a technique that allows you to clean your printer’s nozzle and hotend from any material that may be stuck or burnt inside. You can also use it to clean your hotend during your usual maintenance routine.
The cold pull should be made if your nozzle is only partially clogged, and some filament is still being extruded. If the nozzle is completely clogged, please check the Clogged nozzle guide.
Procedure
- Go to the LCD Menu -> Settings -> Temperature -> Nozzle (MK2.5/S, MK3/S/+) / LCD Menu -> Control -> Temperature -> Nozzle (MK3.5/S), and set the temperature to 270 °C.
- While waiting for the nozzle to reach the temperature, toggle the Filament autoload off in the LCD Menu -> Settings -> Fil. sensor -> F. autoload (MK2.5/S, MK3/S/+) / LCD Menu -> Settings -> Filament sensor (MK3.5/S).
- Still being in the Menu, go to Settings and choose Disable steppers (MK2.5/S, MK3/S/+). On MK3.5/S, navigate to Control -> Disable motors.
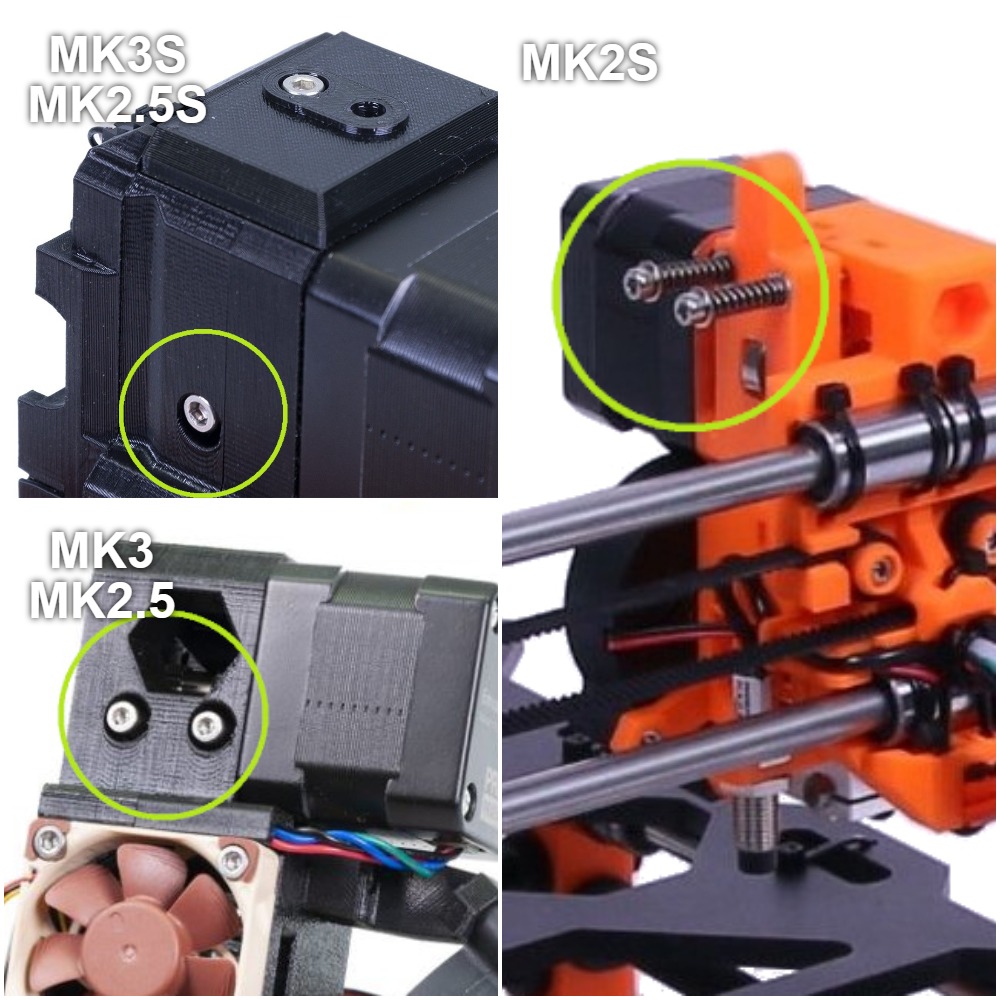
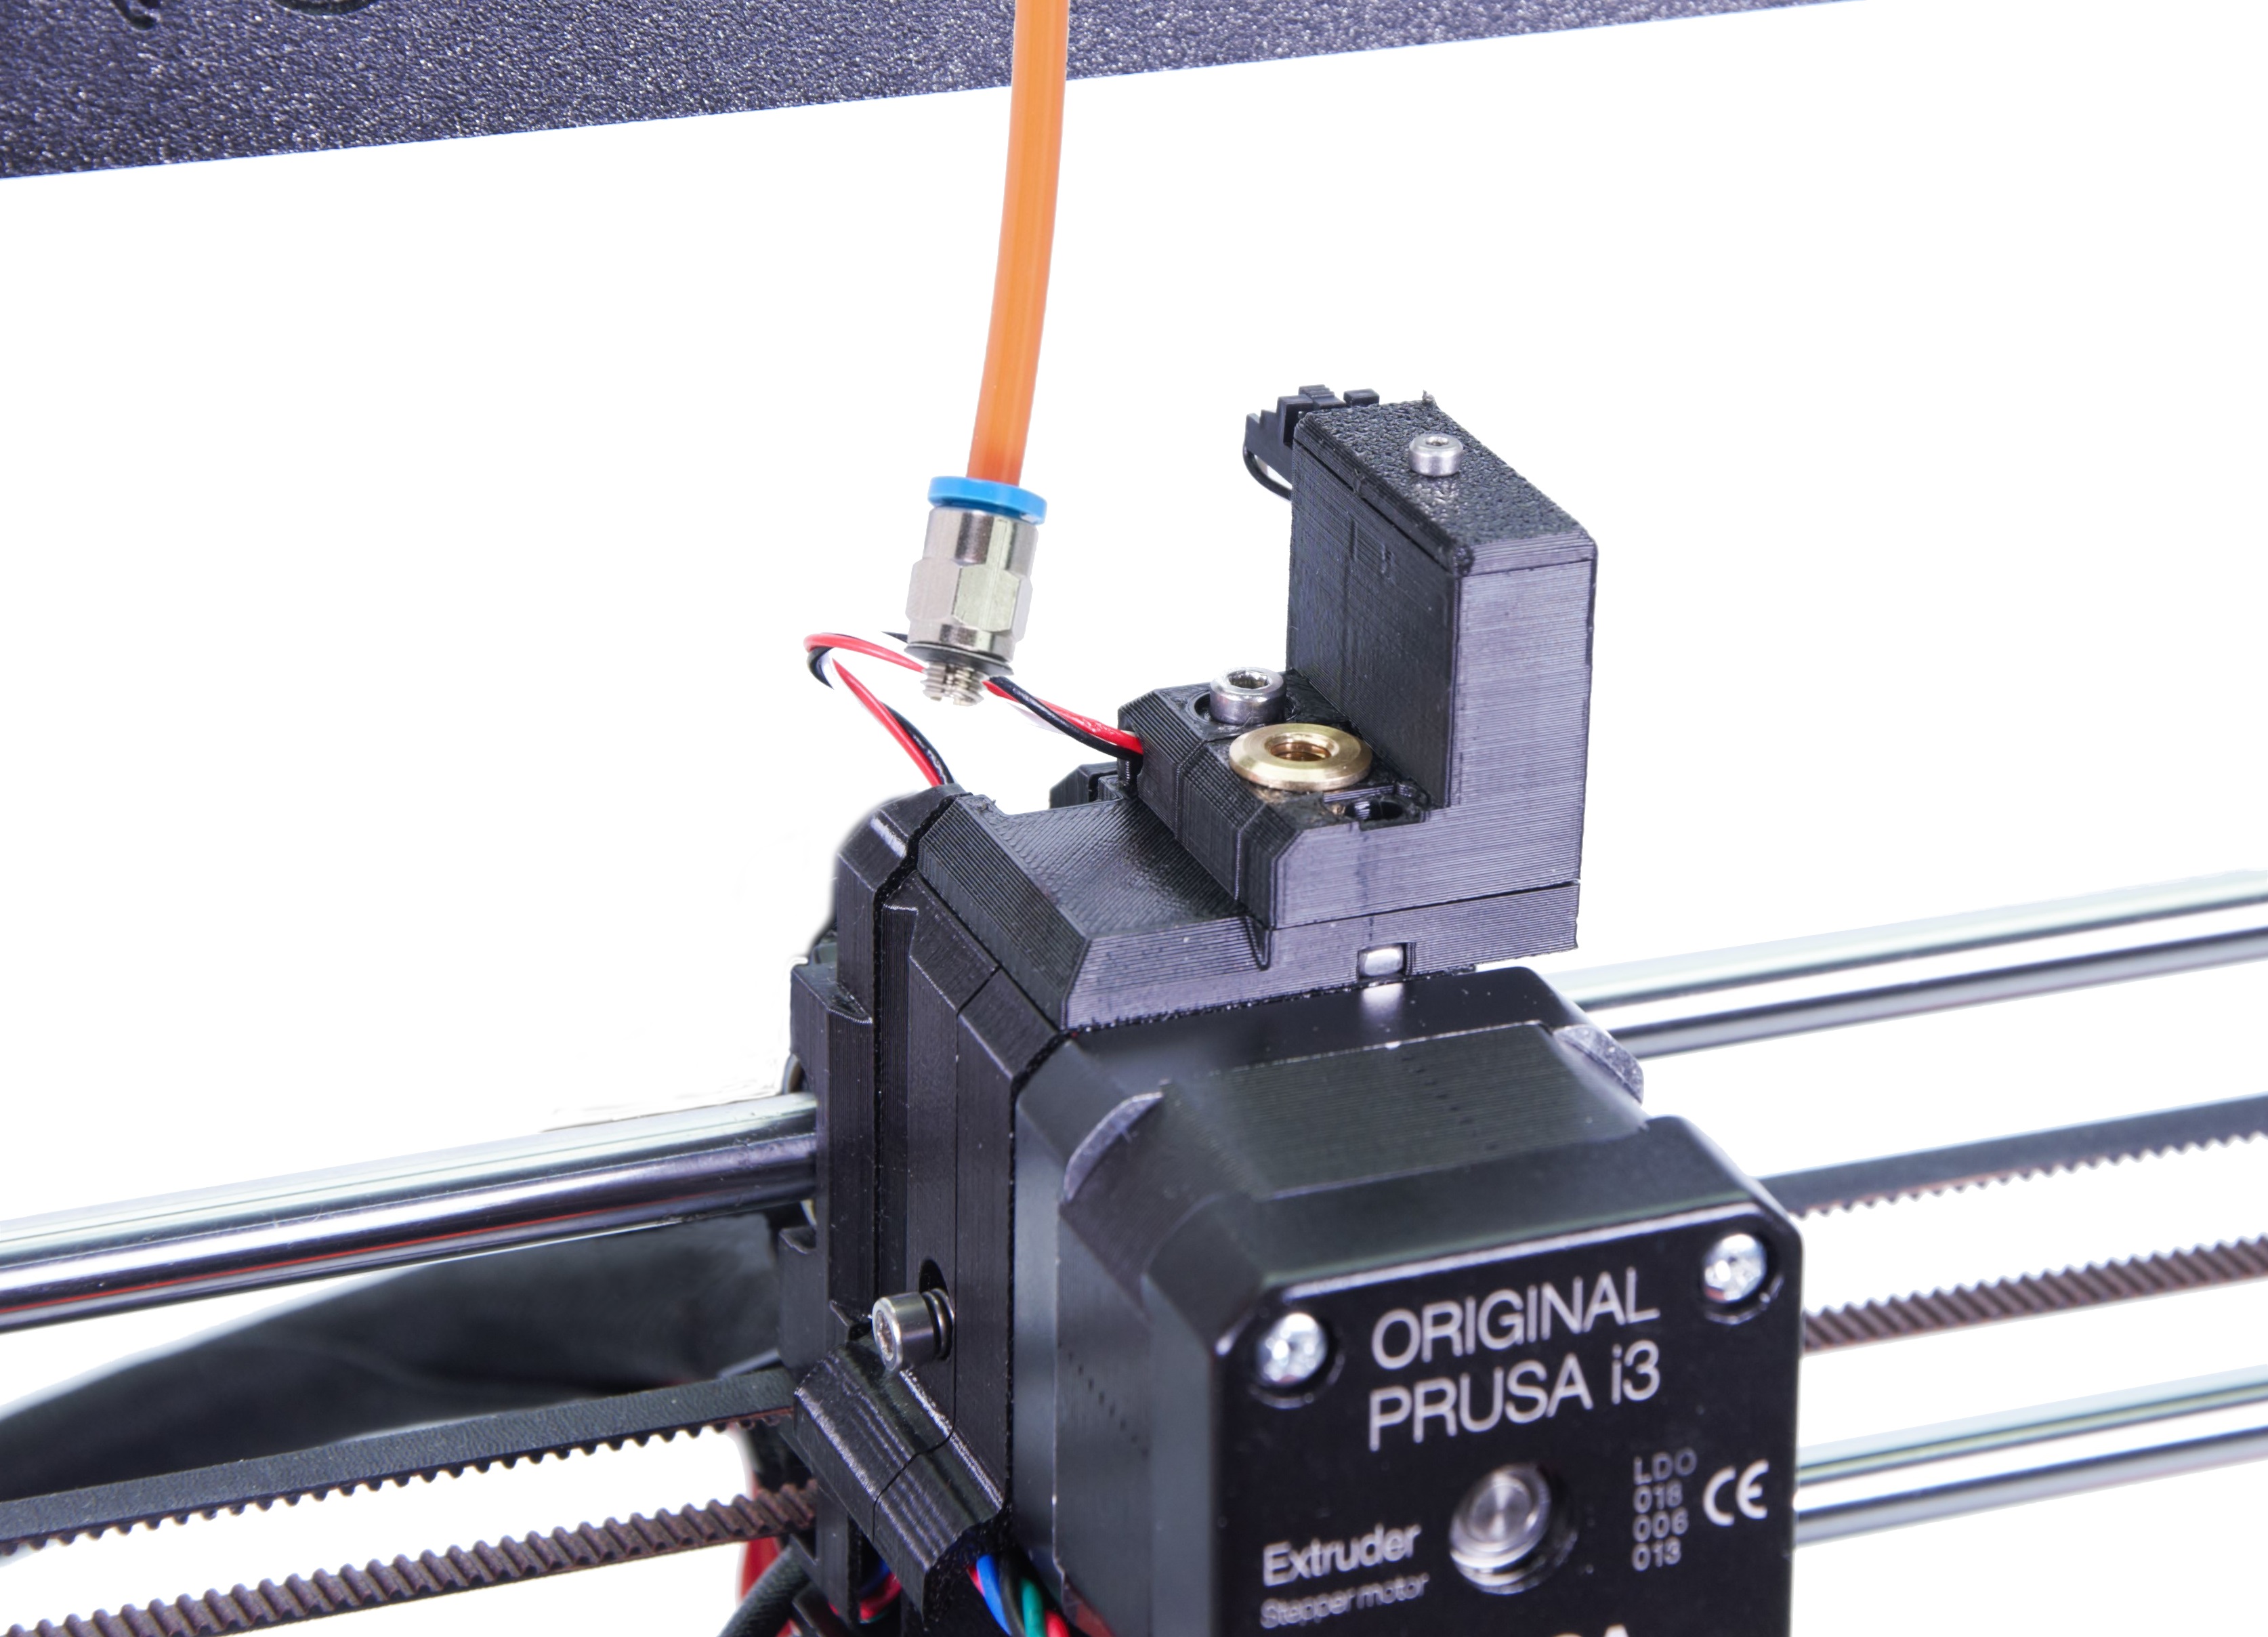
There is no message of the steppers being disabled, but you may hear an electrical hiss disappear when selected. If you can move the bed or extruder on its axis by hand, they are disabled. - Open the Extruder Idler door. Unscrew the screws circled below using a 2.5 mm Allen key. On the MMU2S and MMU3, unscrew the Bowden PTFE tube that connects the MMU unit with the extruder.
 |  |
- Once it has reached 270 °C, insert PLA filament manually into the extruder and push it in until it starts pouring out of the nozzle.
- Stop heating by pressing Cooldown in the LCD Menu -> Preheat (scroll all the way down), or by pressing the reset (X) button. Let the nozzle temperature drop to room temperature. To speed up the cooling you can engage the print fan at full speed, from LCD menu -> Settings/Control -> Temperatures -> Fan speed -> [255].
- Continue manually pushing the filament down until the temperature is too low for it to melt and come out (around 170 °C for PLA). The nozzle has to be filled for the cold pull to be successful.
- Pick away extruded material so there is nothing obstructing the pull later on.
- After the nozzle cools down to the room temperature, go again to the LCD Menu -> Settings/Control -> Temperature -> Nozzle and set the temperature to 85 °C.
- As soon as the extruder reaches this temperature, grab the filament with pliers and pull it slowly but steadily out of the extruder. The filament can break inside. Make sure to pull straight upwards, not sideways. Hold the extruder with your other hand.
- Don't stop until the filament is completely pulled out from the extruder.
Results
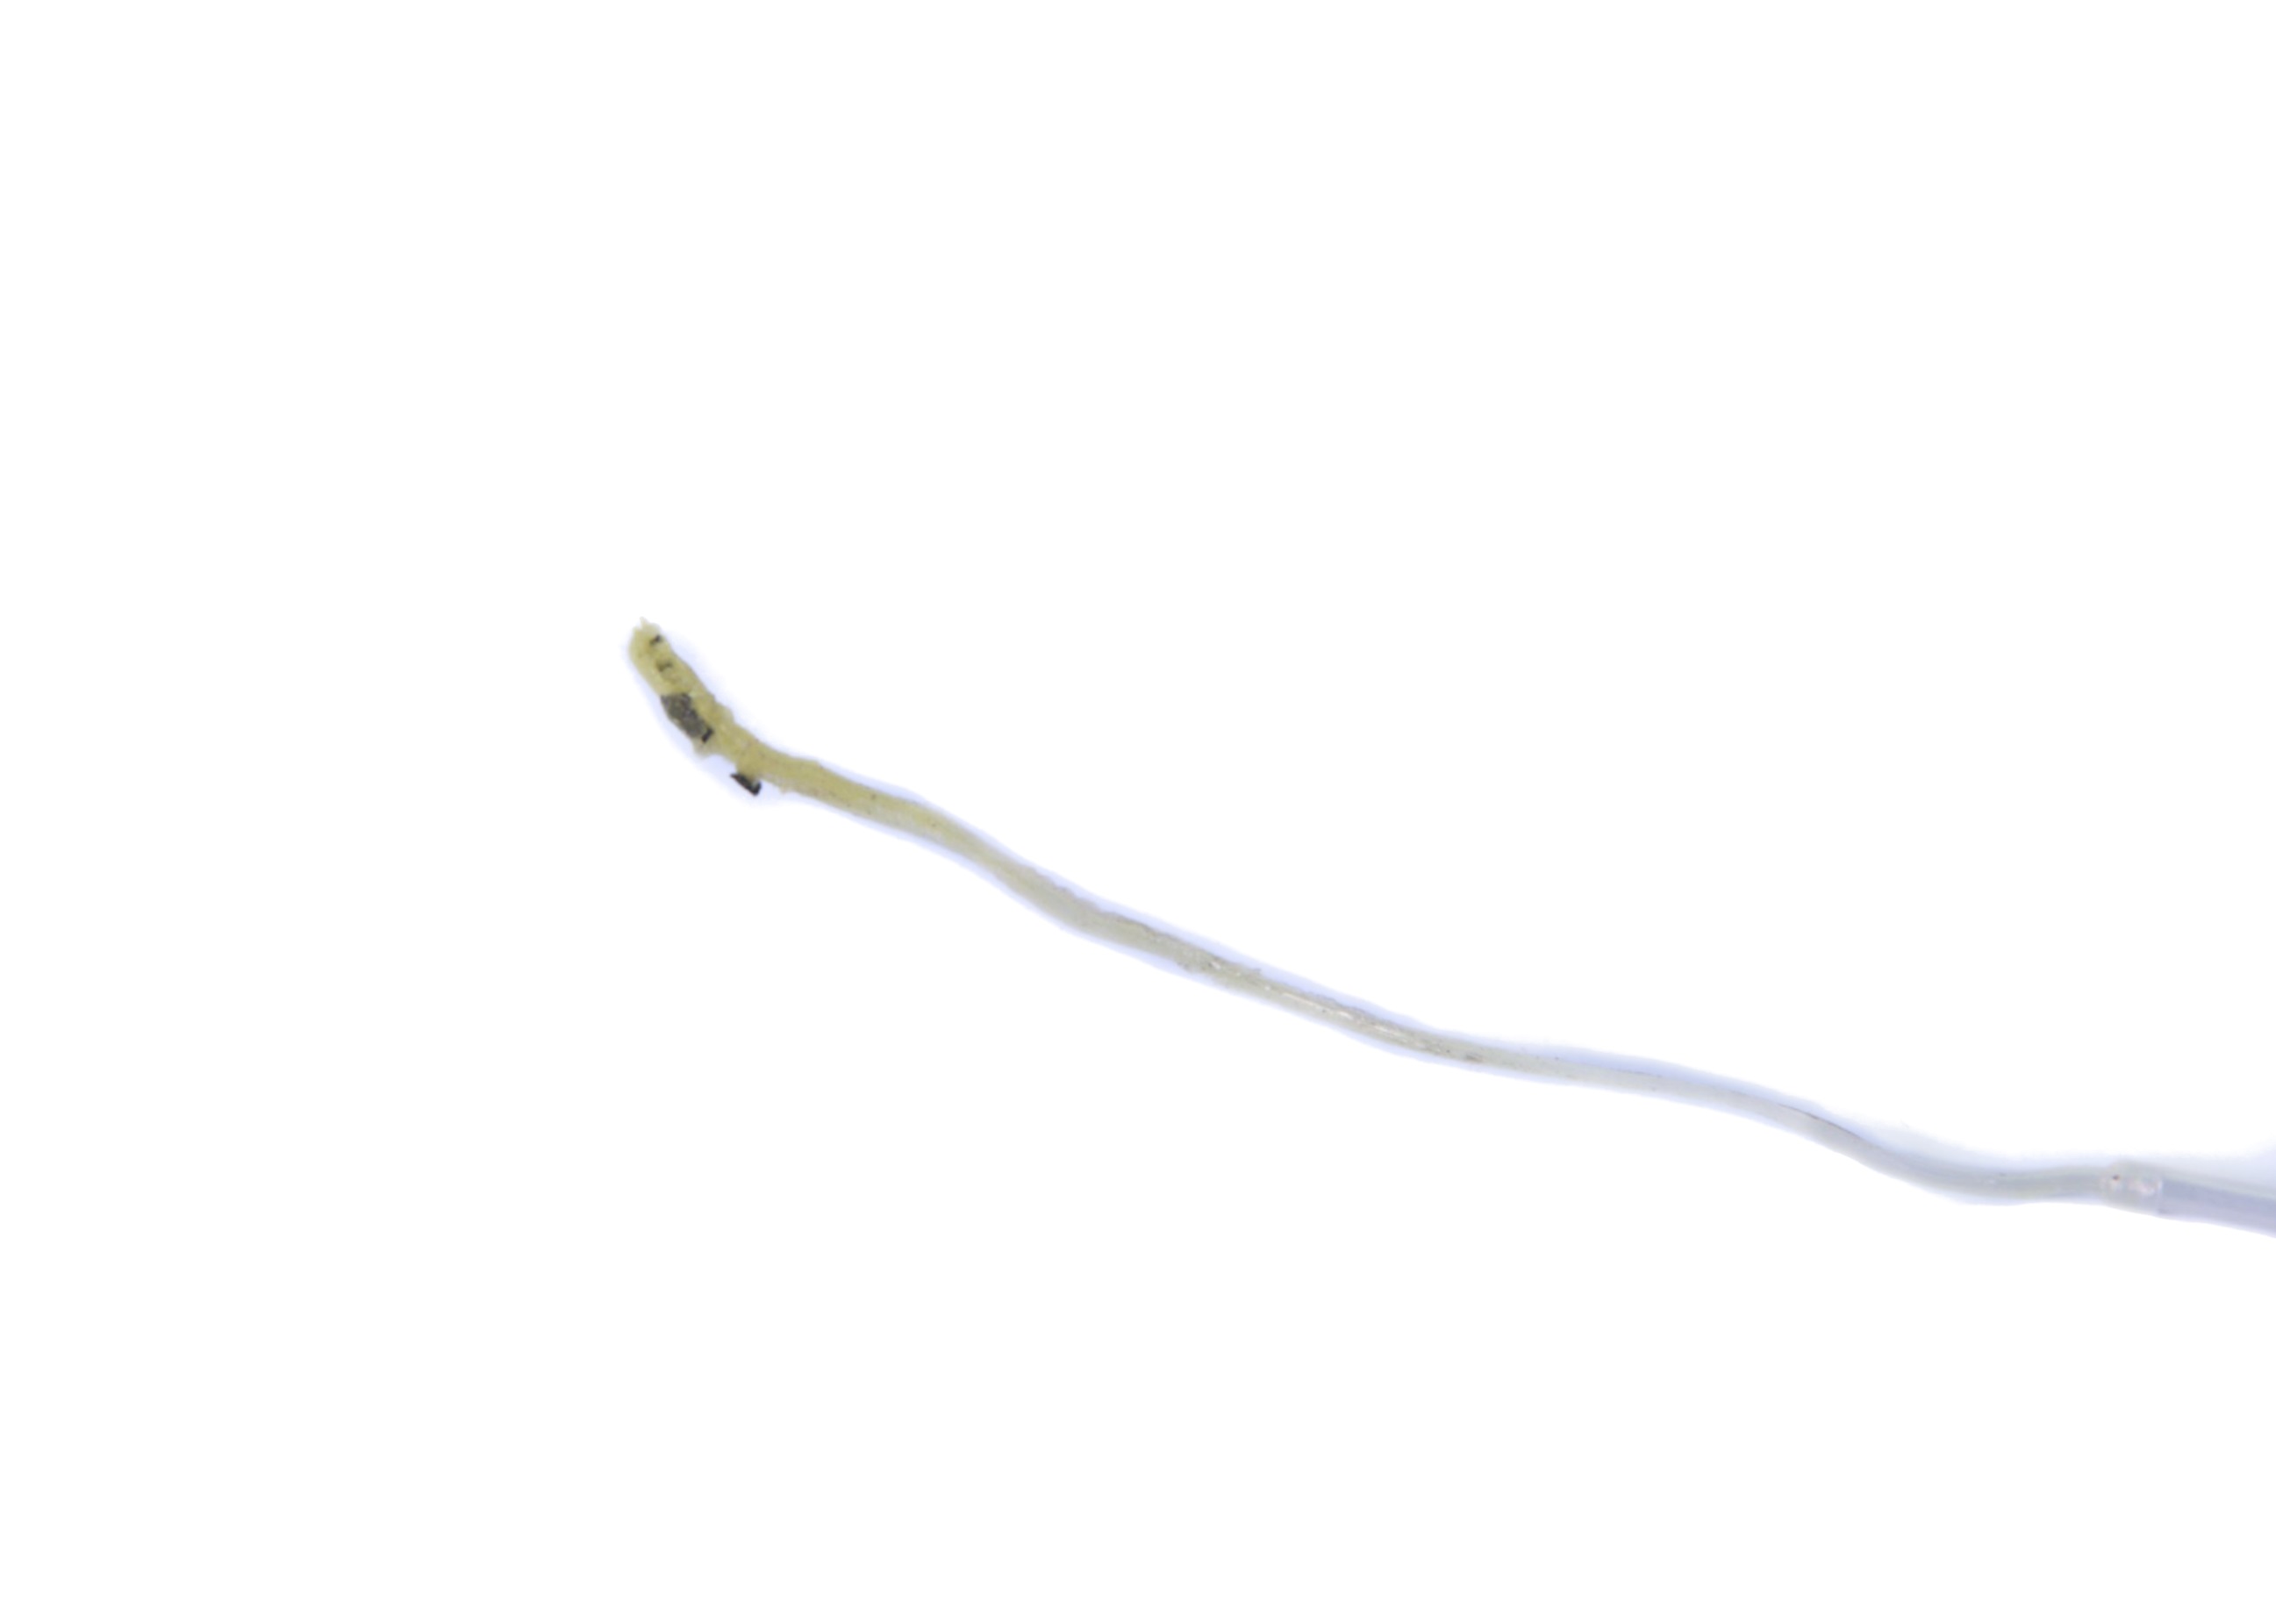
On the tip of the filament that has been pulled out, you may see remnants of the previous material(s) you have been using or some burnt dirt that has settled in the nozzle (left picture). You might want to repeat this procedure several times until the filament comes out clean.
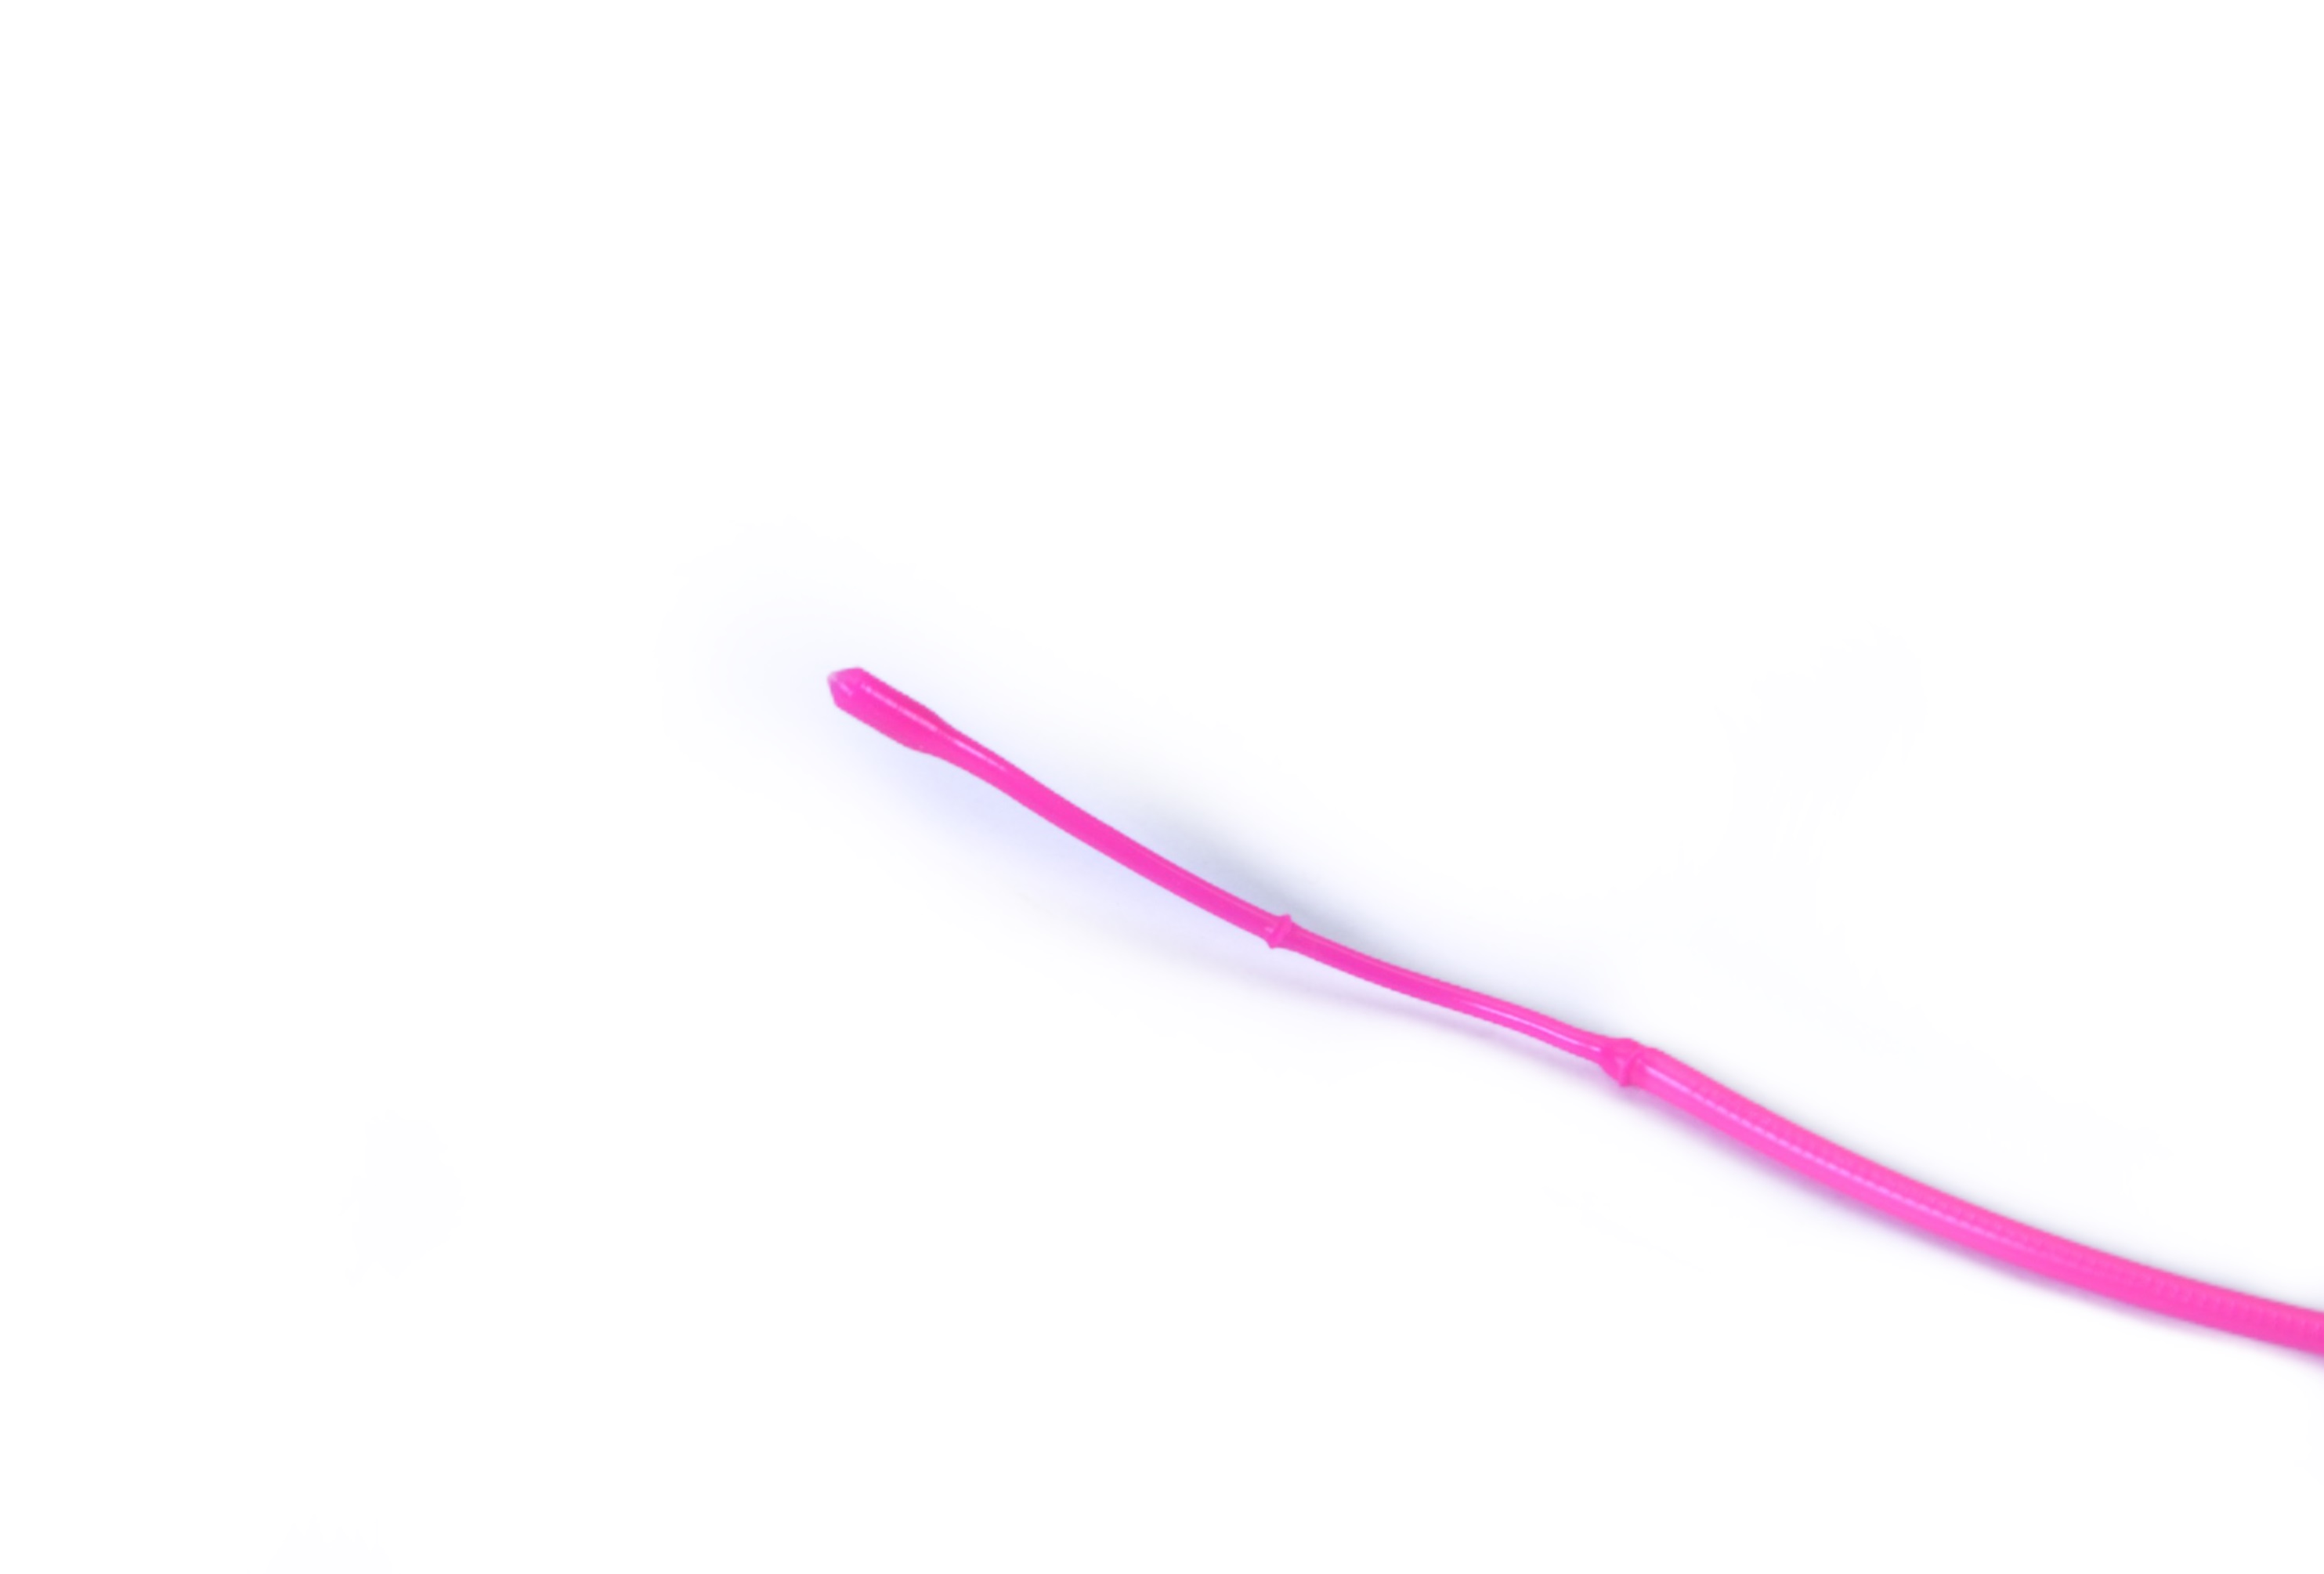
The right picture shows what a clean cold-pulled filament should look like. It is important to have the imprint of the nozzle on it, this way you are sure the nozzle was filled and nothing was left inside. Also, the color is not mixed with the one you have been using previously or have dark marks on it.
 |  |
After the procedure
Secure the idler door by having the head of the idler screw, on the left of the extruder, about flush with the plastic parts, when the filament is not loaded. Then we recommend running the Z calibration as pushing on the extruder might have thrown it off balance. Also, turn the filament sensor/filament autoload back on.
On MK2.5/S and MK3/S/+, the Z-axis calibration is found in LCD menu -> Calibration -> Calibrate Z).
On MK3.5/S, the Z-axis calibration is found in LCD menu -> Control -> Calibrations & tests -> 3. Z alignment calibration.
31 comments
This feature (auto cold pull) was available when these instructions were updated, does that mean I should perform a manual cold pull even though the automatic is available?
I haven't found any specific instructions regarding its use and how/what to do with the MMU, so I turn the MMU off in the control panel as a first step, then follow the control prompts.
Is there anything that I should be aware of that I've missed some where?
Thanks.
Hello. I checked version 6.0.4, and the 'disable motors' option is under the control menu.