What happened?
The printer displayed the message: "Chamber cooling fan is not spinning. Check it for possible debris, then inspect the wiring."
This warning indicates that the chamber cooling fan has failed to start during operation. The issue could be caused by a mechanical blockage such as dust or debris, wiring problems, or a fan malfunction.
Error name: Chamber cooling fan error
Error code: #31839 (CORE One) #35839 (CORE One L) #36839 (CORE One INDX)
How to fix it?
Start by visually inspecting the fans.
- Ensure the printer is cold and off.
- Locate the chamber cooling fans on the rear of the printer, from the inside.
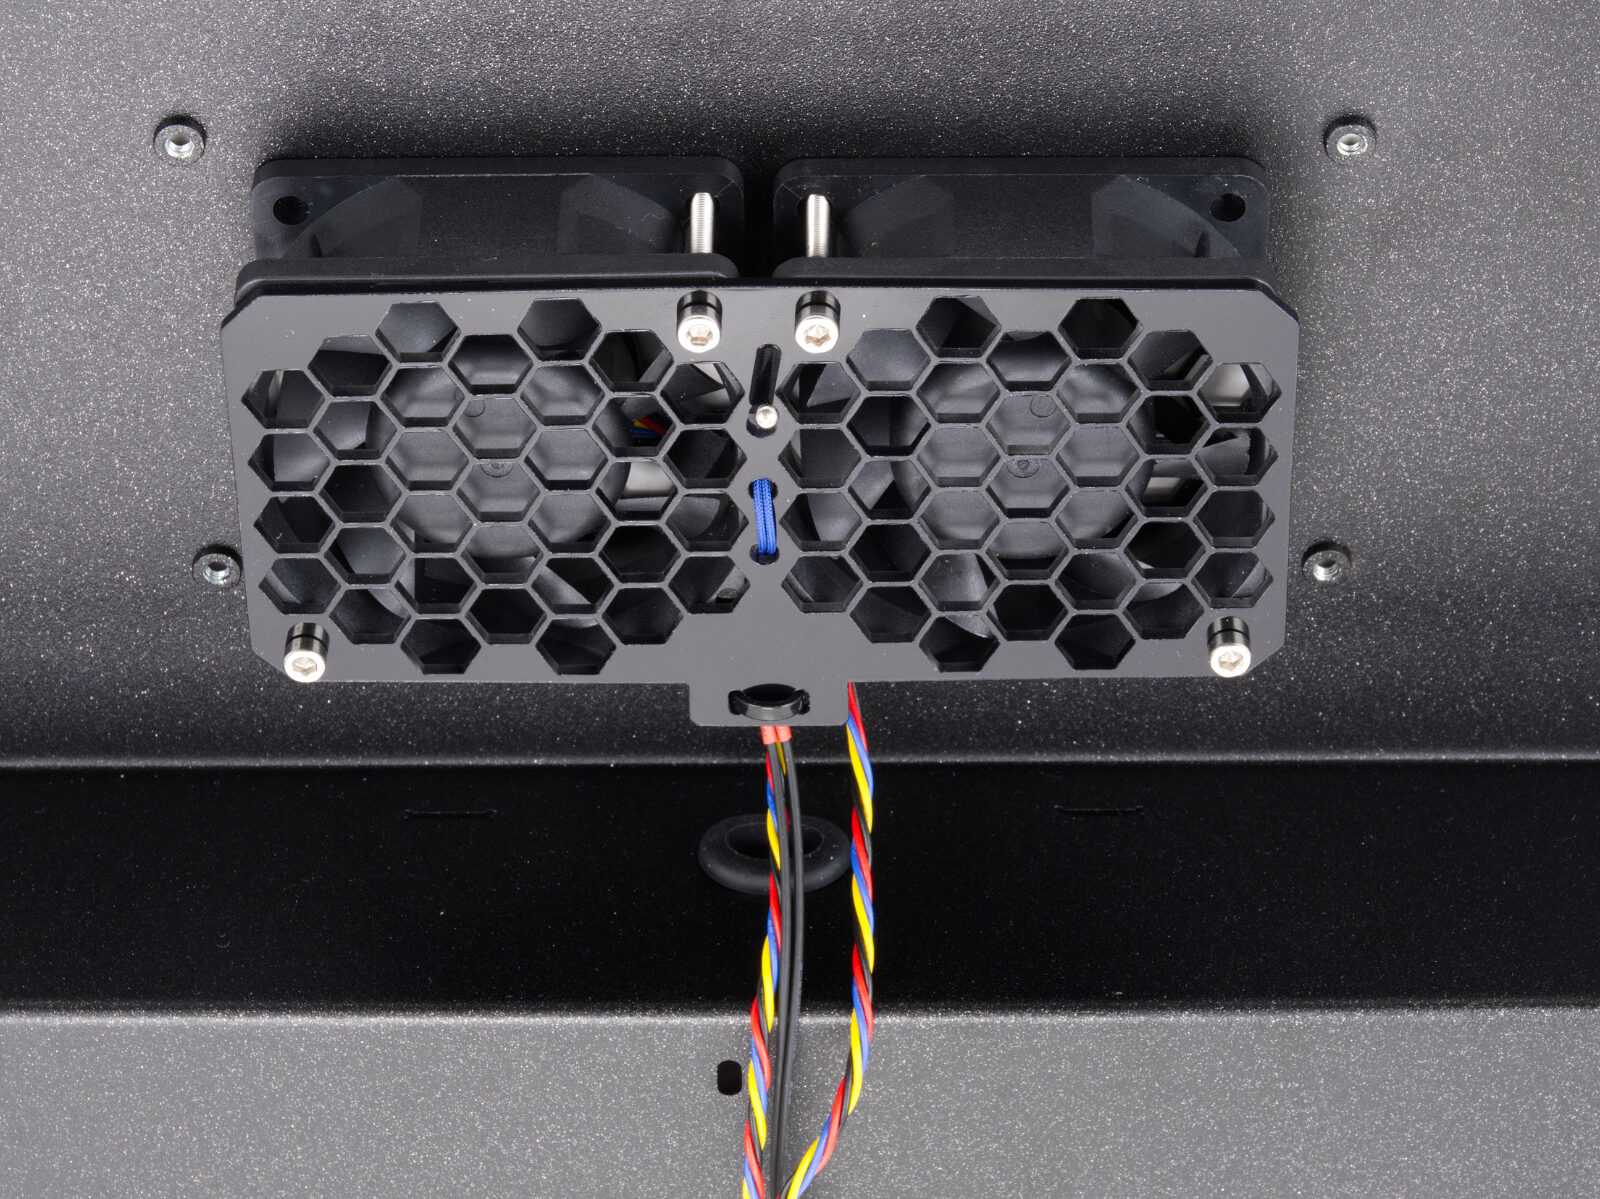 Picture taken on CORE One. The CORE One L has a similar design, but the chamber fan case is attached by nylon rivets.
- Check for debris, look for any dust buildup or foreign objects that might be obstructing the fan blades.
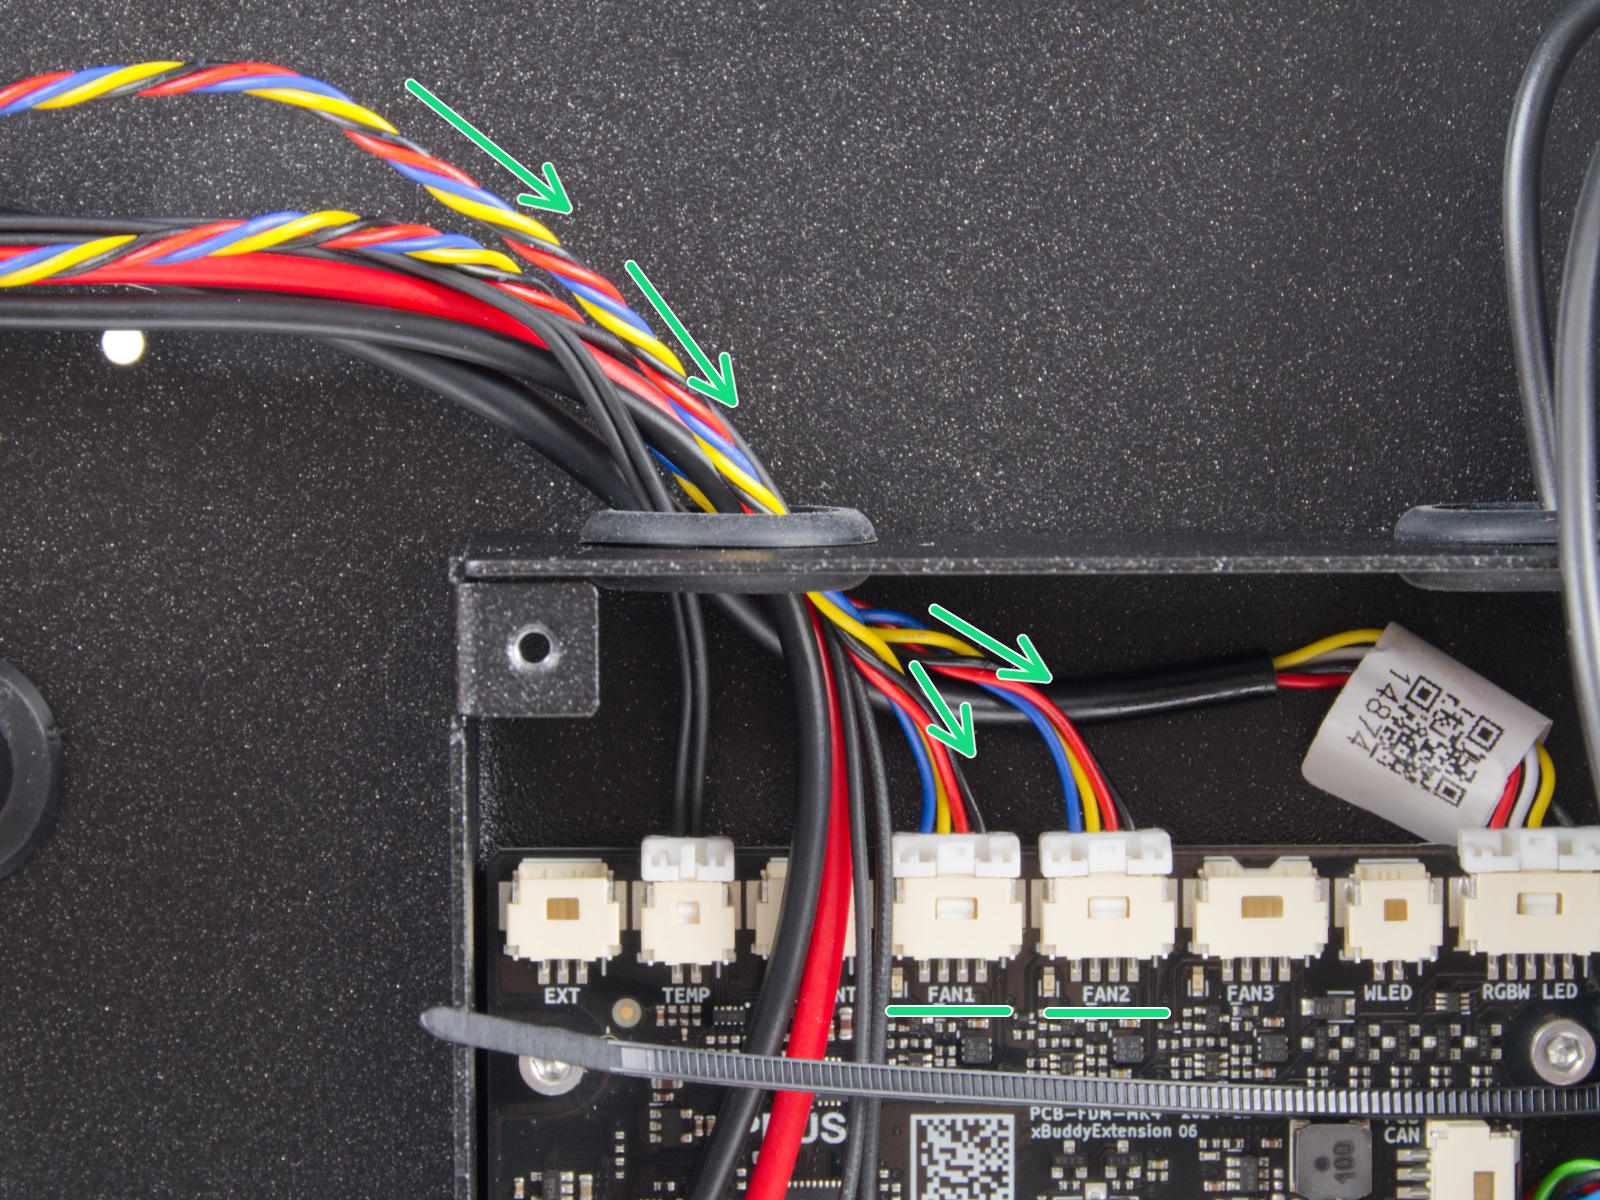
- Inspect wiring and connectors, make sure the fan cable is securely connected and shows no signs of damage.
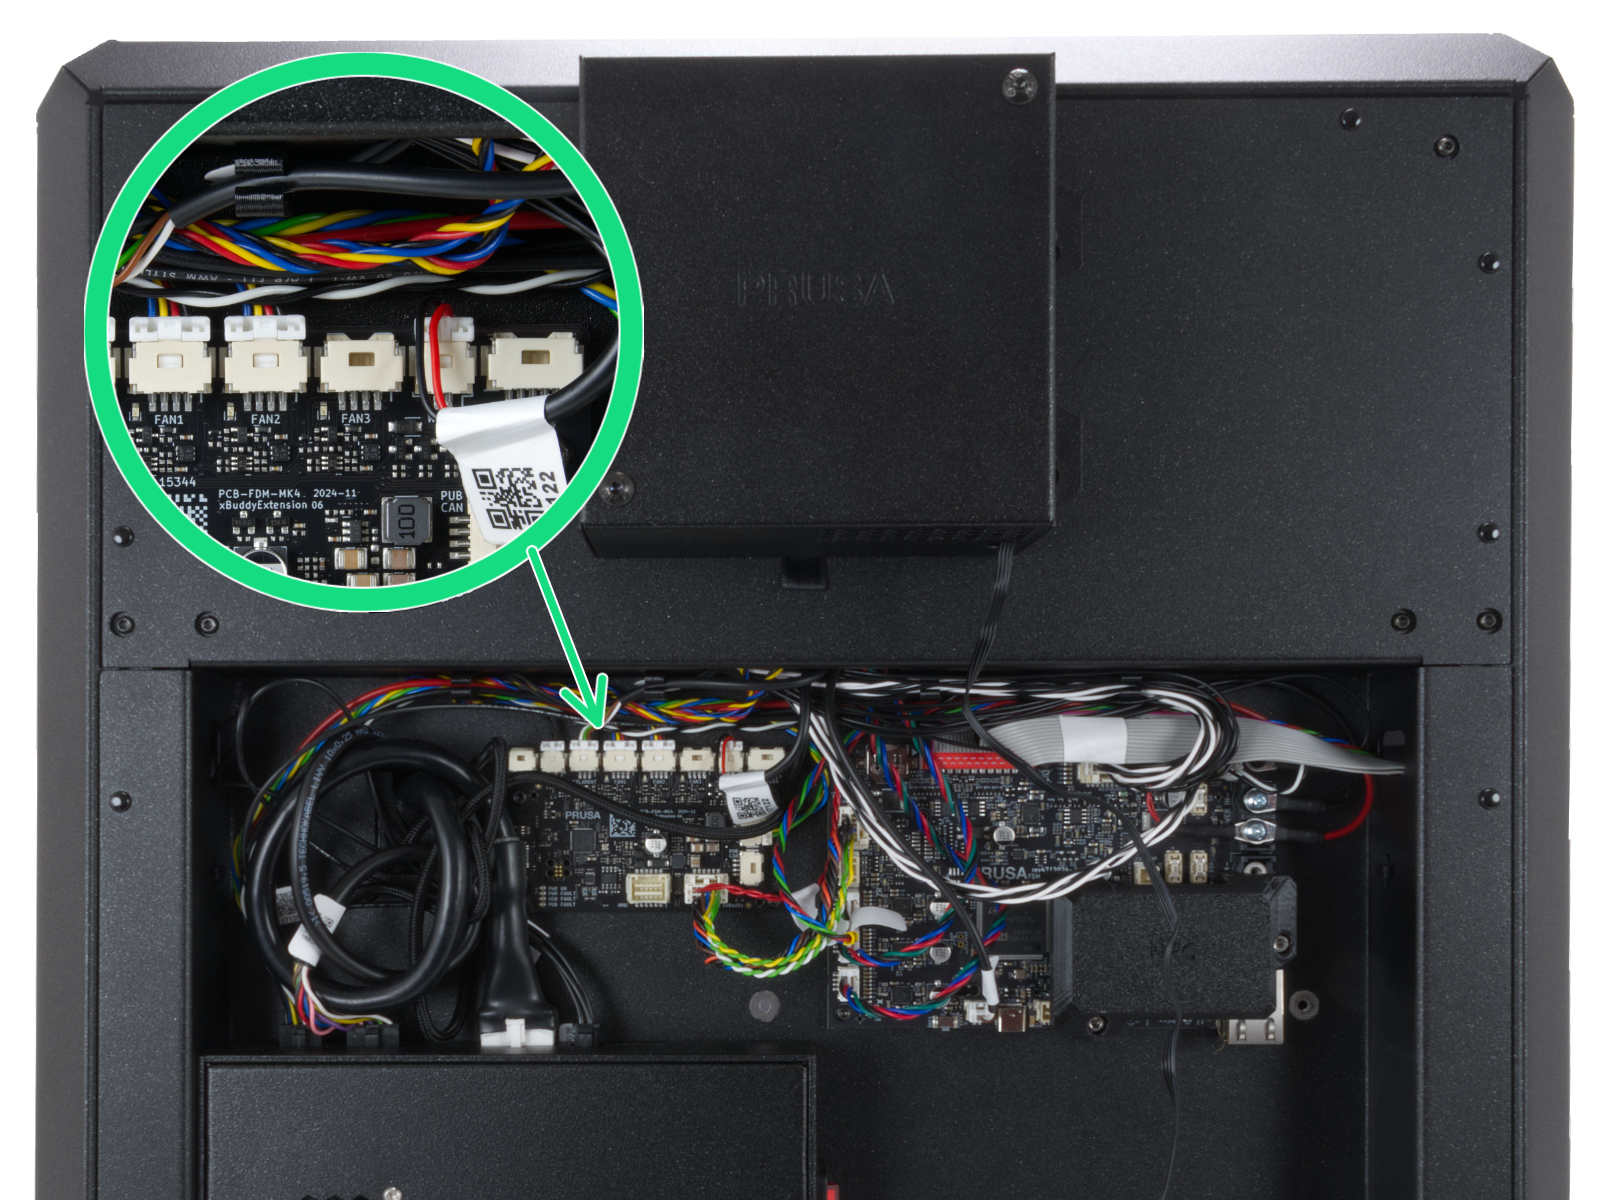
How to access the parts - CORE One
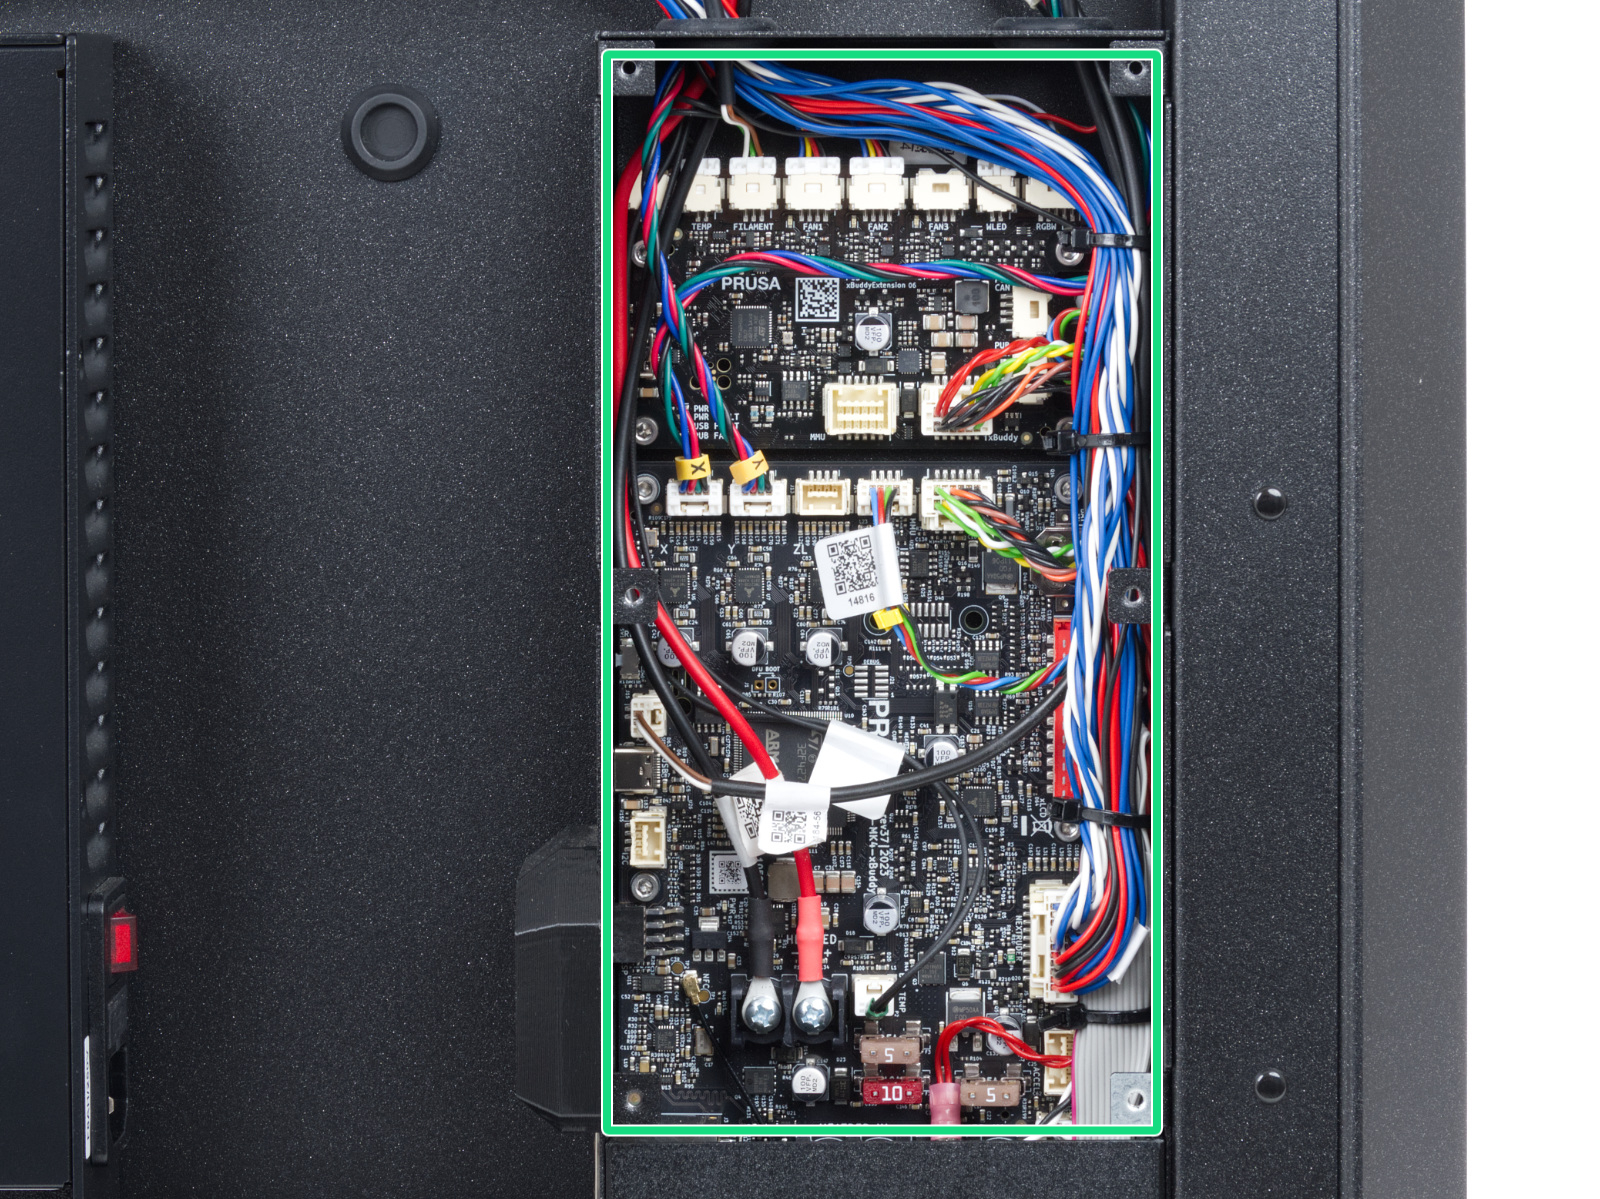
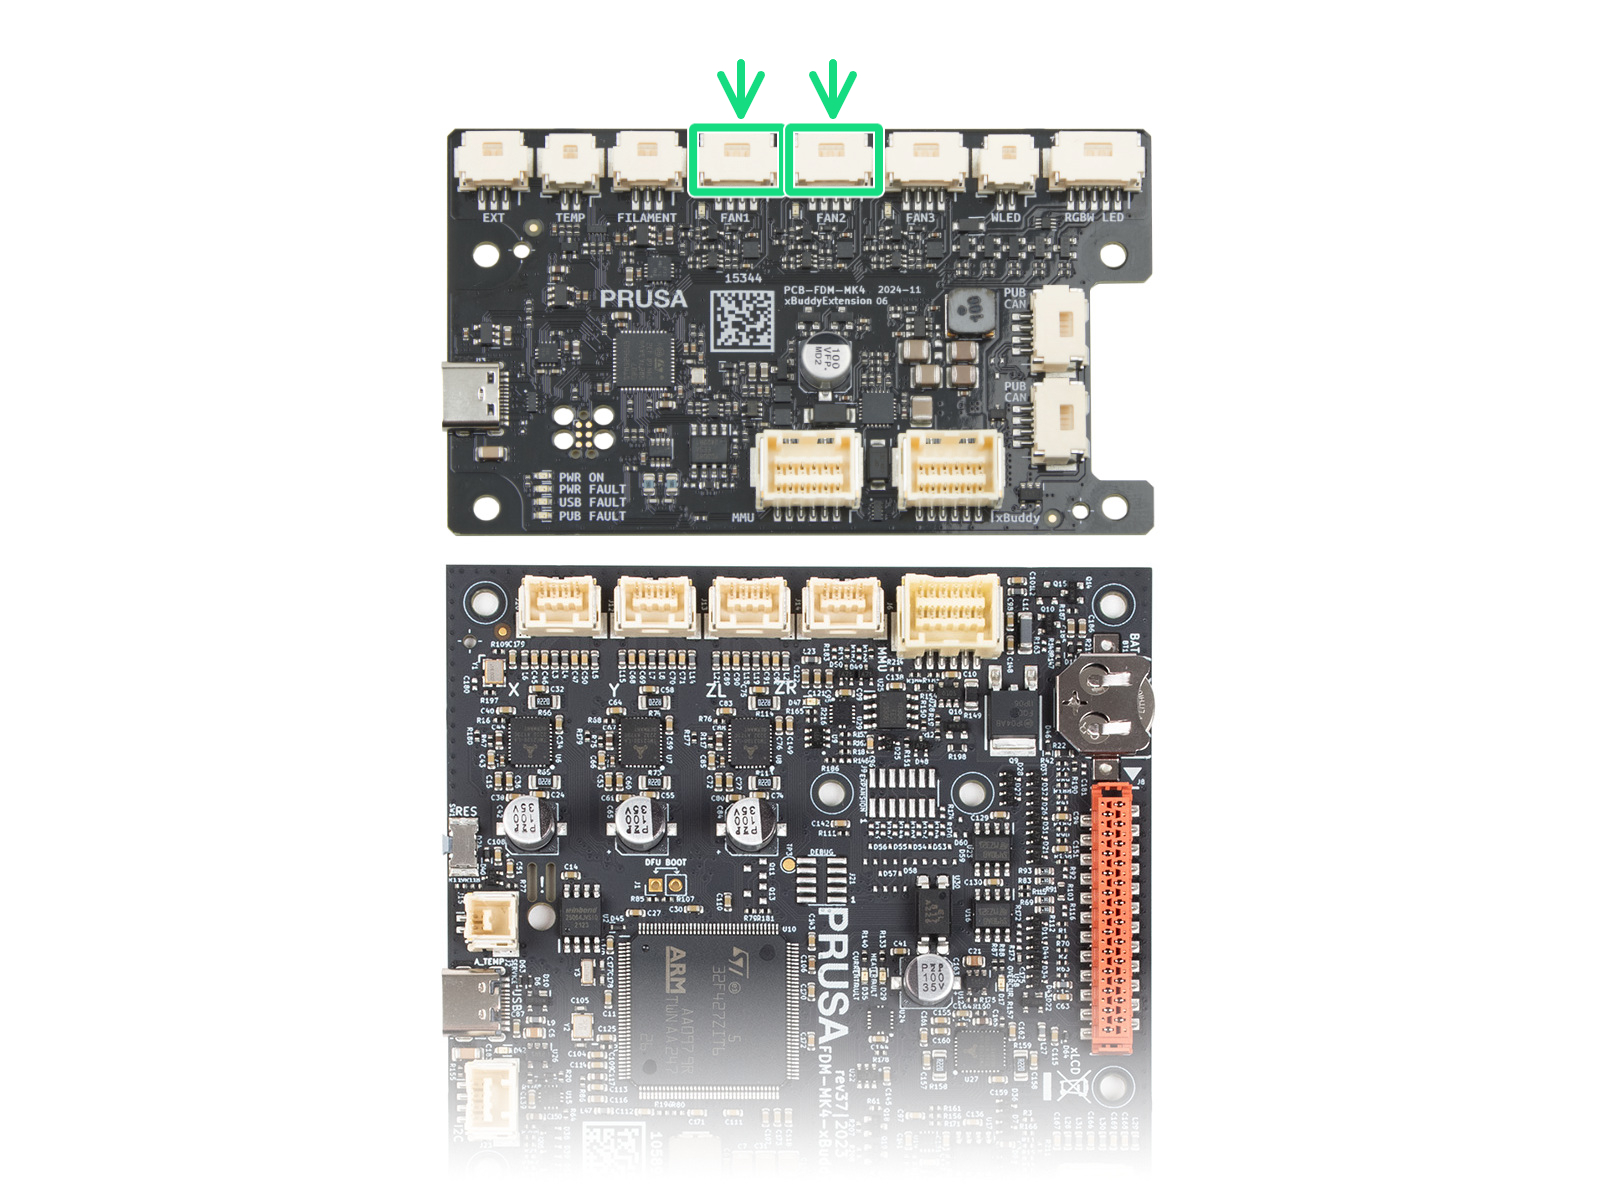
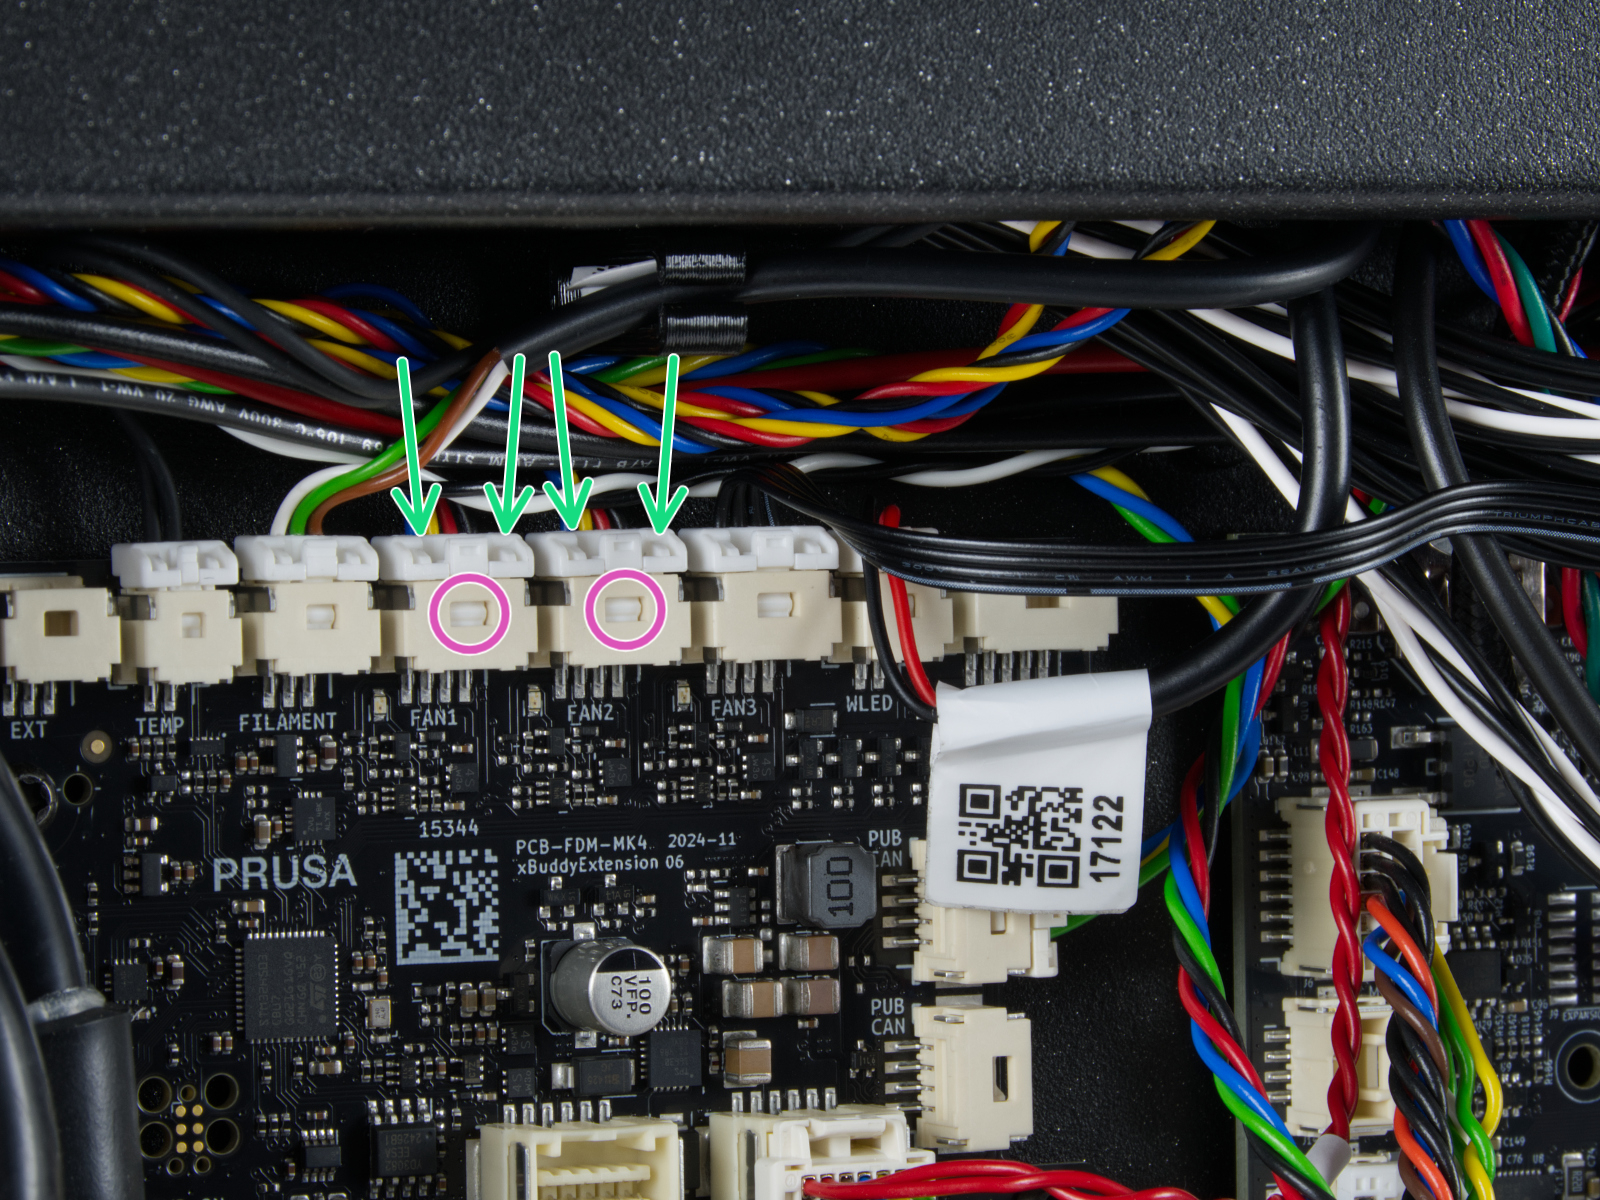
Uncover the xBuddy and the xBuddy extension boards by removing six M3x4rT screws. The chamber fans are connected to the FAN1 and FAN2 connectors on the xBuddy extension board.
 |  |
 |  |
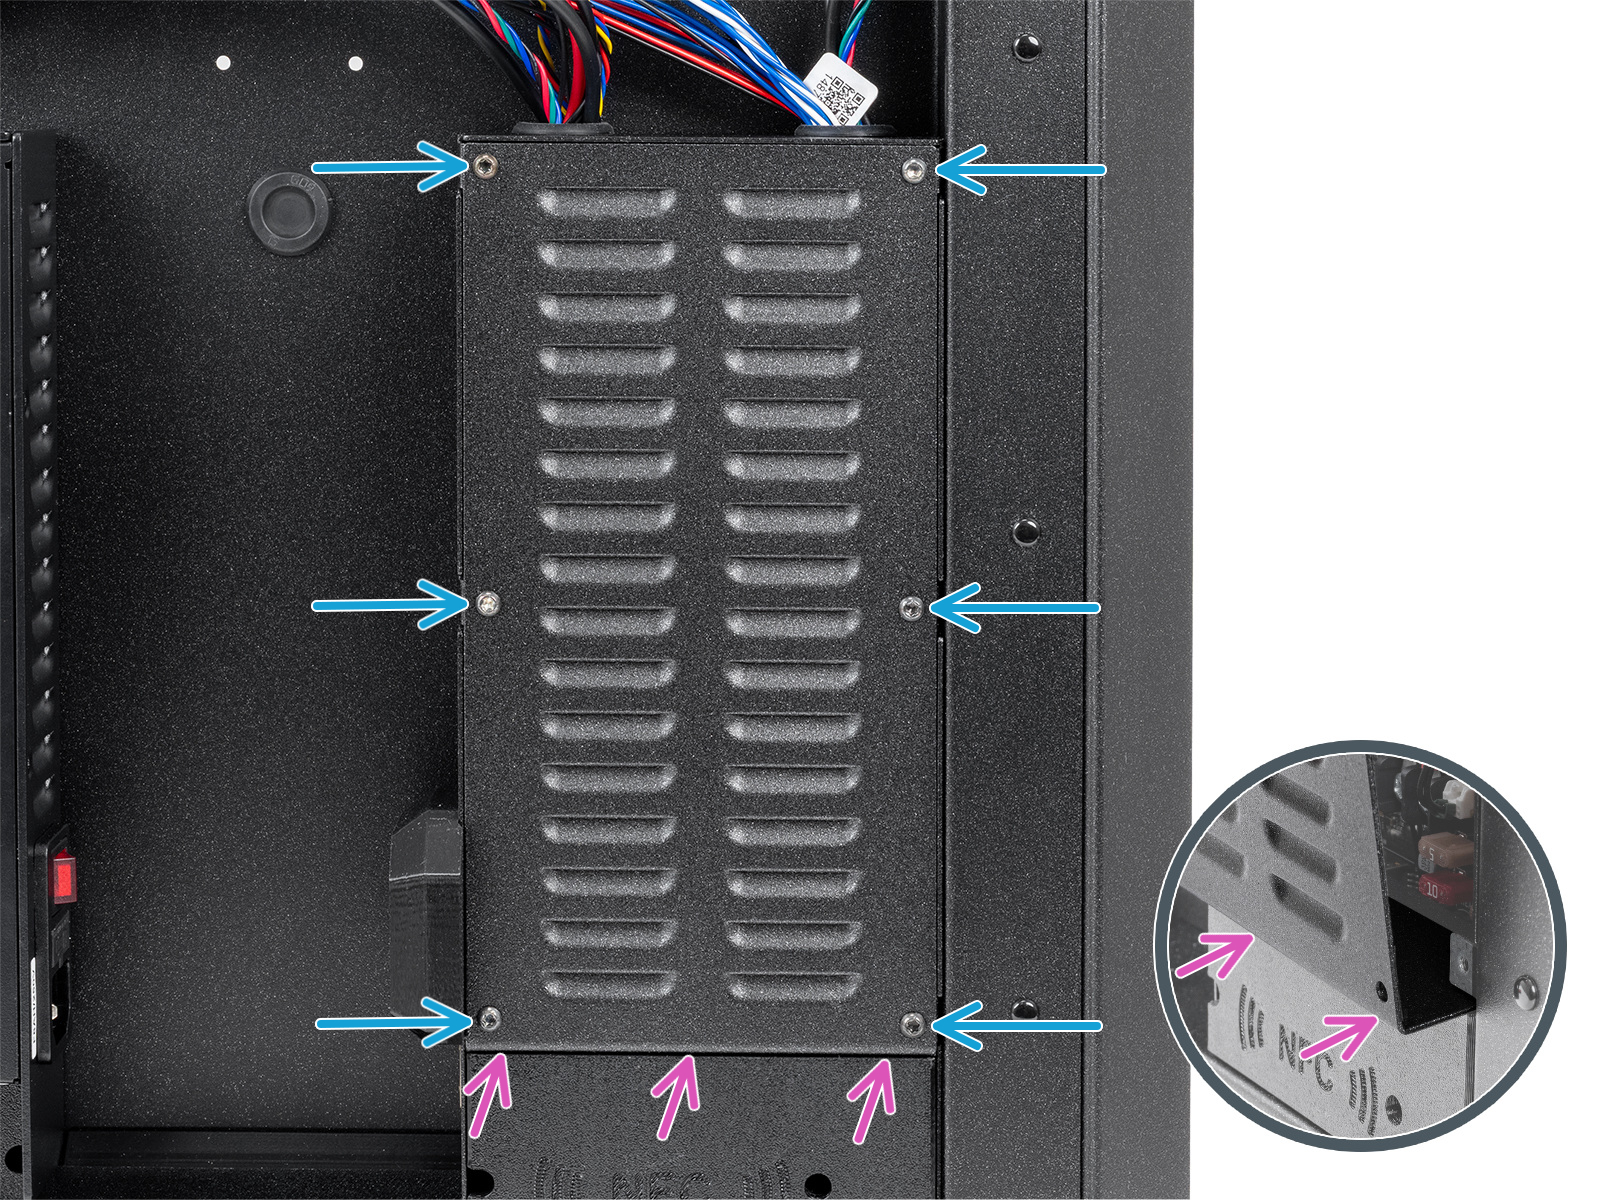
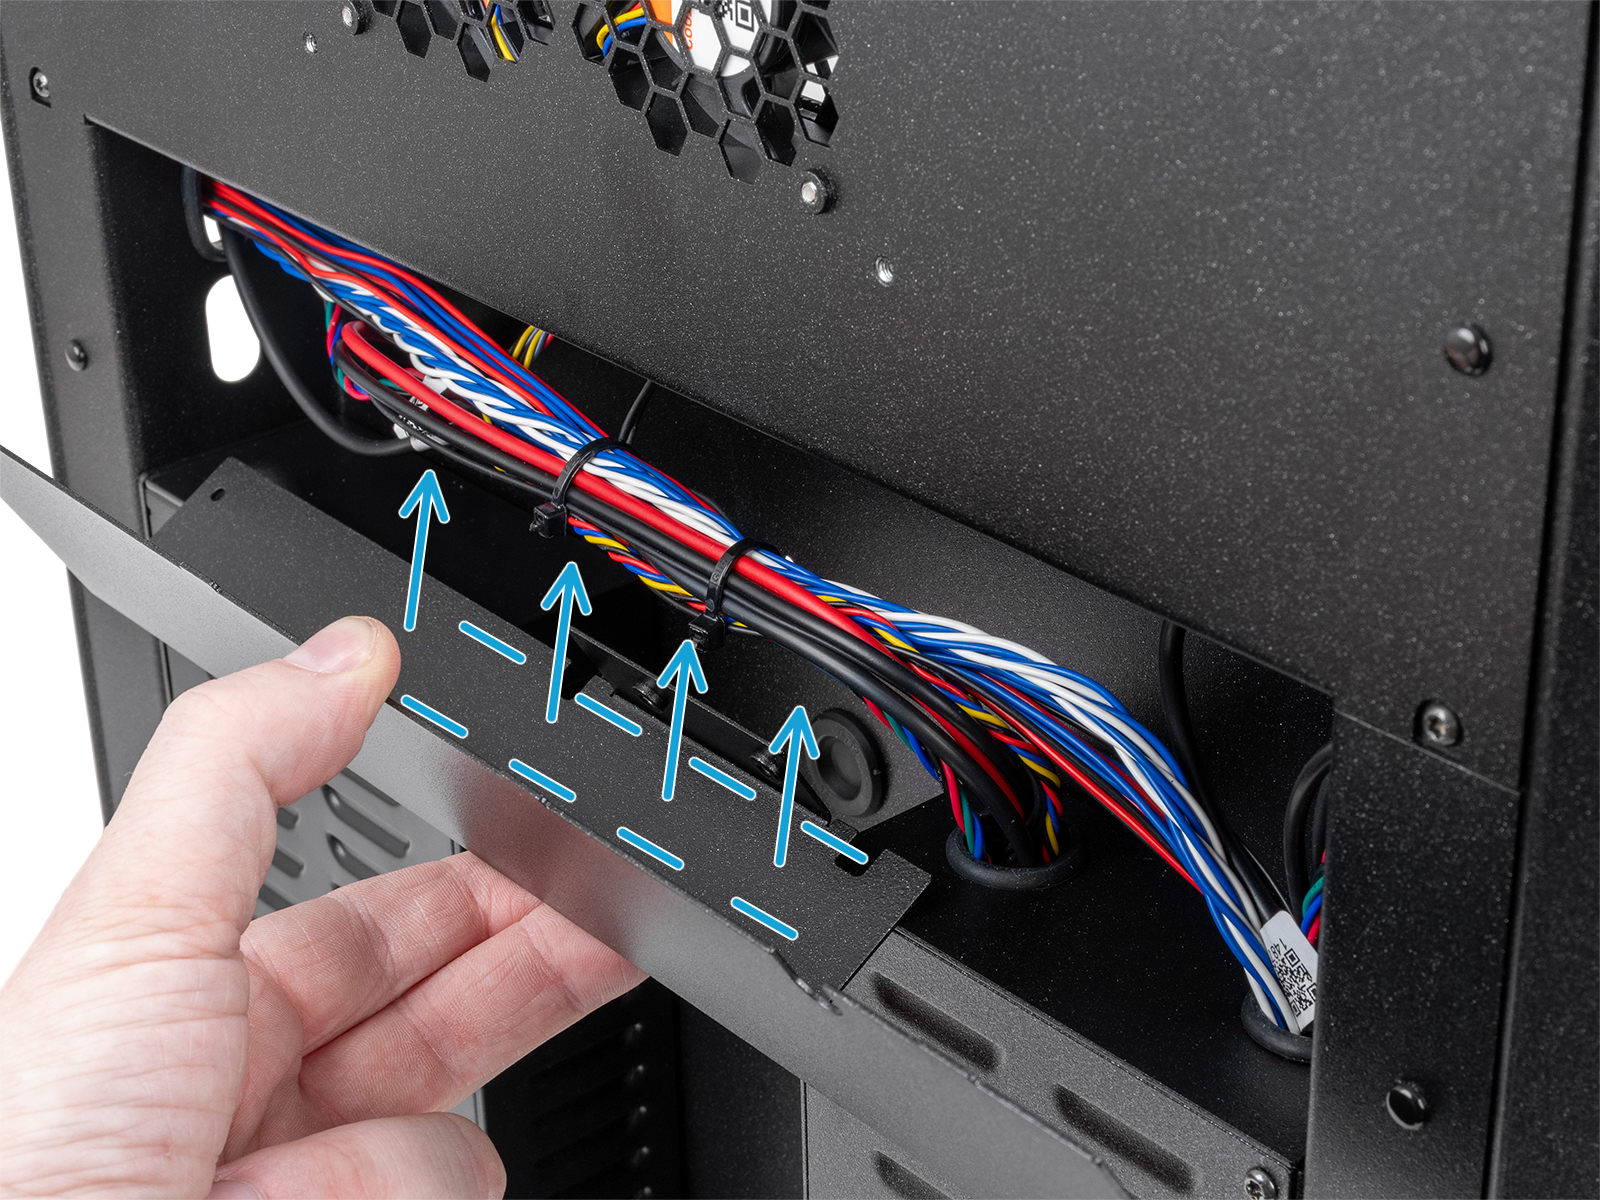
To gain access to the rest of the fan cables, remove the rear sheet metal cover by removing two M3x4rT from inside the printer, and sliding the cover out.
 |  |
You can gain access to each fan by removing the fan-grid. For this, loosen four M3x30 screws to release the fan grid. 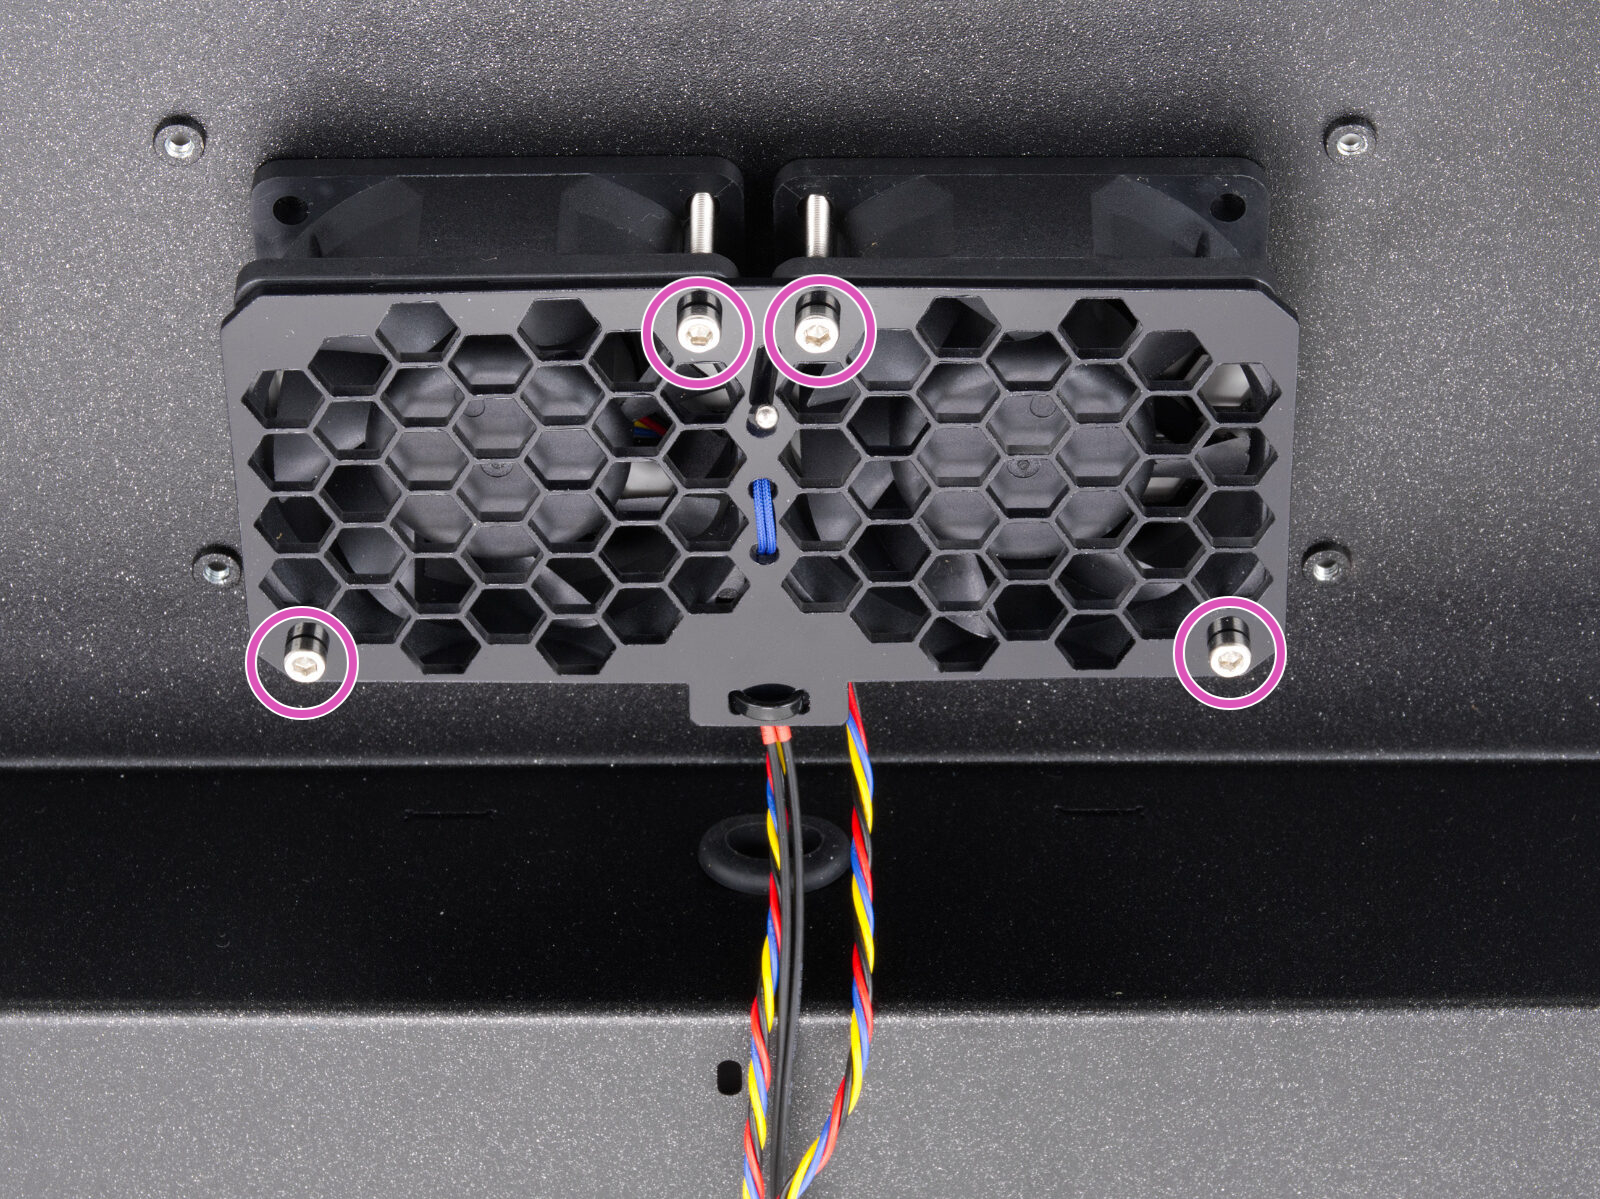
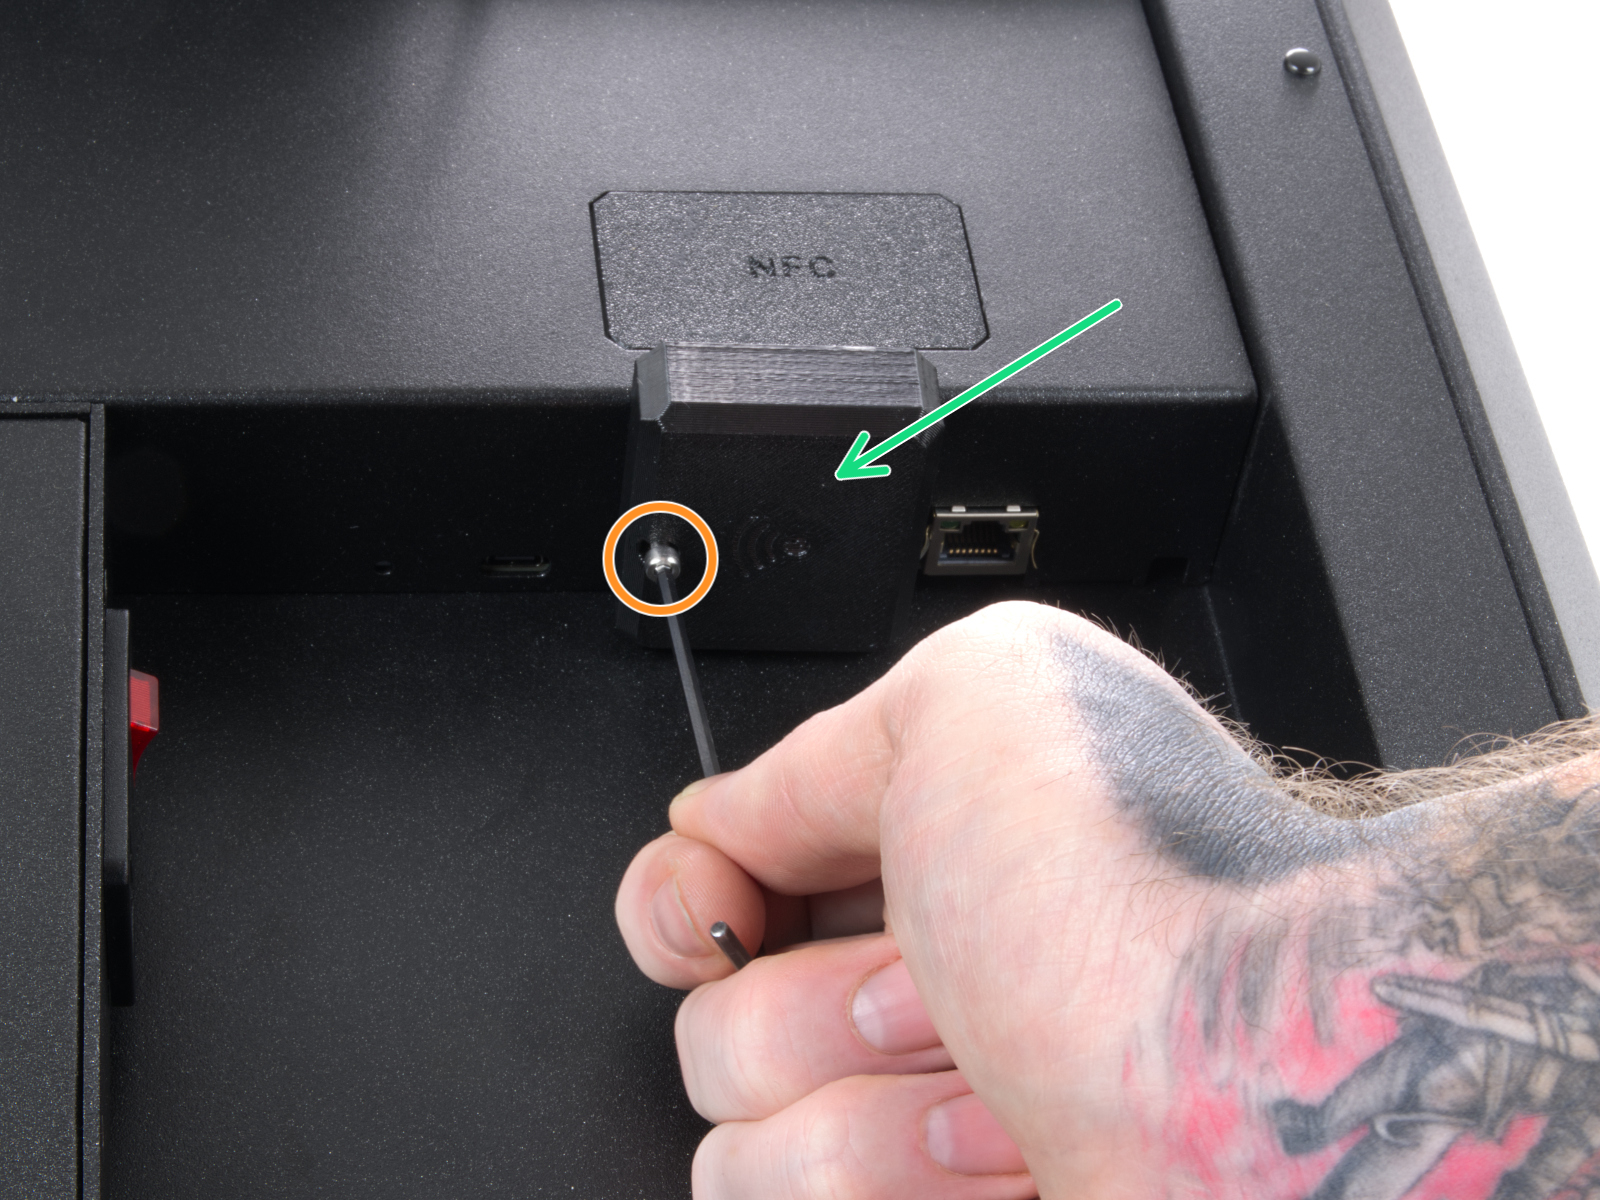
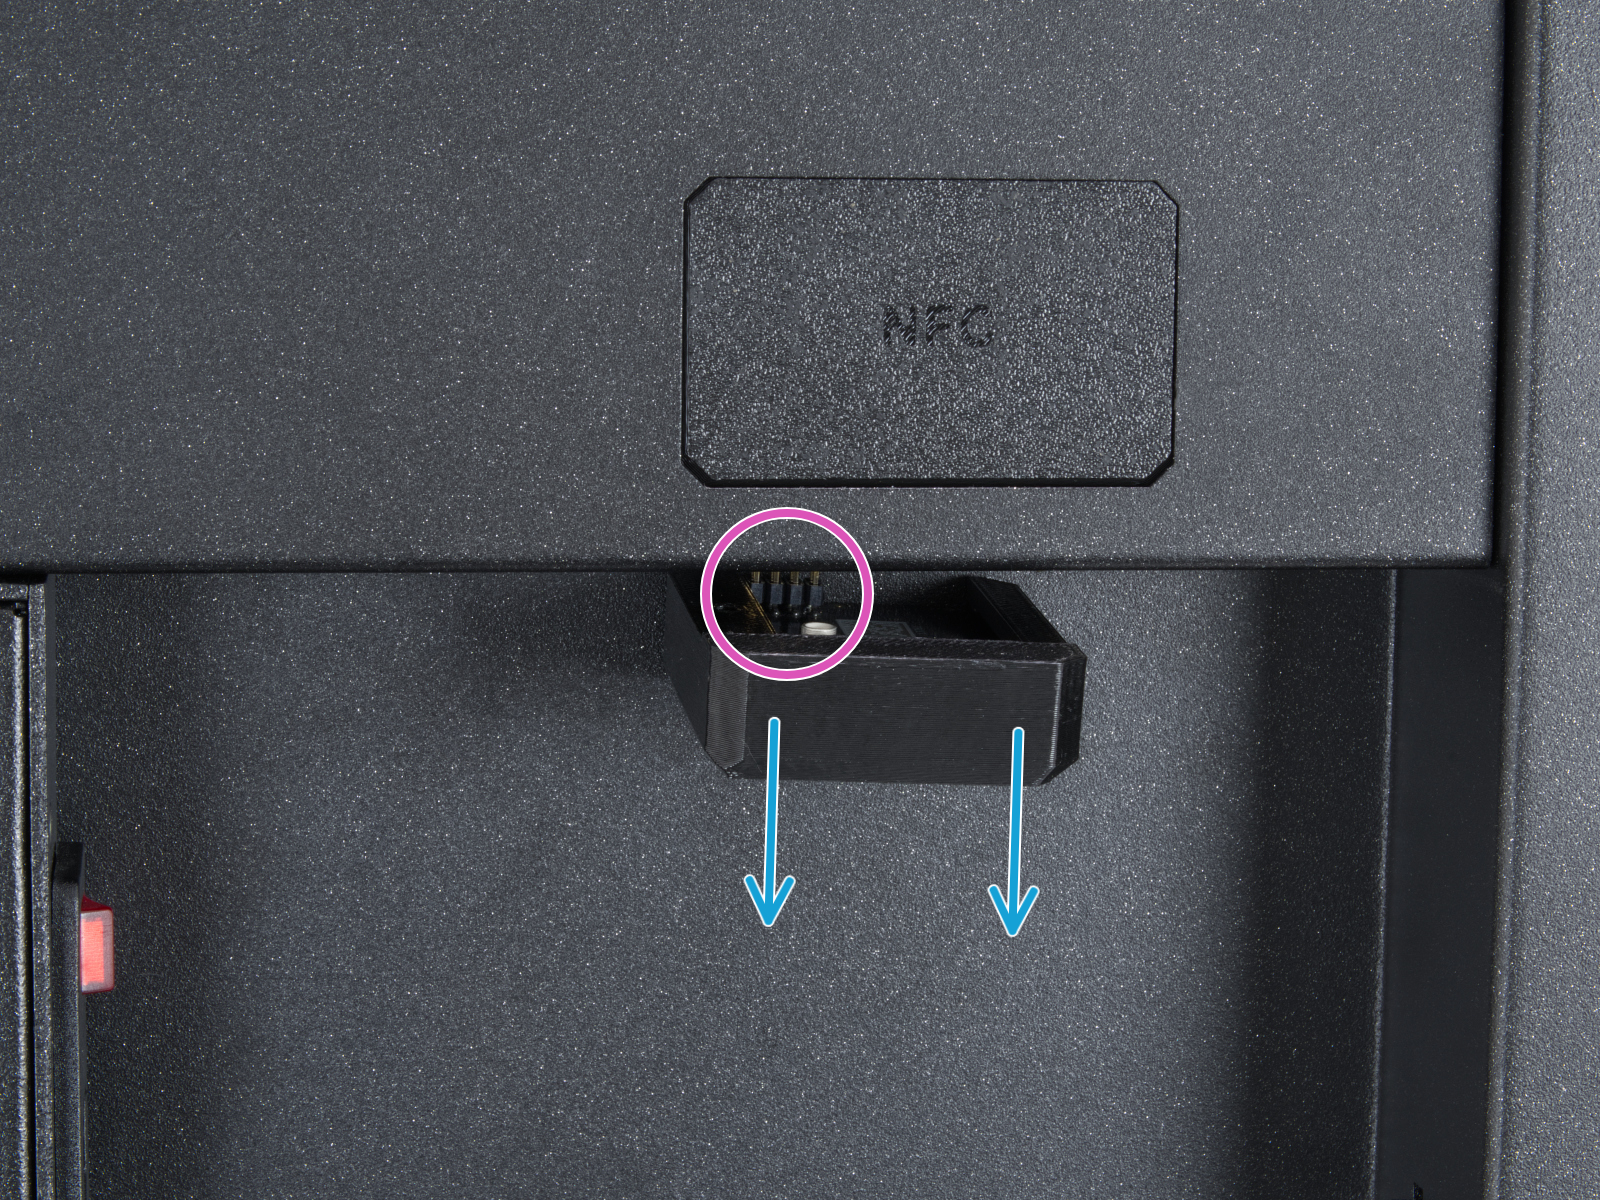
How to access the parts - CORE One L
Locate the Wi-Fi module on the rear panel of the printer. Using a 2.5 mm Allen key, remove the M3x14 screw. Gently pull the Wi-Fi module straight downward to remove it from the printer.
 |  |
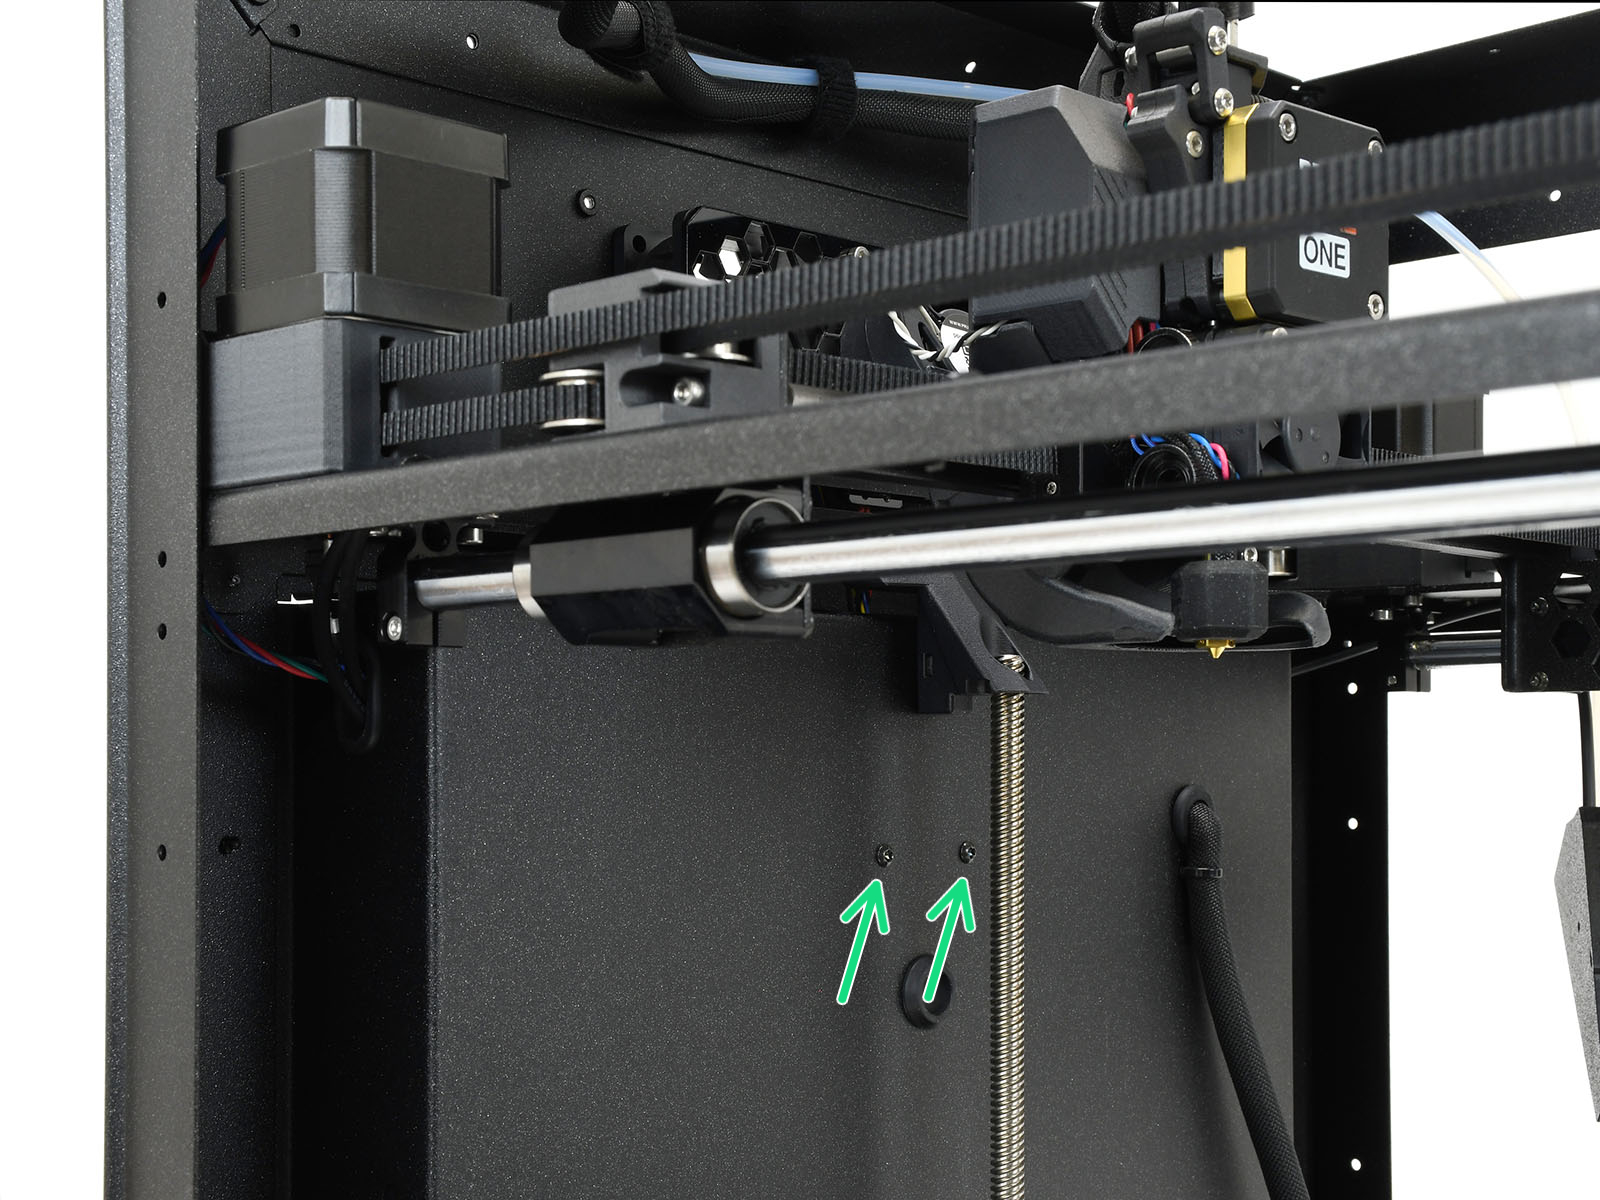
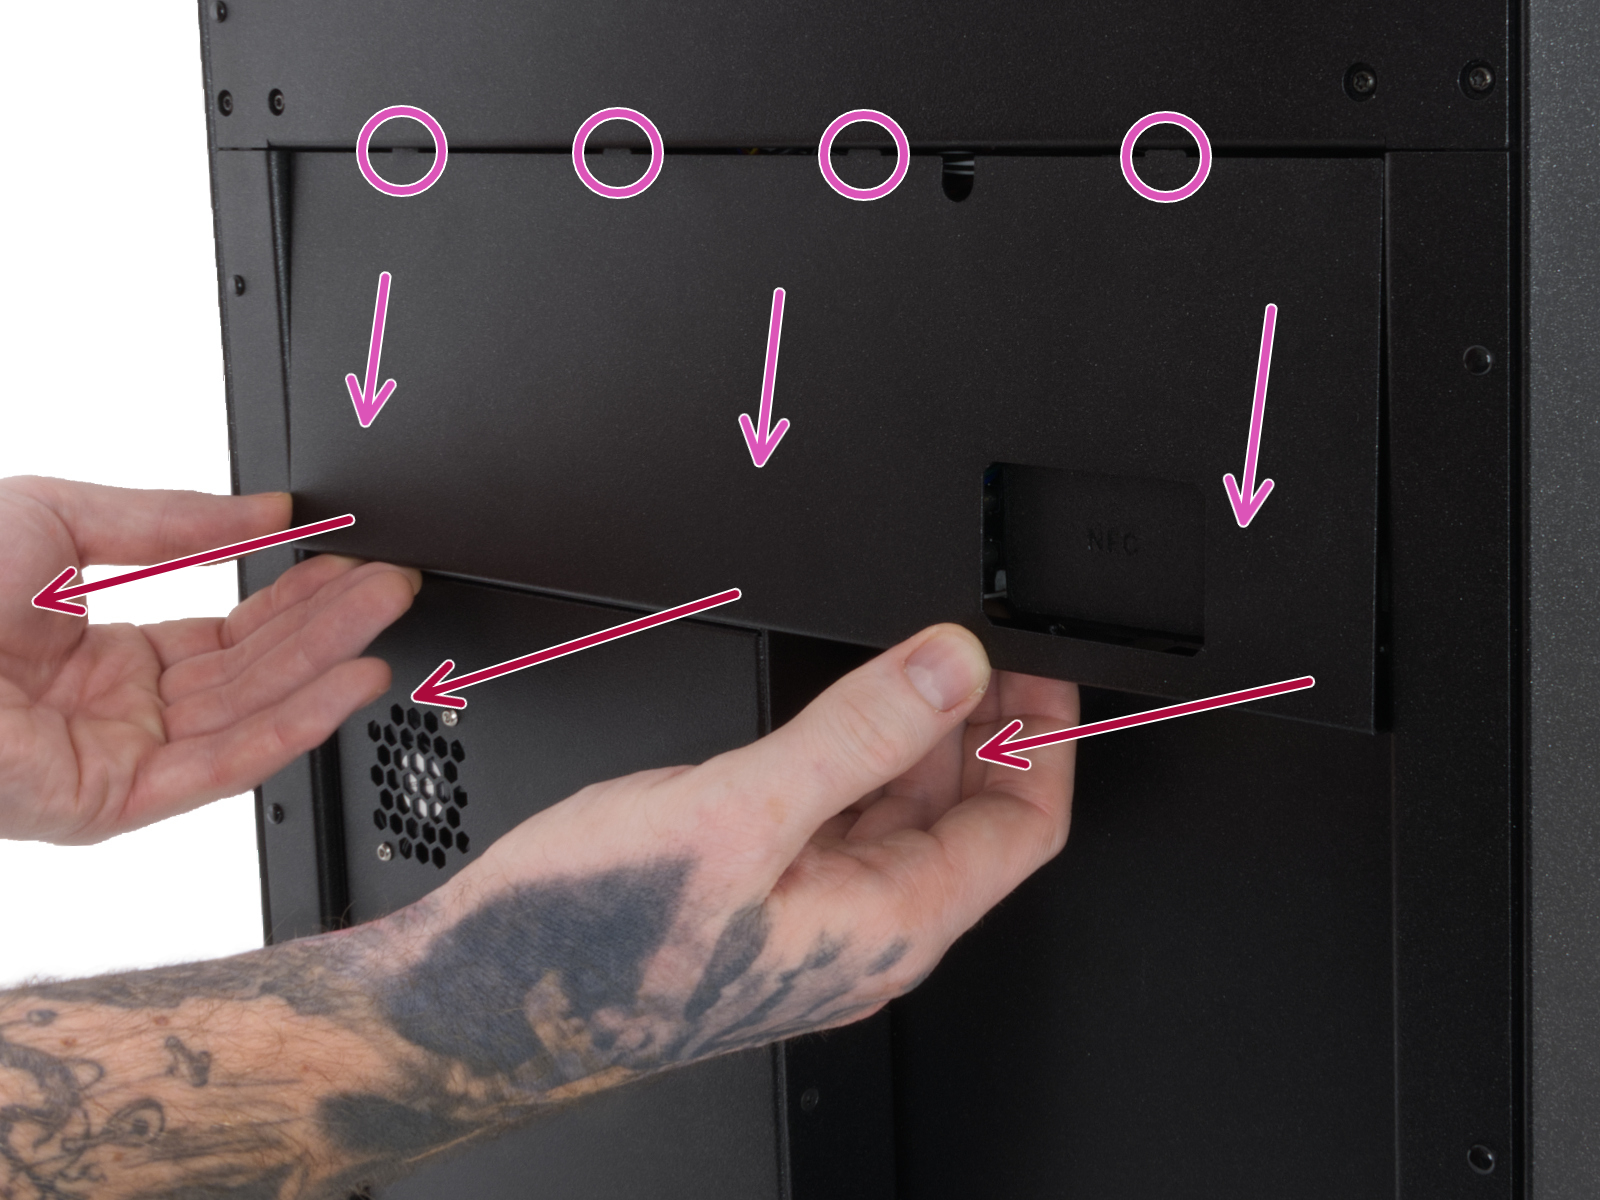
From the inside of the printer, locate on the rear side the highlighted M3x4bT bolts.

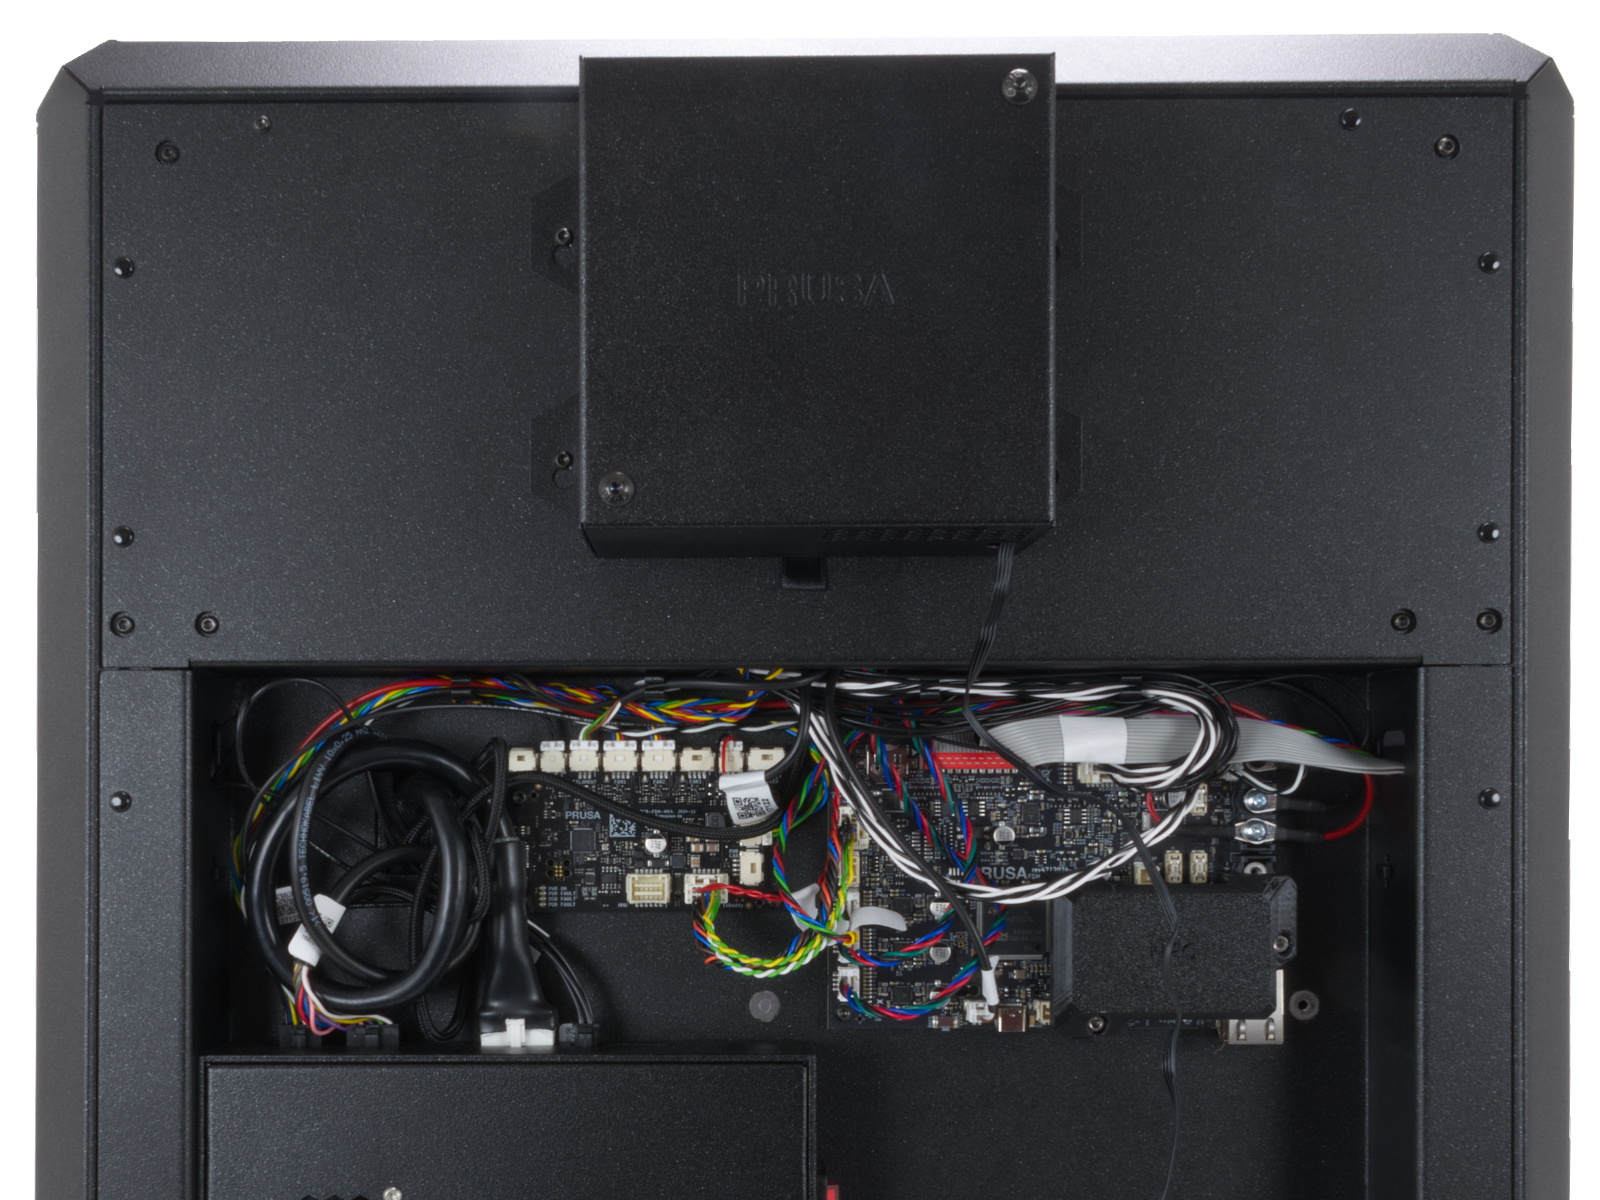
Using a T10 Torx key, remove two M3x4rT bolts to release the rear xBuddy box cover. Lift the cover to expose the xBuddy and xBuddy extension boards. Fan chamber fans are connected to the FAN1 and FAN2 slots.
 |  |
 |  |
You can gain access to each fan by removing the fan-grid, from the rear of the printer, on the inside. For this, remove four nylon rivets to release the fan grid.
Final steps (CORE One, CORE One L)
Once the checks are complete, you can attempt to test the fan from the printer menu by navigating to LCD Menu -> Control -> Calibrations & Tests -> Fan Test.
If the fan still does not operate, it may need to be replaced. Do not hesitate to contact our technical support for further assistance.