- Idler motor - rotates the idler.
- Idler - contains five pulleys. By rotating the idler, a single pulley gets in direct contact with the filament and applies pressure on it. Then, the pulley motor can push the filament forward into the selector.
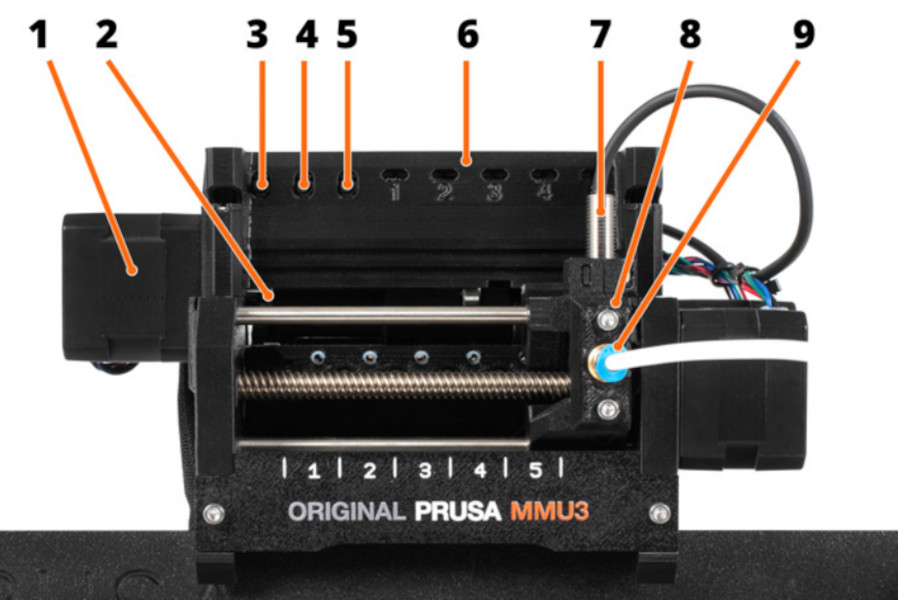
- Left hardware button - moves the selector left.
- Middle hardware button - preloads filament into the selected position.
- Right hardware button - moves the selector right.
- LED indicators - indicate the current status of the MMU (selected position, errors, etc.)
- SuperFINDA (or FINDA for short) - MMU3 filament sensor built into the selector.
- Selector - selects a filament slot by moving to the requested position. Filament is then pushed through the Selector into the nozzle by the Pulley Motor.
- Fitting - There are two fittings on the front PTFE tube. The other one is mounted to the top of the extruder. The color of the fittings may vary.
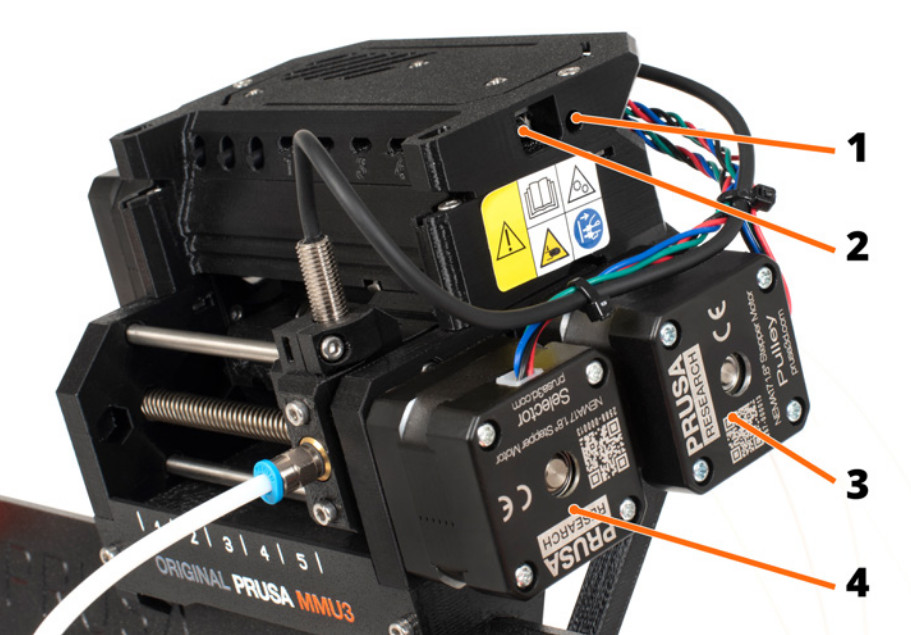
- Reset button - triggers reset of the MMU3 unit only.
- MicroUSB port - for flashing MMU3 firmware via PC.
- Pulley motor - rotates the pulleys that move the filament inside the MMU3 unit.
- Selector motor - moves the Selector left and right.
Was this article helpful?
This action is available only to registered users. Please log-in.
Log in to post a comment
No comments