Relevant for


When you import multiple models or create many instances of the same model, arranging them on the print bed could be very time-consuming. PrusaSlicer features an auto-arrange tool that distributes the objects over the entire Print bed with a reasonable gap between them. Auto-arrange can be initiated either by hitting the A key or by picking the Auto-arrange from the top toolbar.
The Auto-arrange tool can be used to arrange only a subset of the objects on the bed while keeping the position of unselected objects unchanged. This can be achieved by selecting the set of objects and hitting the Arrange button while holding down the Shift key, or pressing the Shift + A hotkey.
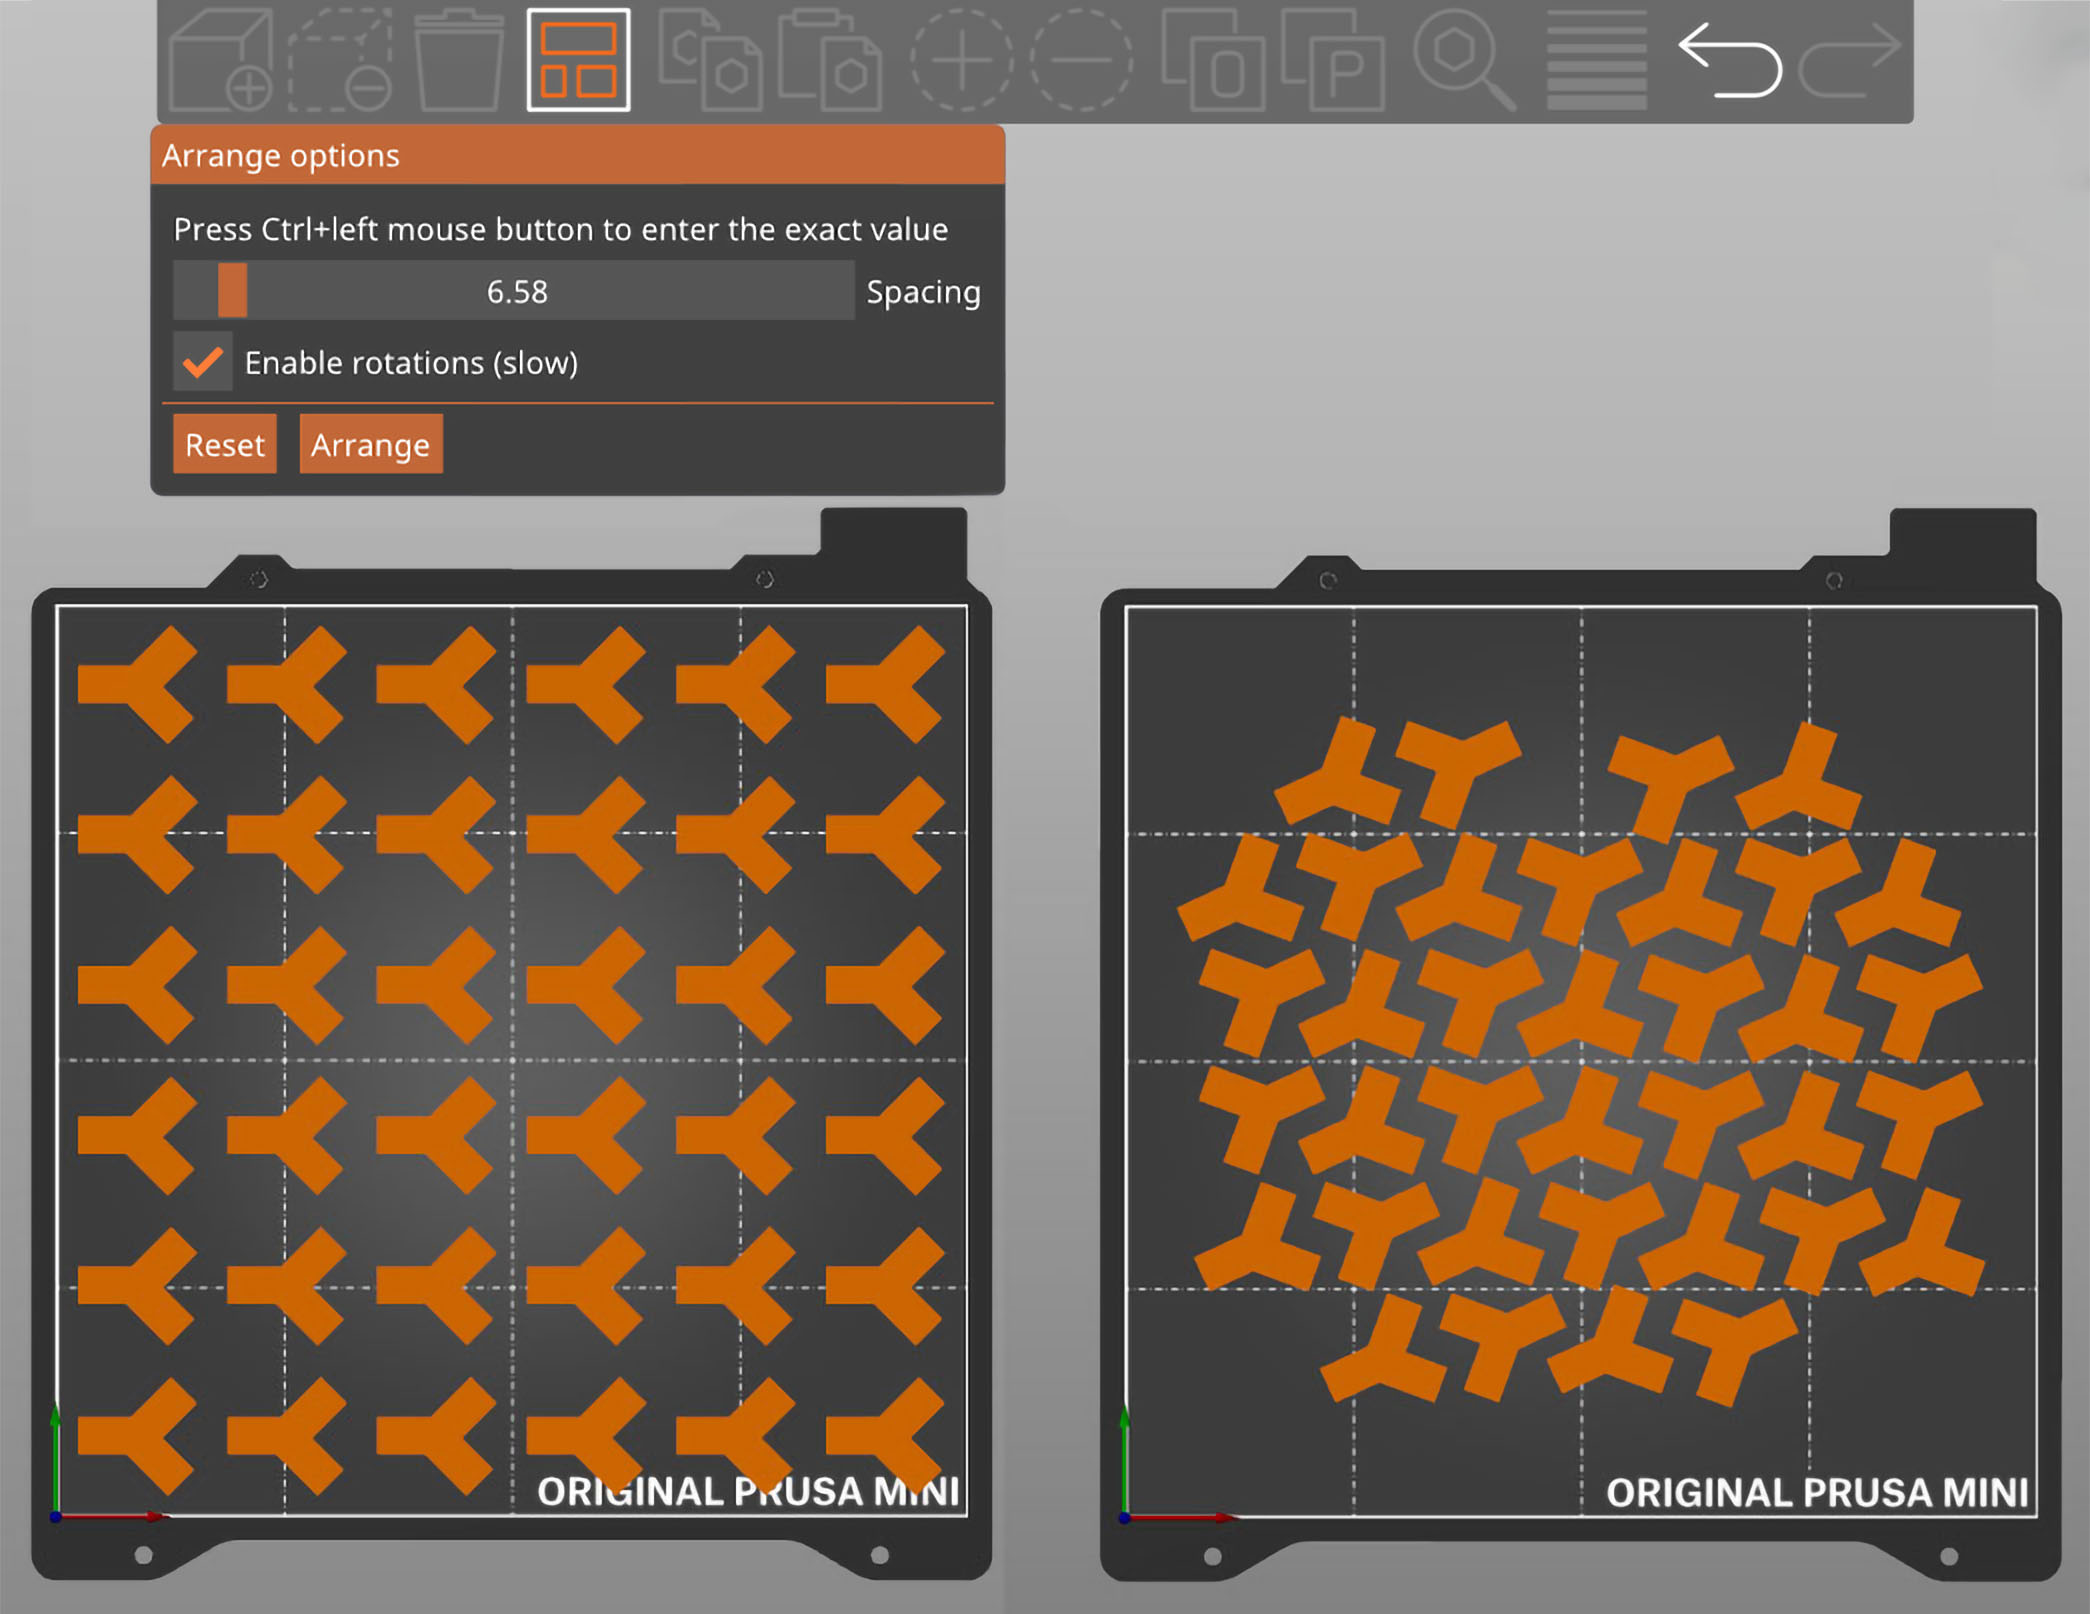
Starting with PrusaSlicer 2.3, right-clicking the Auto-arrange icon in the top toolbar opens a dialog to tune the distance between objects and to allow rotation of objects around their Z-axis during the arrangement. As a result, you’ll be able to fit more parts on the build plate.
You can either use the slider to set the spacing or enter an exact value by Ctrl+Left mouse button clicking into the text field.
The current spacing and rotation settings also affect the Fill bed with instances function.
8 comments
So I had to figure it out my self, and I found a solution :-D
I also use organic supports. and if I just copy an model on the plate to print more at a time, PrusaSlicer keeps warning about crossing path's after generating the supports.
The solution is a bit counter intuitive at first, but then it makes some sense :-)
When You copy an object they become "instances" of that object, which you can observe in the dialogue on the right side of the window.
Select all those instances and right-click, then select "mark as separate objects" (the un-intuitive part).
Then select them all again, adn right-click, now the menu is way longer, and here you can select "merge", this changes them into one "artificial" object.
Now when you slice, the supports are shared.
Note: make sure you finish the arrangement before merge, as after merge the auto arrange only sees one object.
Note2: This appears to happen automatically in EasyPrint, and may explain why sequential build does not work in EasyPrint, if organic support is enabled...
Is there a way to change this to the back left? I prefer to print back there so that the side panels help block drafts and that is closer to where I have my camera mounted.
Alos how can I lay the plater back completely flat? The mouse just moves it in huge steps. Please do consider providing a "Set plater to flat" button..