In 3D printing (and modeling, animation and more), objects are represented by their outer shell. This shell is represented as a triangle mesh. It’s possible to have several meshes inside a single file.
Sometimes this is done on purpose, for example, when you export the entire platter as a single STL or when you export a multi-material model. You may want to separate the shells in order to transform individual objects independently of each other or set different print settings for different models. PrusaSlicer can automatically identify multiple shells inside a single file and split them into separate models.
Select the model you wish to split and click either on Split to objects or Split to parts in the top toolbar.


Split to objects
- Creates an individual object for each shell
- Places each newly created object on the print bed
Split to parts
- Keeps a single model object in the scene, but creates multiple parts
- Parts stay in their original location, even if they’re floating in mid-air above the print bed
- Usually used to split MMU models without misaligning individual parts
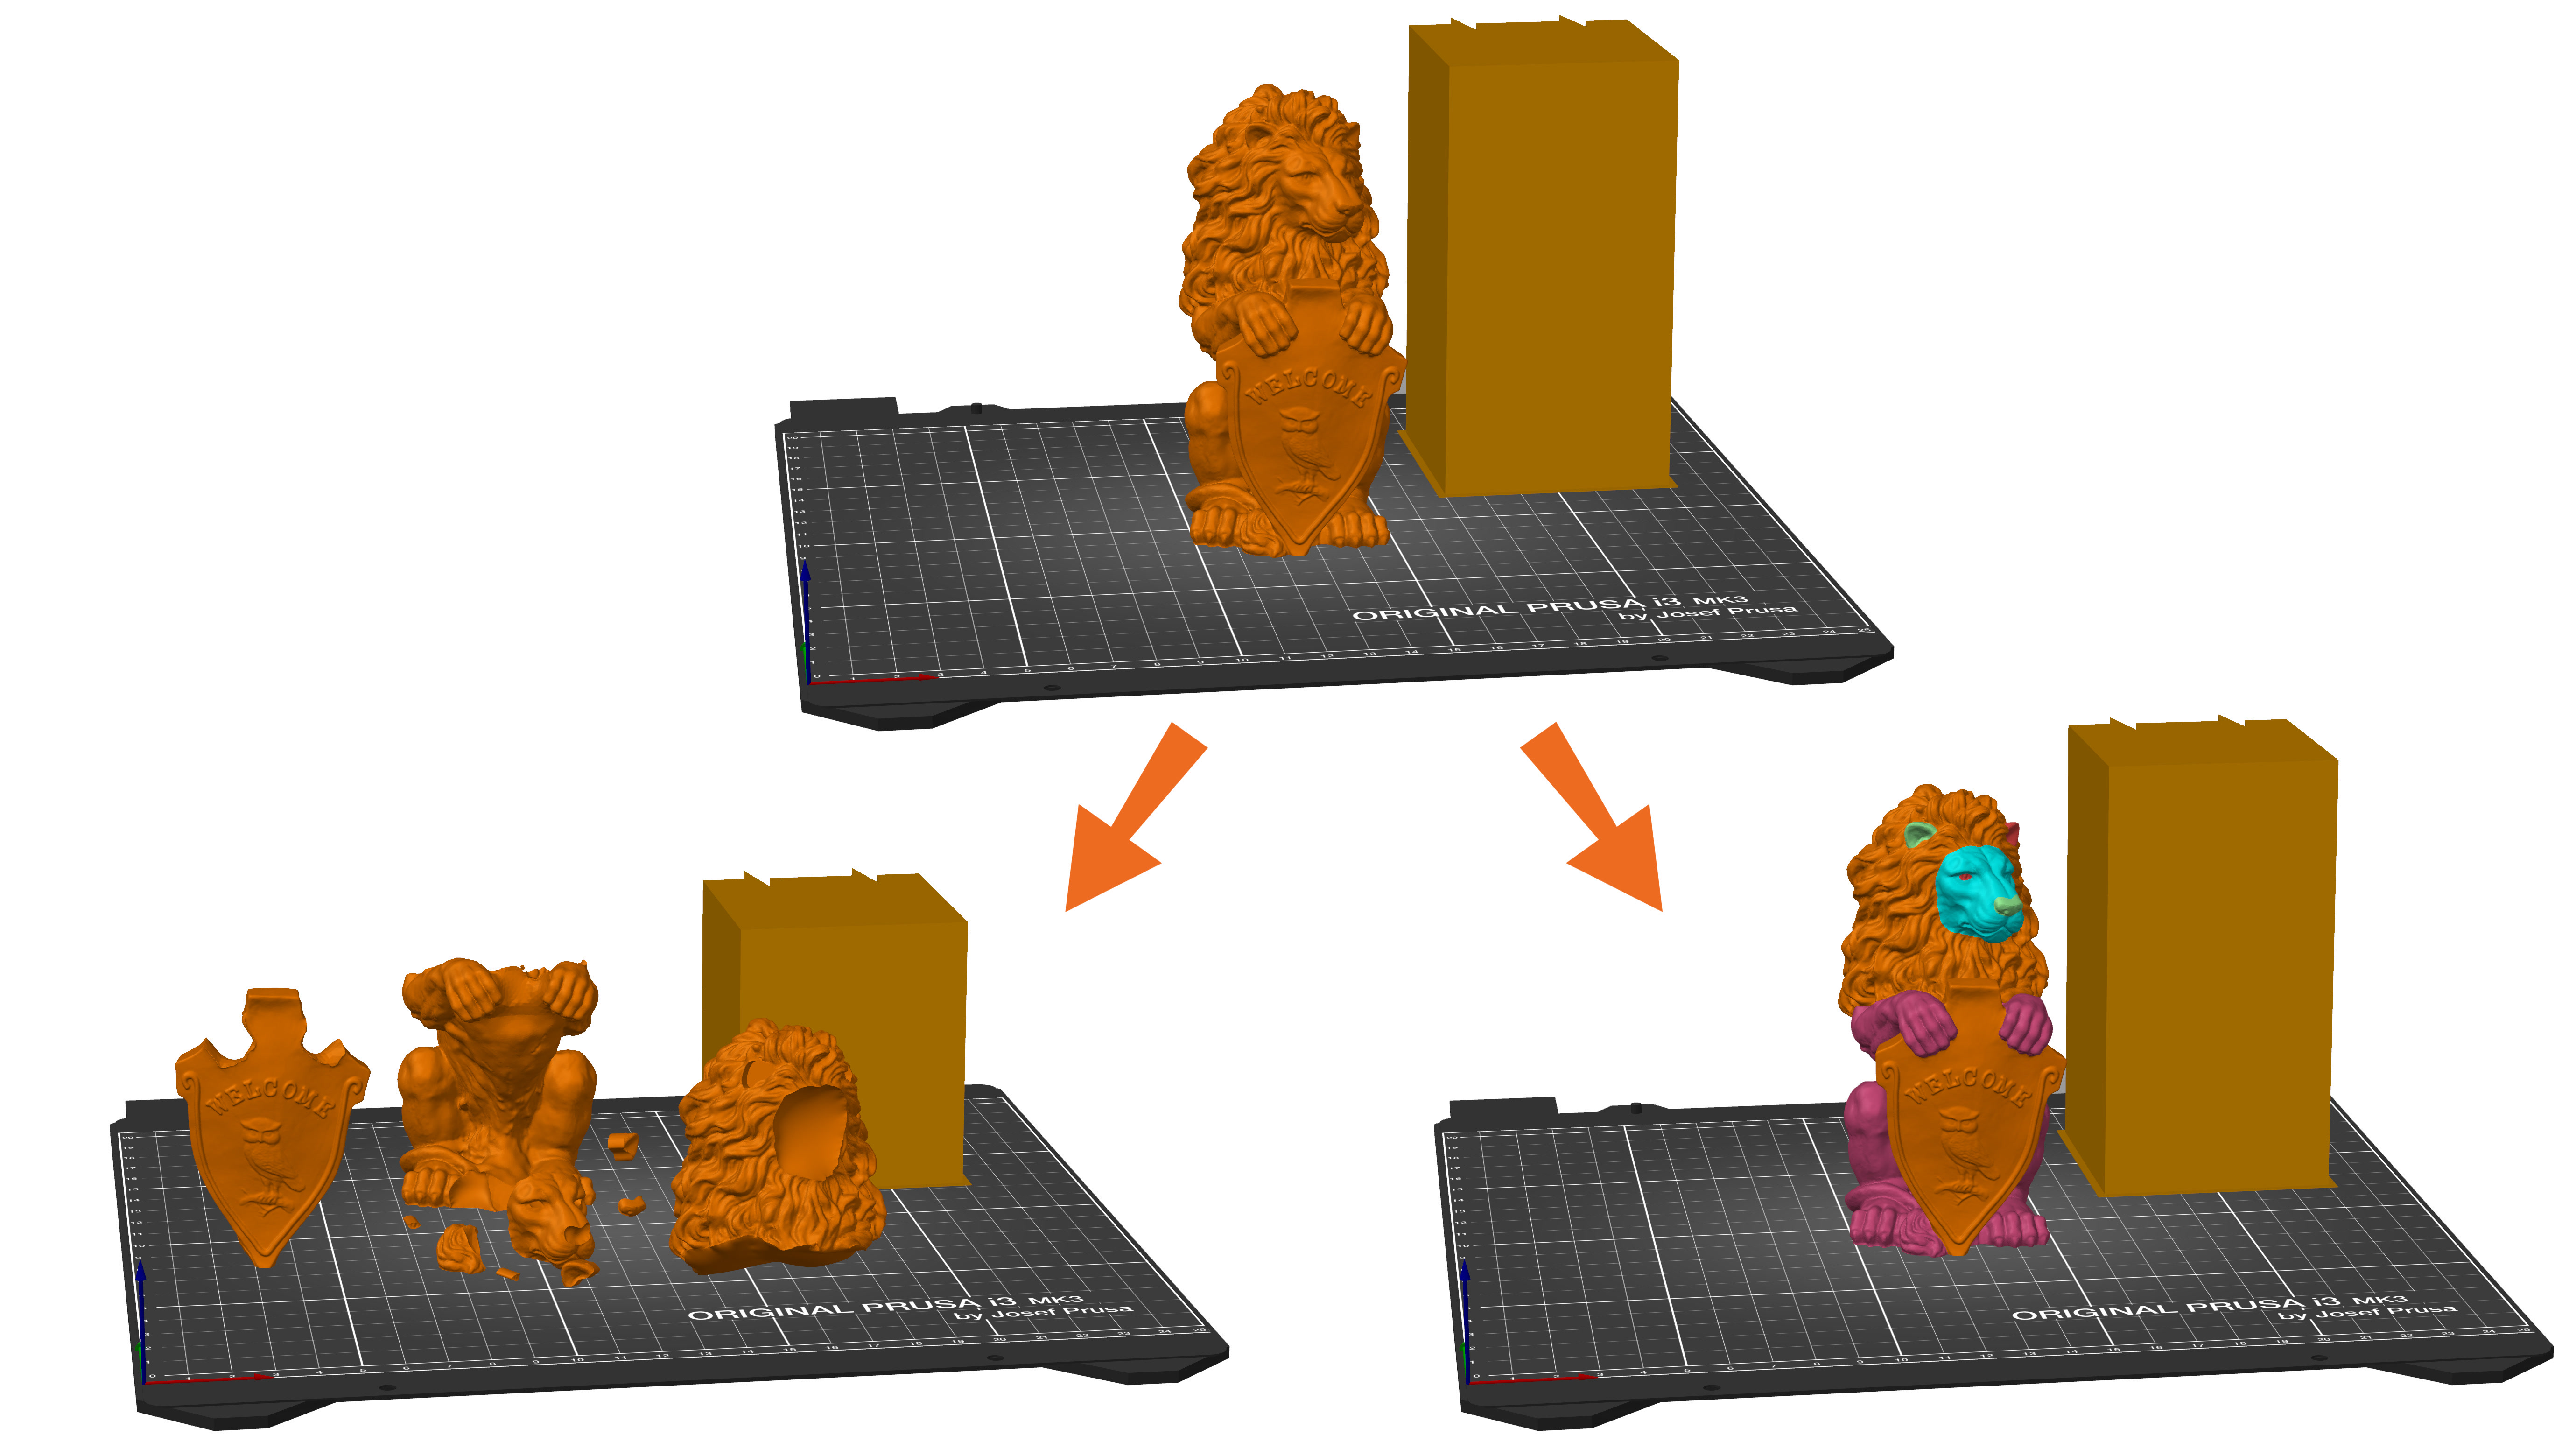 Split to objects (left) and Split to parts (right)
4 comments
Is there some command or function to tell the slicer that if it starts with two parts and you split them you only end up with two objects?
If i preform the exact same function in orca slicer it does exactly what i ask it and becomes just two parts (not over a thousand...) i would rather use prusa slicer but it seems incapable of preforming a simple task unless im missing some option?
Maybe a tick box that says only split into predefined parts? (or worded similarly)
When I want to "split" stuff simply, what I usually do is add my file however many times there are objects to split, so in your case I'd add my file twice to the software, and spread them out just a little. Then in the list of objects that are shown, right click on one of the two entries and select "Add Negative Volume" and choose the most sensible shape to cover one of the objects in your file with. I often select Box. Then scale, pan, drag, etc. this new "negative volume" box until one of your two objects in the one file is completely within its boundaries. Then on the other file listed in your objects list repeat this same process except you'll cover the "other object" that you want to split. Then you can simply toggle the visibility of which ever one you're not trying to print and voila! And by toggling visibility on either, or both, you can put one or the other to the printer.
I'm not sure if this would suit your situation but I use this all the time when I want to run a test print of just a part or piece of a file/model. I had no idea there was even an "Add Negative Volume" function, and it blew my mind when I learned it was there. I hope it would allow you to quickly and easily separate what you see as objects that are linked in a file. Best of luck with your efforts!
In some figures you can see the holes where the loose parts should go but on smooth surfaces it is not easy to glue parts at the right spot.
I have a follow-up question though. This function creates an object with the name "Merged" that has unnamed parts in it. Is there a way to make it keep the names that the parts originally had? If not, perhaps it should be added in a future update. I like to have all my parts named in the 3mf files I publish, and it's pretty annoying to redo that manually every time, even though the files come from cad already named.
Did they remove it?