When purchasing the Original Prusa MINI+, kit or semi-assembled, there is an option to add a filament sensor to the printer. It can also be purchased separately later.
This sensor assembly uses an IR sensor which is triggered by a mechanical lever. The electronics are the same as in the filament sensor assembly of the Original Prusa MK2.5S, MK3S, and MK3S+.
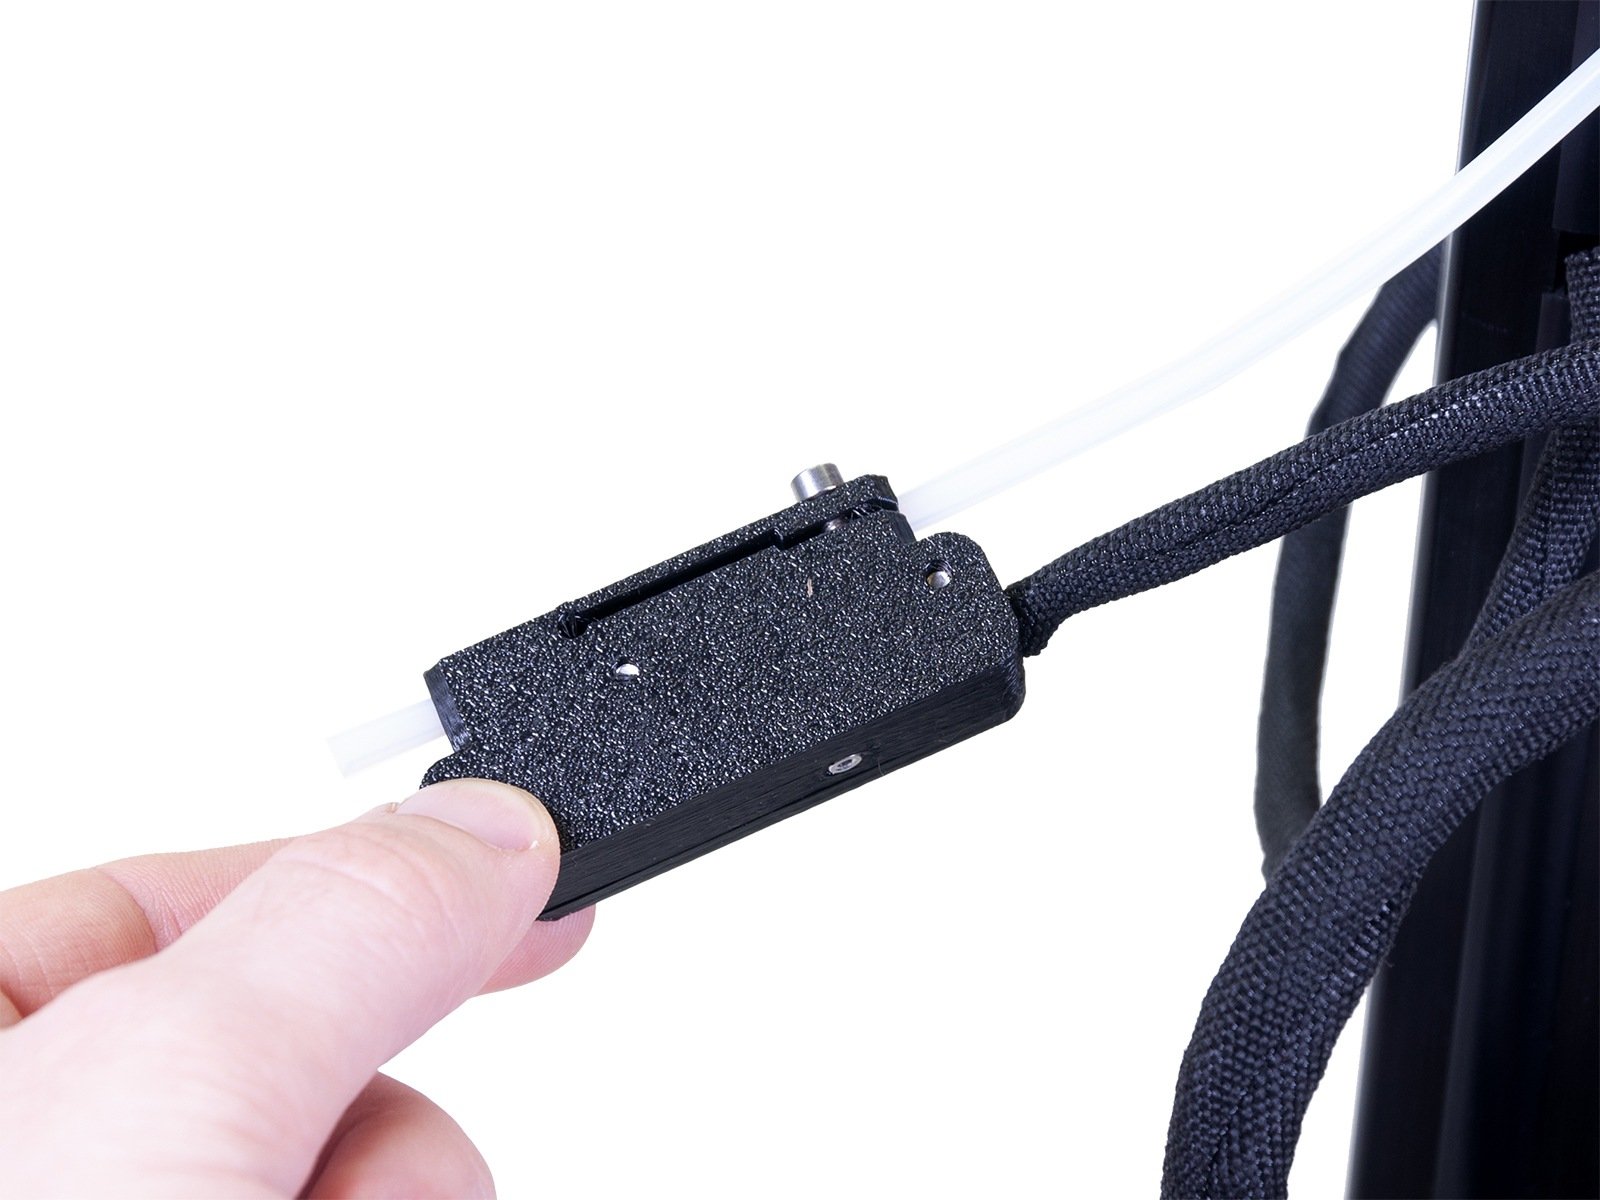
The sensor assembly is attached to the PTFE tube that leads into the extruder. If the filament runs out, the printer will pause your print, unload the remaining filament, and wait for a new filament to be loaded.
How to test the sensor
When the IR filament sensor is installed, you can see its status in the printer's menu under Info -> Sensor info:
- 1 - Filament loaded
- 0 - Filament unloaded
- N/A - Sensor is not activated or installed incorrectly.
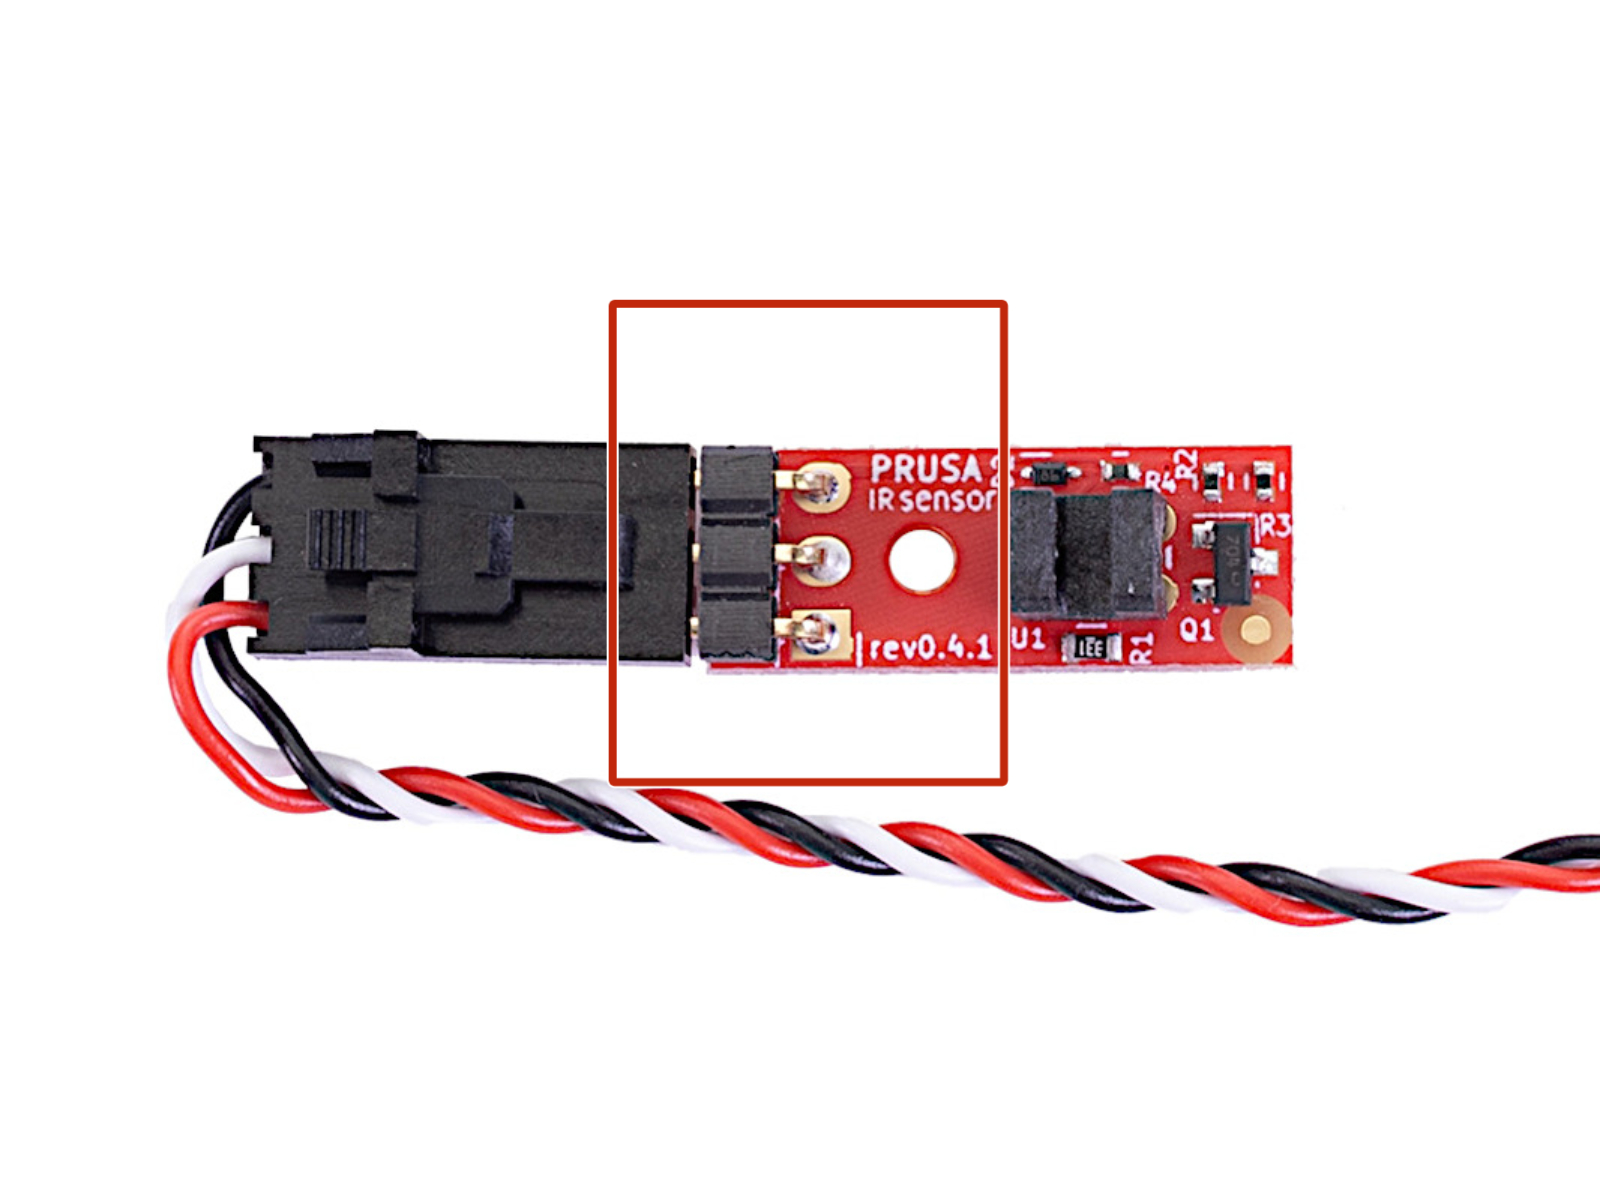
If the sensor has been installed, activated and the status remains N/A, check the IR filament sensor cable connections on the sensor and on the Buddy board:
- The cable connector that goes into the board has a safety latch on one side. Make sure that this is locked in place when connected to the board. Check if the black wire is towards the Z-tower (front of the printer) and the red wire is towards the PSU connector (back of the printer).
- On the sensor side of the cable, make sure the latch faces the same direction as the components on the chip.
- Confirm the sequence of colors and their direction according to the pictures below.
- Make sure the firmware is the latest version.
 |  |
Filament sensor detected, but not working
In case the printer does not detect a filament runout, there might be two issues:
- The lever is stuck
- Malfunctioning sensor
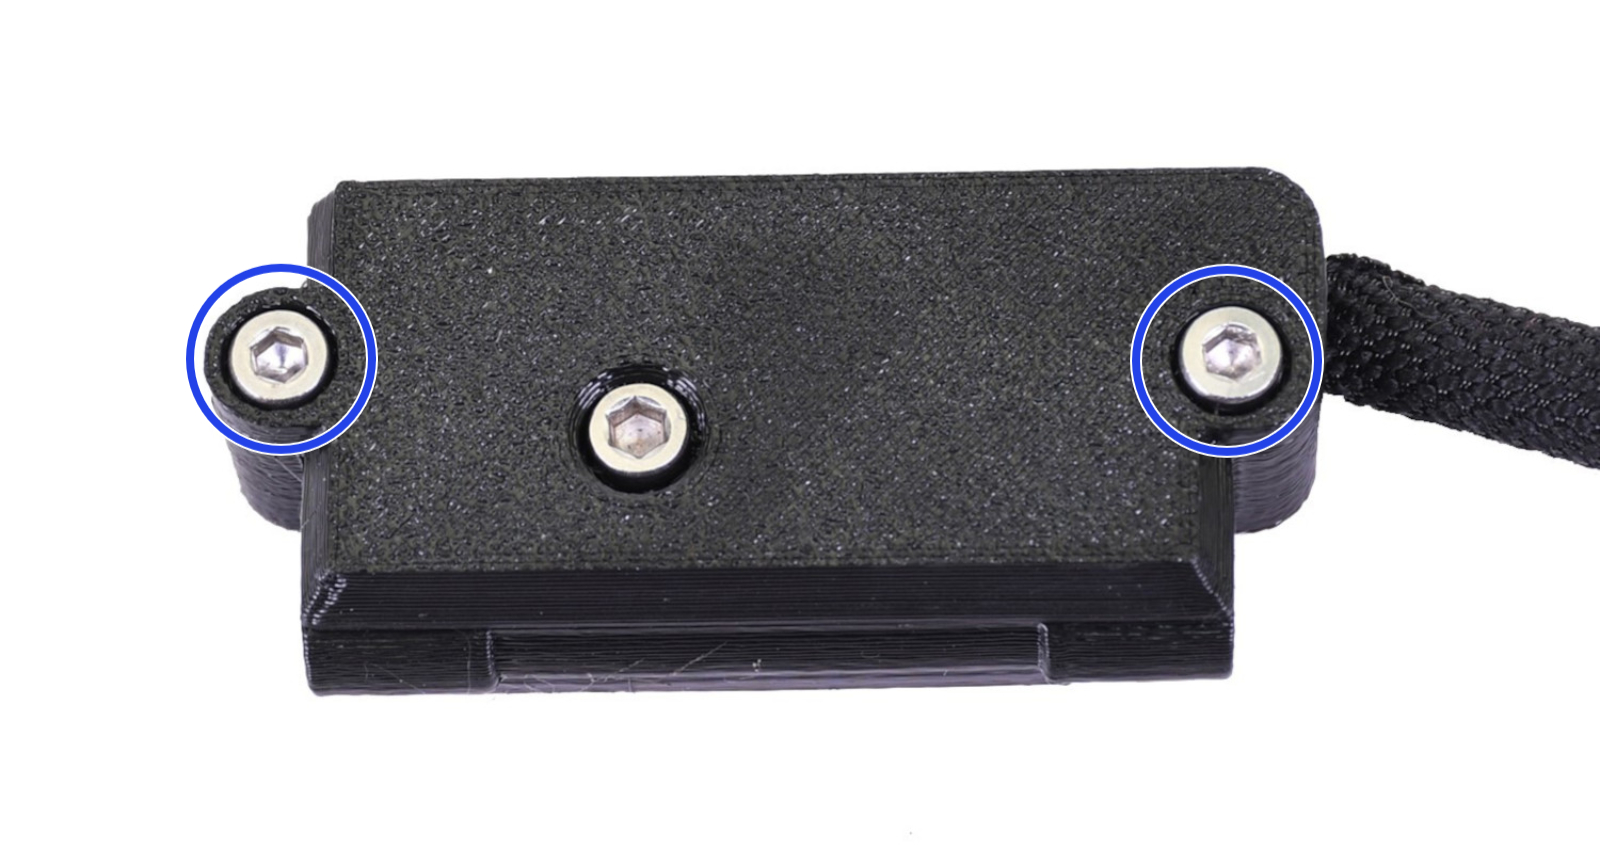
To access the sensor for testing, unscrew the two M3x12 screws on each end of the sensor cover (blue circles).
Lever is stuck
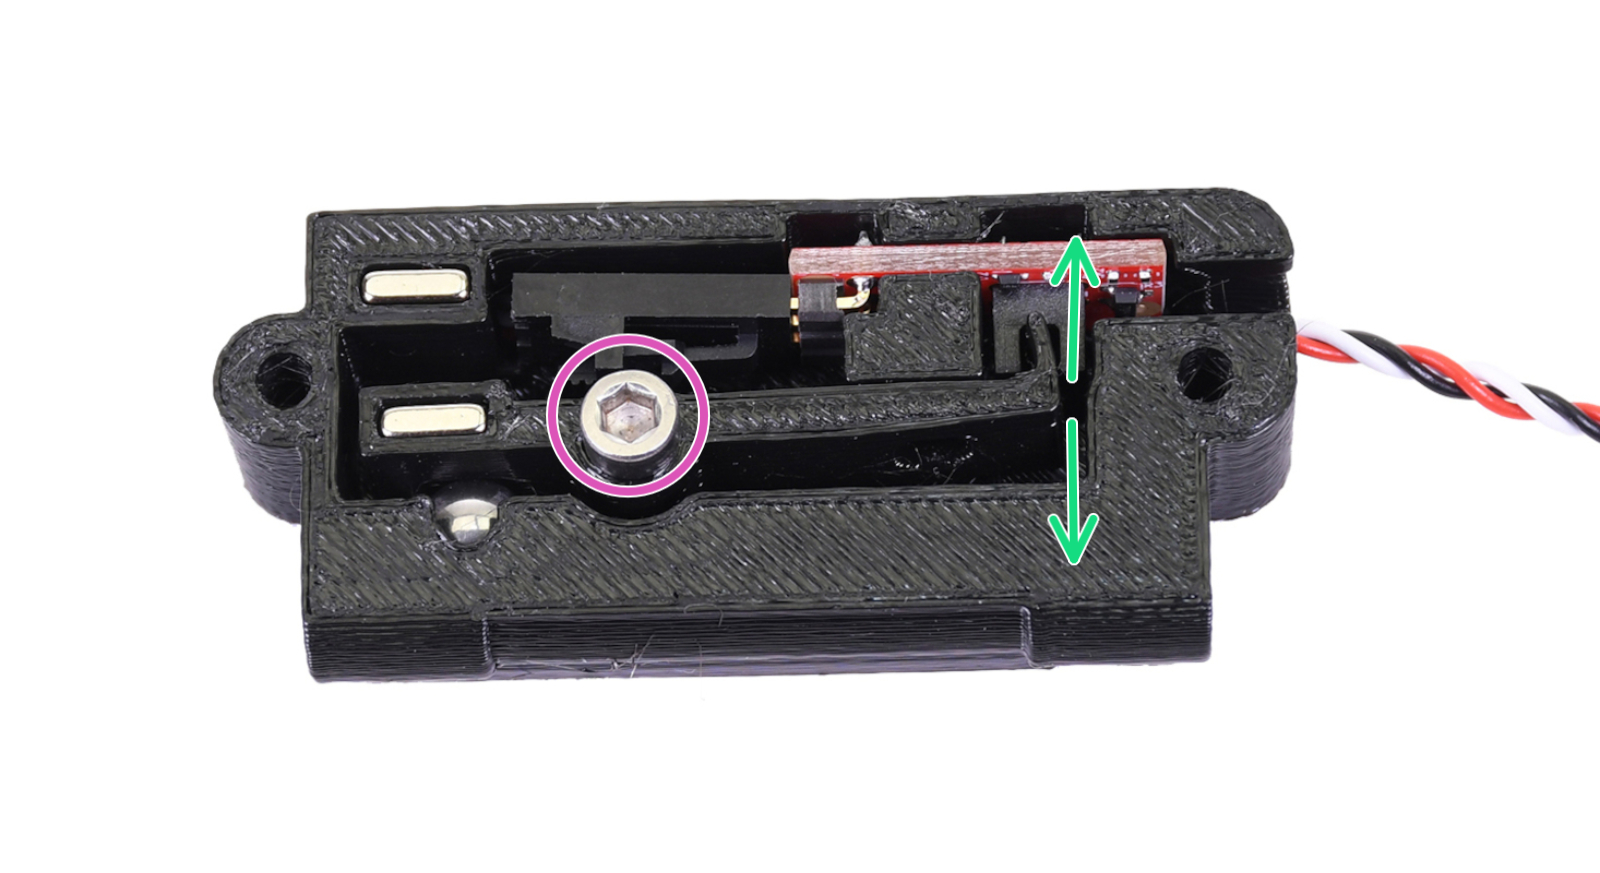
The end of the lever needs to be between the plastic parts of the sensor while the status is 0. Move the lever by hand and see if it moves easily. In case it does not move, loosen the middle screw (purple circle).
Malfunctioning sensor
Correct behavior:
- When the lever is in the triggered position (pictured above), the status within LCD menu -> Info -> Sensor info should be 0.
- When the lever is in the lowered position (when the filament is loaded), with the printed lever outside the IR sensor, the status within LCD menu -> Info -> Sensor info should be 1.
Malfunction:
If the status is either 0 or 1, regardless of the lever position, the sensor is malfunctioning.
2 comments