AA

Featured products

    Popular categories

      Trending searches

        Articles

          Blog

            Products

              Categories

                Suggested searches

                  Searching…
                  No results
                  Something went wrong.
                  ↑↓ Select↵ OpenEsc Close search
                  • English
                  • Čeština
                  • Deutsch
                  • Español
                  • Français
                  • Italiano
                  • Polski
                  • 日本語
                  • Orders
                  • Address
                  • In-stock Alerts
                  • My Courses
                  • Subscription
                  • Edit Account
                  • 3D printers9+▾

                    3D printersnew

                    newPrusa CORE One L+Learn more
                    newPrusa CORE One+ (Gen 2)Learn more
                    newPrusa CORE One L+ INDX 8-ToolnewPrusa CORE One+ (Gen 2) INDX 8-ToolPrusa CORE One L+: Critical InfrastructureOriginal Prusa MK4SnewOriginal Prusa XL+Original Prusa XL+: Critical Infrastructure

                    Printer upgrades

                    newINDX Conversion KitsnewPrusa CORE One L to CORE One L+ upgradenewPrusa CORE One+ to Prusa CORE One+ (Gen 2)newPrusa XL to Prusa XL+ Upgrade
                    Prusa Reward ProgramLove your Prusa printer? Share your experience and earn $30 Prusa e-shop vouchers.
                    How to Choose a 3D Printer?We’ll walk you through the basics to find the exact machine for your space, budget, and ideas.
                    Free E-bookDownload a free e-book Basics of 3D Printing with Josef Prusa and make your first steps in 3D printing world
                    Original Prusa Printable PartsCollections of printable spare parts for Original Prusa 3D printers and upgrades.
                    Shipping informationRegularly updated info about the current manufacturing capacity and delivery times of our printers.
                    Custom 3D PrintingProfessional custom 3D printing from various materials according to your requirements.
                  • Materials▾

                    Filaments

                    PrusamentPLAPETGASA / ABSPC (Polycarbonate)PA (Nylon)FlexCompositesSpecialMaterials clearance sale

                    Resin

                    Prusament ResinResin Cleaner
                    Filament GuideCheck my Prusament Spool
                    Prusament.com
                  • Parts & Accessories▾

                    Accessories

                    EnclosuresNozzlesPrint SheetsEssential AccessoriesCameras & AddonsTools & CraftingAdhesives

                    Spare parts

                    Merchandise

                    Spare parts - All PrintersCORE OneMK4/S & MK3.9/SMK3/S/+XL
                    Merch
                  • For Business▾
                    Prusa Pro HT90Prusa Pro SLXPrusa Pro AFSPrusa Pro Medical OneOriginal Prusa XL+Original Prusa XL: Critical Infrastructure
                    Prusa CORE One+ (Gen 2)Learn more
                    Prusa CORE One L+Learn more
                    Prusa CORE One L: Critical Infrastructure Edition

                    3D Printing for

                    Manufacturing and R&DAutomotive IndustryHealthcareEducation and Academic ResearchArchitects and DesignersFilm IndustryCritical Infrastructure

                    3D Printing Stories

                    • How 3D printing started: About Rep-rap and open-source with Adrian Bowyer
                    • Teaching mathematics redefined with 3D printing at JKU Linz
                    • The story behind the LTT screwdriver
                    • Victoria Hand Project: Changing Prosthetic Care with 3D Printing
                    Official Prusa Resellers
                    Sustainability
                    Prusa Education
                    Contact and Inquiry
                    Custom 3D Printing
                    ISO Certified
                  • Software▾
                    PrusaSlicer

                    PrusaSlicerPrusaSlicer

                    PrusaSlicer is an open-source, feature-rich, frequently updated tool that contains everything you need to export the perfect print files for your 3D printer.

                    WindowsMacOSLinux
                    Prusa Connect

                    Prusa Connect

                    Prusa Connect is a cloud service enabling remote control and monitoring of your 3D printers, offering secure data handling, easy setup, and support for managing multiple printers from anywhere.

                    Log in to Connect
                    Prusa.app

                    Prusa.app

                    Control your printer/s remotely from anywhere using the Prusa Connect technology behind. Prusa.app brings a new level of Prusa printer experience to Android and iOS phones.

                    Try it now!
                    Drivers & FirmwareDownload the latest firmware and drivers for your 3D printer.
                    PrusaSlicer Support
                    Prusa Connect Support
                  • 3D Models▾
                    3D PrintersArt & DesignHobby & MakersHouseholdTabletop MiniaturesToys & GamesPrintables Store

                    Popular 3D models

                    • SQUATCHEE-SPIN
                    • The Over-engineered Backpack Wall Mount V2
                    • Black Hole Lamp
                    • Strong garden hose holder
                    • Prusa Spool Bot
                    • Build Tray — Modular Organizer for Assembly, Disassembly and Maintenance

                    Design Contests

                    • Framework Laptop 12 Mainboard Re-Use9/1/2026 – 9/30/2026
                    • 🏆 Designer Challenge: Magic tricks!9/1/2026 – 9/22/2026
                    • Makeup Organizers9/4/2026 – 9/20/2026
                  • Community▾

                    Upcoming Events

                    • 3D Printopia 20269/26/2026 – 9/27/2026 · Pennsylvania, United States · Prusa Team
                    • Maker Faire Bay Area9/25/2026 – 9/27/2026 · Kalifornie, United States · Prusa Team
                    • Hobby Messe10/2/2026 – 10/4/2026 · Sachsen, Germany · Prusa Team
                    • Mezinárodní strojírenský veletrh10/6/2026 – 10/9/2026 · Jihomoravský kraj, Czechia · Prusa Team

                    Prusa Forum

                    • nextruder stepper motor clicking and ticking, even without gearbox
                    • Sagging bondtech extruder cable
                    • Print quality issues suddenly
                    Prusa World MapPrusa World MapFind local 3D printing users and explore the community around you.
                  • Help▾
                    Guides & TutorialsPrusaSlicerPrusa ConnectMaterials

                    Printer Model

                    CORE One INDXCORE One LCORE One+CORE One

                    Hardware Troubleshooting

                    • Selftest failed (CORE One/+)
                    • Clogged nozzle (CORE One, CORE One L, XL, MK4/S, MK3.9/S)
                    • Adjusting belt tension (CORE One/+, CORE One INDX, CORE One L/+)
                    • Prusa Connect and PrusaLink explained

                    Drivers & Firmware

                    INDX familyCORE One familyMK4 familyXL familyMMU familyPRO family
                  • Courses▾

                    Become an expert in 3D printing

                    Prusa Academy offers online courses on various 3D printing related topics. Each course features:

                    • easy-to-read text with many pictures and short videos
                    • links for inspiration and further study
                    • quizzes for testing your knowledge along the way
                    • certificate of completion
                    Browse all coursesMy courses library
                    • 3D Modeling in Autodesk Fusion
                    • PrusaSlicer Masterclass – Beginner to Advanced
                    • Complete Guide to 3D Print Postprocessing, Painting, and Detailing
                    • Beginner's Guide to Blender for 3D Printing: Edit and Remix STLs
                  • Blog▾
                    • Prusament PLA ColorMix: Print 45 color shades using just five filament spools (and more)
                    • Back-to-School 2026 Deals Are Here!
                    • PrusaSlicer 3.0 Preview – Built for the Future of 3D Printing
                    E-Book: Basics of 3D Printing
                  • Company▾

                    About Prusa Research

                    We are the largest maker of 3D printers in Europe and the United States.

                    Founded as a one-man startup in 2012 by Josef Prusa, a Czech hobbyist, maker, and inventor. In just 15 years, we've grown into a company of more than 1,200 people. Every month, we design, build, and ship over 10,000 innovative and secure 3D printers from our headquarters in Prague, Czech Republic, and Delaware, USA, to users in more than 160 countries.

                    Watch a video and find out how Prusa Research was born and what we achieved within only 10 years!

                    About UsTimelineSustainabilityOpen-source
                    About Us
                    Contact Us
                    Logo and Photos
                    ISO Certified
                  1. Support
                  2. Printer features
                  3. Creating a resin calibration object (SL1/SL1S)
                   

                  Contents

                  • Selecting a model
                  • Creating the project file
                  • Modifying the project file
                  • Starting the print
                  • Assessing the results
                  • How objects are arranged
                  • Creating a PrusaSlicer preset

                  Blog

                  • Prusament PLA ColorMix: Print 45 color shades using just five filament spools (and more)
                  • Back-to-School 2026 Deals Are Here!
                  • PrusaSlicer 3.0 Preview – Built for the Future of 3D Printing

                  Newsletter

                  Signup and get our monthly squeeze on updates, blog, printables and much more.

                  By clicking, you agree to receive our newsletter.

                  This site is protected by reCAPTCHA Enterprise and the Google Privacy Policy and Terms of Service apply.

                  SQUATCHEE-SPIN
                  E-shop
                  • 3D Printers
                  • Printer Upgrades
                  • Filaments
                  • Accessories
                  • Prusa Merchandise

                  © Prusa Research a.s.

                  Printables
                  • 3D Models
                  • Store
                  • Clubs
                  • 3D Design Contests
                  • Brands
                  Community
                  • World Map
                  • Forum
                  • User Groups
                  • Events
                  Help
                  • Prusa Help
                  • Prusa Academy
                  • 3D Printing Calculators
                  Software
                  • PrusaSlicer
                  • Prusa.app
                  • Prusa Connect
                  • Drivers and Software
                  Company
                  • About Us
                  • Blog
                  • Official Prusa Resellers
                  • Contact Us
                  • Certified for ISO 9001, ISO 14001, ISO 45001
                  • General Terms and Conditions
                  • General Terms and Conditions of Use of the PRUSA Websites
                  • Privacy Policy
                  • Information about cookies
                  • Customer Complaints Policy
                  • Status Page
                  • Do Not Sell or Share My Personal Information
                  • Supplemental Statements
                  • General Terms and Conditions
                  • General Terms and Conditions of Use of the PRUSA Websites
                  • Privacy Policy
                  • Information about cookies
                  • Customer Complaints Policy
                  • Status Page
                  • Do Not Sell or Share My Personal Information
                  • Supplemental Statements

                  © Prusa Research a.s.

                  JOSEF PRUSA®, PRUSA RESEARCH®, PRUSA POLYMERS®, PRUSA ORANGE®, PRUSA 3D ® AND PRUSAMENT® are registered trademarks of Prusa Development a.s. used by Prusa Research a.s. under licence from Prusa Development a.s.

                  Creating a resin calibration object

                  (SL1/SL1S)

                  Relevant for

                  SL1
                  SL1S SPEED
                  Article is also available in following languages
                  English
                  Čeština
                  Polski
                  Deutsch
                  Français
                  Español
                  Italiano
                  日本語

                  This guide will show you how to use your own model to generate a resin Calibration-object. We recommend this approach only to experienced users. The pre-made Resin calibration object should serve most user's needs, but there might be some specific models you are familiar with or that have features and geometry special to your application.

                  Please note that for the Original Prusa SL1S SPEED this feature was completely overhauled and is currently available starting firmware 1.7.0-beta.4! This version is dedicated to experienced users. The final firmware will be released soon.

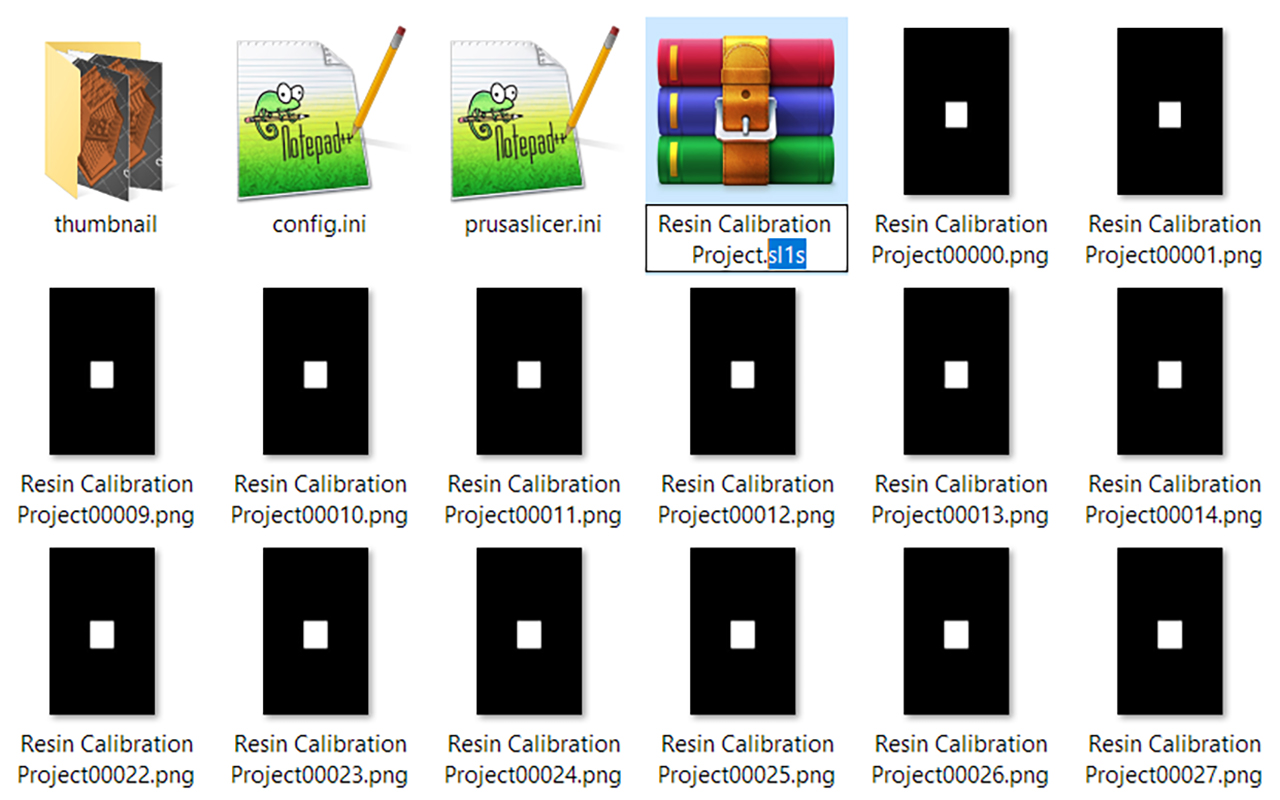
                  The .sl1/.sl1s-files for your Original Prusa resin printer is equivalent to the G-code for a FFF machine, but a little different. Files for the Original Prusa SL1 or SL1S SPEED (.sl1/.sl1s files) are archives like a zip-file, with a series of pictures (.png files) for each layer of the print, in addition to a configuration file (.ini file). After slicing, the configuration file is mainly what you have to edit to create your calibration object. The printer will do the rest.

                  Selecting a model

                  Number and size

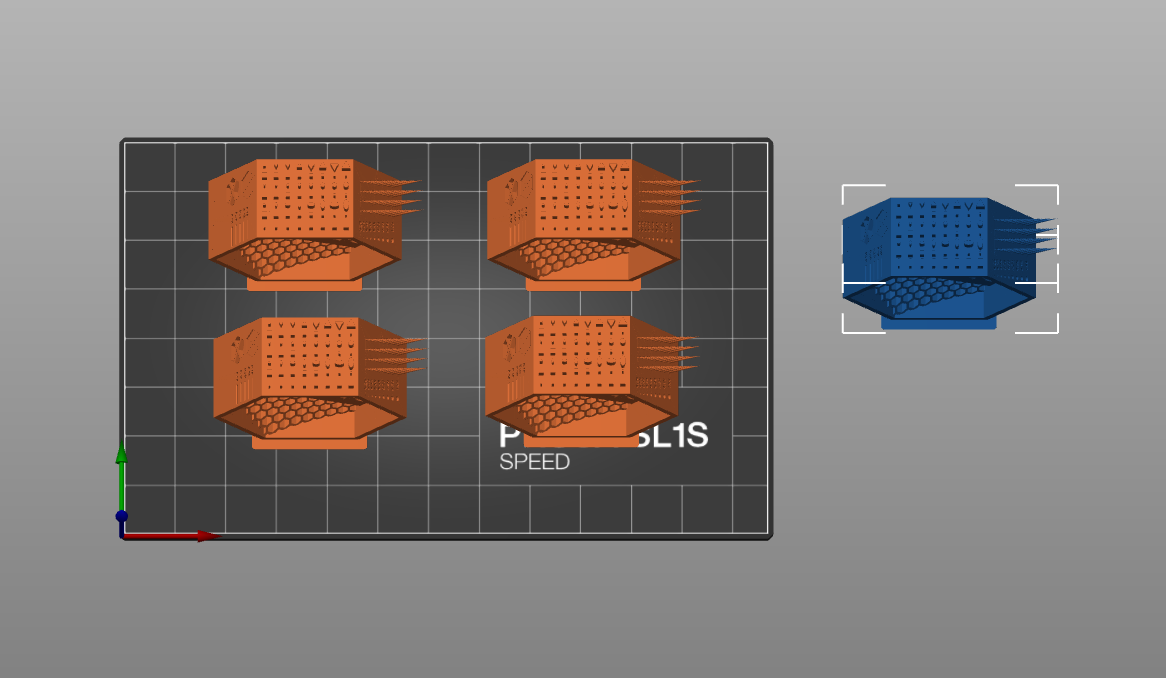
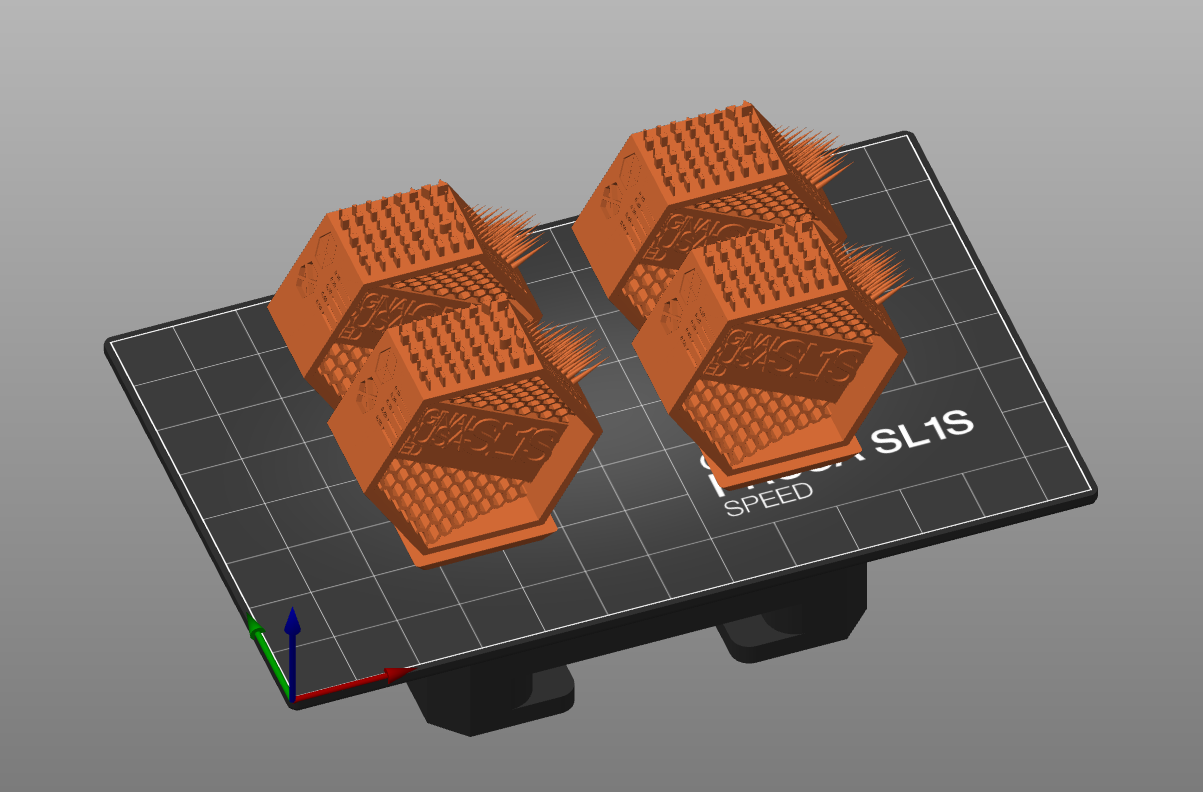
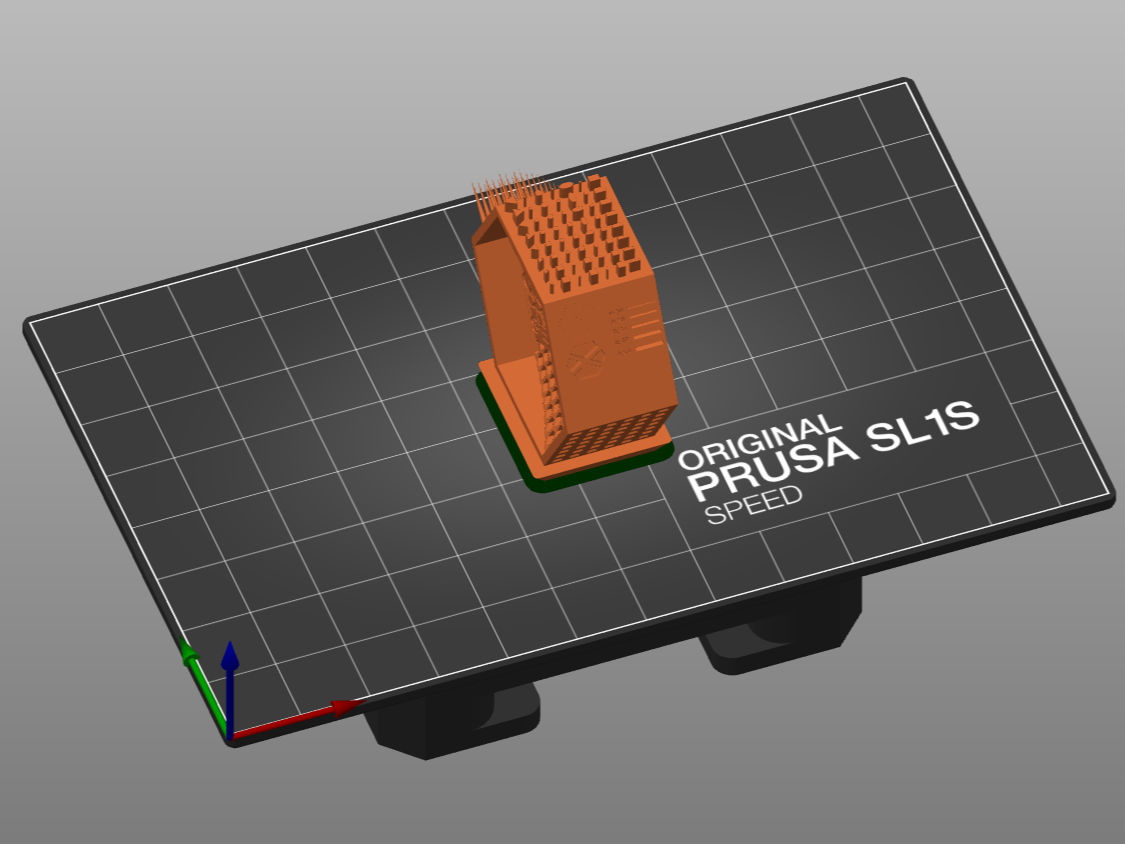
                  There are two main considerations when choosing a calibration object: The size of the object and the number of objects on the plate. The system will not know the size of your object so if you choose something too big, it can be cropped or not fit on the plate at all. You can test this by creating more instances and see how many will tile on the print platform (maximum 9). However, in the final project, you must only have one instance. The printer will generate the rest.

                  You will find more information on size and orientation of an object at the end of this article.

                  Examples of how many instances will fit on the plate. In this case, 4 instances.

                  Geometry

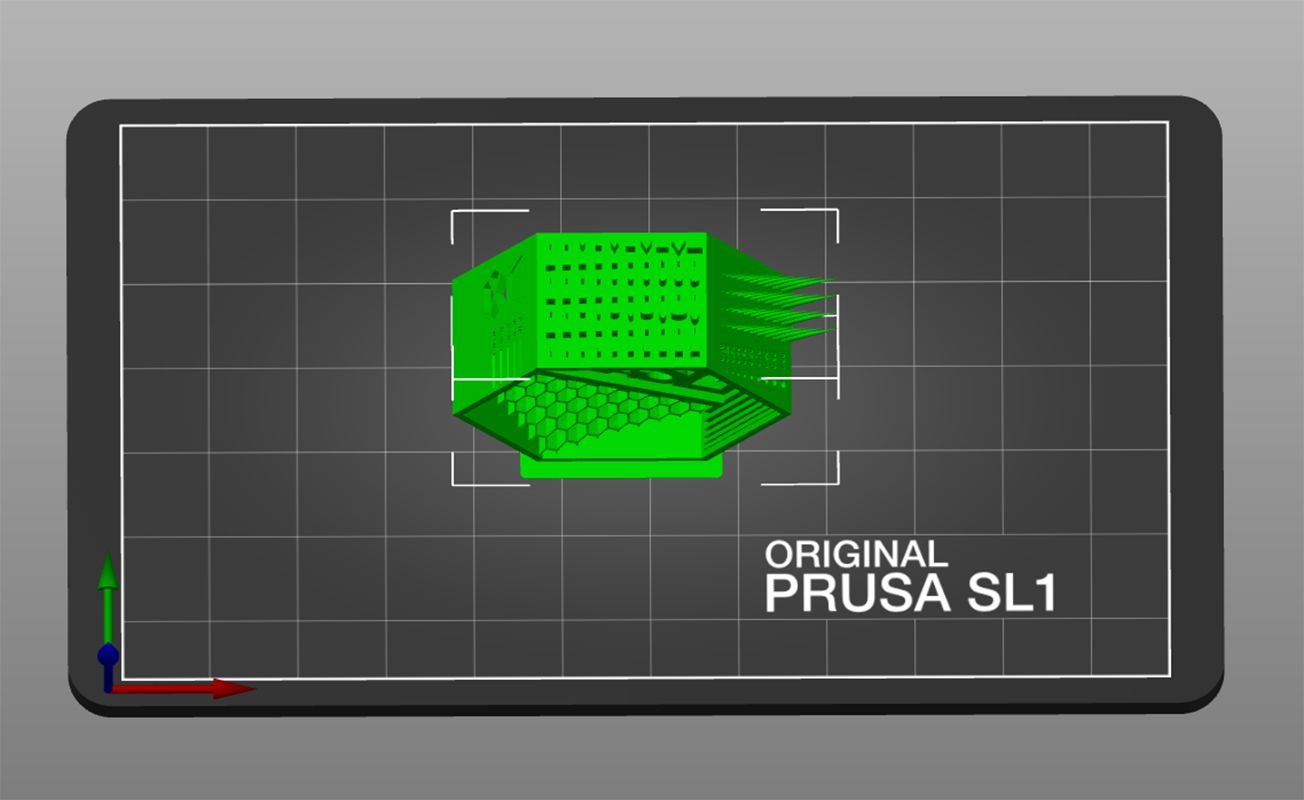
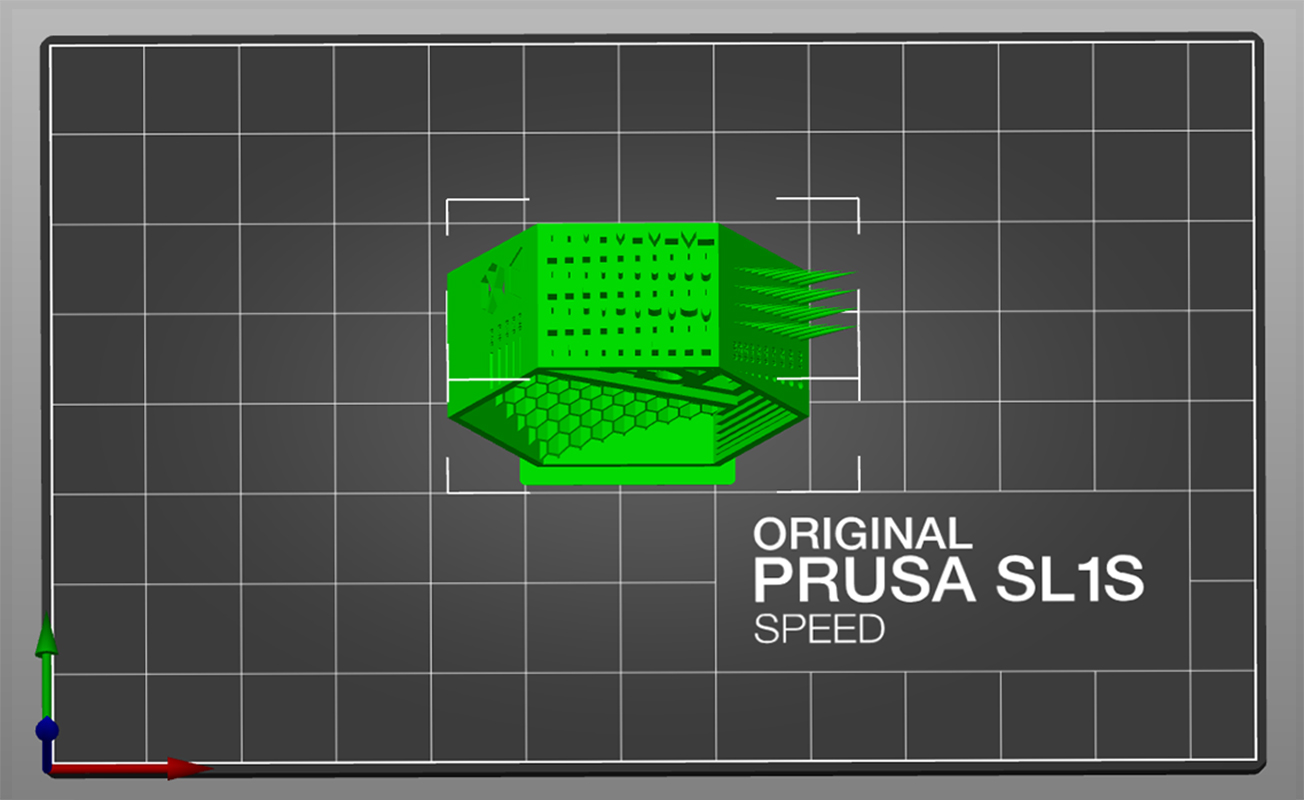
                  We recommend a model with no extreme overhangs which require supports. This will save you a lot of time. Objects can fail completely, which you must then clean up before running the calibration again. Printer "stress tests" you should experiment with later. This is just to find the optimal exposure time across general geometries. This guide will use a version of the Original Prusa SLA Test Object, which is slightly modified to have a smaller footprint. It can be downloaded from Printables.com.

                  Creating the project file

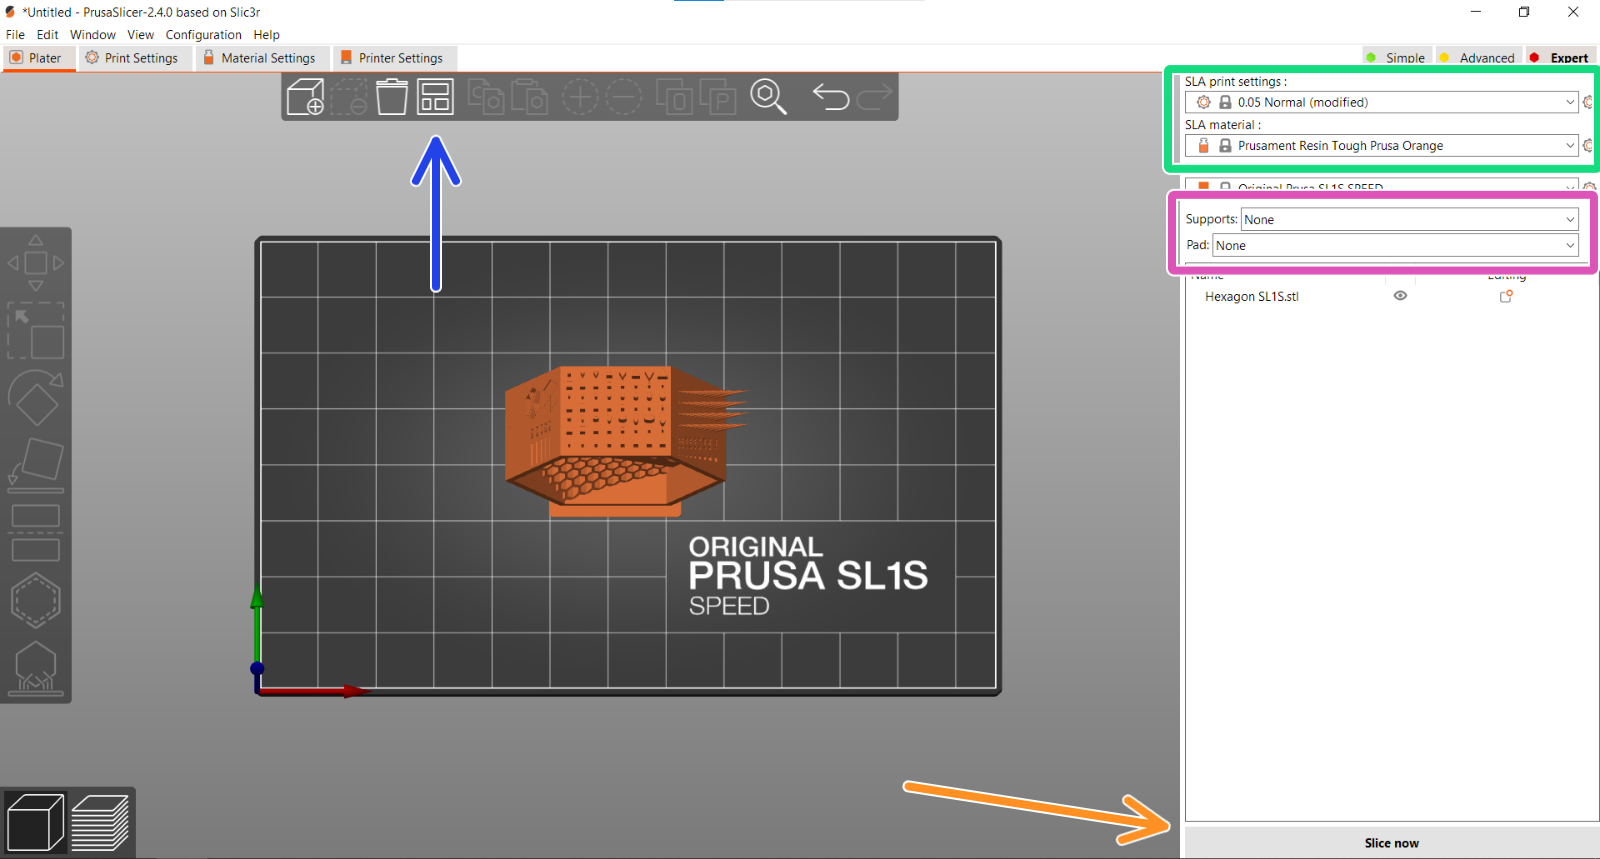
                  1. Open PrusaSlicer and select the printer you are calibrating for (SL1 or SL1S).
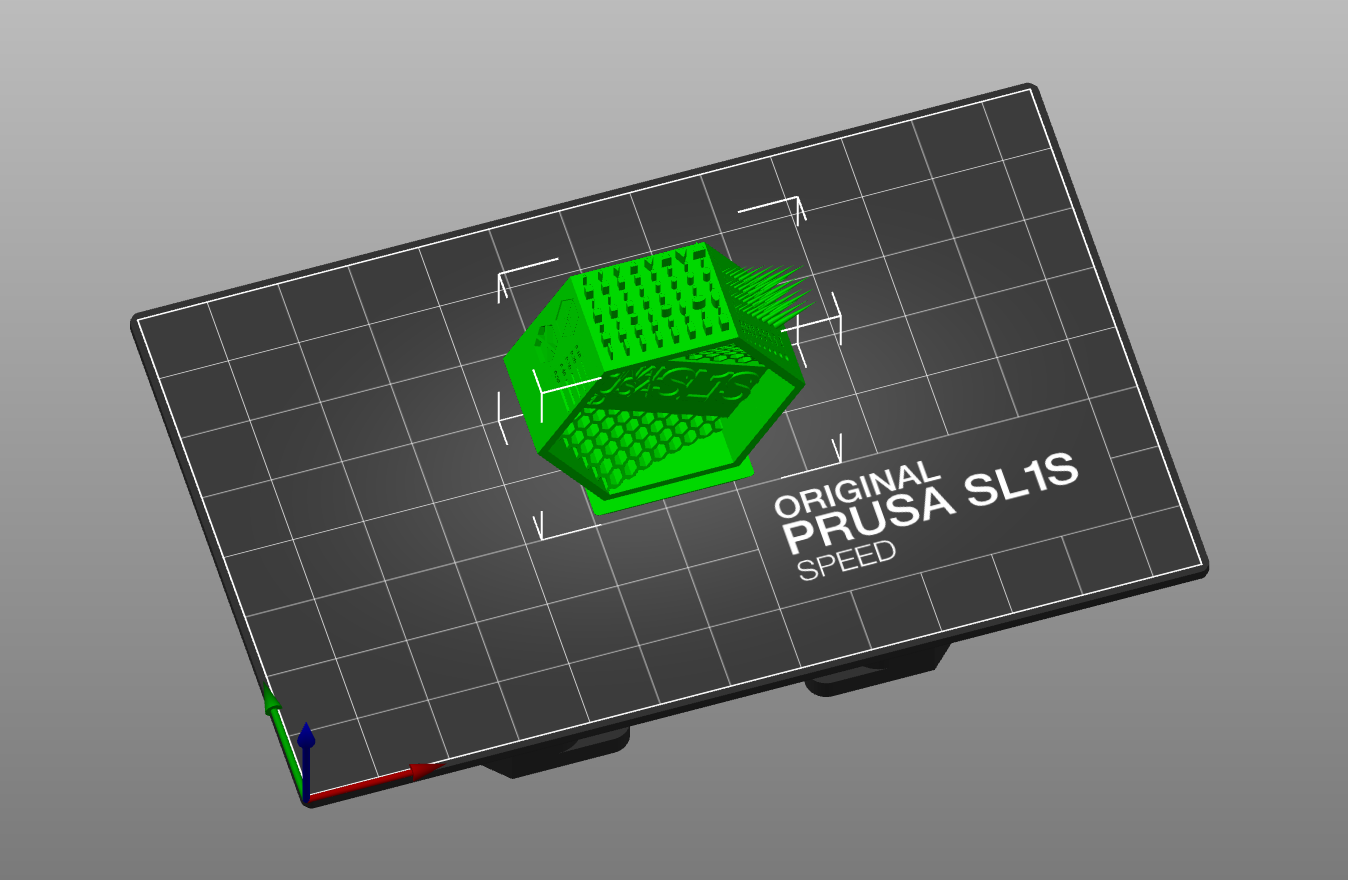
                  2. Add your model to PrusaSlicer and center it by using the Auto-arrange tool (blue arrow). Only create one instance!
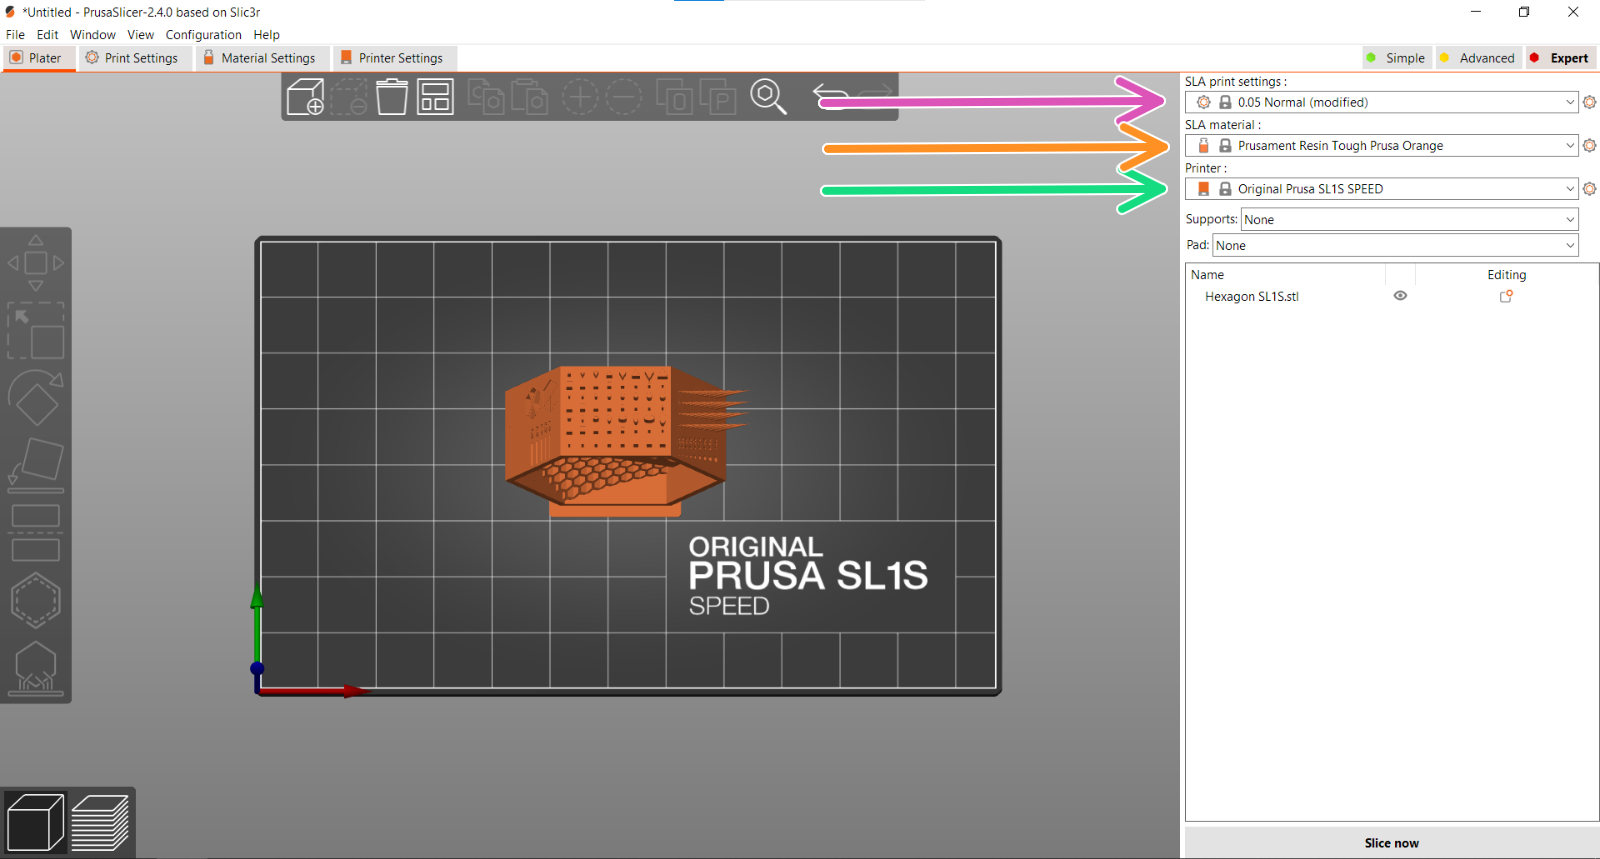
                  1. As Resin type select Prusament Resin Tough Prusa Orange, at 0.05 Normal as SLA print setting (green square). This is a good starting point for Tough resins.
                  2. Use no supports or pad (purple square). 
                  If you are calibrating for another type of resin than Tough, i.e. Flexible or high-tenacity resin, it may be better to start with an existing preset for this type of resin. Exposure time can also be adjusted on the printer itself when you later start the print.
                  1. The printer will generate a label showing the exposure time. This is always placed to the right of the model. You may have to rotate the model to make them all fit on the plate.
                  2. Slice and Export your SL1/SL1S project file.
                  3. Copy the exported file onto a USB drive or uploaded through PrusaLink to print the project.

                  Modifying the project file

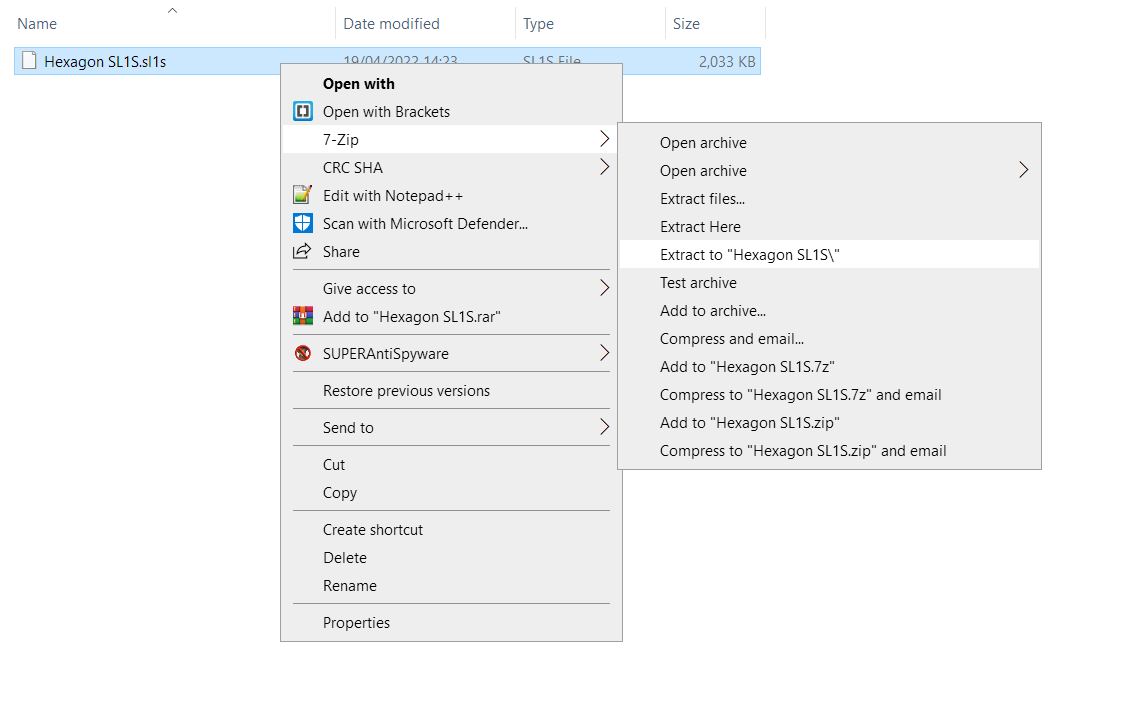
                  1. A program like 7zip is open-source and will automatically recognize the project as an archive. Right-click the file and you are provided the option to "Extract" the content to a folder. If you do not want 7zip installed, change the file name ending from ".sl1" to ".zip" and any archiving application will recognize it.

                  Make sure you have enabled showing file extensions in the file name. Under Windows 10 this is done by a check-box found under the View-tab in File Explorer. 
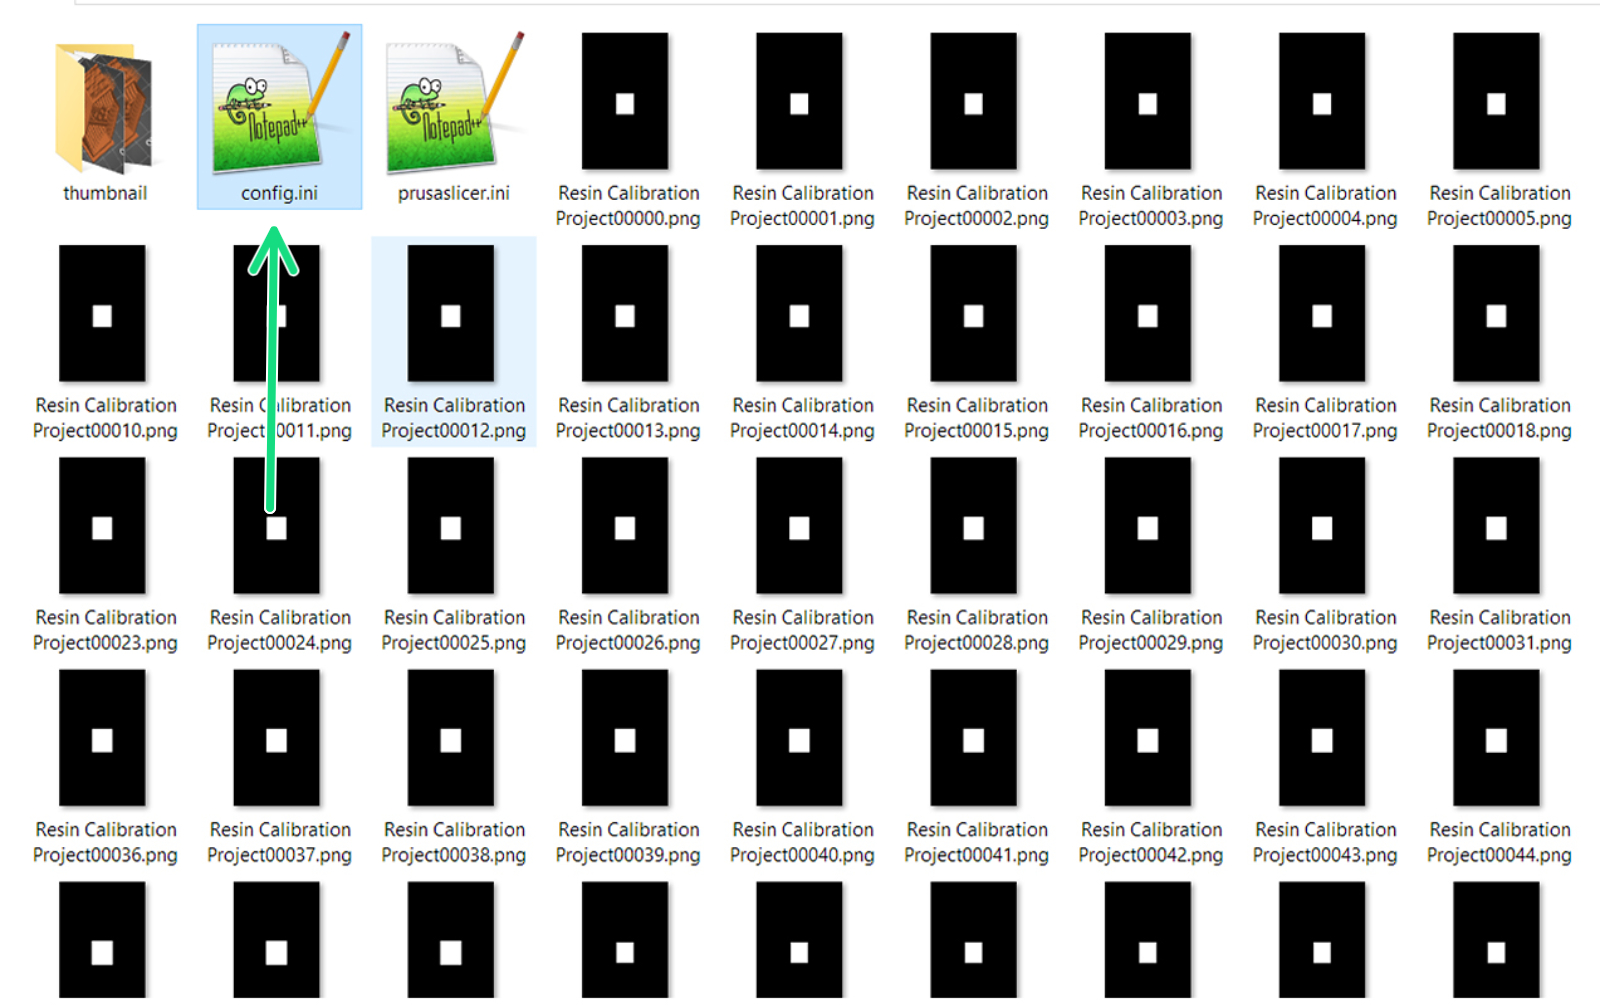
                  1. You will now have a folder with a lot of images and two configuration files. You need to open edit "config.ini" in Notepad, Brackets, or any other plain-text editor. Just ignore "PrusaSlicer.ini".

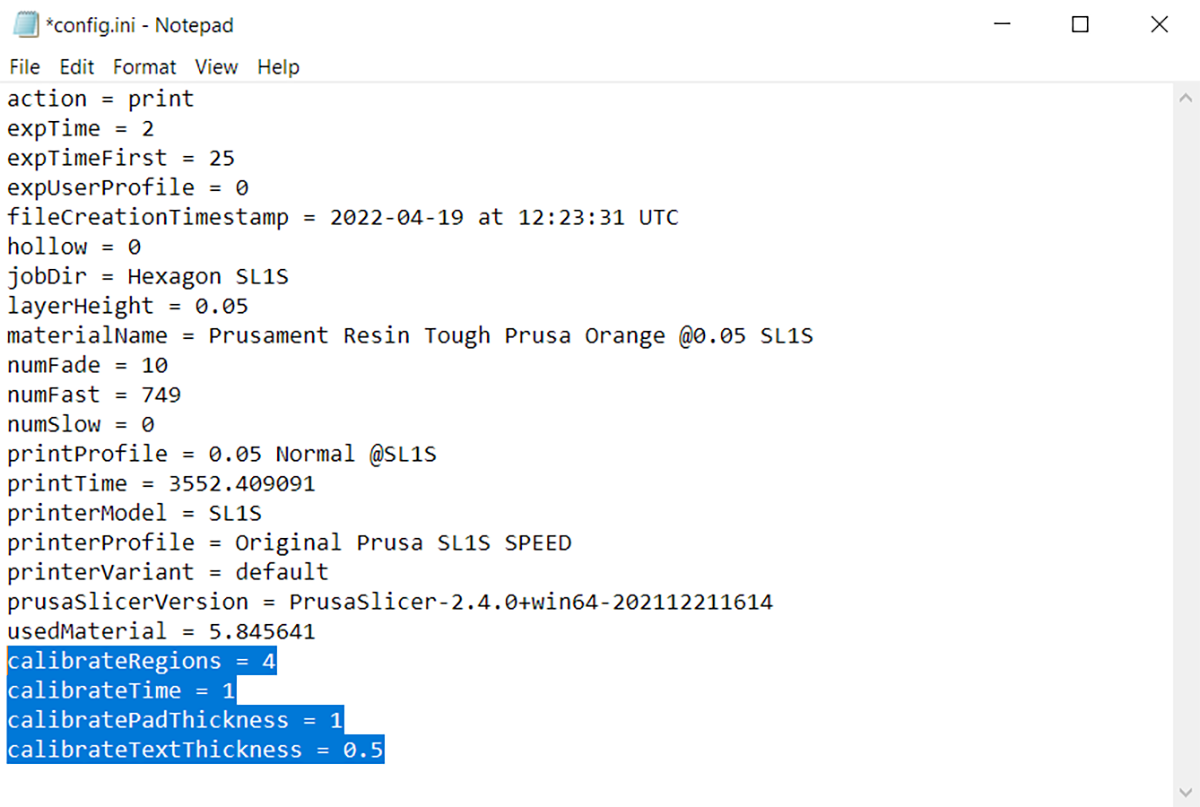
                  1. After the last line ("usedMaterial = ***"), paste the three lines of code found below for your printer. It is important that you use values compatible with your printer model (SL1 or SL1S SPEED) due to their very different average length of exposure.

                  Explanation of parameters:

                      • calibrateRegions represents the number of objects on the print plate. For this model, it is set to 4, due to the size of the object. You can change this but only use the numbers 2 4 6 8 9, depending on the size.
                      • calibrateTime is the time increment in seconds per object. Can be adjusted to 1 decimal place (0.1s)
                      • calibratePadThickness is the thickness in millimeters of the label generated for exposure time.
                      • calibrateTextThickness is the height in millimeters of the text on the label.
                  SL1SL1S SPEED

                  Suggested values for a tough resin on each printer version.

                  1. Make sure you have the configuration as in the picture below and save (ctrl/cmd+S) the config.ini file and close your text editor.

                  *Default configuration values.

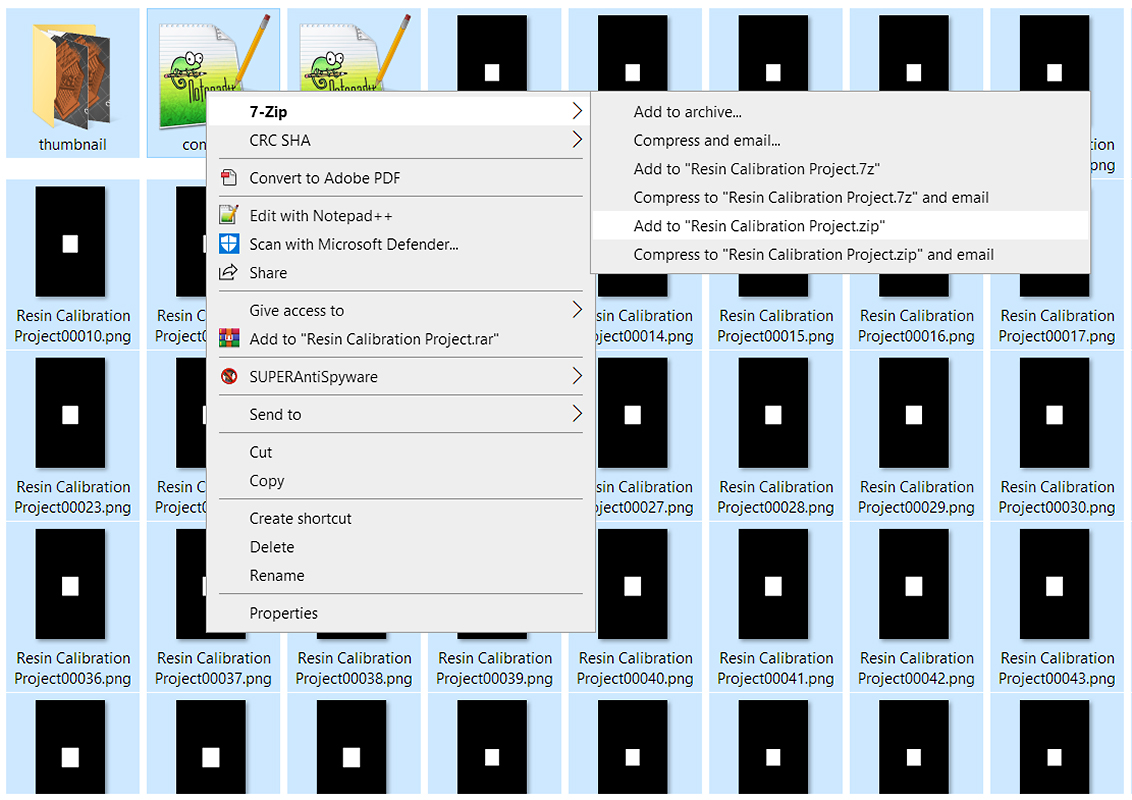
                  1. Select all files in the folder (ctrl/cmd+a), right-click and create an archive (.zip file) of the content.
                  Do not create the .zip file by simply right-clicking the folder. This will create an archive with a folder, not a series of files, which is incompatible.
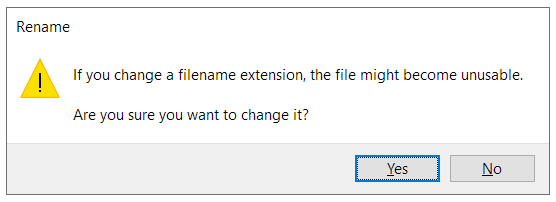
                  1. Change the ending of this Zip file to ".sl1" or ".sl1s", depending on your printer model. Windows will warn you you may make the file unusable, and ask if you wish to continue. Click Yes.

                  1. Copy your newly made SL1 Resin Calibration object to a USB stick and you are ready to run the file on your printer.

                  Starting the print

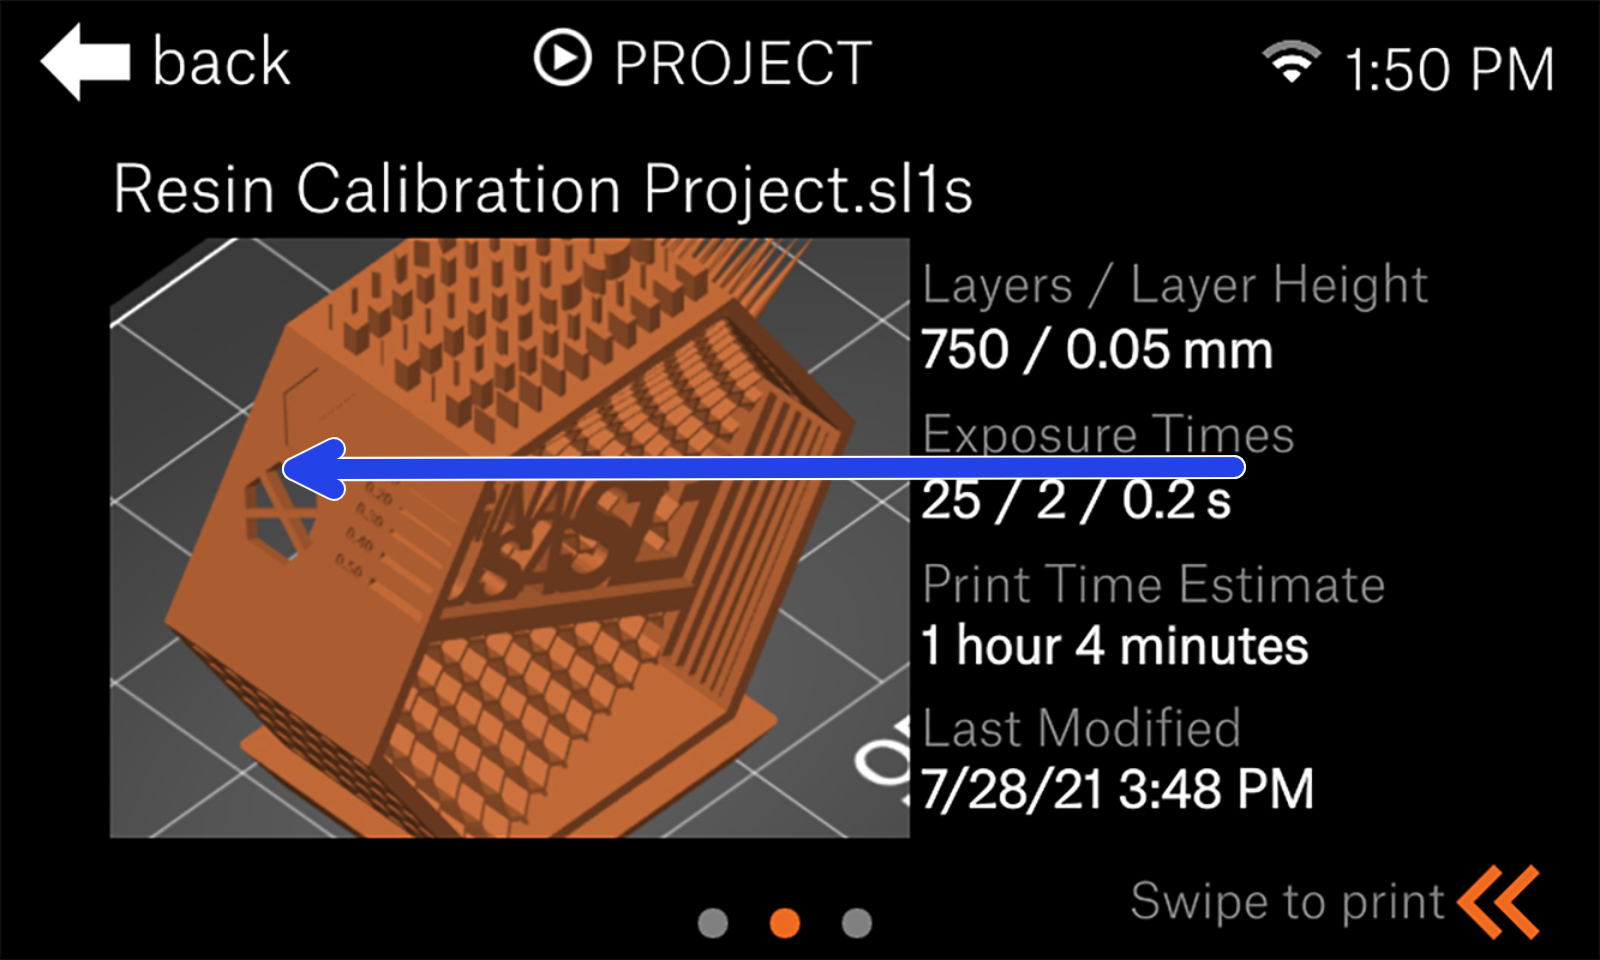
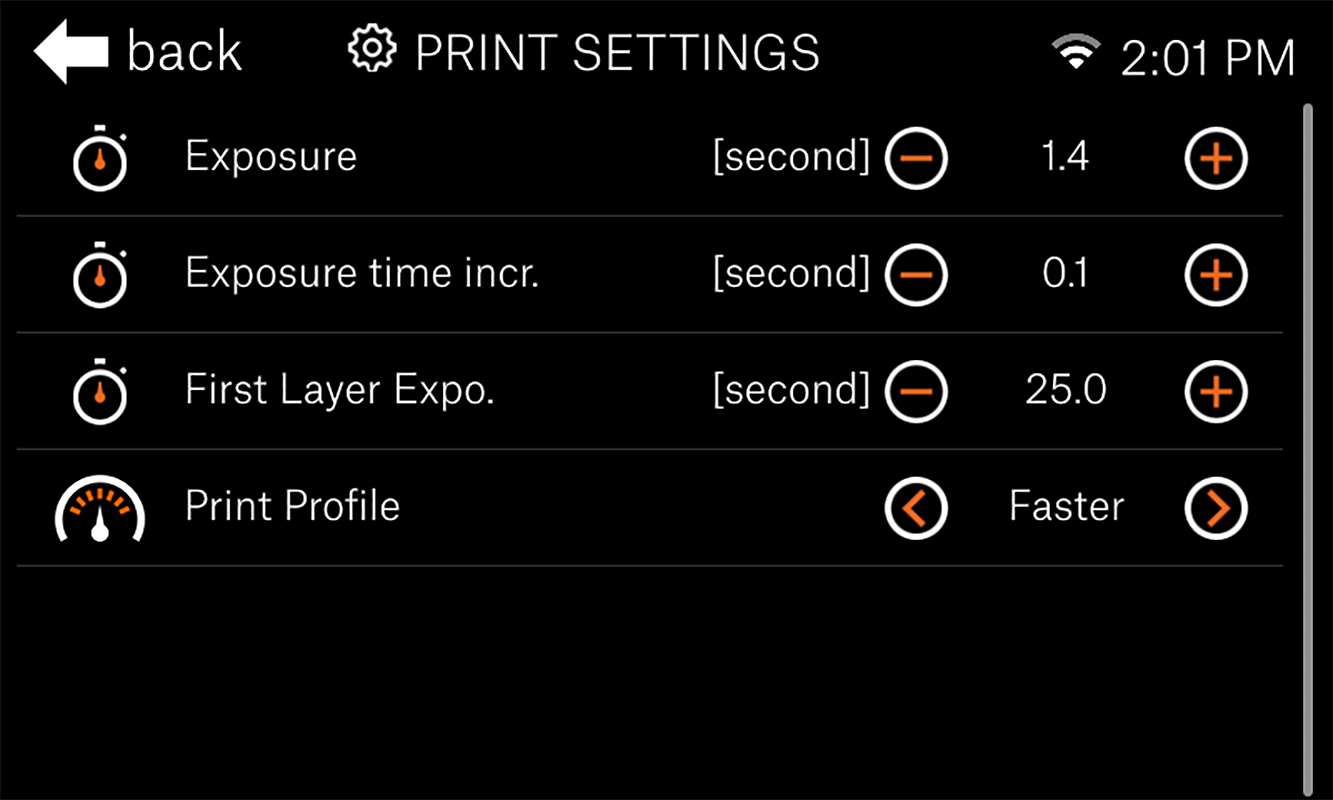
                  1. When selecting the project, swipe left to confirm your print settings.
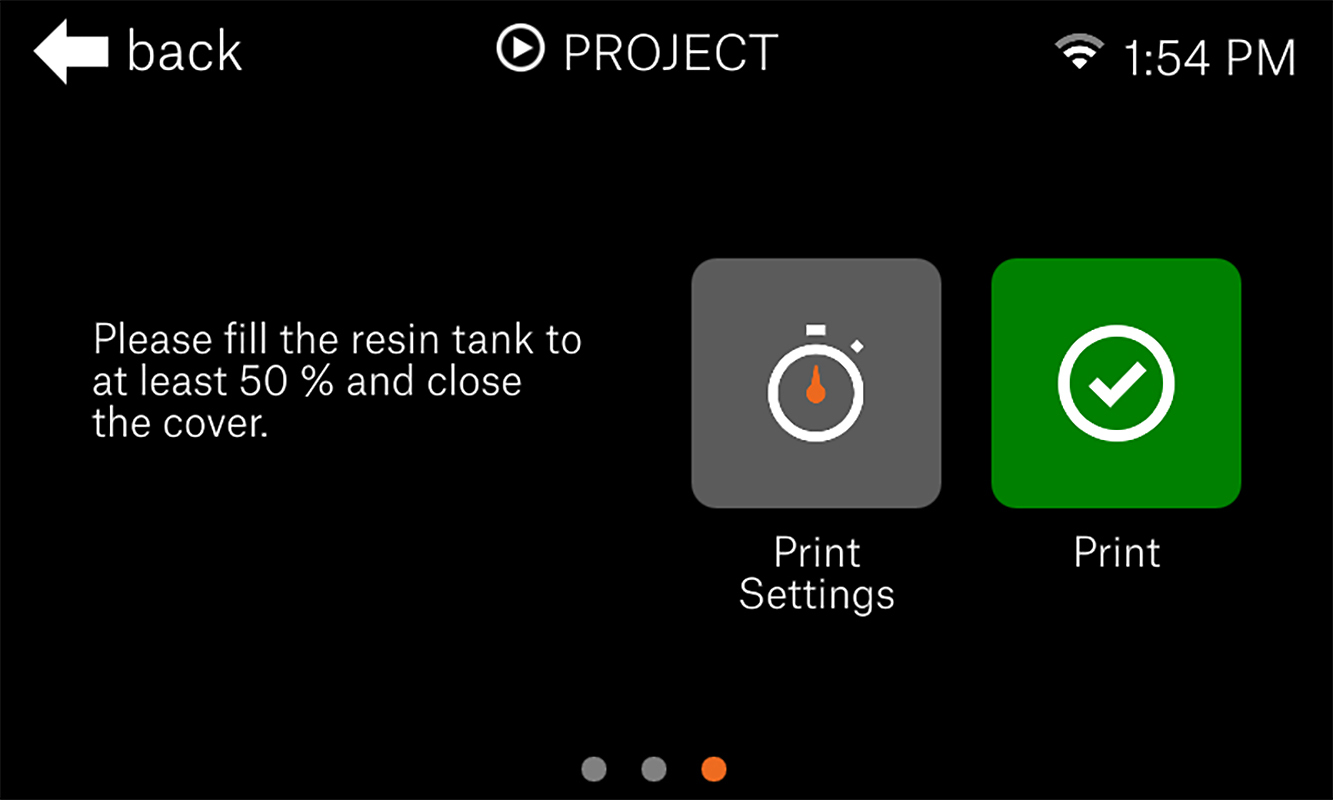
                  1. Within Print settings, you can edit the values of some parameters you pasted in the previous steps. Verify they are as you need them and tap 'Back' in the top-left corner.

                  Settings for SL1S SPEED. These values will NOT be compatible with SL1.

                  1.  Start your print and let it finish. You will see the printer has created more instances of the object and added a label stating the total layer exposure duration per instance.

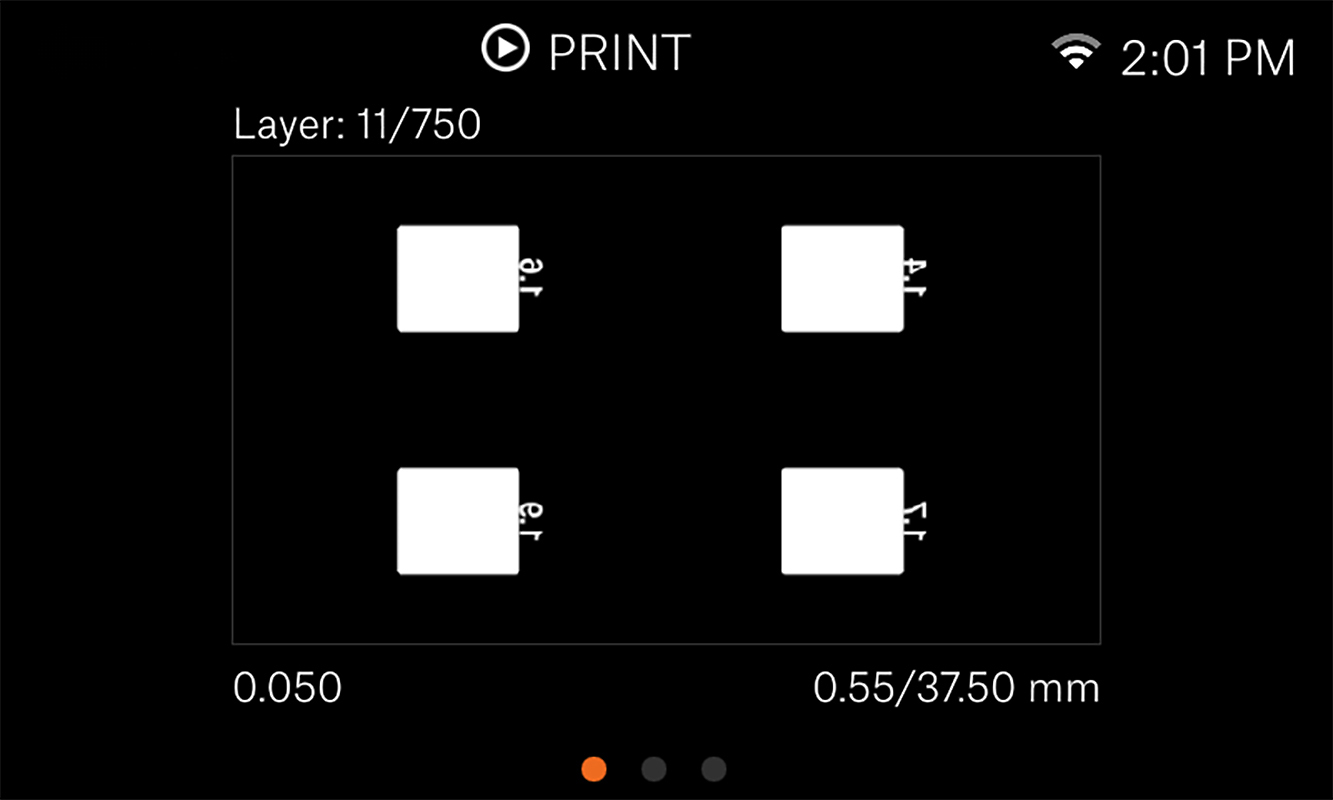
                  During printing, you can swipe right to see the mask of the current layer.

                  Assessing the results

                  Assessing the results will depend on the geometry, but there are some general rules you can follow: The geometry of prints will grow with exposure time. In practice, this means that if you have missing details you must increase exposure duration. Vice versa, if elements, like thin holes, are filled completely you should reduce the exposure.

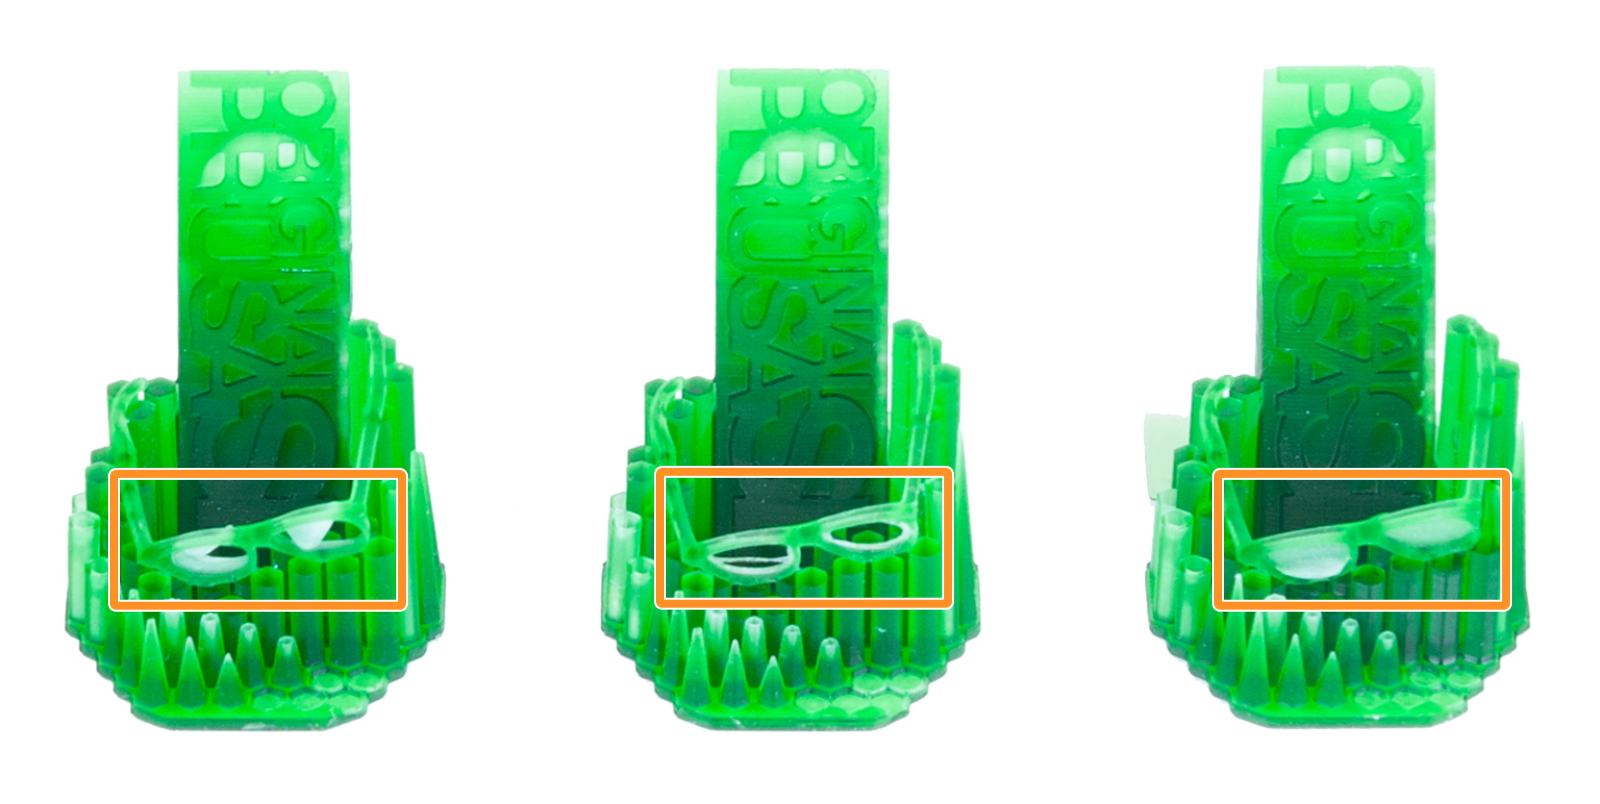
                  An example of how geometry forms can be found in the pre-made calibration object's glasses, where the actual glass within the frame will not be printed if exposure duration is set too low.

                  This can be observed where different geometry meets/makes contact as well. Say you have two arrows pointing to each other, touching at the very tip; With insufficient exposure, the tips will not touch. Oppositely, with too long exposure, the point of contact will not be a single point, but rather the two arrow tips will slightly merge together.

                  How objects are arranged

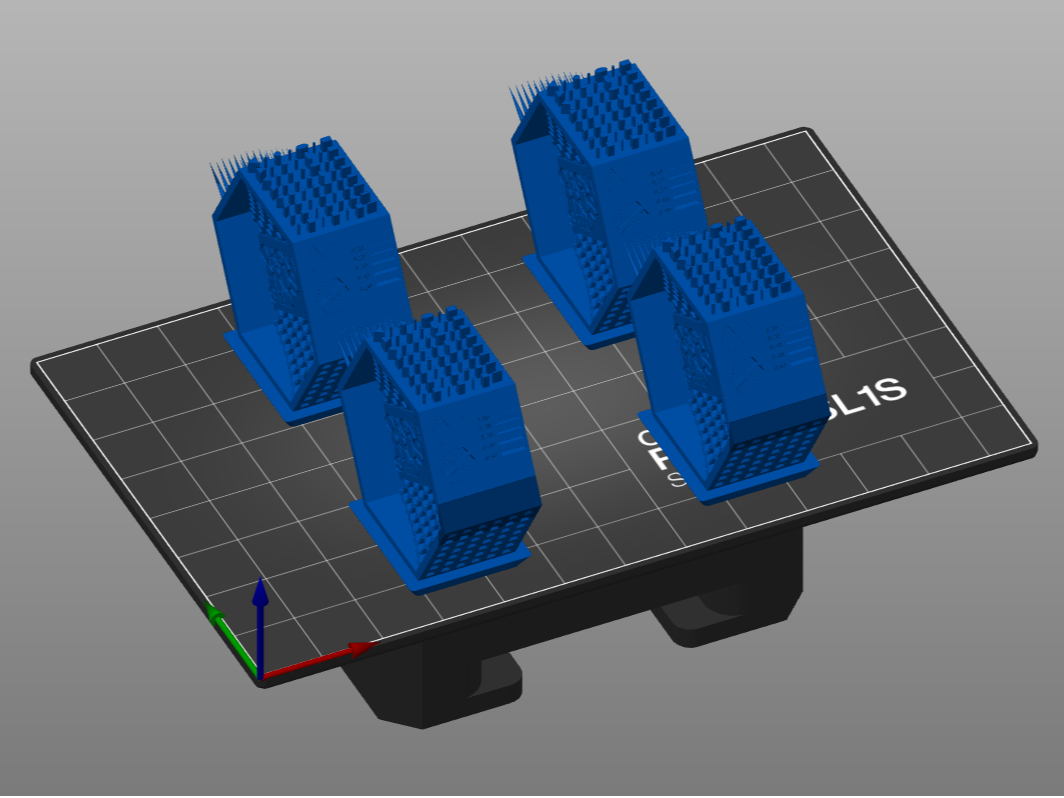
                  The printer will automatically take the unmasked area of the print and copy it as many times as is set in the config file (calibrateRegions). It is a basic copy/paste, following strict rules, meaning it will not rotate or arrange objects. With anything more than 2 objects it will place them in a grid pattern.

                  RegionsGrid sizeMax. X/Y object size SL1S SPEEDMax. X/Y object size SL1
                  42x263 mm x 40 mm60 mm x 34 mm
                  63x242 mm x 40 mm40 mm x 34 mm
                  84x231 mm x 40 mm30 mm x 34 mm
                  93x342 mm x 26 mm40 mm x 22 mm

                  * Values are rounded down. Considerations for non-uniform/symmetric/extreme geometries must be applied. Note that for each object there is a tag (5x10 mm) connected to it. This affects the maximum object size. 

                  If orientation or size is not right

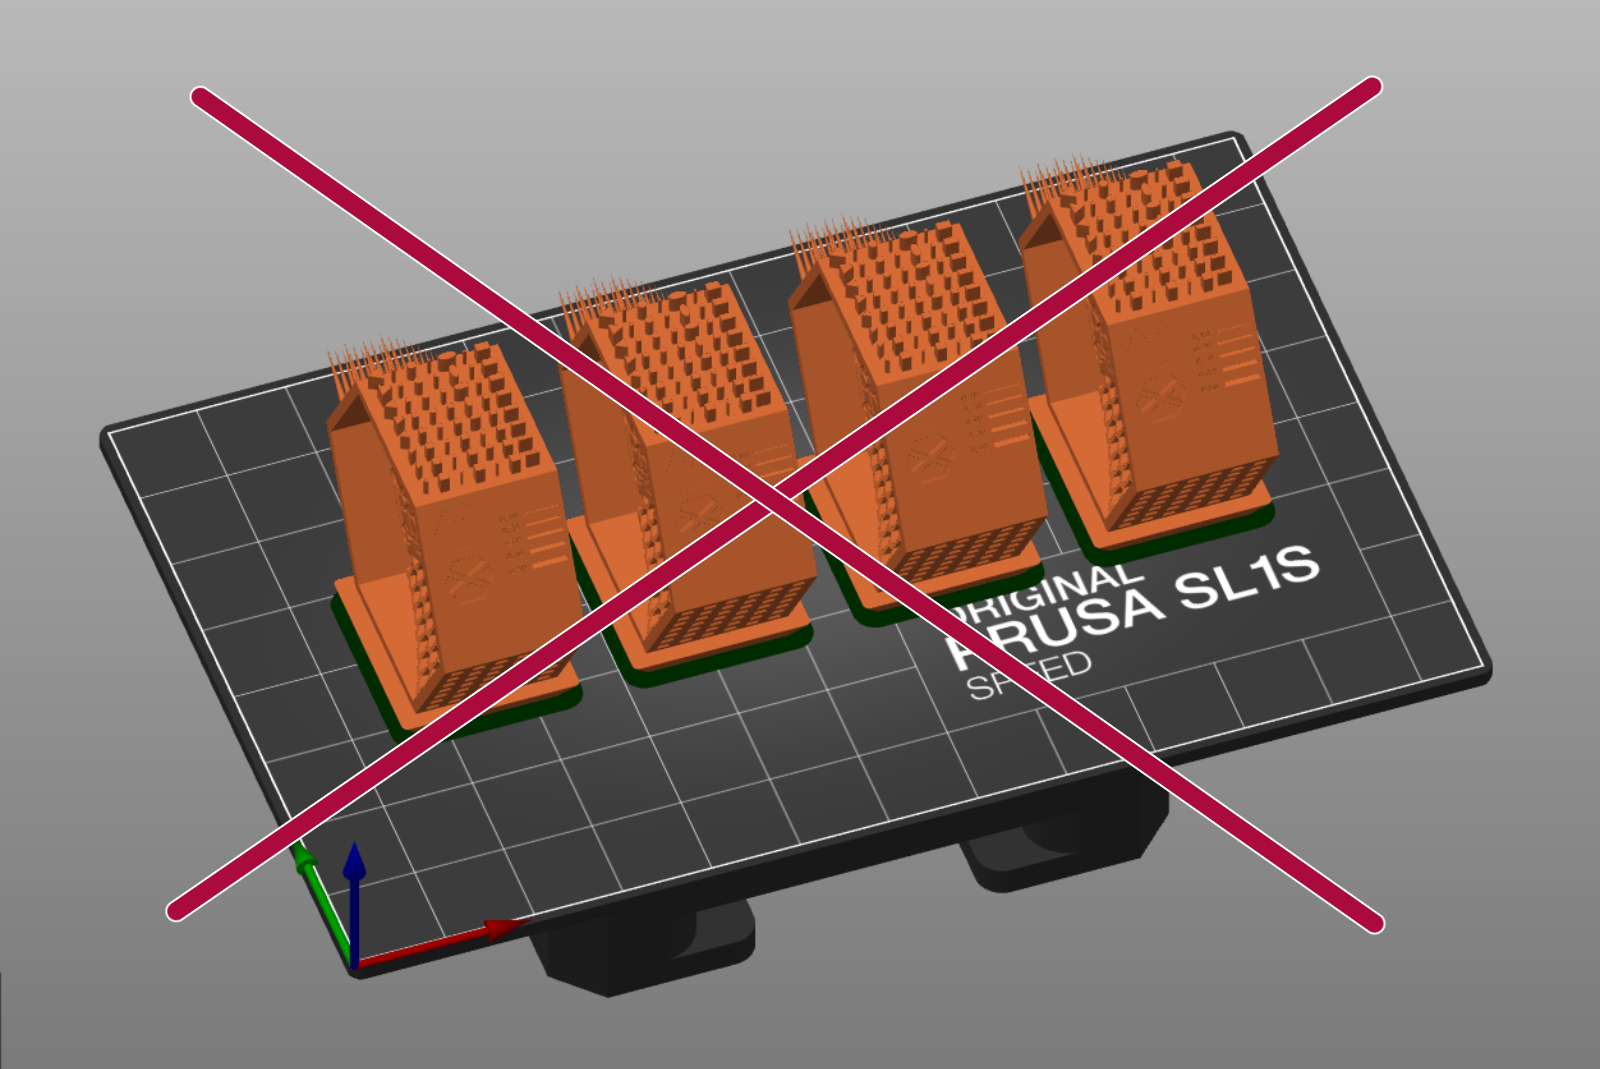
                  With four regions it will always put them two by two. Therefore, the size and orientation of the model can affect whether everything will fit on the plate, or will be cropped by being outside of the platform. 

                  It will not consider the total area of the object and place them all in a row, if that is how it would fit, like PrusaSlicer does.

                  Creating a PrusaSlicer preset

                  Did you find the best exposure time for your resin? Great! You can start a normal print right away, adjusting the exposure time on the printer's display before the print or you can create your own resin profile:

                  1. Open PrusaSlicer and in the Plater view, select from the list of the printers (green arrow), Original Prusa SL1/SL1S SPEED, depending on which you have.
                  2. Select Prusament Resin Tough Prusa Orange as "SLA material" (orange arrow).
                  3. From SLA print settings (purple arrow), select the layer height you want to calibrate the resin for. This will load all the available resins.

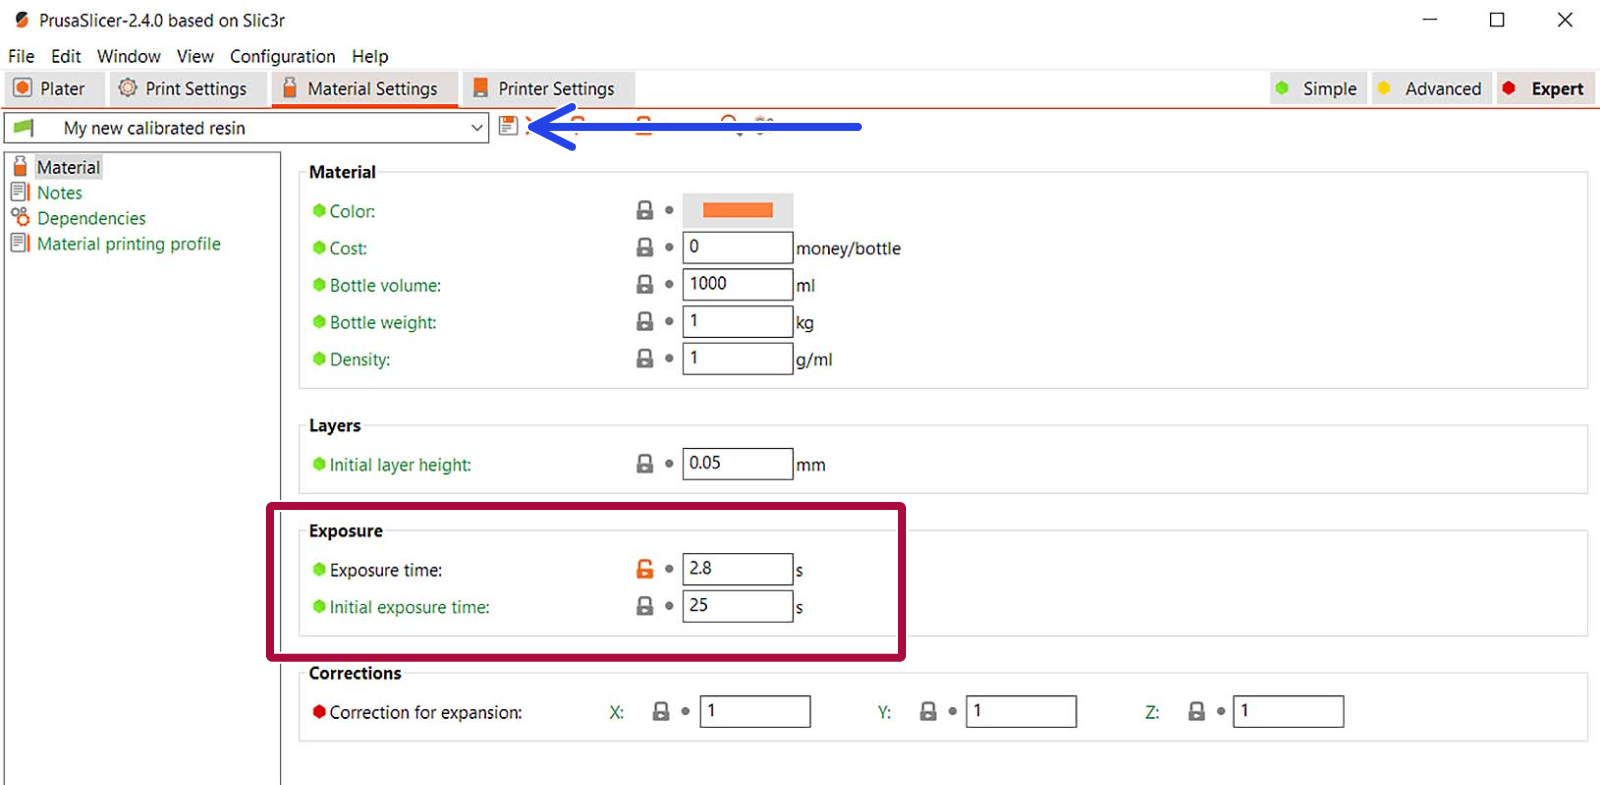
                  1. Click on the "Material settings" tab on top.
                  2. Select any resin from the dropdown list with the layer height you intend to calibrate for. It will be used as a base for your new profile. Then click on the "Save" icon (?) next to the list (blue arrow).
                  3. A dialogue will open up where you name the preset (e.g. "My new calibrated resin") and hit "OK".
                  4. In the new resin, the profile adjusts the fields "Initial Exposure time" and "Exposure time" (red square), which sets the time for which each layer of the sliced object is exposed to the UV light.
                  5. Now, you are good to go. Slice your next model and Happy Printing!

                  Was this article helpful?
                  This action is available only to registered users. Please log-in.
                  Log in  to post a comment
                  No comments

                  Topics

                  • About your printer
                    • Printer features
                      • Pouring resin and starting print
                      • Internet connection (SL1/SL1S)
                      • Resin Calibration (SL1/SL1S)
                      • Printer statistics and system information (SL1/SL1S)
                      • One-click print
                      • Brightness adjustment (SL1)
                      • Top-bar Notifications (SL1/SL1S)
                      • Menu structure (SL1/SL1S)
                      • Creating a resin calibration object (SL1/SL1S)
                      • Resin Tank Cleaning (SL1/SL1S)
                      • Custom print profiles (SL1/SL1S)
                    • Printer description
                    • General Information