This guide will show you how to use your own model to generate a resin Calibration-object. We recommend this approach only to experienced users. The pre-made Resin calibration object should serve most user's needs, but there might be some specific models you are familiar with or that have features and geometry special to your application.
The .sl1/.sl1s-files for your Original Prusa resin printer is equivalent to the G-code for a FFF machine, but a little different. Files for the Original Prusa SL1 or SL1S SPEED (.sl1/.sl1s files) are archives like a zip-file, with a series of pictures (.png files) for each layer of the print, in addition to a configuration file (.ini file). After slicing, the configuration file is mainly what you have to edit to create your calibration object. The printer will do the rest.
Selecting a model
Number and size
There are two main considerations when choosing a calibration object: The size of the object and the number of objects on the plate. The system will not know the size of your object so if you choose something too big, it can be cropped or not fit on the plate at all. You can test this by creating more instances and see how many will tile on the print platform (maximum 9). However, in the final project, you must only have one instance. The printer will generate the rest.
You will find more information on size and orientation of an object at the end of this article.
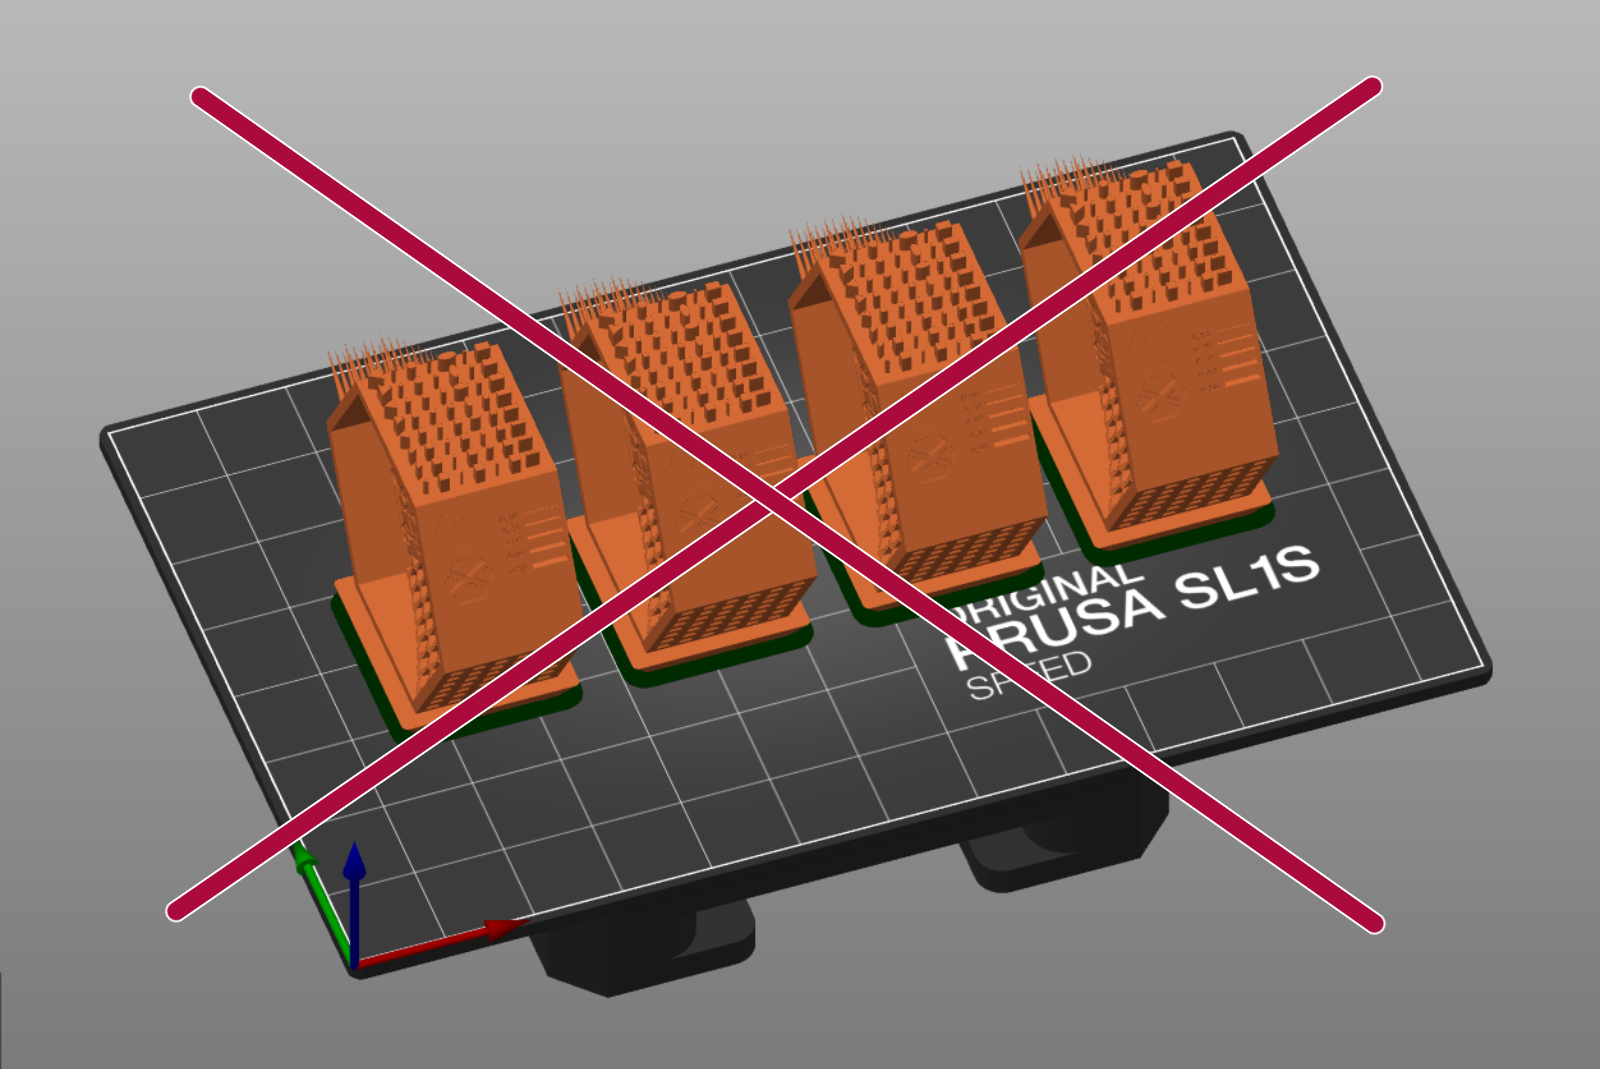
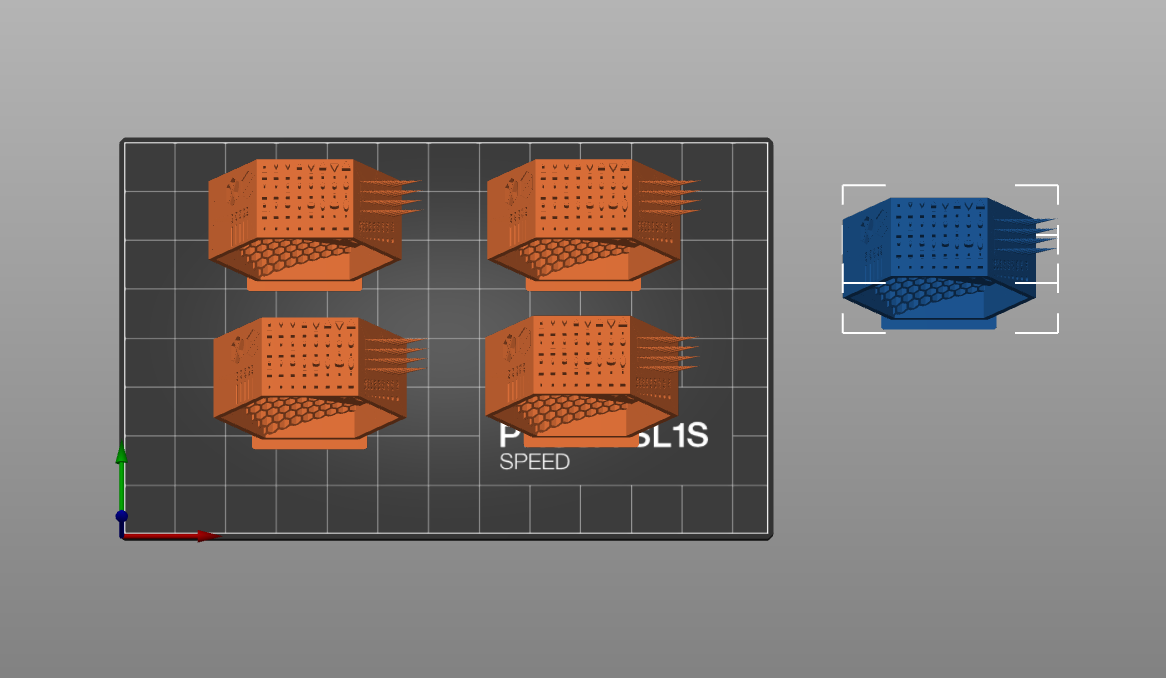 Examples of how many instances will fit on the plate. In this case, 4 instances.
Geometry
We recommend a model with no extreme overhangs which require supports. This will save you a lot of time. Objects can fail completely, which you must then clean up before running the calibration again. Printer "stress tests" you should experiment with later. This is just to find the optimal exposure time across general geometries. This guide will use a version of the Original Prusa SLA Test Object, which is slightly modified to have a smaller footprint. It can be downloaded from Printables.com.
Creating the project file
- Open PrusaSlicer and select the printer you are calibrating for (SL1 or SL1S).
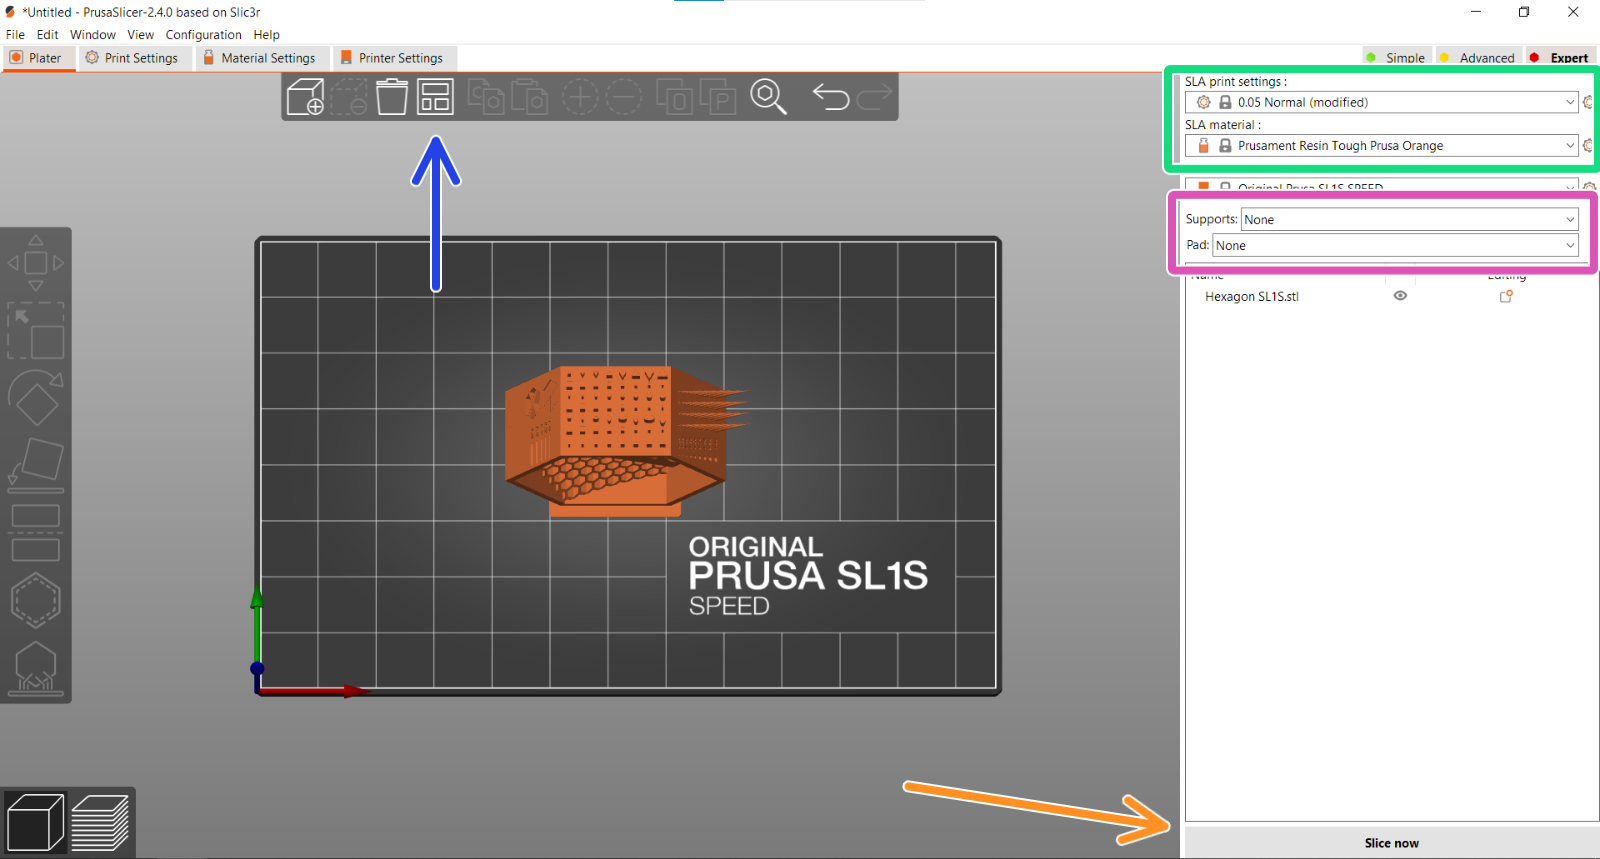
- Add your model to PrusaSlicer and center it by using the Auto-arrange tool (blue arrow). Only create one instance!
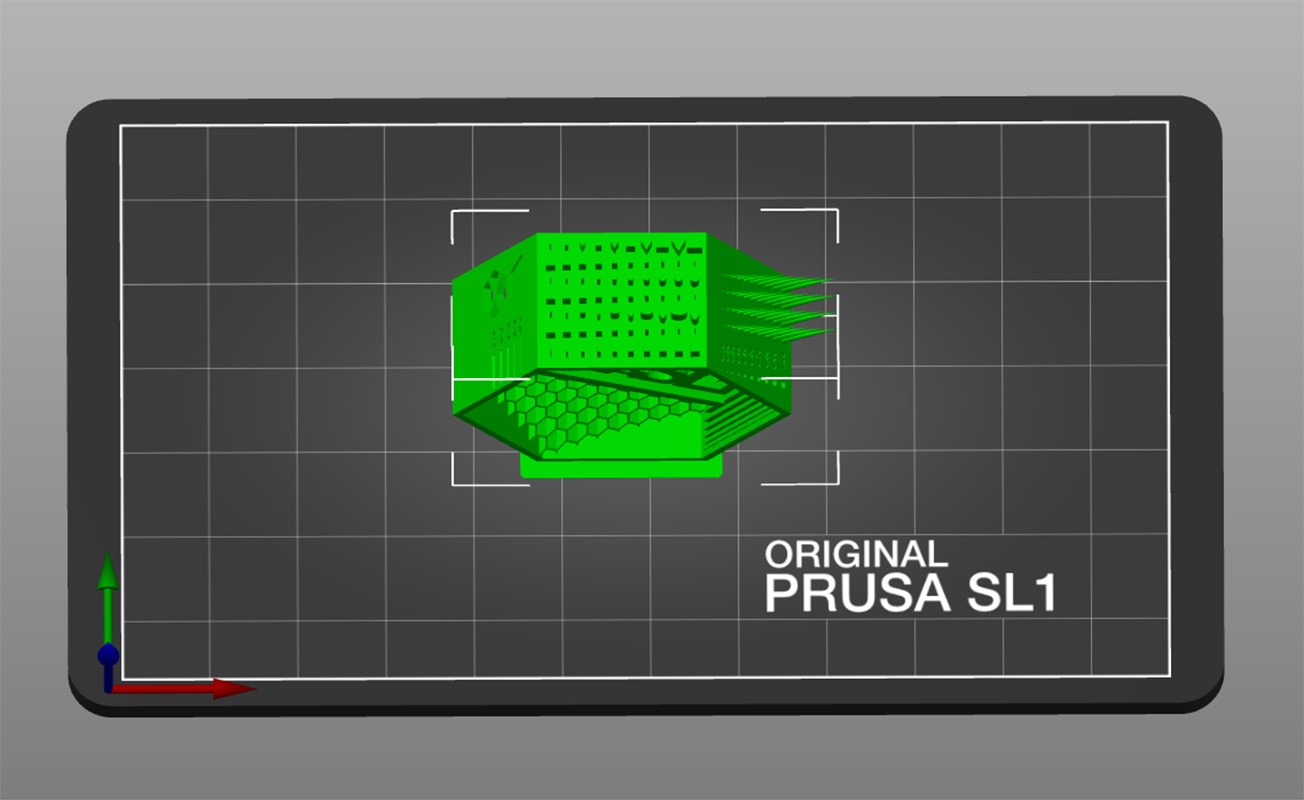 | 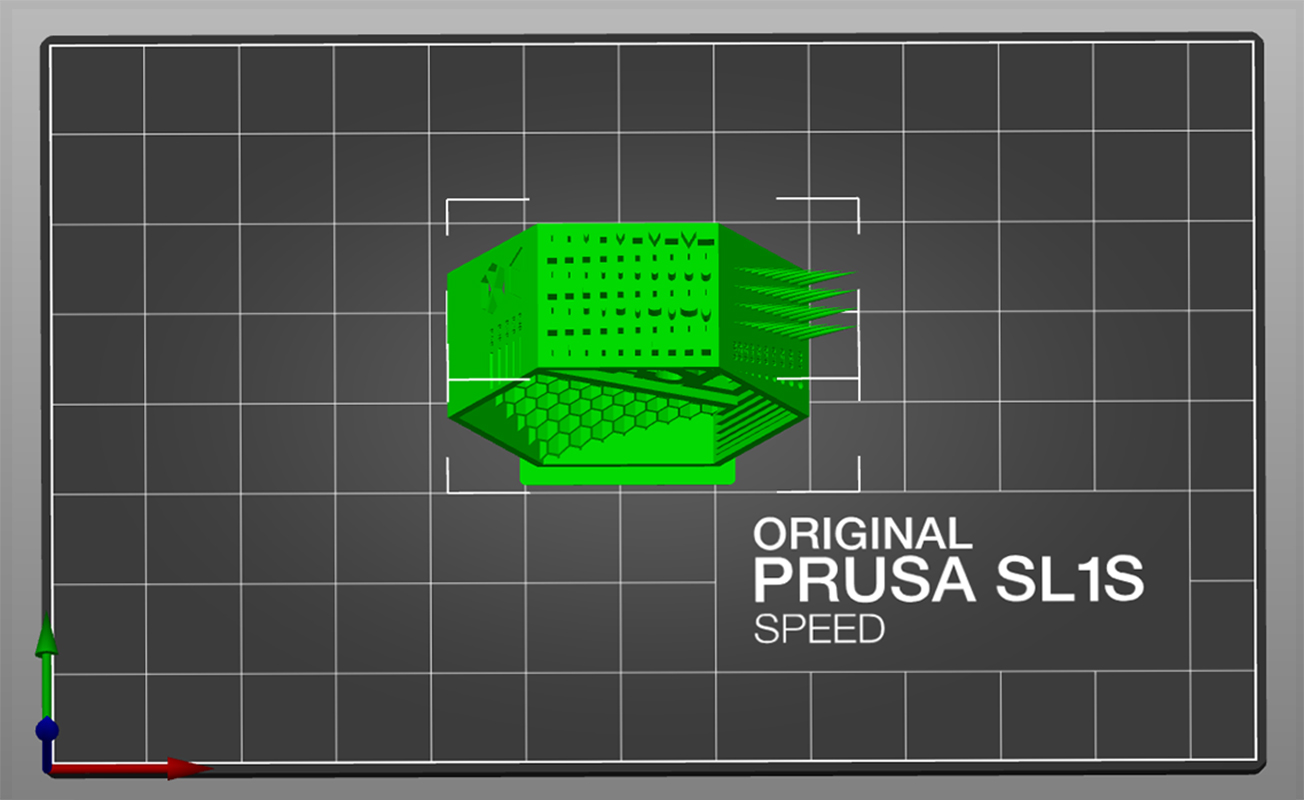 |
- As Resin type select Prusament Resin Tough Prusa Orange, at 0.05 Normal as SLA print setting (green square). This is a good starting point for Tough resins.
- Use no supports or pad (purple square).
- The printer will generate a label showing the exposure time. This is always placed to the right of the model. You may have to rotate the model to make them all fit on the plate.
- Slice and Export your SL1/SL1S project file.
- Copy the exported file onto a USB drive or uploaded through PrusaLink to print the project.
Modifying the project file
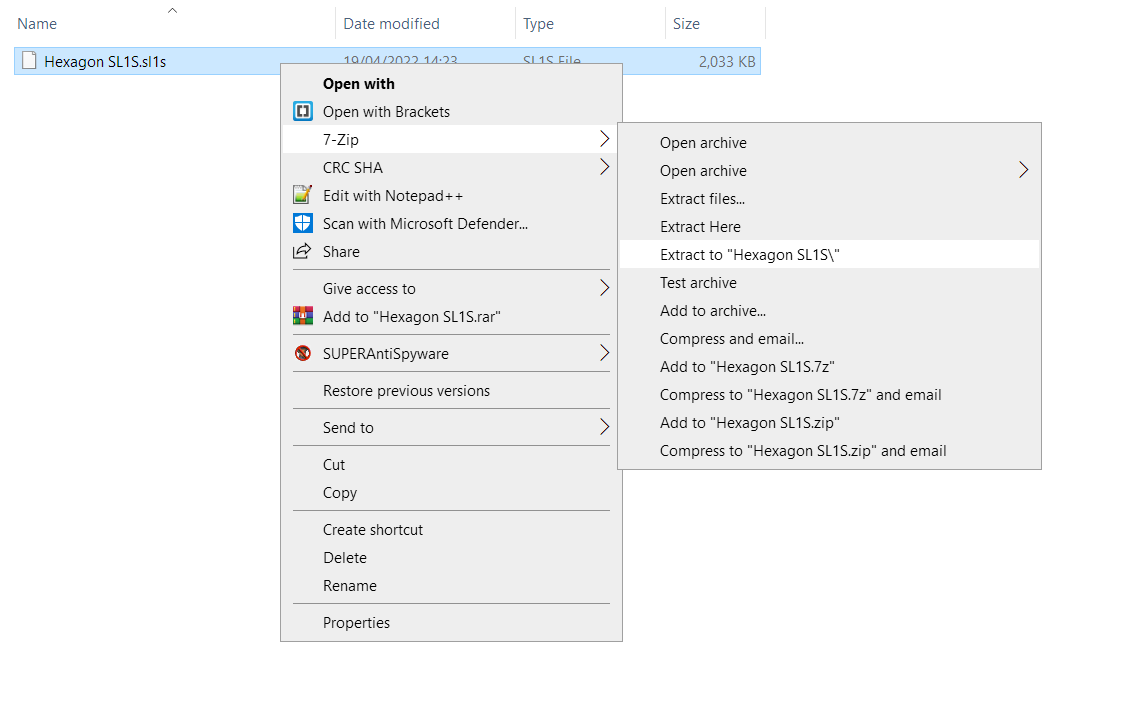
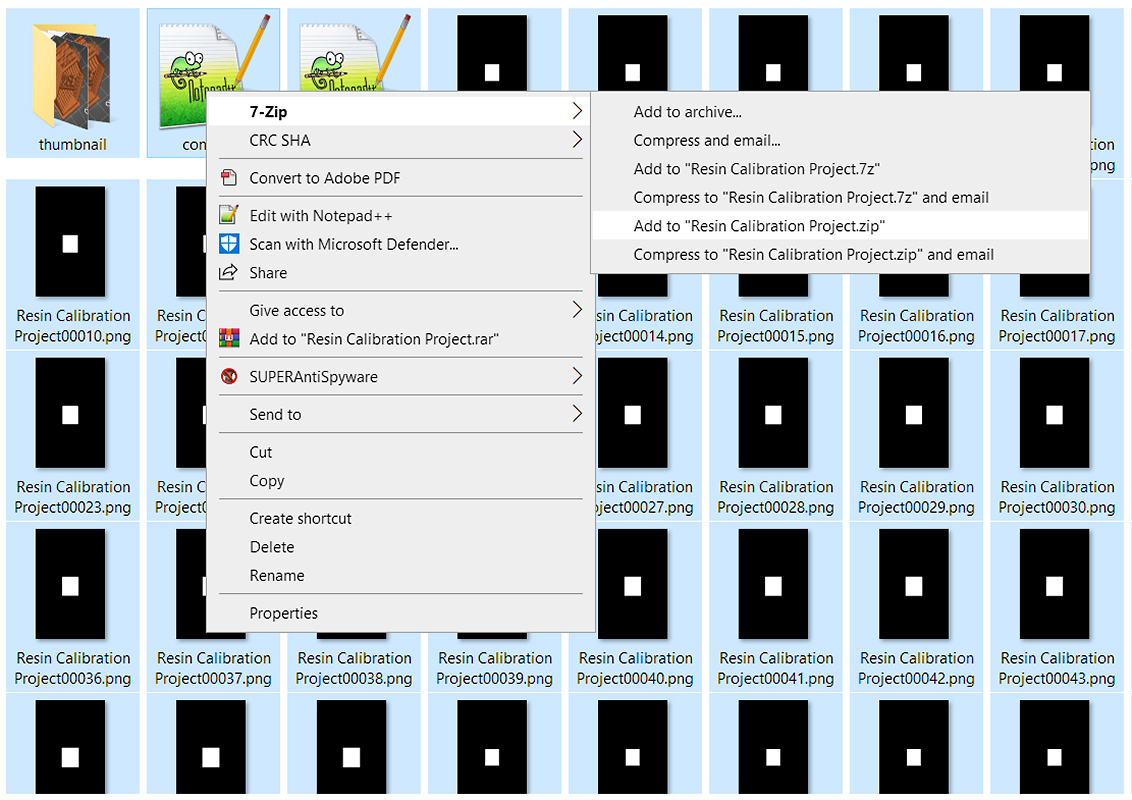
- A program like 7zip is open-source and will automatically recognize the project as an archive. Right-click the file and you are provided the option to "Extract" the content to a folder. If you do not want 7zip installed, change the file name ending from ".sl1" to ".zip" and any archiving application will recognize it.
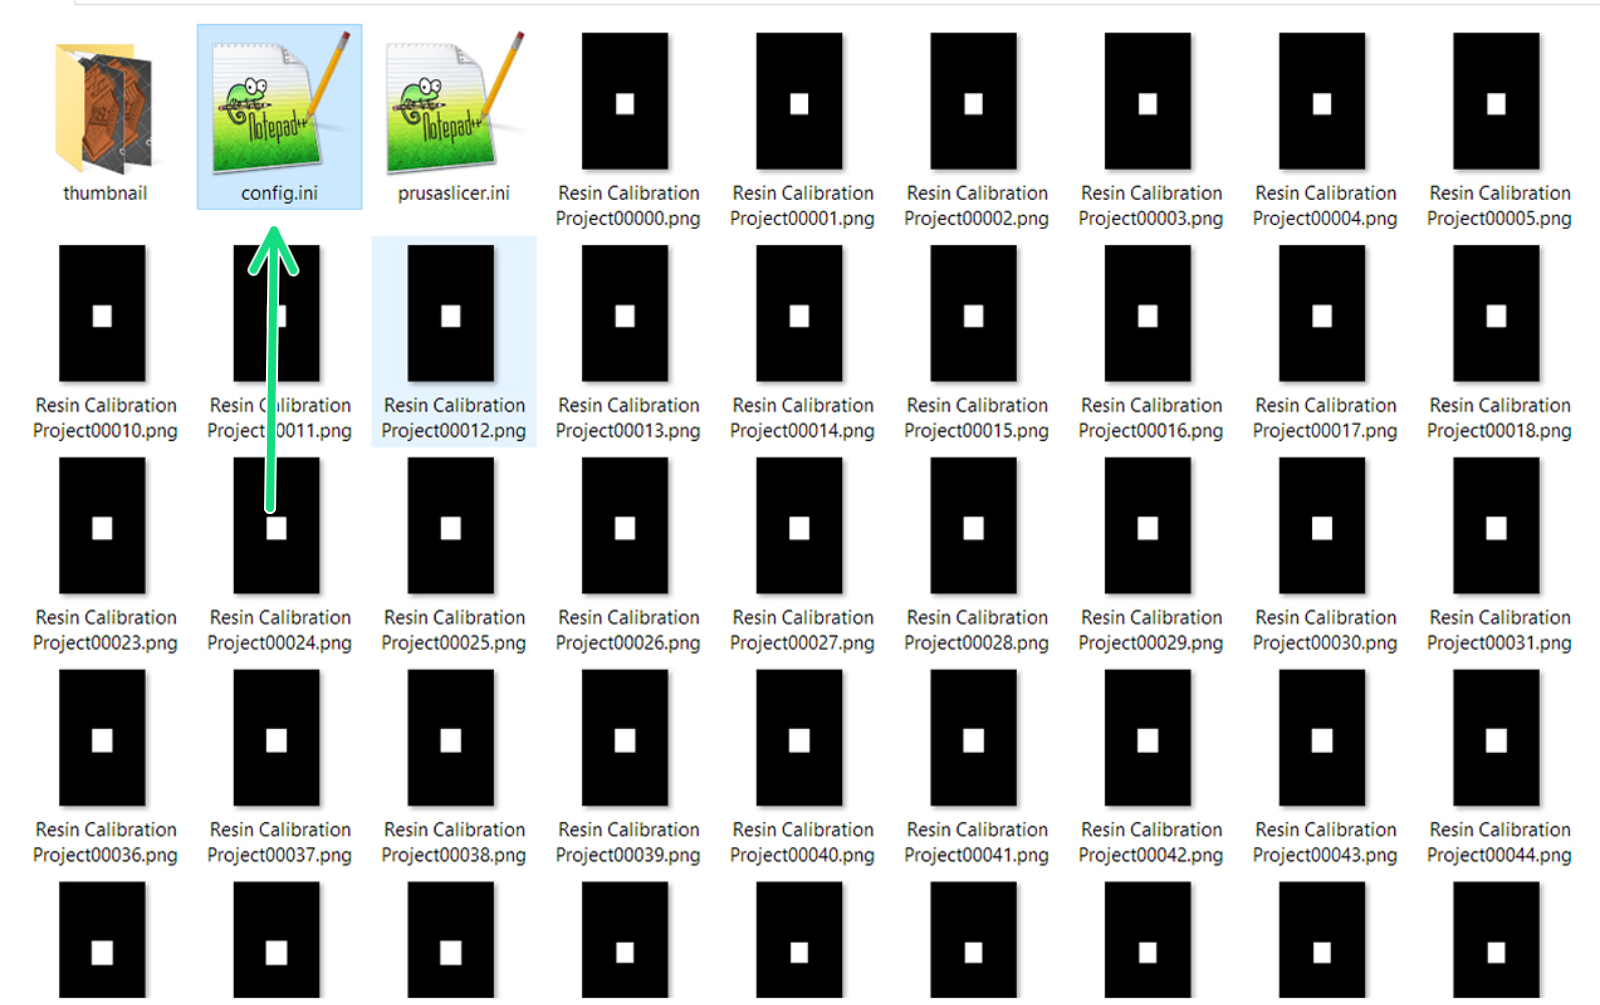
- You will now have a folder with a lot of images and two configuration files. You need to open edit "config.ini" in Notepad, Brackets, or any other plain-text editor. Just ignore "PrusaSlicer.ini".
- After the last line ("usedMaterial = ***"), paste the three lines of code found below for your printer. It is important that you use values compatible with your printer model (SL1 or SL1S SPEED) due to their very different average length of exposure.
Explanation of parameters:
-
-
- calibrateRegions represents the number of objects on the print plate. For this model, it is set to 4, due to the size of the object. You can change this but only use the numbers 2 4 6 8 9, depending on the size.
- calibrateTime is the time increment in seconds per object. Can be adjusted to 1 decimal place (0.1s)
- calibratePadThickness is the thickness in millimeters of the label generated for exposure time.
- calibrateTextThickness is the height in millimeters of the text on the label.
-
| SL1 | SL1S SPEED |
|---|---|
Suggested values for a tough resin on each printer version.
- Make sure you have the configuration as in the picture below and save (ctrl/cmd+S) the config.ini file and close your text editor.
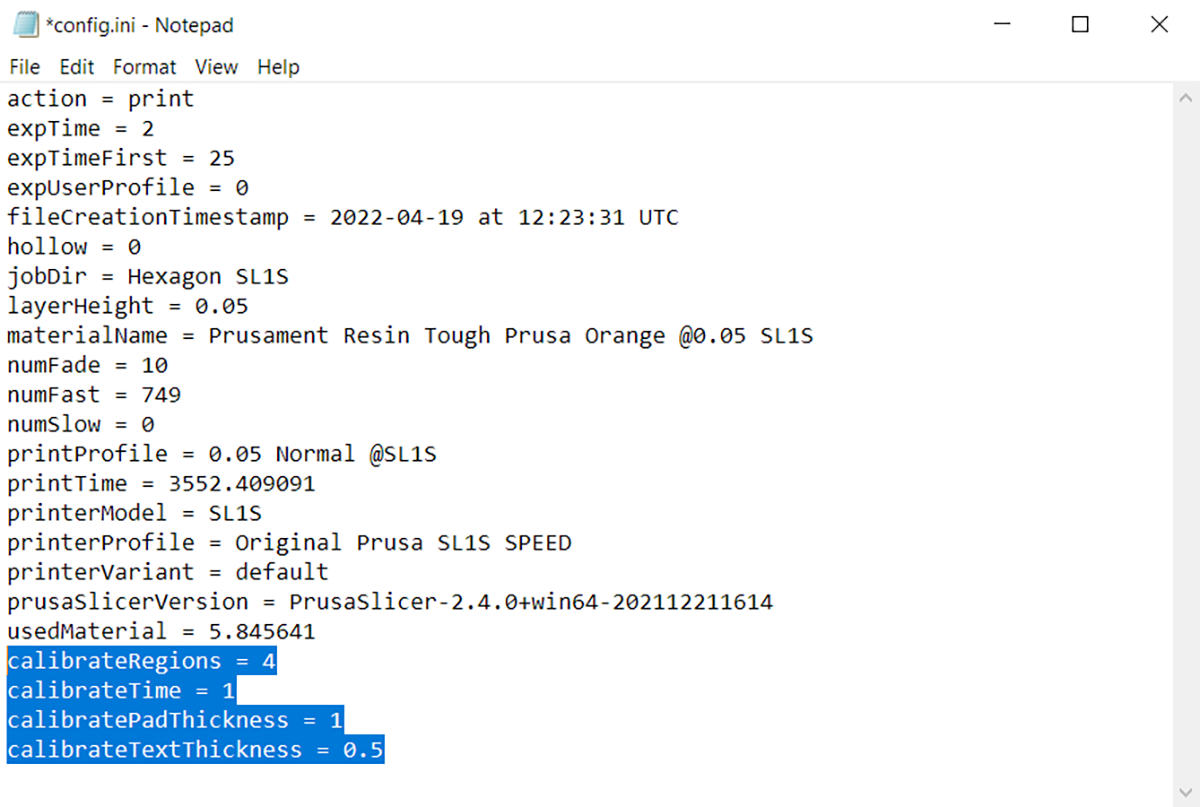
*Default configuration values.
- Select all files in the folder (ctrl/cmd+a), right-click and create an archive (.zip file) of the content.
 | 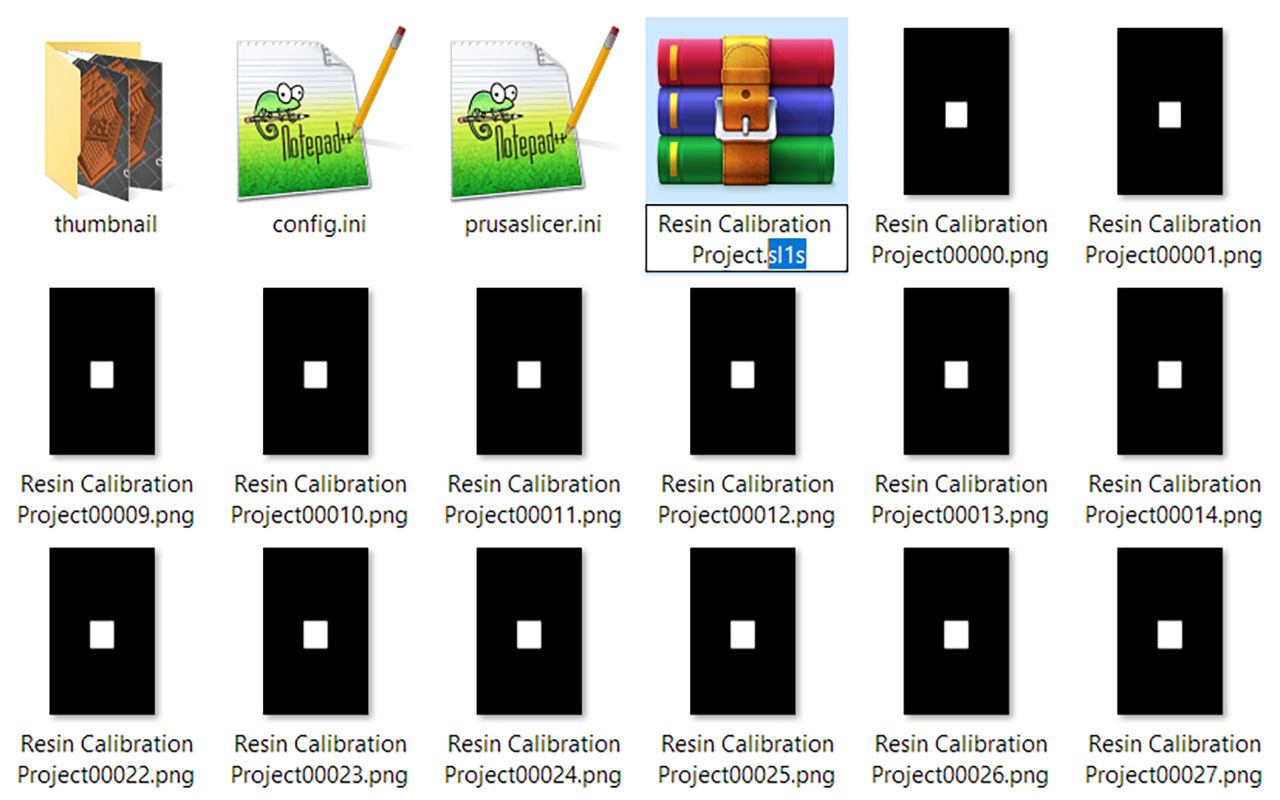 |
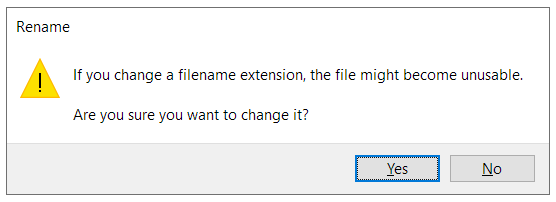
- Change the ending of this Zip file to ".sl1" or ".sl1s", depending on your printer model. Windows will warn you you may make the file unusable, and ask if you wish to continue. Click Yes.
- Copy your newly made SL1 Resin Calibration object to a USB stick and you are ready to run the file on your printer.
Starting the print
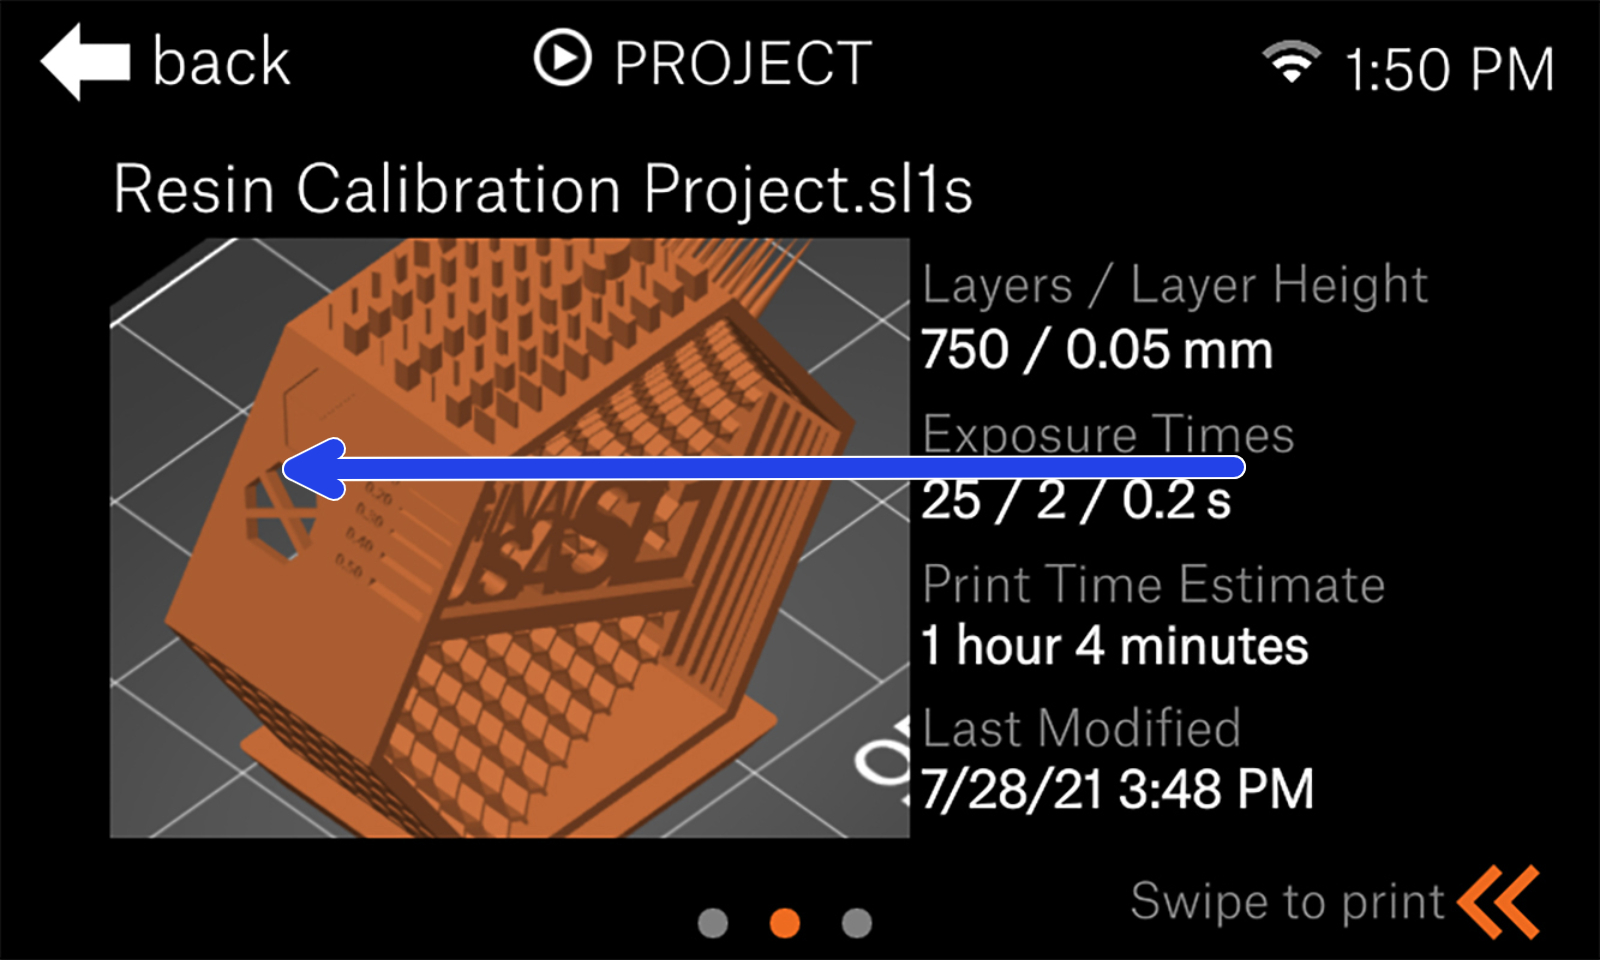
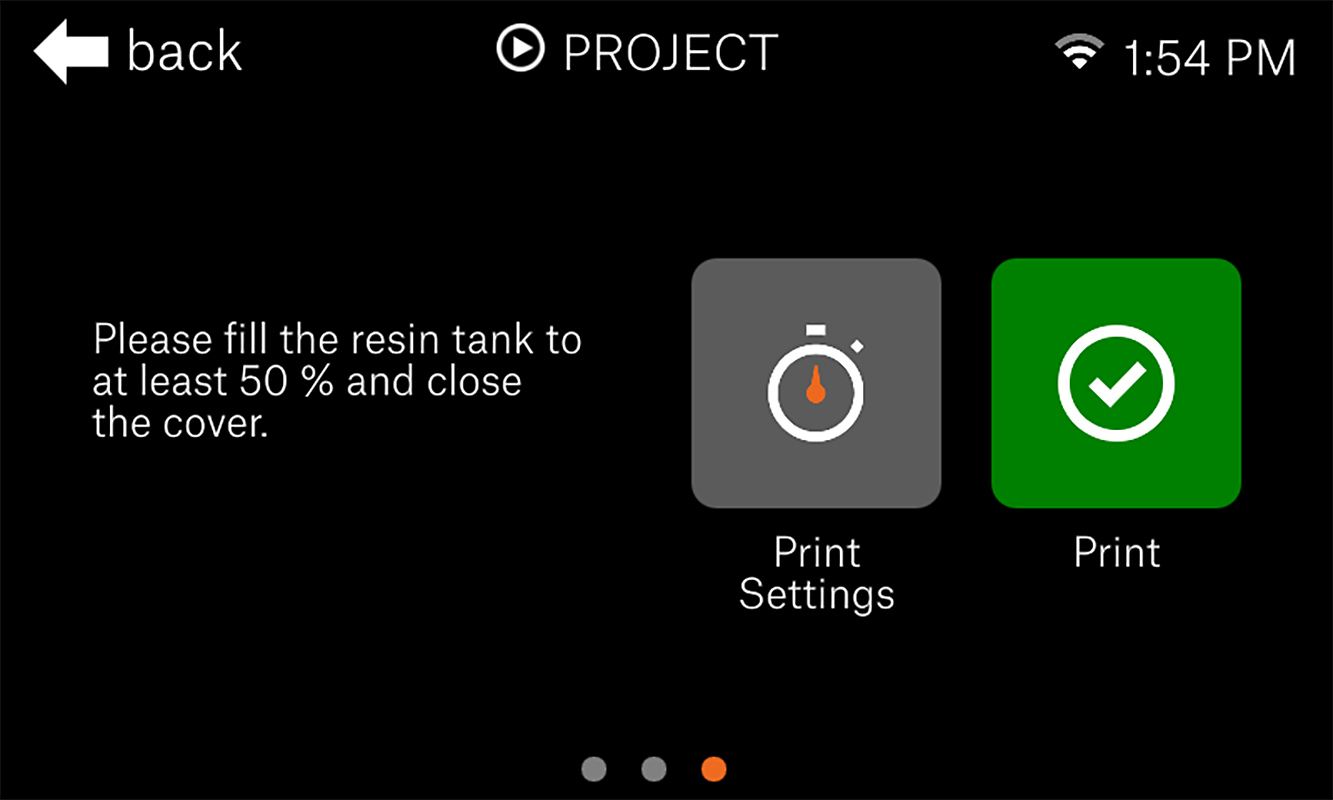
- When selecting the project, swipe left to confirm your print settings.
 |  |
- Within Print settings, you can edit the values of some parameters you pasted in the previous steps. Verify they are as you need them and tap 'Back' in the top-left corner.
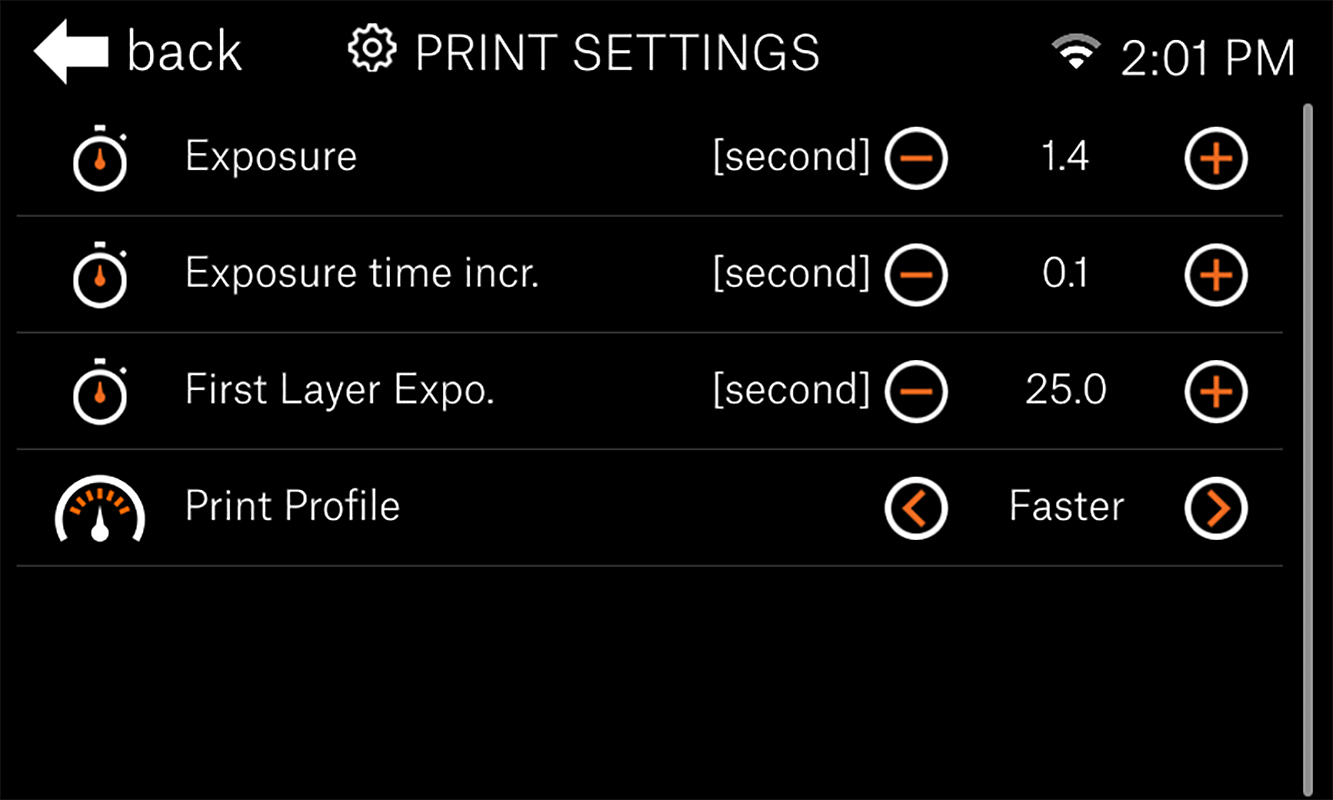
Settings for SL1S SPEED. These values will NOT be compatible with SL1.
- Start your print and let it finish. You will see the printer has created more instances of the object and added a label stating the total layer exposure duration per instance.
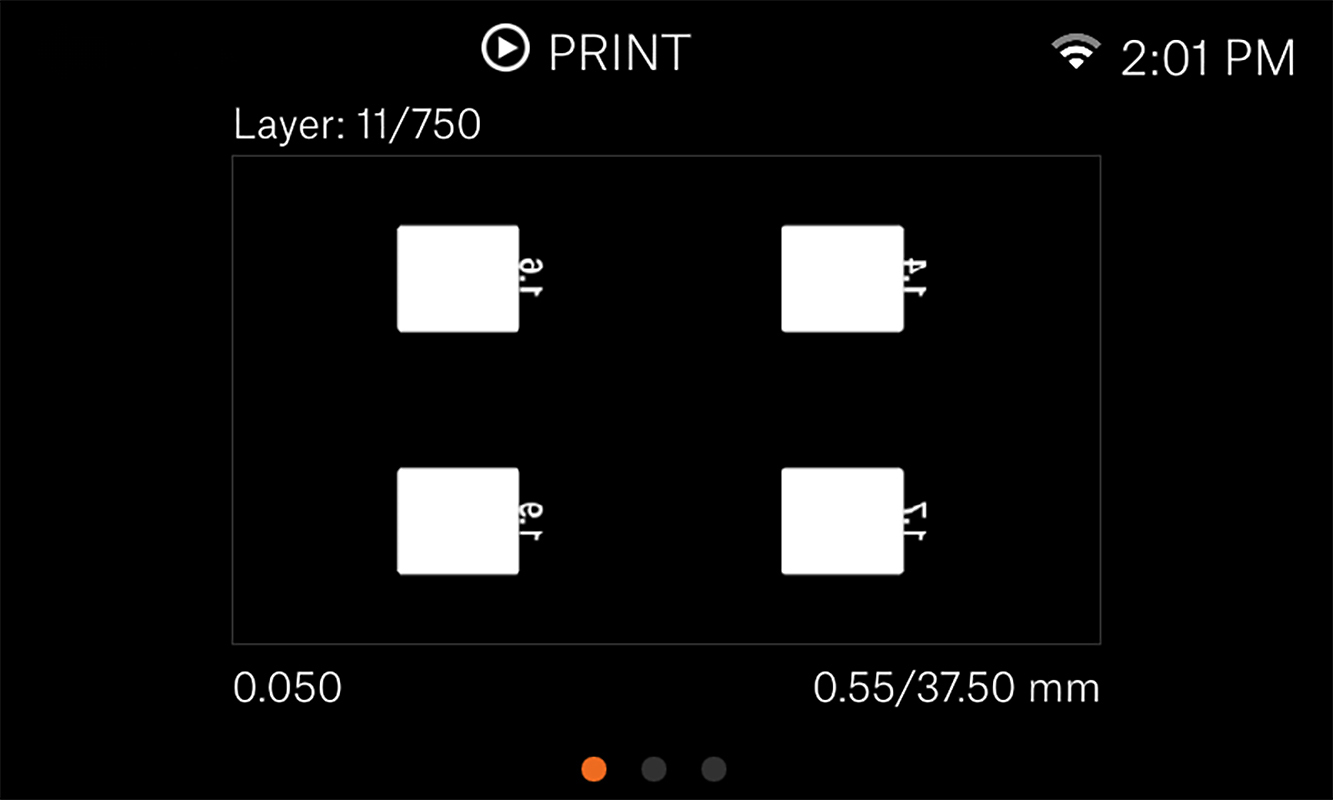
During printing, you can swipe right to see the mask of the current layer.
Assessing the results
Assessing the results will depend on the geometry, but there are some general rules you can follow: The geometry of prints will grow with exposure time. In practice, this means that if you have missing details you must increase exposure duration. Vice versa, if elements, like thin holes, are filled completely you should reduce the exposure.
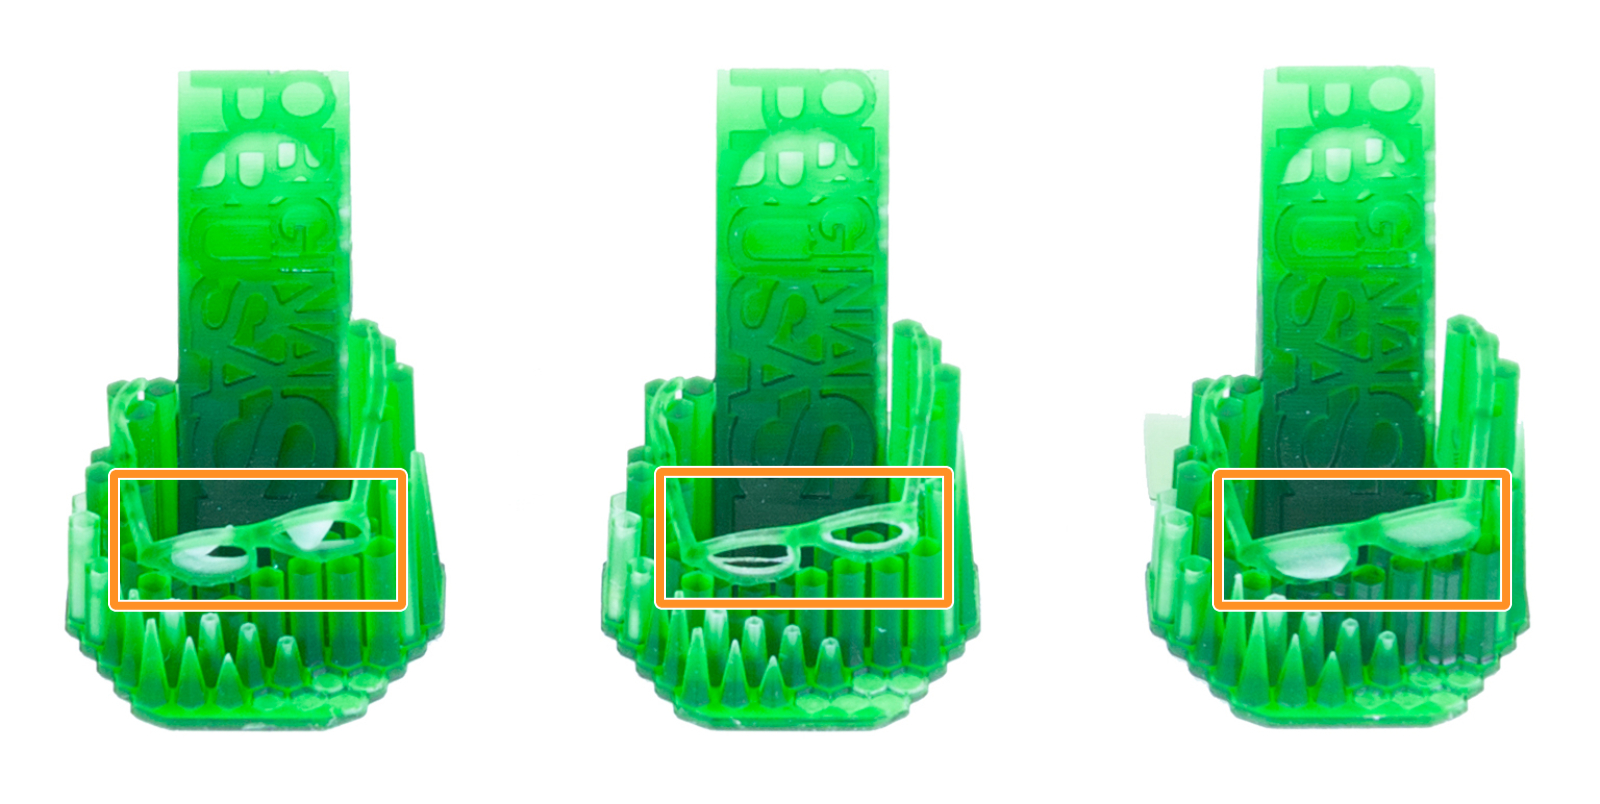 An example of how geometry forms can be found in the pre-made calibration object's glasses, where the actual glass within the frame will not be printed if exposure duration is set too low.
This can be observed where different geometry meets/makes contact as well. Say you have two arrows pointing to each other, touching at the very tip; With insufficient exposure, the tips will not touch. Oppositely, with too long exposure, the point of contact will not be a single point, but rather the two arrow tips will slightly merge together.
How objects are arranged
The printer will automatically take the unmasked area of the print and copy it as many times as is set in the config file (calibrateRegions). It is a basic copy/paste, following strict rules, meaning it will not rotate or arrange objects. With anything more than 2 objects it will place them in a grid pattern.
| Regions | Grid size | Max. X/Y object size SL1S SPEED | Max. X/Y object size SL1 |
|---|---|---|---|
| 4 | 2x2 | 63 mm x 40 mm | 60 mm x 34 mm |
| 6 | 3x2 | 42 mm x 40 mm | 40 mm x 34 mm |
| 8 | 4x2 | 31 mm x 40 mm | 30 mm x 34 mm |
| 9 | 3x3 | 42 mm x 26 mm | 40 mm x 22 mm |
* Values are rounded down. Considerations for non-uniform/symmetric/extreme geometries must be applied. Note that for each object there is a tag (5x10 mm) connected to it. This affects the maximum object size.
If orientation or size is not right
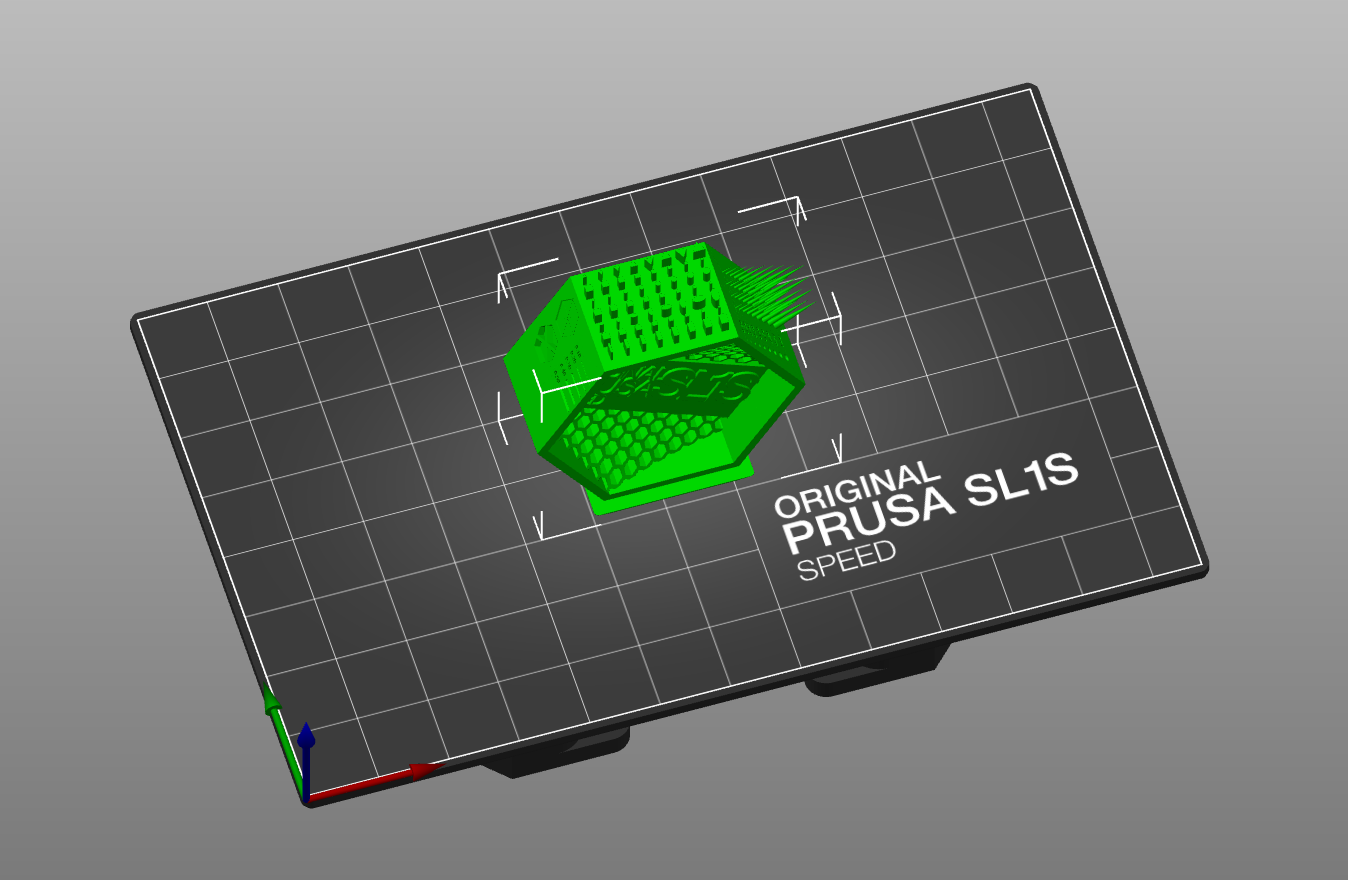 | 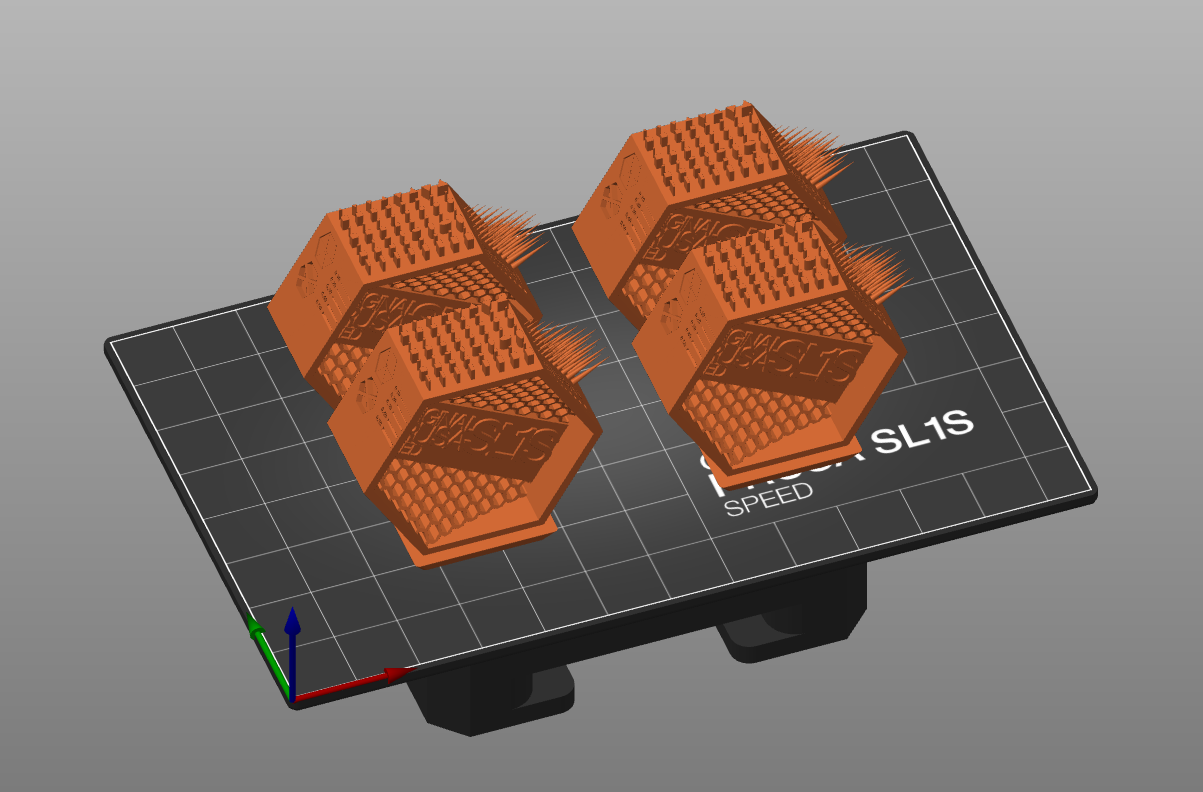 |
With four regions it will always put them two by two. Therefore, the size and orientation of the model can affect whether everything will fit on the plate, or will be cropped by being outside of the platform.
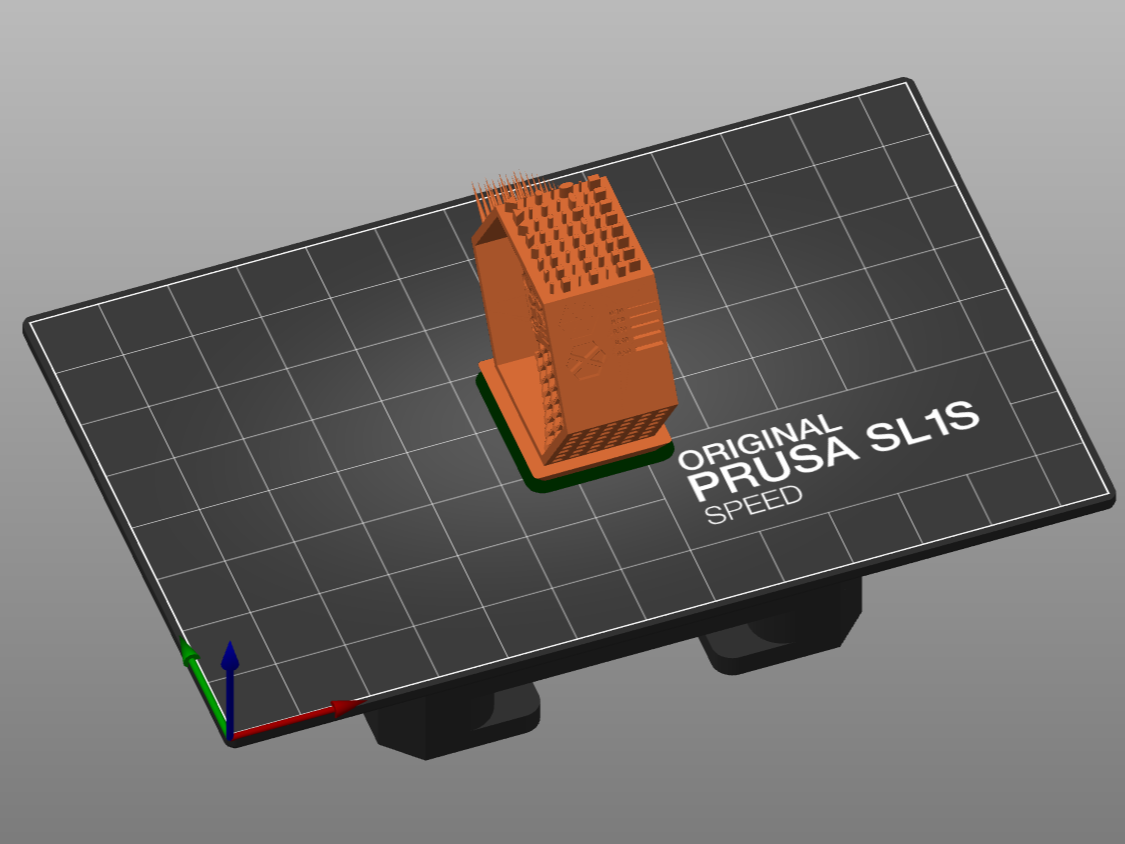 | 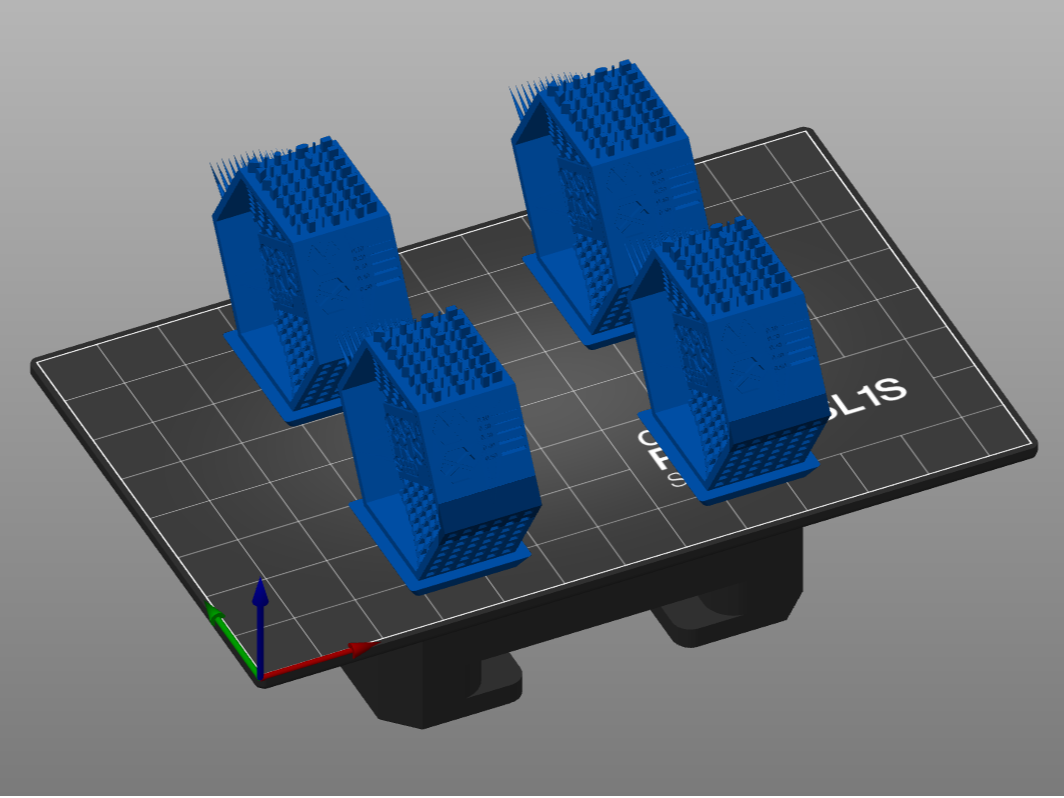 |
It will not consider the total area of the object and place them all in a row, if that is how it would fit, like PrusaSlicer does.
Creating a PrusaSlicer preset
Did you find the best exposure time for your resin? Great! You can start a normal print right away, adjusting the exposure time on the printer's display before the print or you can create your own resin profile:
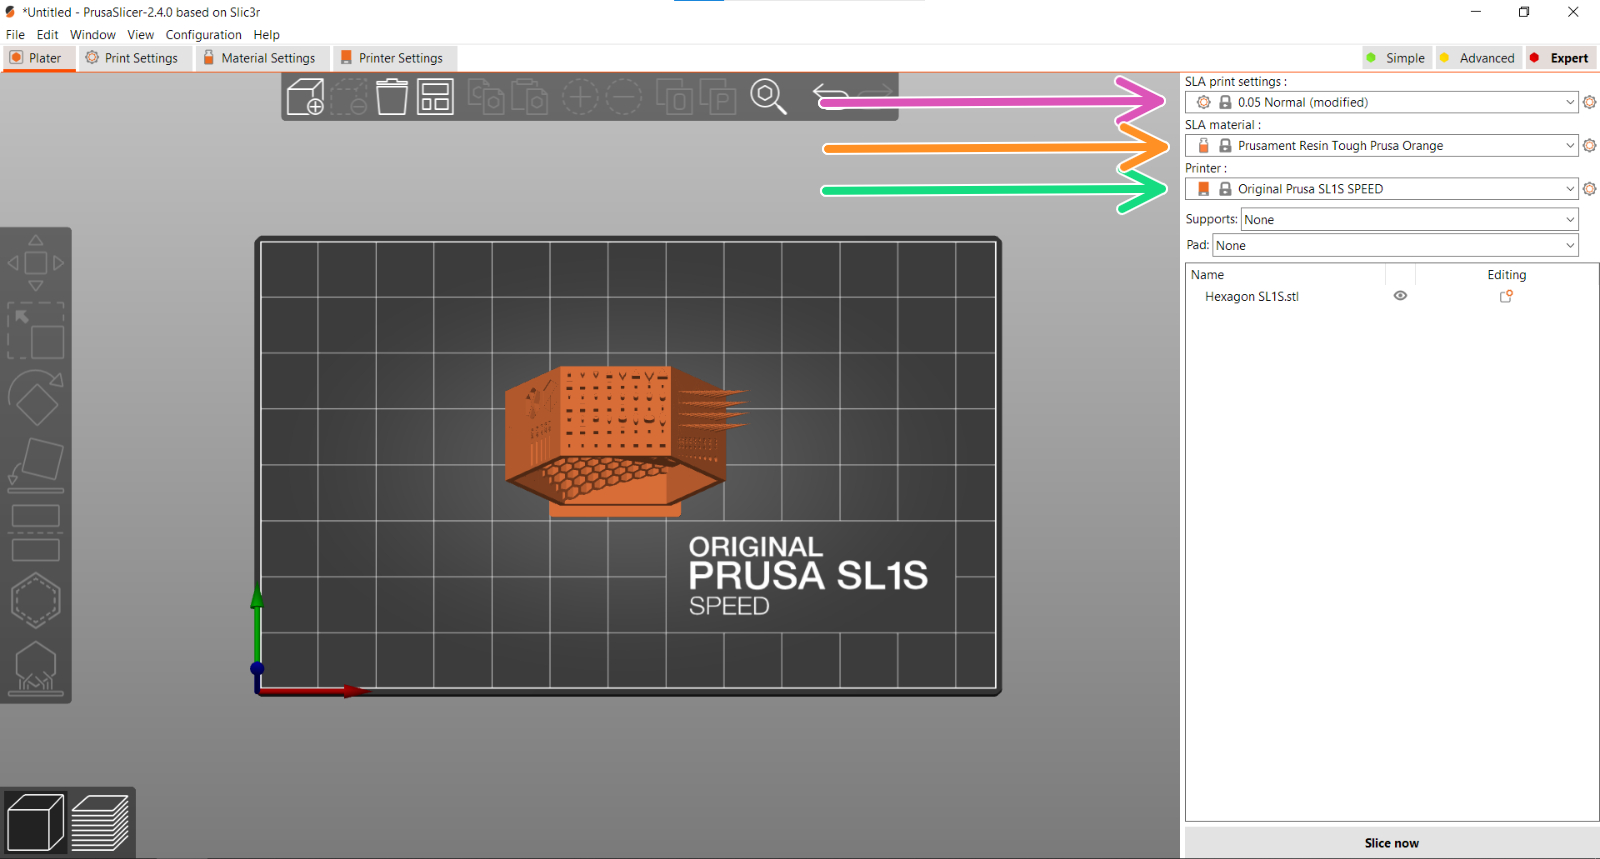
- Open PrusaSlicer and in the Plater view, select from the list of the printers (green arrow), Original Prusa SL1/SL1S SPEED, depending on which you have.
- Select Prusament Resin Tough Prusa Orange as "SLA material" (orange arrow).
- From SLA print settings (purple arrow), select the layer height you want to calibrate the resin for. This will load all the available resins.
- Click on the "Material settings" tab on top.
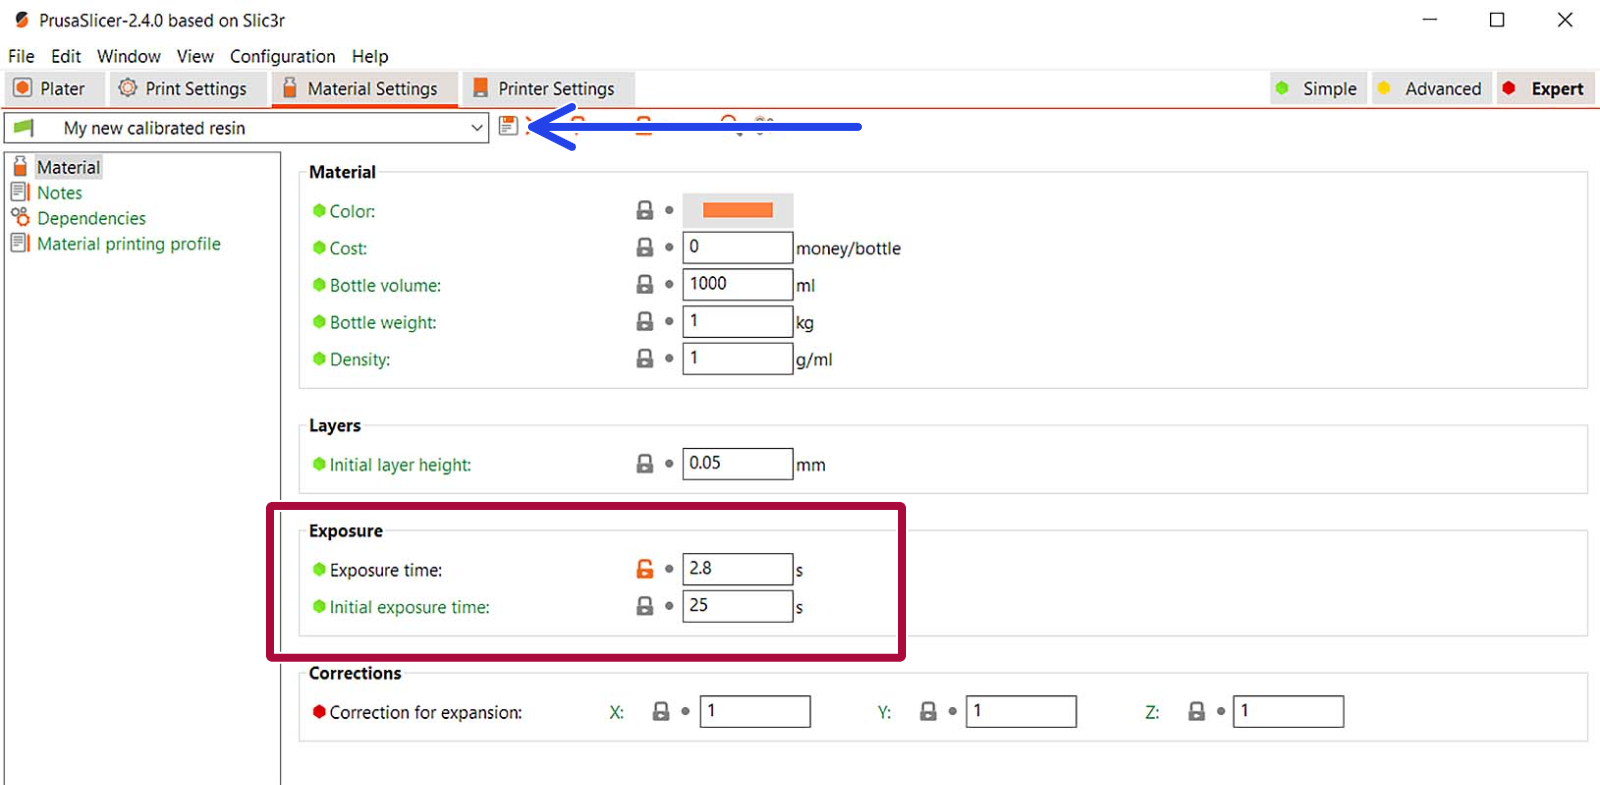
- Select any resin from the dropdown list with the layer height you intend to calibrate for. It will be used as a base for your new profile. Then click on the "Save" icon (?) next to the list (blue arrow).
- A dialogue will open up where you name the preset (e.g. "My new calibrated resin") and hit "OK".
- In the new resin, the profile adjusts the fields "Initial Exposure time" and "Exposure time" (red square), which sets the time for which each layer of the sliced object is exposed to the UV light.
- Now, you are good to go. Slice your next model and Happy Printing!
