Prusa
  • SHOP
    • Latest products
    BY CATEGORY
    • 3D printersnew
    • 3D printer upgradesnew
    • Materials
    • Accessories
    • Spare parts
    • Courses
    • Merch
    • Get a price quote
    QUICK LINKS
    • Shipping & delivery
    • Returns & refunds
    • Payment & financing
    • Warranty
    • VAT & Customs fees
    • FAQ

    0 item in your cartitems in your cart

    Your cart is empty

    Go to cartShop 3D printers

    My profile

    Log in to see orders, saved items

    My profile

    Signed in as

    • Orders
    • Logout
  • 3D PRINTING
    • Explore 3D printing
    FOR BEGINNERS
    • 3D printing 101
    • How FDM printing works
    • Buying your first printer
    • 3D model catalog
    BY APPLICATION
    • Rapid prototyping
    • Manufacturing
    • Engineering
    • Research
    • Arts & design
    GO DEEPER
    • Materials guide
    • Courses
    • Webinars
    • Case studies
    • Custom 3D printing
  • 3D PRINTERS
    • All 3D printers
    FOR
    • Home or garageHobbyists, tinkerers and home printing
    • BusinessIn-house production for small teams
    • EnterpriseFleets, security and scale
    • Which Prusa is right for me
    SHOP & BROWSE
    • CORE One+new
    • CORE One+ INDXnew
    • CORE One L+new
    • CORE One L+ INDXnew
    • XL+new
    • MK4S
    • Prusa Pro HT90
    • Prusa Pro AFS
    • Prusa Pro SLX
    MORE FROM PRINTERS
    • Parts & upgradesnew
    • Critical infrastructure
    • Case studies
    • Signature Oak
    • Kits
  • MATERIALS
    • All materials
    BY USE
    • Every-day & design
    • Functional engineering
    • Composites
    • Pro speciality
    • SLA resins
    PRUSAMENT
    • PLA
    • PETG
    • ASA
    • PC
    • PA11
    • Flex
    • TPU
    MORE FROM MATERIALS
    • Materials guide
    • We make material in house
    • Sustainability
    • Order on the store
  • SOFTWARE
    • All software
    PREPARE THE PRINT
    • PrusaSlicer 3.0New
    PRINT & MONITOR
    • Prusa Connect
    • EasyPrint
    • iOS & Android app
    • Prusa Farm
    GET STARTED
    • Download & install
    • Knowledge base
    MORE FROM SOFTWARE
    • 3D model catalog
  • SUPPORT
    • Explore support
    FIND ANSWERS
    • Knowledge base
    • Troubleshooting
    • Courses
    • Webinars
    GET HELP
    • Contact us
    • Livechat
    • Shipping & delivery
    • Warranty
    • Returns & refunds
    • Service & spare parts
    • Service & Repair
    COMMUNITY
    • Forum
    • Reddit
    • Printables
  • TRUST CENTER
    • Trust Center overview
    BY TOPIC
    • GDPR
    • Certificates
    • Security
    • Compliance
    COMMITMENTS
    • Sustainability report
    TALK TO US
    • Contact the security team
  • COMPANY
    • About Prusa
    GET TO KNOW US
    • Our story
    • How we make printers
    • Open source
    • Brand & media kit
    NEWS
    • Blog
    • Newsroom
    • Events
    TRUST & PARTNERS
    • Sustainability
    • Resellers & distributors
    • Affiliate program
    • Contact
    • English
    • Čeština
    • Deutsch
    • Español
    • Français
    • Italiano
    • Polski
    • 日本語
  • Signed in as

    • Orders
    • Address
    • In-stock Alerts
    • My Courses
    • Subscription
    • Edit Account
    • Logout

Log in to see orders, saved items

Signed in as
  • Orders
  • Address
  • In-stock Alerts
  • My Courses
  • Subscription
  • Edit Account
  • English
  • Čeština
  • Deutsch
  • Español
  • Français
  • Italiano
  • Polski
  • 日本語
Shop

0 item in your cartitems in your cart

Your cart is empty

Go to cartShop 3D printers

My profile

Log in to see orders, saved items

My profile

Signed in as

  • Orders
  • Logout
SHOP
  • Latest products
BY CATEGORY
  • 3D printersnew
  • 3D printer upgradesnew
  • Materials
  • Accessories
  • Spare parts
  • Courses
  • Merch
  • Get a price quote
QUICK LINKS
  • Shipping & delivery
  • Returns & refunds
  • Payment & financing
  • Warranty
  • VAT & Customs fees
  • FAQ

Featured products

    Popular categories

      Trending searches

        Articles

          Blog

            Products

              Categories

                Suggested searches

                  Searching…
                  No results
                  Something went wrong.
                  ↑↓ Select↵ OpenEsc Close search
                  1. Support
                  2. Prusa CORE One L+
                  3. Printer features
                  4. Nextruder silicone sock (CORE One/+, CORE One L/+, XL/+, MK4/S, MK3.9/S)
                   

                  Contents

                  • Why use a silicone sock?
                  • Cleaning the hotend
                  • Preliminary steps
                  • Installing the silicone sock

                  Blog

                  • Print colorful and glowing Halloween decorations with our spooky offer
                  • Factorio Has Arrived on Printables
                  • Prusament PLA Lightweight: 65% lighter than regular PLA. Perfect choice for aircraft, cosplay, and more.

                  Newsletter

                  Signup and get our monthly squeeze on updates, blog, printables and much more.

                  By clicking, you agree to receive our newsletter.

                  This site is protected by reCAPTCHA Enterprise and the Google Privacy Policy and Terms of Service apply.

                  Factorio Transport Belts
                  E-shop
                  • 3D Printers
                  • Printer Upgrades
                  • Filaments
                  • Accessories
                  • Prusa Merchandise

                  © Prusa Research a.s.

                  Printables
                  • 3D Models
                  • Store
                  • Clubs
                  • 3D Design Contests
                  • Brands
                  Community
                  • World Map
                  • Forum
                  • User Groups
                  • Events
                  Help
                  • Prusa Help
                  • Prusa Academy
                  • 3D Printing Calculators
                  Software
                  • PrusaSlicer
                  • Prusa.app
                  • Prusa Connect
                  • Drivers and Software
                  Company
                  • About Us
                  • Blog
                  • Official Prusa Resellers
                  • Contact Us
                  • Certified for ISO 9001, ISO 14001, ISO 45001
                  • General Terms and Conditions
                  • General Terms and Conditions of Use of the PRUSA Websites
                  • Privacy Policy
                  • Information about cookies
                  • Customer Complaints Policy
                  • Status Page
                  • Do Not Sell or Share My Personal Information
                  • Supplemental Statements
                  • General Terms and Conditions
                  • General Terms and Conditions of Use of the PRUSA Websites
                  • Privacy Policy
                  • Information about cookies
                  • Customer Complaints Policy
                  • Status Page
                  • Do Not Sell or Share My Personal Information
                  • Supplemental Statements

                  © Prusa Research a.s.

                  JOSEF PRUSA®, PRUSA RESEARCH®, PRUSA POLYMERS®, PRUSA ORANGE®, PRUSA 3D ® AND PRUSAMENT® are registered trademarks of Prusa Development a.s. used by Prusa Research a.s. under licence from Prusa Development a.s.

                  Nextruder silicone sock

                  (CORE One/+, CORE One L/+, XL/+, MK4/S, MK3.9/S)

                  Relevant for

                  CORE One family
                  MK4 family
                  XL family
                  MK3.9 family
                  36 comments
                  Article is also available in following languages
                  English
                  Čeština
                  Polski
                  Deutsch
                  Français
                  Español
                  Italiano
                  日本語

                  The Original Prusa Printers with the Nextruder are equipped with a Prusa Nozzle. A dedicated silicone sock can be attached to this nozzle.

                  We offer Nextruder silicone socks in a set of three on our e-shop.

                  Why use a silicone sock?

                  The main function of a silicone sock is to keep the temperature in the heater block stable, which improves the printer's performance. There are additional benefits to using the silicone sock, like keeping your hotend clean from filament dirt and protecting it in case the print detaches from the print surface. They are instrumental if you want to print high-temperature filaments.

                  The Nextruder silicone sock also has a low chance of slipping off your hotend. The Nextruder has the cables on the top of the heater block, so there is no need for the sock to have cable openings on the side. 

                  Cleaning the hotend

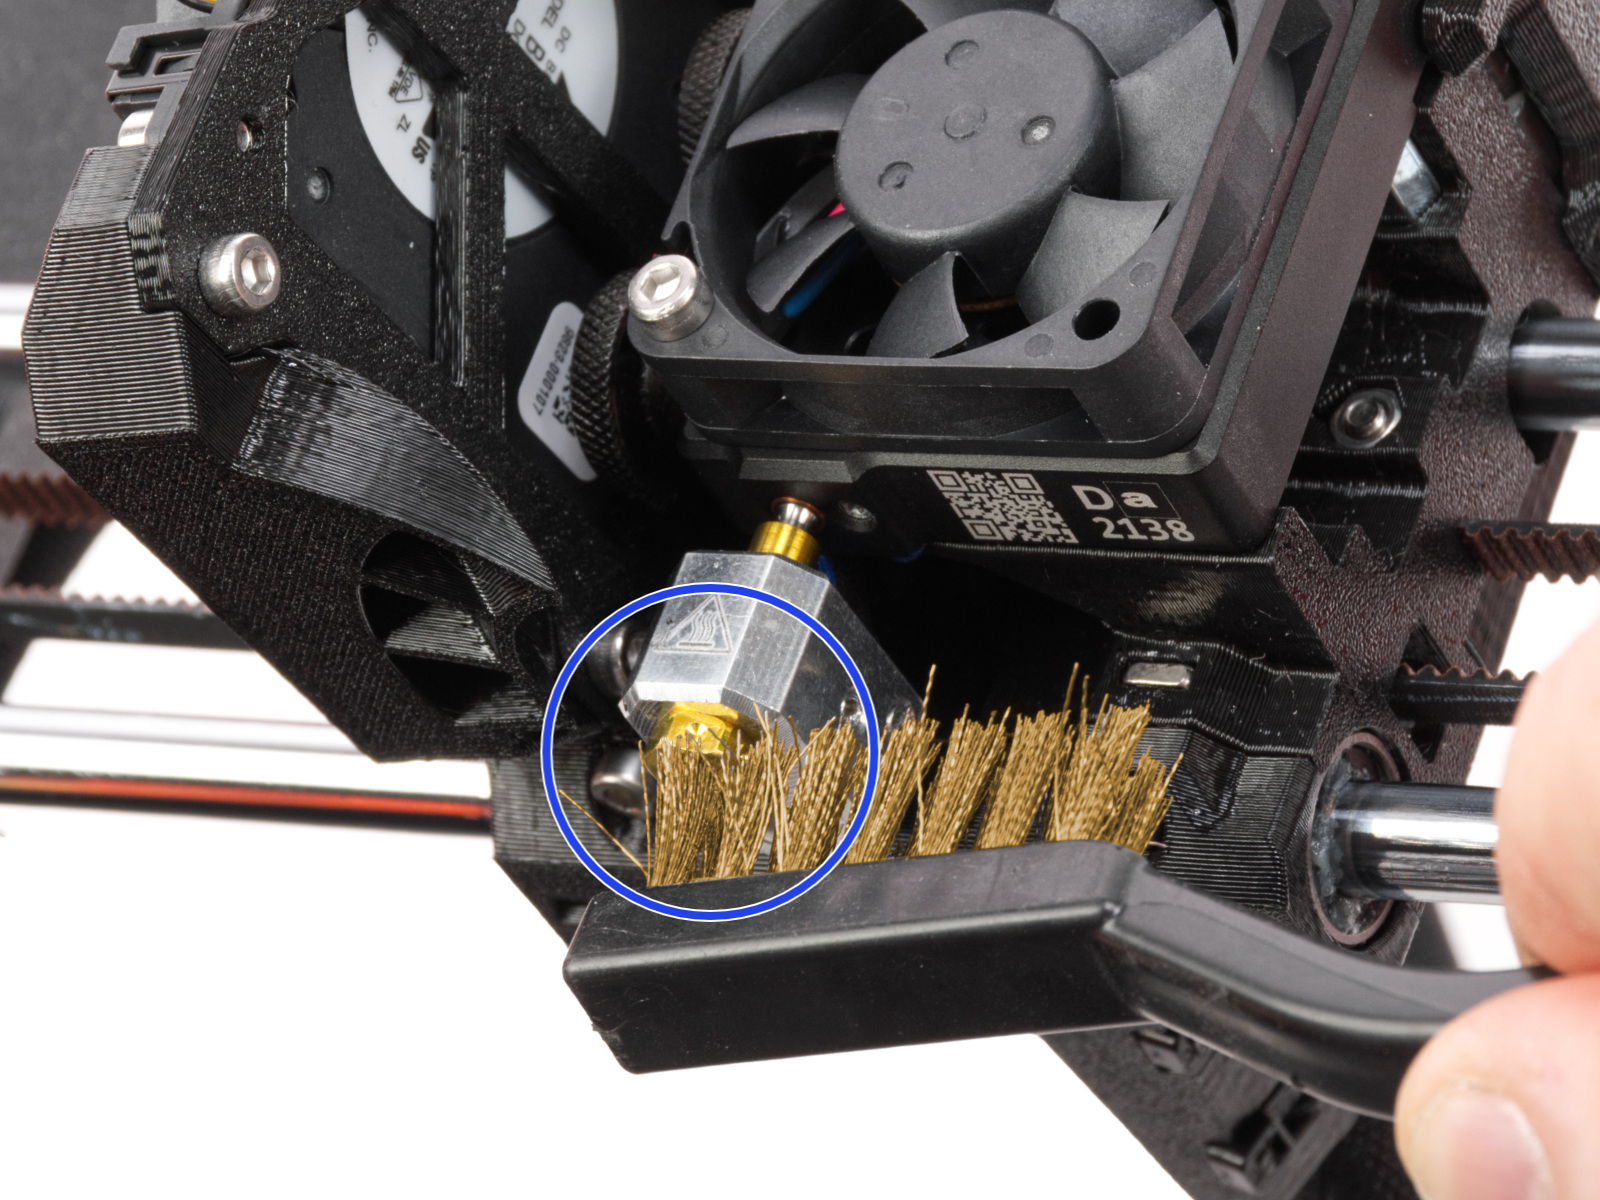
                  Before installing the sock on your hotend, it is necessary to have the heaterblock and the hotend clean of the remains of the filament. For that, go to the printer menu to Control -> Temperature -> Nozzle Temperature and use the knob to set the temperature to 250°C. Wait for about five minutes so that all of the filament remains can be softened. Then, using the brass brush, carefully clean the heaterblock and the hotend from the filament residue. Avoid contact of the brush with the hotend cables, as this could cause a short circuit. 

                  After that, go to the printer menu to Preheat -> Cooldown. Wait until the hotend reaches a temperature below 50 ºC before continuing. 

                  Preliminary steps

                  Make sure that the hotend is fully cooled down to room temperature and that the printer is switched off before manipulating the printer parts or installing the silicone sock.
                  Heated parts can cause severe burns! 

                  Prusa CORE One, CORE One L

                  1. Move the printer axes, in particular the Z-axis, so that the bottom of the hotend is accessible. This is done by navigating to LCD Menu -> Control -> Move Axis.
                  2. Fully cool down the printer to room temperature and switch it off. 

                  Original Prusa MK4S, MK3.9S

                  1. Move the printer axes, in particular the Z-axis, so that the bottom of the hotend is accessible. This is done by navigating to LCD Menu -> Control -> Move Axis.
                  2. Fully cool down the printer to room temperature and switch it off. 
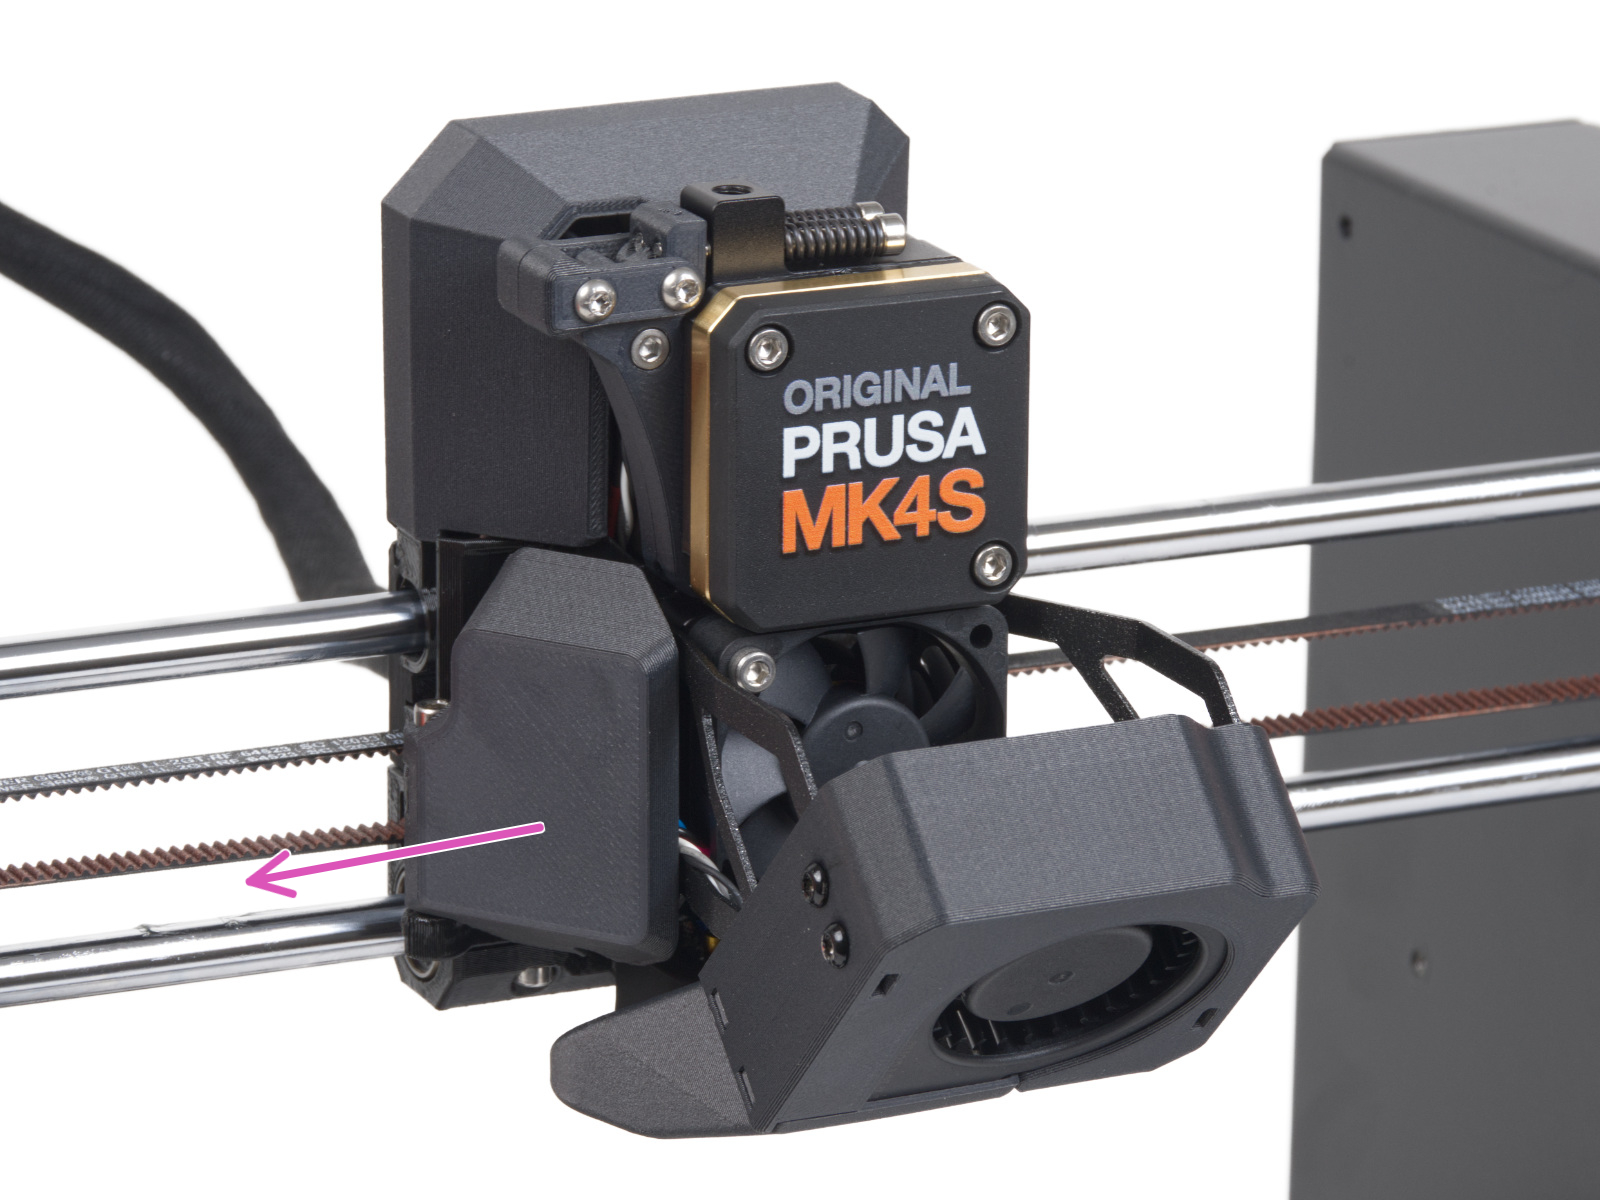
                  3. Rotate the fan-door-cover to open it completely. 
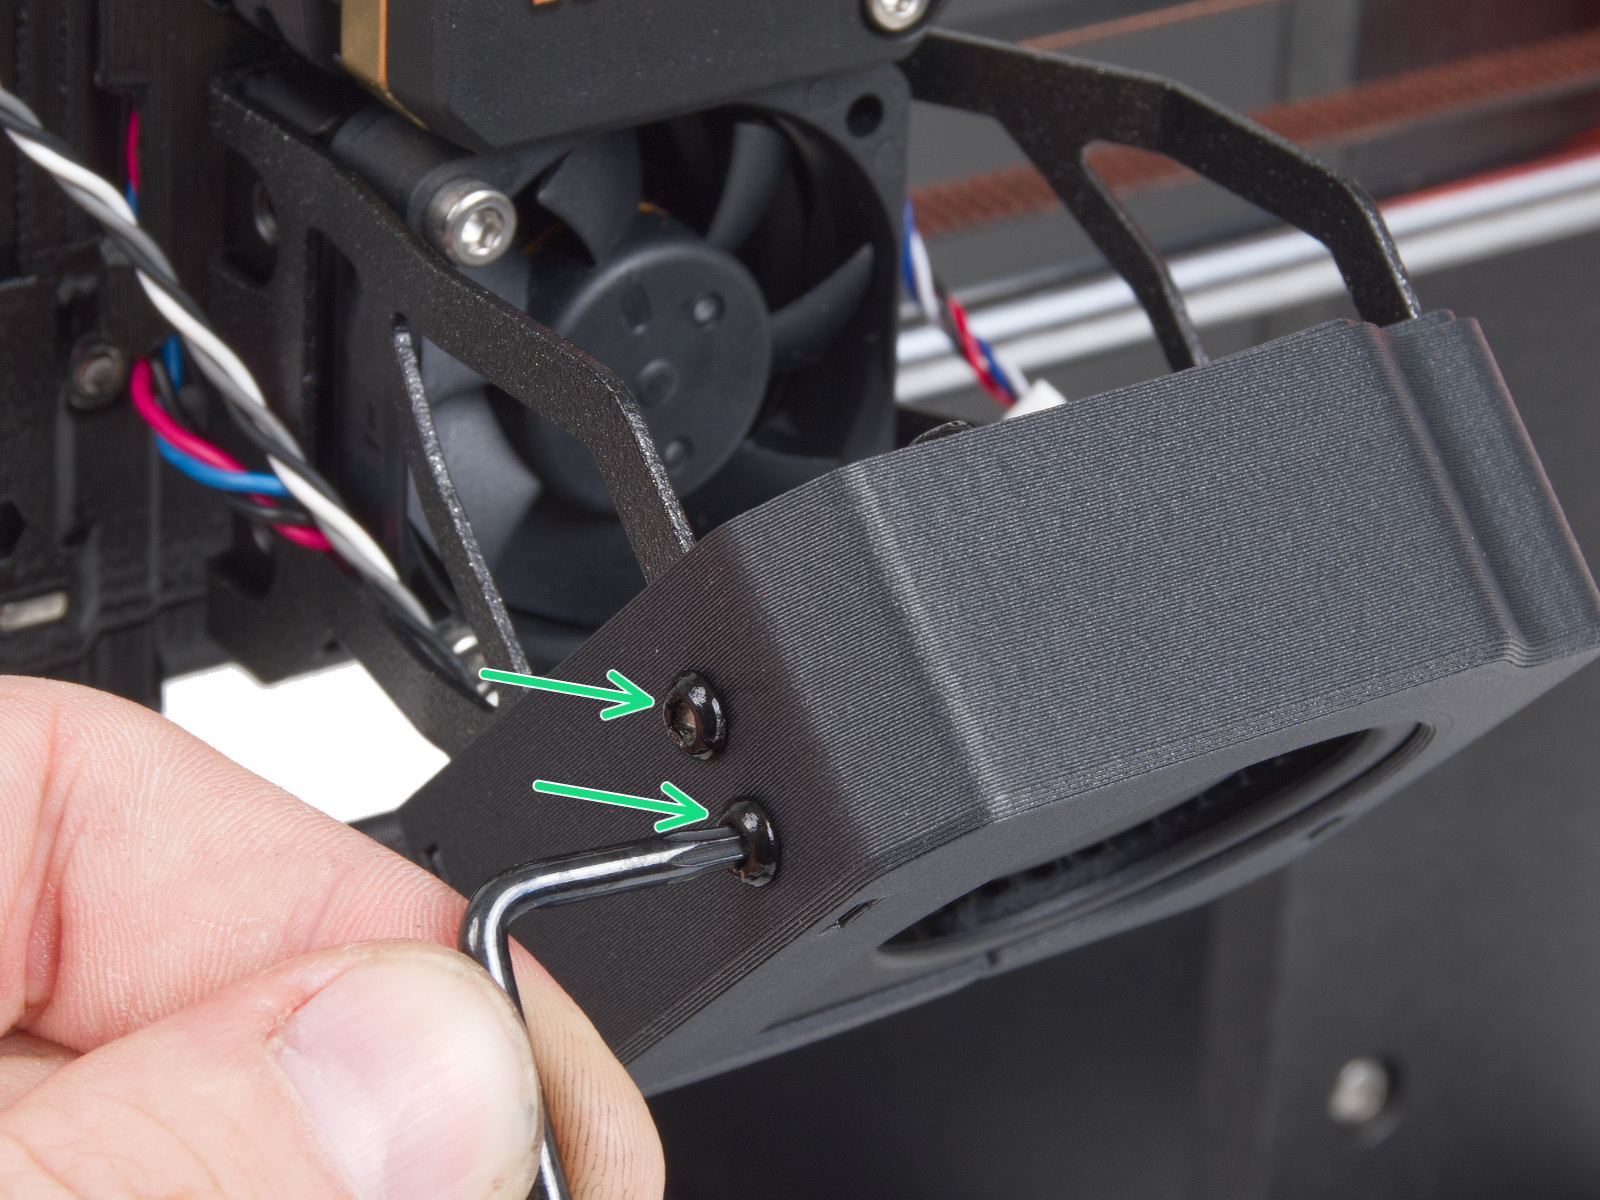
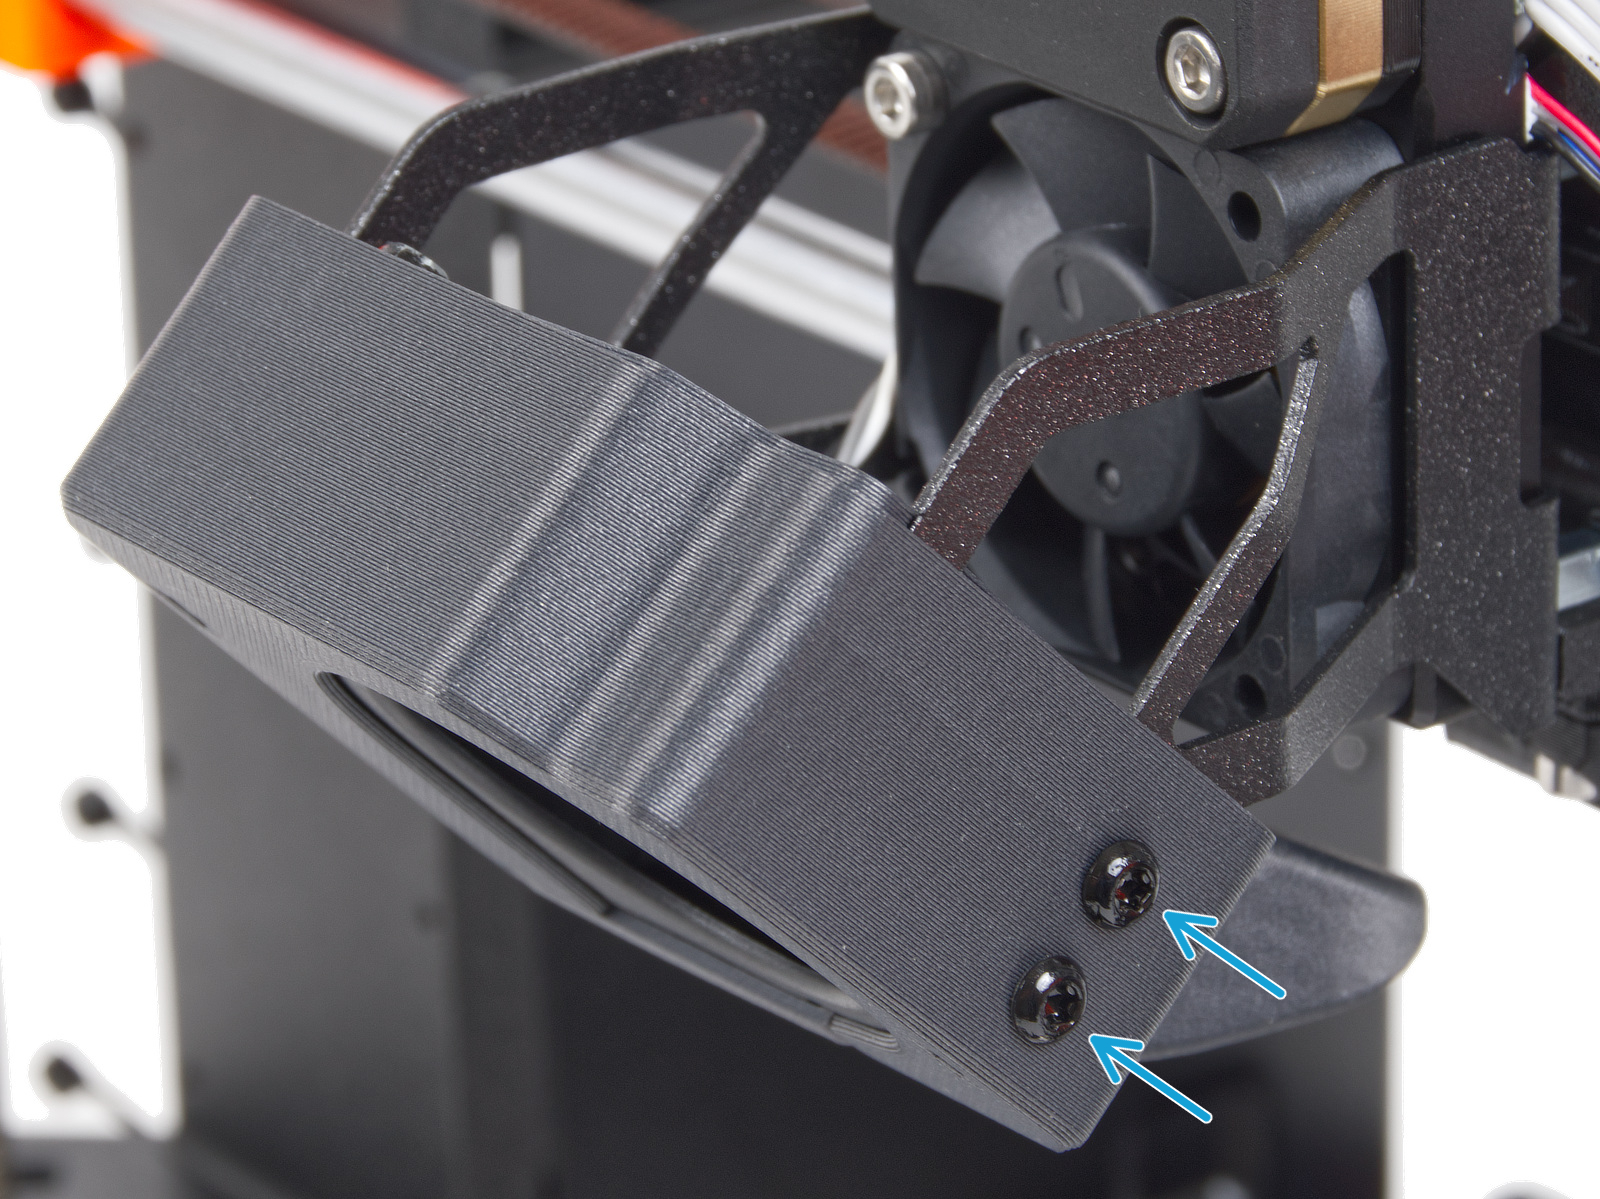
                  1. Loosen 4x M3x5rT screws, two on the left and two on the right. 
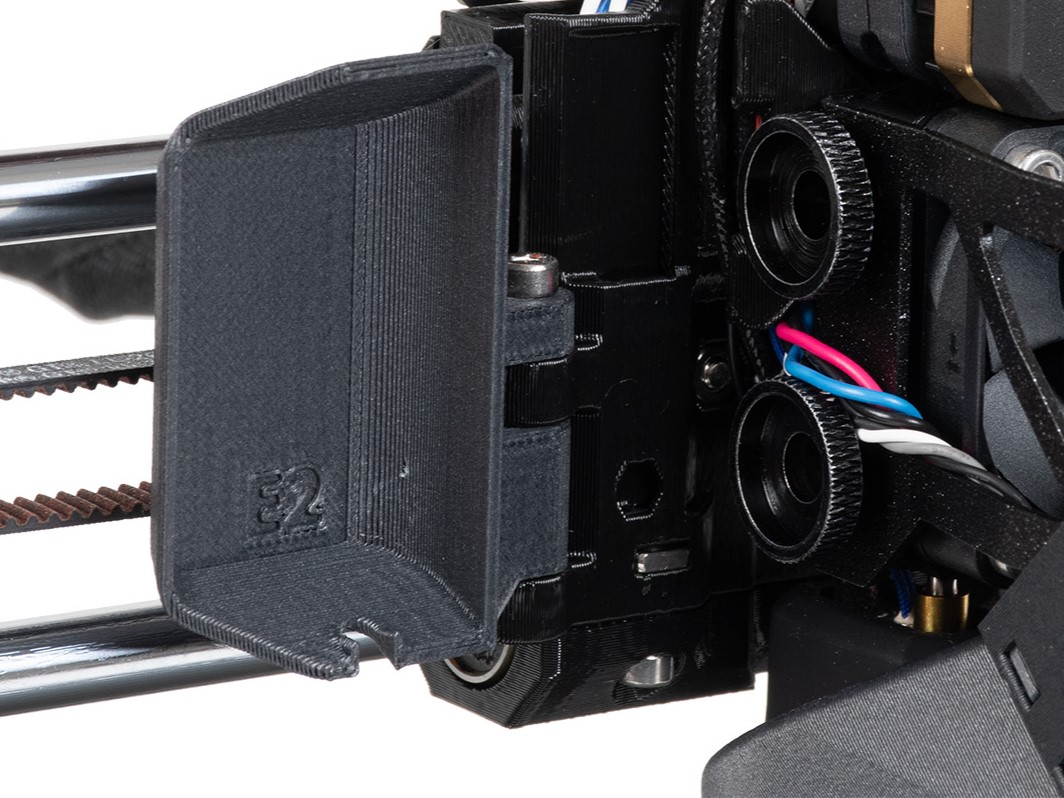
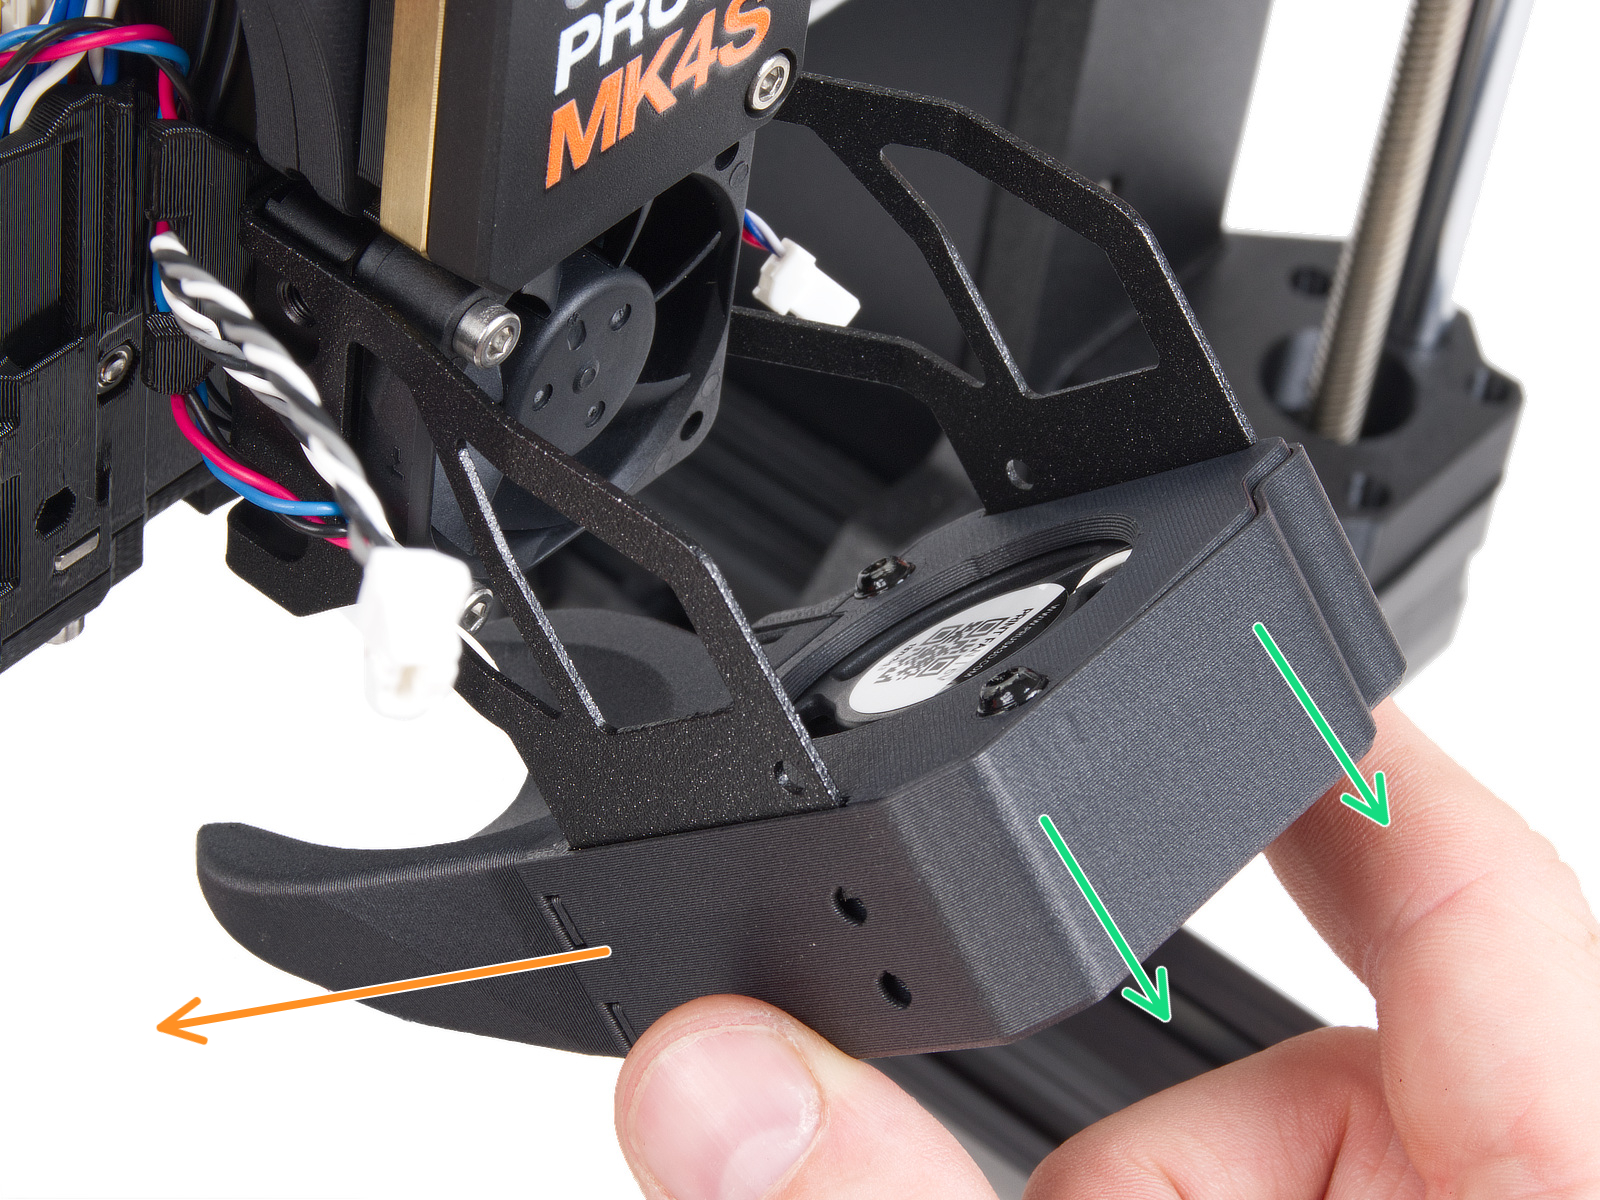
                  1. Slide out the print fan assembly, and place it to the left of the hotend. Be careful to not excessively pull or pinch the attached cables. 

                  Original Prusa MK4, MK3.9

                  1. Move the printer axes, in particular the Z-axis, so that the bottom of the hotend is accessible. This is done by navigating to LCD Menu -> Control -> Move Axis. 
                  2. Fully cool down the printer to room temperature and switch it off. 
                  3. Rotate the print fan so that it is parallel to the X-axis. 

                  Original Prusa XL 

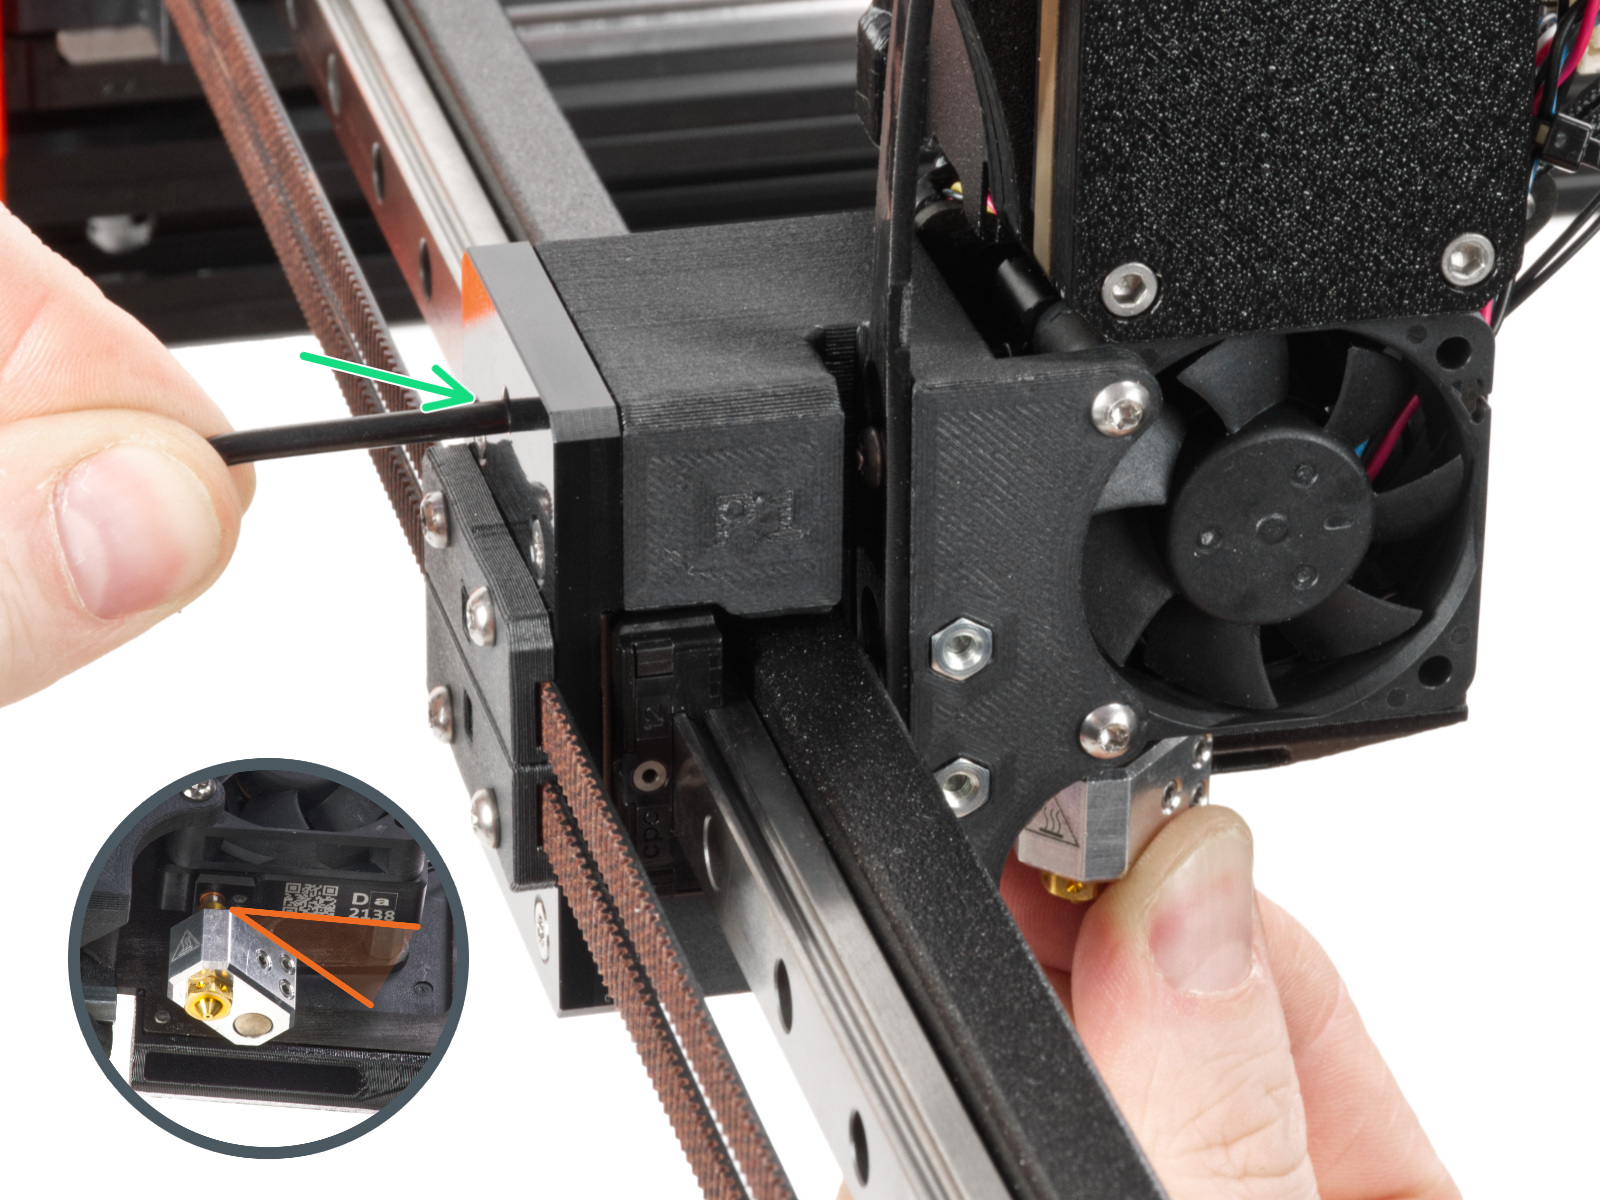
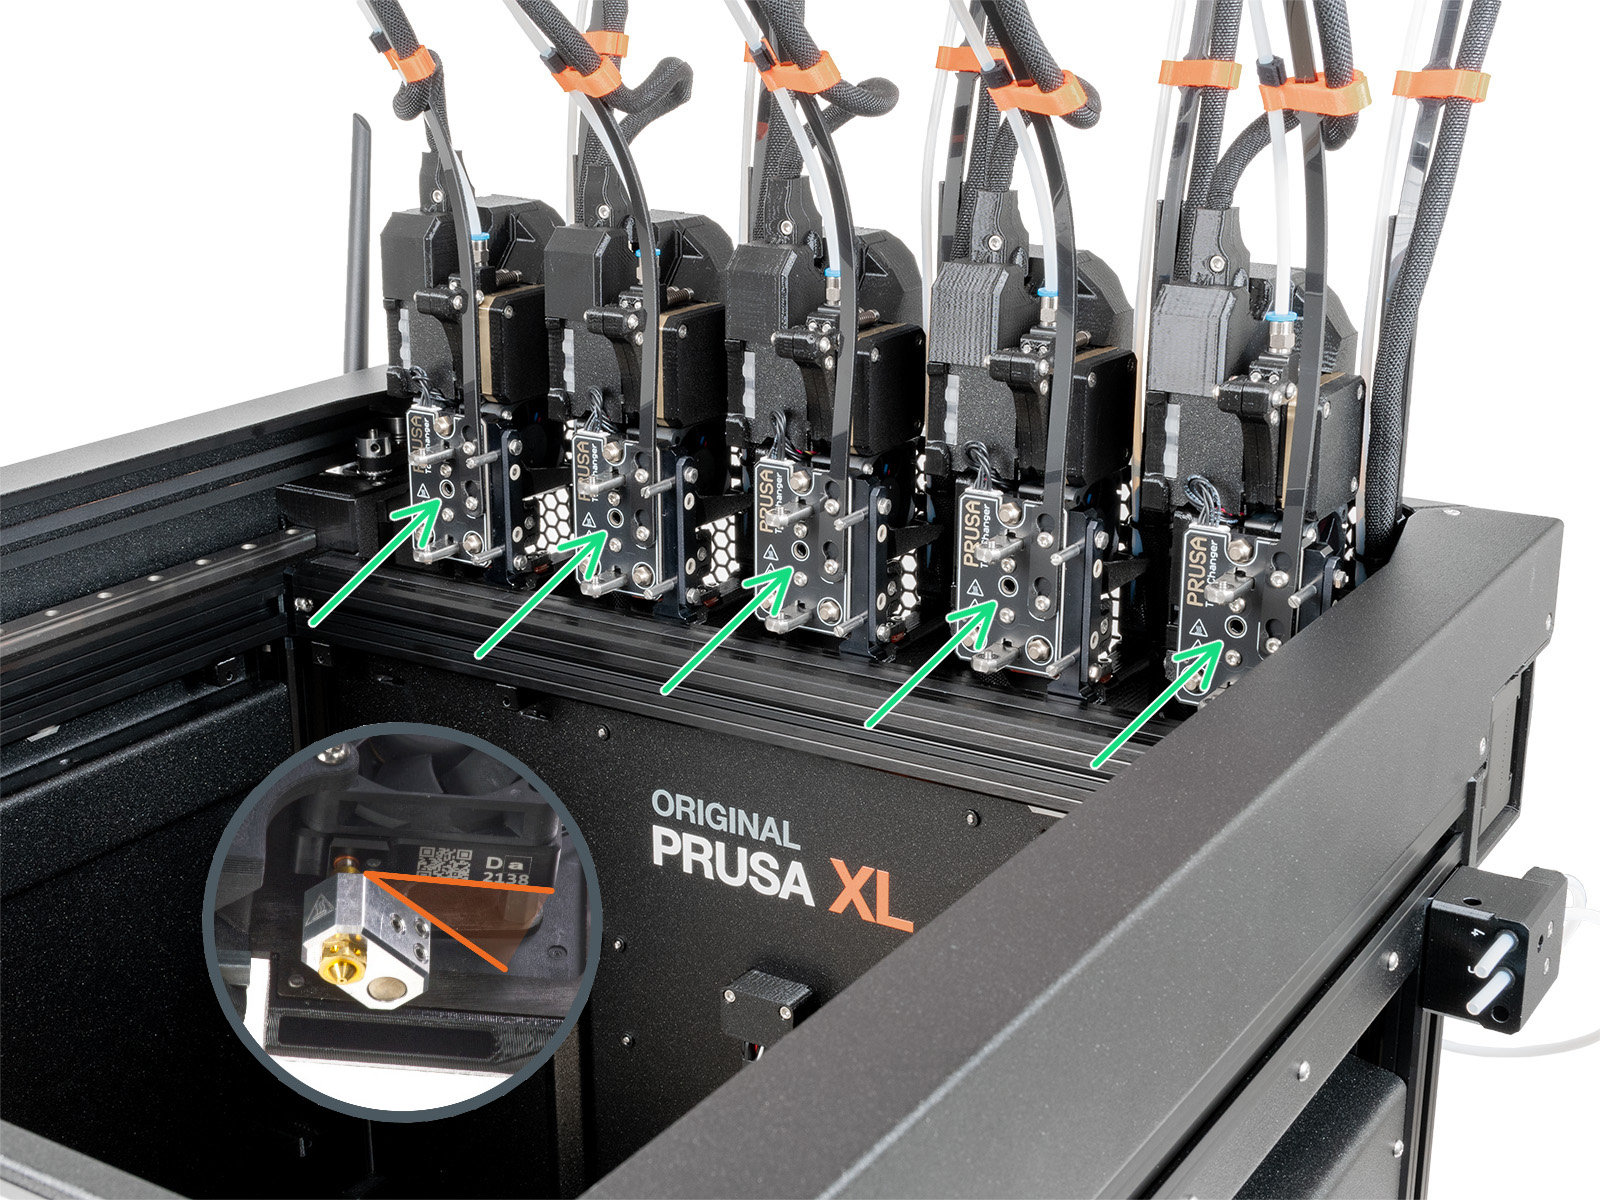
                  The hotend is installed at a 35°-40° angle. If you notice the sock would not fit due to a lack of space between the heaterblock and fan shroud, follow these steps: 

                  1. Access the grub screw that secures the hotend.
                    1.  On single-tool XL, remove the x-carriage cover. This component is located at the front of the print head. 
                    2.  On the multi-tool XL, park the tool. To do so, navigate to LCD Menu -> Control -> Pick/Park Tool -> Park Current Tool.
                  2. Slightly loosen the grub screw that secures the hotend, so you can slightly reposition the hotend angle. Keep as much as possible of the initial 35°-40° angle.
                  3. Push the hotend upward and tighten the grub screw, without using extra force.

                  Prepare the printer for silicone sock installation with the following steps: 

                  1. On the multi-tool XL, pick the tool. Navigate to LCD Menu -> Control -> Pick/Park Tool -> Pick Tool #.
                  2. Move the printer axes, in particular the Z-axis, so that the bottom of the hotend is accessible. This is done by navigating to LCD Menu -> Control -> Move Axis.
                  3. Fully cool down the printer to room temperature and switch it off.

                  Installing the silicone sock

                  Make sure that the hotend is not heated, and that the printer is switched off, before installing the silicone sock. Heated parts can cause severe burns! 

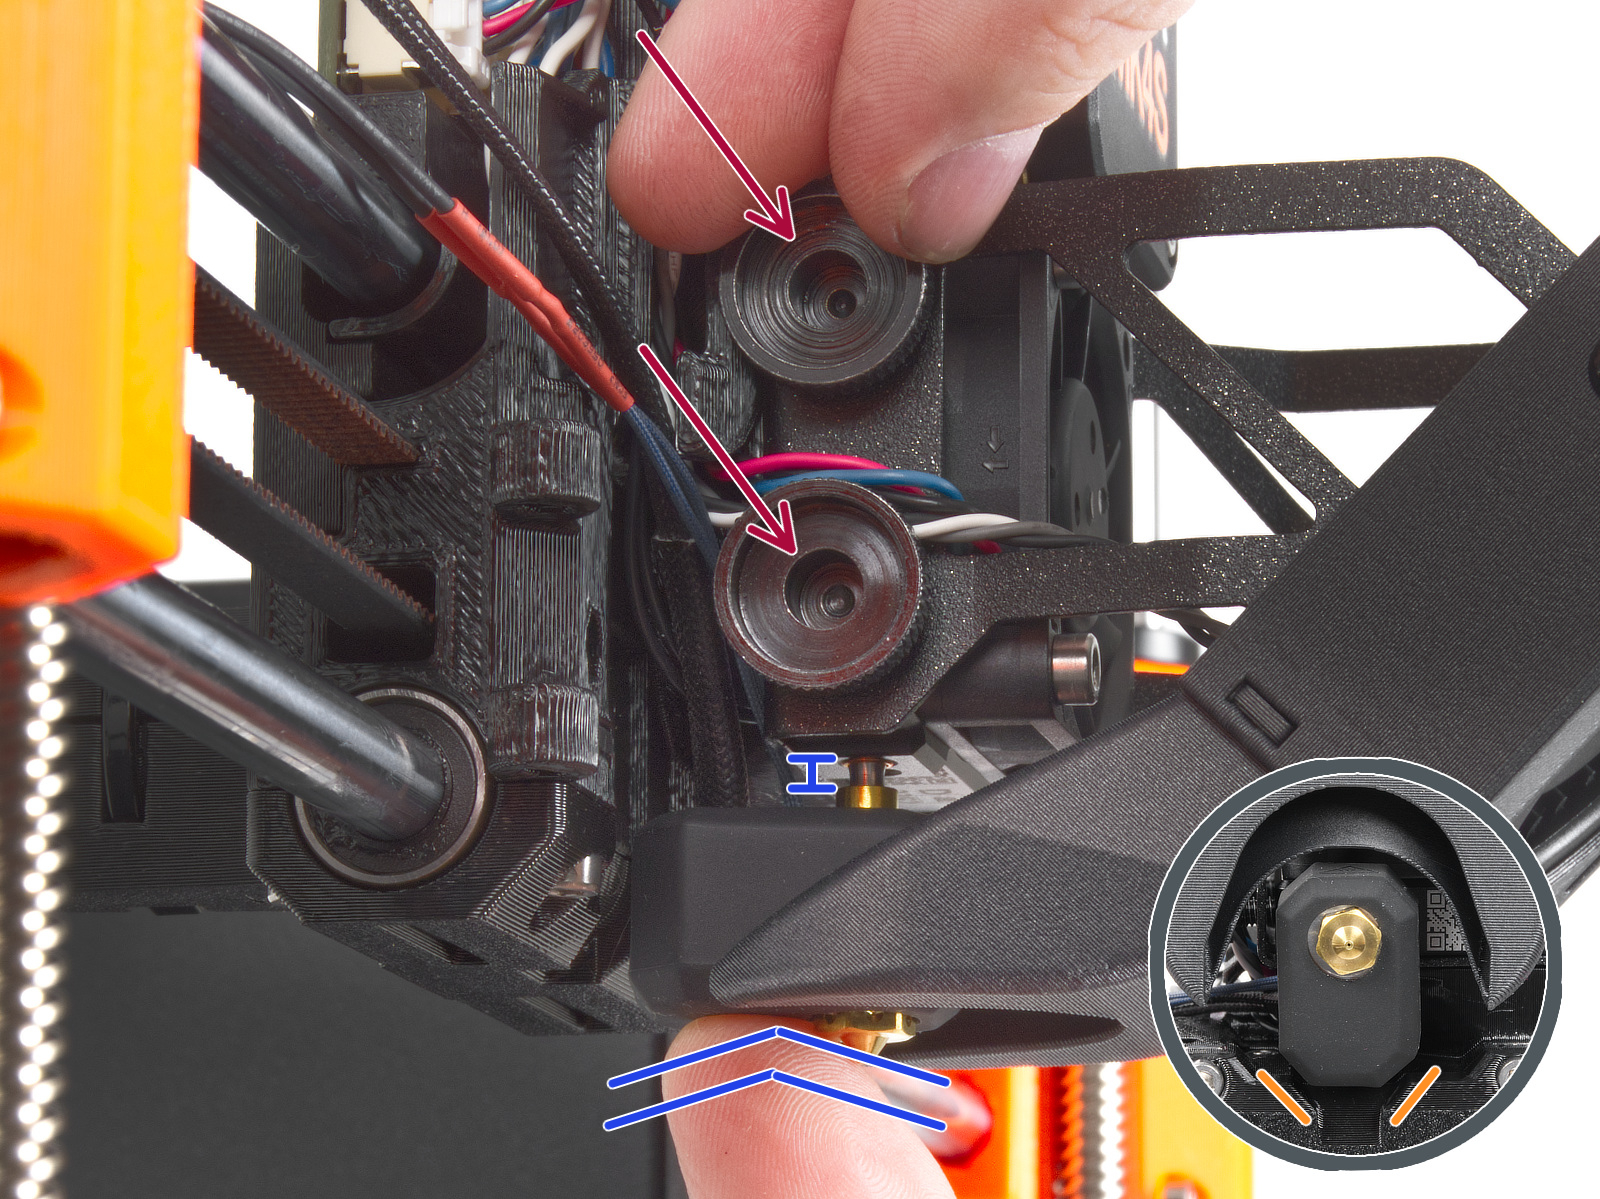
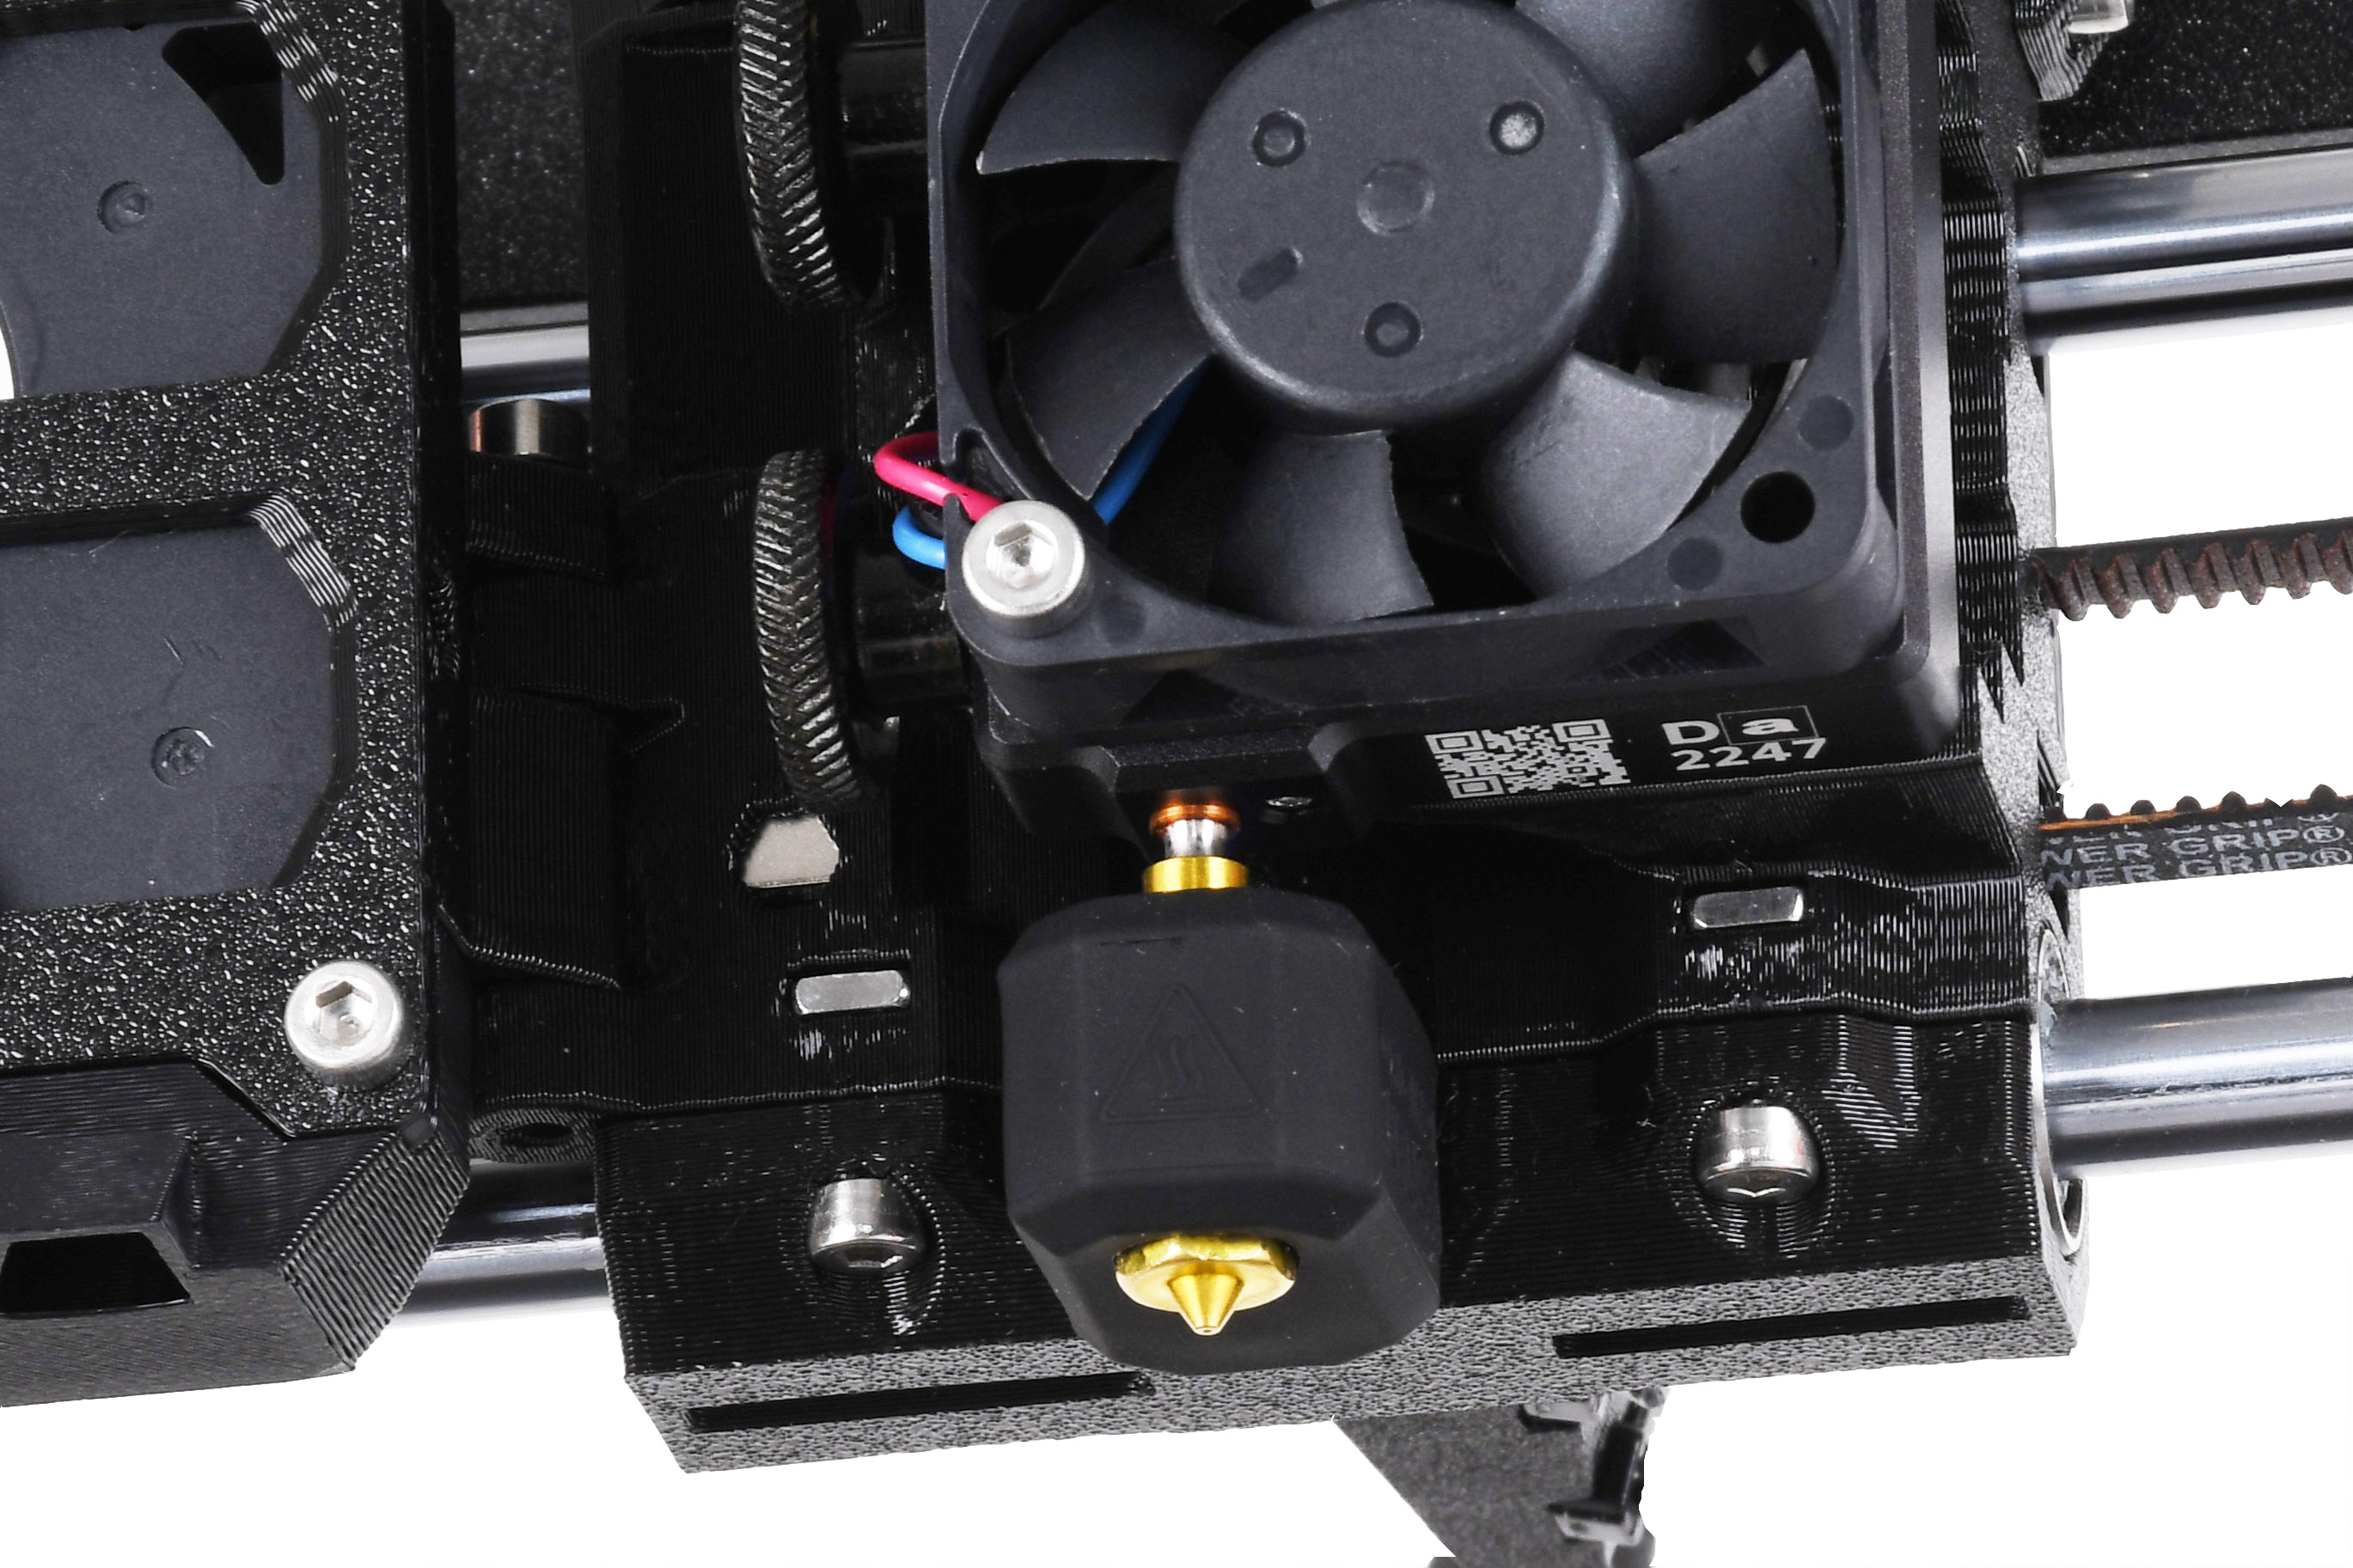
                  Push the sock from the bottom of the hotend. If there is any resistance, do not attempt to push the sock harder, as excessive force might bend the heatbreak. 

                  Once the silicone sock is installed, the printer needs to be adjusted. Navigate to LCD Menu -> Settings -> Hardware -> Nextruder Silicone sock, and set it to ON. 

                  CORE One, CORE One LMK4S, MK3.9S
                  MK4, MK3.9
                  Was this article helpful?
                  This action is available only to registered users. Please log-in.

                  Topics

                  • About your printer
                    • Printer features
                      • Flexible steel sheets (guidepost)
                      • Power-modes
                      • Water-soluble materials (PVA/BVOH)
                      • Experimental settings (MK4/S, MK3.9/S, MK3.5/S, XL/+, MINI/+)
                      • Loadcell (MK4/S, MK3.9/S, XL/+)
                      • Status LED explained (MK4/S, XL/+)
                      • Nextruder filament sensor (CORE One, CORE One L, MK4/S, MK3.9/S, XL/+)
                      • Buddy firmware-specific G-code commands
                      • Nextruder silicone sock (CORE One/+, CORE One L/+, XL/+, MK4/S, MK3.9/S)
                      • Model preview
                      • Cancel Object (MK4/S, MK3.9/S, XL/+, CORE One+/GEN 2, MINI/+)
                      • Tools Mapping (XL)
                      • Support settings for the XL/+
                      • Touch screen (CORE One L, CORE One, MK4/S, MK3.9/S, MK3.5/S, XL/+)
                      • NFC antenna
                      • Accelerometer (CORE One, MK4/S, MK3.9/S)
                      • Tools Mapping and Filament Mapping (XL/+, INDX, MMU3)
                      • GPIO Module
                      • Network Connection (CORE One L, CORE One, MK4S, MK3.9S)
                      • MMU3 Prusa Nozzle vs. CHT nozzle
                      • Flashing custom firmware (CORE One L, CORE One, MK4/S, MK3.9/S, MK3.5/S)
                      • Safety and safety timer messages (CORE One, CORE One L, XL, MK4/S, MK3.9/S, MK3.5/S)
                      • Advanced filtration system for Prusa CORE One
                      • Prusa CORE One to CORE One+ upgrade (community version)
                      • MMU3 for CORE One L
                    • Printer description
                    • General Information

                  19 comments

                  Log in  to post a comment
                  bssquared2054
                  •
                  I've got the 5 tool Prusa XL that has FW 6.10.1 and there is no silicon sock setting under Hardware, so what's up with that? I know that 6.10.2 was released a few days ago but the release info says nothing about silicon sock feature. Thoughts?
                  Reply
                  pomalaterre
                  •
                  Do we have to redo some calibration after having installed the socks ? (specially if to do so we have moved a little the angle of the hot head, and moved back to the original angle manually so with little precision, as suggested in the above doc) ?
                  Reply
                  Jan Kratochvíl
                  •
                  Hello. It should not be necessary. The loadcell should still calibrate everything at the start. But there is no rule to calibrate your printer again just to be sure.
                  Reply
                  Carl A
                  •
                  My XL5 Nextruder firmware does NOT have a Nextruder Silicon Sock adjustment anywhere.
                  My firmware is 6.2.x. maybe I need to update to latest firmware??? since old notes say that this is not available on the printer menu.
                  I have been having multiple Heatbreak thermistor failure problems since installing the socks. When I do a selftest all heatbreaks check OK. Have checked all of the fittings. It does it after 8 to 10 hours of printing of 24 items (a 2+ day print).
                  The above information and XL assembly manuals need to be updated to reflect how to make the required adjustments.
                  Reply
                  Carl A
                  •
                  Latest FW does have a procedure to set extruder for a sock.
                  Reply
                  pomalaterre
                  •
                  Yes I confirm. In 6.4.2 it's in Hardware/Tool
                  Reply
                  Cliff
                  •
                  I've got a MK4S, the sock got pushed off due to a unexplained blobbing incident. I've managed to get the blob off and the sock out of the blob - do I just push it back over the heater block?
                  Reply
                  Karsten Tügel
                  •
                  My Core One L did not stop printing when the filament run out, what is wrong?
                  The filament sensor have 3 positions of the orange tap, at the right position it show an orange X.
                  Reply
                  Jan Kratochvíl
                  •
                  Hello. The orange lever has only two positions. If the orange X is visible, the sensor is off and you should slide the lever all the way to the left. You can try to recalibrate the filament sensors and check if the sensor is changing value when inserting filament.
                  Reply