This guide will show the easiest way to set up and print supports with different materials for the Original Prusa XL. Before starting, make sure you have the two or five tool-heads XL printer selected in the main plater.
Print settings
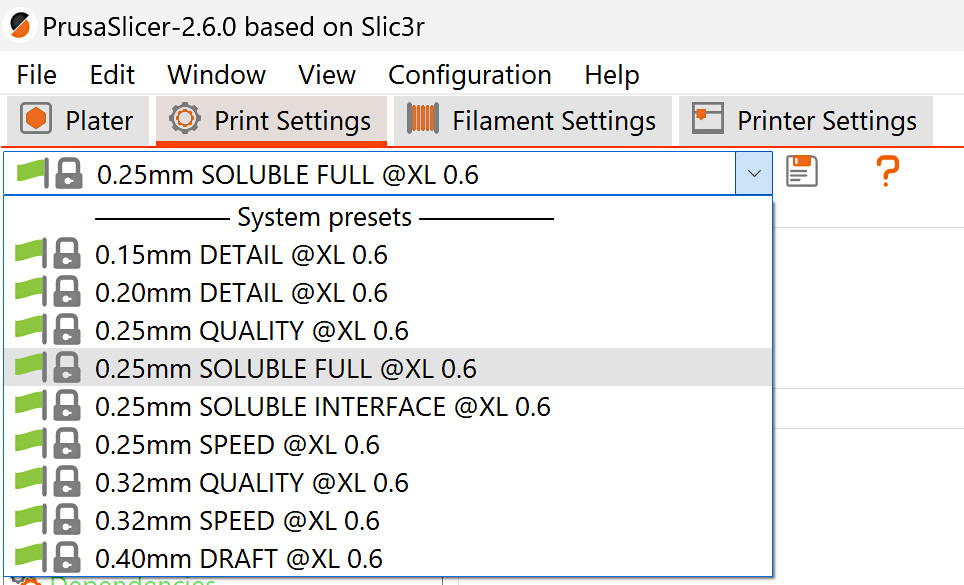
Choose the option Soluble Full from the drop list in the print settings. Note that this option is not available for 0.25 mm and 0.3 mm nozzles.
Support material
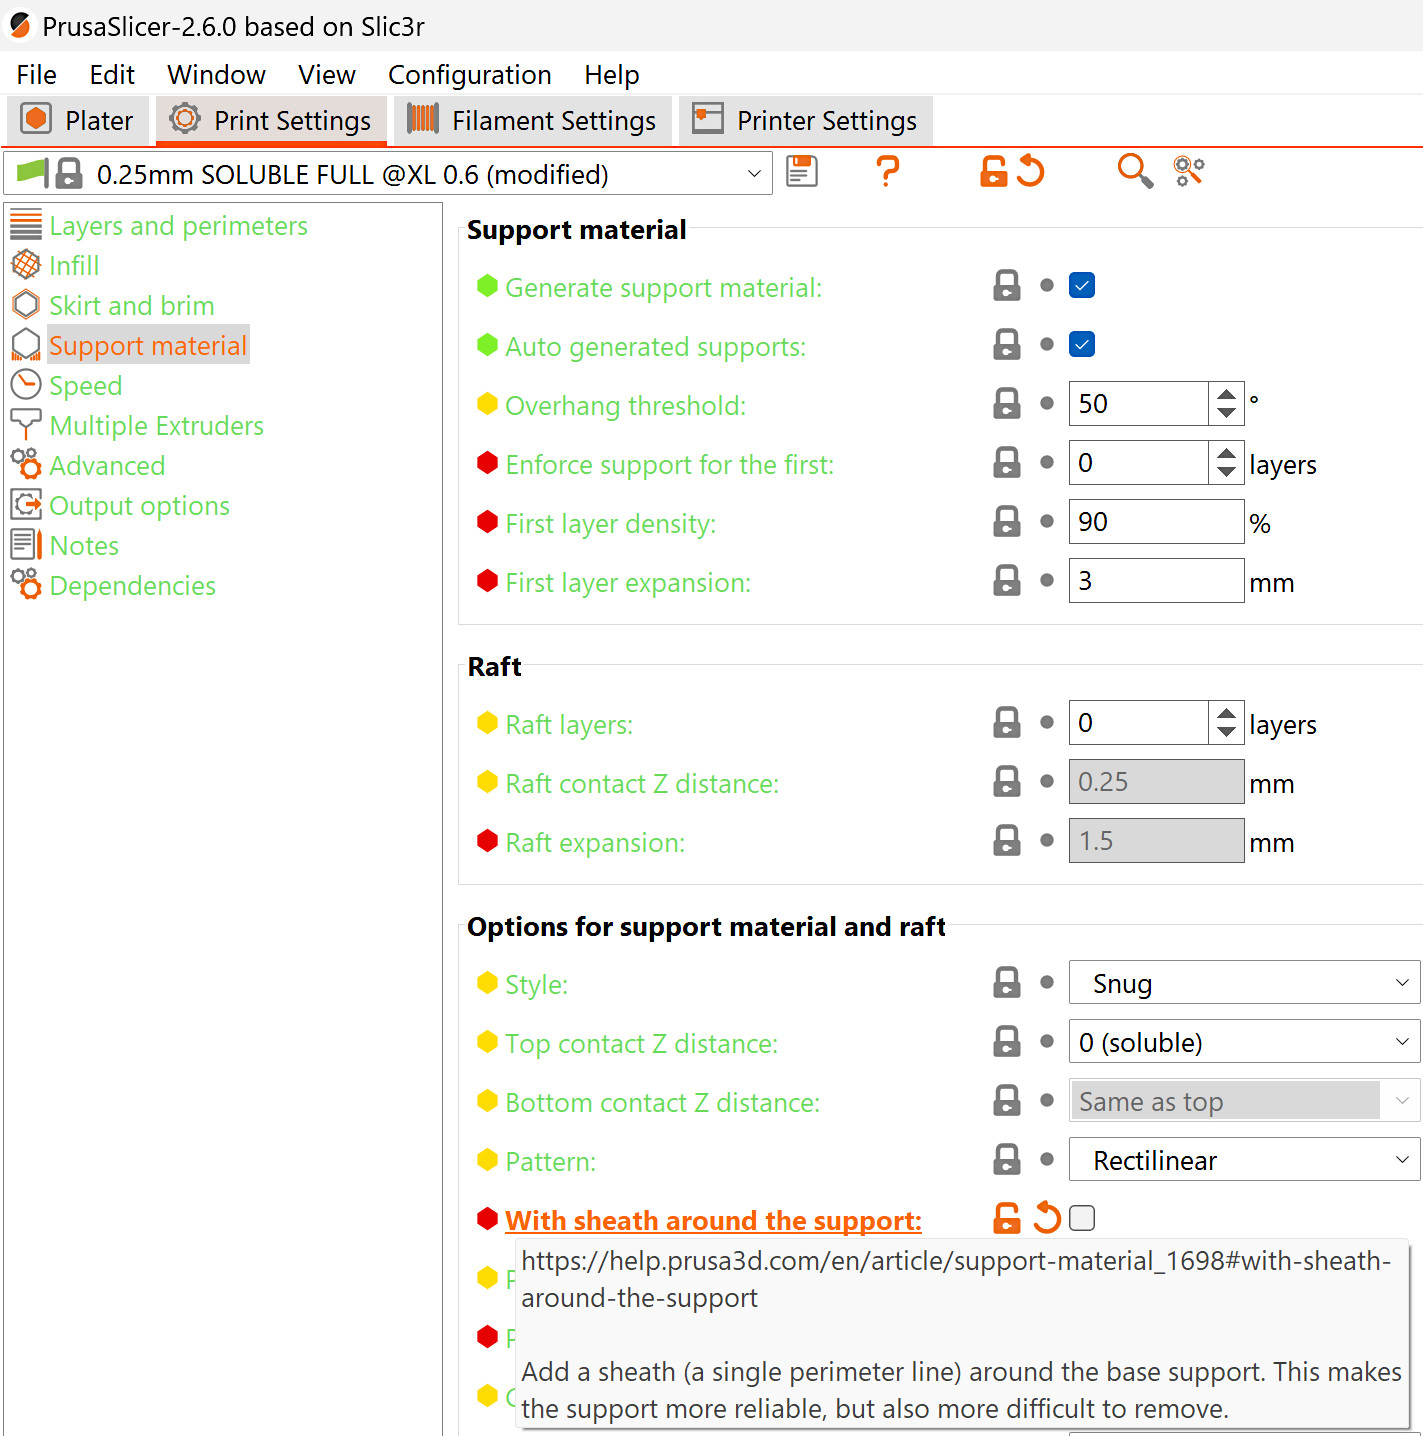
Go to Print settings -> Support material. Make sure that the option Generate support material is checked. For more information about each setting, go to Support material.
By default, a solid sheath (one perimeter wall) will be generated around the supports set as soluble, making it very difficult to remove them. We recommend unchecking this option when using supports of different materials.
Extruders
Support extruder
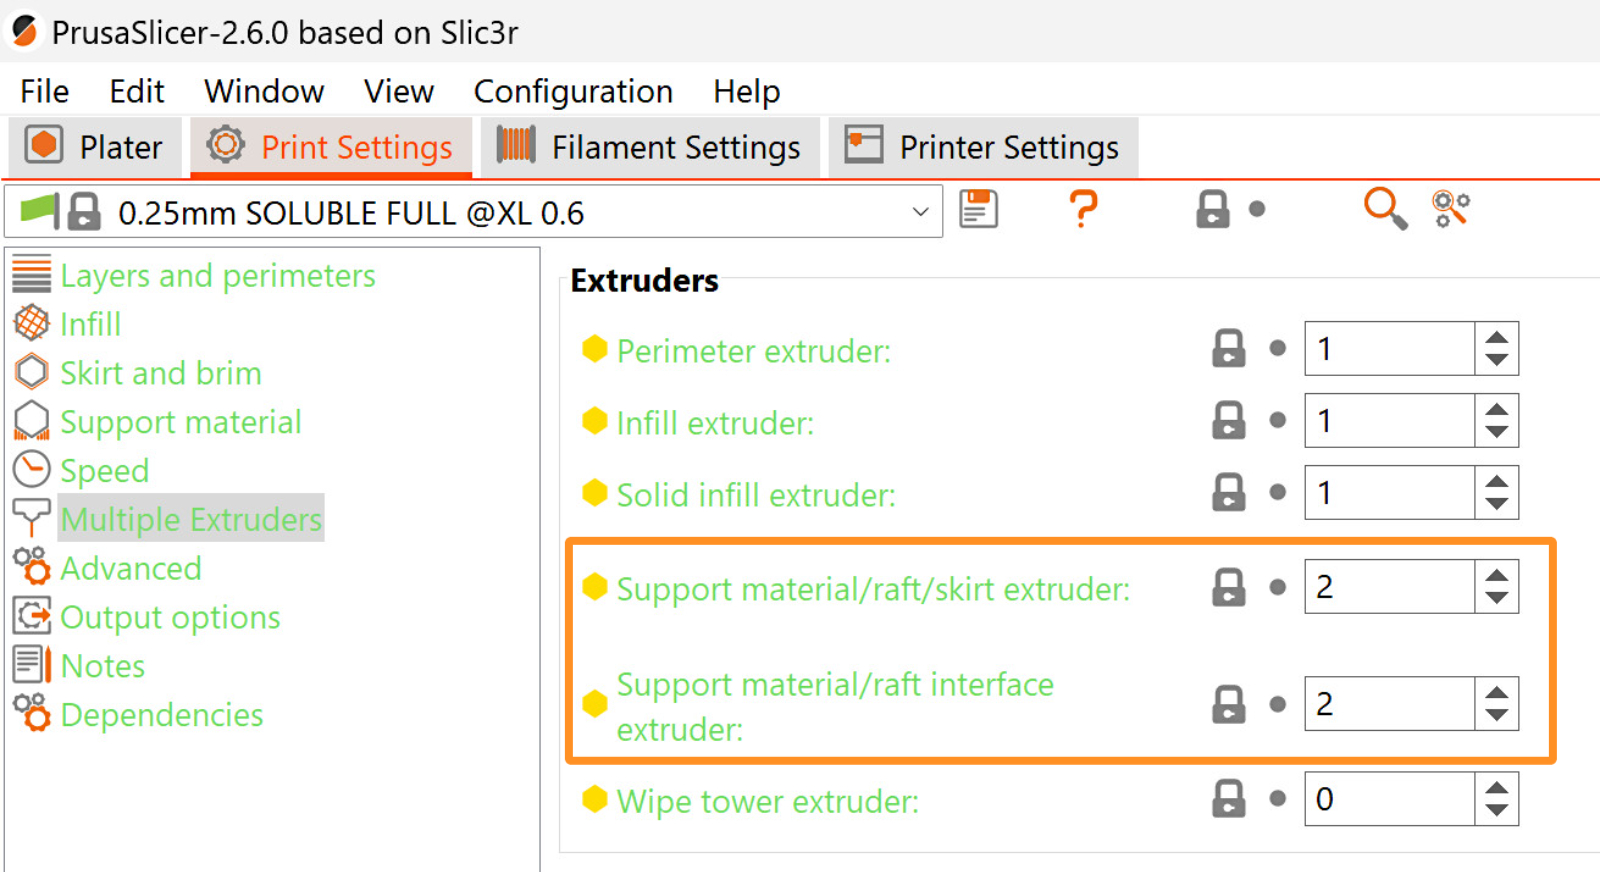
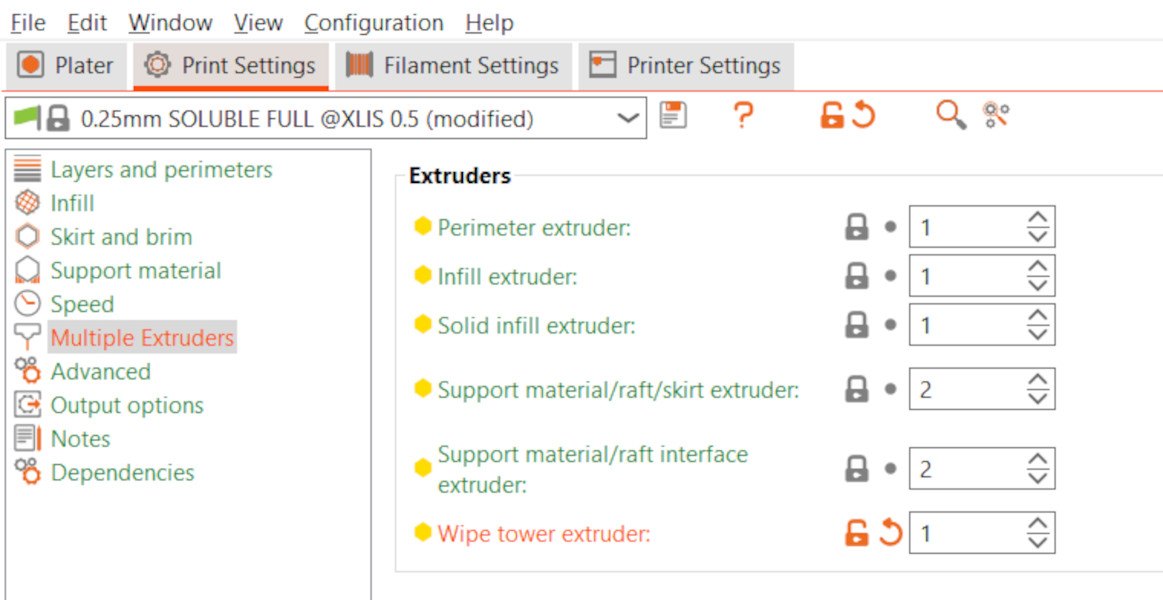
By default, the support material is set to be on Extruder 2. You can change this by selecting the support material/raft/skirt extruder and the support material/raft/interface extruder in Print Settings -> Multiple Extruders.
This feature can only be used with Organic Supports when using a Wipe tower. Changing the support extruder with any other support style than Organic will disable the wipe tower.
Print extruders
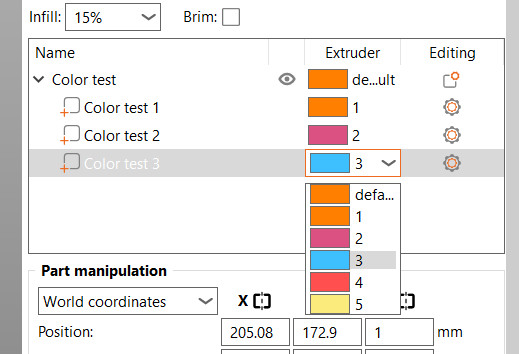
If your model is imported correctly, each part will appear in the object list on the right side. If you don't see the object list, switch to the Advanced or Expert mode.
You can assign a color (extruder) to a part by double-clicking on the colored rectangle in the Object list. You can also press a number key, e.g. "3" to assign the extruder to the selected model. The support extruder will not be shown in this list.
Wipe tower
On the prime tower, the filaments might not stick to each other. This can cause the tower to break and cause crashes on the print. To prevent that, go to Print settings -> Multiple Extruders -> Wipe tower extruder, and select an extruder for the prime tower. This will cause one of the extruders with a specific filament to act on all tower layers, even if this filament is not used in that layer, making the tower more stable. Leaving the value at 0 will use the available tool, the last one used in that layer. This saves time but makes the prime tower less reliable when printing with more than one type of material.
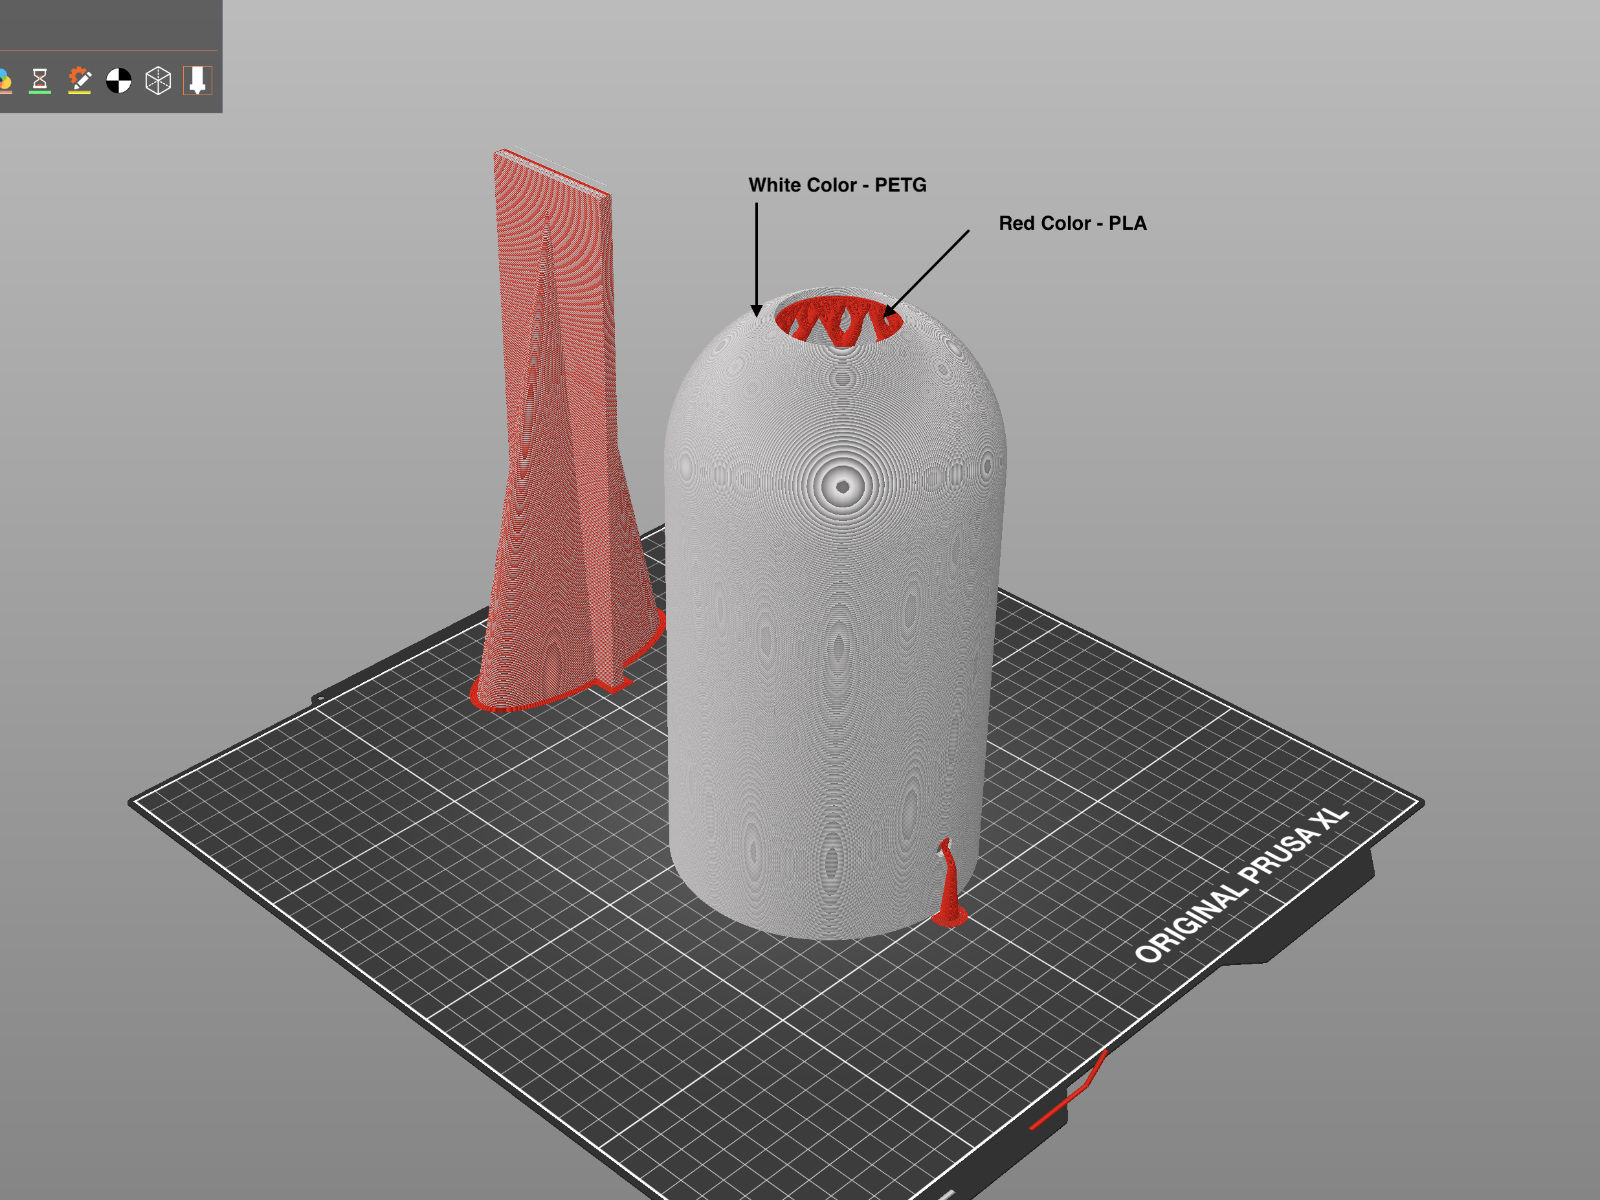 | 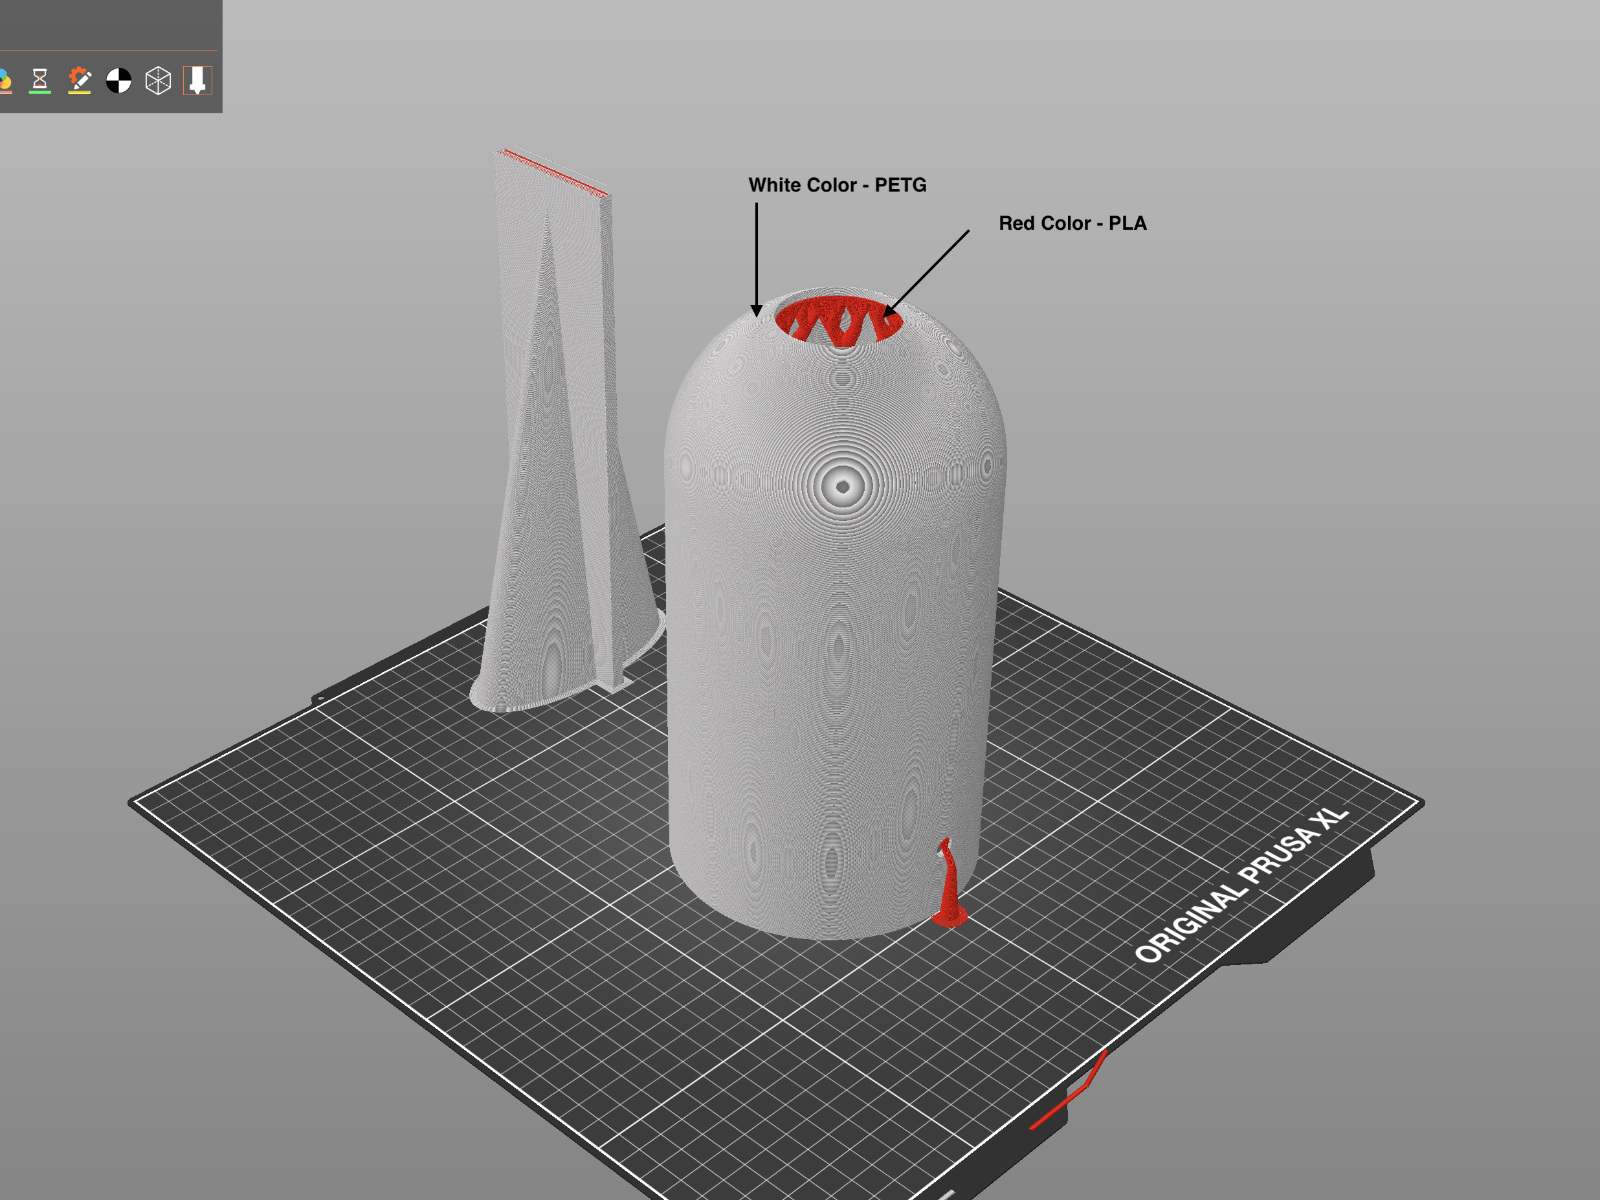 |
| Extruder not defined | Extruder defined |
Changing the preview color
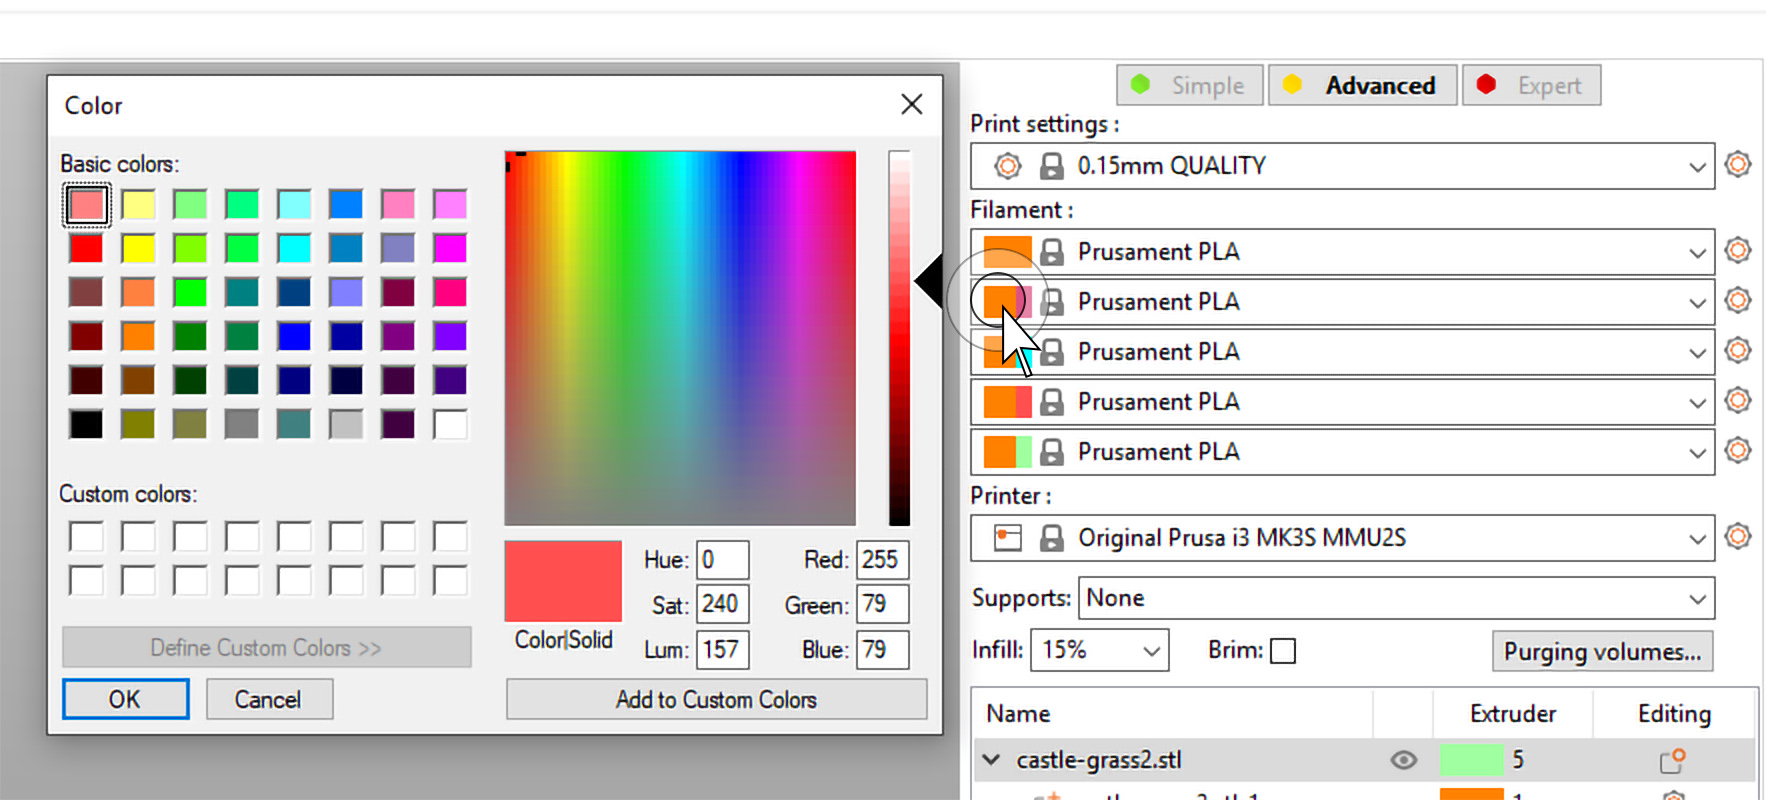
Changing the color of the individual "extruders" has no actual effect on the print, but it's a nice way to visualize it and help you select the right filament colors. You can change the color assigned to an extruder by clicking on the color box next to the profile name in the Filament profile selection.
