Smart wipe tower
The smart wipe tower ensures sharp color transitions and stable filament flow after a color change while aiming to waste as little filament as possible. There is always only one wipe tower no matter how many objects are being printed at once.
The wipe tower size is not dependent on the size of the object being printed but on the amount of color changes. Printing multiple copies at once or printing big objects improves the overall efficiency of the filament used.
Wipe tower placement
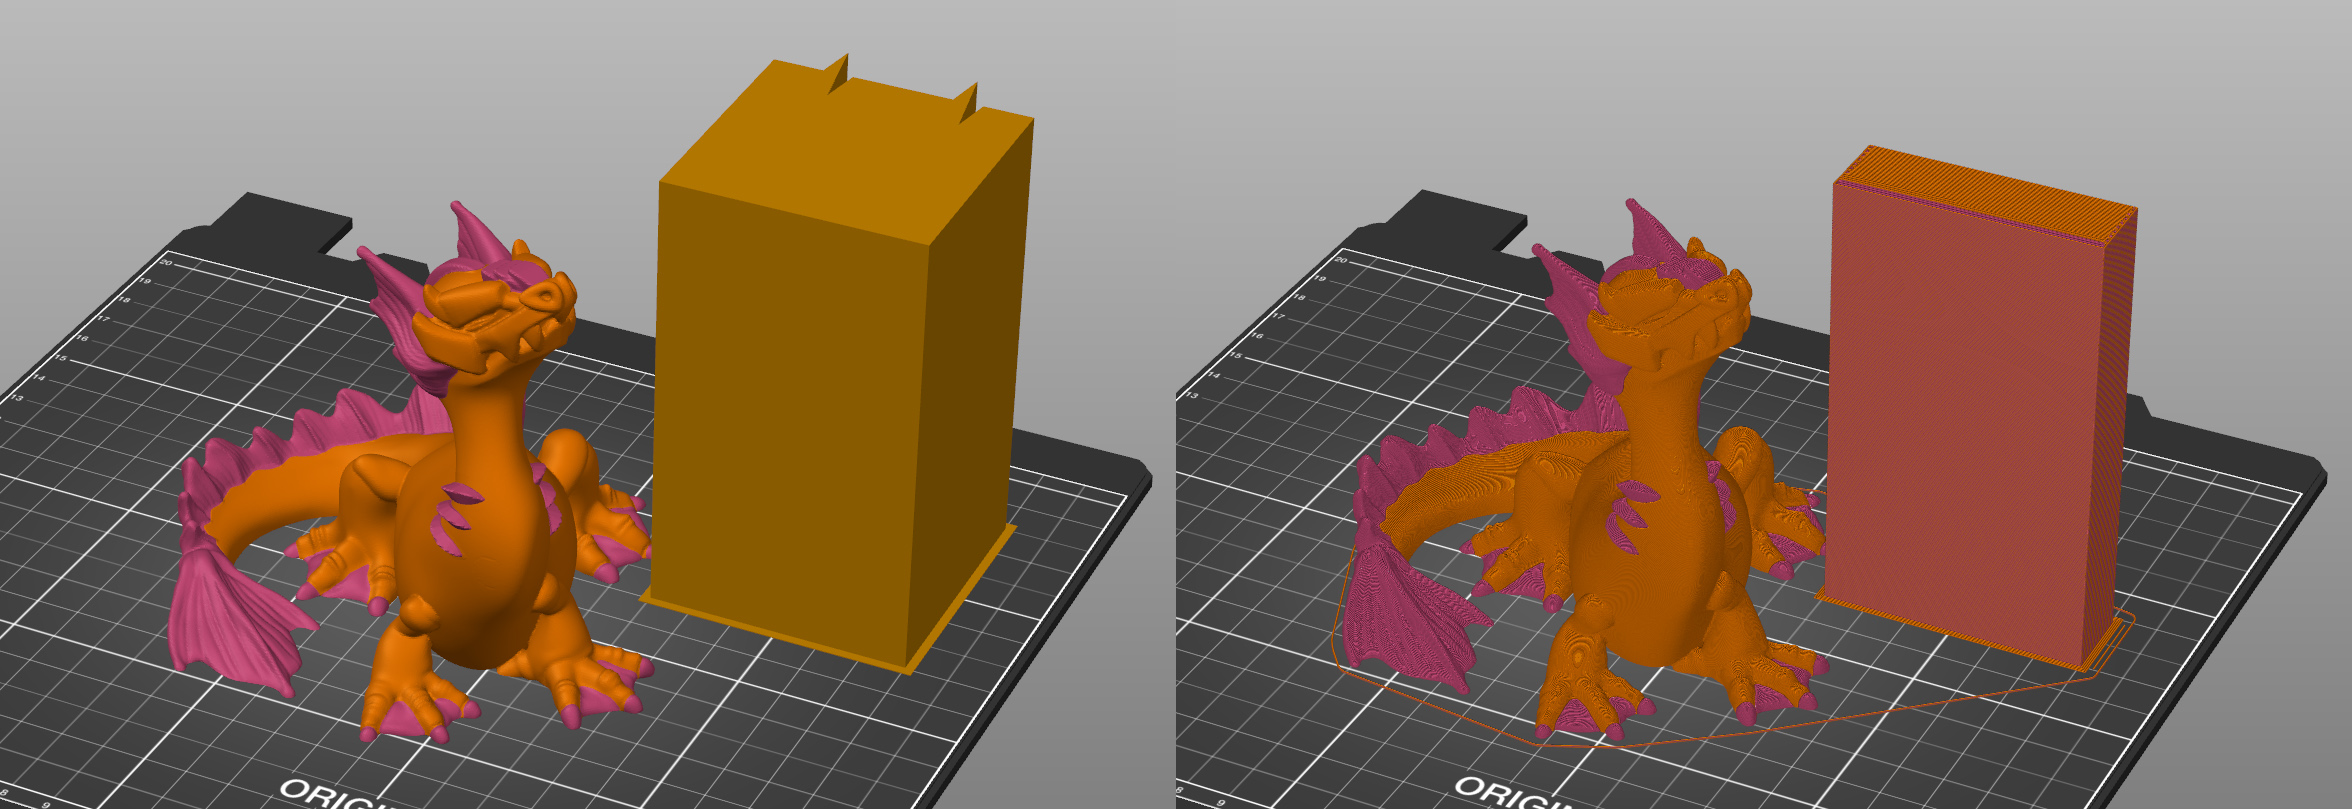
As soon as you select a multi-material printer in the Printer selection box, the smart wipe tower will appear in the 3D view. The preview shows its maximum footprint, because the size may decrease after slicing, based on the number of color changes in each layer. The size will decrease from the edge with the polyline. You can change the placement of the wipe tower by dragging it with the left mouse button. Make sure the wipe tower doesn’t intersect any of the objects.
To shorten the travel moves between the object and the wipe tower, place it near the object/objects.
Wipe tower size
In Print settings - Multiple Extruders - Wipe tower, you can set the Width of the wipe tower. The other dimension is calculated automatically based on the amount of filament necessary to purge.
The purge amount can be set by clicking on the Purging volumes... button in the right panel.
The wipe tower is rarely solid. Instead, the ratio of sparse and dense infill is automatically adjusted every layer, based on the current number of color changes, to waste as little filament as possible.
Wipe tower ramming line
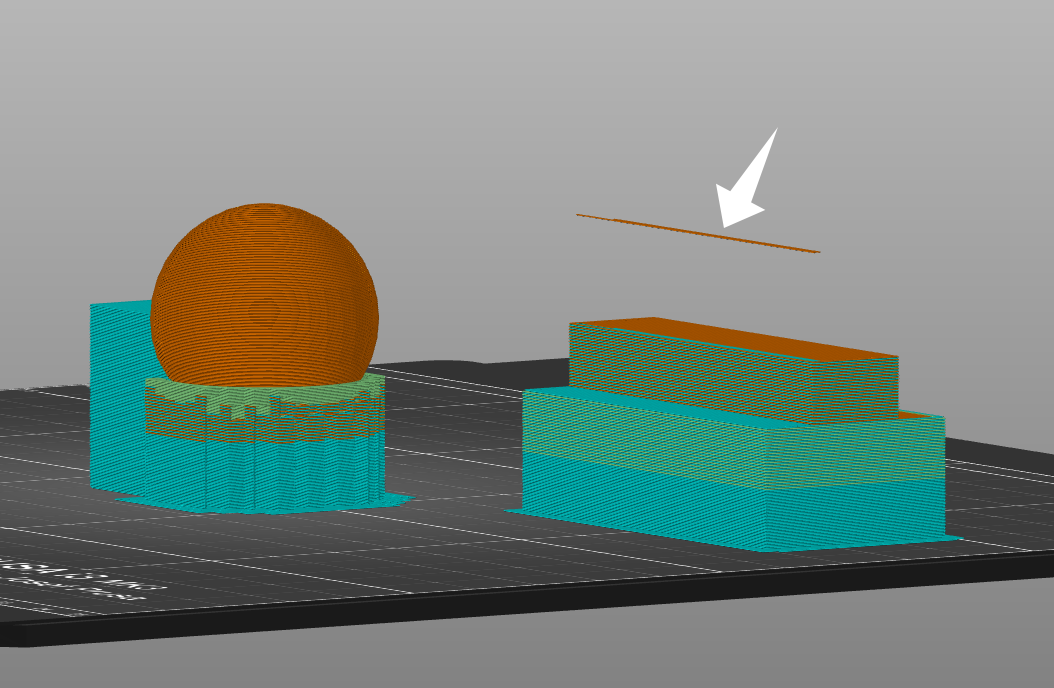
If you see a line in the air above the Wipe tower, that's normal. It's the visualization of the final extruder ramming before it unloads the last used filament (in order to create a sharp tip).
Wipe tower with supports
Note that if you are using a wipe tower and enable supports, you can only change the Support material/raft/skirt extruder and the Support material/raft interface extruder if the support layers stay synchronized with the object layers. This can be done in two ways. One is selecting the Soluble or Breakaway profiles on the main plater, and going to Print settings - Support material - Top Z contact distance, and setting it to zero. This will automatically turn on the "Synchronize with object layers". If you need to keep some distance between the support and the parts, another way is to synchronize the layers is to go to Print settings - Support material - Style, and select Organic supports. Find more info on supports here: Support material.
Wipe tower without sparse layers
The wipe tower size can be reduced by skipping the sparse layers (layers without a tool change). This saves material and in almost all cases reduces the print time.
- Go to Print settings - Multiple extruders
- Tick No sparse layers (EXPERIMENTAL)
On our set of multi-material projects, this feature reduced the total print time by 3.16%, and the filament deposited on the wipe tower was reduced by 16.17%.
The wipe tower without sparse layers feature is very useful together with ColorPrint with the MMU. Only a handful of filament switches are needed to print a colored sign unattended and as a result, a lot of material is saved compared to a full wipe tower.
As PrusaSlicer currently does not check for collisions of the extruder with the printed object when lowering down to the top of the wipe tower, this feature is marked as experimental, and it is recommended to place the wipe tower to the rear right corner of the MK3S's print bed, while the object is placed to the opposite corner.
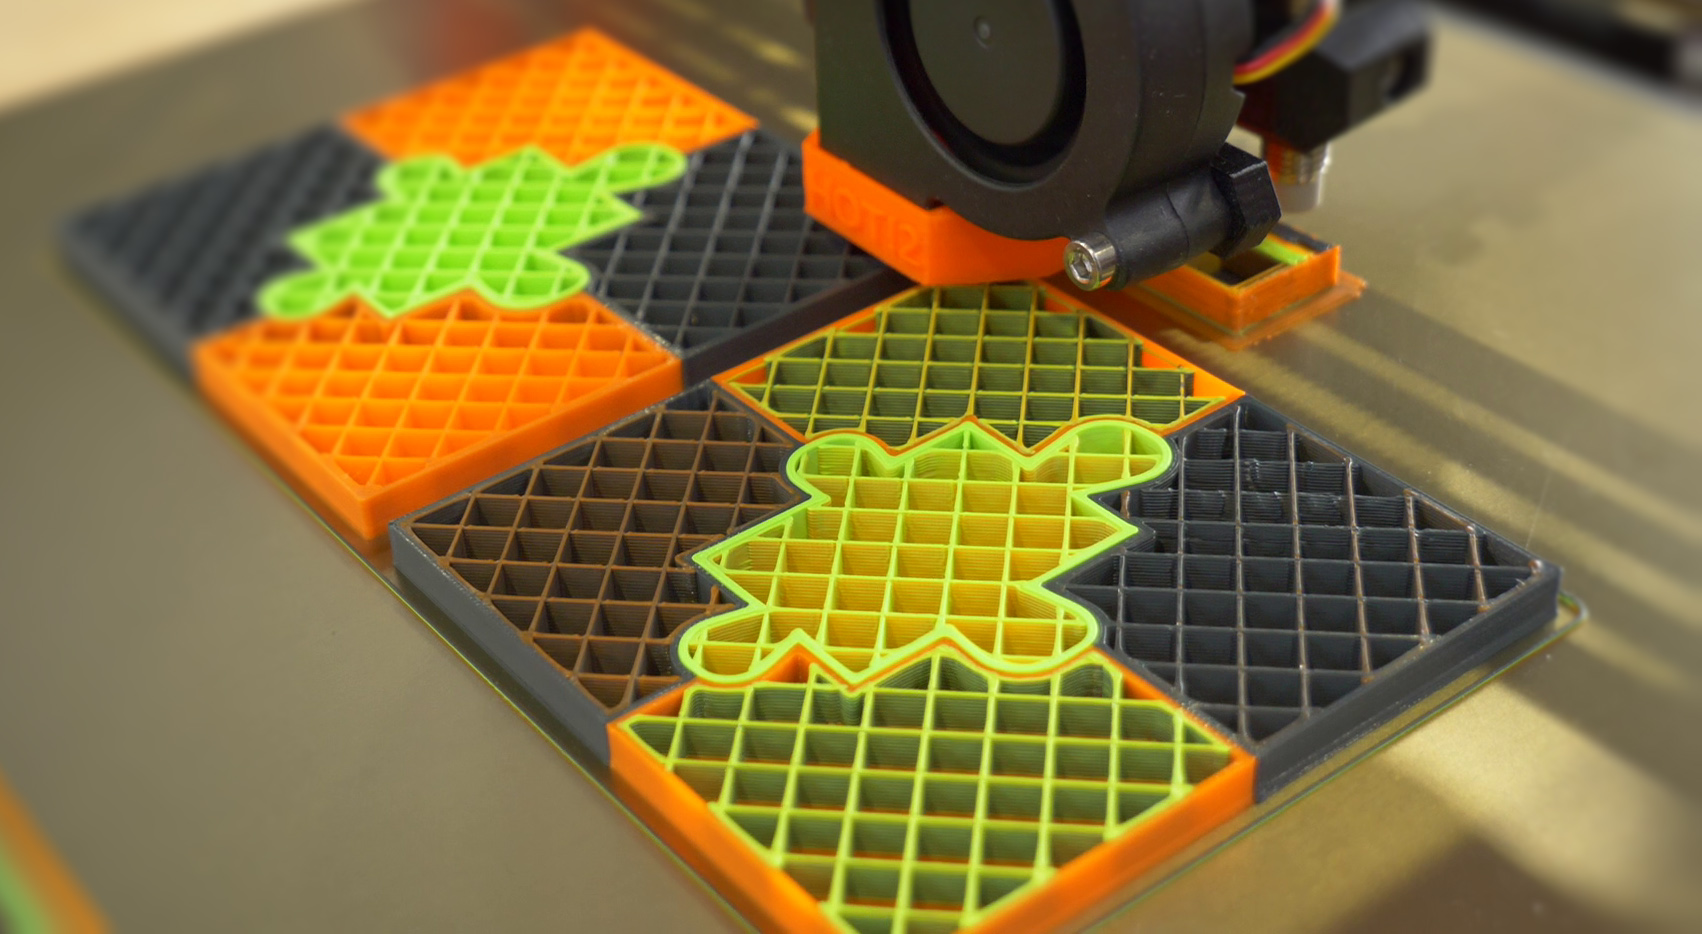
Wipe to infill
Since the inside of the model isn’t visible, it can be used to wipe the nozzle during the color transition. The wipe tower cannot be eliminated completely, because some models do not have enough infill, but wipe to infill can greatly reduce the amount of wasted material.
- Right-click on a model in the 3D view.
- Choose Wipe options.
- Then in the right panel tick Wipe into this object’s infill.
Wipe object
To further decrease the amount of material used for the smart wipe tower, you can choose to wipe residual filament into an object. The so-called ‘wipe object’ will be used during the color transition to wipe the nozzle. As a result, the colors of the object will be mixed - this is handy in case you don’t care about the surface color (e.g. mechanical parts).
- Right-click on a model in the 3D view
- Choose Wipe options.
- Then in the right panel tick Wipe into this object
Wipe object taller than the multi-colored object
The wipe object will be finished with the last filament used during the multi-colored print.
Multi-colored object taller than the wipe object
After the wipe object is finished printing, wiping will move to the smart wipe tower.
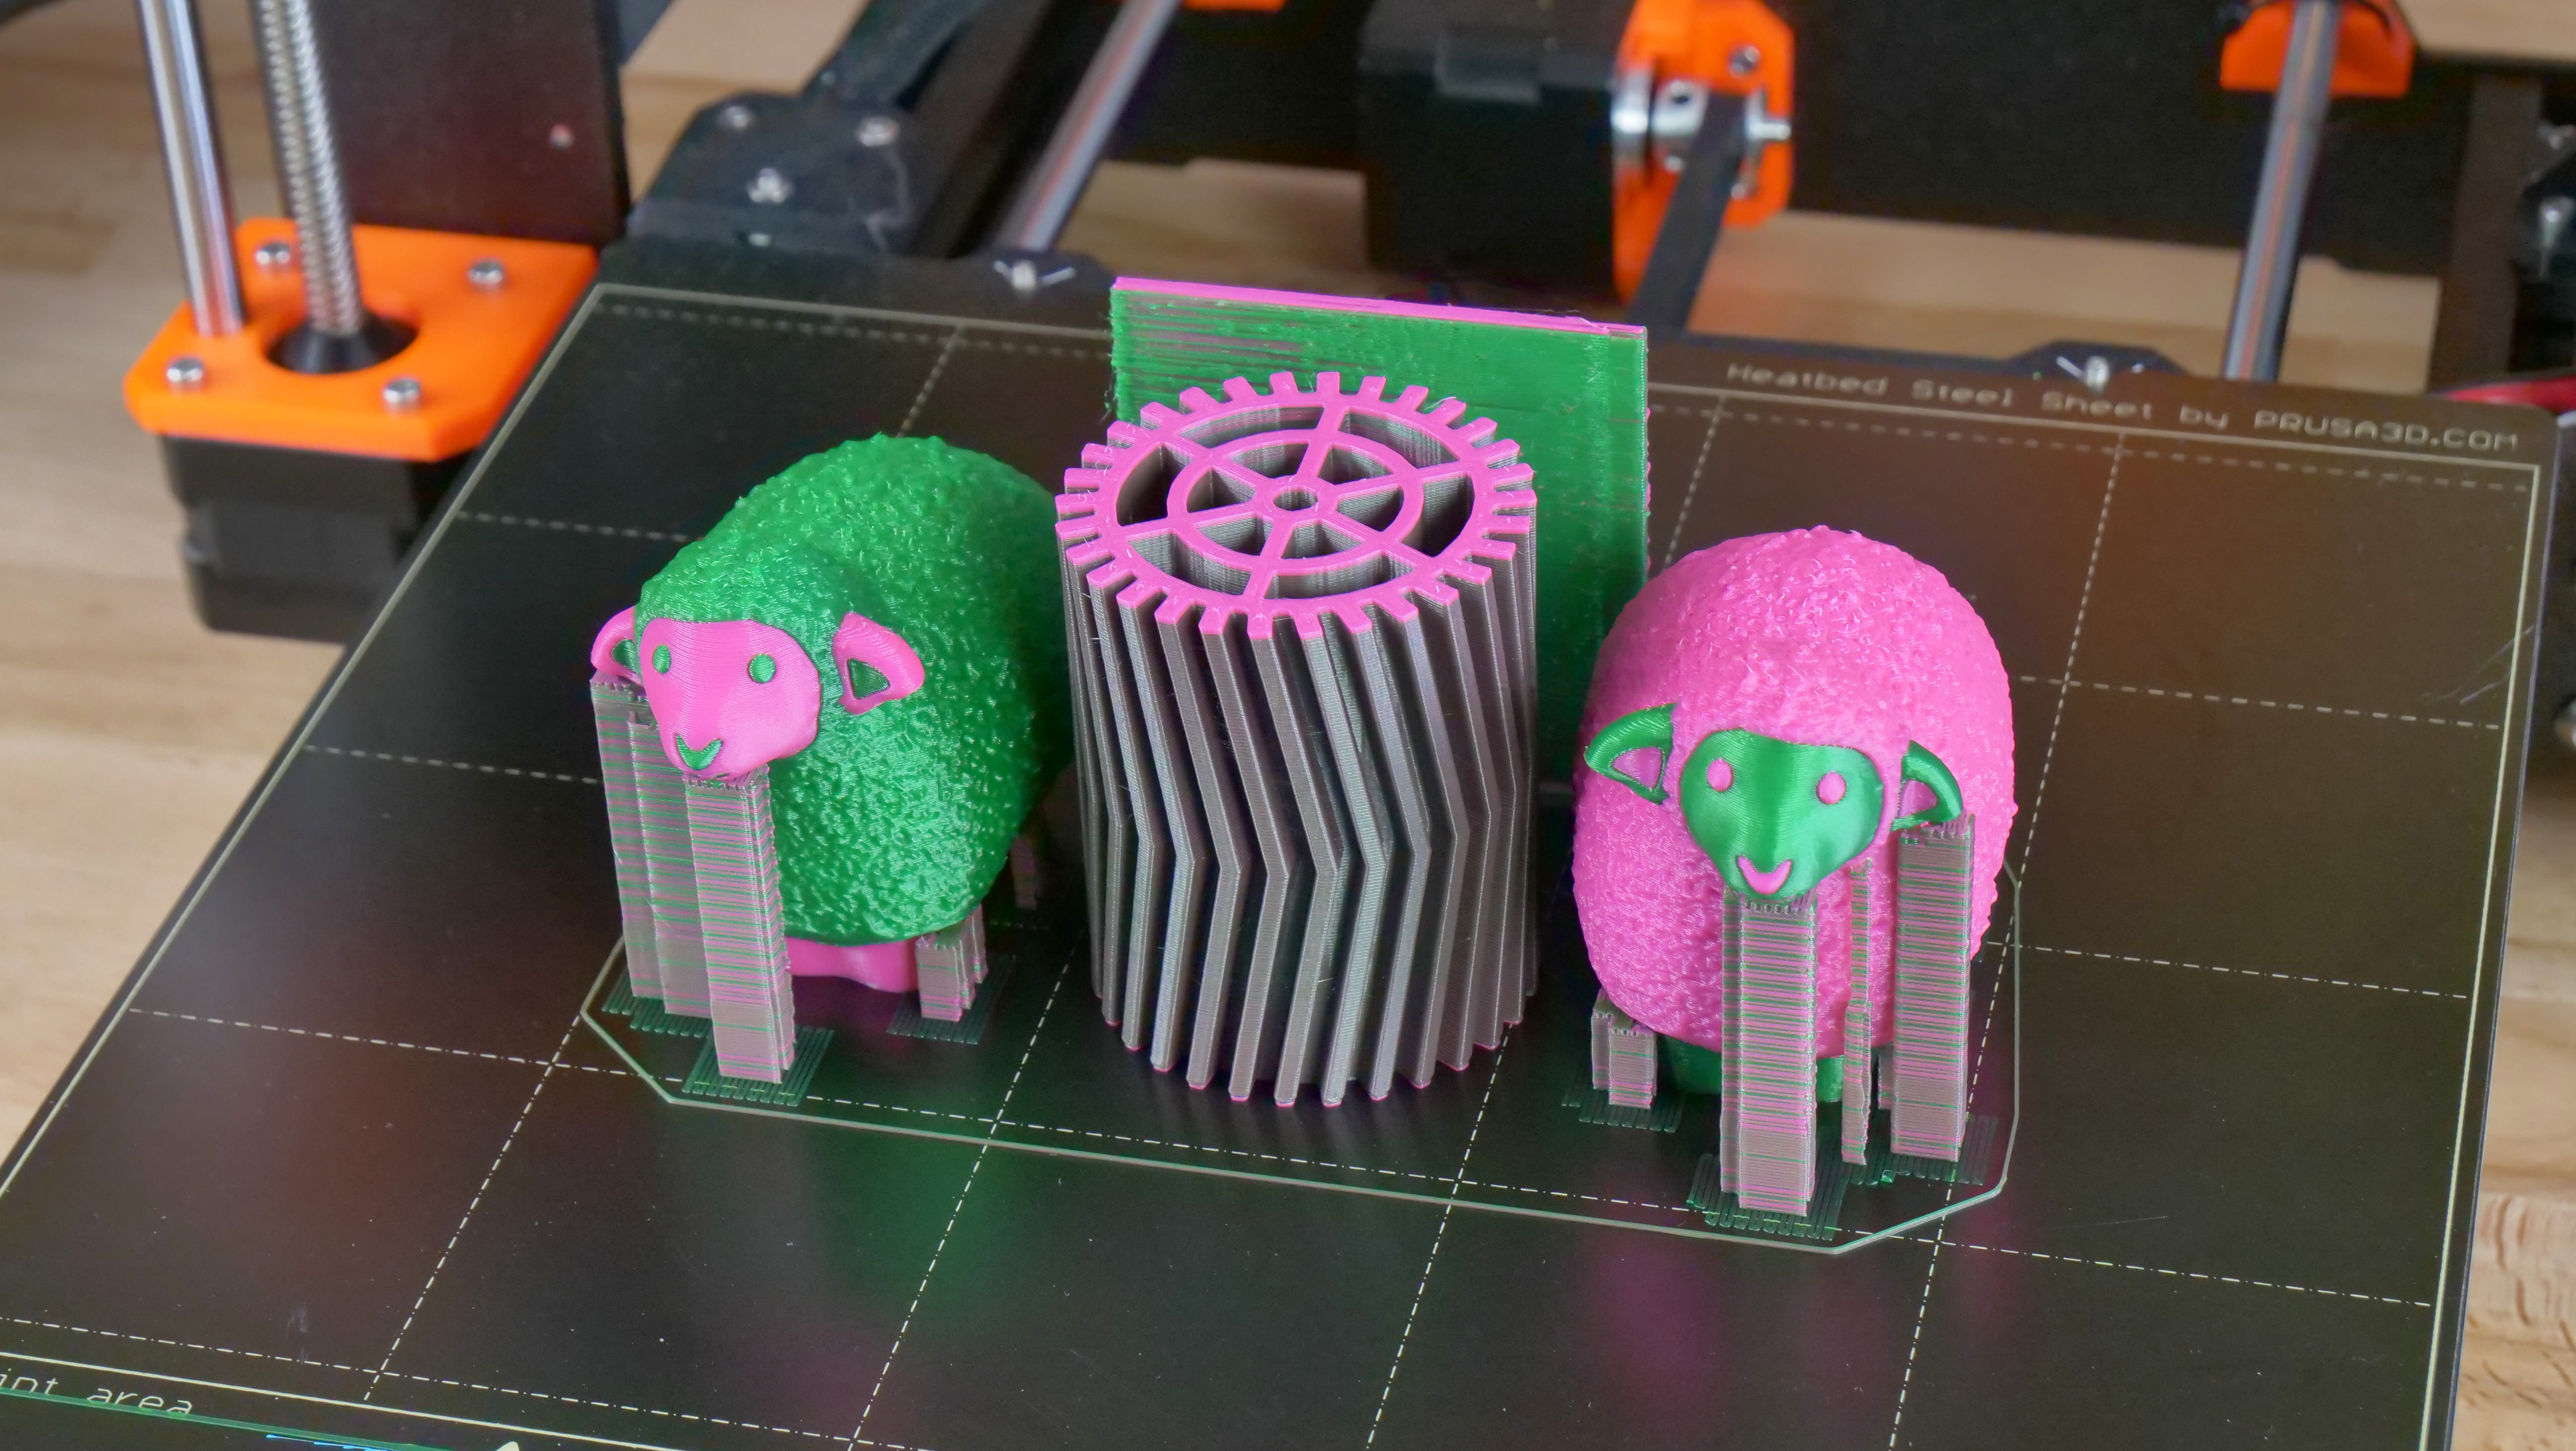 The footprint of the wipe tower is minimal thanks to the wipe object (gear)
Blobs on wipe tower
If you notice some defects such as over-extrusions on the wipe tower, with the print otherwise OK, locate where the defect is.
If it is in the center of the wipe tower, it is related with an issue on unload, as some filament remained into the nozzle and is pushed on the next load.
If it is on the edge of the wipe tower, it is related with the purge wasn’t done correctly and some filament remained in the melt zone after unloading.
In both situations, ensure you have the latest version and profiles from PrusaSlicer, and in case of persistent issues, do not hesitate to let our technical support know, with pictures of the print and tower, and G-Code file.
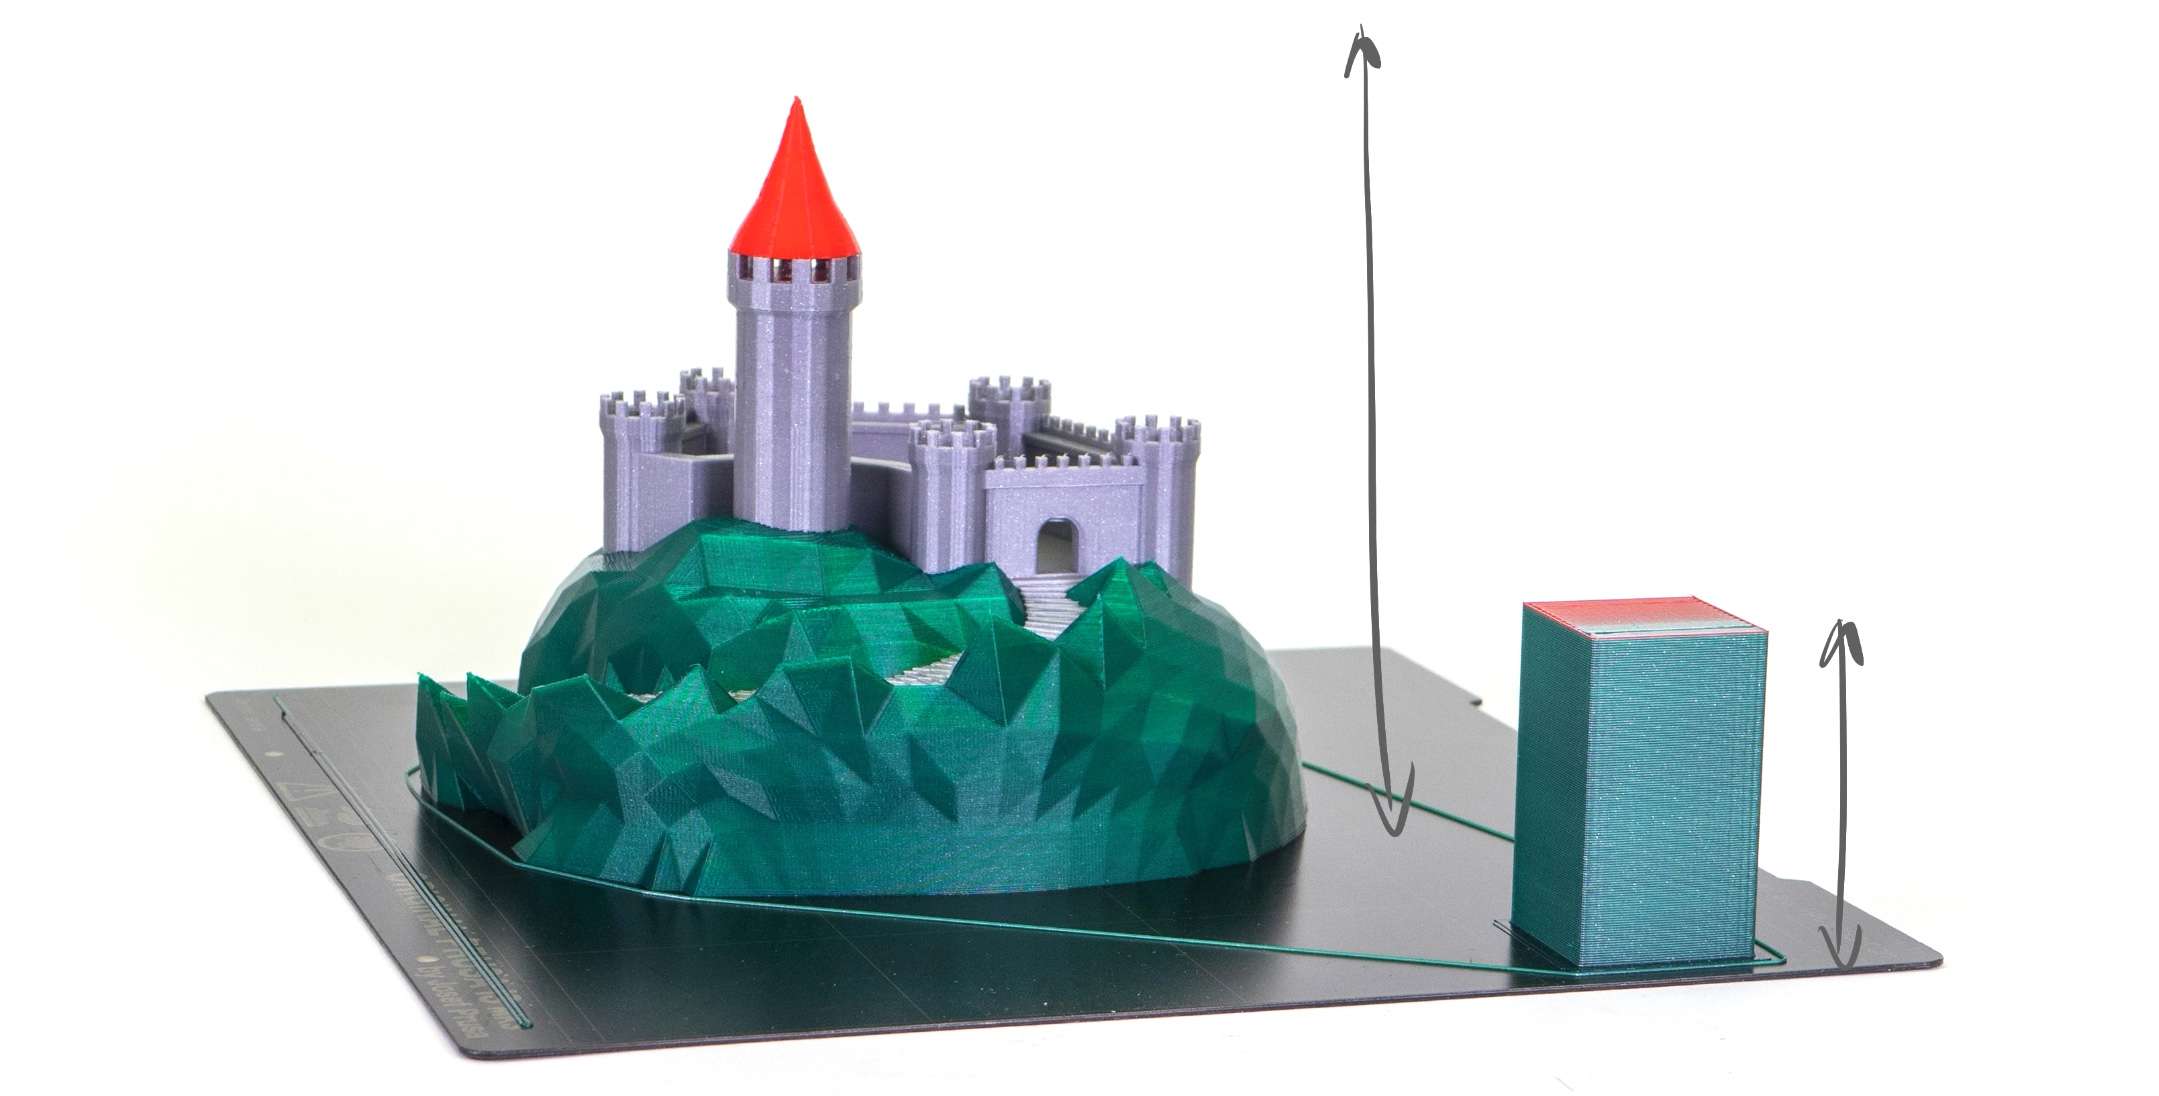
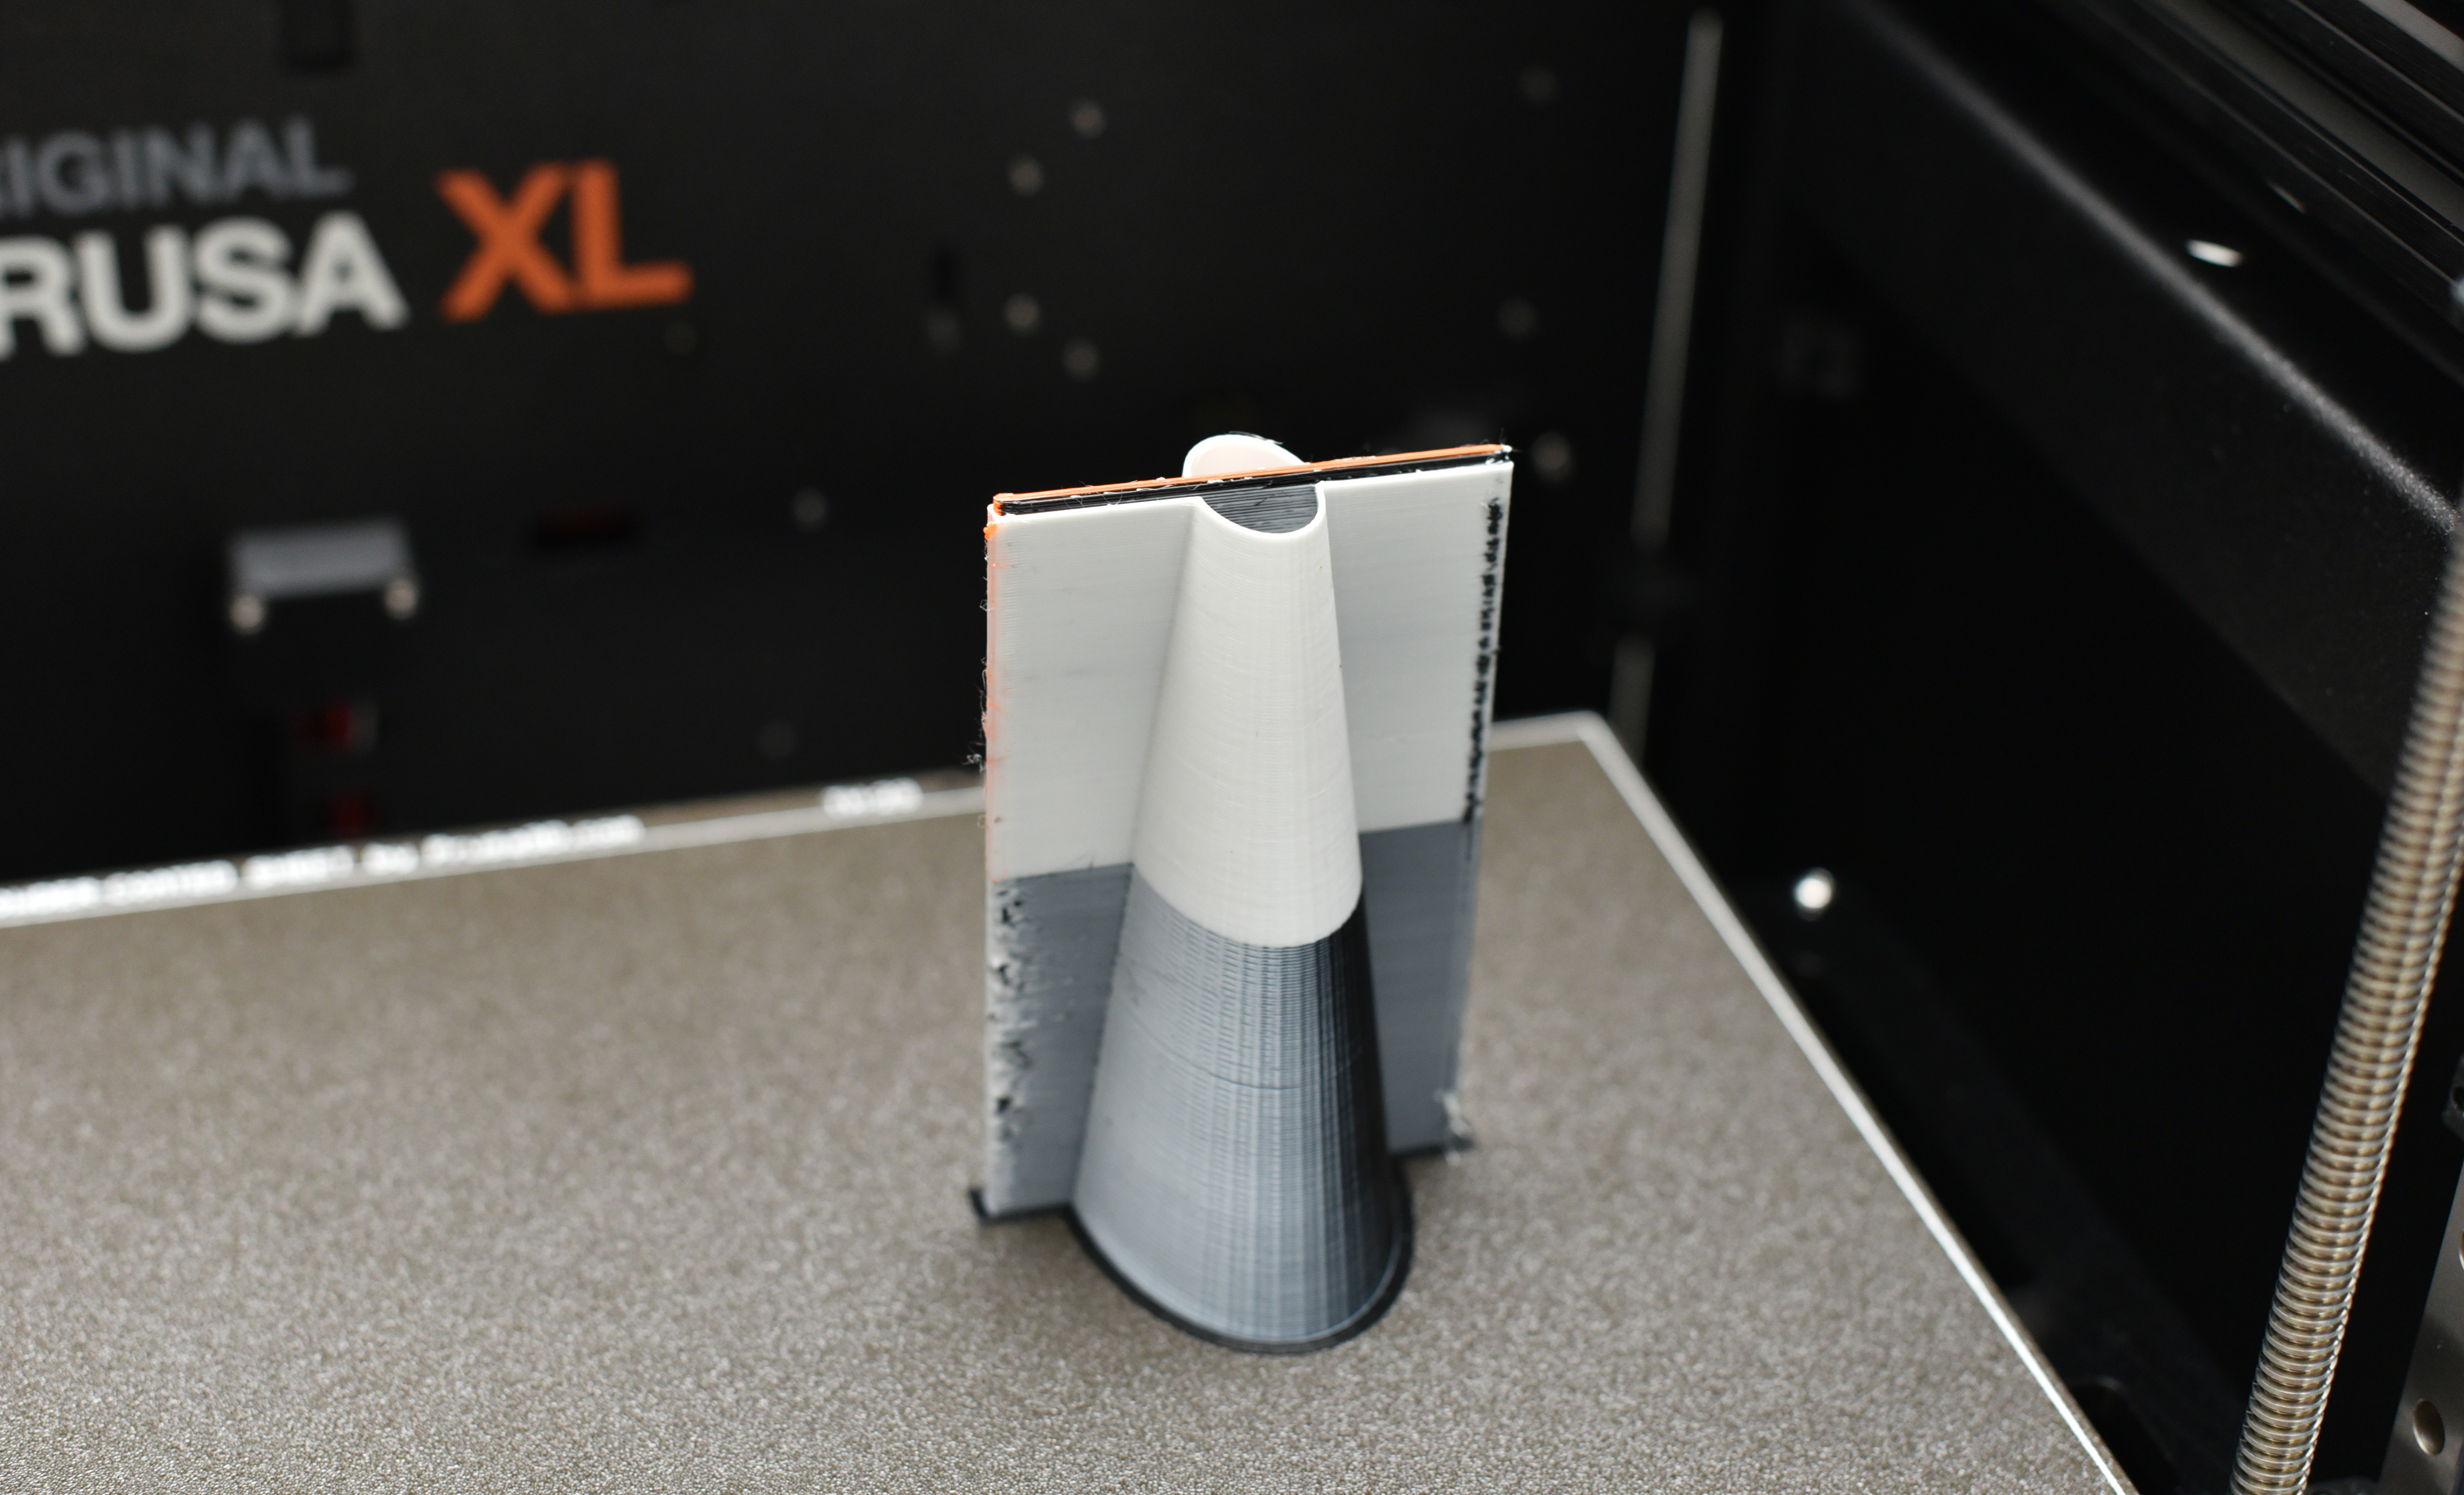
Stabilizing cone
The wipe tower can optionally be printed with a “stabilization cone”, which prevents it from toppling over. This feature is especially useful when the wipe/priming tower is very small in footprint, but can reach great heights, as on the Original Prusa XL.
The apex angle of the cone is adjustable in Print Settings-Multiple Extruders-Wipe tower. Setting the value to zero disables the cone.
22 comments
Under the "Wipe tower with supports" section, regarding synchronizing the support and object layers with each other, there is the phrase "One is selecting the Soluble or Breakaway profiles on the main plater...".
I searched on the main platter in the slicer, and couldn't find the Soluble or Breakaway profiles. How do I access/select one of these profiles on the main platter?
(I don't want to be mean, but the proper noun for this tab, given its function, is "platter" with a double-T. "Plater" has a different meaning. I'm surprised no one at Prusa noticed it.)
Regarding Purging Volumes: Prusa Slicer 2.9.2 does not display the 'Purging Volumes' button on the plater screen when Prusa XL Multi Extruder printer is selected.
Without purge objects, the tower is said to be made of 14m of filament. When adding as many purge objects as to fill 14m the tower is displayed with the same size.
If I want to reduce waste and print ugly but usable parts instead the tower how to make sure I add enough of them ? Where the tower is placed if there is not enough purge objects? A screenshot of the sliced print with two sheeps and a cog would help as well.