Starting from Prusa Slicer version 2.5.0, the standard perimeter generator is Arachne.
The Arachne generator produces perimeter loops and gap fills with varying extrusion widths. Simply put, it automatically widens or thins perimeters as needed.
For years, the strategy PrusaSlicer used when generating perimeters was to offset the object contour with an extrusion line of constant width. This caused problems in various cases, especially when printing thin walls, text, or logos. The developers of Cura implemented a new strategy named Arachne based on the paper [Kuipers et al., 2020]. We ported the feature from Cura. We want to thank the Ultimaker Cura team led by Jaime van Kessel, for implementing this feature and for keeping Cura open-source.
This approach produces nicer-looking prints with fewer artifacts. Gap infill and small extrusions used to fill gaps between perimeters are also significantly reduced, reducing the print time.
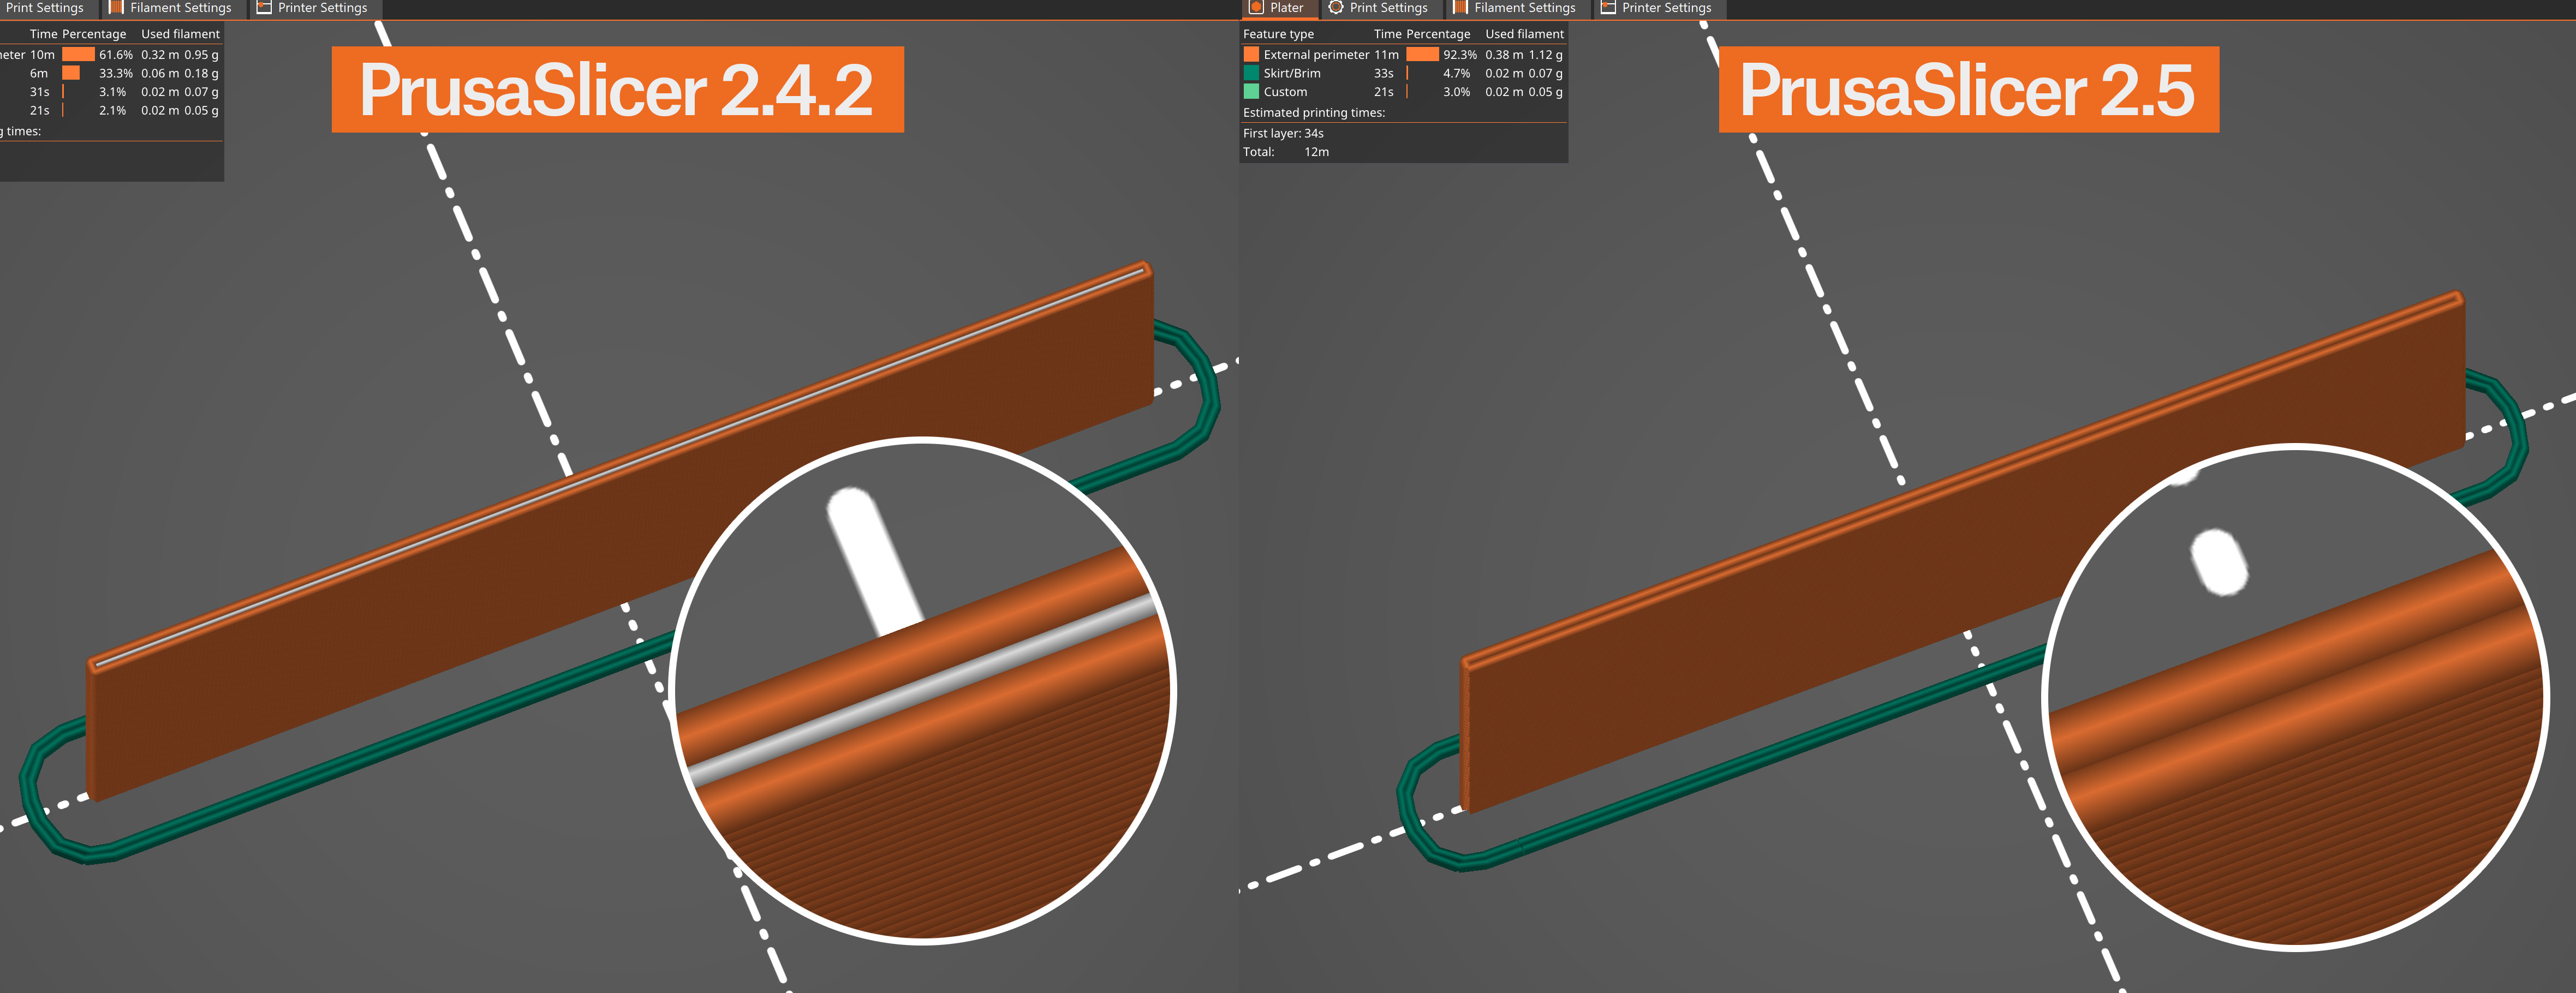
One field where the Arachne perimeter generator shows its power is when printing texts or small logos. Drawing fonts with constant line width is quite difficult. The new perimeter generator doesn’t have this limitation and produces much cleaner text even at a smaller scale. 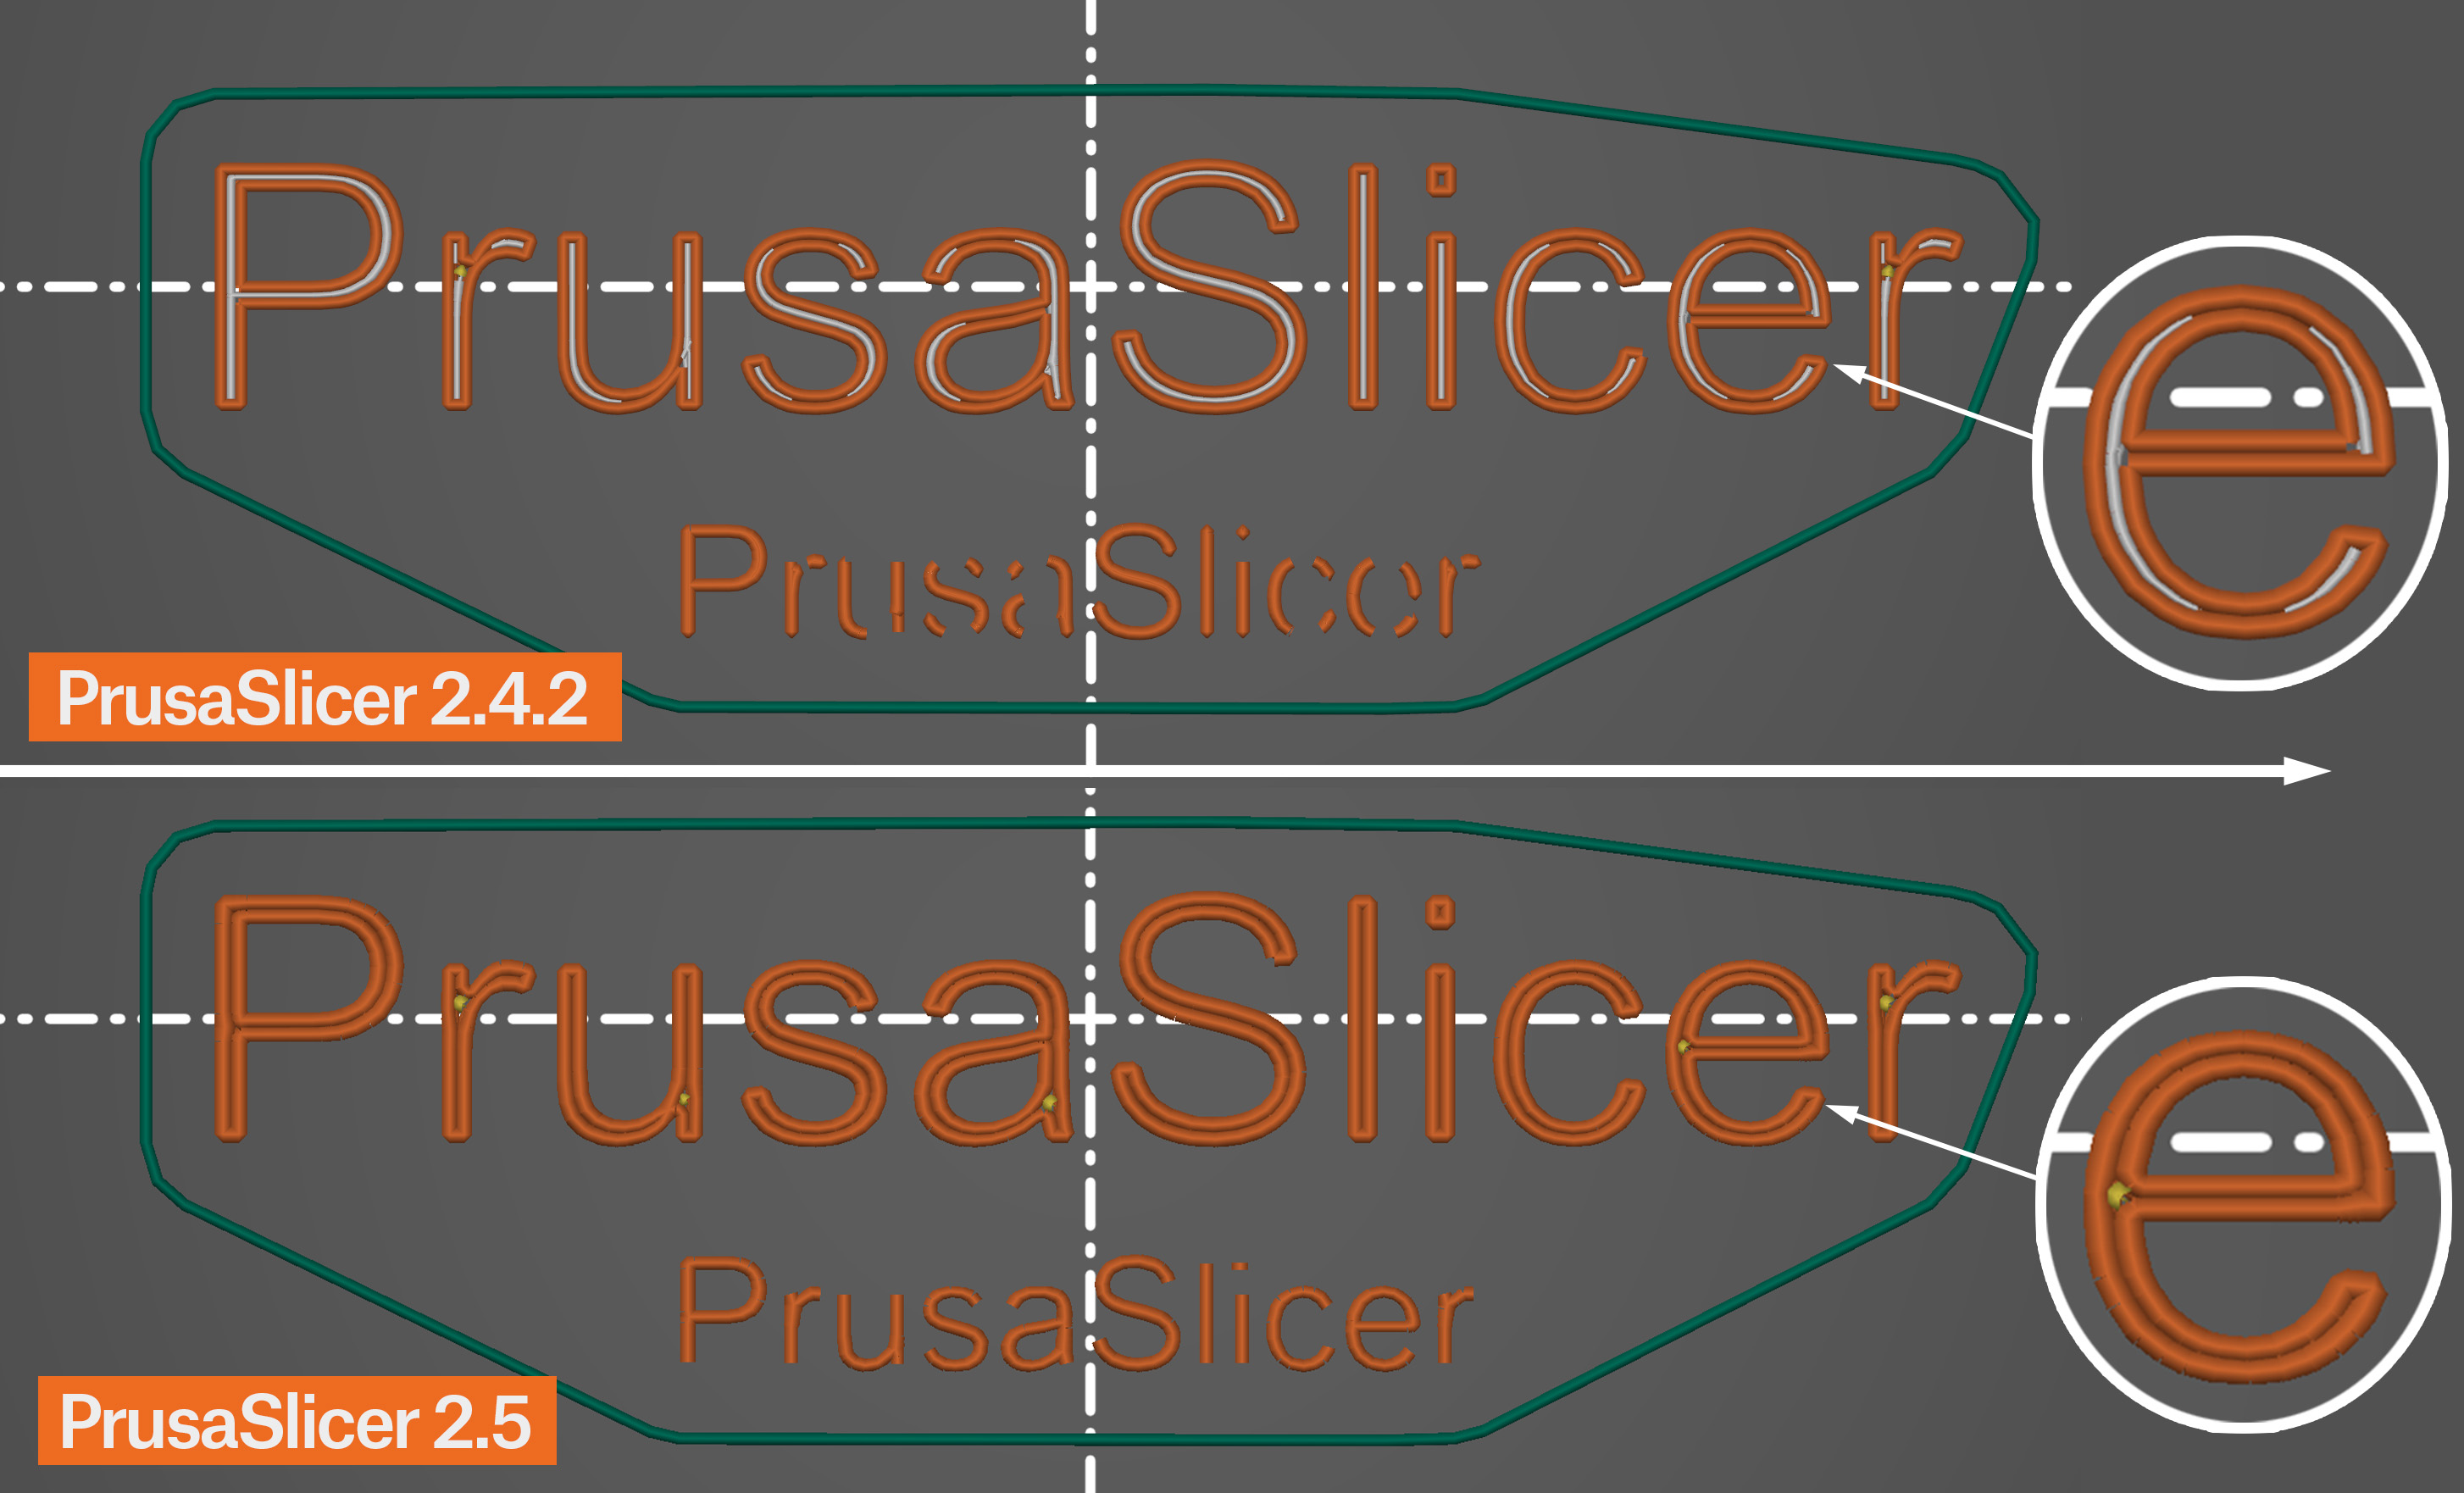
Classic perimeter generator in PrusaSlicer 2.4.2 vs Arachne in PrusaSlicer 2.5
The Arachne perimeter generation is the default option. If you want to use the previous perimeter generator, you can switch to it in the Print settings - Layer and perimeters - Perimeter generator settings.
The Detect Thin Walls feature is disabled when the Arachne perimeter generator is selected. It’s not needed since Arachne always tries to adapt the extrusion width to thin lines.
You can adjust the Arachne perimeter generator settings in Print settings - Advanced - Arachne perimeter generator
Minimum feature size
Minimum thickness of thin features, expressed in millimeters or as a percentage of the nozzle diameter.
Features thinner than this value will not be printed.
Feature thicker than the minimum will be widened to the minimum perimeter width.
Minimum perimeter width
Width of a perimeter that will replace thin features defined by the Minimum feature size.
Perimeter transition length
When transitioning between a different number of perimeters as the part becomes thinner, a certain amount of space is allocated to split or join the perimeter segments. This value defines the length of this transition area.
Perimeter transitioning threshold angle
An angle at which a transition between even and odd number of perimeters should happen. A wedge shape with an angle greater than this value will not have transitions and no perimeters will be printed in the center to fill the remaining space. Lowering this value reduces the number and length of these center perimeters but may leave gaps or over-extrude.
Perimeter transition filter margin
This value prevents transitioning back and forth between one extra perimeter and one fewer. It is expressed in millimeters or as a percentage of the nozzle diameter.
Increasing this margin reduces the number of transitions, which reduces the number of extrusion starts/stops.
7 comments
If gap fill is important for cosmetic or functional purposes, you must use Classic perimeters.
I stopped using arachne with a 0.6mm nozzle...