Prusa
  • ショップ
    • 最新製品
    カテゴリー別
    • 3Dプリンター新着
    • 3Dプリンターアップグレード新着
    • 材料
    • アクセサリー
    • スペアパーツ
    • コース
    • グッズ
    • 見積もりを取得
    クイックリンク
    • 配送と配達
    • 返品と返金
    • 支払いと融資
    • 保証
    • VATと関税
    • よくある質問

    0 点の商品がカートに入っています点の商品がカートに入っています

    カートは空です

    カートを見る3Dプリンターを購入

    マイプロフィール

    ログイン すると注文や保存した商品を確認できます

    マイプロフィール

    ログイン中:

    • 注文
    • ログアウト
  • 3Dプリント
    • 3Dプリントを探る
    初心者向け
    • 3Dプリントの基礎
    • FDM印刷の仕組み
    • 初めてのプリンターを購入する
    • 3Dモデルカタログ
    用途別
    • ラピッドプロトタイピング
    • 製造
    • エンジニアリング
    • 研究
    • アートとデザイン
    さらに深く
    • 材料ガイド
    • コース
    • ウェビナー
    • 導入事例
    • カスタム3Dプリンティング
  • 3Dプリンター
    • すべての3Dプリンター
    用途
    • 自宅またはガレージ愛好家、改造愛好家、ホームプリンティング
    • ビジネス小規模チーム向けの社内生産
    • エンタープライズフリート、セキュリティ、大規模生産
    • どのPrusaが私に適していますか
    ショップと閲覧
    • CORE One+新着
    • CORE One+ INDX新着
    • CORE One L+新着
    • CORE One L+ INDX新着
    • XL+新着
    • MK4S
    • Prusa Pro HT90
    • Prusa Pro AFS
    • Prusa Pro SLX
    プリンターからさらに
    • 部品とアップグレード新着
    • 重要インフラ
    • 導入事例
    • シグネチャーオーク
    • キット
  • 材料
    • すべての材料
    用途別
    • 日常とデザイン
    • 機能工学
    • 複合材料
    • プロフェッショナル向け特殊材料
    • SLAレジン
    Prusament
    • PLA
    • PETG
    • ASA
    • PC
    • PA11
    • Flex
    • TPU
    材料からさらに
    • 材料ガイド
    • 自社製材料
    • サステナビリティ
    • ストアで注文
  • ソフトウェア
    • すべてのソフトウェア
    印刷の準備
    • PrusaSlicer 3.0新着
    印刷と監視
    • Prusa Connect
    • EasyPrint
    • iOS & Androidアプリ
    • Prusaファーム
    始める
    • ダウンロードとインストール
    • ナレッジベース
    その他のソフトウェア
    • 3Dモデルカタログ
  • サポート
    • サポートを探す
    回答を探す
    • ナレッジベース
    • トラブルシューティング
    • コース
    • ウェビナー
    ヘルプ
    • お問い合わせ
    • ライブチャット
    • 配送と配達
    • 保証
    • 返品と返金
    • サービスとスペアパーツ
    • サービスと修理
    コミュニティ
    • フォーラム
    • Reddit
    • Printables
  • トラストセンター
    • トラストセンター概要
    トピック別
    • GDPR
    • 証明書
    • セキュリティ
    • コンプライアンス
    コミットメント
    • サステナビリティレポート
    お問い合わせ
    • セキュリティチームに連絡
  • 会社
    • Prusaについて
    私たちについて
    • 私たちのストーリー
    • プリンターの製造方法
    • オープンソース
    • ブランド&メディアキット
    ニュース
    • ブログ
    • ニュースルーム
    • イベント
    信頼とパートナー
    • サステナビリティ
    • 再販業者と販売代理店
    • アフィリエイトプログラム
    • お問い合わせ
    • English
    • Čeština
    • Deutsch
    • Español
    • Français
    • Italiano
    • Polski
    • 日本語
  • ログイン中:

    • 注文
    • 住所
    • 在庫アラート
    • マイコース
    • サブスクリプション
    • アカウントを編集
    • ログアウト

ログイン すると注文や保存した商品を確認できます

ログイン中:
  • 注文
  • 住所
  • 在庫アラート
  • マイコース
  • サブスクリプション
  • アカウントを編集
  • English
  • Čeština
  • Deutsch
  • Español
  • Français
  • Italiano
  • Polski
  • 日本語
ショップ

0 点の商品がカートに入っています点の商品がカートに入っています

カートは空です

カートを見る3Dプリンターを購入

マイプロフィール

ログイン すると注文や保存した商品を確認できます

マイプロフィール

ログイン中:

  • 注文
  • ログアウト
ショップ
  • 最新製品
カテゴリー別
  • 3Dプリンター新着
  • 3Dプリンターアップグレード新着
  • 材料
  • アクセサリー
  • スペアパーツ
  • コース
  • グッズ
  • 見積もりを取得
クイックリンク
  • 配送と配達
  • 返品と返金
  • 支払いと融資
  • 保証
  • VATと関税
  • よくある質問

おすすめ製品

    人気のカテゴリー

      急上昇ワード

        記事

          ブログ

            製品

              カテゴリー

                検索候補

                  検索中…
                  結果がありません
                  エラーが発生しました。
                  ↑↓ 選択↵ 開くEsc 検索を閉じる
                  1. サポート
                  2. Prusa CORE One L+
                  3. プリンターの機能
                  4. Nextruder silicone sock (CORE One/+, CORE One L/+, XL/+, MK4/S, MK3.9/S)
                   

                  内容

                  • Why use a silicone sock?
                  • Cleaning the hotend
                  • Preliminary steps
                  • Installing the silicone sock

                  ブログ

                  • Prusament PLA ColorMix:わずか5巻のフィラメントで45色以上をプリント
                  • PrusaSlicer 3.0プレビュー版 — 3Dプリントの未来を見据えた仕様
                  • より高品質なプリントを、もっと簡単に:Prusa XL+、CORE One L+、CORE One+(Gen 2)― 大規模製品アップグレード

                  ニュースレター

                  ご登録いただくと、毎月 新しいファームウェア、PrusaSlicerの新バージョン、3Dプリントプロジェクトの一般的なヒントなど、役立つ情報をお届けします。

                  クリックして、ニュースレターを受け取る。

                  このサイトはreCAPTCHA Enterpriseによって保護されており、Googleのプライバシーポリシーと利用規約が適用されます。

                  Factorio Transport Belts
                  E-shop
                  • 3Dプリンター
                  • プリンターのアップグレード
                  • フィラメント
                  • アクセサリー
                  • Prusa 商品

                  © Prusa Research a.s.

                  Printables
                  • 3Dモデル
                  • Store
                  • Clubs
                  • 3Dデザインコンテスト
                  • Brands
                  コミュニティ
                  • ワールドマップ
                  • フォーラム
                  • ユーザーグループ
                  • イベント
                  ヘルプ
                  • Prusa ヘルプ
                  • Prusa アカデミー
                  • 3Dプリンティング計算機
                  ソフトウェア
                  • PrusaSlicer
                  • Prusa.app
                  • Prusa Connect
                  • ドライバーとソフトウェア
                  会社概要
                  • 私たちについて
                  • Blog
                  • プルサ正規販売代理店
                  • お問い合わせ
                  • ISO 9001・ISO 14001・ISO 45001 認証取得済み
                  • 一般利用規約
                  • PRUSAウェブサイト利用のための一般利用規約
                  • プライバシーポリシー
                  • クッキーに関する情報
                  • お客様の苦情対応に関する方針
                  • Webサイトのステータスページ
                  • Cookie 設定
                  • 一般利用規約
                  • PRUSAウェブサイト利用のための一般利用規約
                  • プライバシーポリシー
                  • クッキーに関する情報
                  • お客様の苦情対応に関する方針
                  • Webサイトのステータスページ
                  • Cookie 設定

                  © Prusa Research a.s.

                  JOSEF PRUSA®、PRUSA RESEARCH®、PRUSA POLYMERS®、PRUSA ORANGE®、PRUSA 3D ® および PRUSAMENT® は、Prusa Development a.s. の登録商標であり、Prusa Research a.s. が Prusa Development a.s. からのライセンスに基づき使用しています。

                  Nextruder silicone sock

                  (CORE One/+, CORE One L/+, XL/+, MK4/S, MK3.9/S)

                  関連するもの

                  CORE One family
                  MK4 family
                  XL family
                  MK3.9 family
                  記事 他の言語でもご覧になれます。
                  English
                  Čeština
                  Polski
                  Deutsch
                  Français
                  Español
                  Italiano
                  日本語

                  The Original Prusa Printers with the Nextruder are equipped with a Prusa Nozzle. A dedicated silicone sock can be attached to this nozzle.

                  We offer Nextruder silicone socks in a set of three on our e-shop.

                  Why use a silicone sock?

                  The main function of a silicone sock is to keep the temperature in the heater block stable, which improves the printer's performance. There are additional benefits to using the silicone sock, like keeping your hotend clean from filament dirt and protecting it in case the print detaches from the print surface. They are instrumental if you want to print high-temperature filaments.

                  The Nextruder silicone sock also has a low chance of slipping off your hotend. The Nextruder has the cables on the top of the heater block, so there is no need for the sock to have cable openings on the side. 

                  Cleaning the hotend

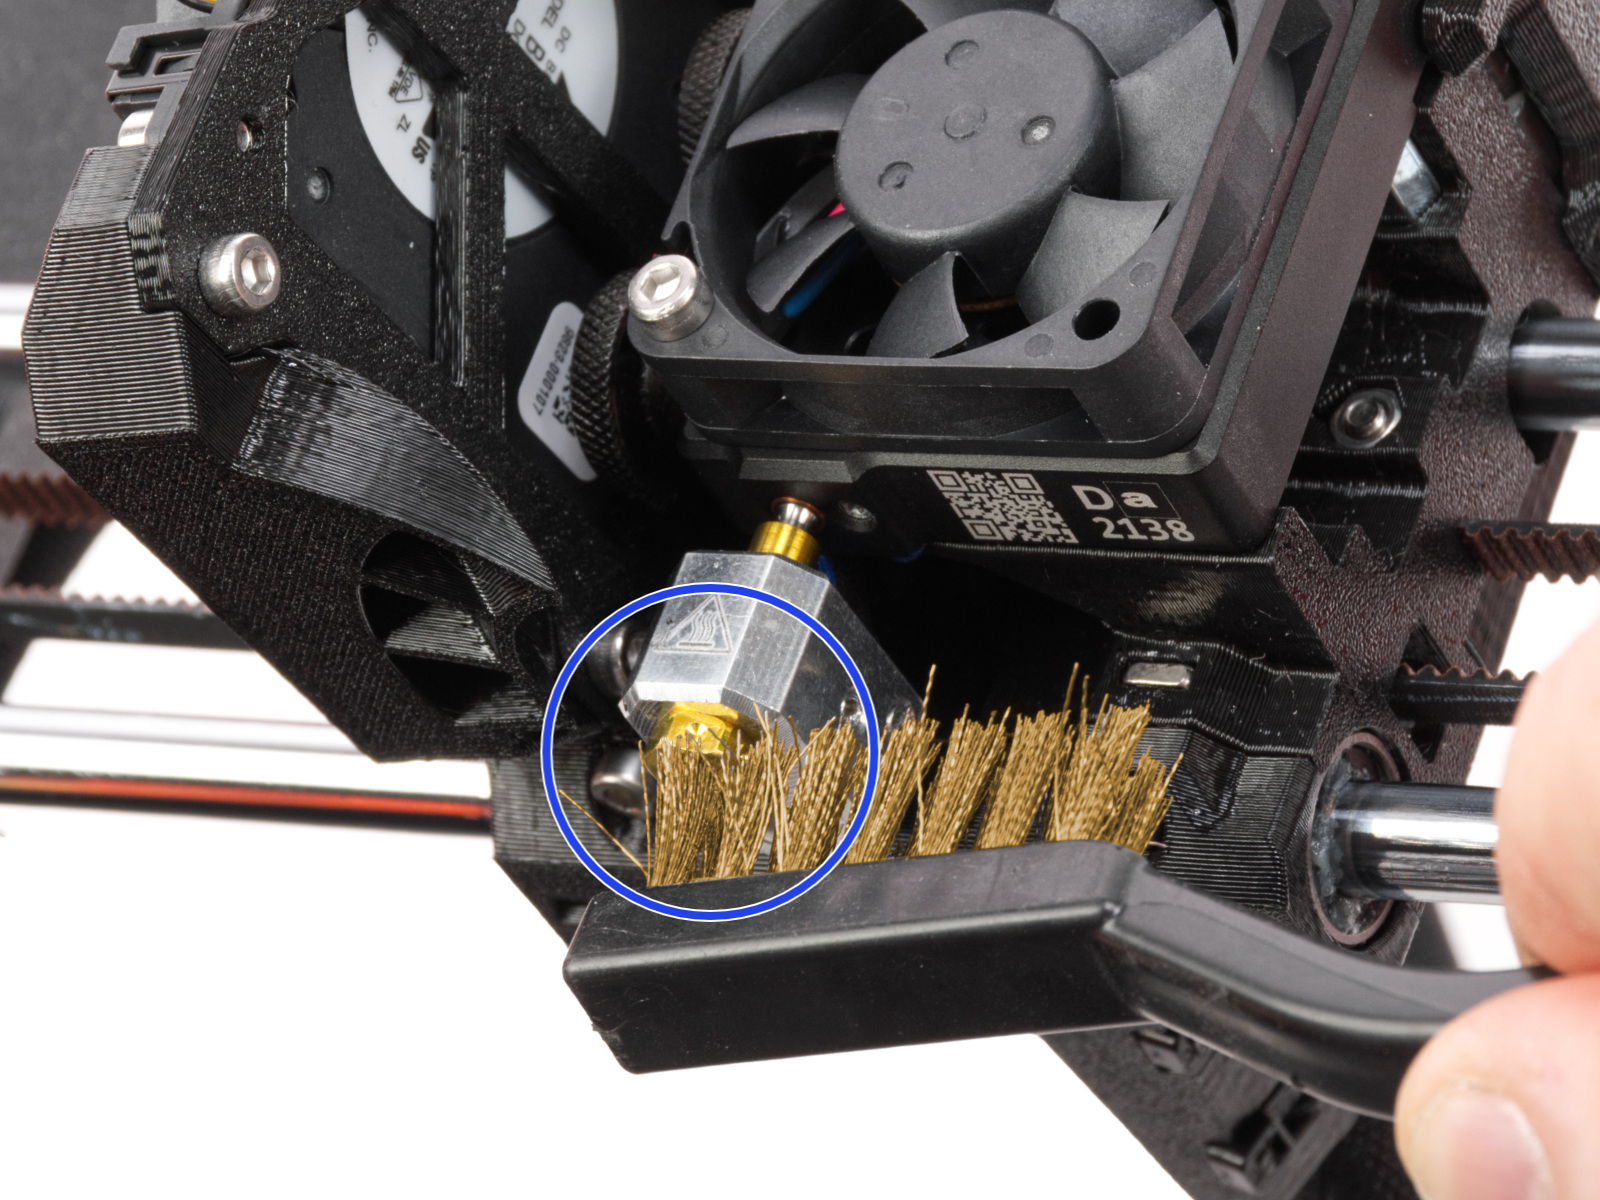
                  Before installing the sock on your hotend, it is necessary to have the heaterblock and the hotend clean of the remains of the filament. For that, go to the printer menu to Control -> Temperature -> Nozzle Temperature and use the knob to set the temperature to 250°C. Wait for about five minutes so that all of the filament remains can be softened. Then, using the brass brush, carefully clean the heaterblock and the hotend from the filament residue. Avoid contact of the brush with the hotend cables, as this could cause a short circuit. 

                  After that, go to the printer menu to Preheat -> Cooldown. Wait until the hotend reaches a temperature below 50 ºC before continuing. 

                  Preliminary steps

                  Make sure that the hotend is fully cooled down to room temperature and that the printer is switched off before manipulating the printer parts or installing the silicone sock.
                  Heated parts can cause severe burns! 

                  Prusa CORE One, CORE One L

                  1. Move the printer axes, in particular the Z-axis, so that the bottom of the hotend is accessible. This is done by navigating to LCD Menu -> Control -> Move Axis.
                  2. Fully cool down the printer to room temperature and switch it off. 

                  Original Prusa MK4S, MK3.9S

                  1. Move the printer axes, in particular the Z-axis, so that the bottom of the hotend is accessible. This is done by navigating to LCD Menu -> Control -> Move Axis.
                  2. Fully cool down the printer to room temperature and switch it off. 
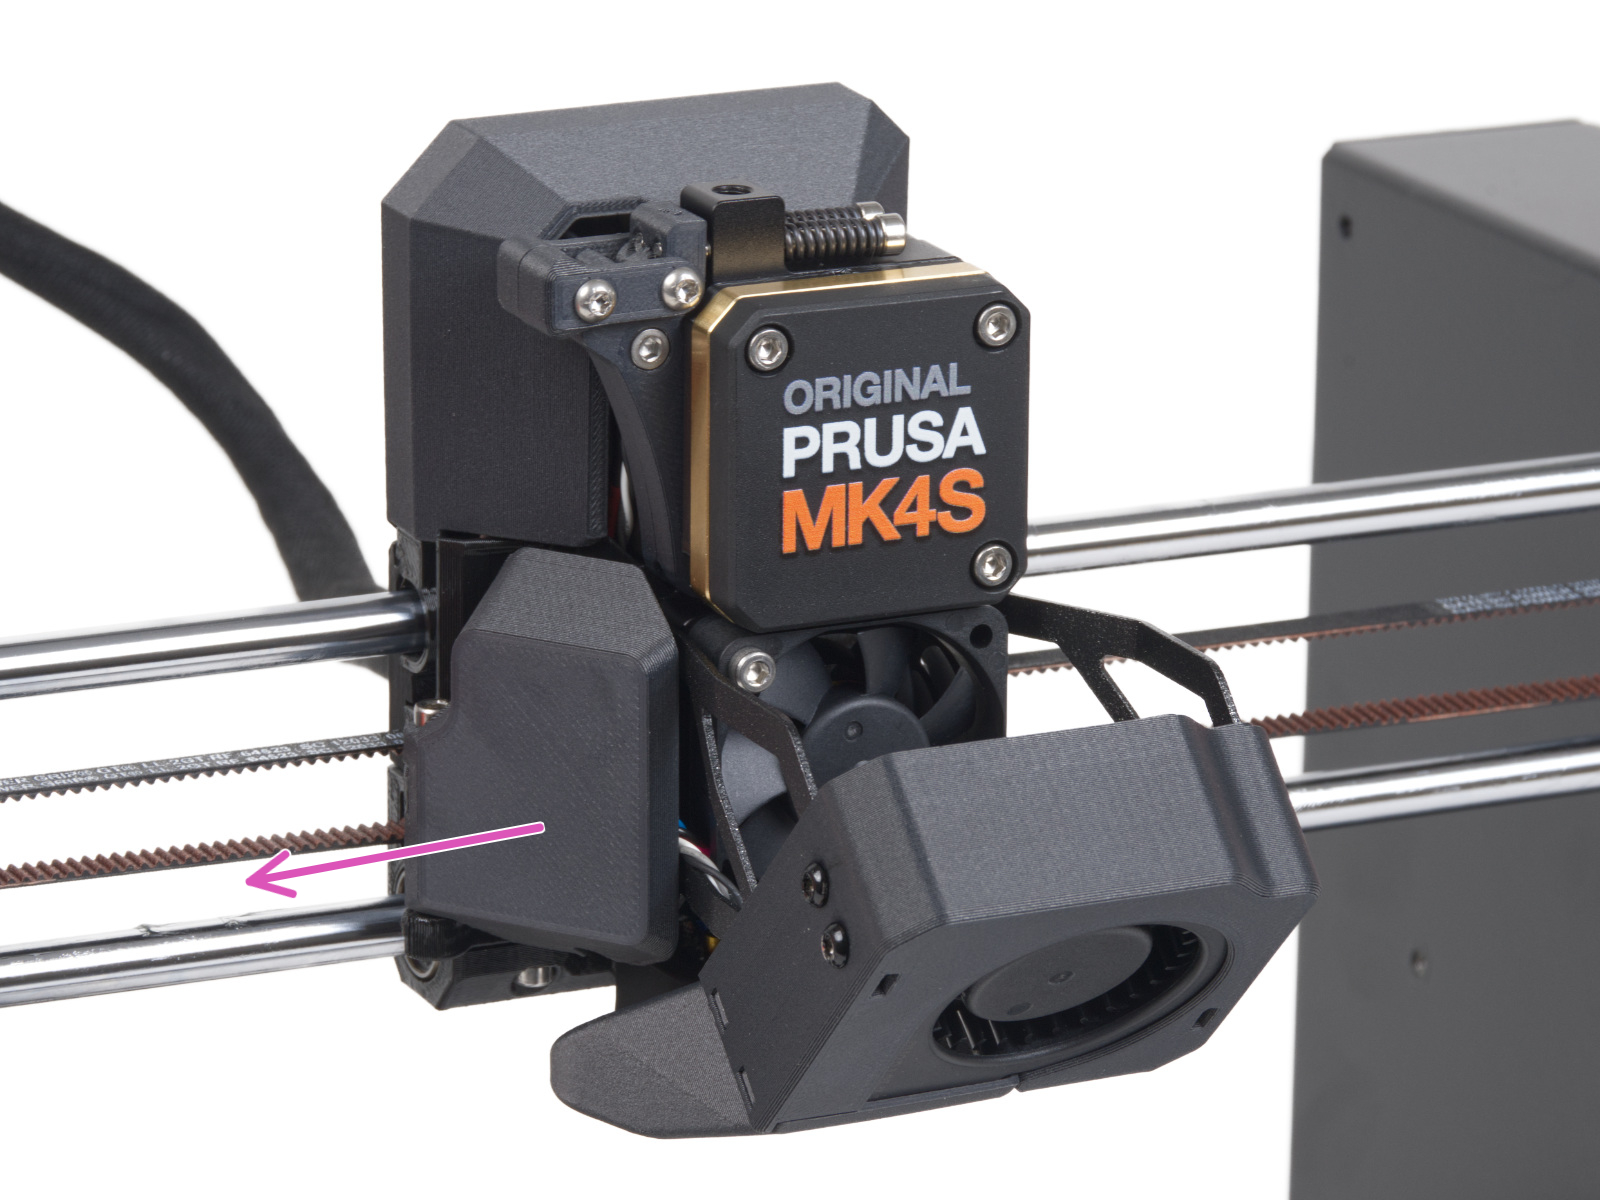
                  3. Rotate the fan-door-cover to open it completely. 
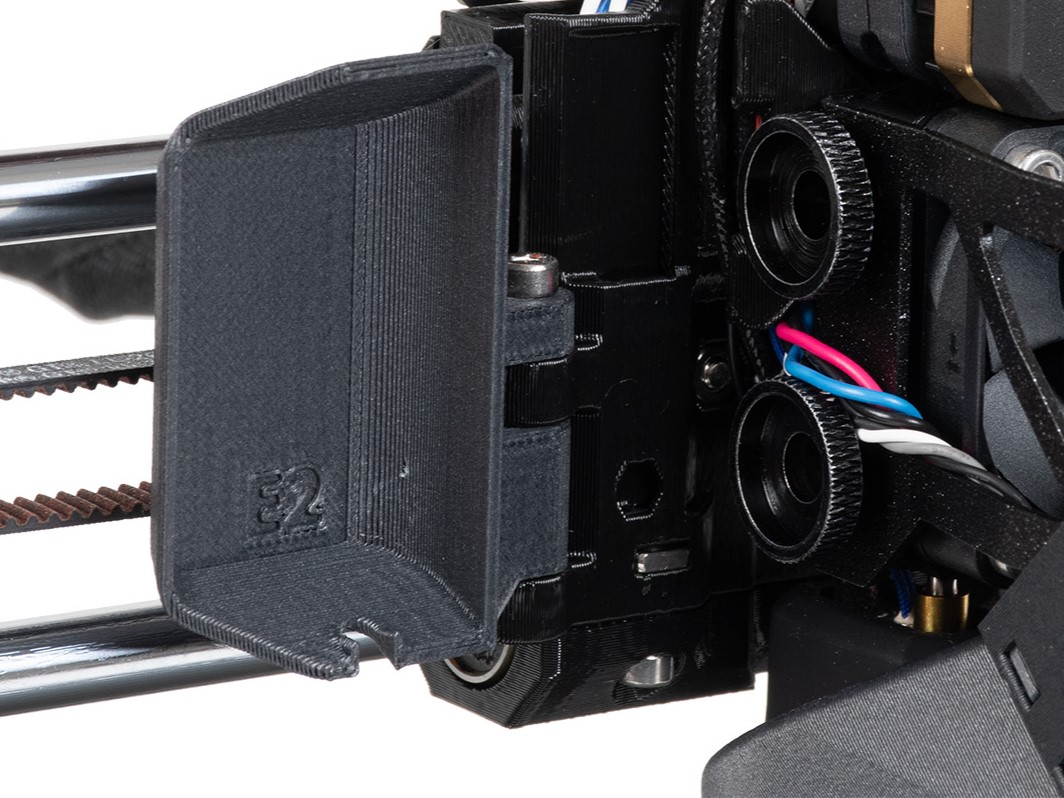
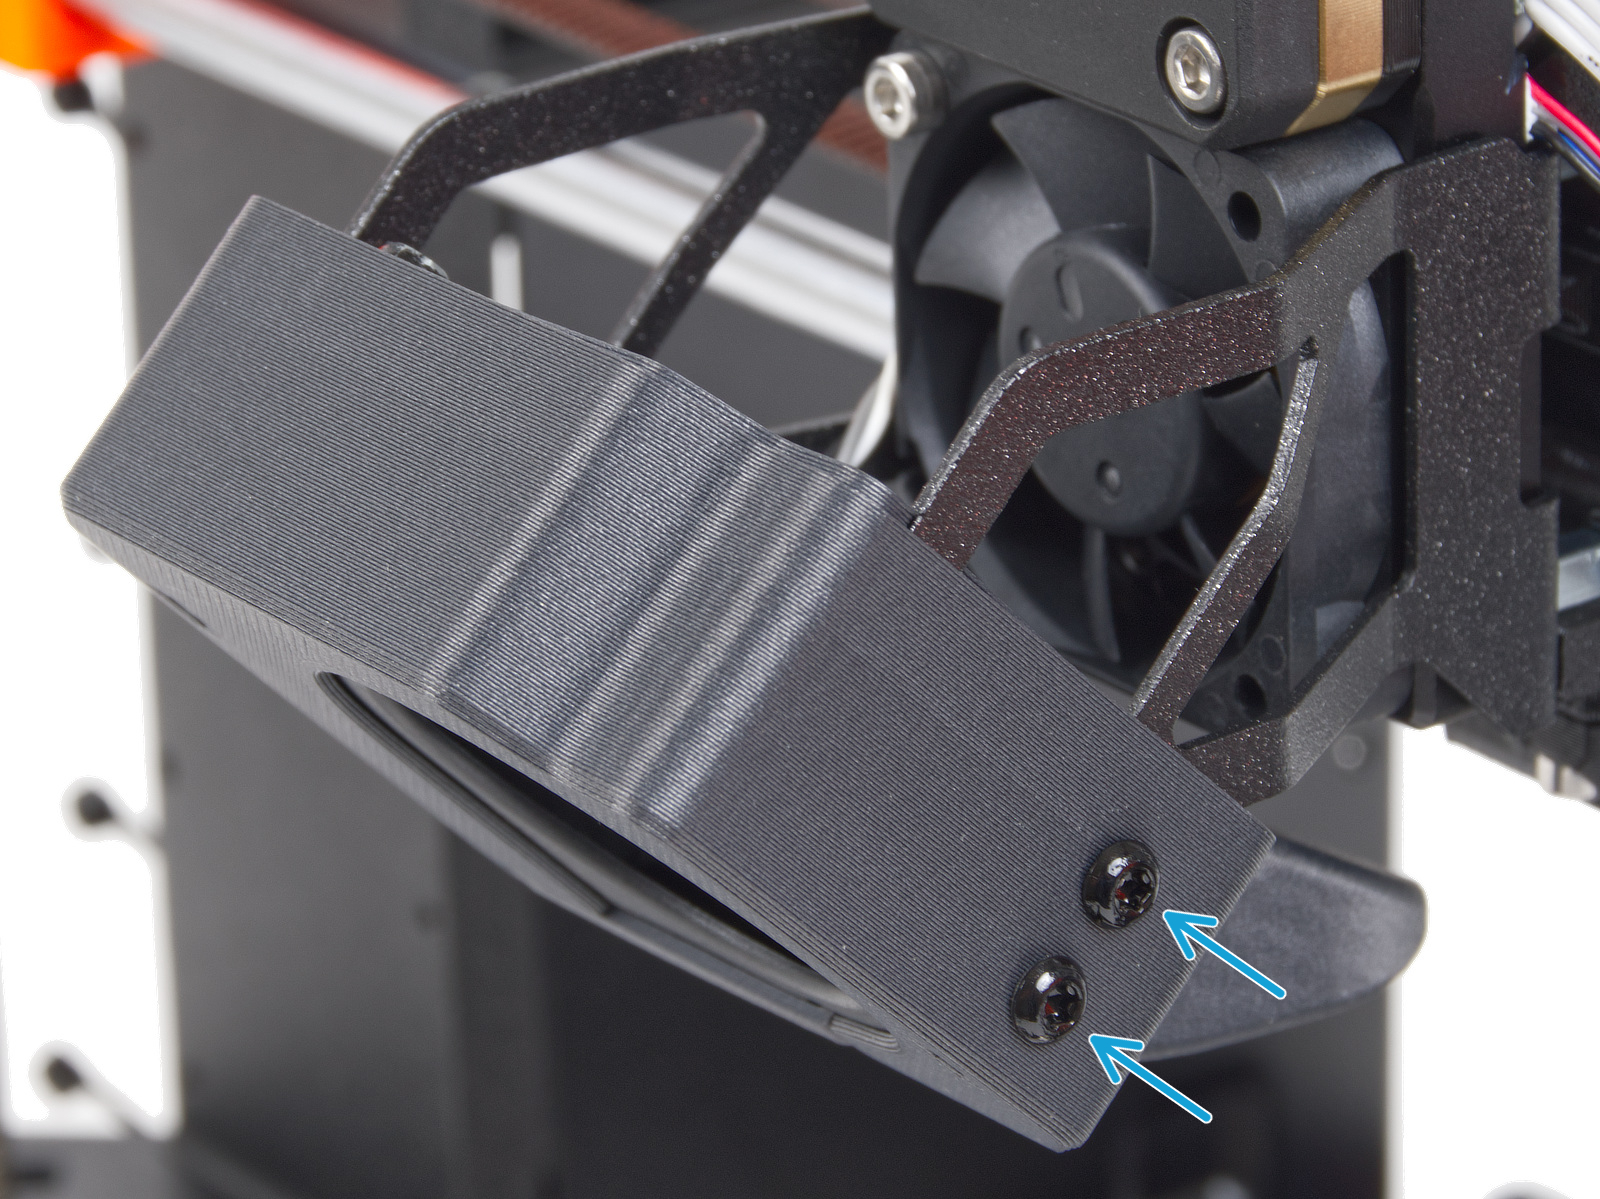
                  1. Loosen 4x M3x5rT screws, two on the left and two on the right. 
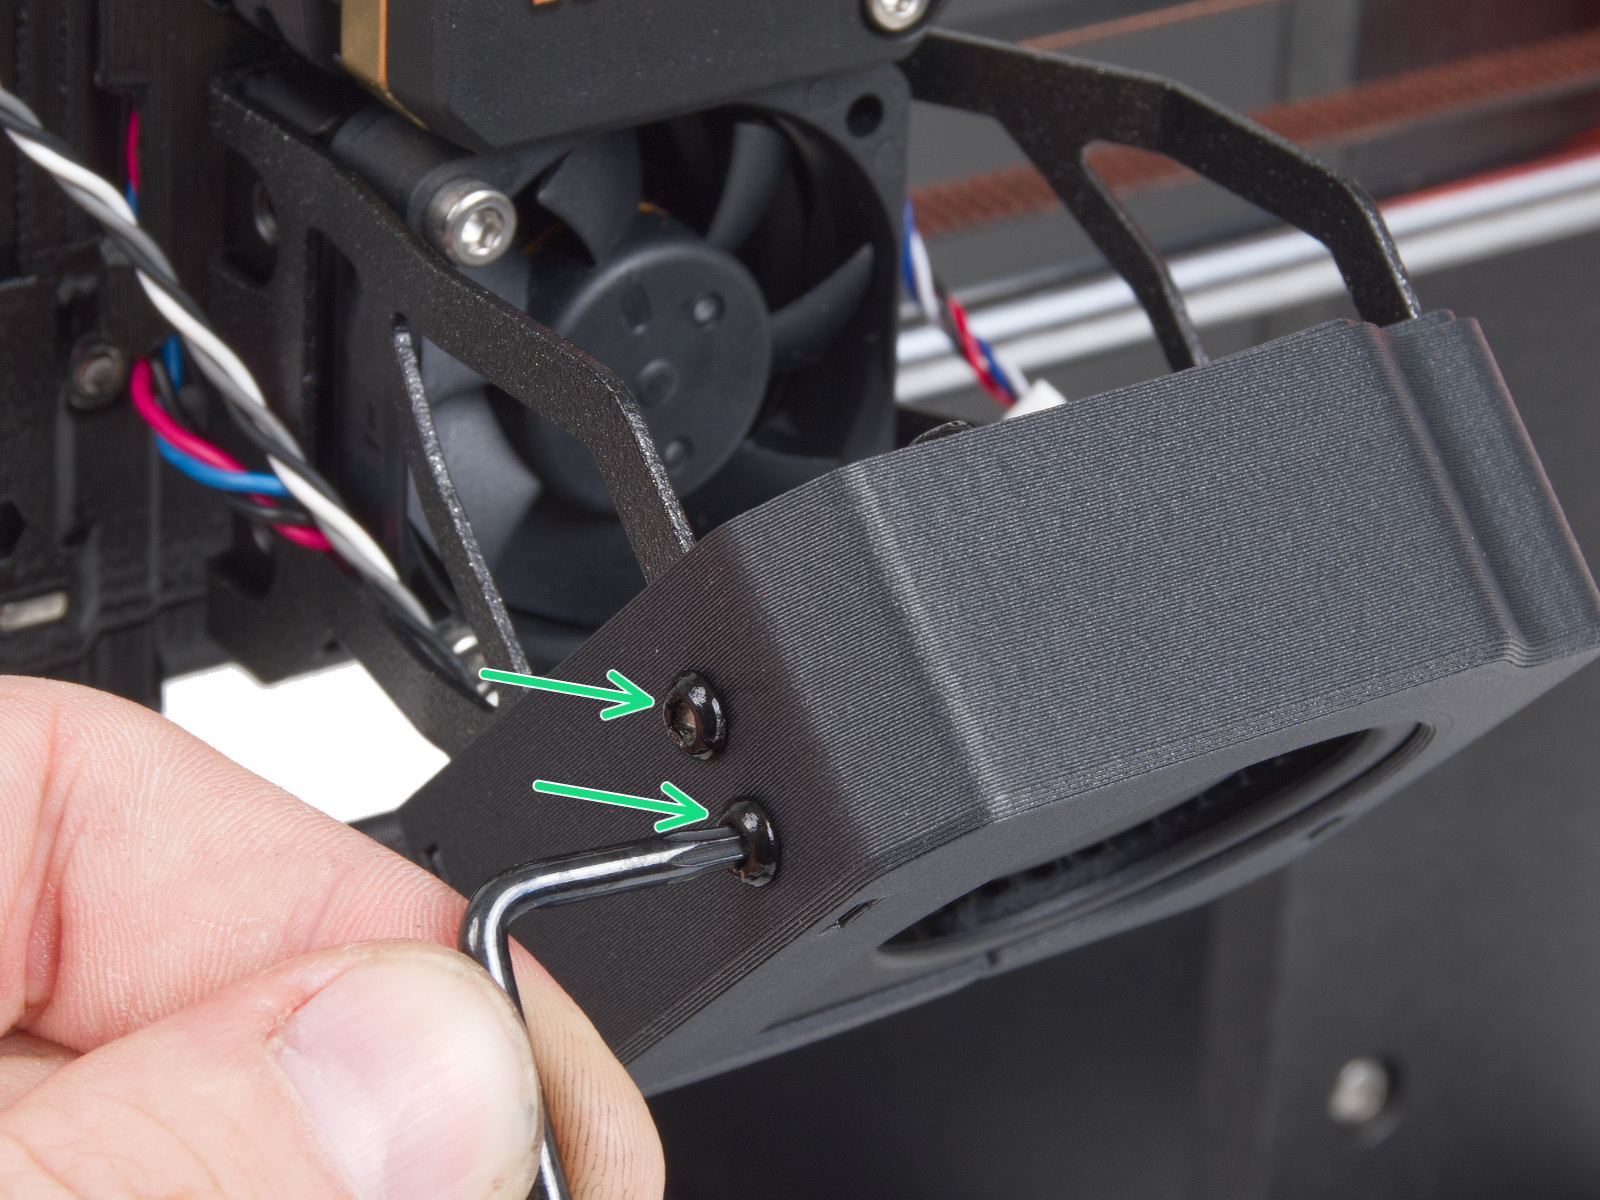
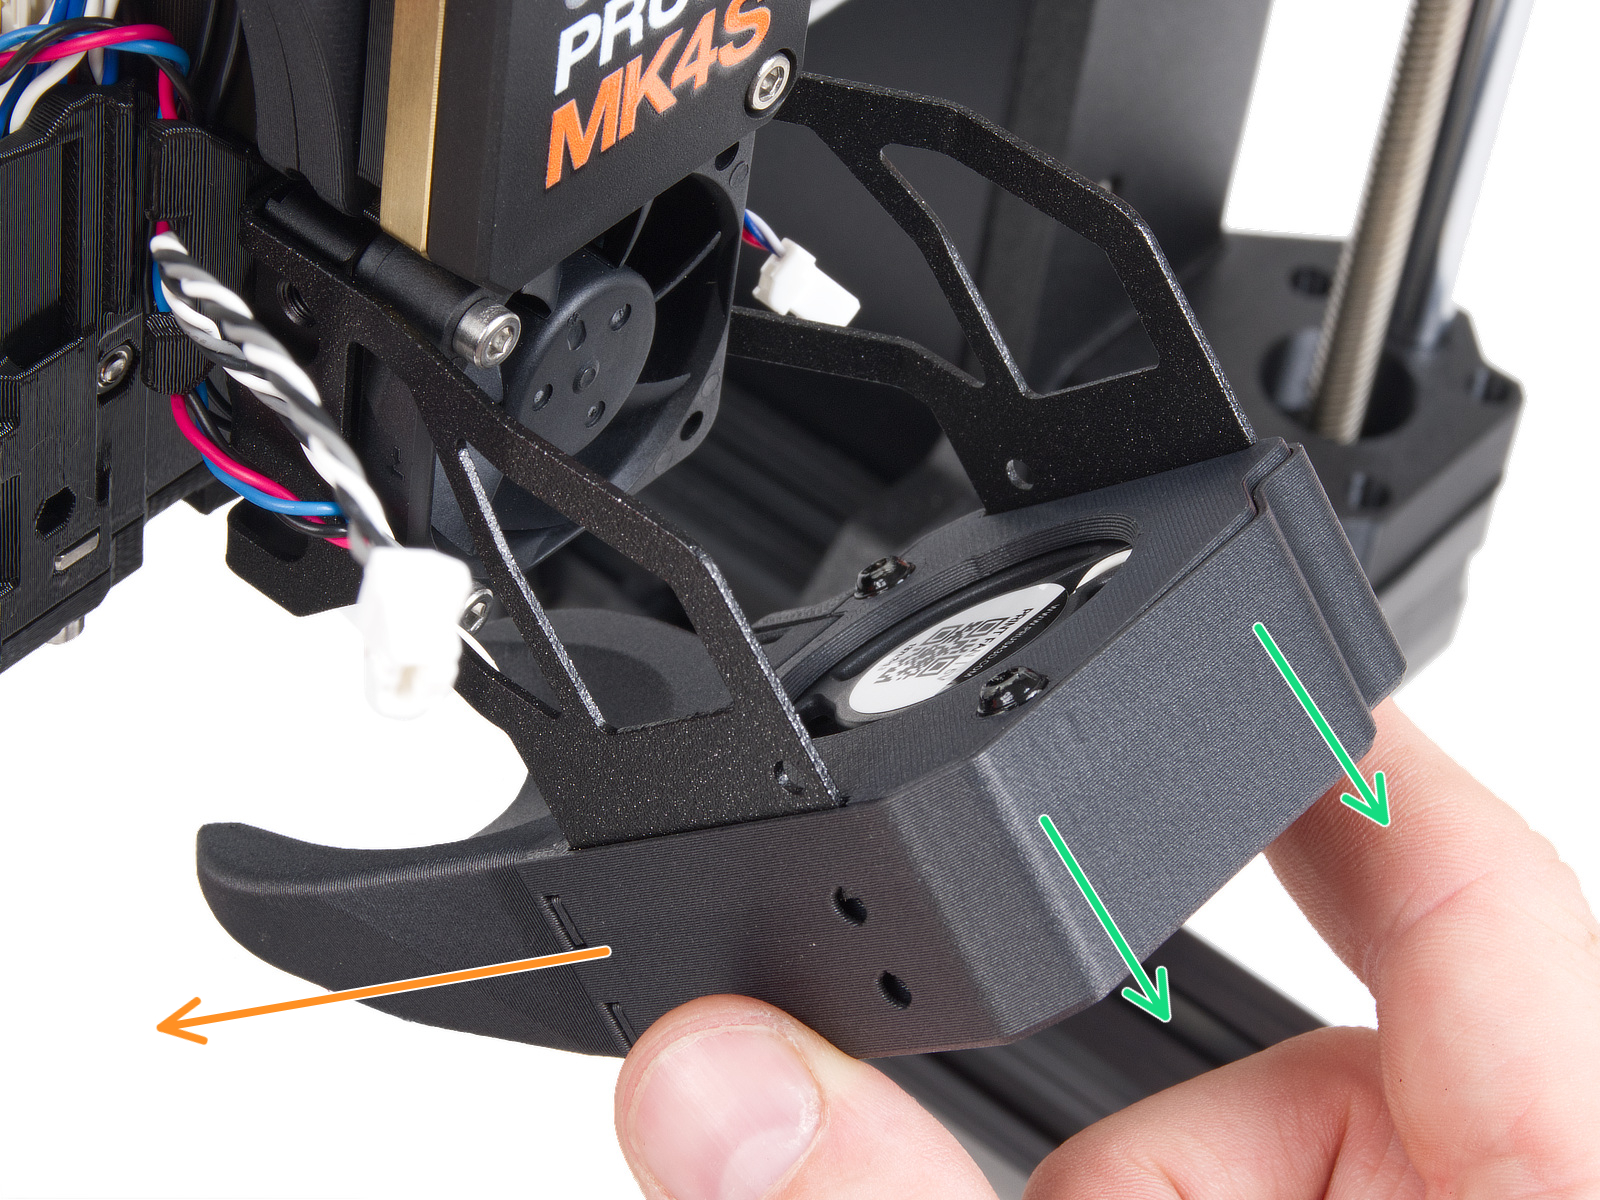
                  1. Slide out the print fan assembly, and place it to the left of the hotend. Be careful to not excessively pull or pinch the attached cables. 

                  Original Prusa MK4, MK3.9

                  1. Move the printer axes, in particular the Z-axis, so that the bottom of the hotend is accessible. This is done by navigating to LCD Menu -> Control -> Move Axis. 
                  2. Fully cool down the printer to room temperature and switch it off. 
                  3. Rotate the print fan so that it is parallel to the X-axis. 

                  Original Prusa XL 

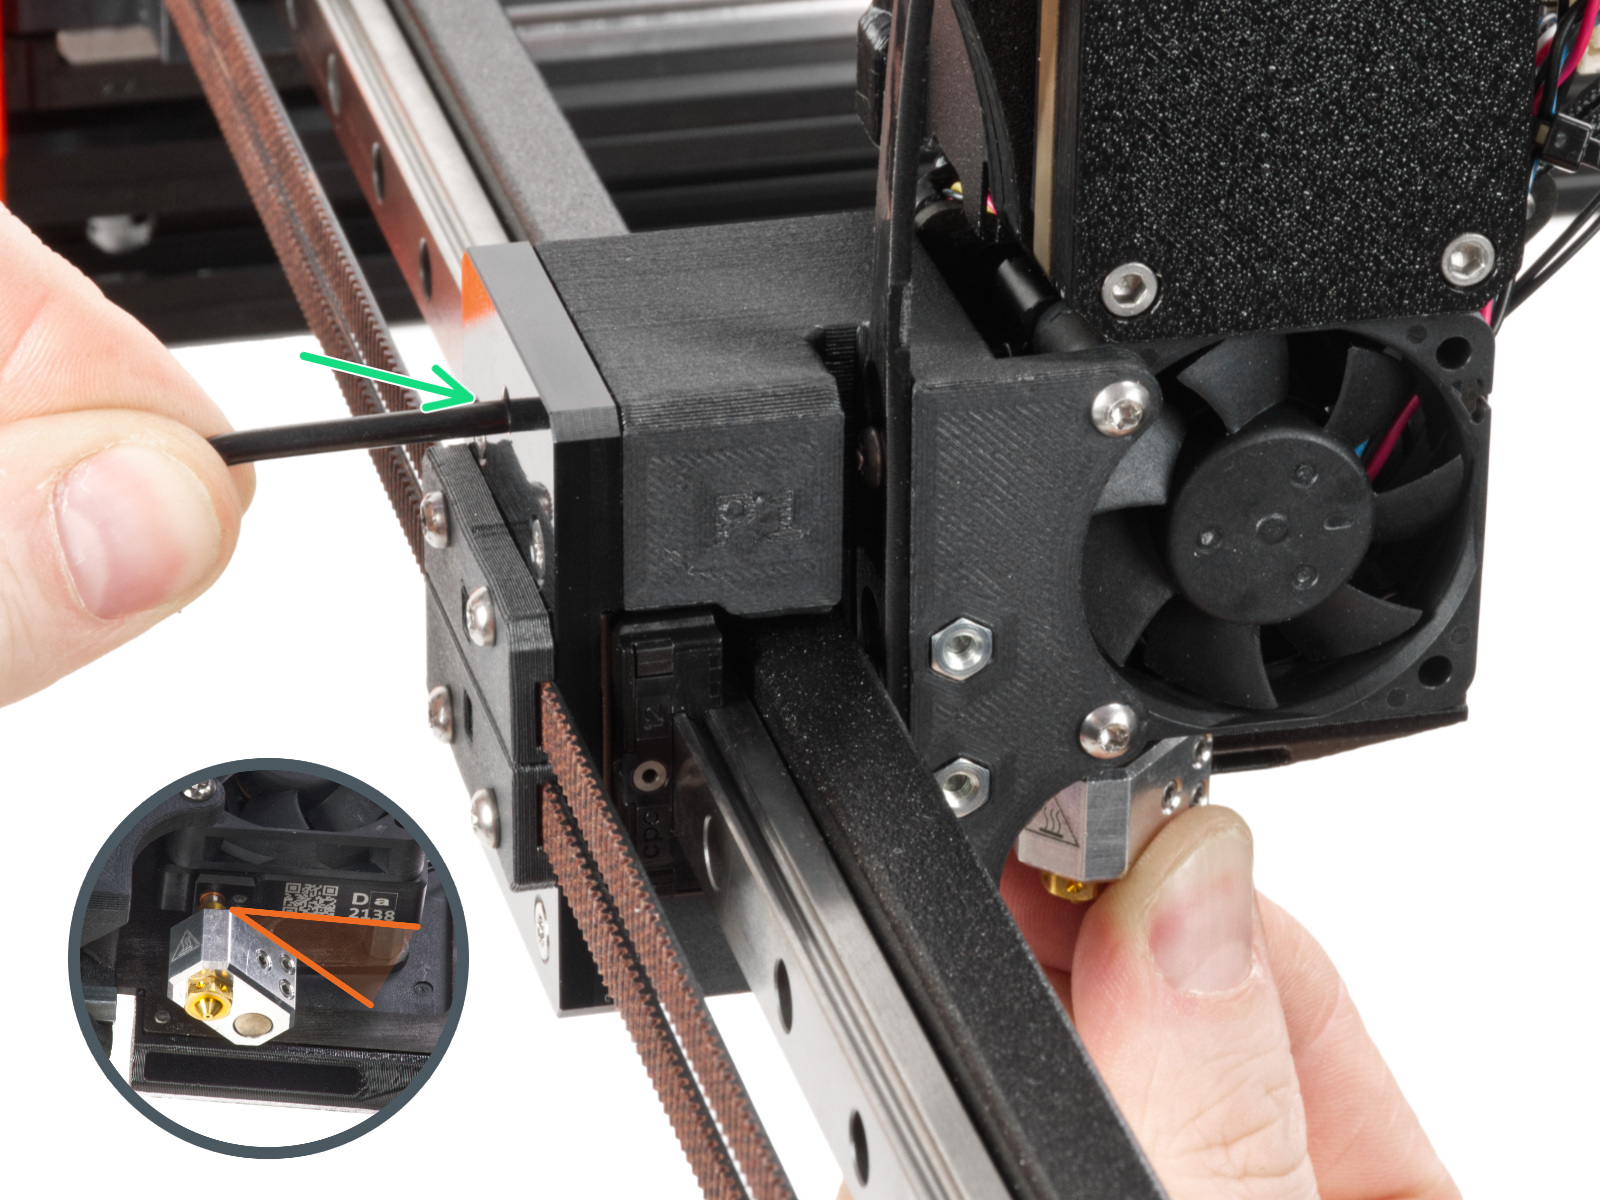
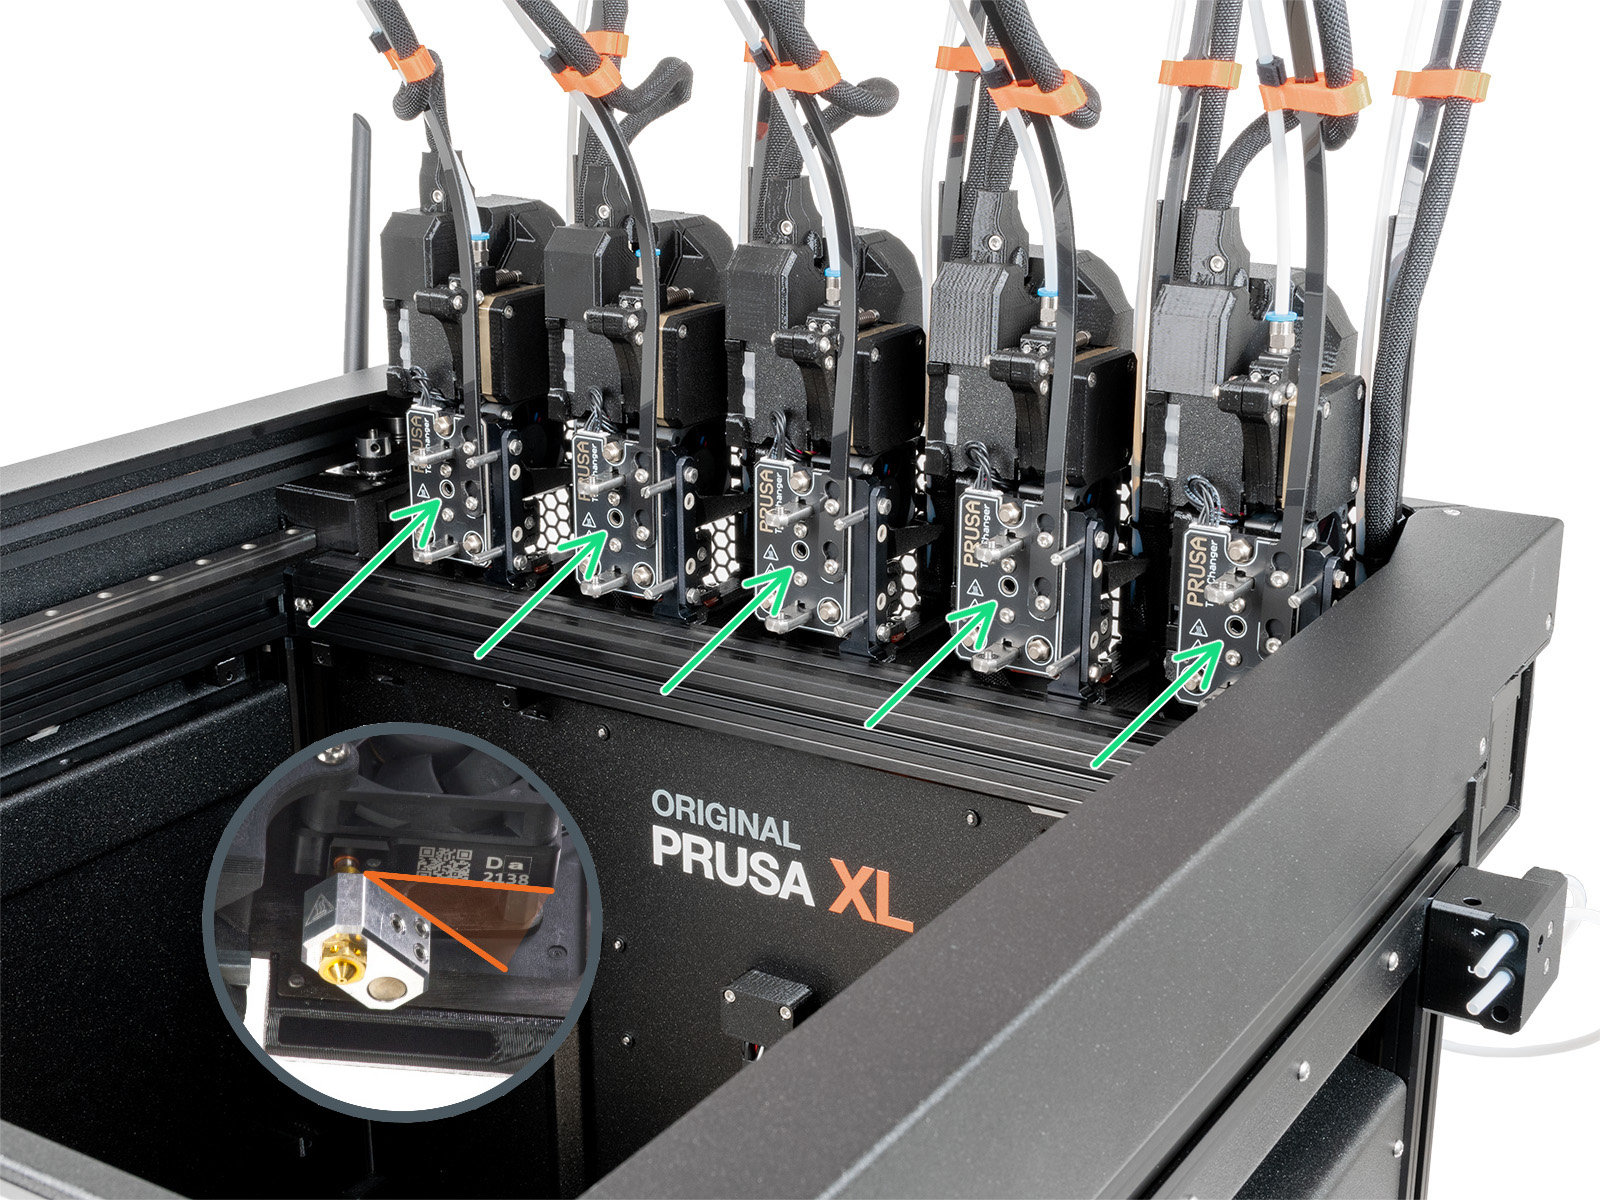
                  The hotend is installed at a 35°-40° angle. If you notice the sock would not fit due to a lack of space between the heaterblock and fan shroud, follow these steps: 

                  1. Access the grub screw that secures the hotend.
                    1.  On single-tool XL, remove the x-carriage cover. This component is located at the front of the print head. 
                    2.  On the multi-tool XL, park the tool. To do so, navigate to LCD Menu -> Control -> Pick/Park Tool -> Park Current Tool.
                  2. Slightly loosen the grub screw that secures the hotend, so you can slightly reposition the hotend angle. Keep as much as possible of the initial 35°-40° angle.
                  3. Push the hotend upward and tighten the grub screw, without using extra force.

                  Prepare the printer for silicone sock installation with the following steps: 

                  1. On the multi-tool XL, pick the tool. Navigate to LCD Menu -> Control -> Pick/Park Tool -> Pick Tool #.
                  2. Move the printer axes, in particular the Z-axis, so that the bottom of the hotend is accessible. This is done by navigating to LCD Menu -> Control -> Move Axis.
                  3. Fully cool down the printer to room temperature and switch it off.

                  Installing the silicone sock

                  Make sure that the hotend is not heated, and that the printer is switched off, before installing the silicone sock. Heated parts can cause severe burns! 

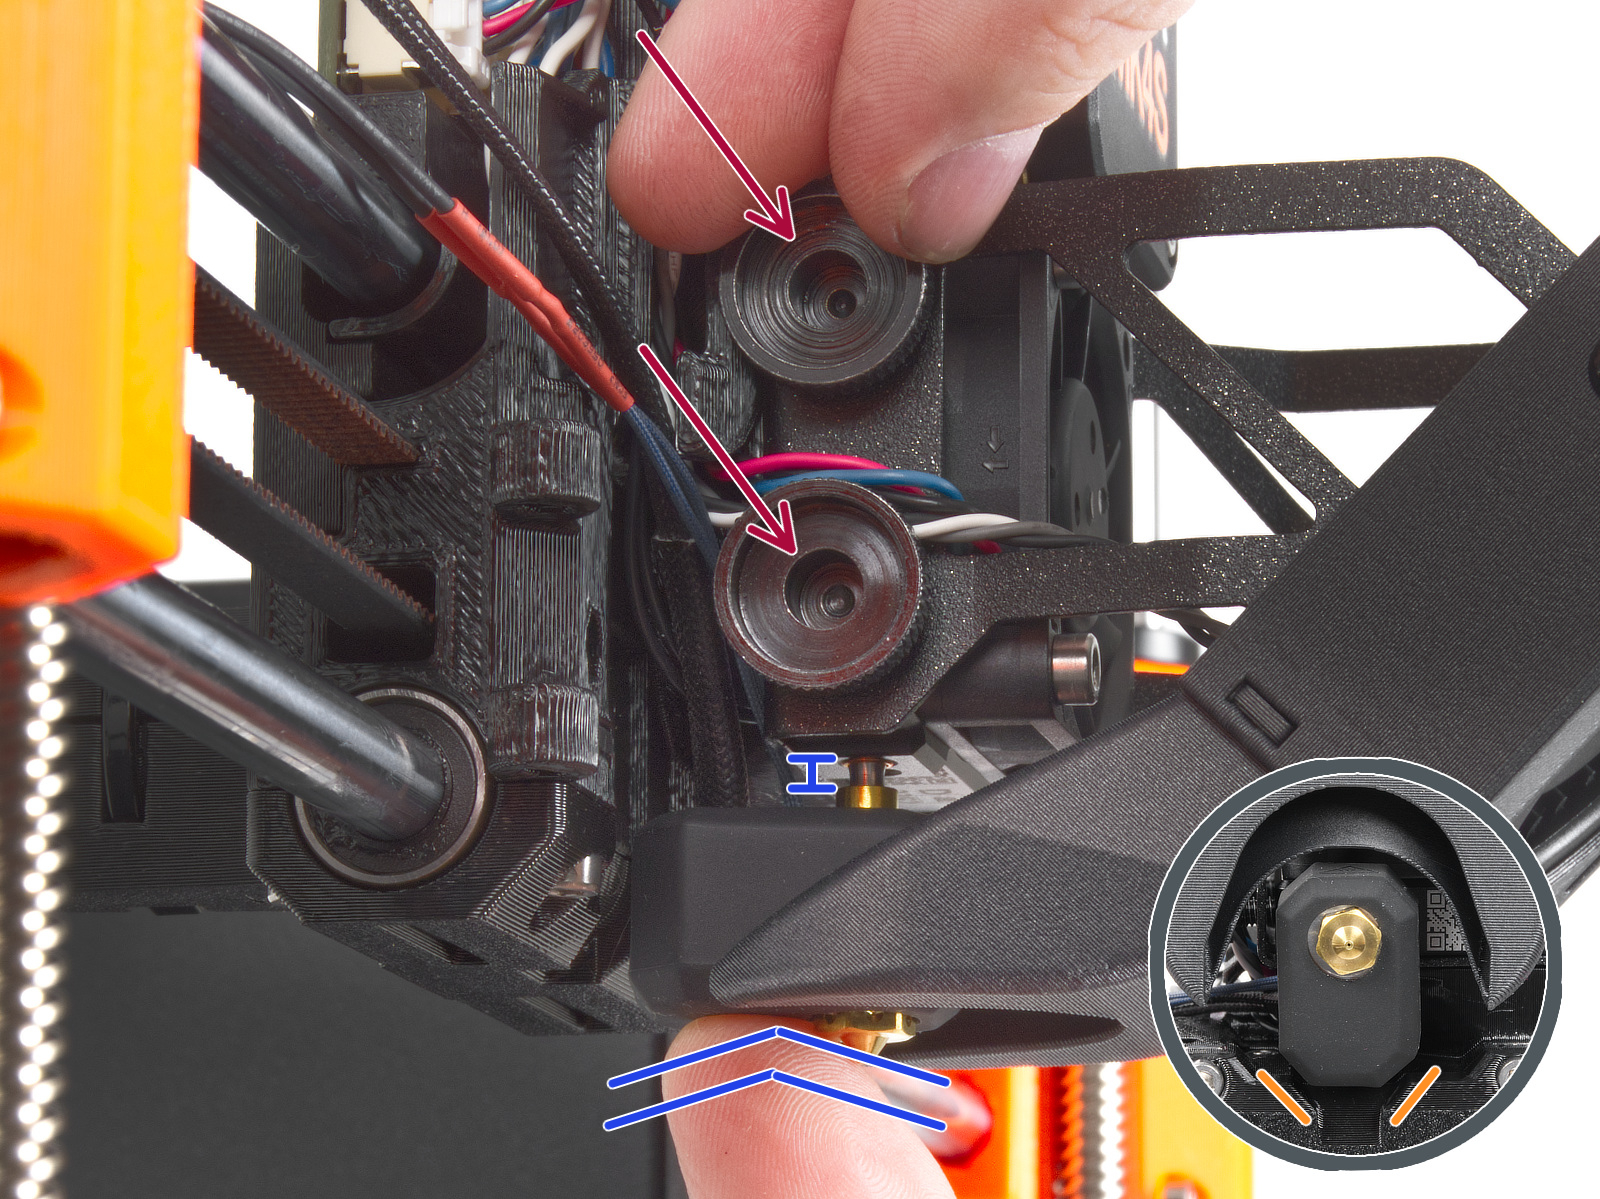
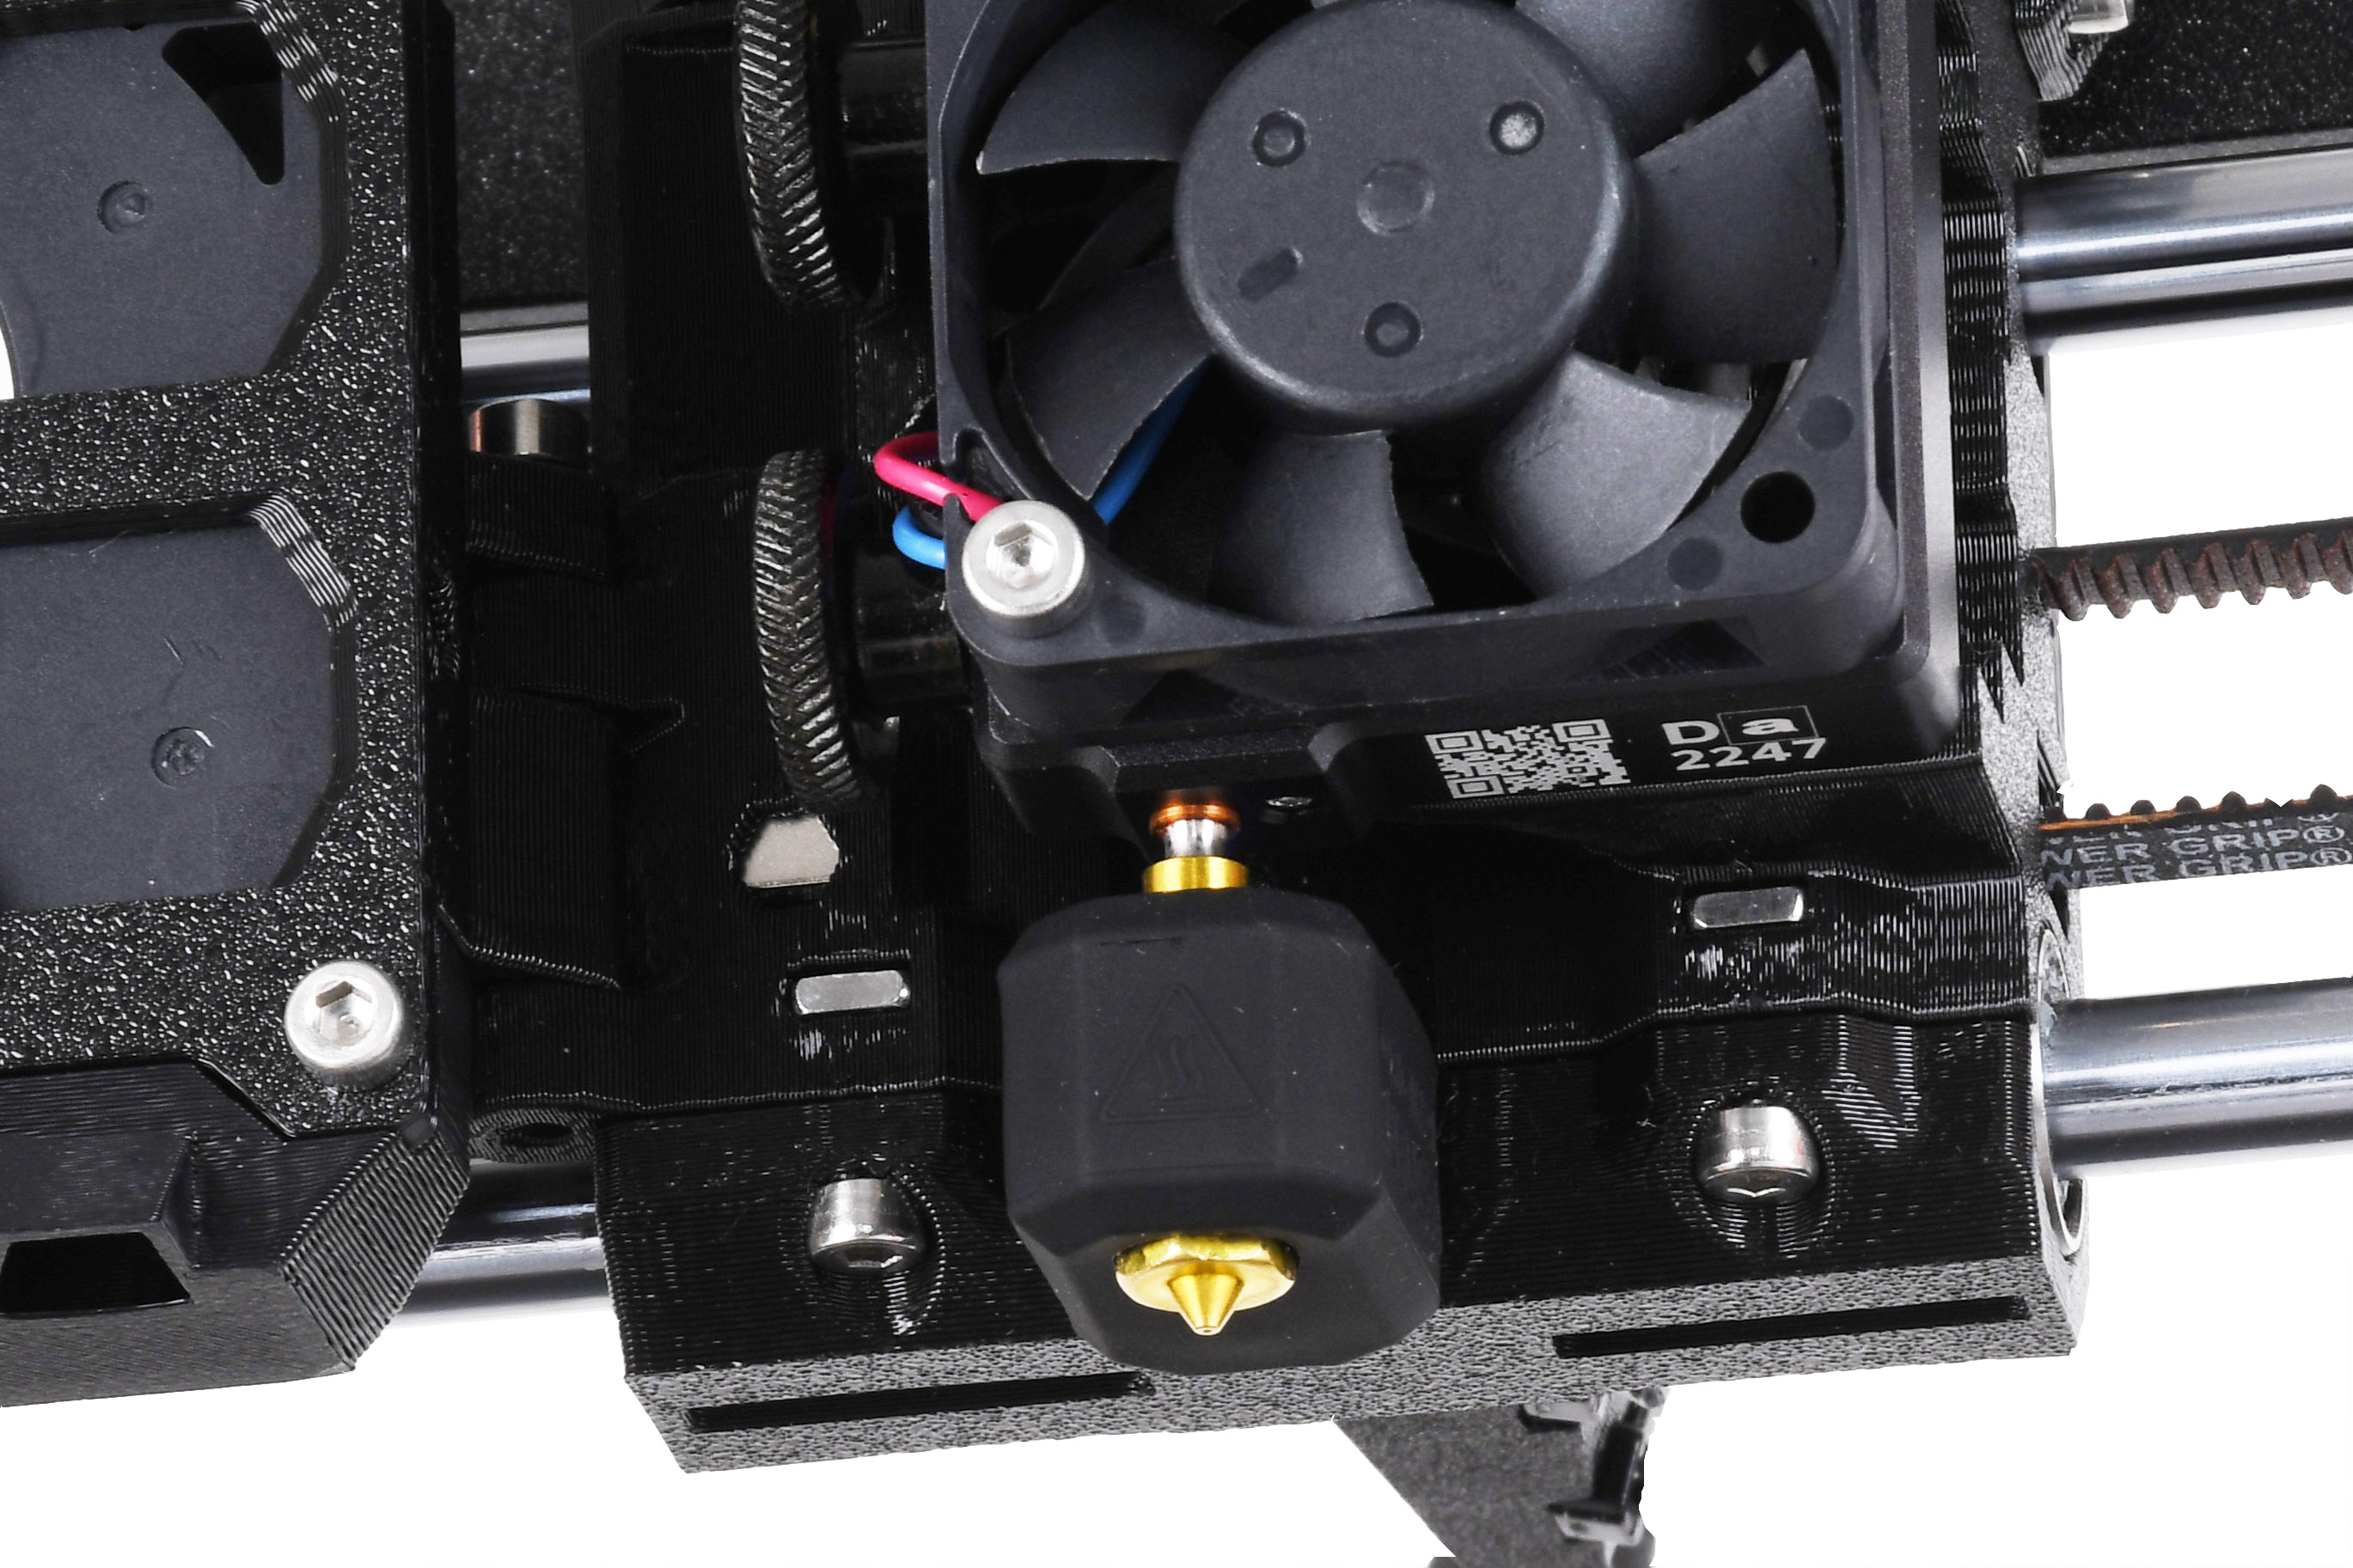
                  Push the sock from the bottom of the hotend. If there is any resistance, do not attempt to push the sock harder, as excessive force might bend the heatbreak. 

                  Once the silicone sock is installed, the printer needs to be adjusted. Navigate to LCD Menu -> Settings -> Hardware -> Nextruder Silicone sock, and set it to ON. 

                  CORE One, CORE One LMK4S, MK3.9S
                  MK4, MK3.9
                  この記事は役に立ちましたか?
                  この操作は登録ユーザーのみが利用できます。ログインしてください。
                  ログイン してコメントを投稿する
                  コメントなし

                  トピックス

                  • あなたのプリンターについて
                    • プリンターの機能
                      • 柔軟性のあるスチールシート(ガイドポスト)
                      • パワーモード
                      • Water-soluble materials (PVA/BVOH)
                      • 実験的なメニュー (MK4/S, MK3.9/S, MK3.5/S, XL, MINI/+)
                      • ロードセル (MK4/S, MK3.9, XL)
                      • ステータスLEDについて (MK4/XL)
                      • Nextruder フィラメントセンサー (CORE One, MK4/S, MK3.9/S, XL)
                      • Buddy firmware-specific G-code commands
                      • Nextruder silicone sock (CORE One/+, CORE One L/+, XL/+, MK4/S, MK3.9/S)
                      • Model preview
                      • オブエジェクトのキャンセル (MK4, MK3.9, XL, MINI/+)
                      • ツールマッピング (XL)
                      • XLにおけるサポート材の設定
                      • タッチスクリーン機能 (CORE One, MK4/S, MK3.9/S, MK3.5/S, XL)
                      • NFC antenna
                      • Accelerometer (CORE One, MK4/S, MK3.9/S)
                      • ツールマッピングとフィラメントマッピング (XL, MMU3)
                      • GPIO Module
                      • Network Connection (CORE One L, CORE One, MK4S, MK3.9S)
                      • MMU3における PrusaノズルとCHTノズル
                      • Flashing custom firmware (CORE One L, CORE One, MK4/S, MK3.9/S, MK3.5/S)
                      • Safety and safety timer messages (CORE One, CORE One L, XL, MK4/S, MK3.9/S, MK3.5/S)
                      • Advanced filtration system for Prusa CORE One
                      • Prusa CORE One から CORE One+ へのアップグレード(コミュニティ版)
                      • MMU3 for CORE One L
                    • プリンターの説明
                    • 一般情報