¿Qué ha pasado?
Esta advertencia aparece cuando la impresora detecta que la boquilla puede no tener una sección transversal circular (redonda) adecuada. La impresora muestra el siguiente mensaje: "La boquilla no parece tener una sección transversal redonda. Asegúrate de que está limpia y perpendicular a la base.".
Esta comprobación forma parte de la rutina automática de calibración de la primera capa de la impresora. Puede fallar si la boquilla está sucia, dañada, obstruida o instalada con un ligero ángulo. Una forma no circular de la boquilla afecta a la extrusión del filamento y a la adhesión de la primera capa.
Nombre del error: Boquilla no tiene sección transversal redonda
Código de error: #17823 (XL) #28823 (MK3.5S) #23823 (MK3.5)
¿Cómo arreglarlo?
ADVERTENCIA: manipula con cuidado, las piezas calientes pueden provocar quemaduras graves.
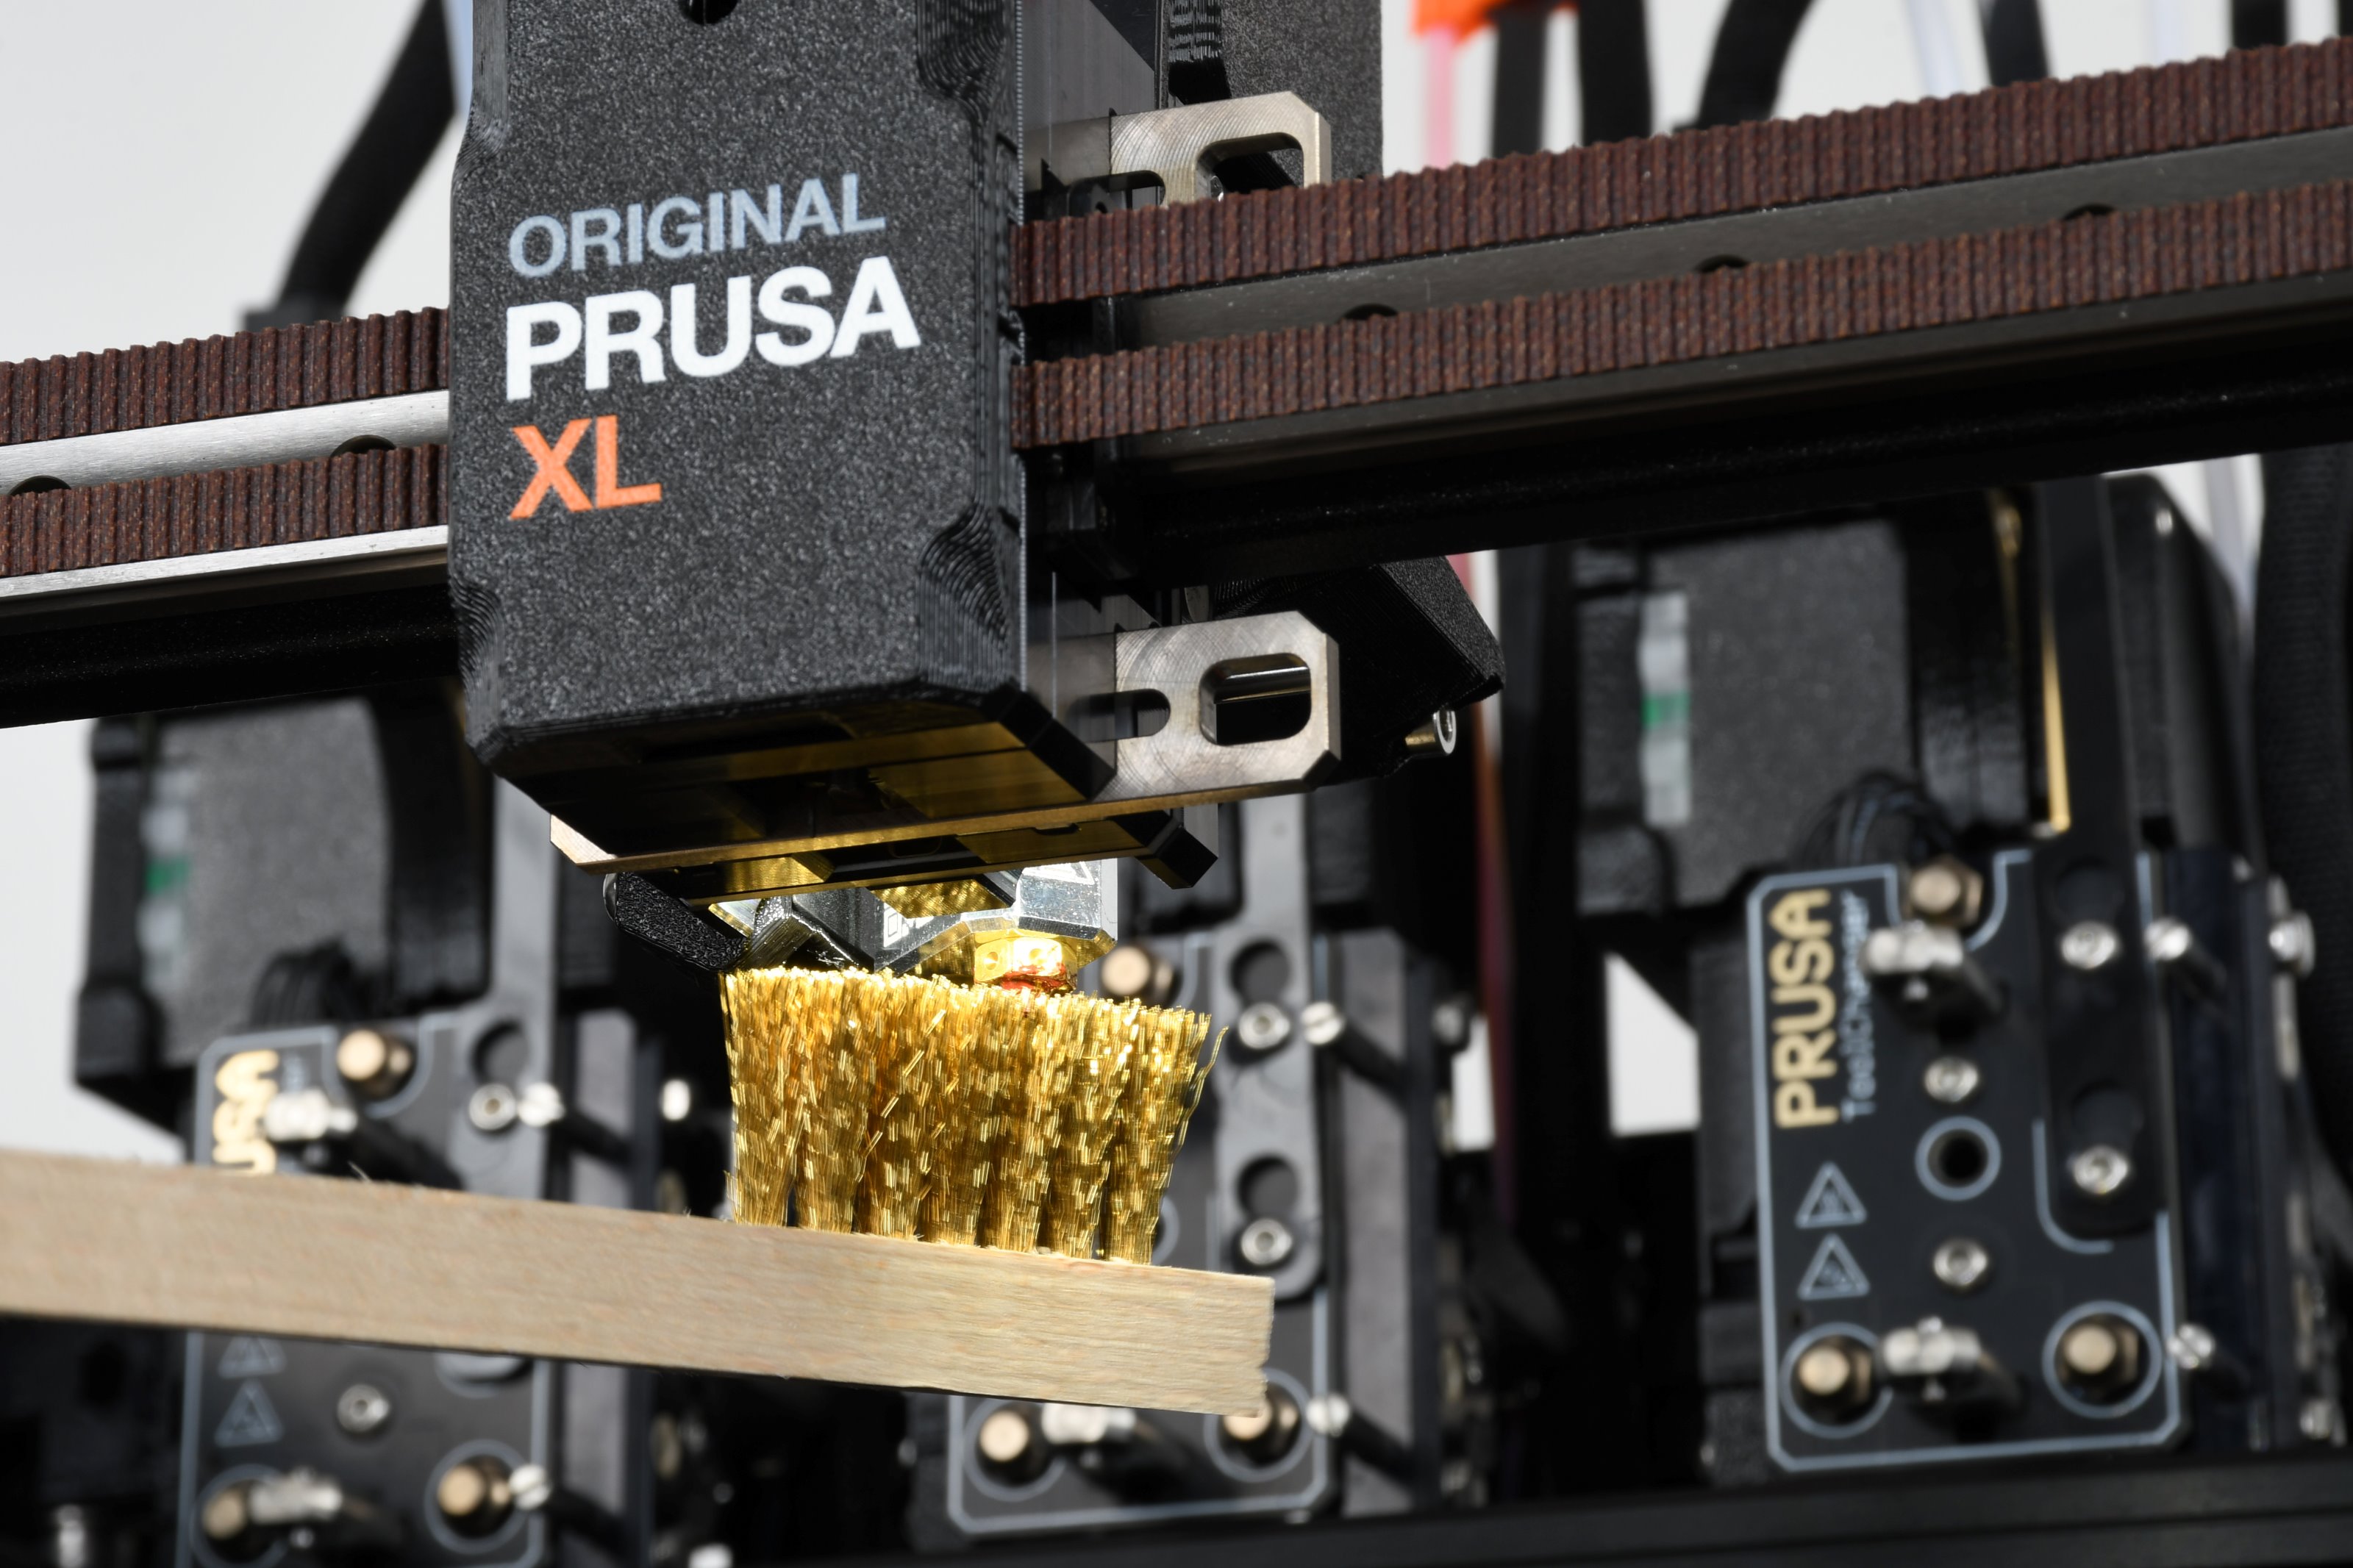
Inspecciona la boquilla para ver si hay residuos de filamento o material endurecido en la punta. Límpiala a fondo con un cepillo de latón.
- Si tiene un calcetín de silicona en el hotend, quítalo.
- En la pantalla de la impresora, ve a Control -> Temperatura y ajusta la temperatura de la boquilla a 250°C.
- Espera al menos 5 minutos. Los restos del filamento deben calentarse ligeramente para poder retirarlos más fácilmente.
- Reinicia la impresora pulsando el botón Reset. Esto garantiza que la impresora no esté calentándose activamente, lo que reduce el riesgo de cortocircuitos accidentales durante la limpieza.
- Con el cepillo de latón, limpia con cuidado el bloque calefactor y el hotend para eliminar los residuos de filamento.
- Cuando el bloque calefactor y el hotend estén perfectamente limpios, espera hasta que las piezas calientes se enfríen a temperatura ambiente. Tardarán aproximadamente 10 minutos.
 |  |
| Original Prusa XL | Original Prusa MK3.5/S |
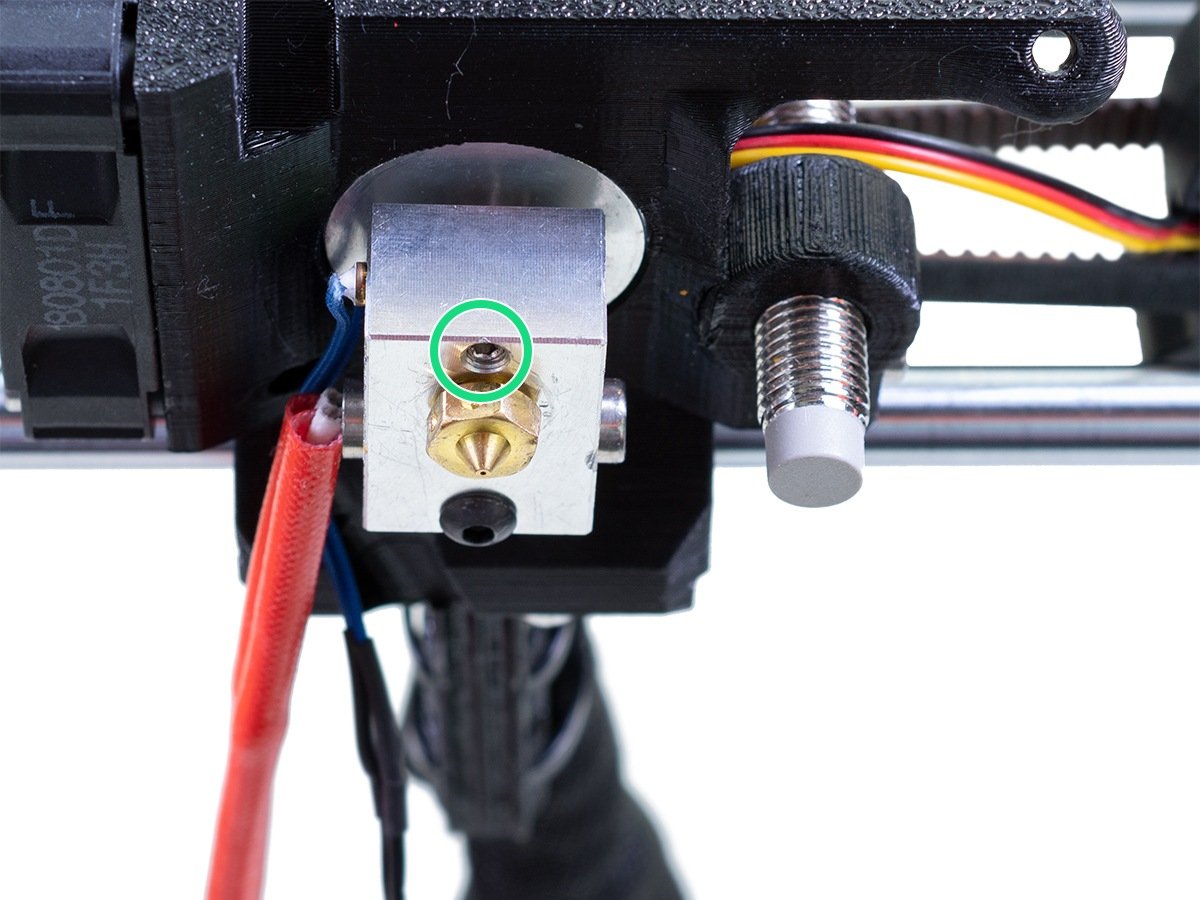
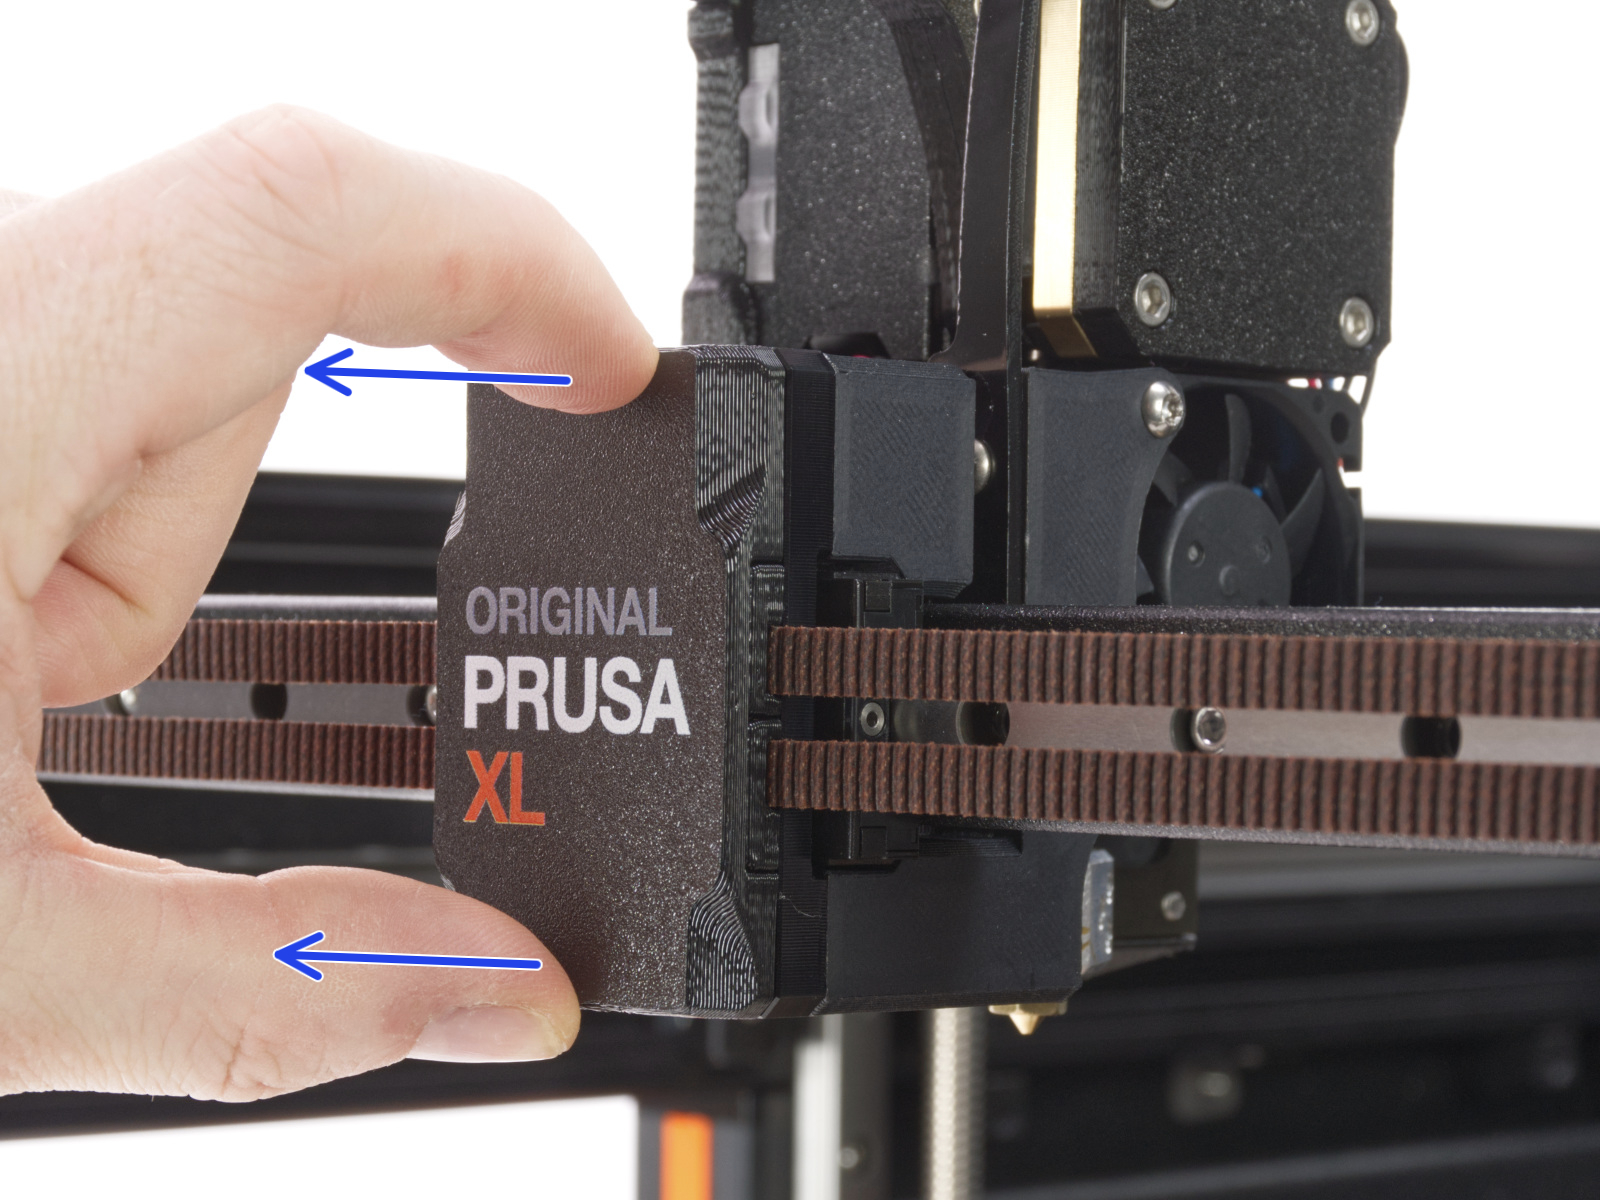
Comprueba la posición de la boquilla. (XL)
En la XL de un cabezal, después de retirar la cubierta del x-carriage, sujeta el bloque calentador (¡asegúrate de que la boquilla no esté caliente!), y utiliza la llave Torx TX8 como se muestra en la imagen, aprieta el tornillo prisionero. No apliques fuerza adicional al apretar, ya que podría dañar el tubo del hotend. La boquilla debe estar aproximadamente a un ángulo de 35°-40° para evitar dañar los cables del hotend.
 |  |
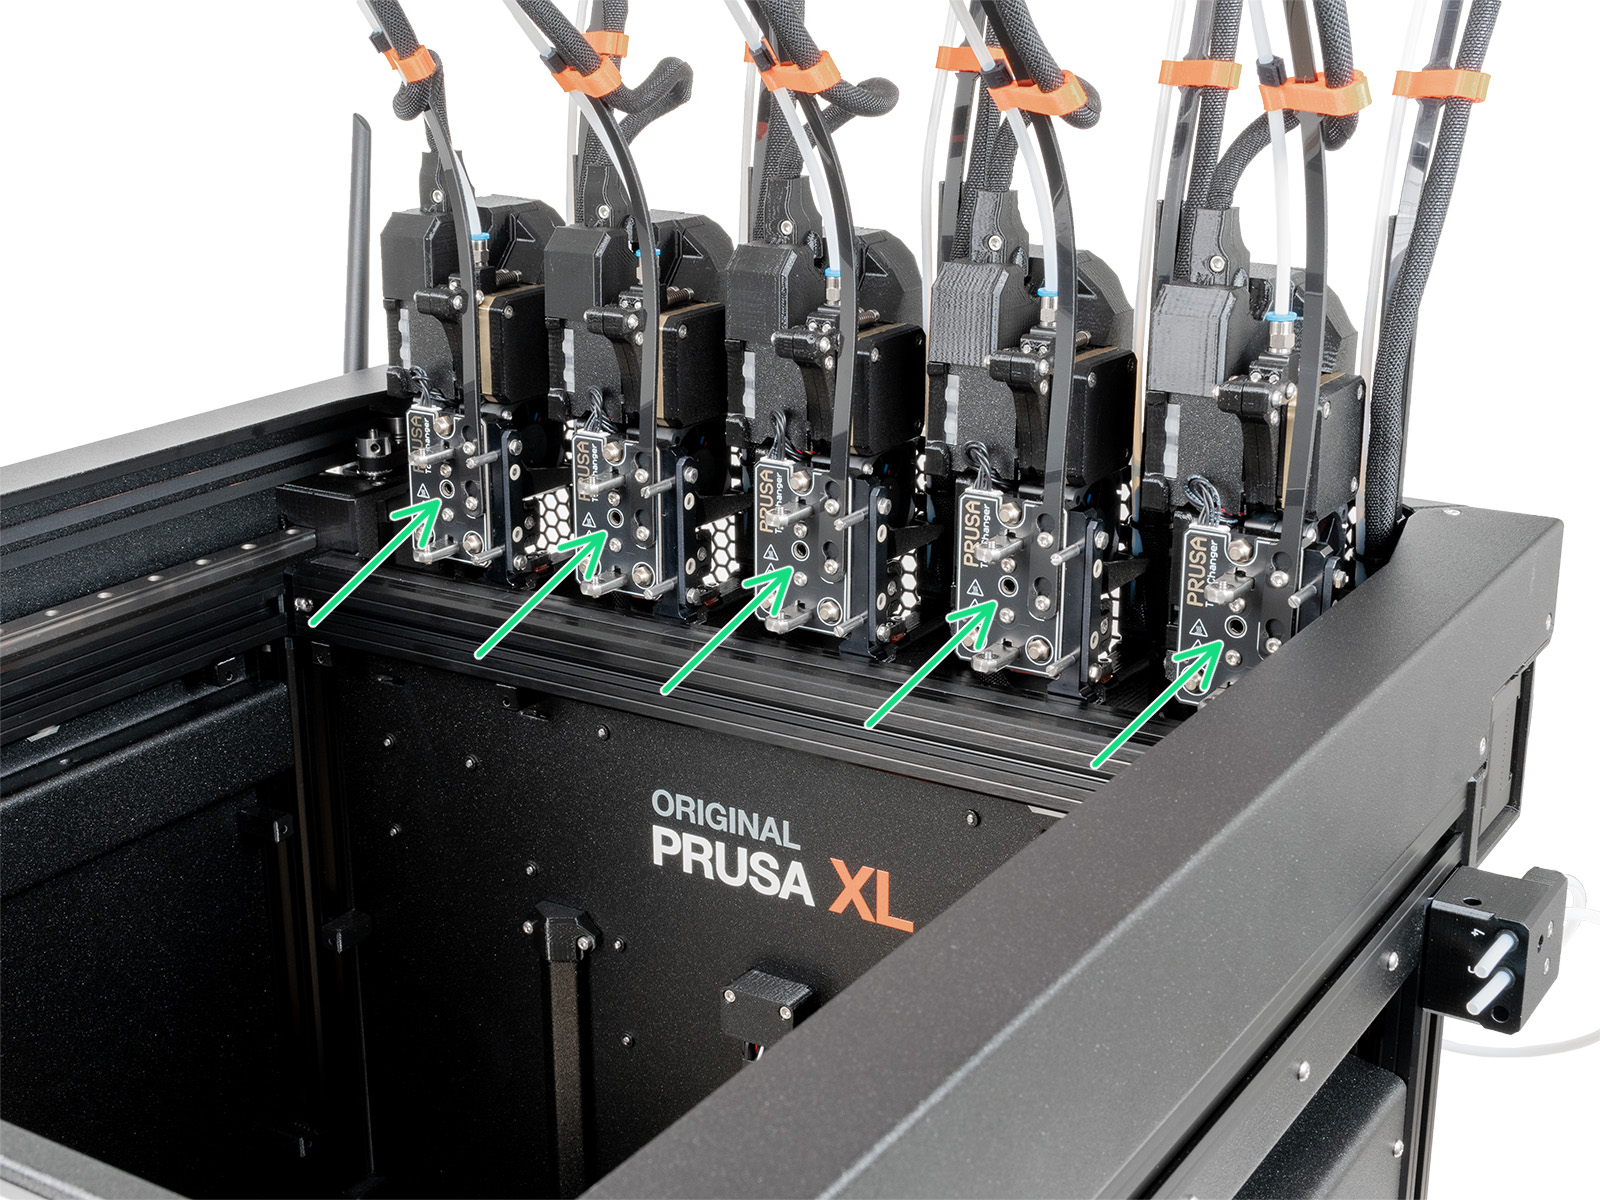
En la XL multicabezal, identifica la herramienta que tiene la boquilla que se va a revisar y aparcarla. Sujeta el bloque calentador (¡asegúrate de que la boquilla no esté caliente!), y utiliza la llave Torx TX8 en la parte que se muestra en la imagen para apretar el tornillo de fijación. No aplique fuerza adicional al apretar, ya que podría dañar el tubo del hotend. La boquilla debe estar aproximadamente en un ángulo de 35°-40° para evitar dañar los cables del hotend.
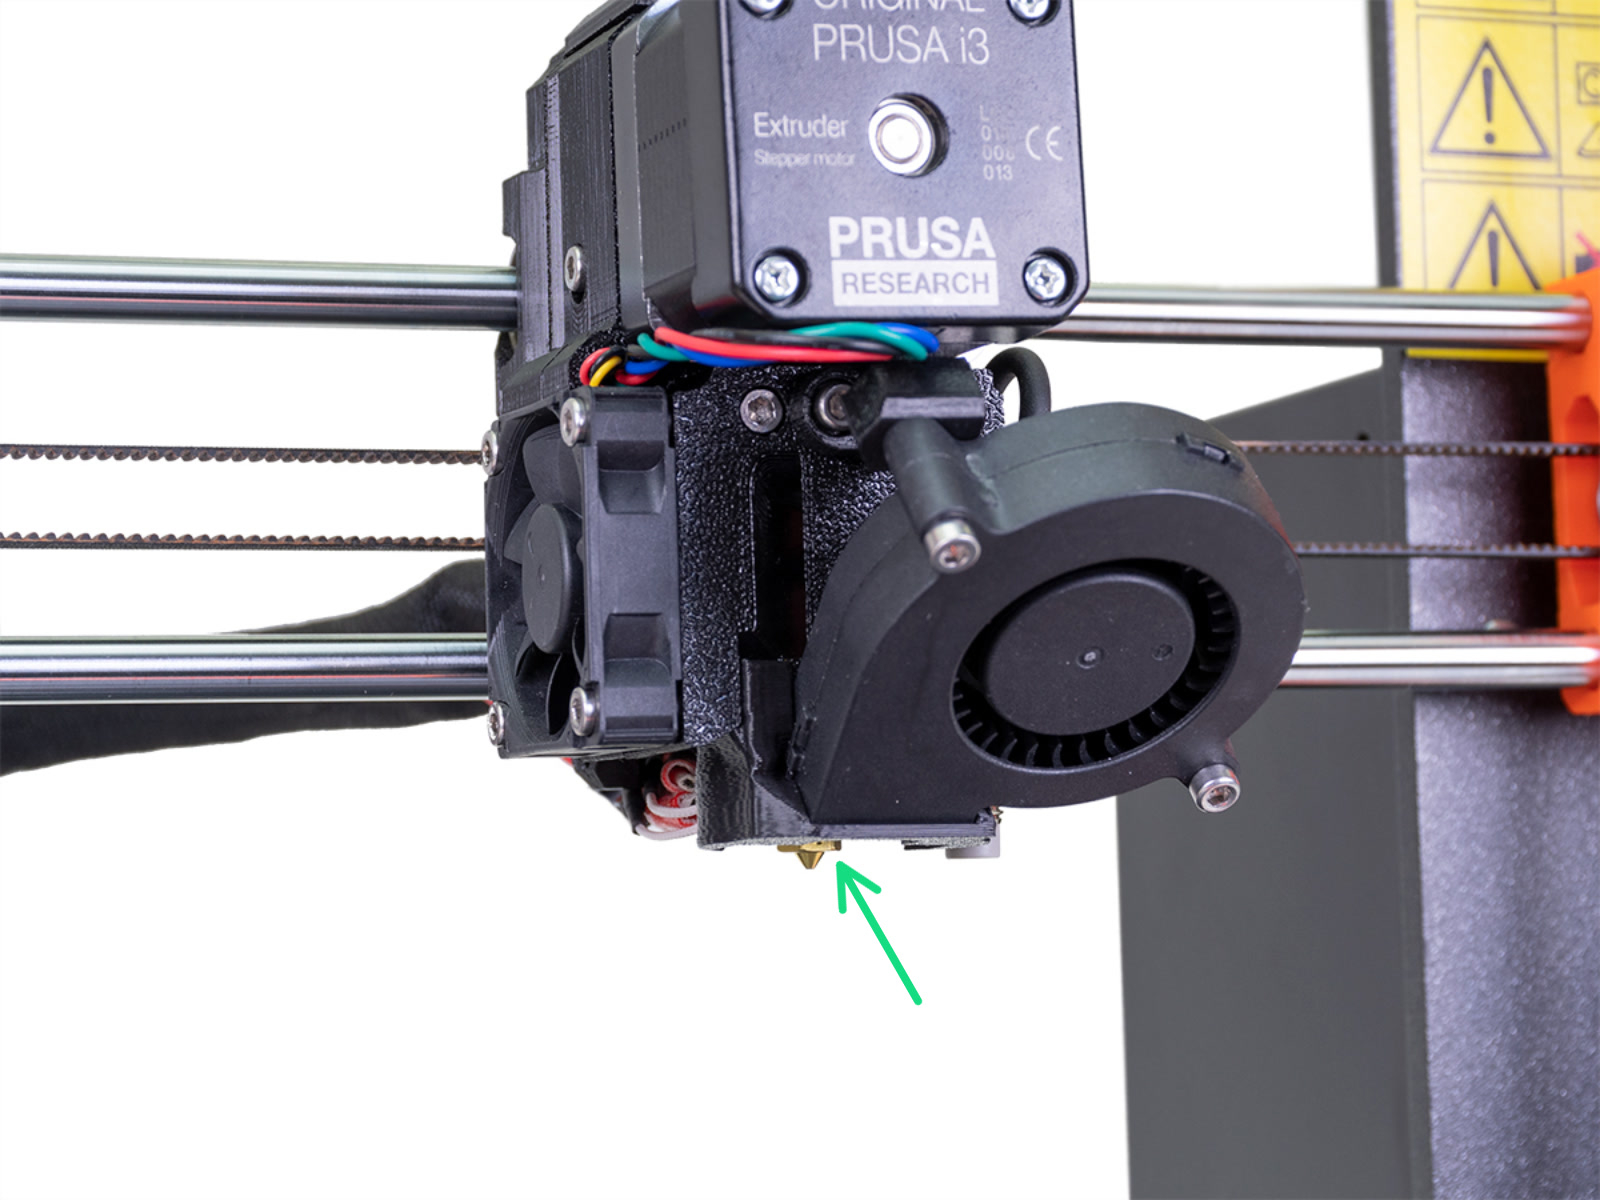
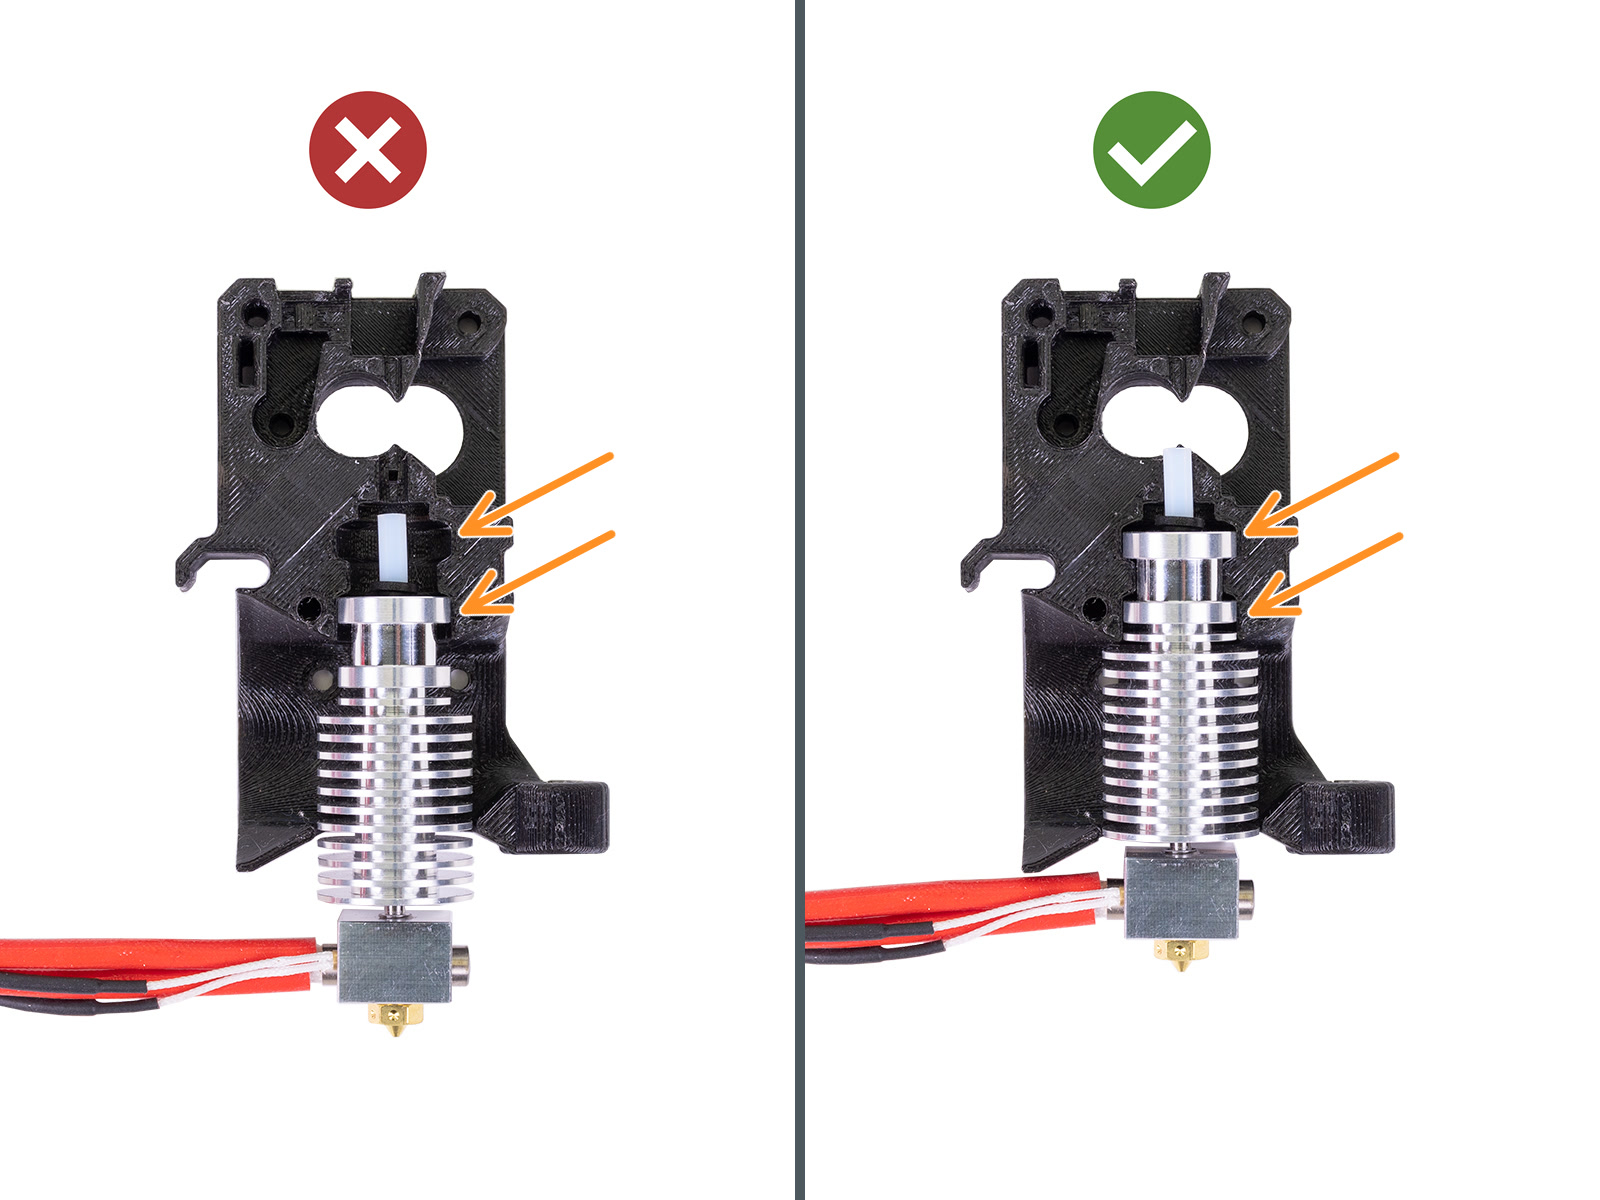
Comprueba la posición de la boquilla (MK3.5/S)
Mira el extrusor desde abajo y comprueba la posición del hotend:
- Posición correcta: solo debe verse la punta de la boquilla.
- Posición incorrecta: el disipador térmico está demasiado bajo. El bloque calefactor está por debajo de la cubierta del ventilador.
- Repite el montaje y asegúrate de que el disipador térmico quede encajado en la muesca superior de la pieza de plástico y que ambas muescas de la pieza de plástico queden rellenas.
 |  |