- English
- Deutsch
- Polski
- Français
- Home
- Calibrazione
- Calibrazione di base
- MMU3 Setup and inspection
MMU3 Setup and inspection
- Calibrazione di base
- Calibrazione Z non riuscita (MK3S/MK2.5S)
- Calibrazione primo layer (i3)
- Calibrazione primo layer (MINI/MINI+)
- Ripristino completo del sistema Original Prusa i3
- Allineamento della scatola degli ingranaggi (MK4)
- Tensione vite idler
- Live adjust Z
- Mesh bed leveling - Livellamento griglia piano
- Installazione e ispezione MMU2S
- MMU3 Setup and inspection
- Necessary calibrations
- Hardware configurations
- Assembly inspection
- Slicer settings
- Test prints
- Calibrazione manuale del multi-tool (XL)
- Autotest (SL1)
- Autotest non riuscito (MINI/MINI+)
- Autotest non riuscito (MK2/S, MK2.5, MK2.5S)
- Selftest failed (MK3.5)
- Autotest non riuscito (MK3/MK3S/MK3S+)
- Autotest fallito (MK4)
- Calibrazione temperatura
- Calibrazione XYZ (MK2.5/MK2.5S)
- Calibrazione XYZ (MK2/S)
- Calibrazione XYZ (MK3/MK3S/MK3S+)
- Dettagli Calibrazione XYZ
- Calibrazione avanzata
- Messaggi di Errore di Calibrazione
After successfully finishing the build of your Original Prusa MMU3 upgrade and going through 11. Primo avvio of the assembly manual you should be good to go. However, if you encounter persistent issues, we have compiled a checklist of what may be the source of the problem.
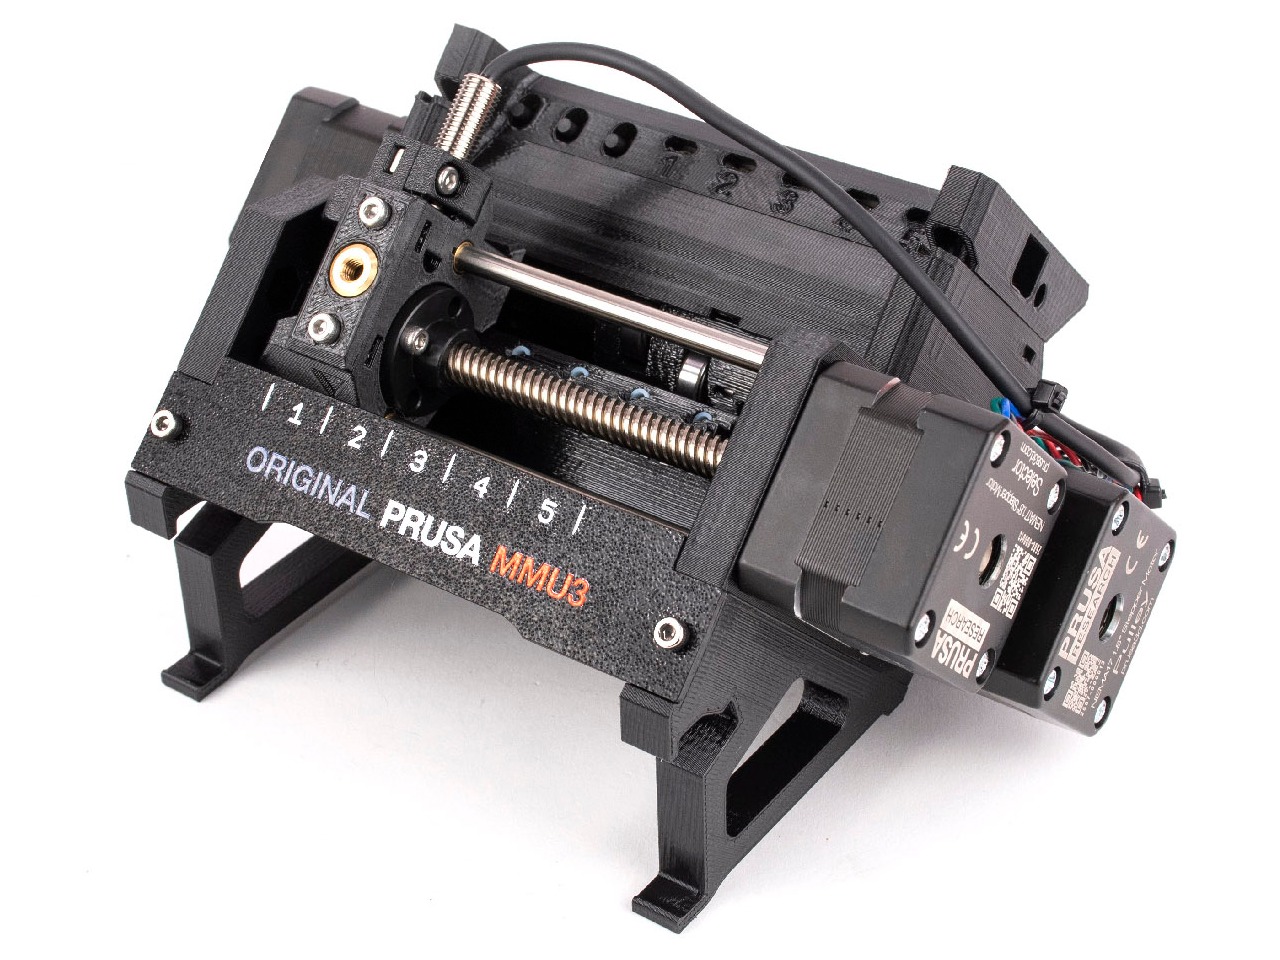
Necessary calibrations
With the hundreds of filament changes that can go into a single MMU print, the system must know where each filament is at all times. For that, there are two sensors that have to be set up properly.
On the MK3/S/+ and the MK3.5, you can see if they trigger correctly on the LCD menu under Support -> Sensor info. Each should trigger "1" of filament is present and "0" when it's not.
On the MK3.9/4, you can add the filament sensor and the superFINDA statuses on the footer by going to LCD menu -> Settings -> User interface -> Footer. They will present "OFF" when no filament is loaded, and "ON" when the filament is loaded.
IR filament sensor calibration
This is one of the two sensors on the MMU3, located on the printer's extruder.
For the MK3S/+ and MK3.5, ensure your IR filament sensor mechanism is properly calibrated before printing.
If you have any issues with the Filament sensor in the MK3.9/4, check the troubleshooting steps here: Sensore filamento (MK4, MK3.9, XL).
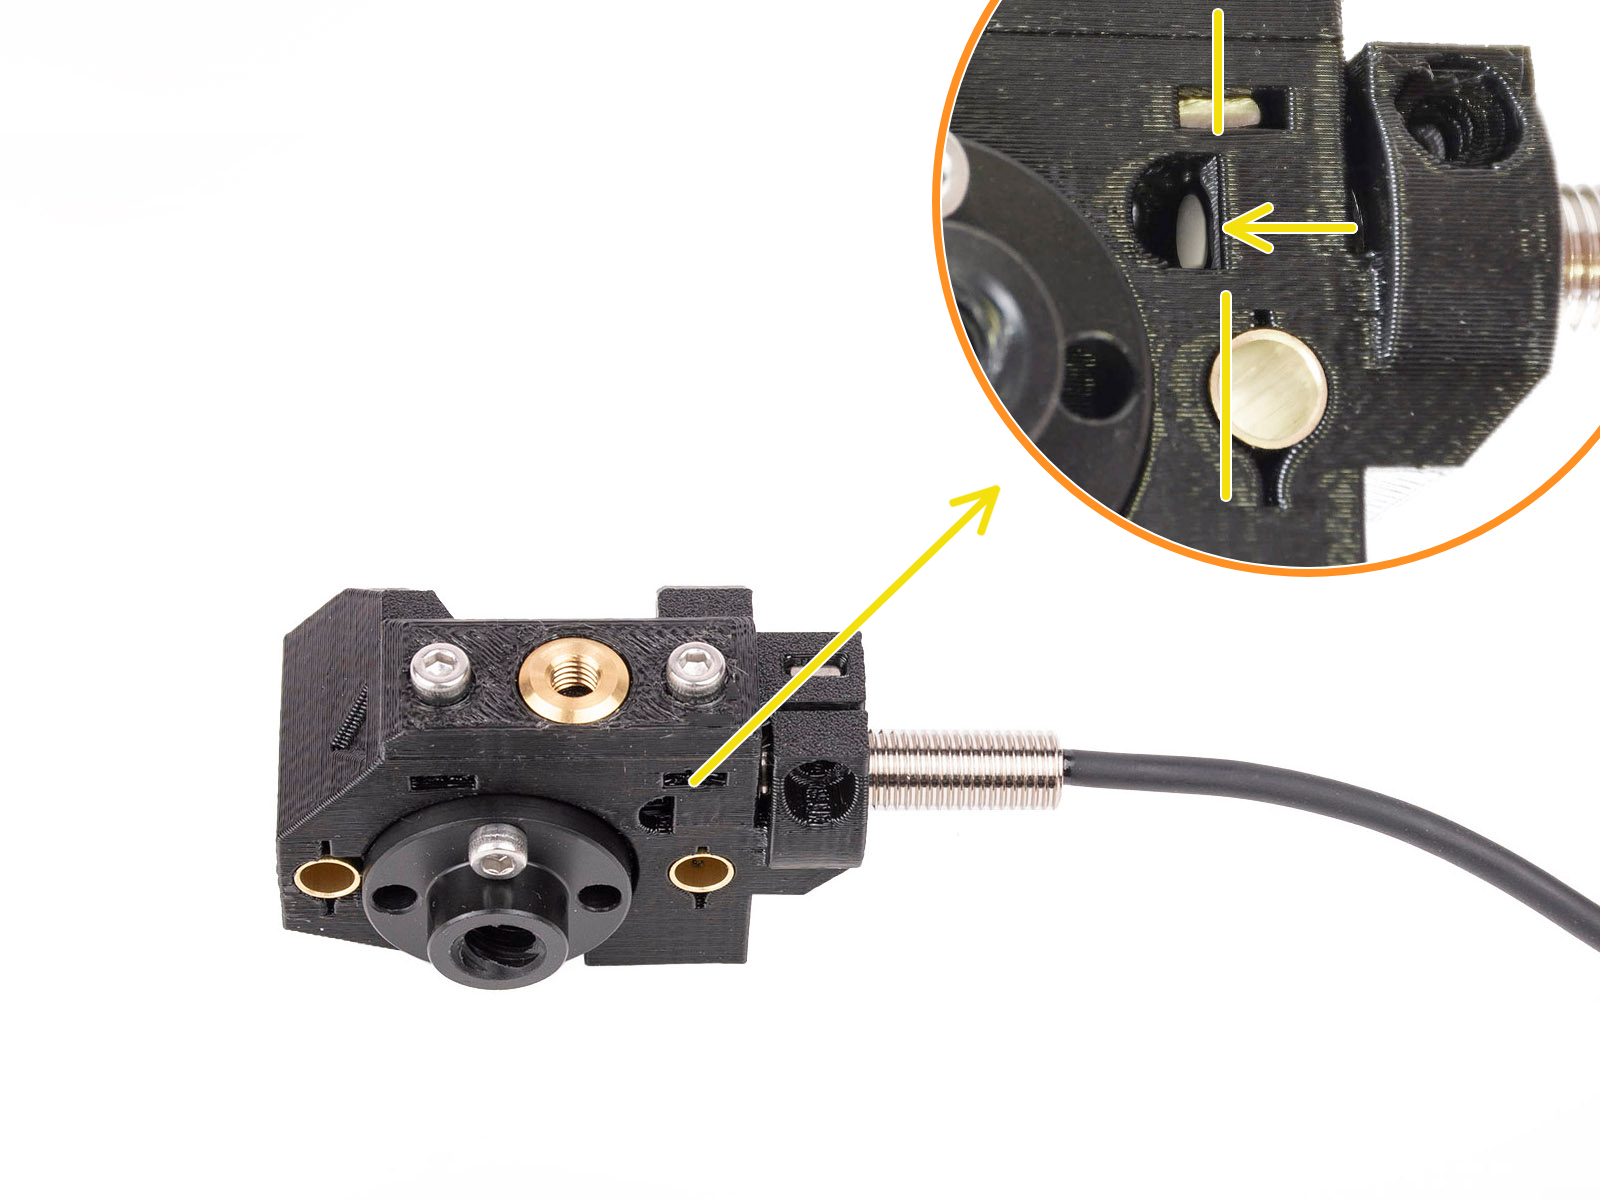
SuperFINDA sensor calibration
The SuperFINDA is the second sensor on the MMU3. Its position is crucial to ensure smooth operation. Its assembly can also collect debris or strings from filament changes. Make sure the tip of the superFINDA is aligned with the D-shaped opening as shown below.
Hardware configurations
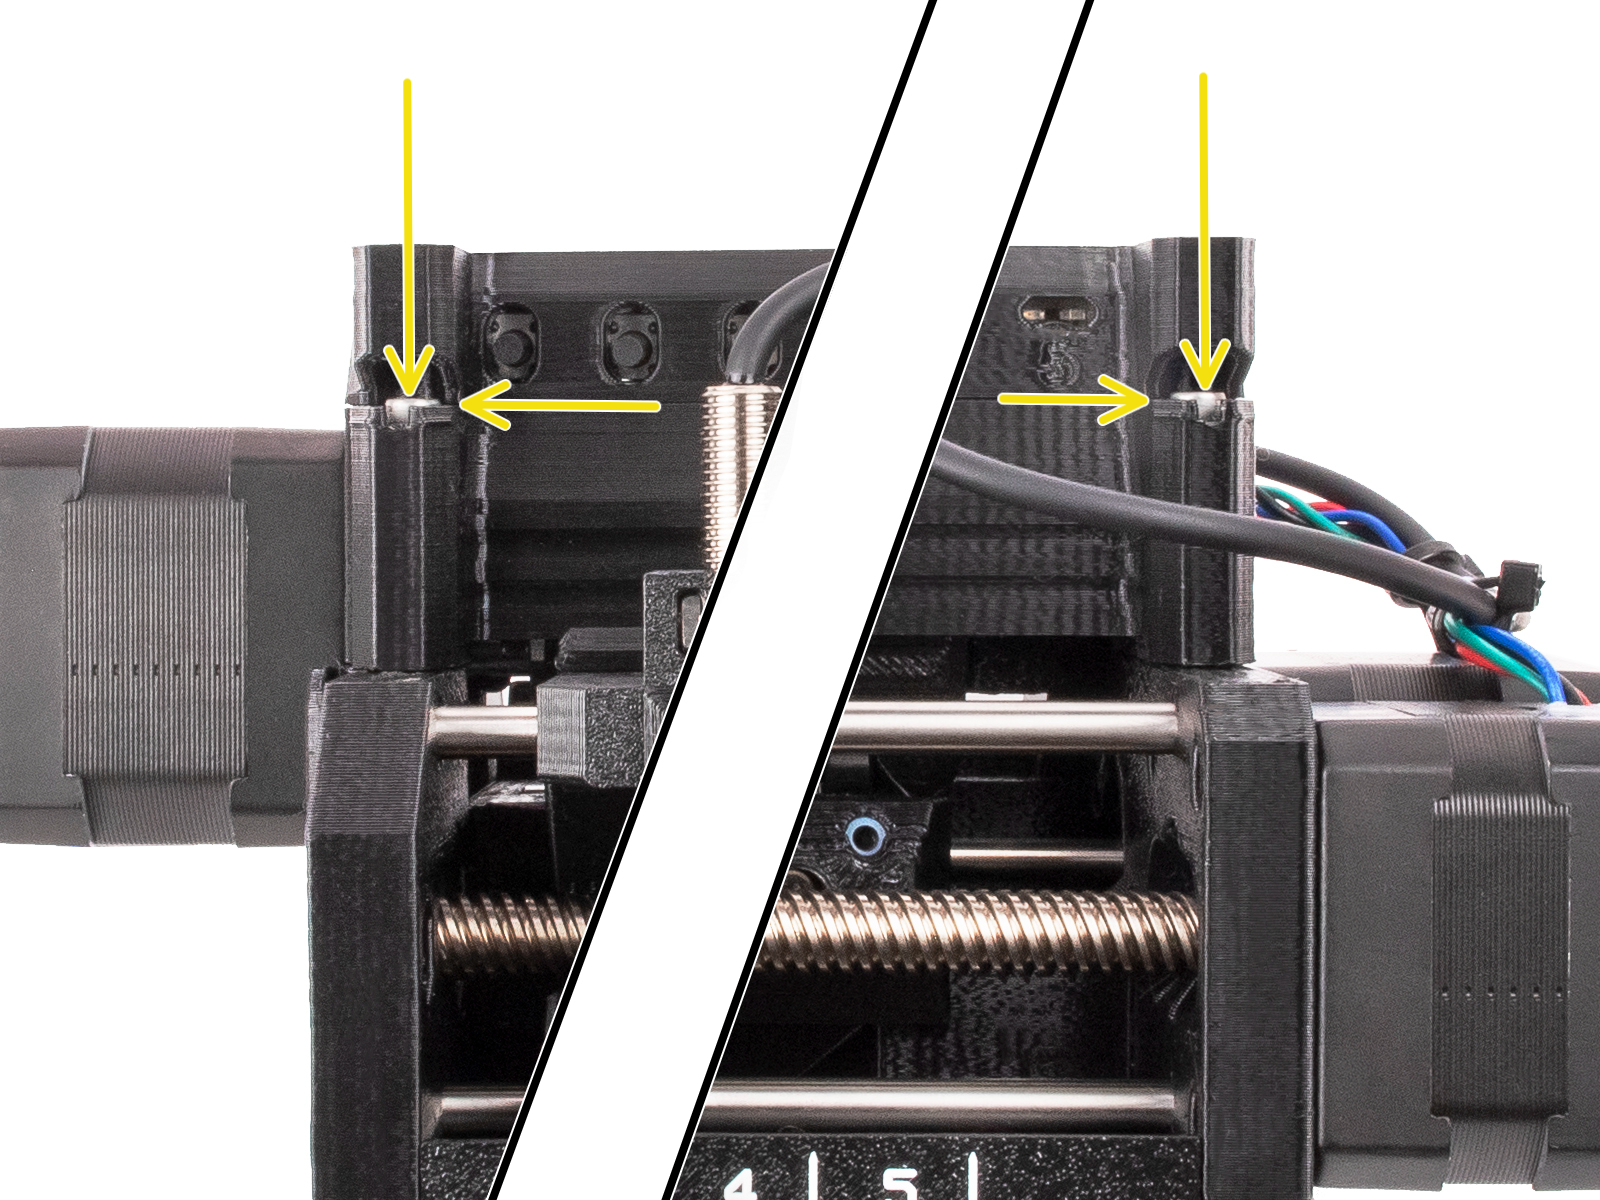
Idler screws tension
Just like the extruder idler screw, its MMU3 counterparts need to be tightened just right. If the screw is overtightened, the idler will struggle with determining its home position and the MMU unit won't work properly. Over-tightening can also cause the pulleys to be "choked" by the filament. If the screws are too loose, the MMU unit might struggle with grabbing the filaments properly. To find the perfect tension, adjust both of the idler tension screws so that the top of the screw head is slightly above the top surface of the idler body.
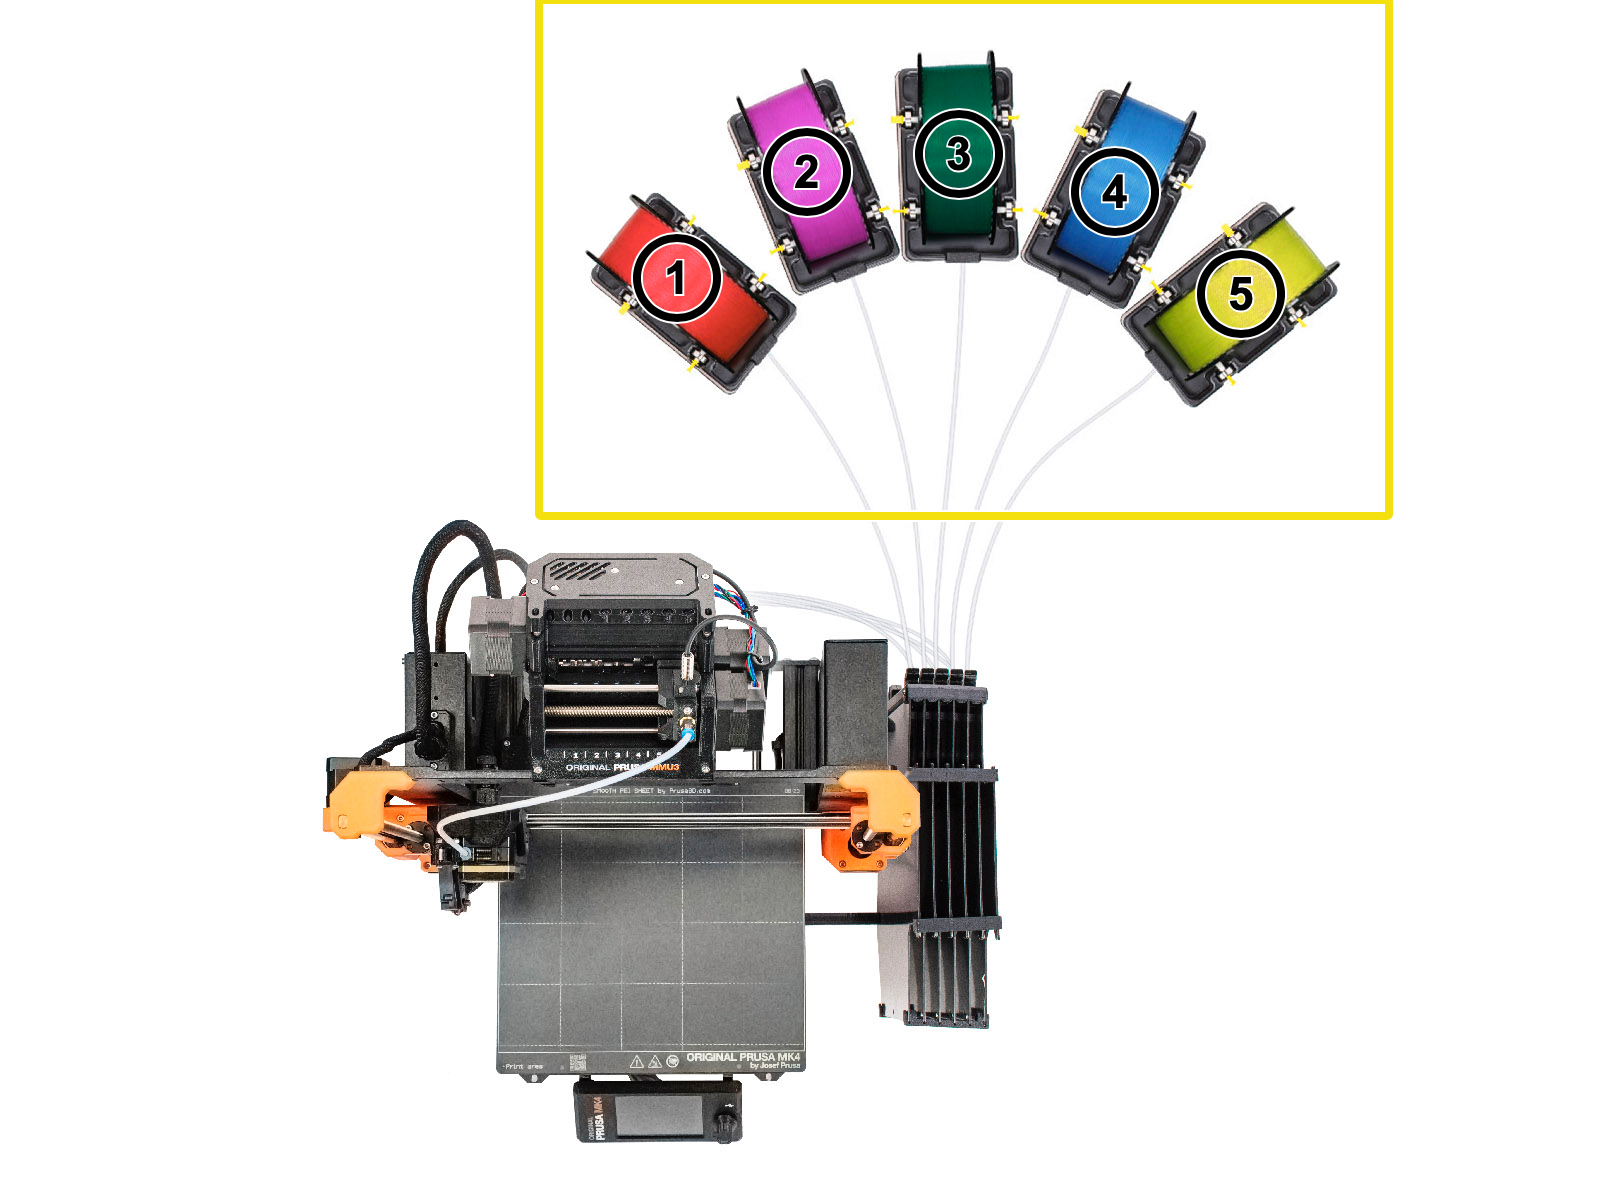
Spools and buffer positioning
The spool holders shouldn't be too close to each other. Ideally, the spools should be positioned as described and shown in the handbook (picture below).
Assembly inspection
Idler Bearings
The five bearings protruding from the idler cylinder must be spinning freely on their shafts. If that is not the case, you can always remove and inspect the bearing by pushing out the shaft from the opposite side they are inserted. Use a rod or Allen key at least 100 mm (~4 in) long.

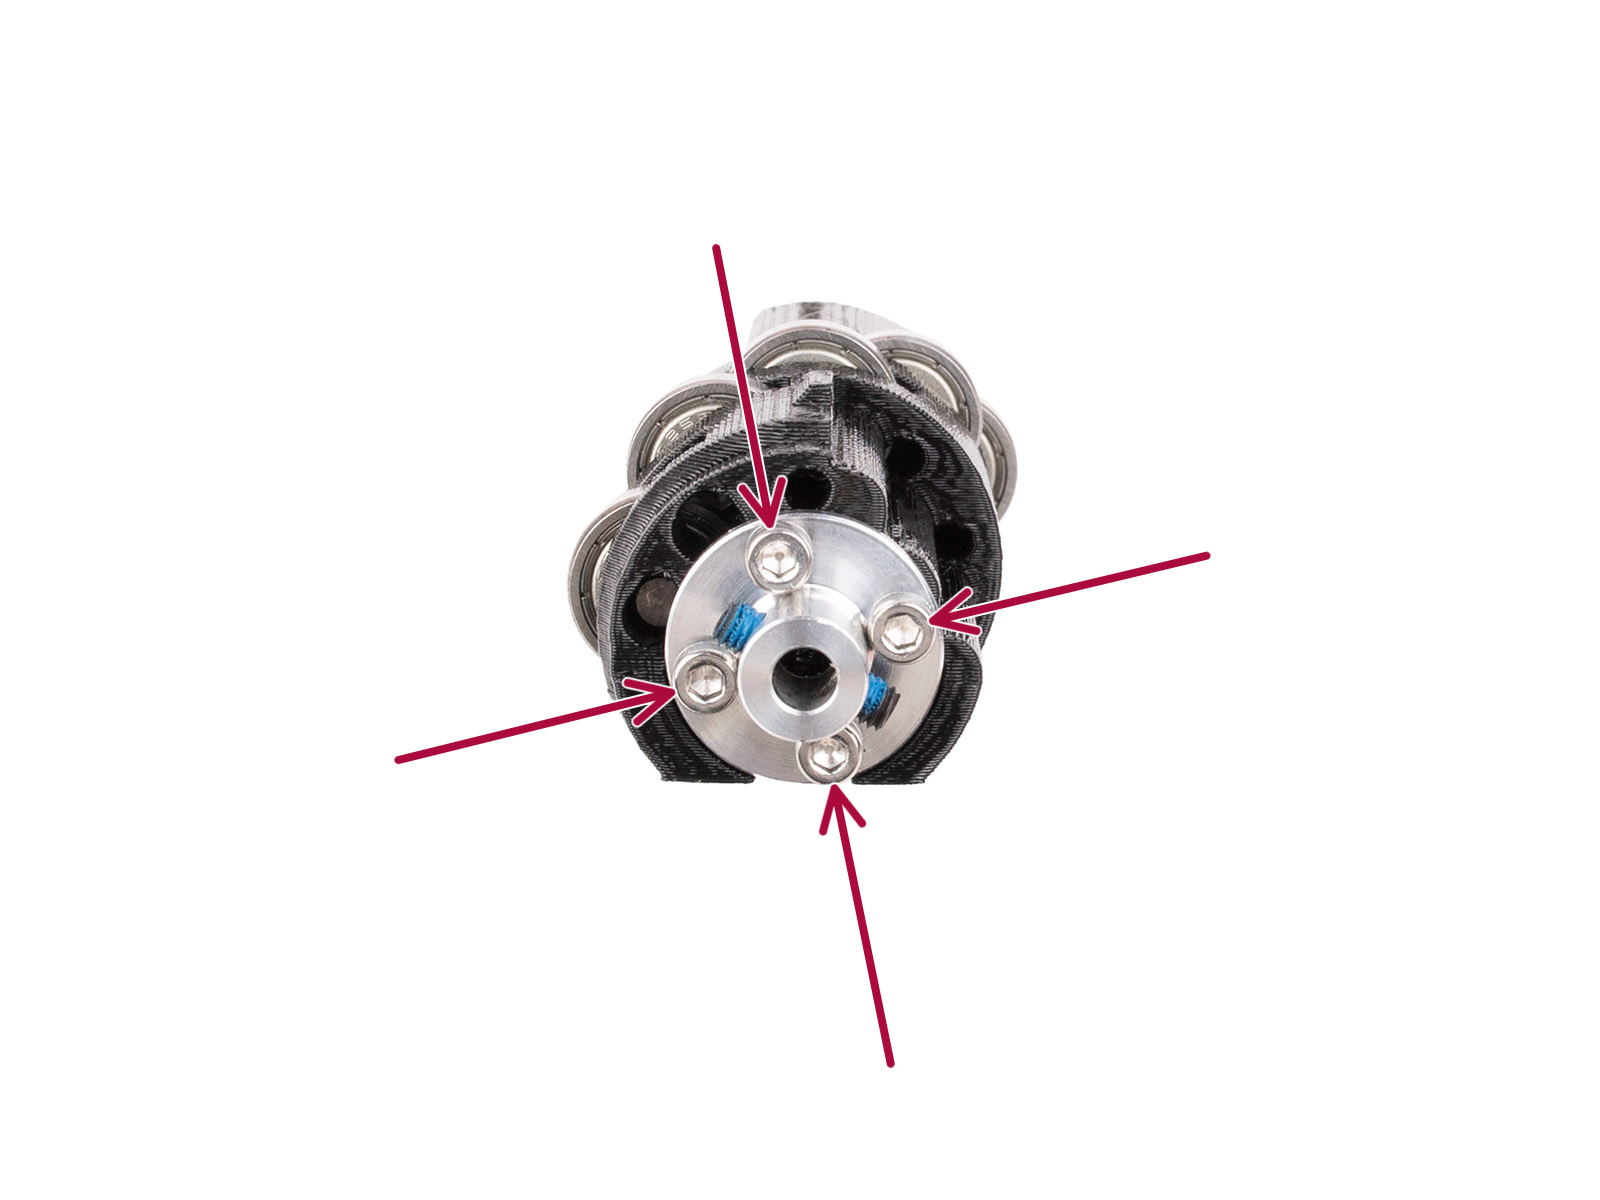
Securing the idler on the shaft
A metal coupler connects the idler and the idler body. Make sure that the four M3x10 screws are well-tightened. Then use a 2 mm Allen key to check if the set screw is firmly tightened on the flat part of the motor shaft. After that, make sure that the idler is rotating freely
 |  |
Align the pulleys
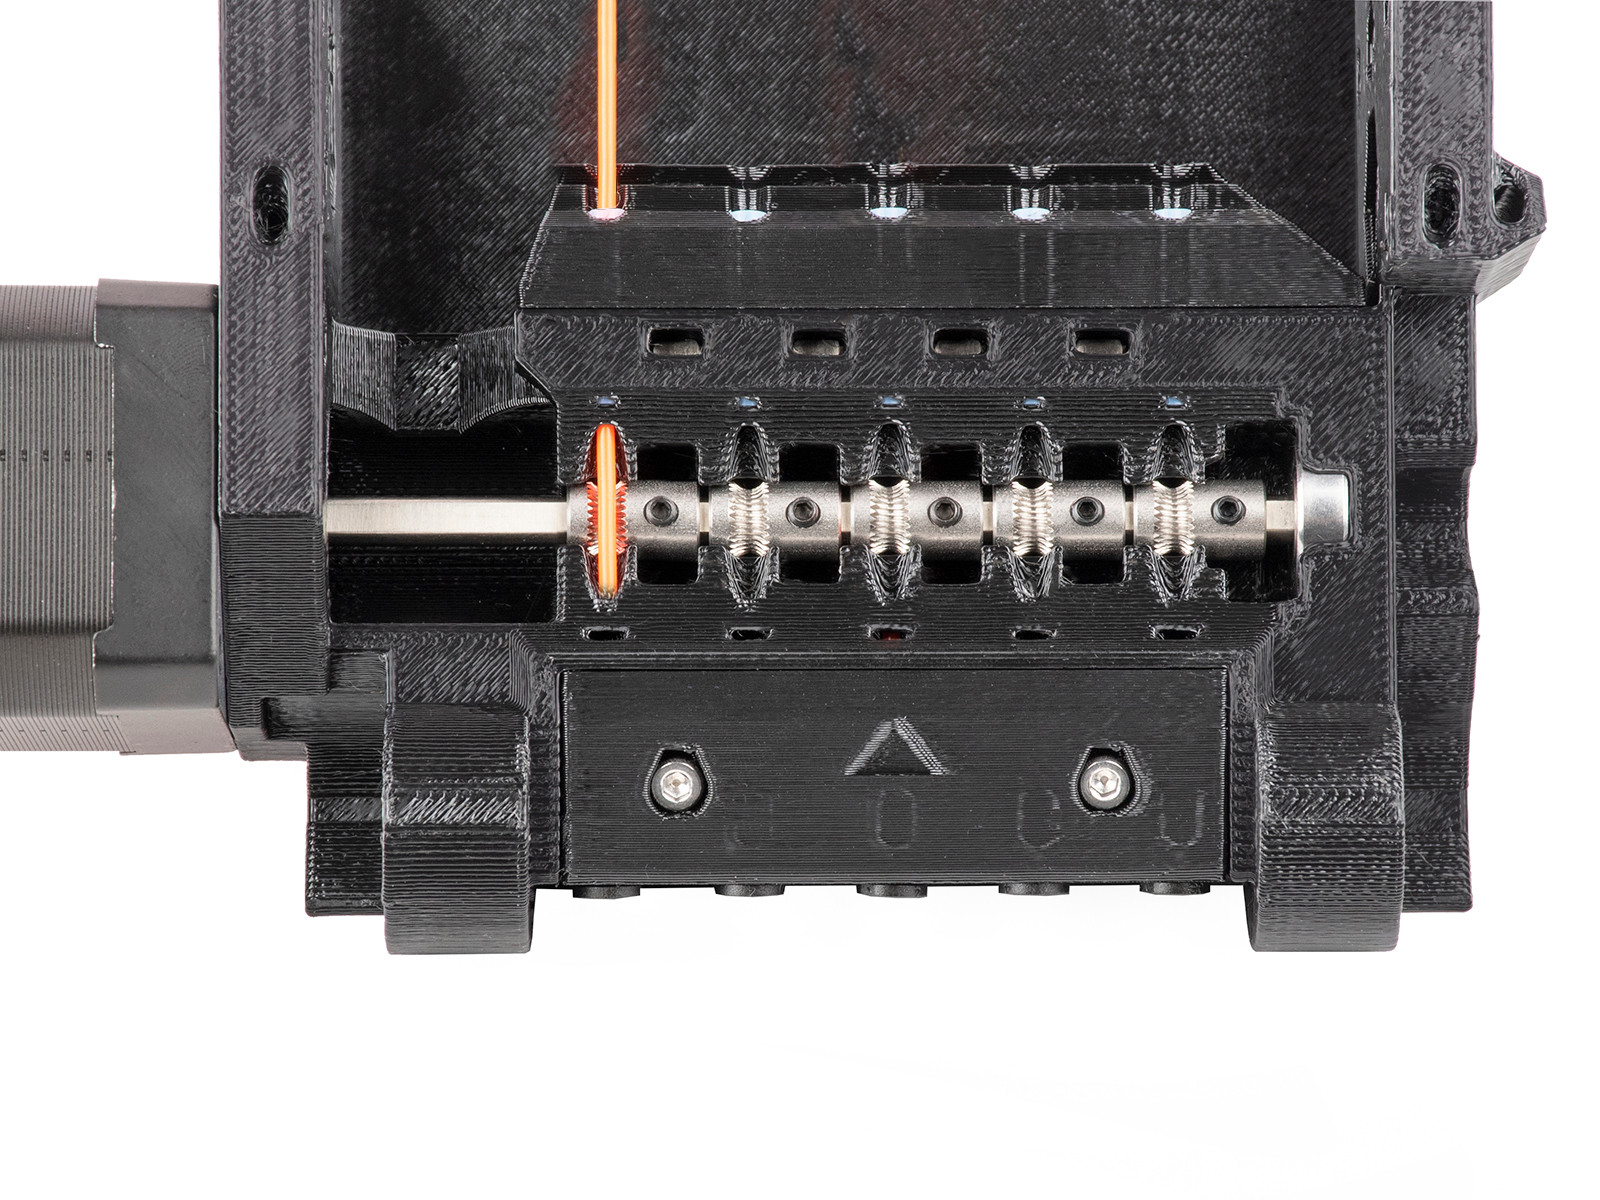
The filaments are being pushed through the MMU3 unit using 5 hobbed pulleys, mounted on the long shaft of the pulley motor. The grub screws must be:
- Oriented on the left side of the teeth, away from the Pulley motor.
- Perfectly aligned with the filament holes and filament, as shown in the photo below.
- Secured by the small black grub screw against the flat side of the Pulley motor shaft.
Black Collets
The PTFE tubes that lead the filaments into the MMU unit are held in place by 5 collets. The collets must be secure so the PTFE tubes do not fall during printing, the collets must be secured. Remember that the PTFE is loose when the collet is pushed in, and secured when the collet is pulled back.
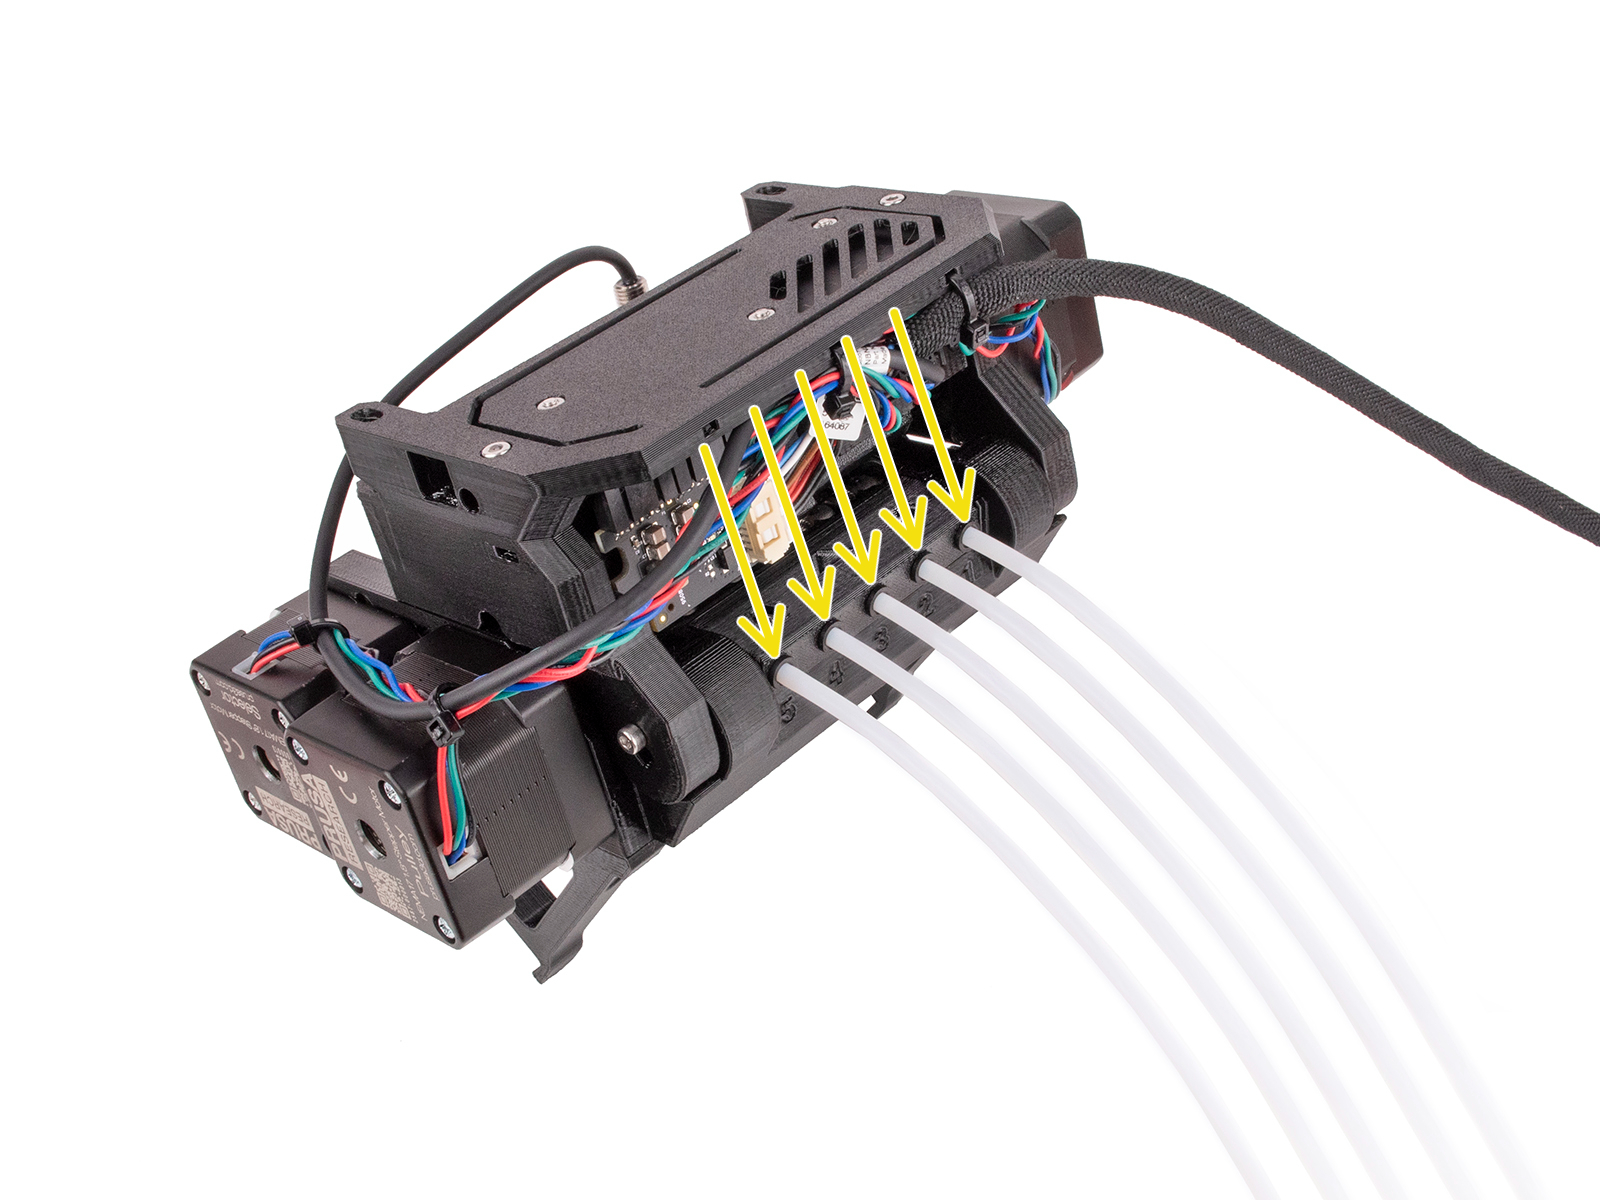
Short PTFE tubes orientation
After the filament is grabbed by the hobbed pulley, it is pushed into one of the five 19 mm (0.75 inches) PTFE tubes. These tubes are chamfered on one end, which provides some extra space for the unloaded filament, as the tip might be slightly thicker than the rest of the filament. Therefore, the chamfered end must be facing out, away from the pulleys.
Selector blade
Make sure the little blade that is supposed to cut filament strings is secured in place with an M3x10 screw, and that the blade is seated nicely.
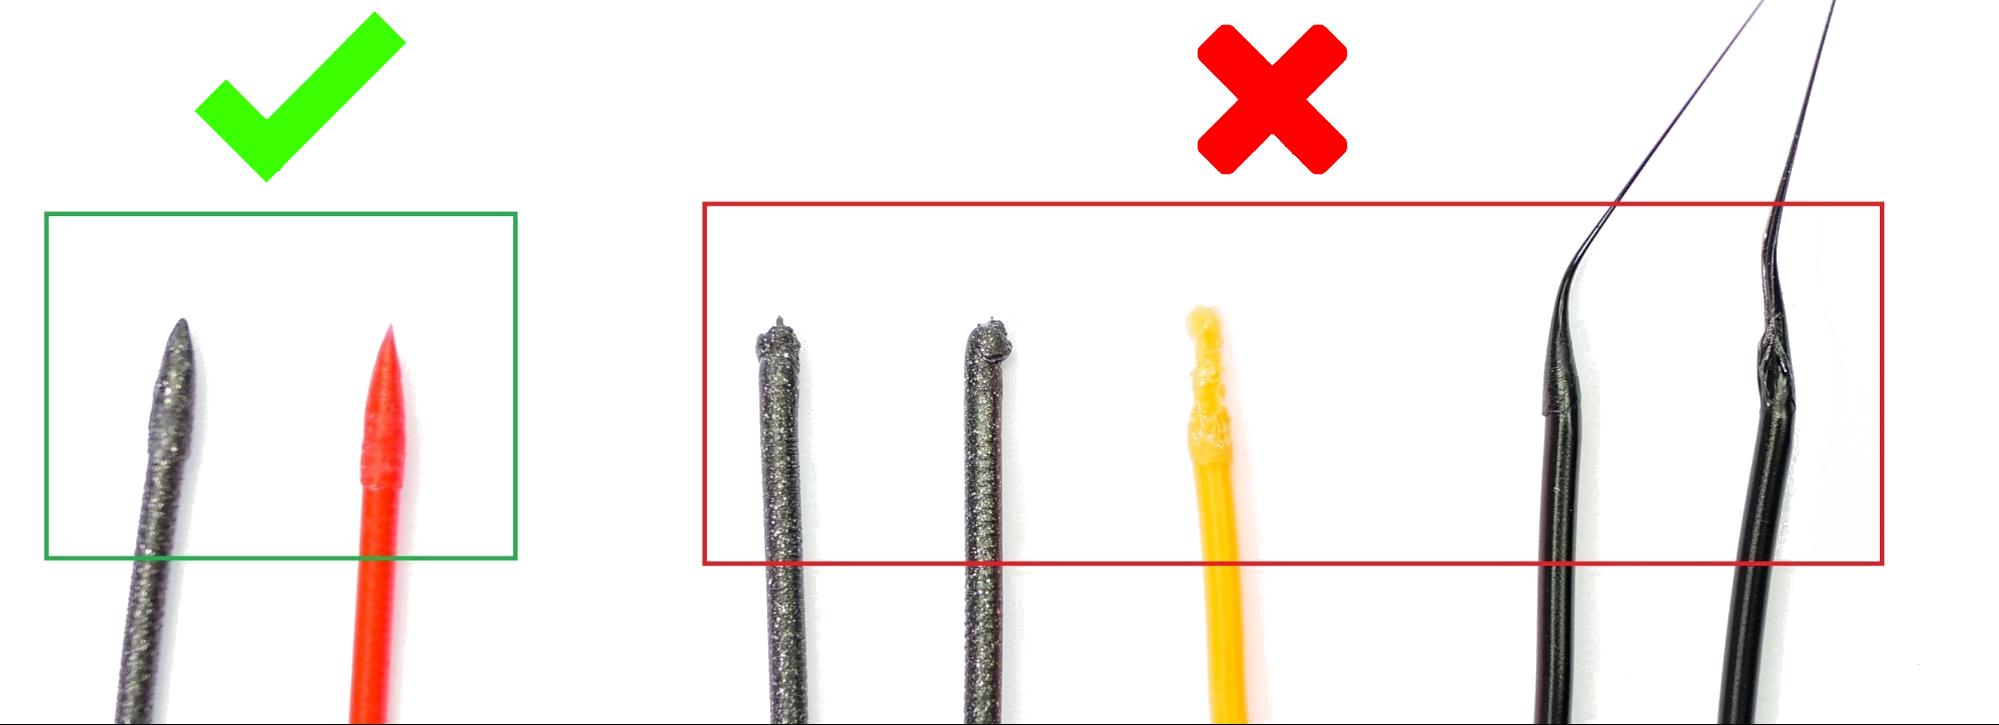
Slicer settings
The shape of the filament tip is very important for a successful MMU3 print. The tip should be pointy but without any lump or string. The diameter of the tip can be slightly bigger than the rest of the filament, but not by much.
First of all, try to adjust the hotend temperature (increase or decrease it by increments of 2°C), which will solve the problem in most cases. You can do so during the print in the Tune menu or when slicing the model.
If the problem persists, head back to PrusaSlicer and increase the number of cooling moves by 2 or 3 from Filament settings -> Advanced -> Number of cooling moves). Furthermore, you can try to increase the unloading speed by increments of 10 mm/s from Filament settings -> Advanced -> Unloading speed.
Test prints
If you are sure that all potential issues mentioned above have been avoided, feel free to test one of the MMU3 Sample Objects.
Commenti


Hai ancora delle domande?
Se hai una domanda su qualcosa che non è trattato qui, dai un'occhiata alle nostre risorse aggiuntive.
E se questo non dovesse funzionare, è possibile inviare una richiesta a [email protected] o tramite il pulsante qui sotto.