Co se stalo?
Během kalibrace, mesh bed levelingu, nebo před tiskem je pro firmware tiskárny zásadní určit polohu tiskové hlavy a vyhřívané podložky. Toto je provedeno skrze proces homingu, kde se tiskové osy pohybují do známé referenční polohy, nazývané domovská poloha..
Pro osu Z se provedou dva pokusy o homing. Firmware MINI/+ používá údaje sondy MINDA/SuperPINDA o jejich vzdálenosti od ocelového plátu: proces homingu proběhne úspěšně, pokud se oba údaje pohybují v rozmezí +- 0,1 mm. Pokud tomu tak není, zobrazí se na tiskárně zpráva "Chyba Homingu".
Název chyby: Homing Error
Kód chyby: #12301
Jak to spravit?
Chyba může znamenat problém se sondou MINDA/SuperPINDA. Její kabel může být poškozený nebo odpojený. Tuto chybu může vyvolat také mechanický problém na ose Z.
Testování sondy MINDA/SuperPINDA
Postupujte podle pokynů v následujícím článku: Testování senzoru M.I.N.D.A./SuperPINDA (MINI/MINI+).
Pohyb osy Z
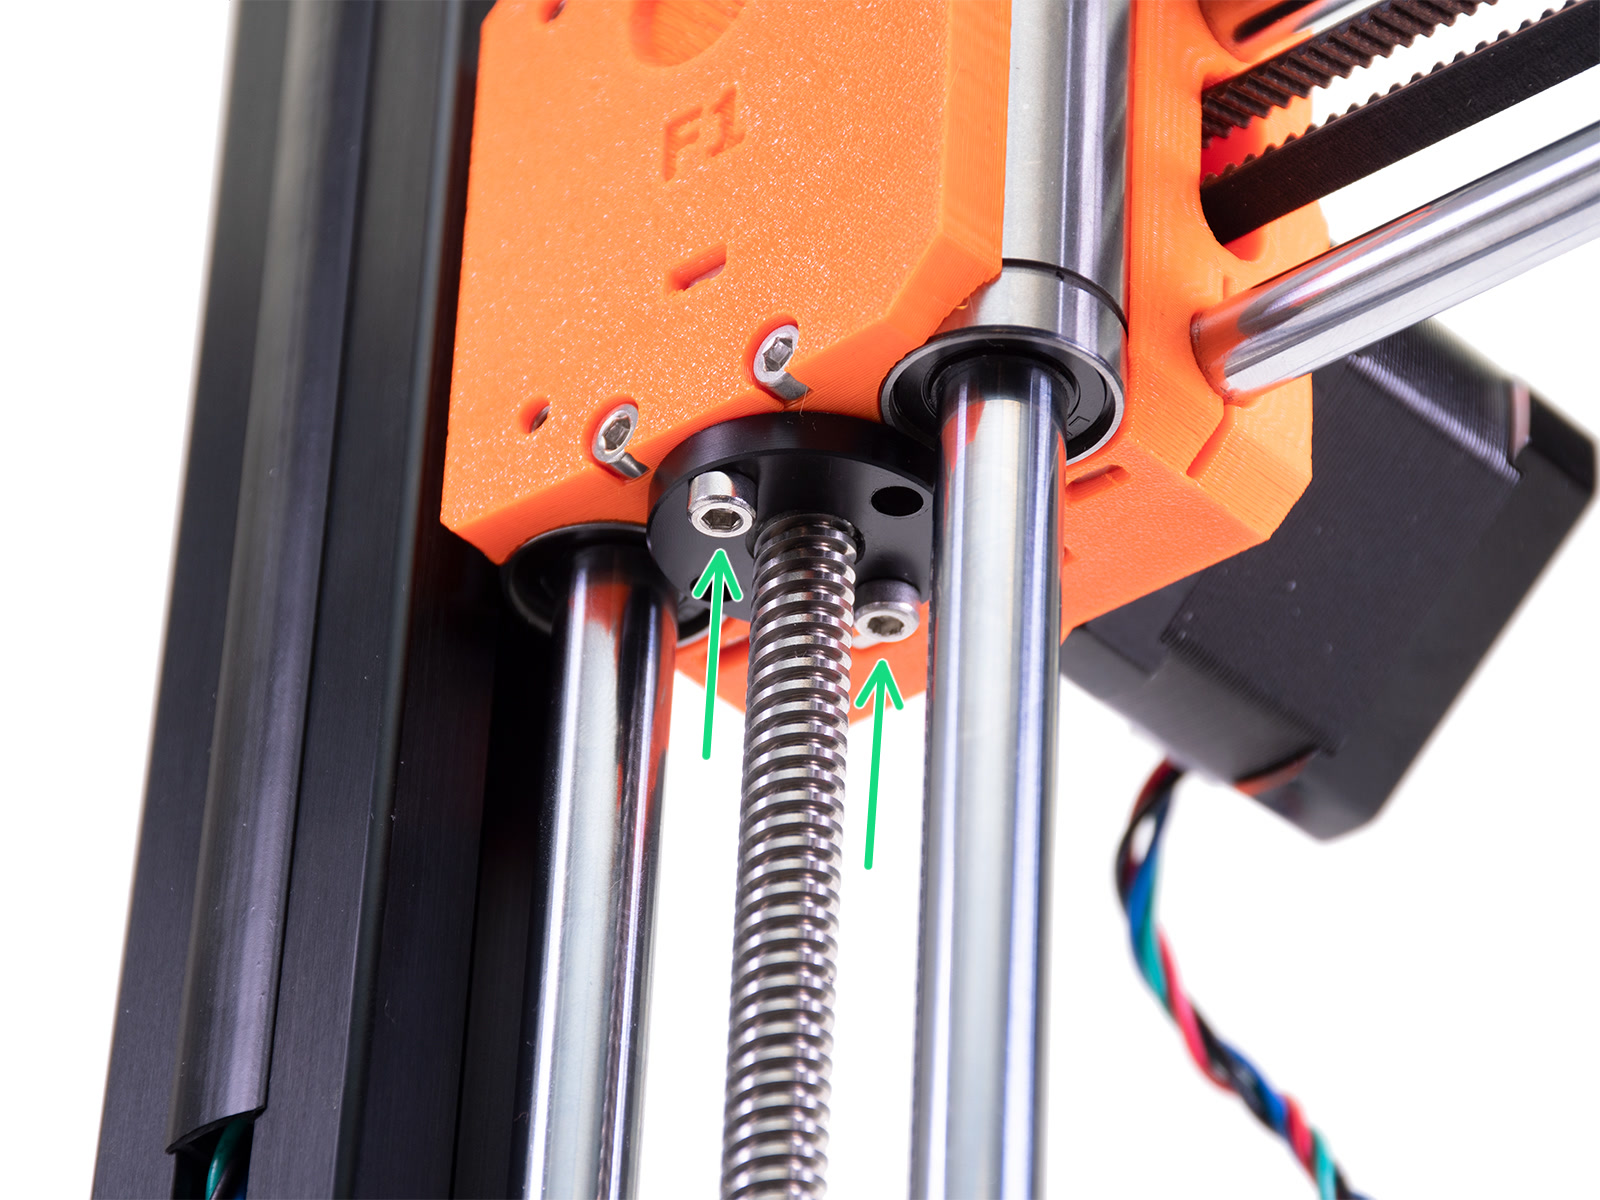
Ujistěte se, že se osa Z může plynule pohybovat. Při vypnuté tiskárně zkontrolujte sestavu osy Z a trapézové matice:
- Povolte šrouby na trapézových maticích a zkontrolujte, zda jsou obě ložiska správně zasunuta. Ložiska nesmí vyčnívat z tištěných dílů.
- Zkontrolujte oba tištěné díly Z-carriage a Z-carriage-back, zda není jeden umístěn níže než druhý. Oba díly musí být ve stejné výšce.
- Rovnoměrně utáhněte trapézovou matici na obou stranách.
- Otestujte pohyb osy Z otáčením vodicího šroubu motoru osy Z dvěma prsty. Pokud cítíte nadměrný odpor, mírně povolte šrouby, které drží trapézovou matici.
Vizuální kontrola sond MINDA/SuperPINDA
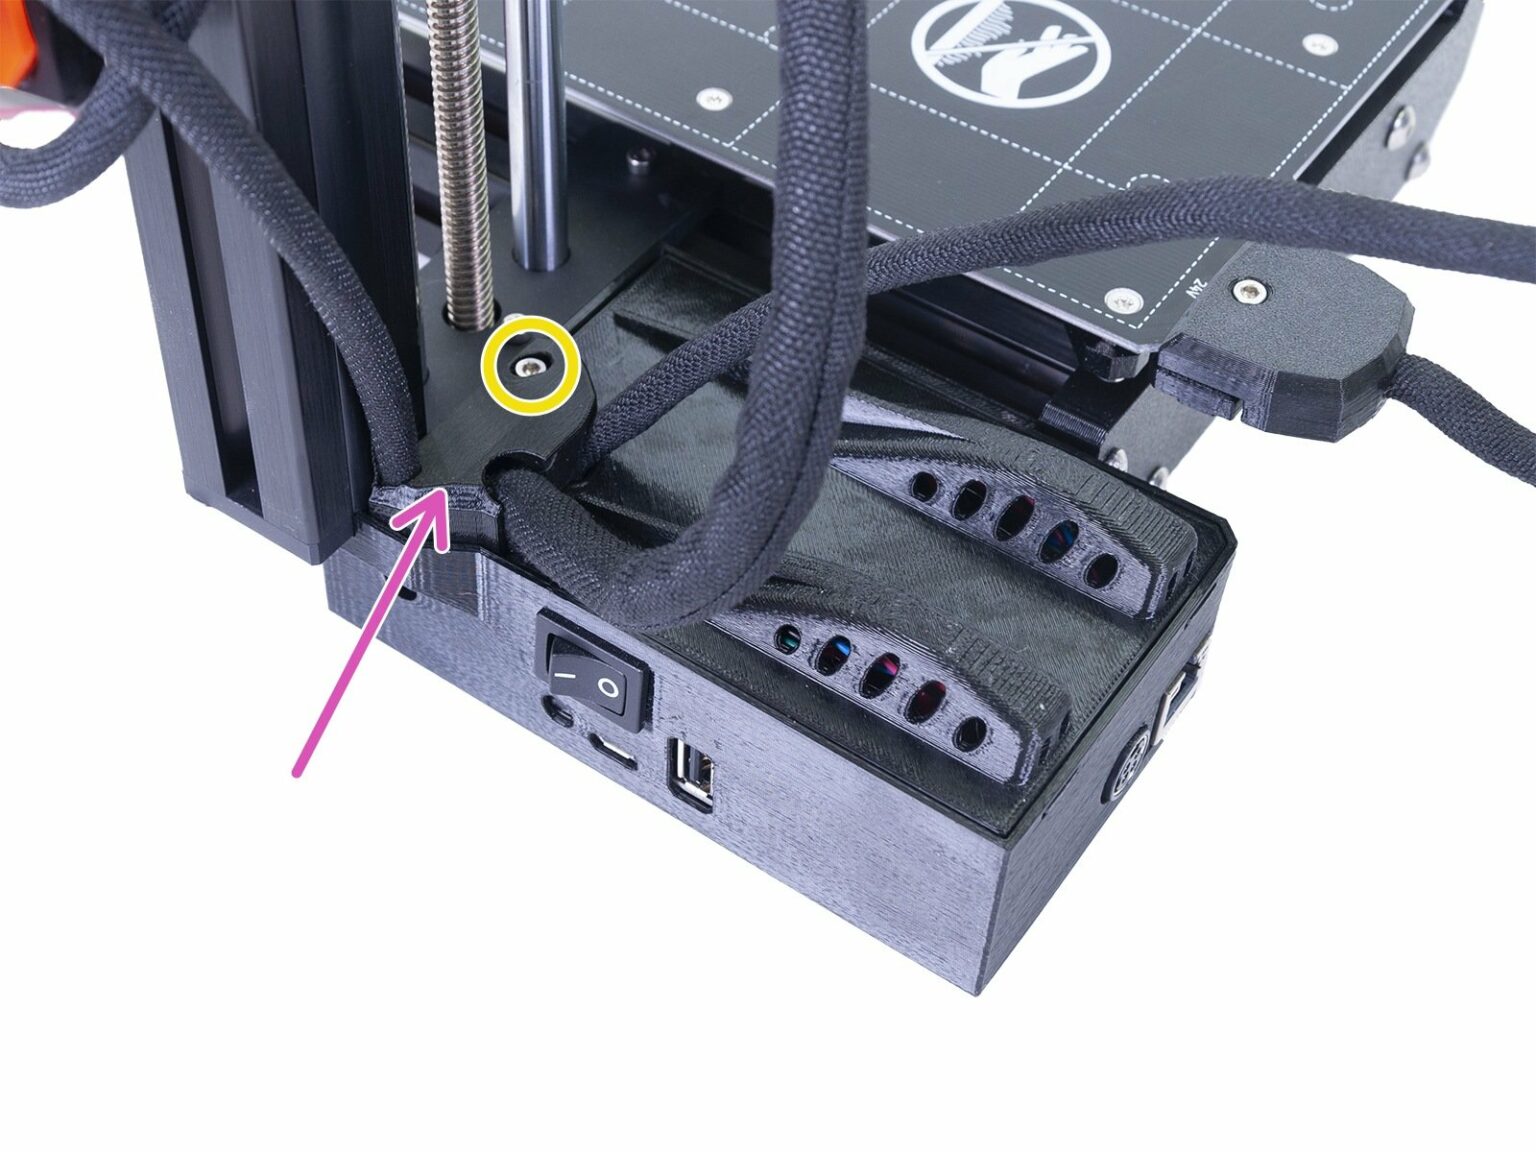
Před testováním sondy MINDA/SuperPINDA byste měli zkontrolovat, zda nejsou vodiče sondy MINDA/SuperPINDA viditelně přerušeny. Také se ujistěte, že je vše připojeno k základní desce Buddy, uvnitř jejího krytu. Uvolněte šroub zajišťující kryt (zakroužkovaný na obrázku níže), sejměte horní kryt kabelu a odklopte jej, abyste odhalili desku.
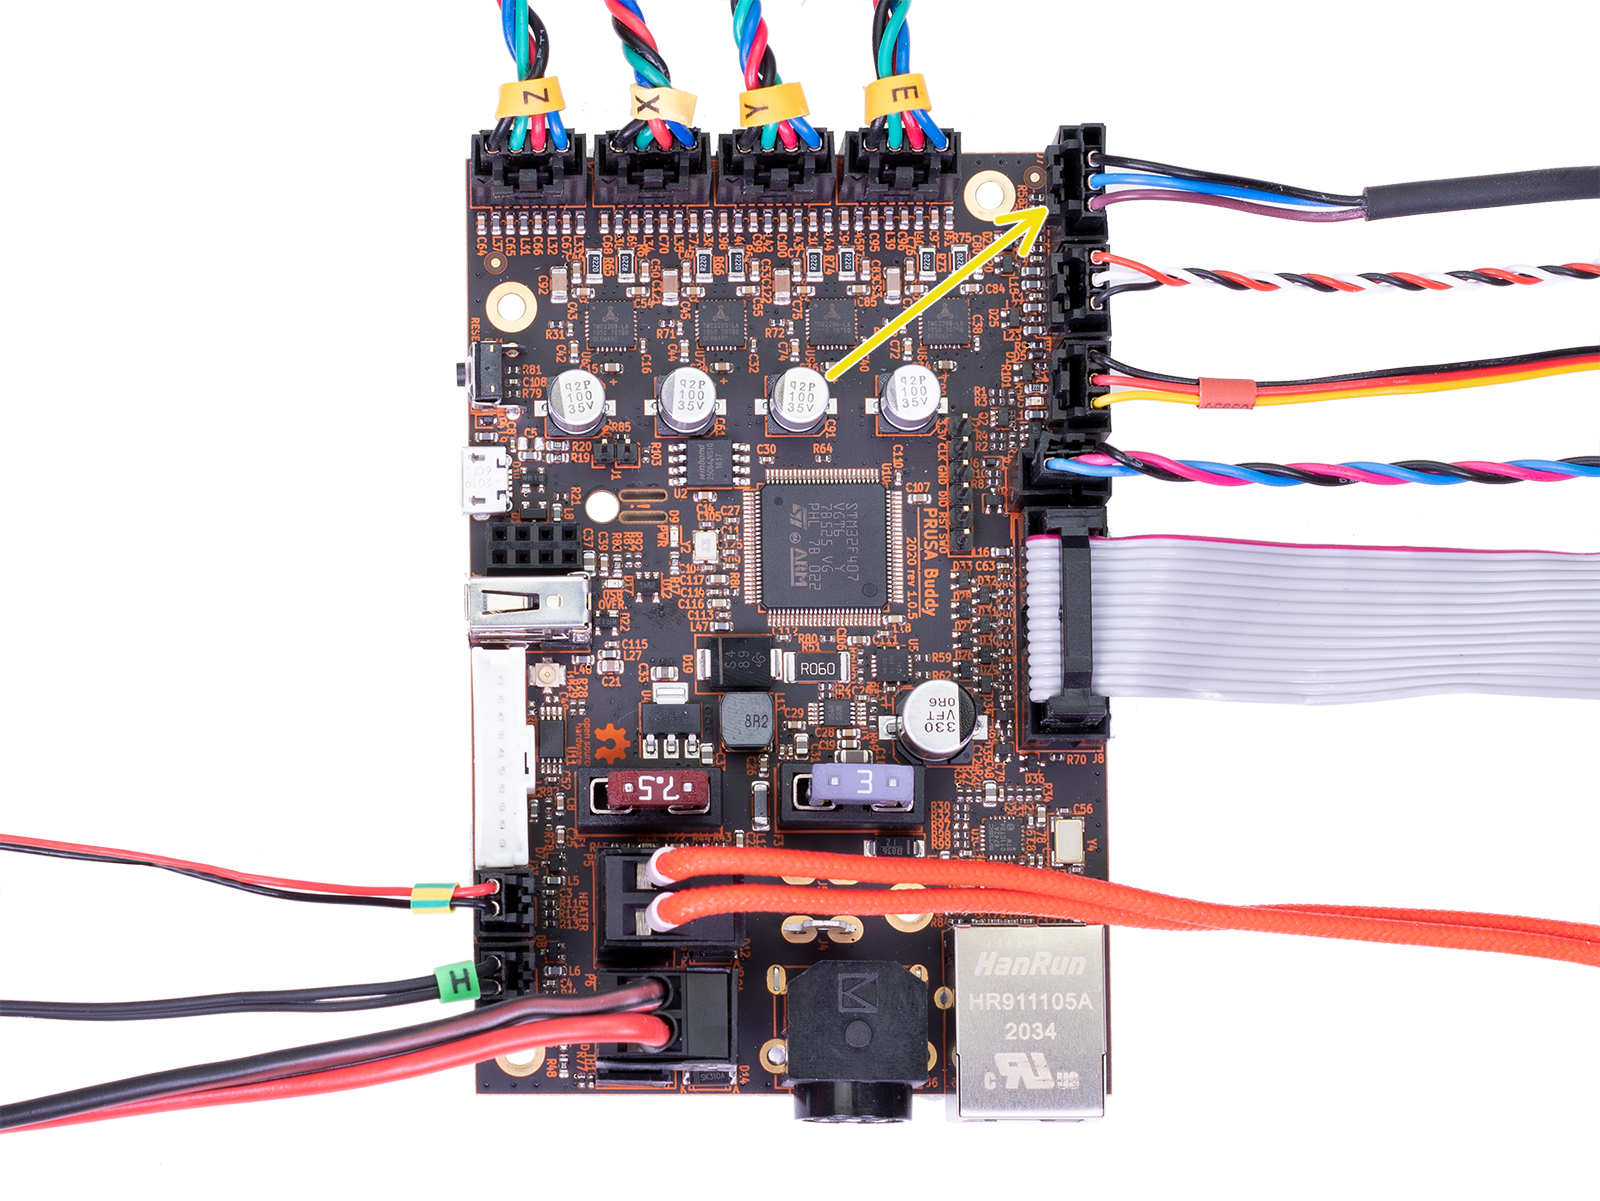
Zkontrolujte, zda jsou všechny konektory pevně zasunuty do zástrček podle obrázku níže. Zaměřte se na MINDA/SUPERPINDA (žlutá šipka). Ačkoli je to nepravděpodobné, při hrubé přepravě nebo manipulaci se mohly kabely MINDA/SuperPINDA uvolnit.
Návod na výměnu dílů
V případě, že zjistíte, že je sonda MINDA/SuperPINDA vadná, objednejte si ji prostřednictvím našeho e-shopu, a poté postupujte podle servisního návodu: Jak vyměnit sondu SuperPINDA (MINI/MINI+).