Object orientation is crucial with (M)SLA printing. It greatly influences the resulting print quality and in the case of the SL1, which cures the whole layer at once, it directly controls the print time.
You might have noticed that SLA prints are often placed at a 45-degree angle. There are several reasons for this:
- Large flat horizontal surfaces require a lot of force to separate from the bottom of the tank when the layer is cured (they would need more supports)
- Tilted objects cover a larger area, so the supports under these objects are spread out more evenly
- Better anti-aliasing
Letting the objects grow gradually under an angle is usually the safest way to achieve good-looking prints. That said, some objects can be placed directly on the printing platform to achieve better results.
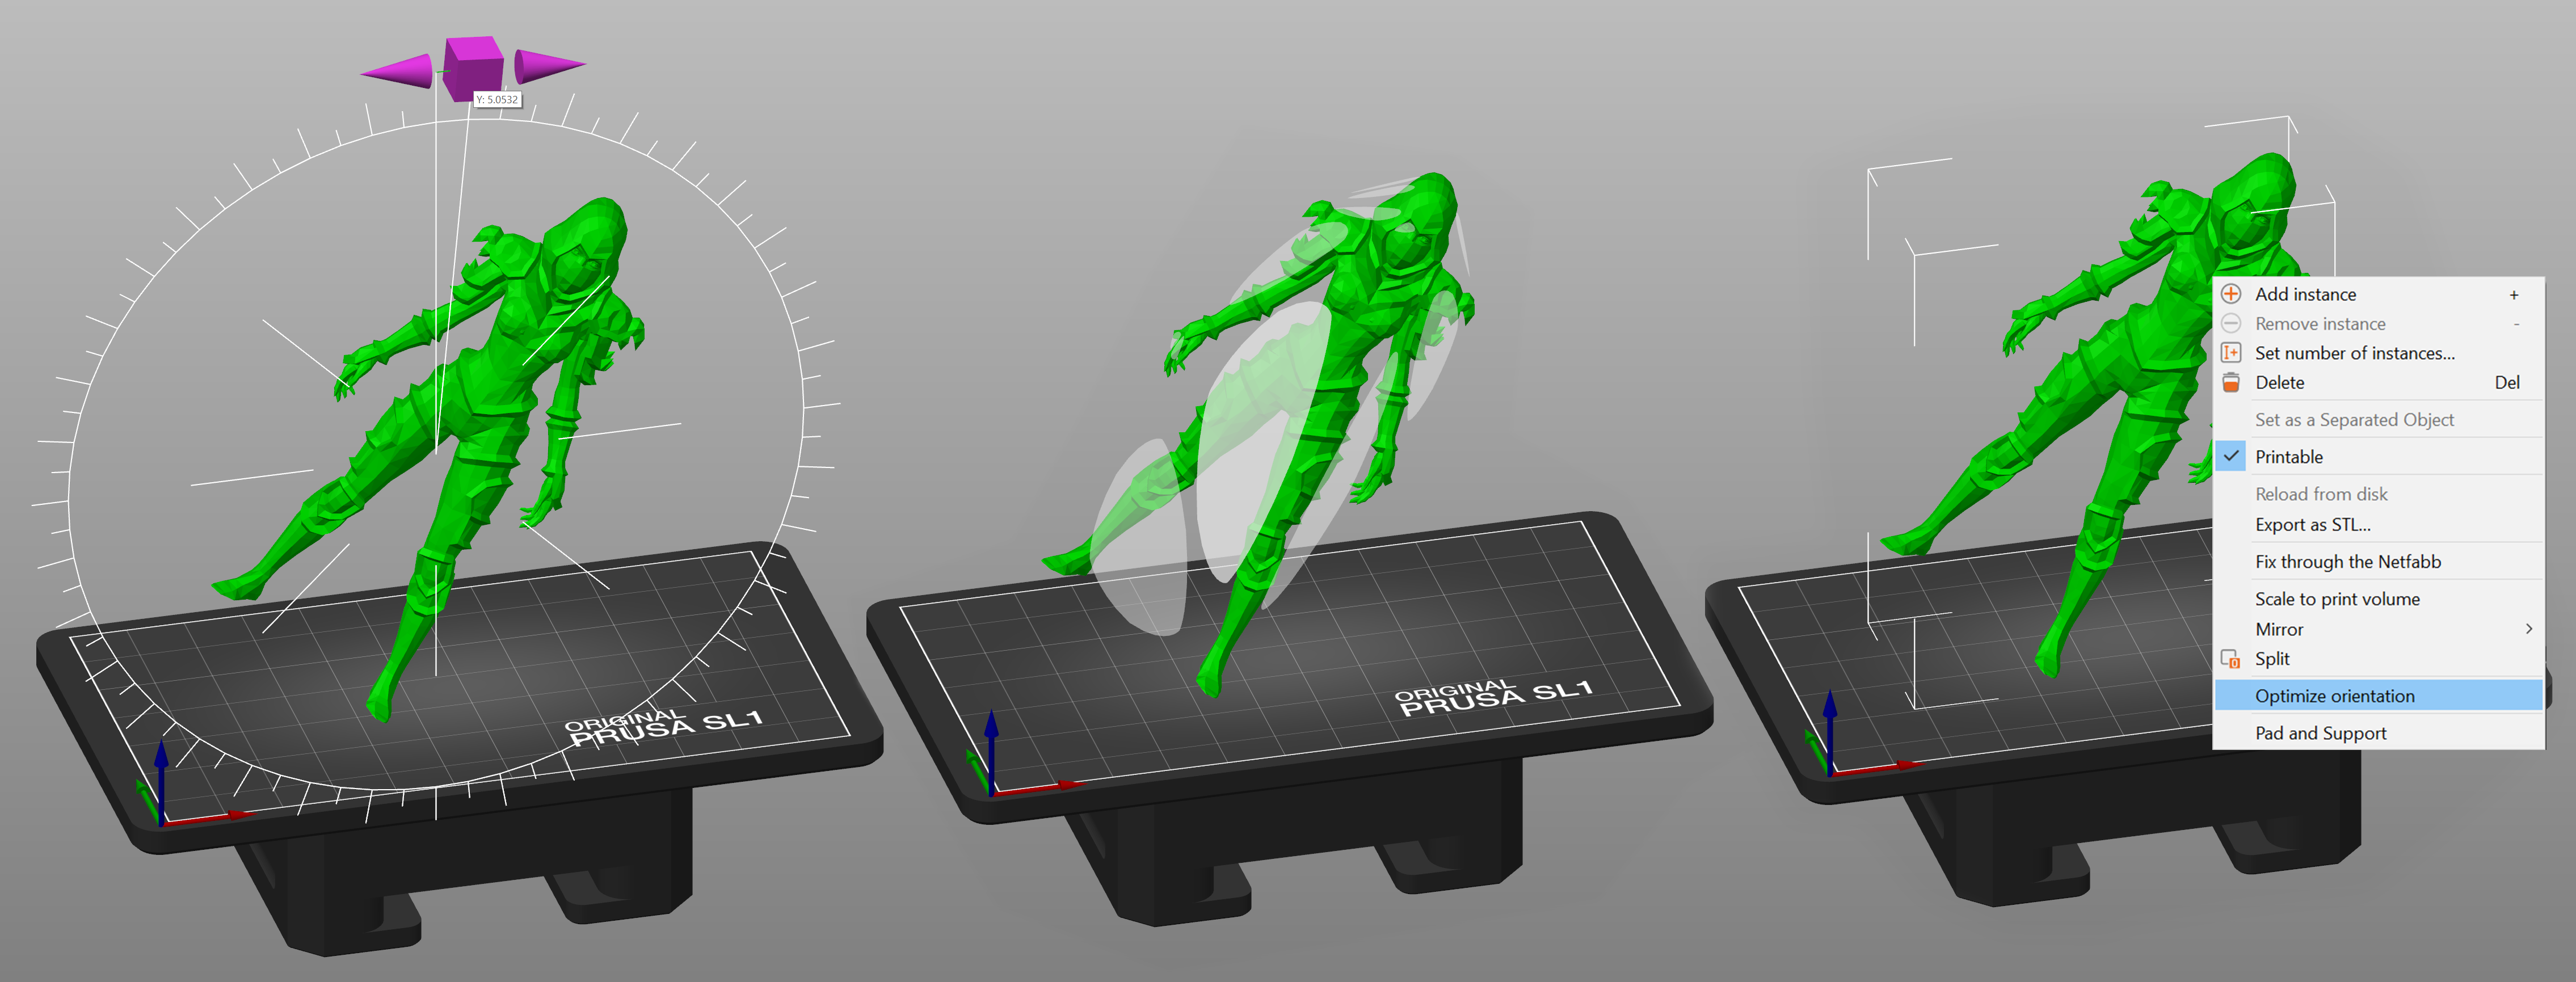
In the majority of cases, the object will have more than a single correct orientation. This happens usually with jewelry or various statues. The rule of thumb here is to try to rotate the object in a manner that will minimize the number of spots where the object would start in mid-air. We call these spots islands. These areas cannot be printed without supports – and since it’s generally better to avoid using supports, you should always try to find a better orientation.
You have 3 tools available to modify objects orientation:
- The Rotate tool (R)
- Place on face tool (F)
- Optimize orientation tool
 The Rotate tool (left), Place on face tool (middle) and Optimize orientation tool (right)
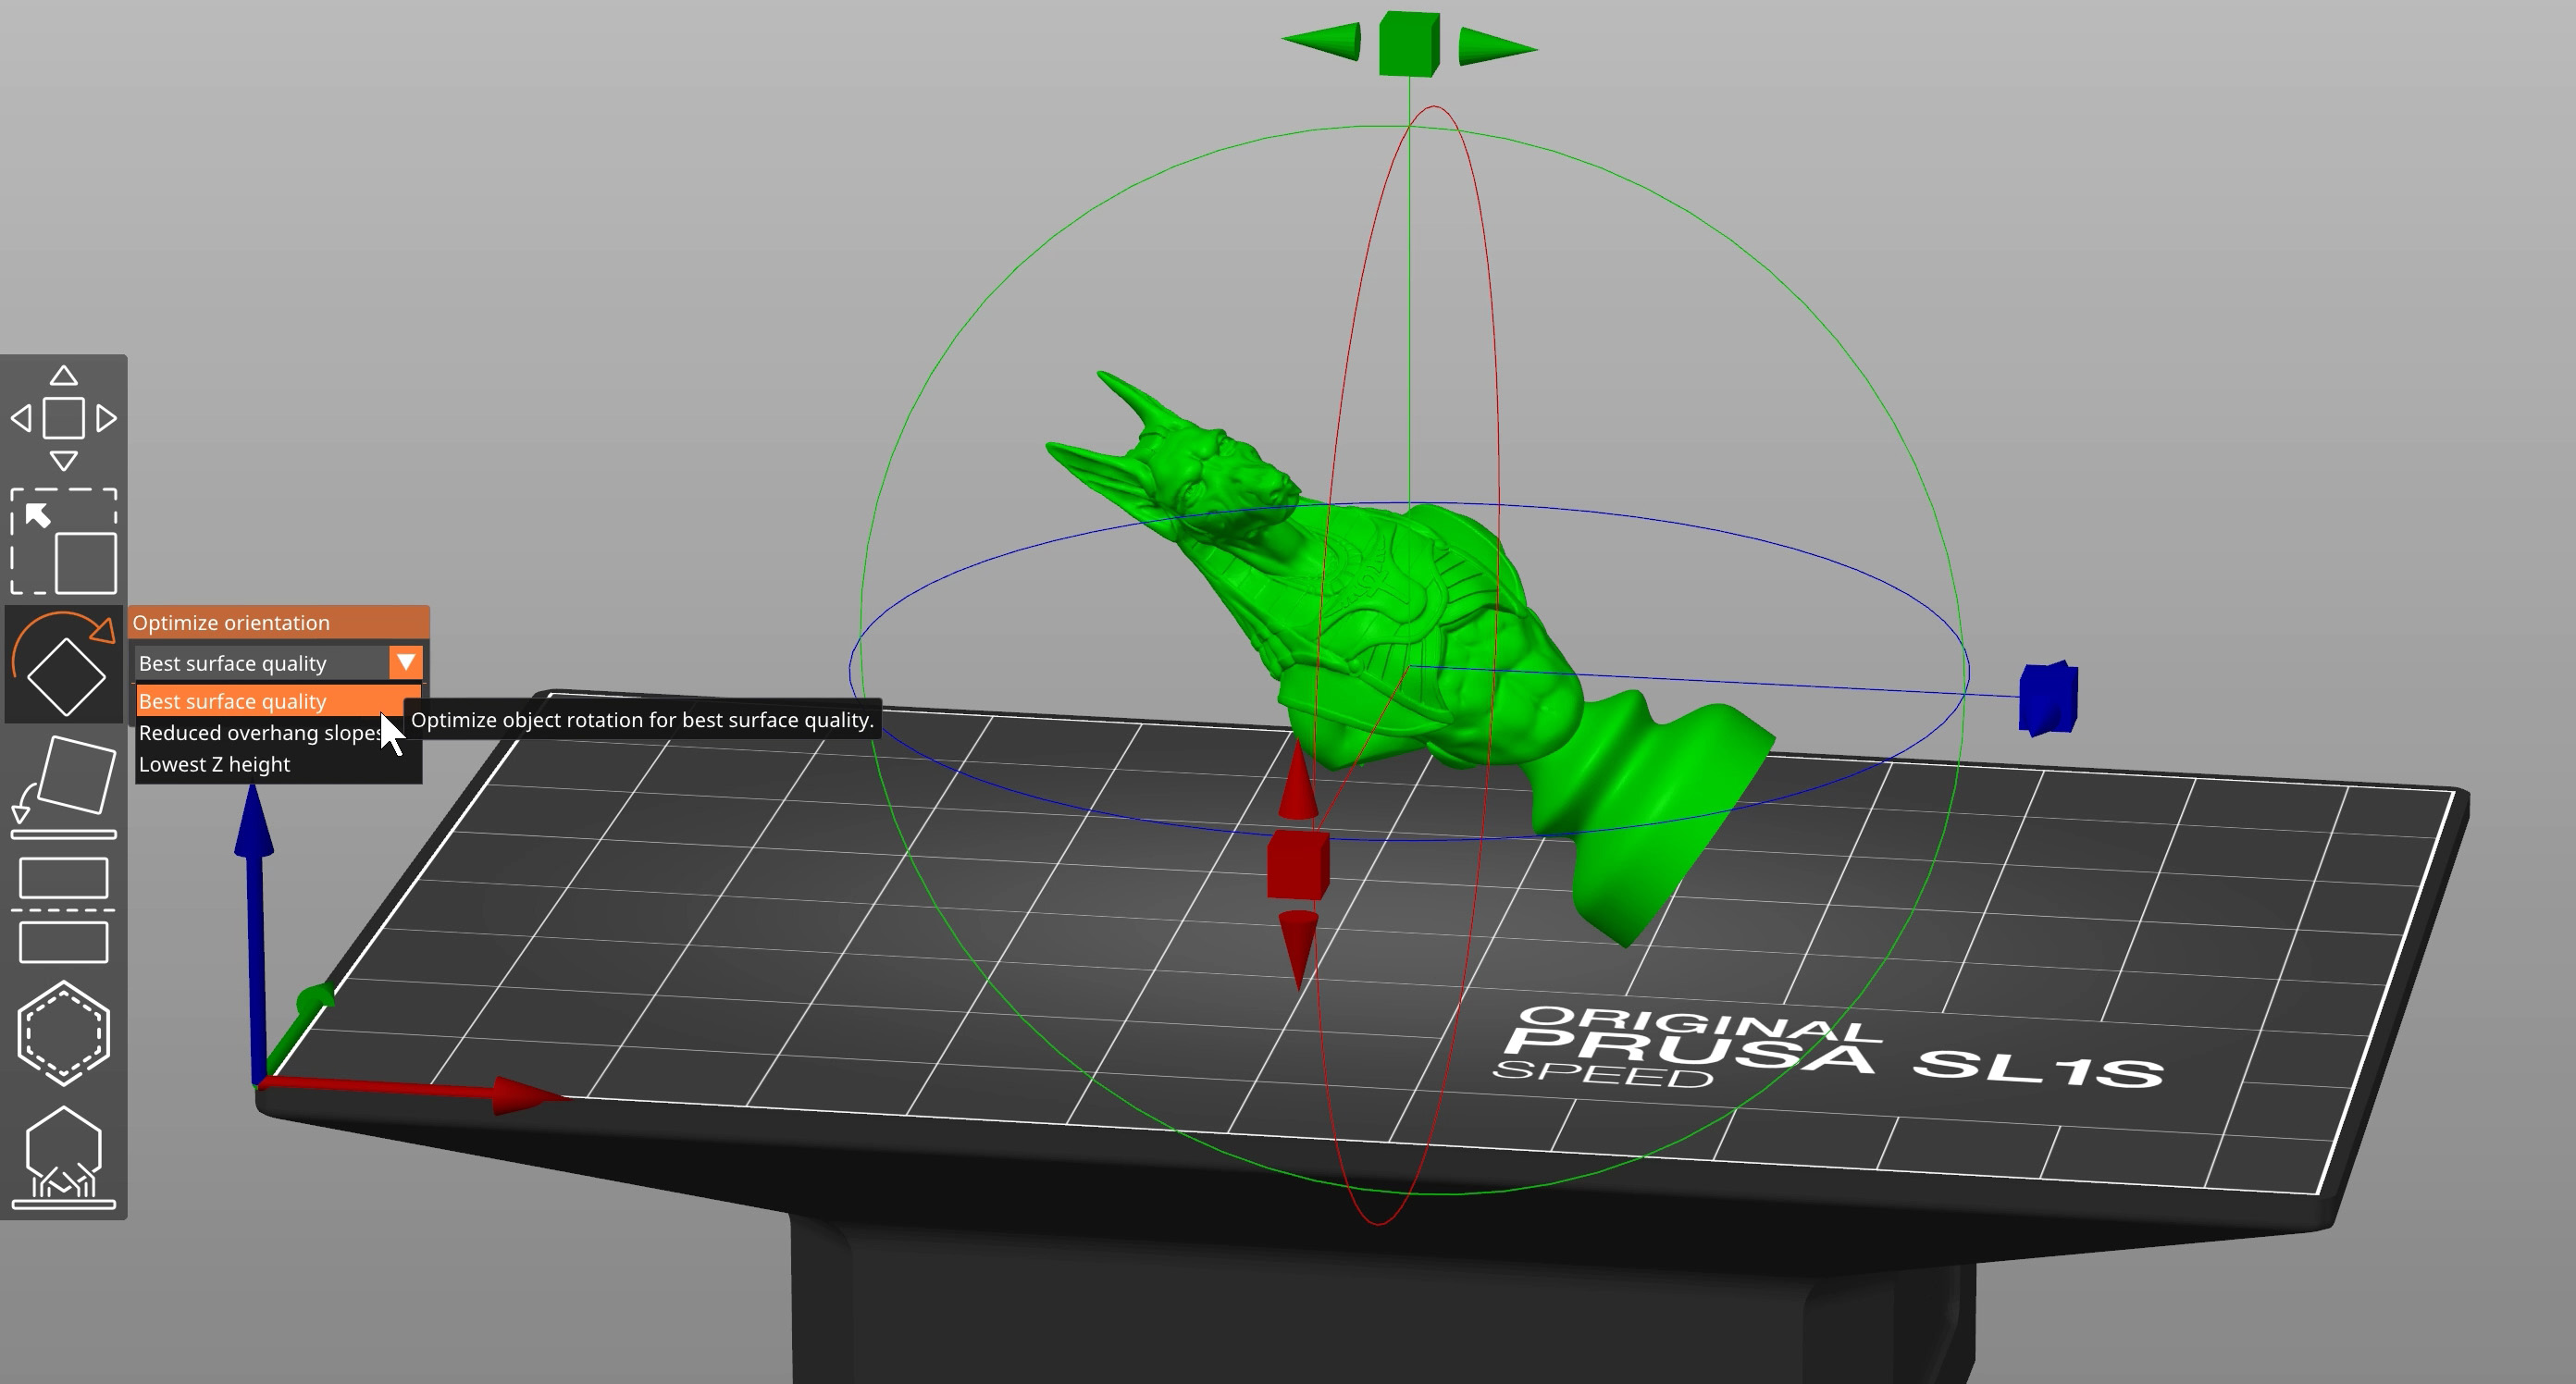
Optimize orientation tool
When you have a model selected and use to Rotate tool, you can choose from 3 different auto-orientation algorithms:
- Best surface quality
- Reduced overhang slopes (minimum supports)
- Lowest Z height (lowest print time)
Print time
Print times of the SL1 and the SL1S Speed are defined by a simple multiplication: the number of layers × (exposure time + tilt time). No matter how many (and how complex) objects there are on the print platform, the exposure times are constant throughout the print – with the exception of the first ten layers, which take slightly longer to finish.
In other words, printing a tall object will take less time, if you lay it flat on the printing platform. Time-wise it doesn’t matter whether you place a single object on the platform – or a dozen. The print time will always be the number of layers multiplied by the exposure time of a single layer.
3 comments
This is not the same for FFF and SLA printing. Optimizing orientation is a feature available for SL1 (MSLA) slicing and has completely different rules than FFF printers like the MINI. Have a look at this https://help.prusa3d.com/en/article/modeling-with-3d-printing-in-mind_164135#orientation-on-the-print-bed
I see this article has gotten some tags that it shouldn't, which I will correct, but you can see it is under SLA Slicing.