Prusa
  • SHOP
    • Latest products
    BY CATEGORY
    • 3D printersnew
    • 3D printer upgradesnew
    • Materials
    • Accessories
    • Spare parts
    • Courses
    • Merch
    • Get a price quote
    QUICK LINKS
    • Shipping & delivery
    • Returns & refunds
    • Payment & financing
    • Warranty
    • VAT & Customs fees
    • FAQ

    0 item in your cartitems in your cart

    Your cart is empty

    Go to cartShop 3D printers

    My profile

    Log in to see orders, saved items

    My profile

    Signed in as

    • Orders
    • Logout
  • 3D PRINTING
    • Explore 3D printing
    FOR BEGINNERS
    • 3D printing 101
    • How FDM printing works
    • Buying your first printer
    • 3D model catalog
    BY APPLICATION
    • Rapid prototyping
    • Manufacturing
    • Engineering
    • Research
    • Arts & design
    GO DEEPER
    • Materials guide
    • Courses
    • Webinars
    • Case studies
    • Custom 3D printing
  • 3D PRINTERS
    • All 3D printers
    FOR
    • Home or garageHobbyists, tinkerers and home printing
    • BusinessIn-house production for small teams
    • EnterpriseFleets, security and scale
    • Which Prusa is right for me
    SHOP & BROWSE
    • CORE One+new
    • CORE One+ INDXnew
    • CORE One L+new
    • CORE One L+ INDXnew
    • XL+new
    • MK4S
    • Prusa Pro HT90
    • Prusa Pro AFS
    • Prusa Pro SLX
    MORE FROM PRINTERS
    • Parts & upgradesnew
    • Spare parts
    • Critical infrastructure
    • Case studies
    • Signature Oak
    • Kits
  • MATERIALS
    • All materials
    BY USE
    • Every-day & design
    • Functional engineering
    • Composites
    • Pro speciality
    • SLA resins
    PRUSAMENT
    • PLA
    • PETG
    • ASA
    • PC
    • PA11
    • Flex
    • TPU
    MORE FROM MATERIALS
    • Materials guide
    • We make material in house
    • Sustainability
    • Order on the store
  • SOFTWARE
    • All software
    PREPARE THE PRINT
    • PrusaSlicer 3.0New
    PRINT & MONITOR
    • Prusa Connect
    • EasyPrint
    • iOS & Android app
    • Prusa Farm
    GET STARTED
    • Download & install
    • Knowledge base
    MORE FROM SOFTWARE
    • 3D model catalog
  • SUPPORT
    • Explore support
    FIND ANSWERS
    • Knowledge base
    • Troubleshooting
    • Courses
    • Webinars
    GET HELP
    • Contact us
    • Livechat
    • Shipping & delivery
    • Warranty
    • Returns & refunds
    • Service & spare parts
    • Service & Repair
    COMMUNITY
    • Forum
    • Reddit
    • Printables
  • TRUST CENTER
    • Trust Center overview
    BY TOPIC
    • GDPR
    • Certificates
    • Security
    • Compliance
    COMMITMENTS
    • Sustainability report
    TALK TO US
    • Contact the security team
  • COMPANY
    • About Prusa
    GET TO KNOW US
    • Our story
    • How we make printers
    • Open source
    • Brand & media kit
    NEWS
    • Blog
    • Newsroom
    • Events
    TRUST & PARTNERS
    • Sustainability
    • Resellers & distributors
    • Affiliate program
    • Contact
    • English
    • Čeština
    • Deutsch
    • Español
    • Français
    • Italiano
    • Polski
    • 日本語
  • Signed in as

    • Orders
    • Address
    • In-stock Alerts
    • My Courses
    • Subscription
    • Edit Account
    • Logout

Log in to see orders, saved items

Signed in as
  • Orders
  • Address
  • In-stock Alerts
  • My Courses
  • Subscription
  • Edit Account
  • English
  • Čeština
  • Deutsch
  • Español
  • Français
  • Italiano
  • Polski
  • 日本語
Shop

0 item in your cartitems in your cart

Your cart is empty

Go to cartShop 3D printers

My profile

Log in to see orders, saved items

My profile

Signed in as

  • Orders
  • Logout
SHOP
  • Latest products
BY CATEGORY
  • 3D printersnew
  • 3D printer upgradesnew
  • Materials
  • Accessories
  • Spare parts
  • Courses
  • Merch
  • Get a price quote
QUICK LINKS
  • Shipping & delivery
  • Returns & refunds
  • Payment & financing
  • Warranty
  • VAT & Customs fees
  • FAQ

Featured products

    Popular categories

      Trending searches

        Articles

          Blog

            Products

              Categories

                Suggested searches

                  Searching…
                  No results
                  Something went wrong.
                  ↑↓ Select↵ OpenEsc Close search
                  1. Support
                  2. Printer maintenance
                  3. First setup and filament loading (USS Drybox)
                   

                  Contents

                  • Initial setup
                  • Open the Drybox
                  • Prepare the hygrometer
                  • Add silica gel
                  • Insert filament spool
                  • Close the Drybox
                  • Filament guiding

                  Blog

                  • Prusament Pellets: Raw material batches for large-format 3D printing or small-scale polymer research & development
                  • Print colorful and glowing Halloween decorations with our spooky offer
                  • Factorio Has Arrived on Printables

                  Newsletter

                  Signup and get our monthly squeeze on updates, blog, printables and much more.

                  By clicking, you agree to receive our newsletter.

                  This site is protected by reCAPTCHA Enterprise and the Google Privacy Policy and Terms of Service apply.

                  Heavy Duty Keyboard Holder (No Supports)
                  E-shop
                  • 3D Printers
                  • Printer Upgrades
                  • Filaments
                  • Accessories
                  • Prusa Merchandise
                  Prusa

                  © Prusa Research a.s.

                  Printables
                  • 3D Models
                  • Store
                  • Clubs
                  • 3D Design Contests
                  • Brands
                  Community
                  • World Map
                  • Forum
                  • User Groups
                  • Events
                  Help
                  • Prusa Help
                  • Prusa Academy
                  • 3D Printing Calculators
                  Software
                  • PrusaSlicer
                  • Prusa.app
                  • Prusa Connect
                  • Drivers and Software
                  Company
                  • About Us
                  • Blog
                  • Official Prusa Resellers
                  • Contact Us
                  • Certified for ISO 9001, ISO 14001, ISO 45001
                  • General Terms and Conditions
                  • General Terms and Conditions of Use of the PRUSA Websites
                  • Privacy Policy
                  • Information about cookies
                  • Customer Complaints Policy
                  • Status Page
                  • Do Not Sell or Share My Personal Information
                  • Supplemental Statements
                  Prusa
                  • General Terms and Conditions
                  • General Terms and Conditions of Use of the PRUSA Websites
                  • Privacy Policy
                  • Information about cookies
                  • Customer Complaints Policy
                  • Status Page
                  • Do Not Sell or Share My Personal Information
                  • Supplemental Statements

                  © Prusa Research a.s.

                  JOSEF PRUSA®, PRUSA RESEARCH®, PRUSA POLYMERS®, PRUSA ORANGE®, PRUSA 3D ® AND PRUSAMENT® are registered trademarks of Prusa Development a.s. used by Prusa Research a.s. under licence from Prusa Development a.s.

                  First setup and filament loading

                  (USS Drybox)

                  Relevant for

                  Accessories
                  4 comments
                  Article is also available in following languages
                  English
                  Čeština
                  Polski
                  Deutsch
                  Français
                  Español
                  Italiano
                  日本語

                  Before using the Prusa USS Drybox for the first time, it is important to prepare it correctly to ensure a stable low-humidity environment for your filament.

                  This article covers the initial assembly and first filament loading process. For complete product overview, humidity management, maintenance, and printer-specific installation guides, see the main Prusa USS Drybox article.

                  The Drybox is designed to slow down moisture absorption using silica gel. It does not dry filament. If your filament is already moist, it must be dried in a dedicated drying device before use.

                  Initial setup

                  Open the Drybox

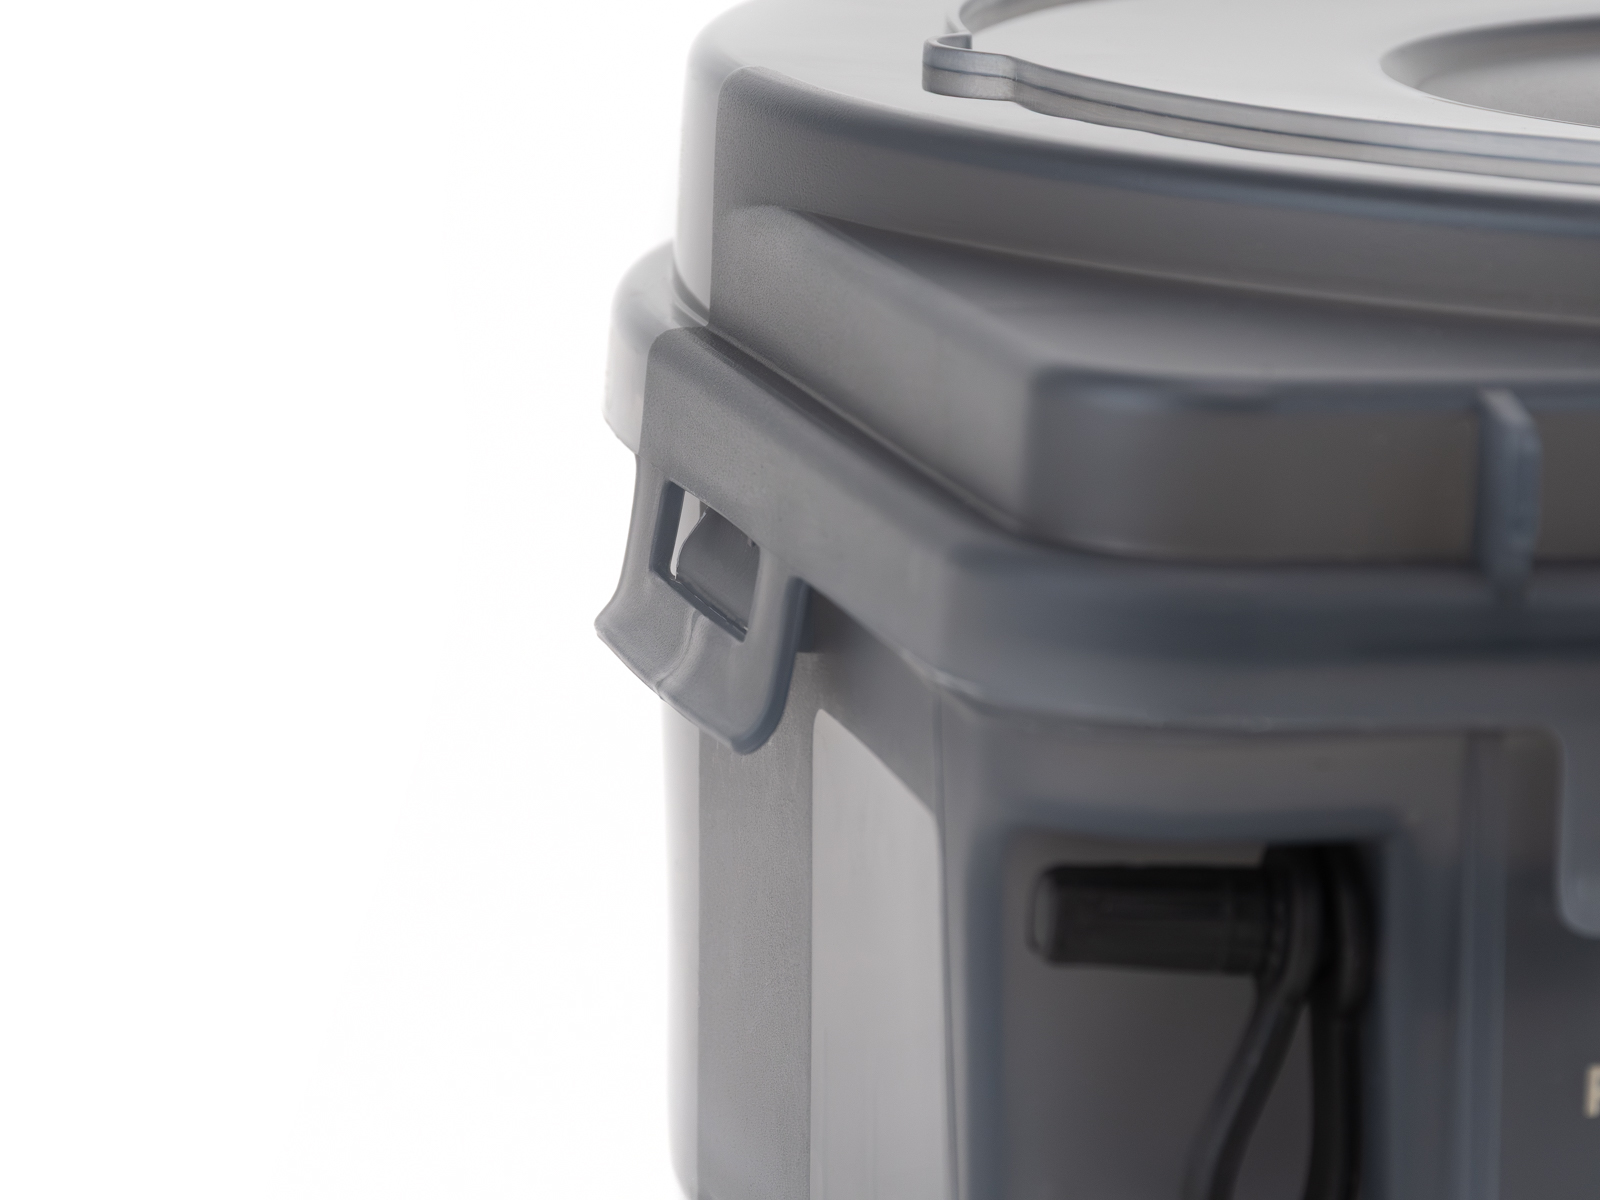
                  Release all latches and open the lid.

                  Check that all seals are properly seated and not damaged.
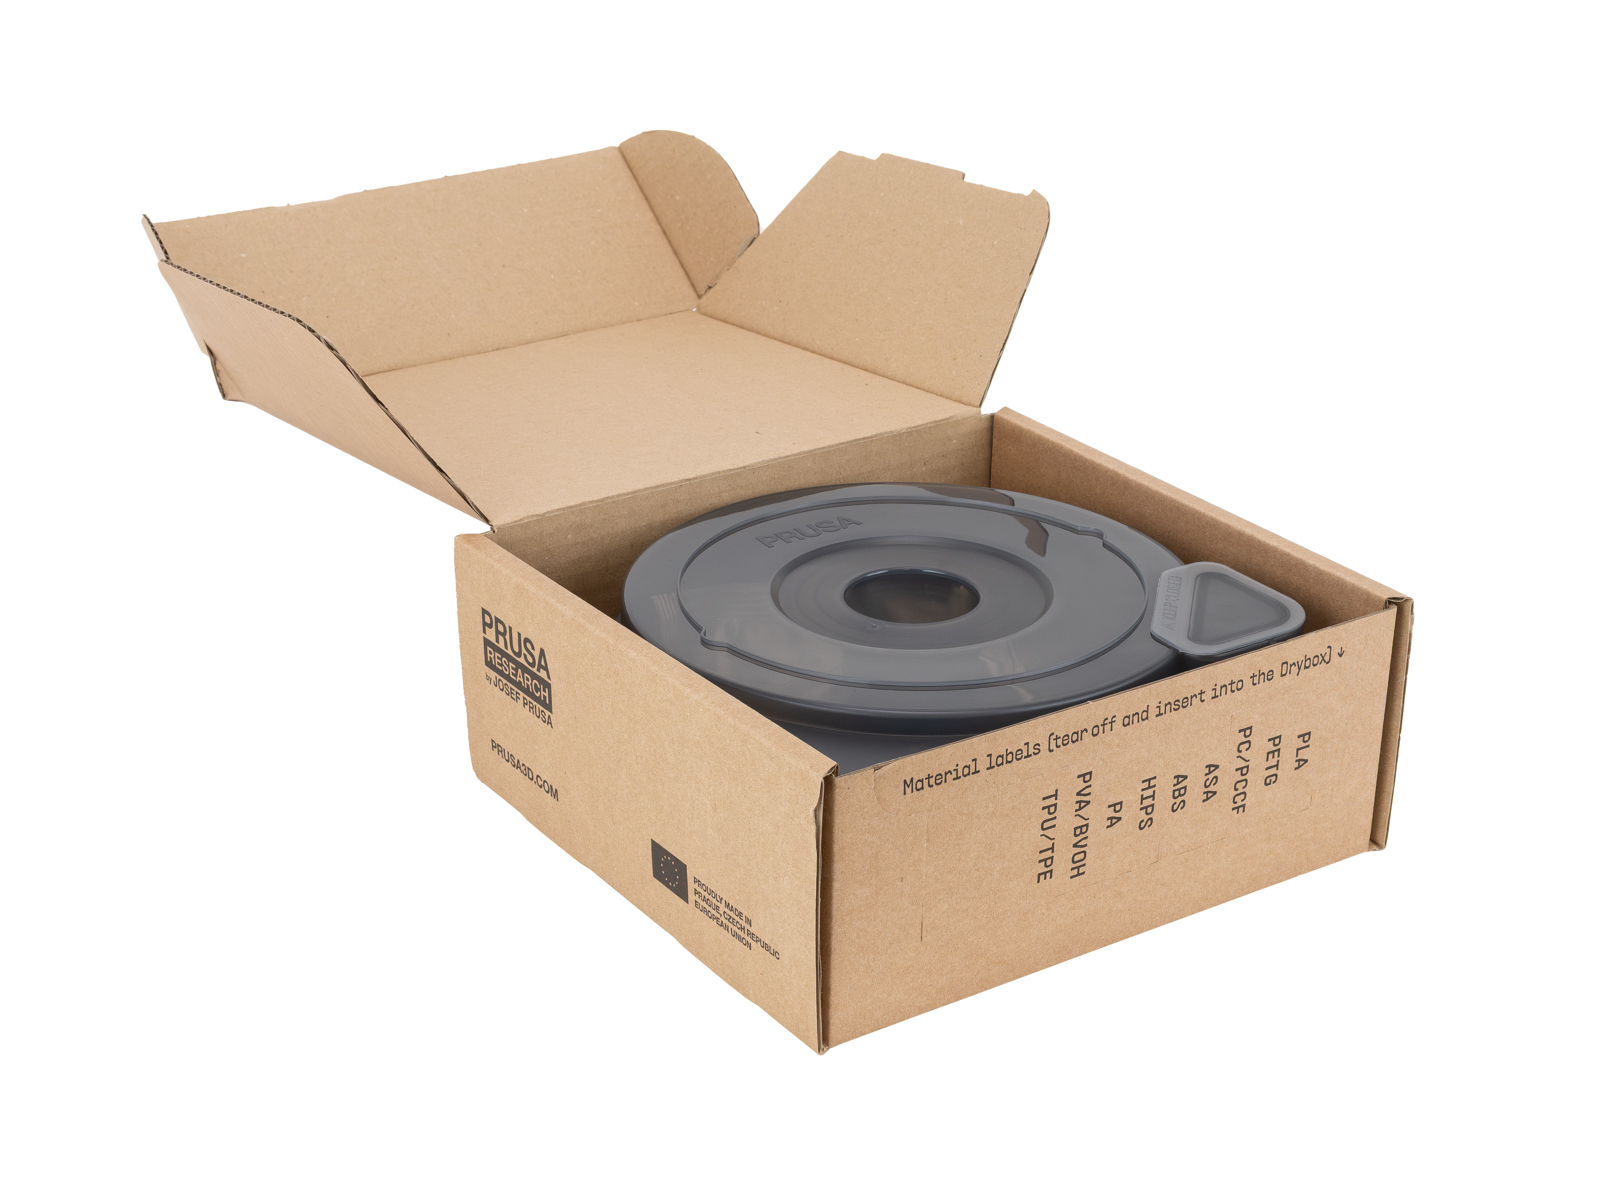
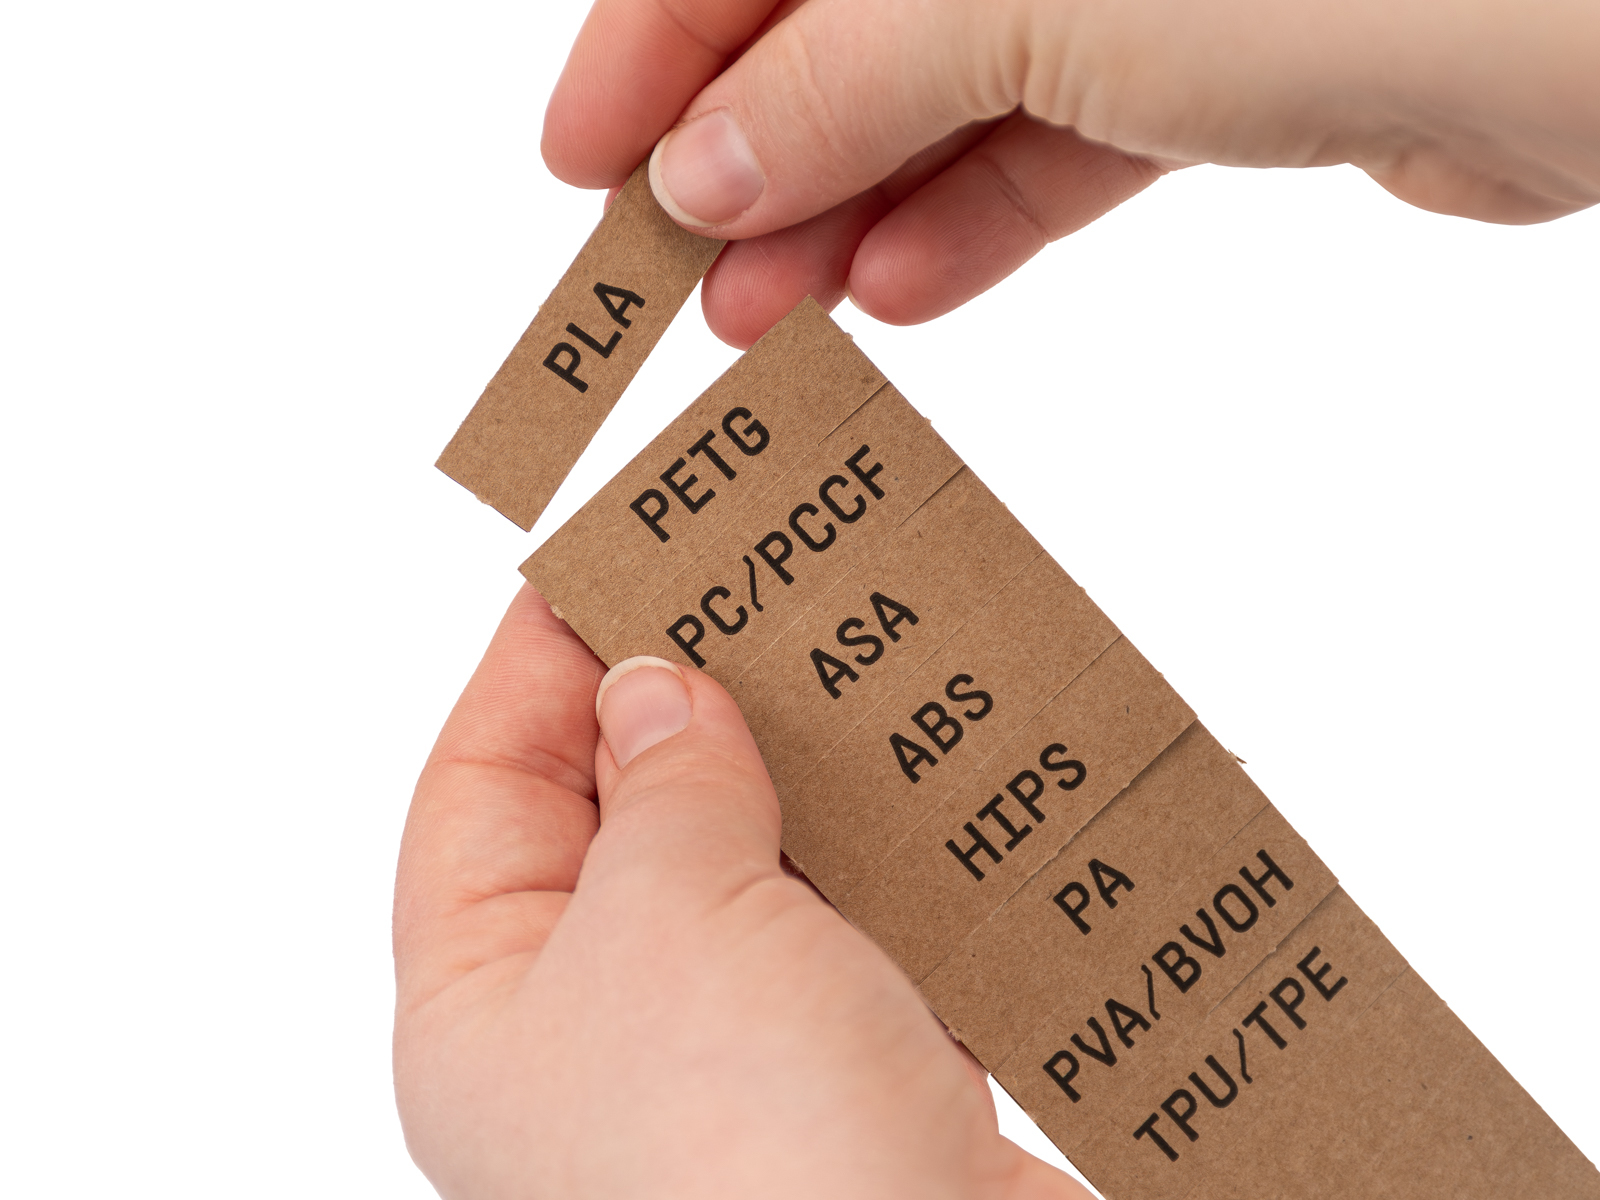
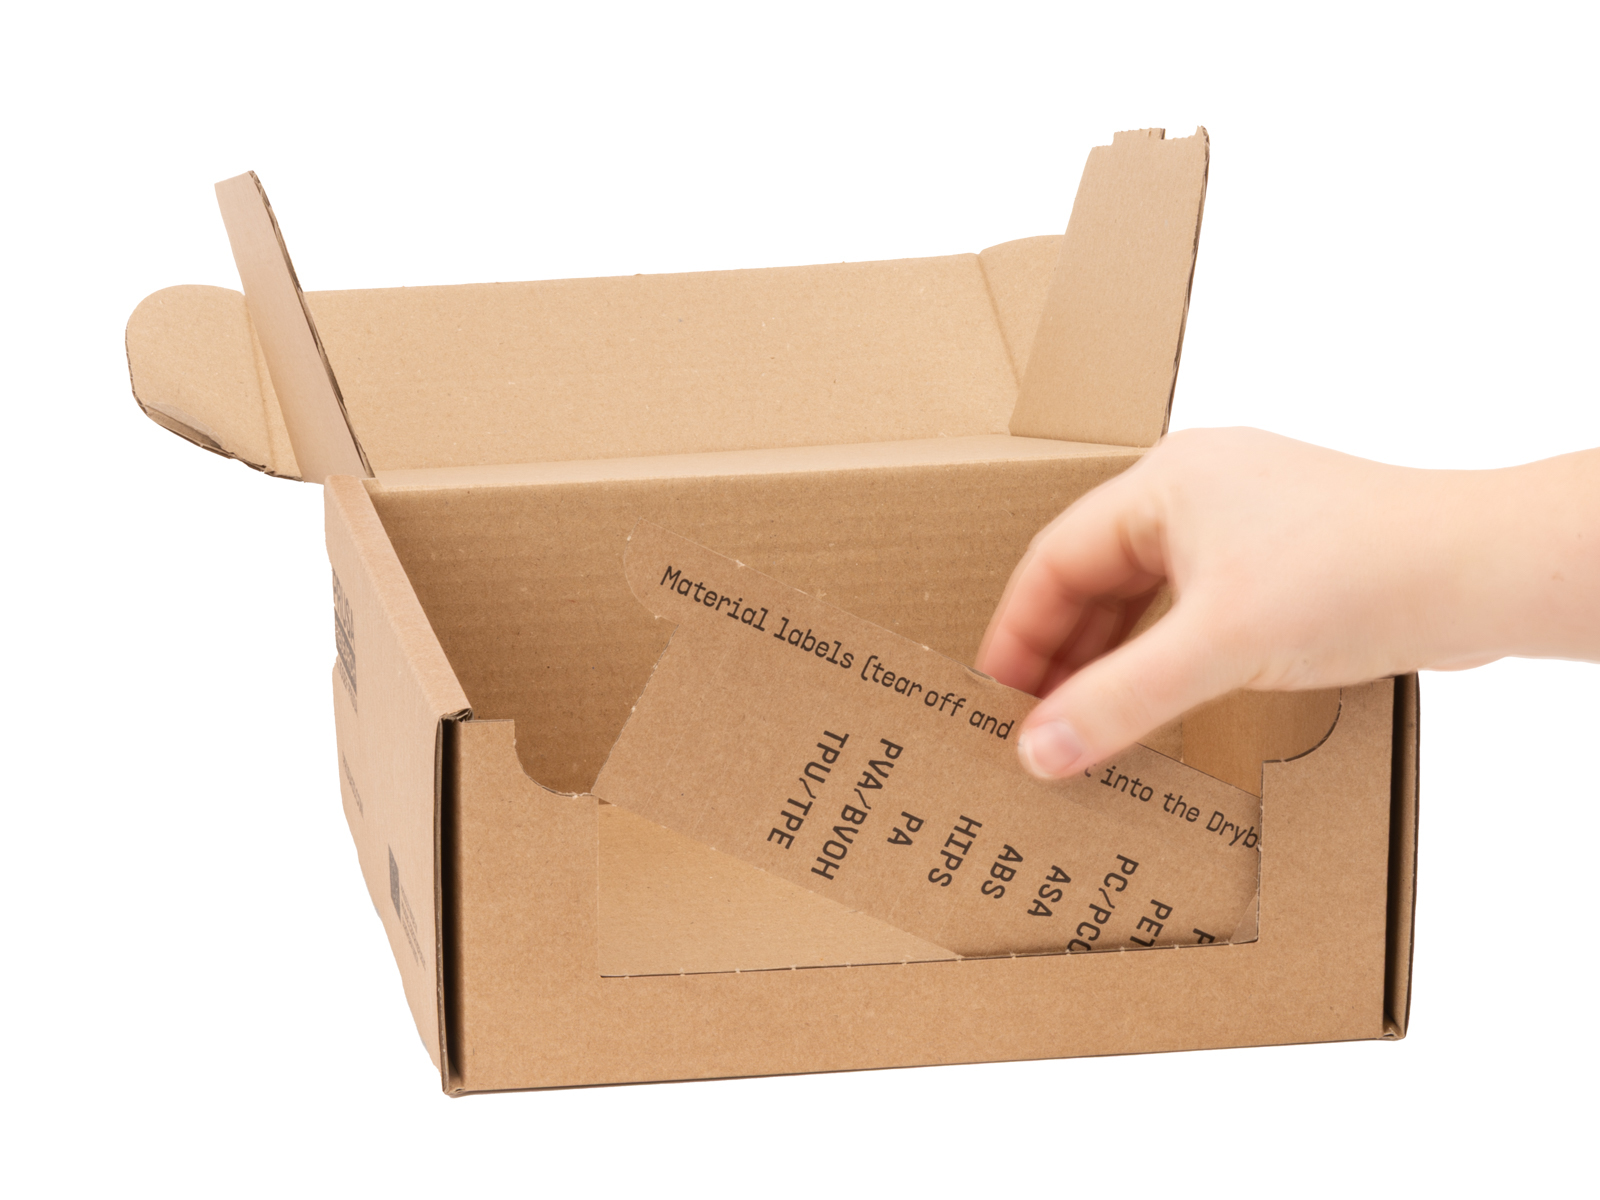
                  On the outer packaging, you will find a label sheet with the most commonly used filaments, along with a few blank labels that can be torn out.

                  Prepare the label you intend to use first. Any remaining labels can be stored for future use.
                  Prepare the hygrometer

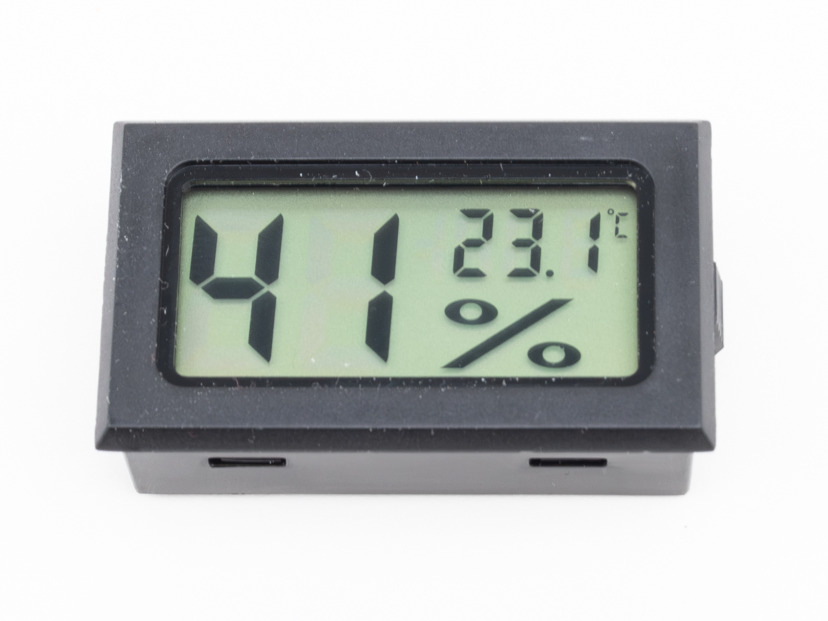
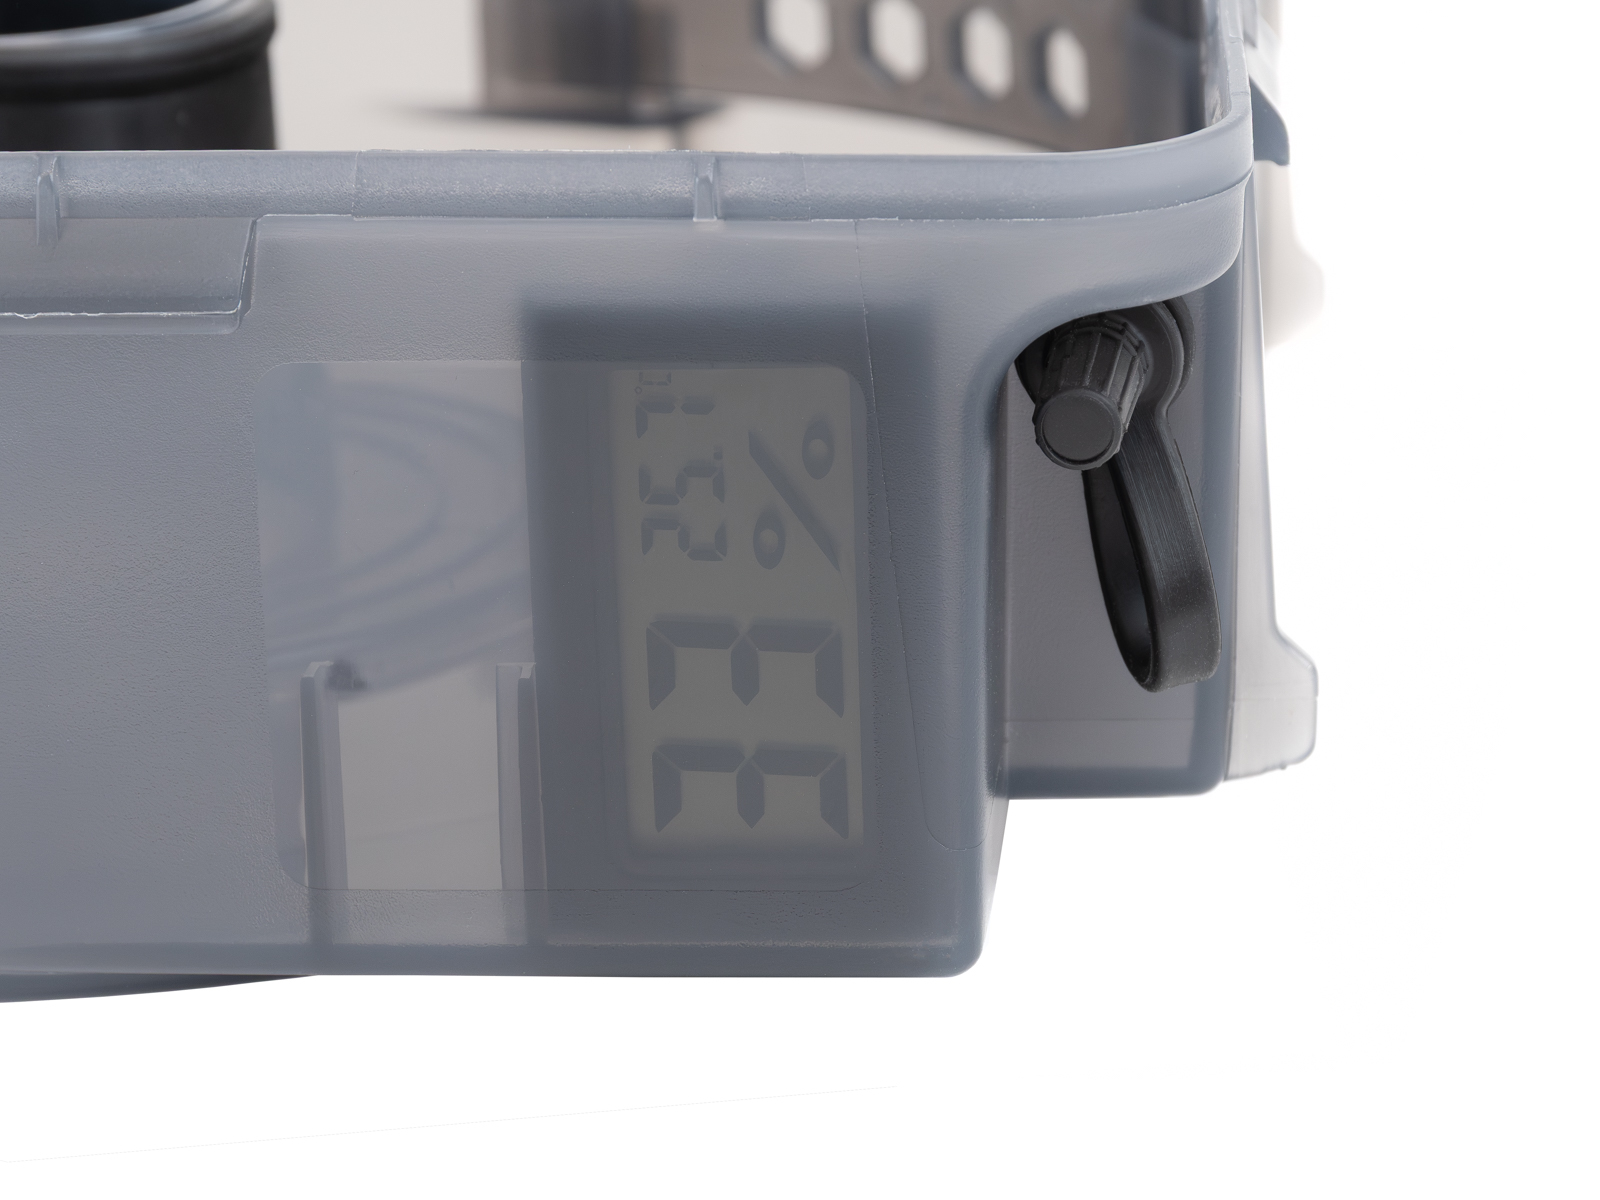
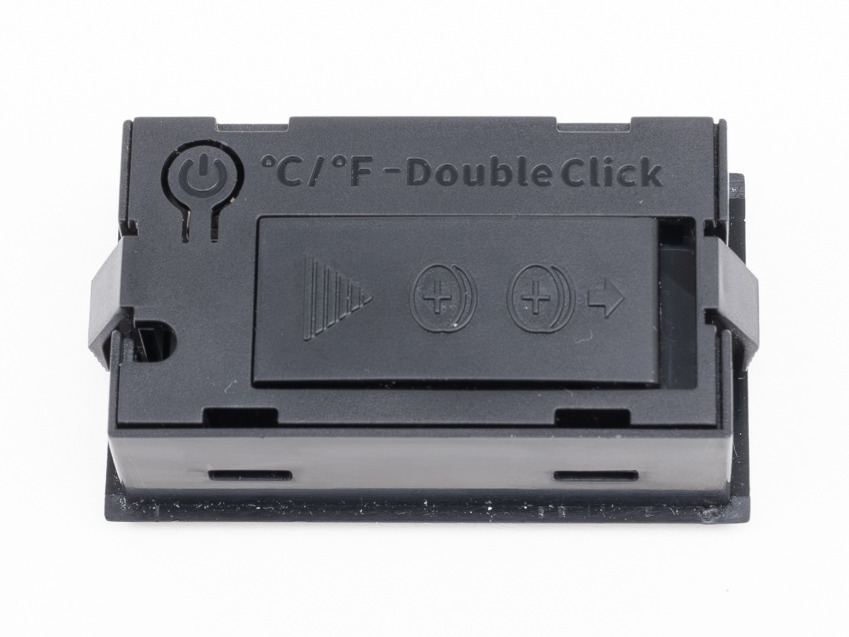
                  Remove the TPM40 hygrometer from its packaging.

                  • Pull out the battery tab (if present)
                  • Turn it on by holding the rear button until it powers up
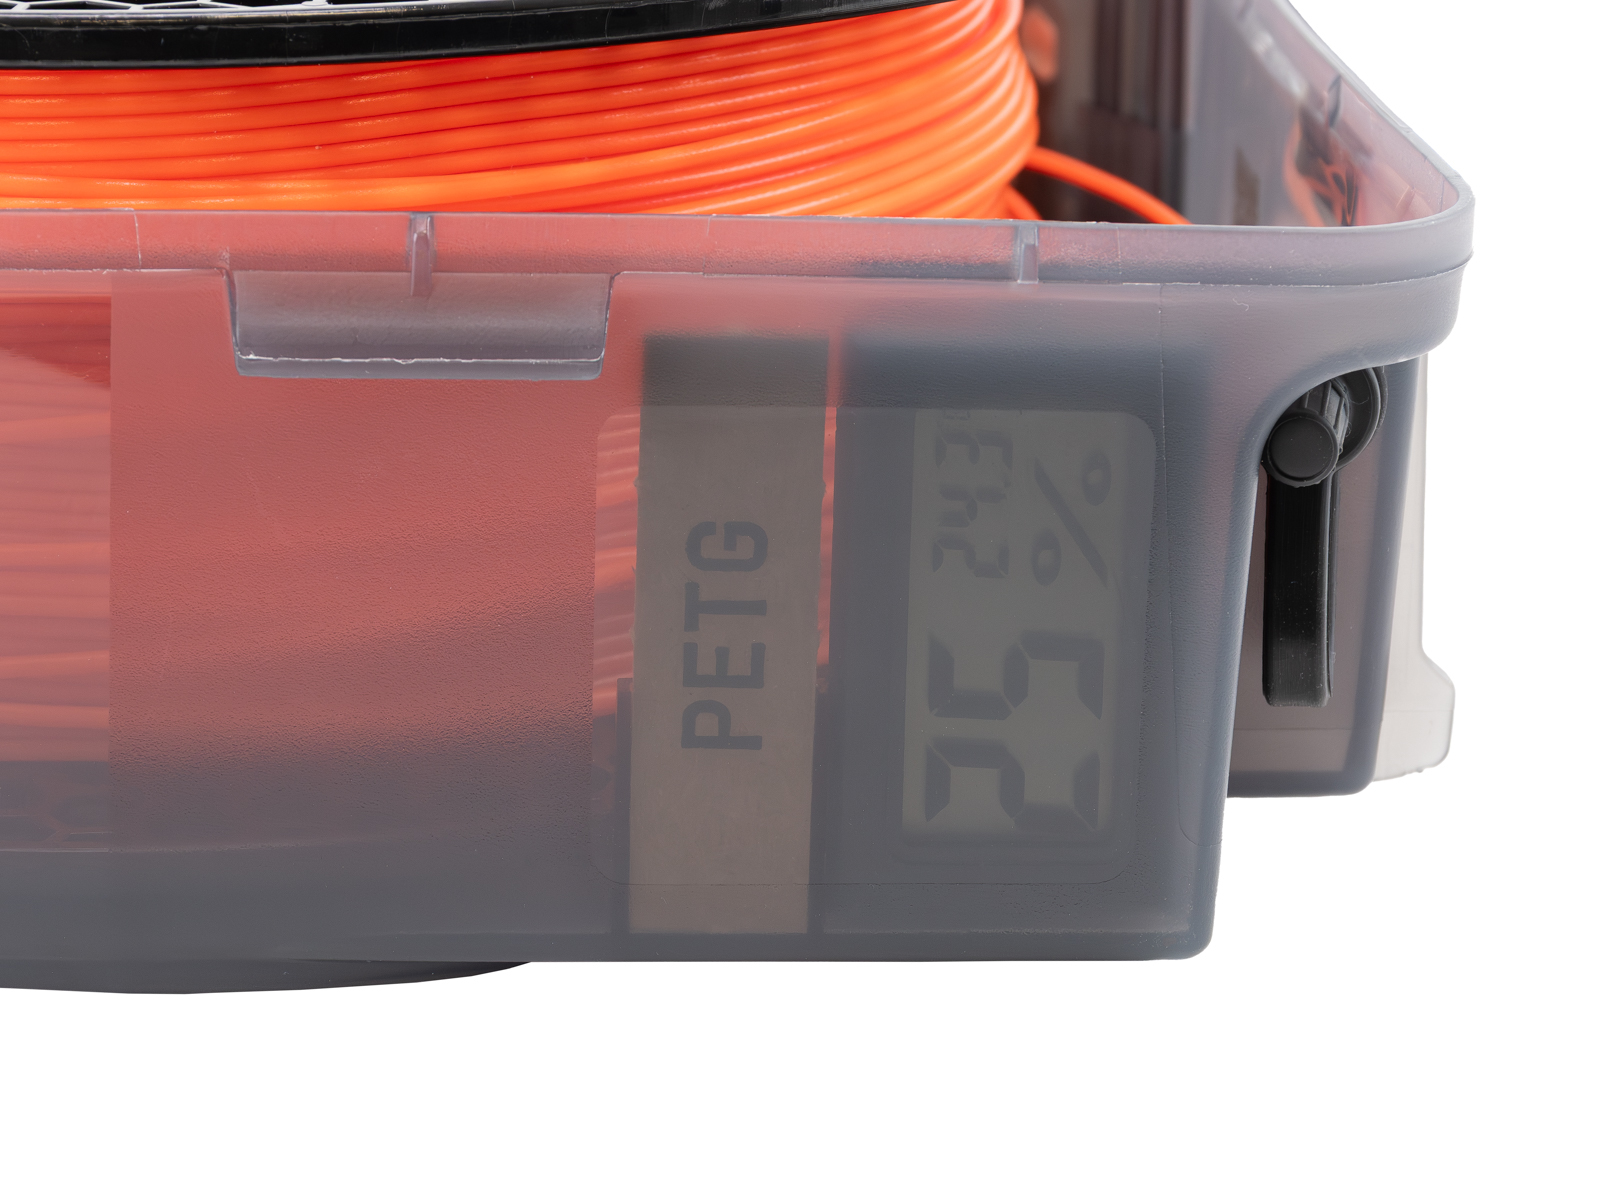
                  • Insert it into the dedicated slot inside the lid
                  • Make sure the display faces the transparent side of the box

                  You can switch between °C and °F using a double press of the button.
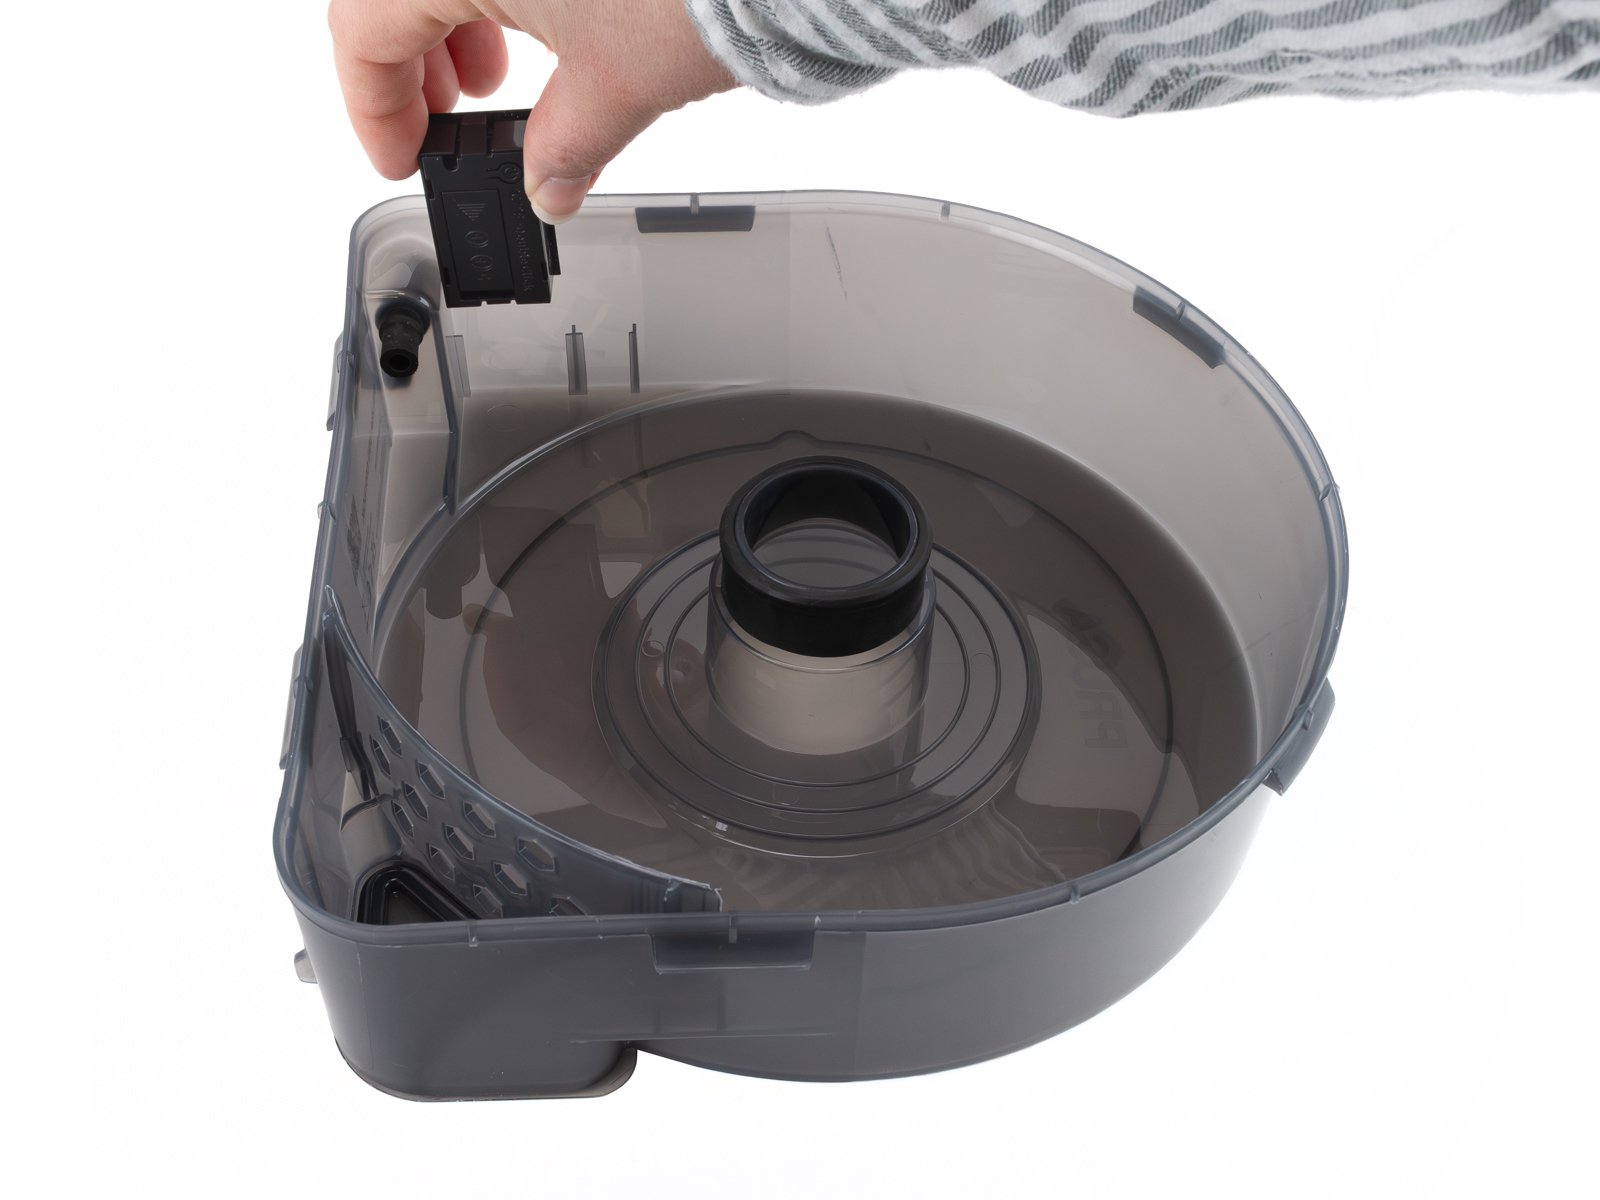
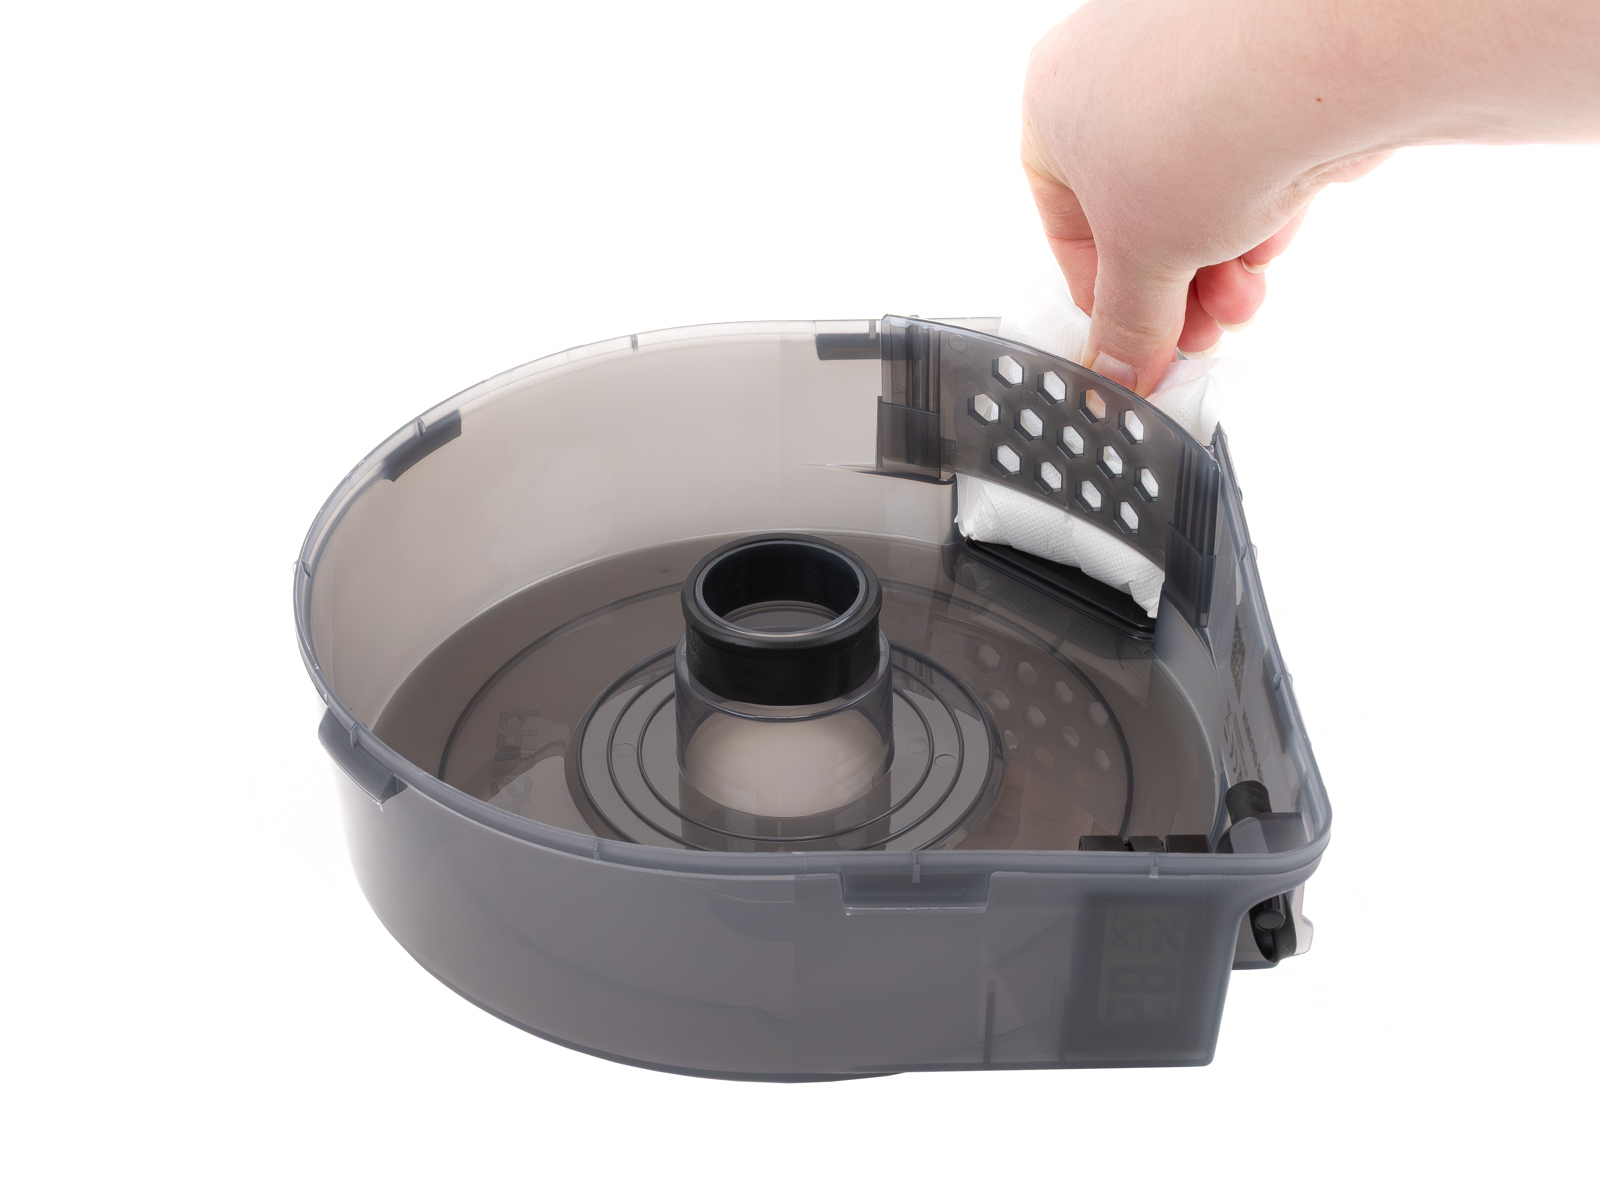
                  Add silica gel

                  Open the aluminium packaging of the silica gel.
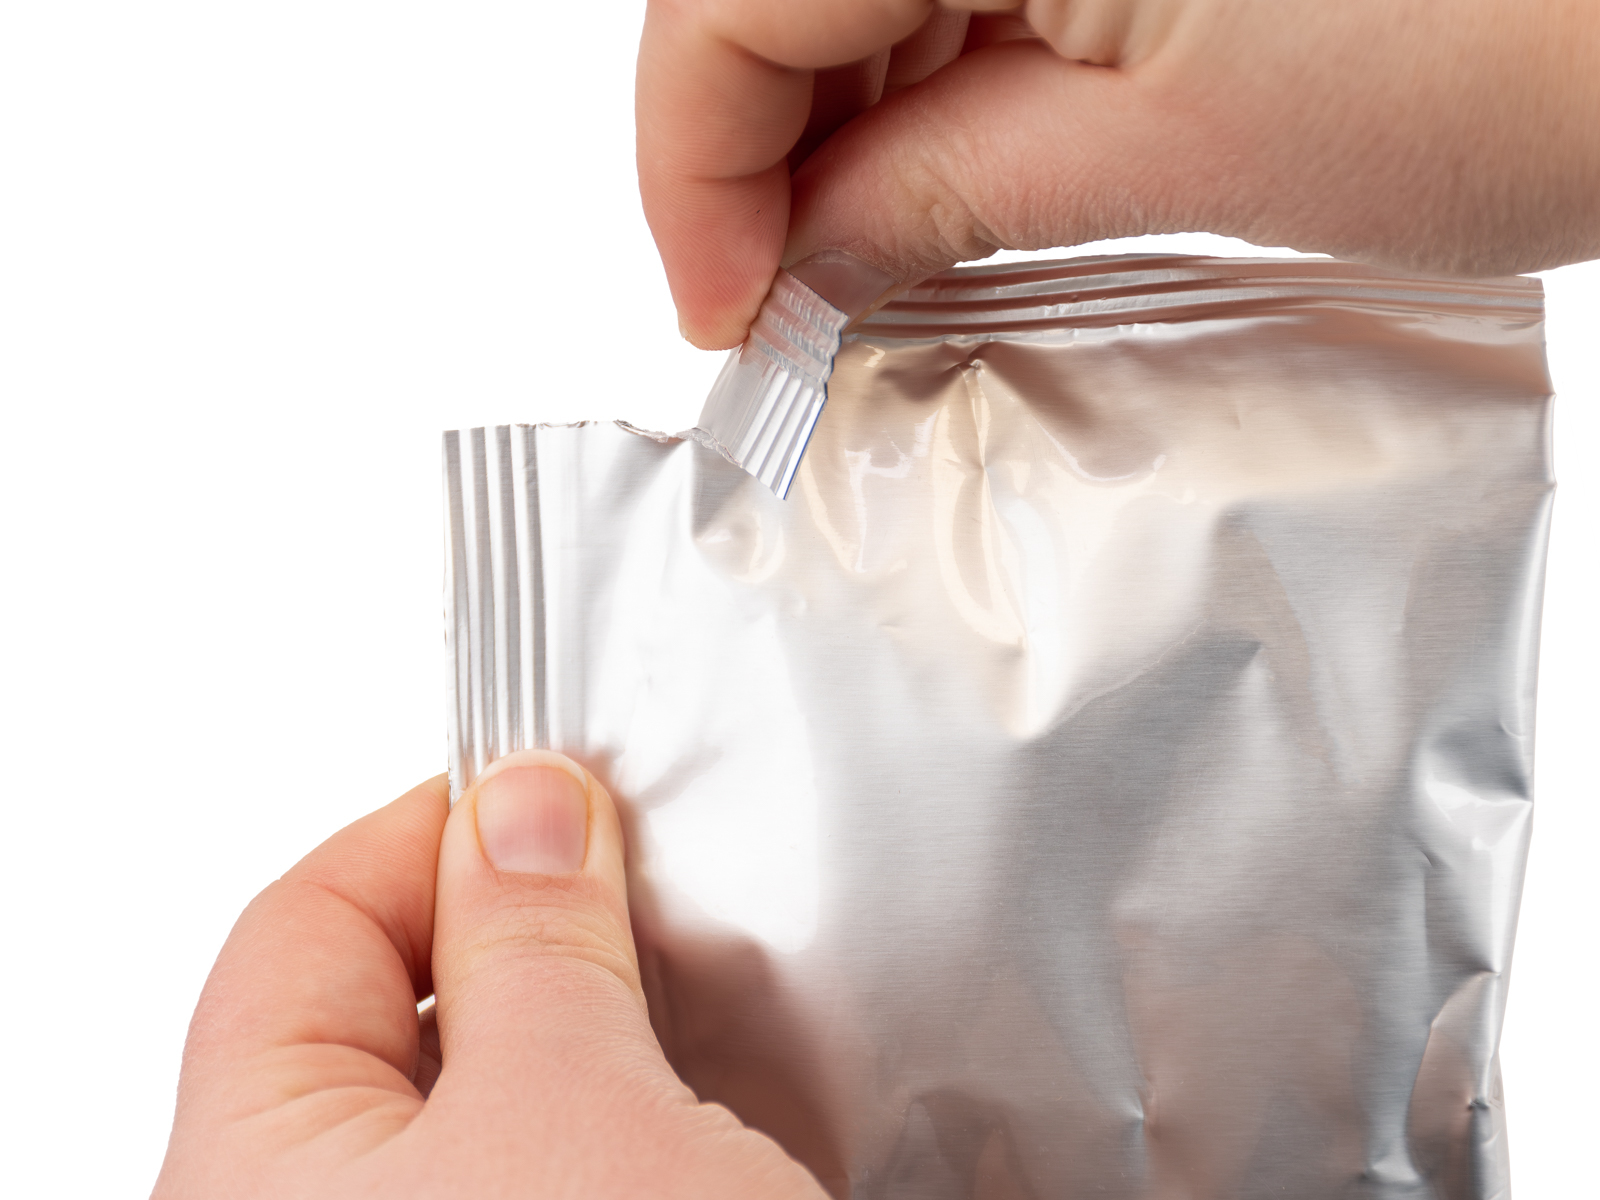
                  Do not cut the packaging with scissors if not required. Avoid damaging the contents.
                  Place the desiccant behind the plastic grid in the corner of the Drybox.

                  Insert filament spool

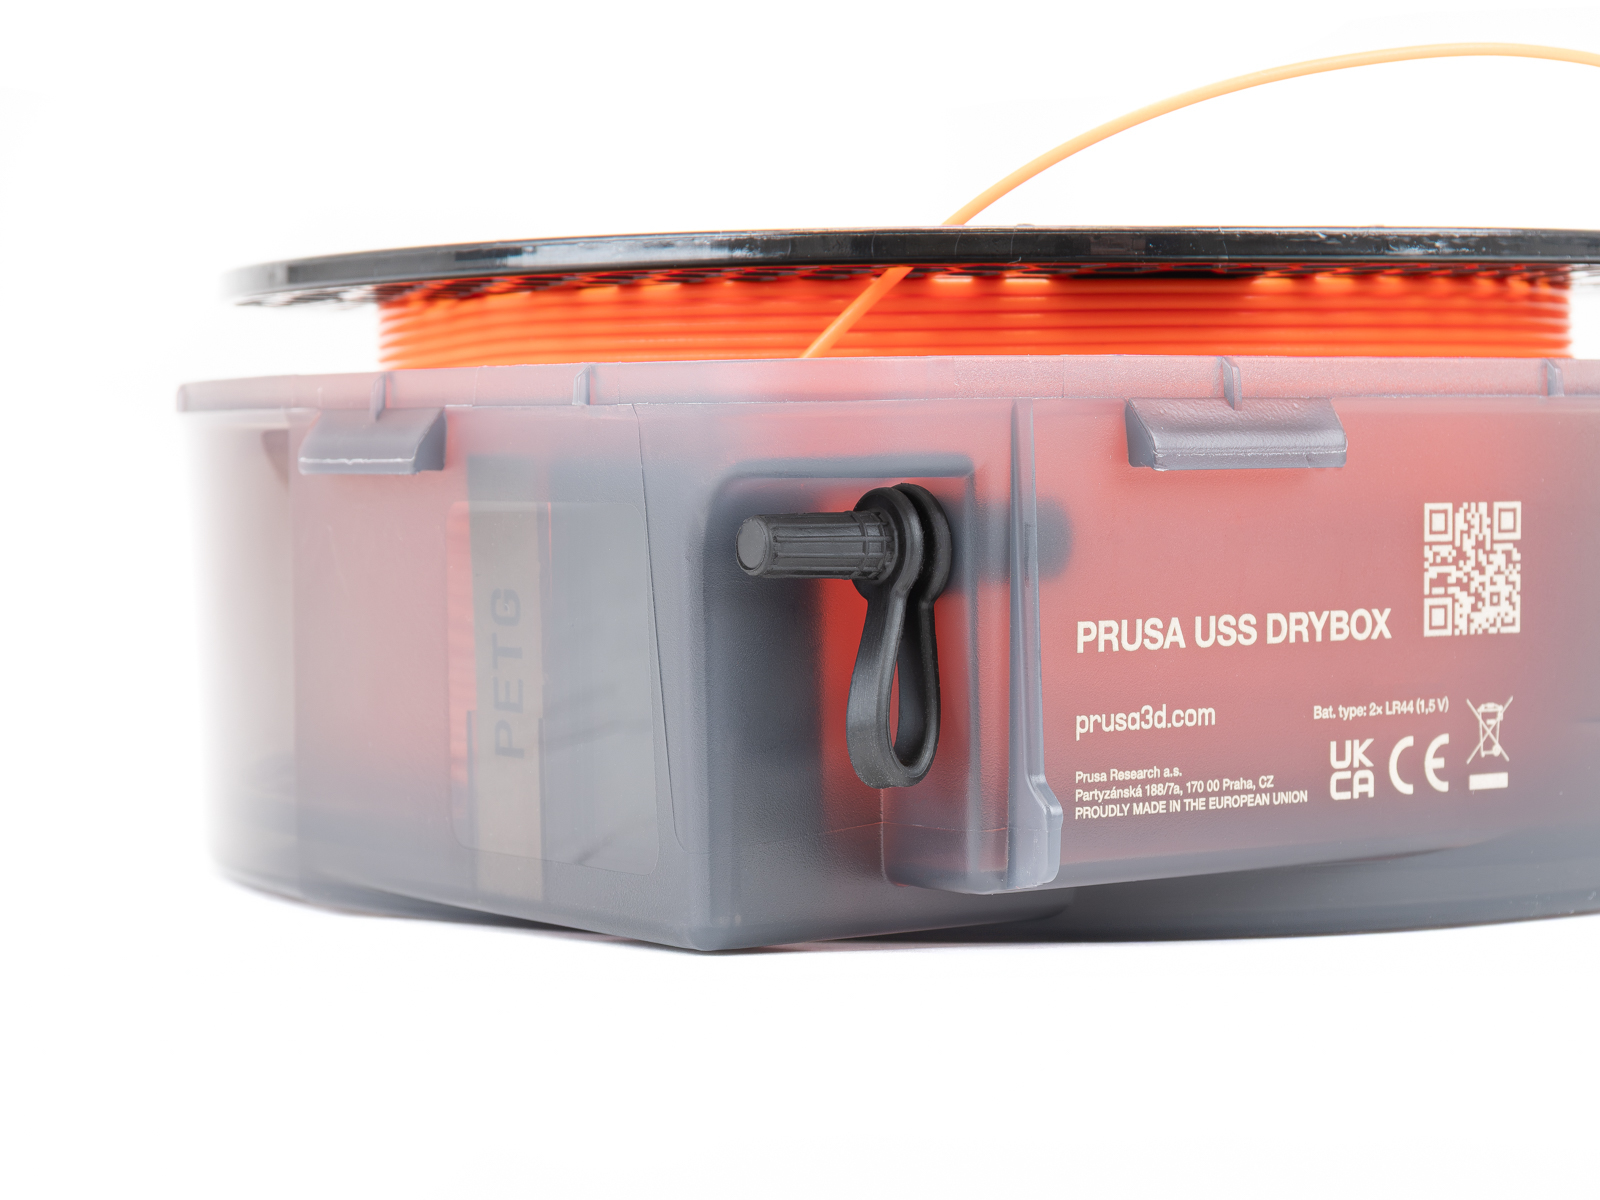
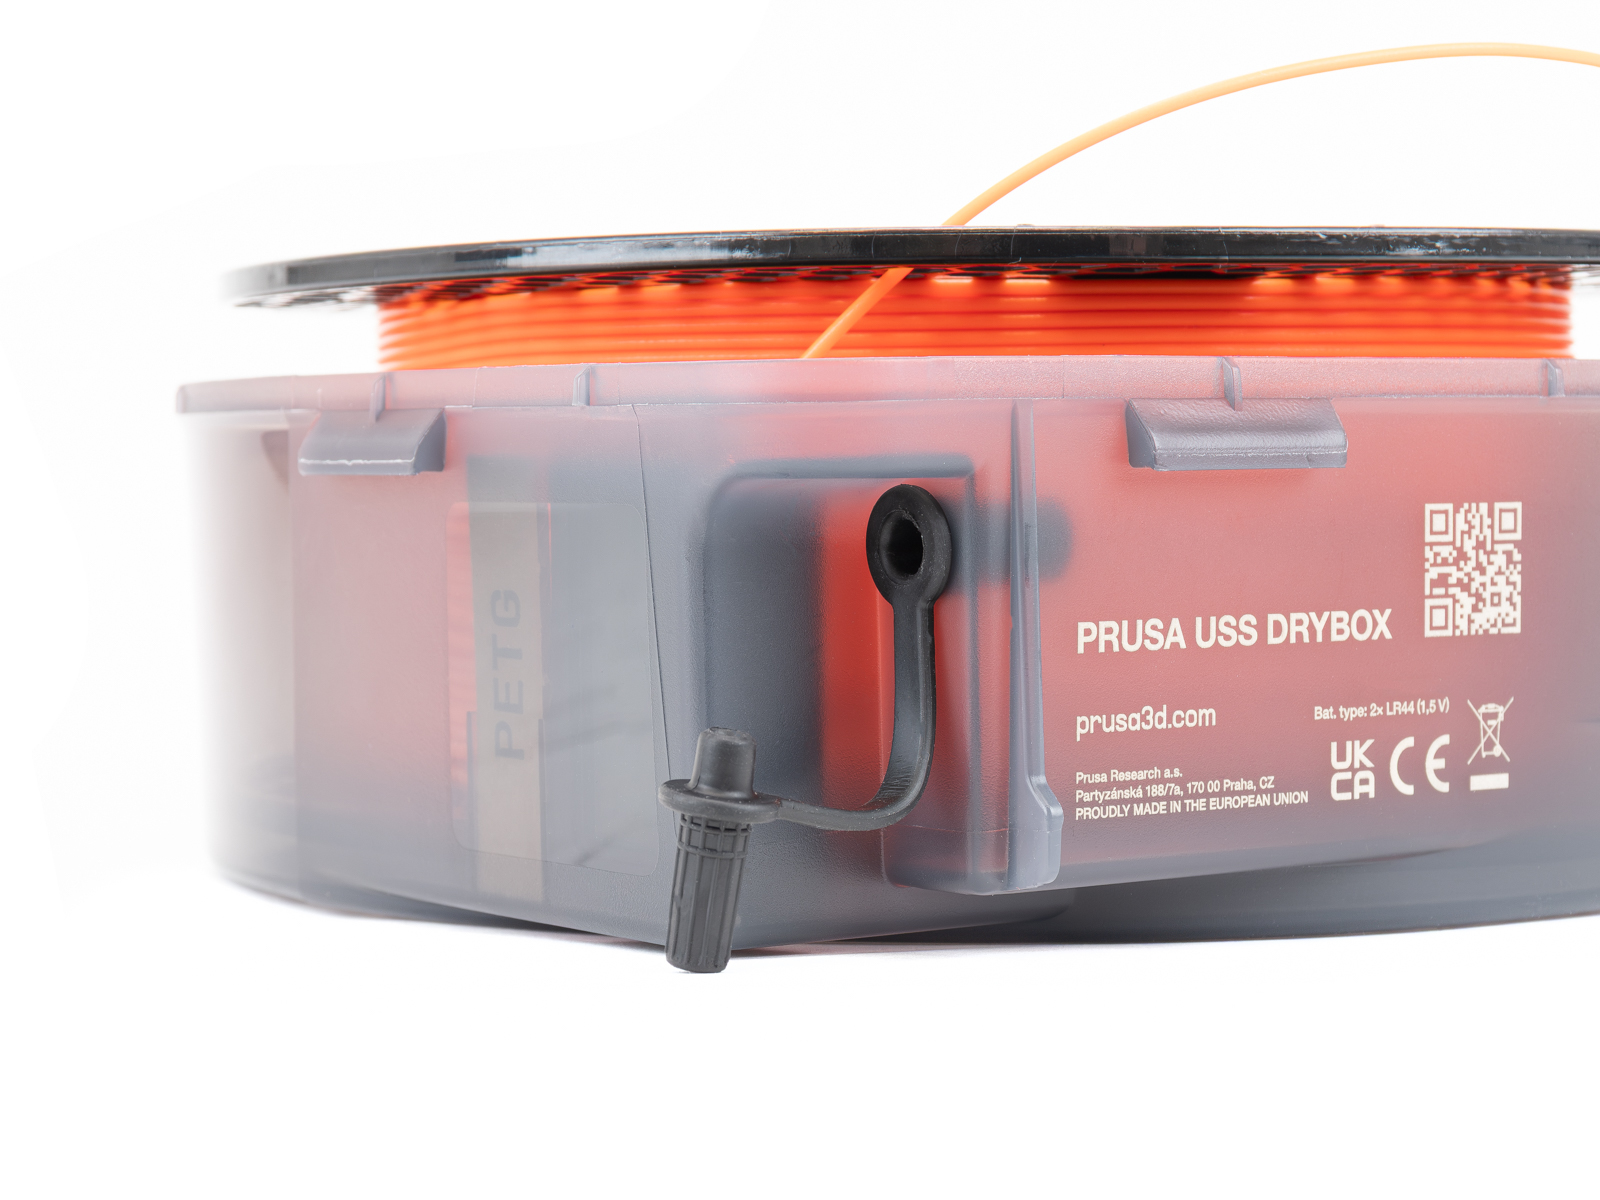
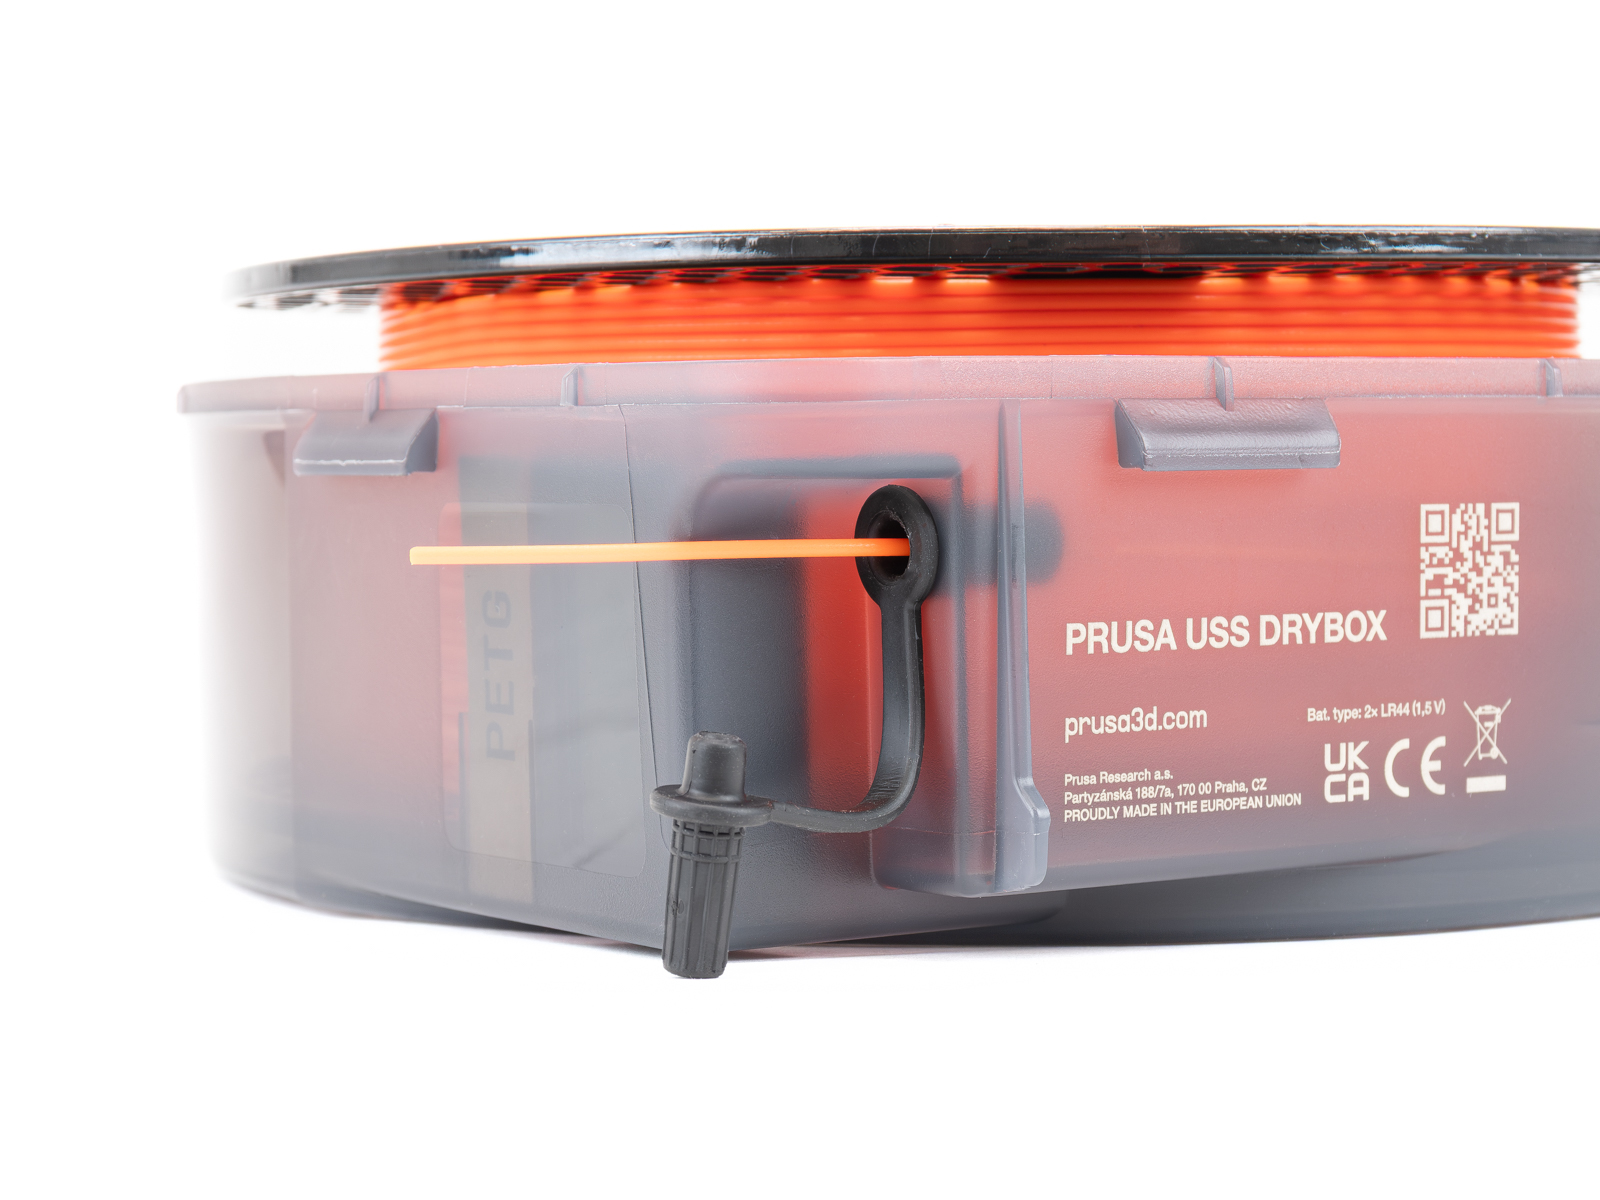
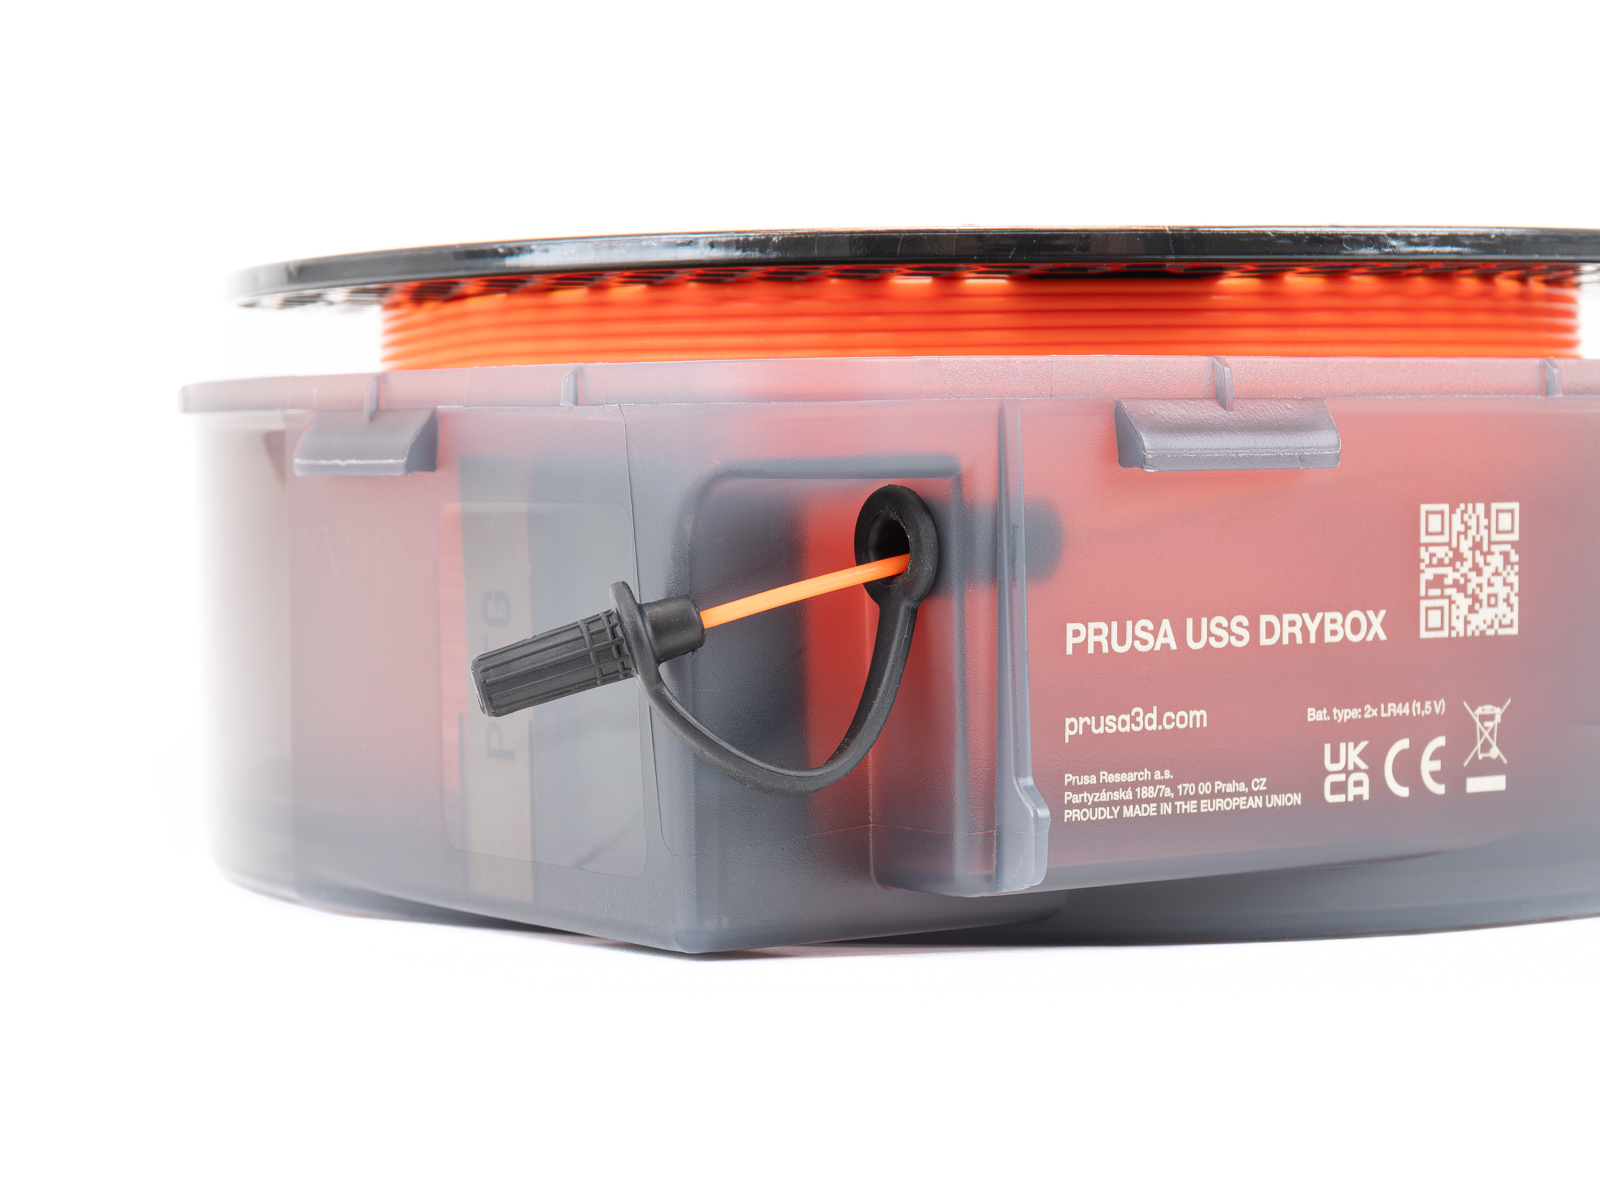
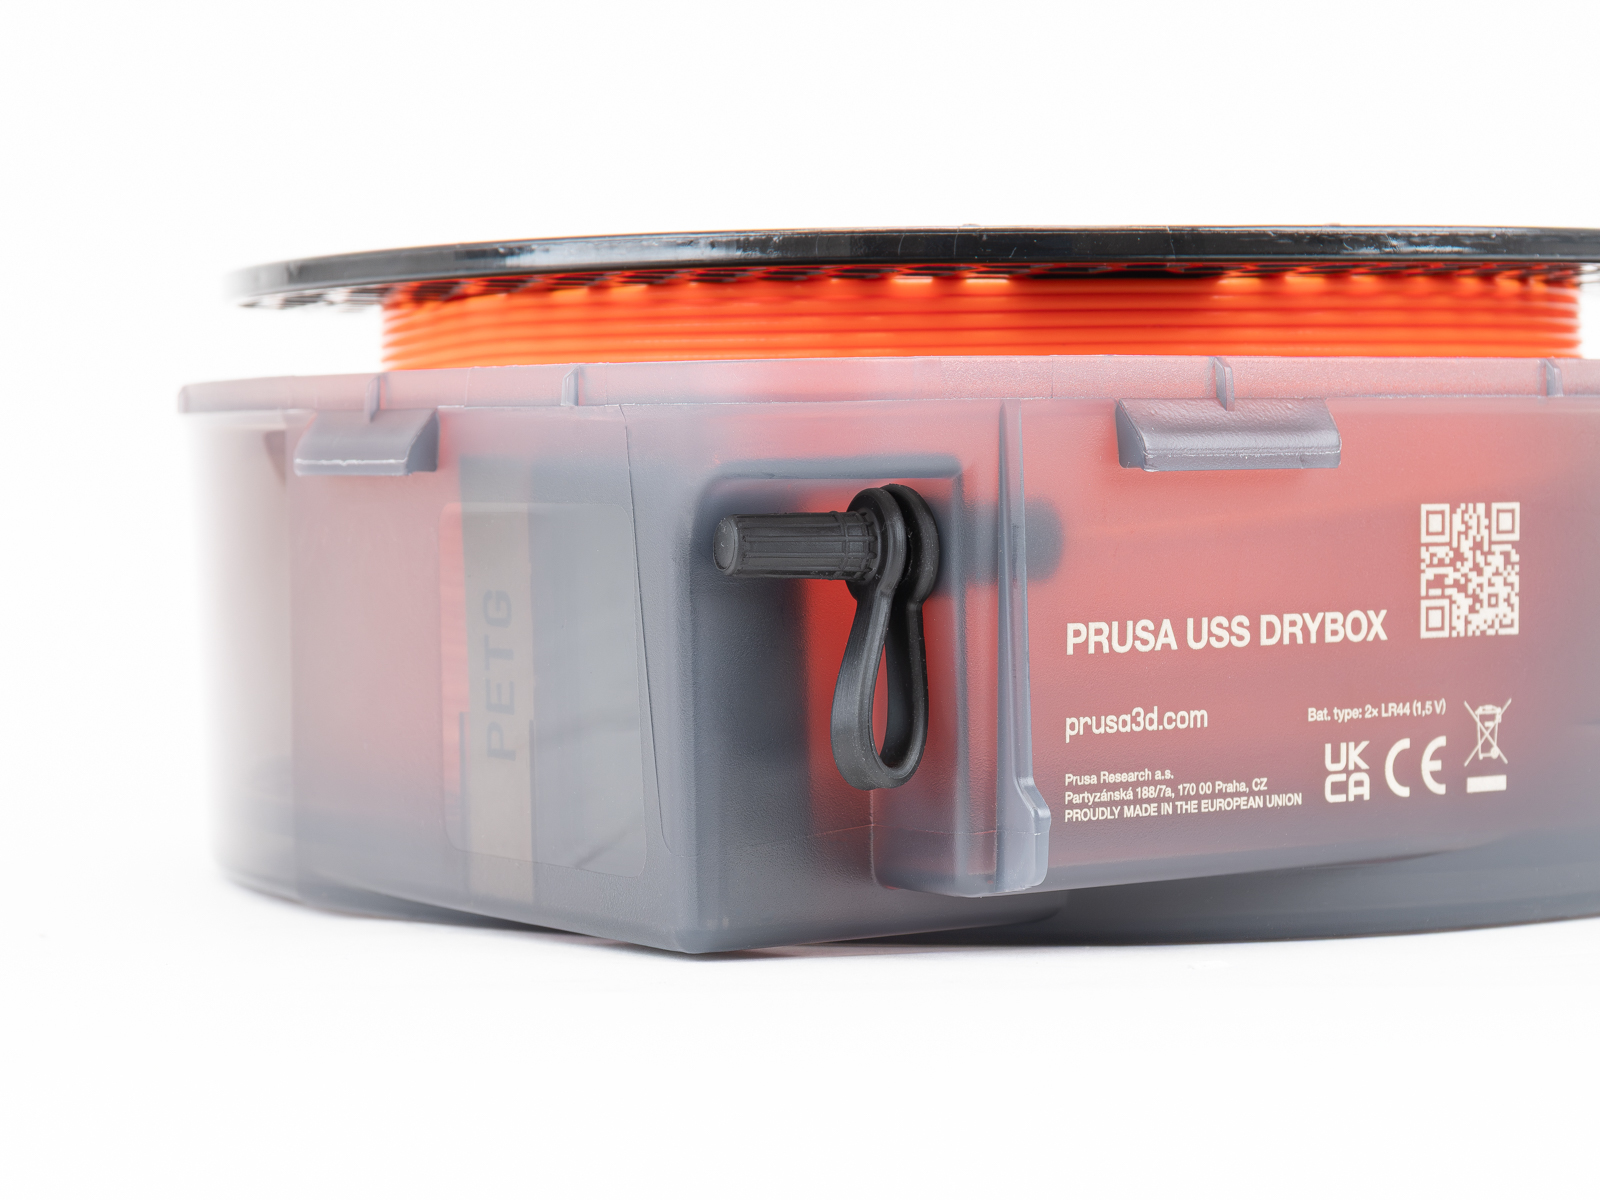
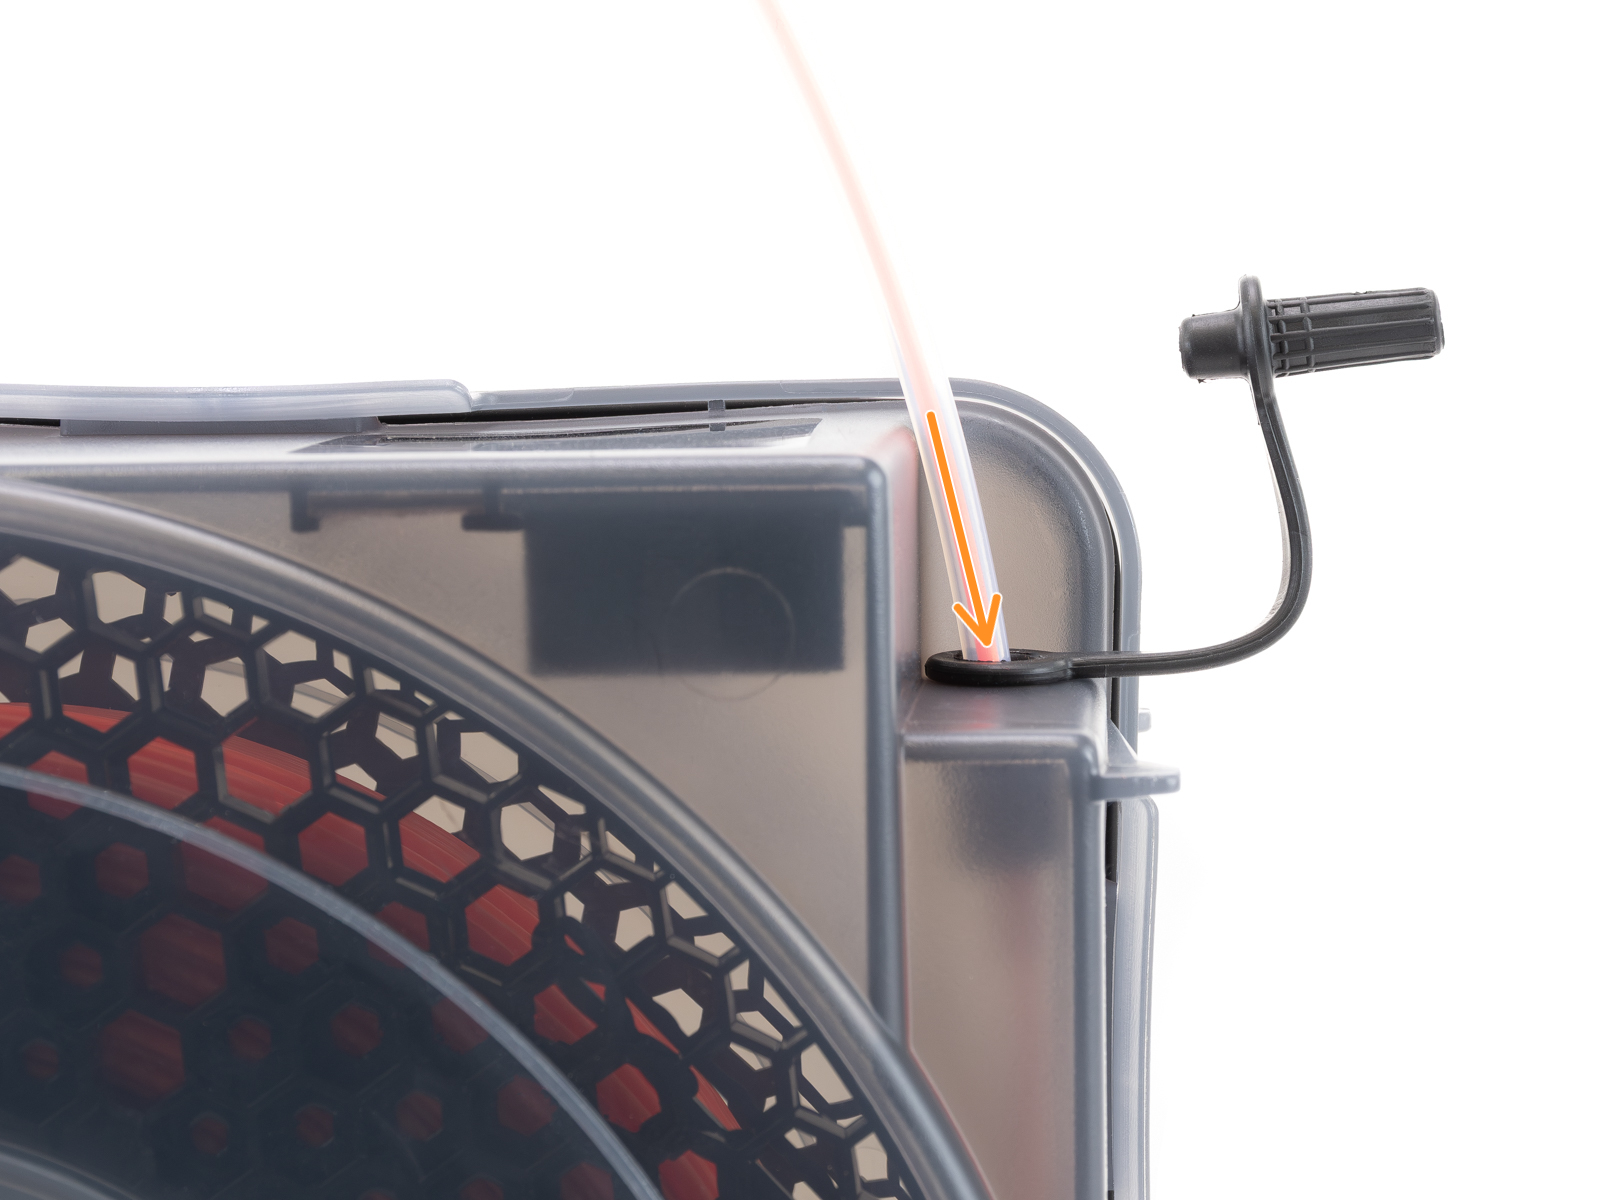
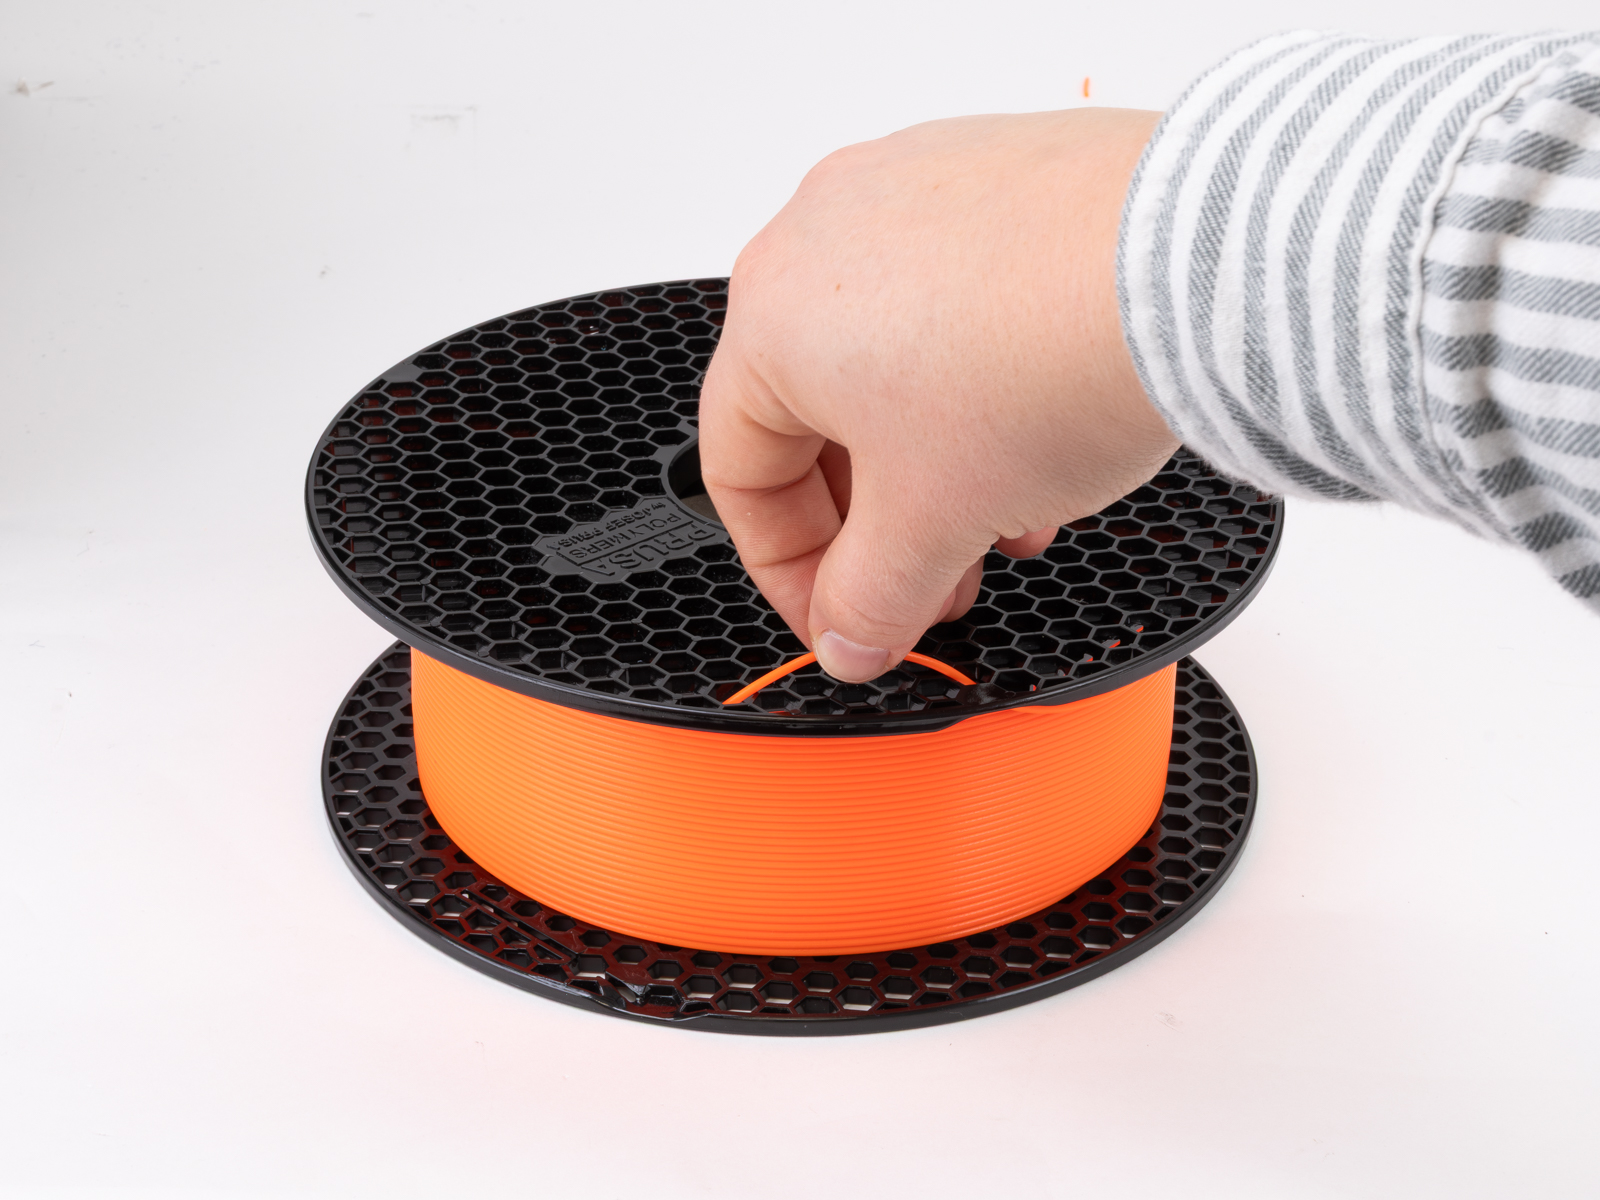
                  Place the filament spool inside the Drybox with the filament end oriented toward the filament outlet (grommet).

                  Secure the loose end of the filament so it does not unwind.

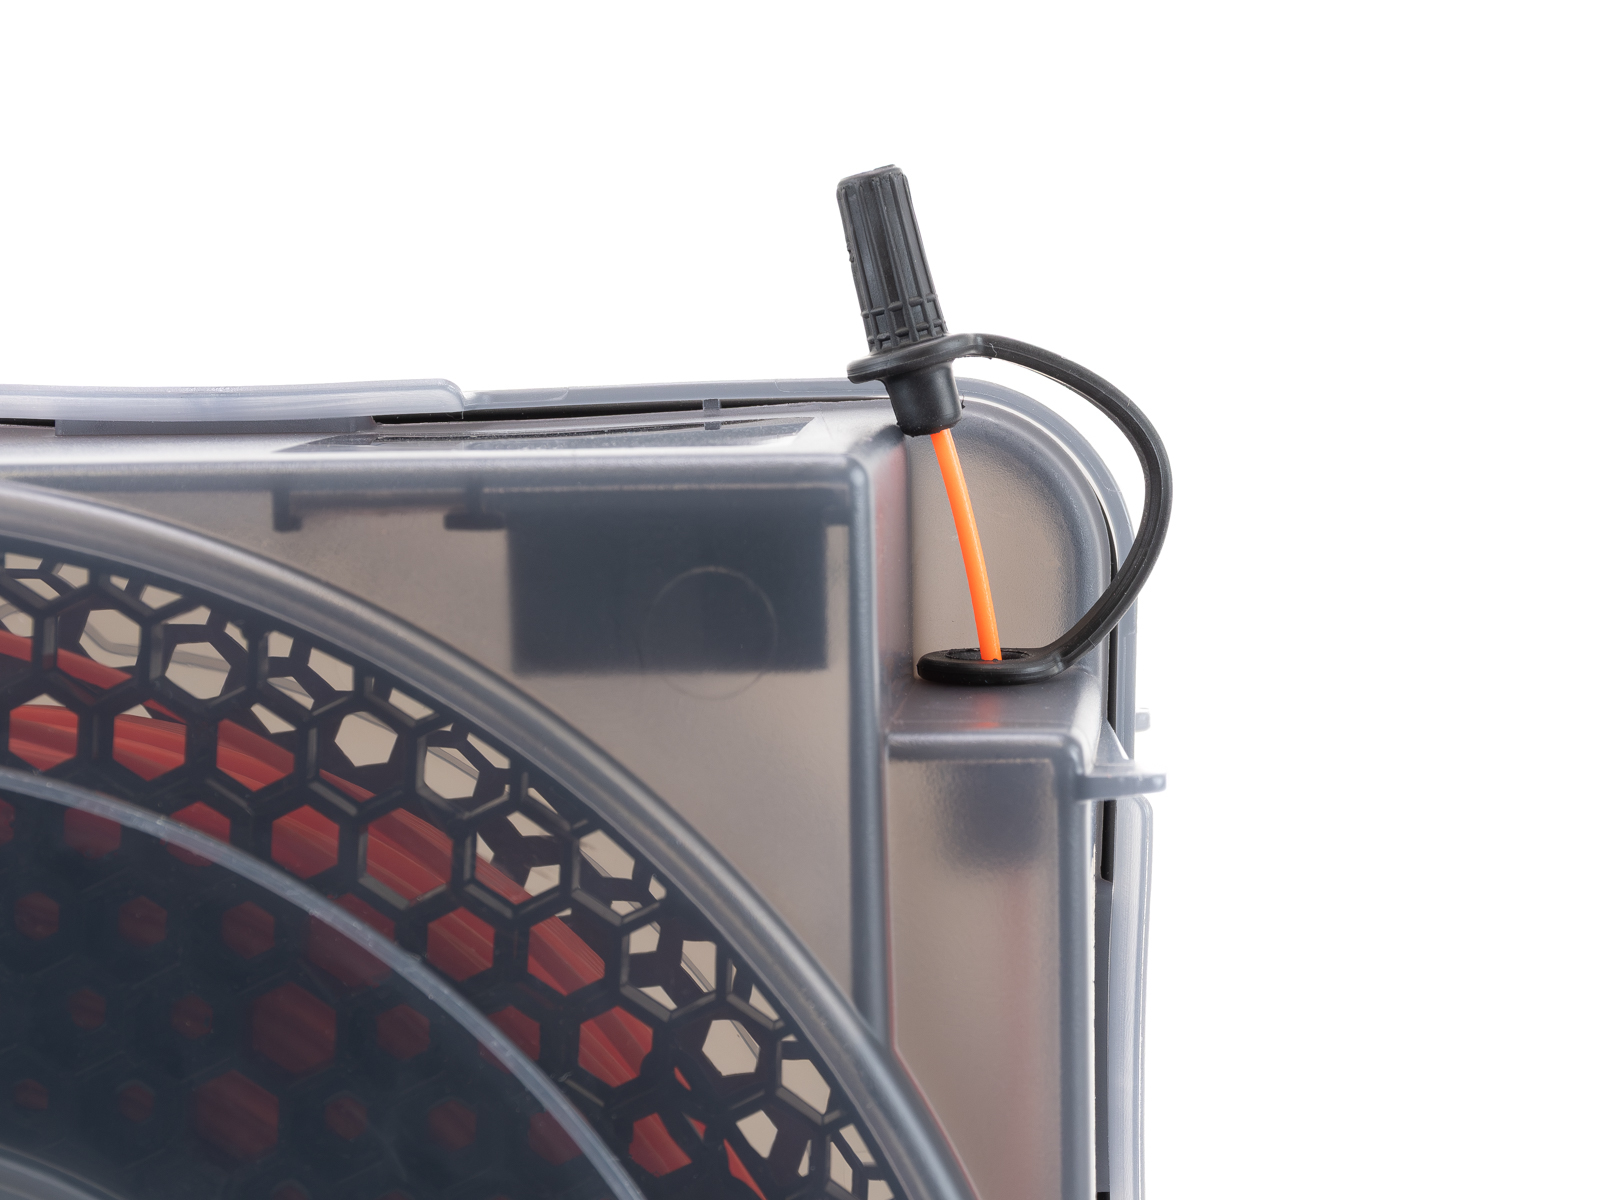
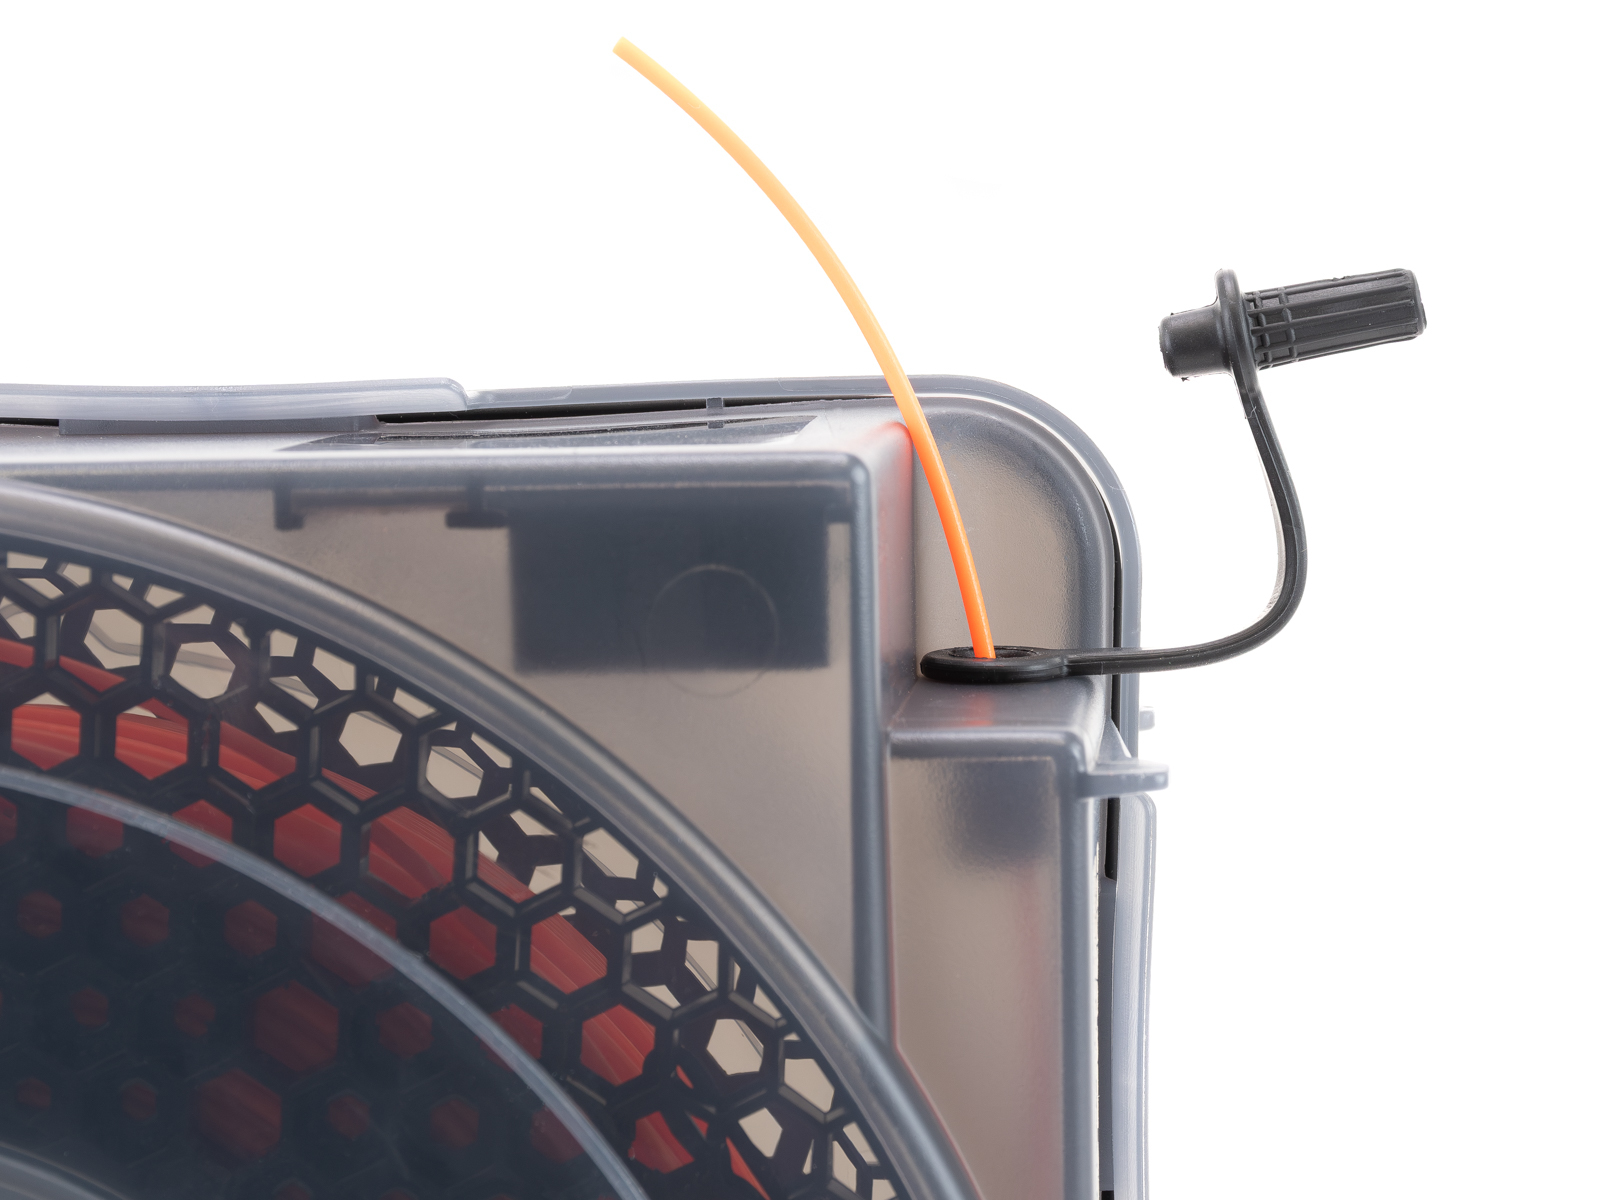
                  Use the grommet system:

                  • Open the grommet lid
                  • Insert filament through the opening
                  • Lock the filament end into the grommet cover
                  • Close the grommet to minimize air exposure

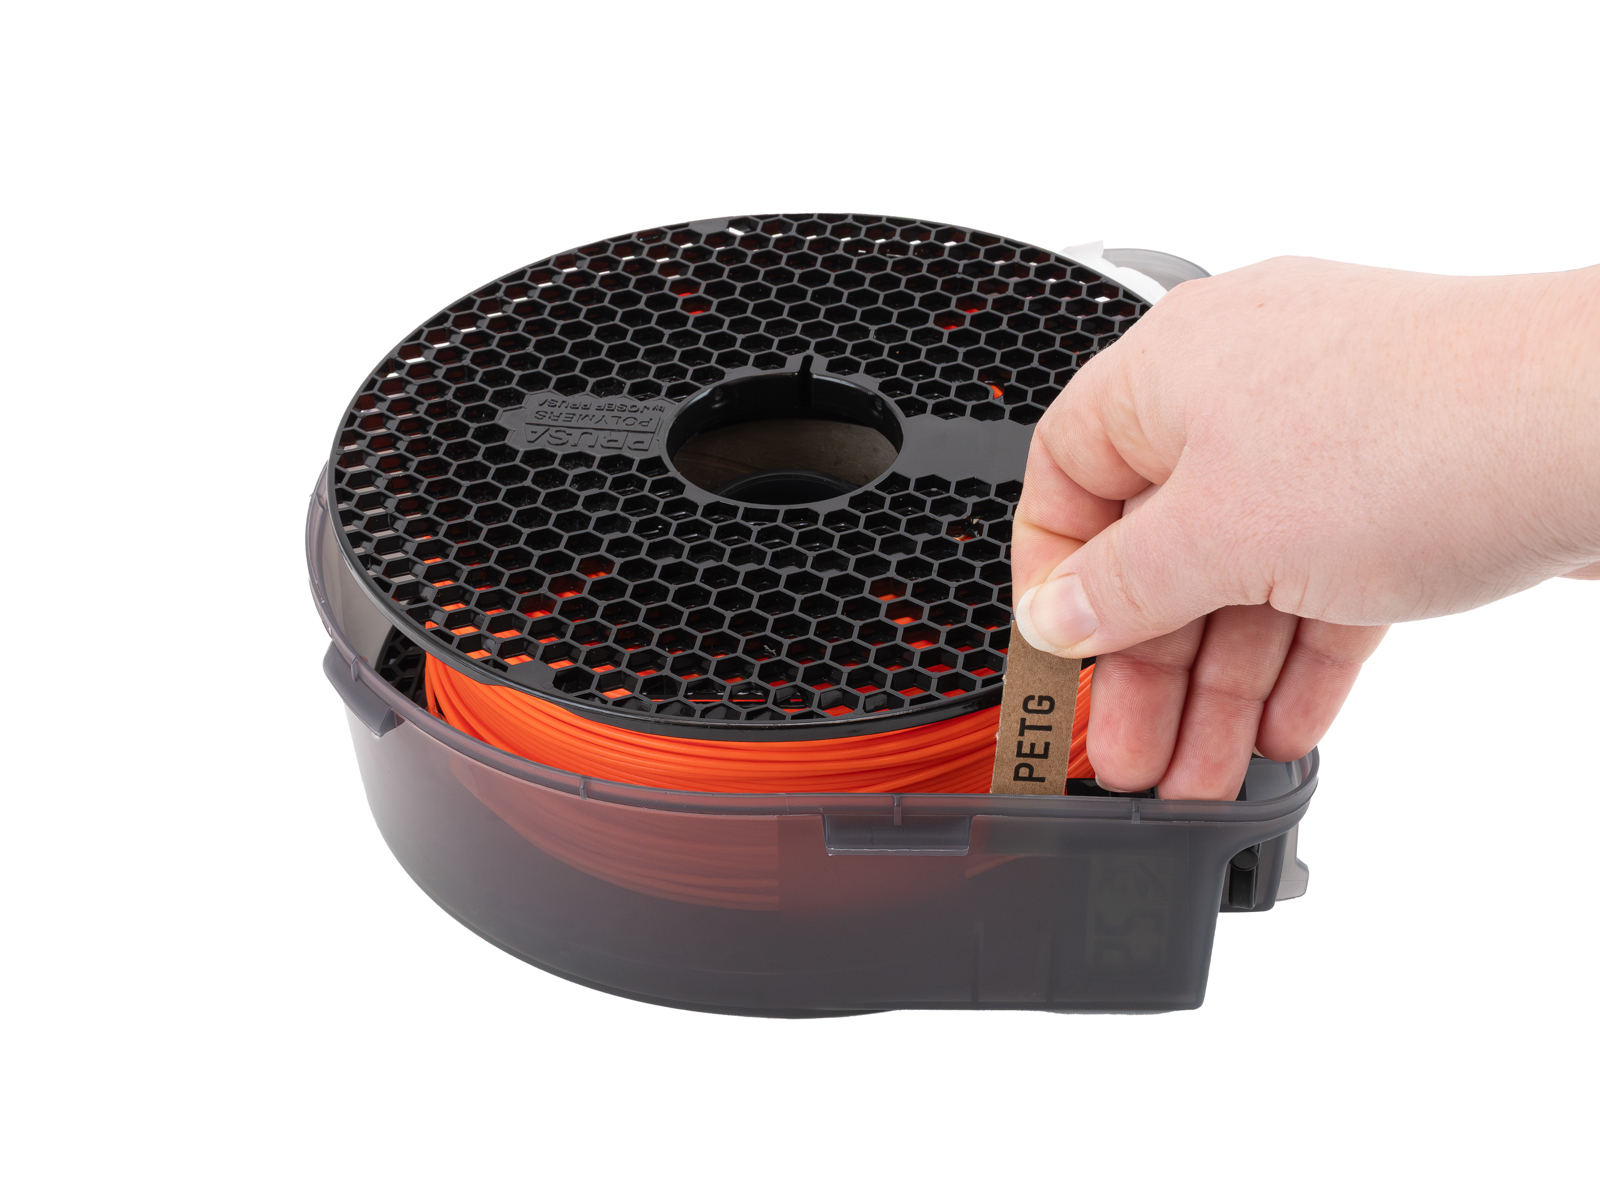
                  Before closing the Drybox, insert the filament label if you are using one.
                  Close the Drybox

                  Close the lid and secure all latches.

                  Make sure:
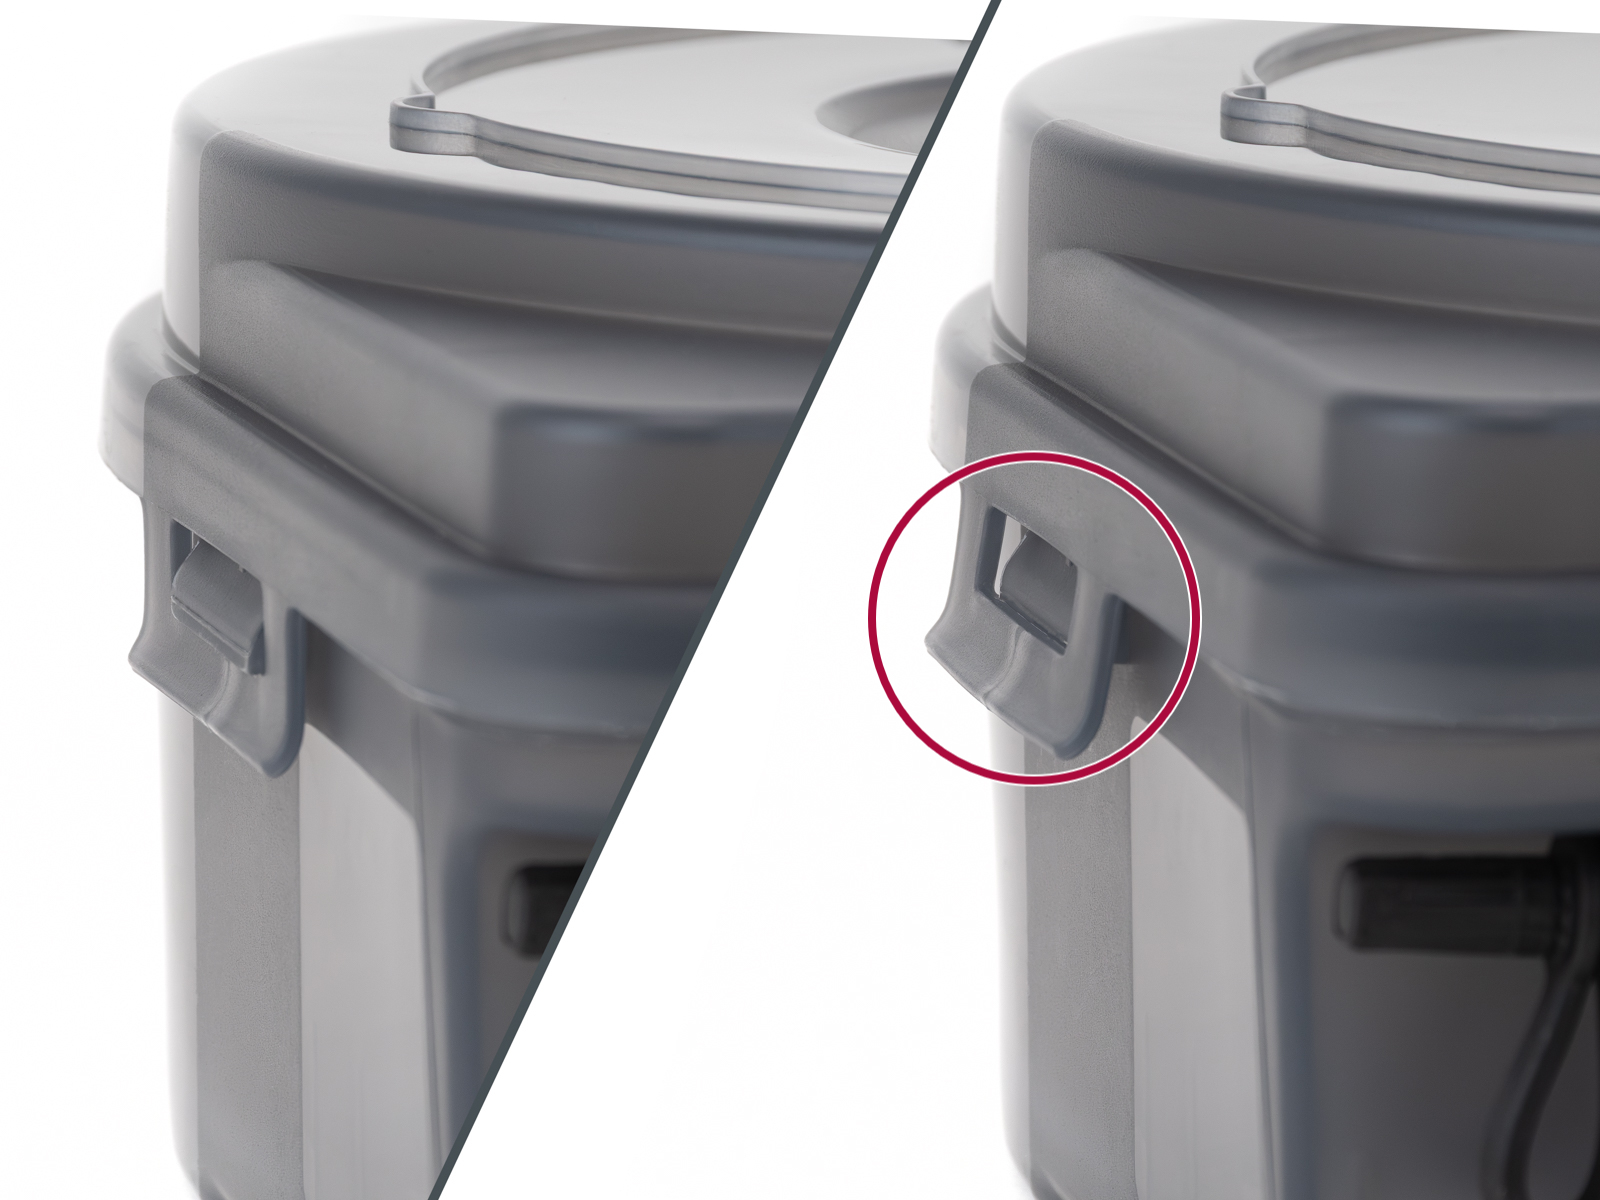
                  • The gasket seals evenly around the entire perimeter
                  • All clips are fully engaged
                  • The box is tightly closed
                  Improper sealing will increase internal humidity.

                  Filament guiding

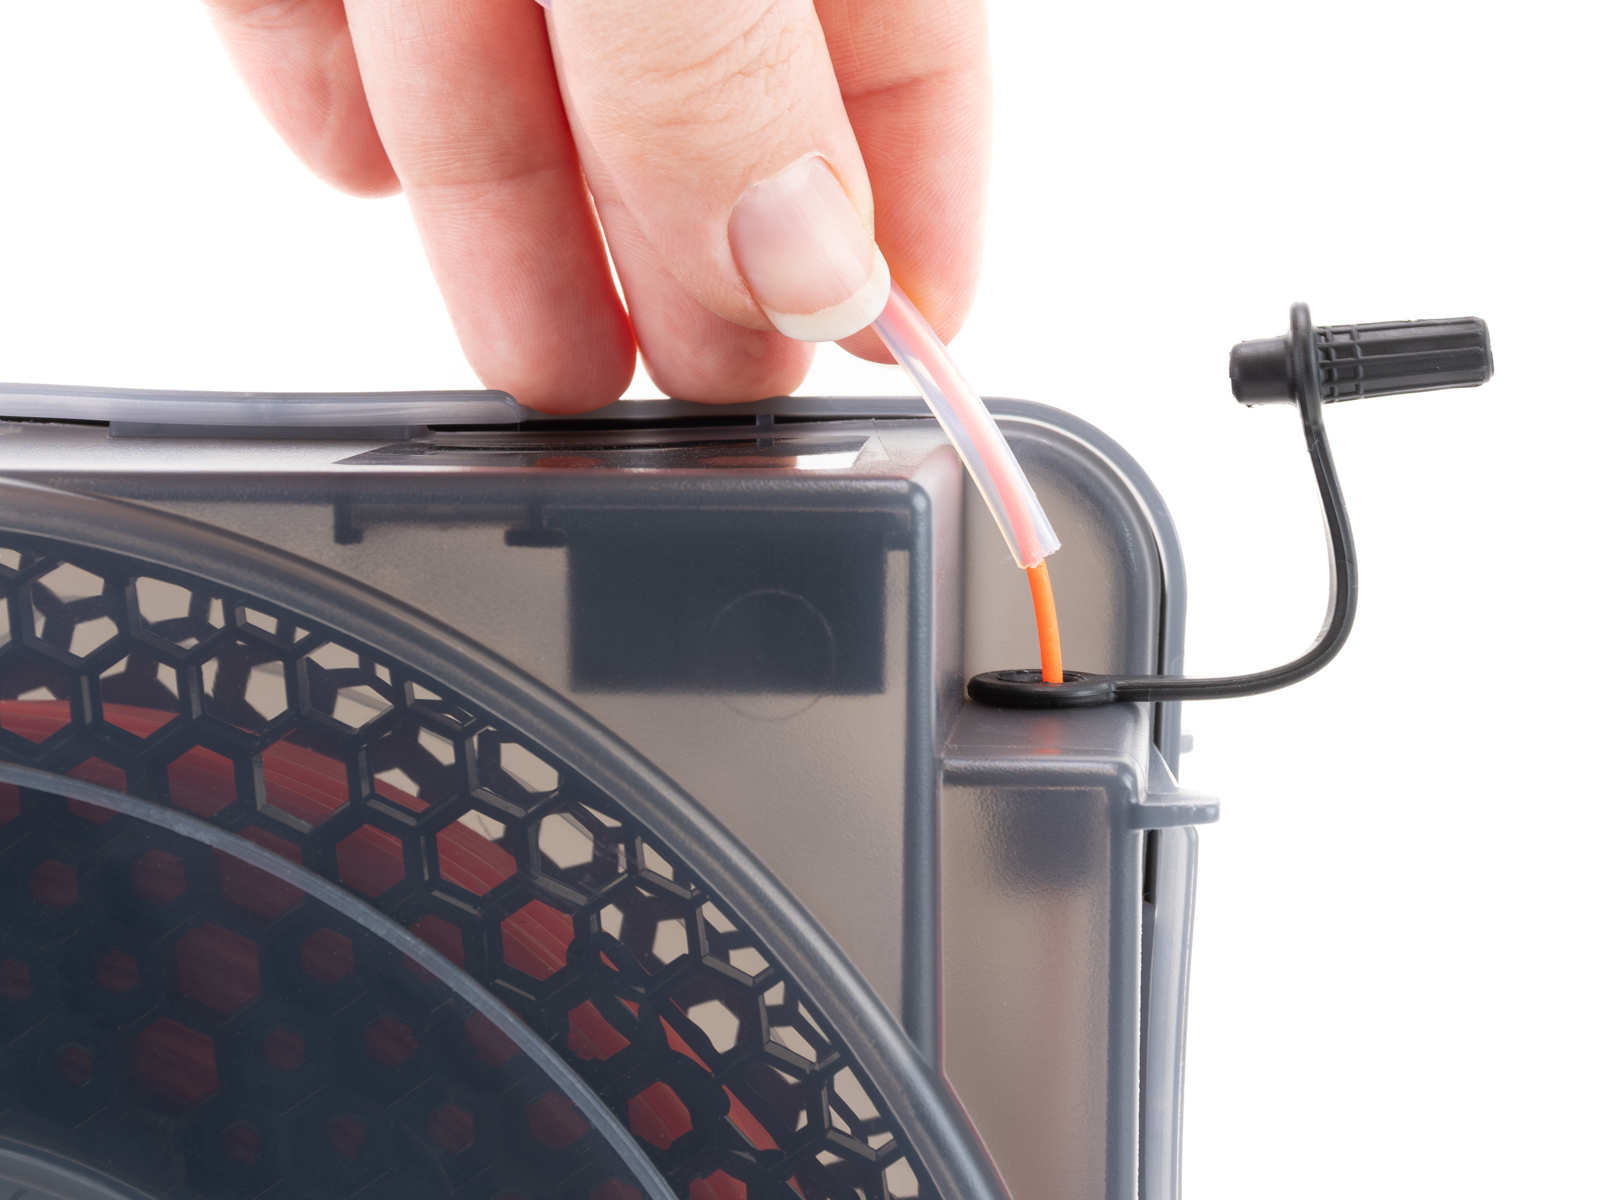
                  Open the grommet again.

                  Take the filament end and guide it through the PTFE tube.

                  Insert the PTFE tube into the grommet opening.
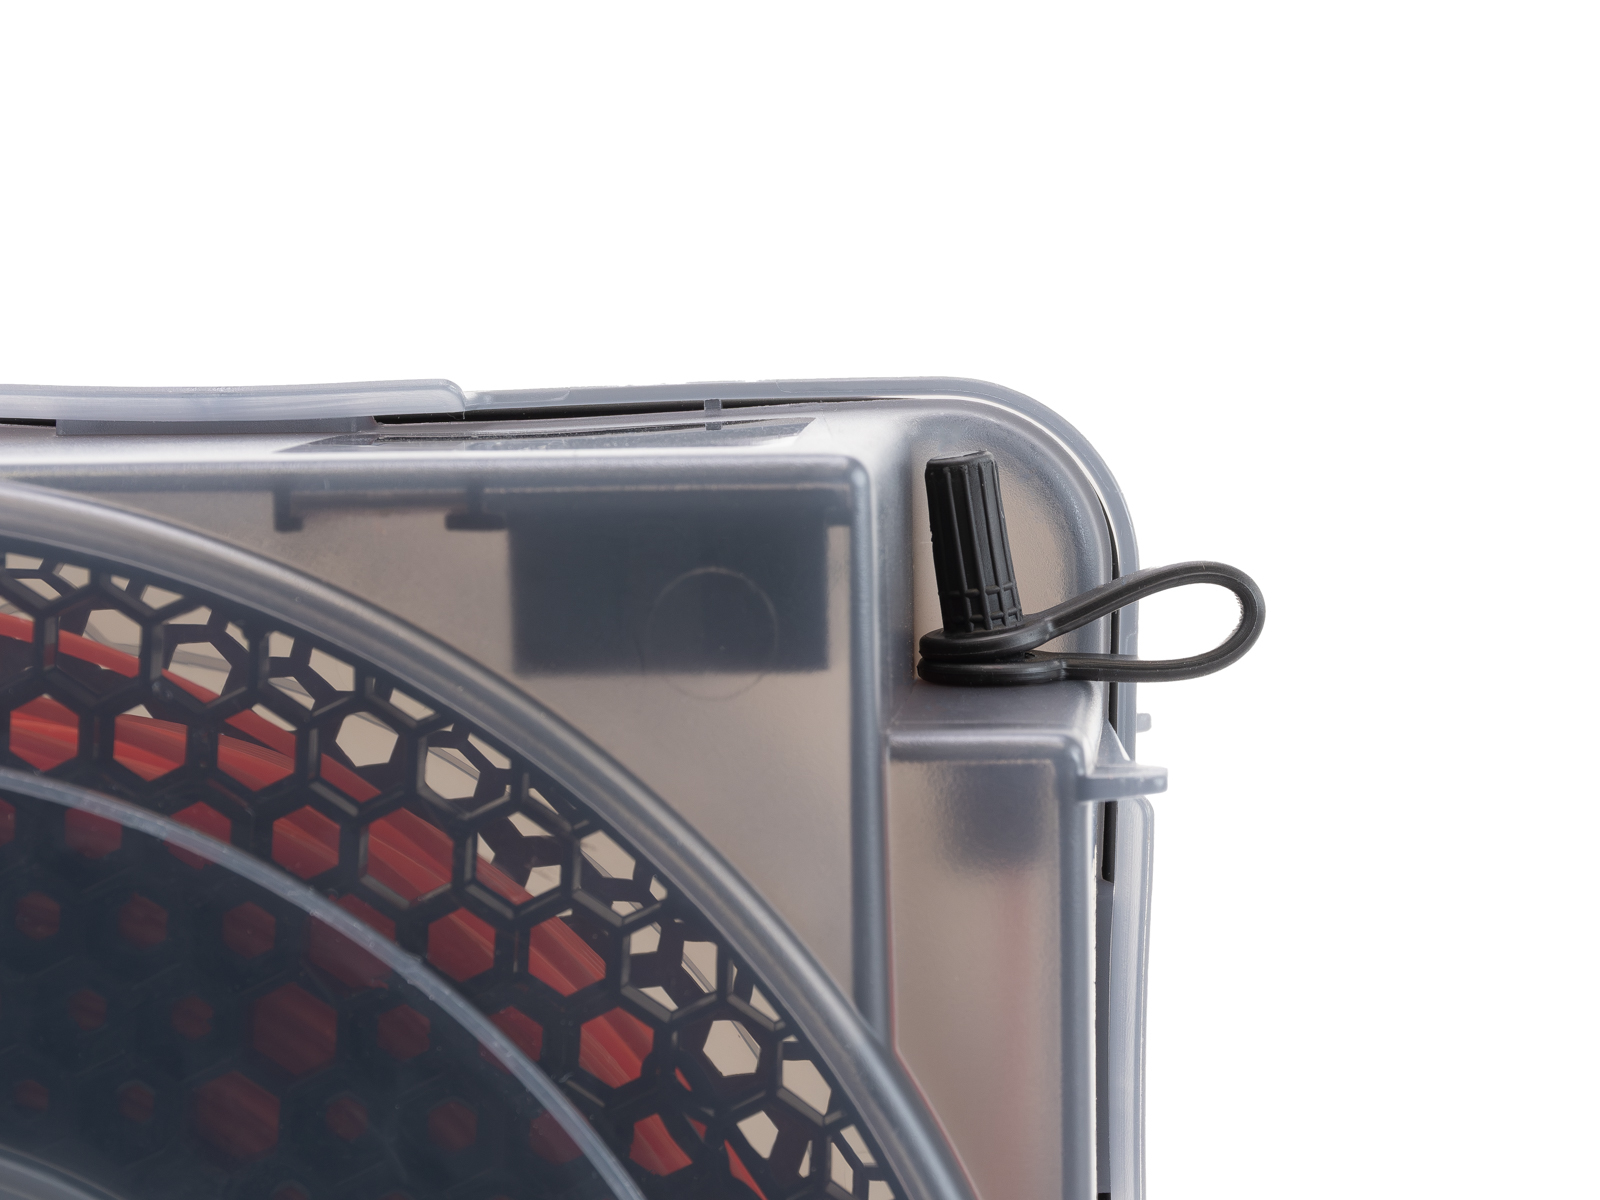
                  Try to minimize filament exposure to ambient air during this step.

                  Once closed, allow up to 1 hour for humidity levels to stabilize.

                  Check the hygrometer reading before printing. If humidity is too high for your material, replace or regenerate the silica gel.

                  Was this article helpful?
                  This action is available only to registered users. Please log-in.

                  2 comments

                  Log in  to post a comment
                  Micah
                  •
                  Everything went great for me!
                  Reply
                  pfelecan
                  •
                  Installing the hygrometer was more trouble that expected: the button cells are a little bit loose and when shaking a little bit the device it goes of and on; it needs something to fill the loose space such a piece of paper thick enough.
                  Also, given the color and transparency of the dry-box, the visibility of the measures is not so great; maybe a clearer plastic would be more adequate.
                  Reply
                  jd14
                  •
                  and here I was thinking it was just me :)
                  Reply
                  uzer66
                  •
                  I had issues with it not powering on as well. I ended up bending the battery contact tabs that are on the sides in towards the centre more so they would make better contact with the battery.
                  Reply

                  Topics

                  • Using the printer
                    • Printer maintenance
                      • First setup and filament loading (USS Drybox)
                      • Prusa USS Drybox - Installation on CORE One
                      • Prusa USS Drybox - Installation on CORE One L / CORE One+
                      • Prusa USS Drybox - Installation on HT90
                      • Prusa USS Drybox - Installation on XL
                      • Prusa USS Drybox - Installation on MK4/3.9 series
                    • 3D models
                    • Material guide
                    • Slicing
                    • Prusa Connect & PrusaLink