日本語
Login
3Dプリンター
マテリアル
部品 & アクセサリー
ソフトウェア
3Dモデル
応用事例
コミュニティ
ヘルプ
アカデミー
ブログ
会社概要
サポート
Original Prusa MMU2S
Original Prusa i3 MK3S to MMU2S [進行中の翻訳]
2C. MK3/MK2.5 extruder disassembly | プリンタの準備
1. プリンタの準備
Step 1 of 16 (Chapter 4 of 14)
内容
コメント
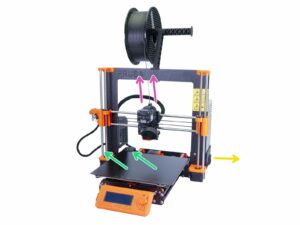
始める前に
確認すること:
⬢
the filament is unloaded from the hotend
⬢
プリンターが適切に冷却されていること
⬢
プリンタのプラグが抜かれている
⬢
you removed the steel sheet
This chapter is dedicated
only
to the
MK3/MK2.5 owners
. If you have new MK3S/MK2.5S, please follow:
2B. MK3S/MK2.5S - extruder disassembly
The MK3 and MK2.5 have several design iterations and yours might differ from the one used as an example in this disassembly. As a result, some instructions might be not applicable to your printer (you can skip them).
Loading...
次
内容
Original Prusa i3 MK3S to MMU2S [進行中の翻訳]
1. はじめに
2A. MK3S+ extruder disassembly
2B. MK3S/MK2.5S - extruder disassembly
2A. MK3/MK2.5 - extruder disassembly
プリンタの準備
Releasing the cable bundle
Unplugging the extruder cables
Removing the filament sensor cable
Releasing tension in the X-axis belt
Removing the extruder
Fans and motor removal
P.I.N.D.A. probe removal
Hotend removal
PTFEチューブの取り外し
新しいPTFEチューブを挿入する
Removing the Bondtech gear
Idler disassembly
Removing the filament sensor (optional)
Haribo time?
Disassembly is finished!
3A. MK3S+ extruder upgrade
3B. MK3S/MK2.5S - extruder upgrade
3A. MK3/MK2.5 - extruder upgrade
4. Idler body assembly
5. Pulley body assembly
6. Electronics and MMU2S unit assembly
7. Spool holder and buffer assembly
8. Preflight check & Calibration
9. First flight
Manual changelog MMU2S
コメント
ログイン
してコメントを投稿する
コメントなし