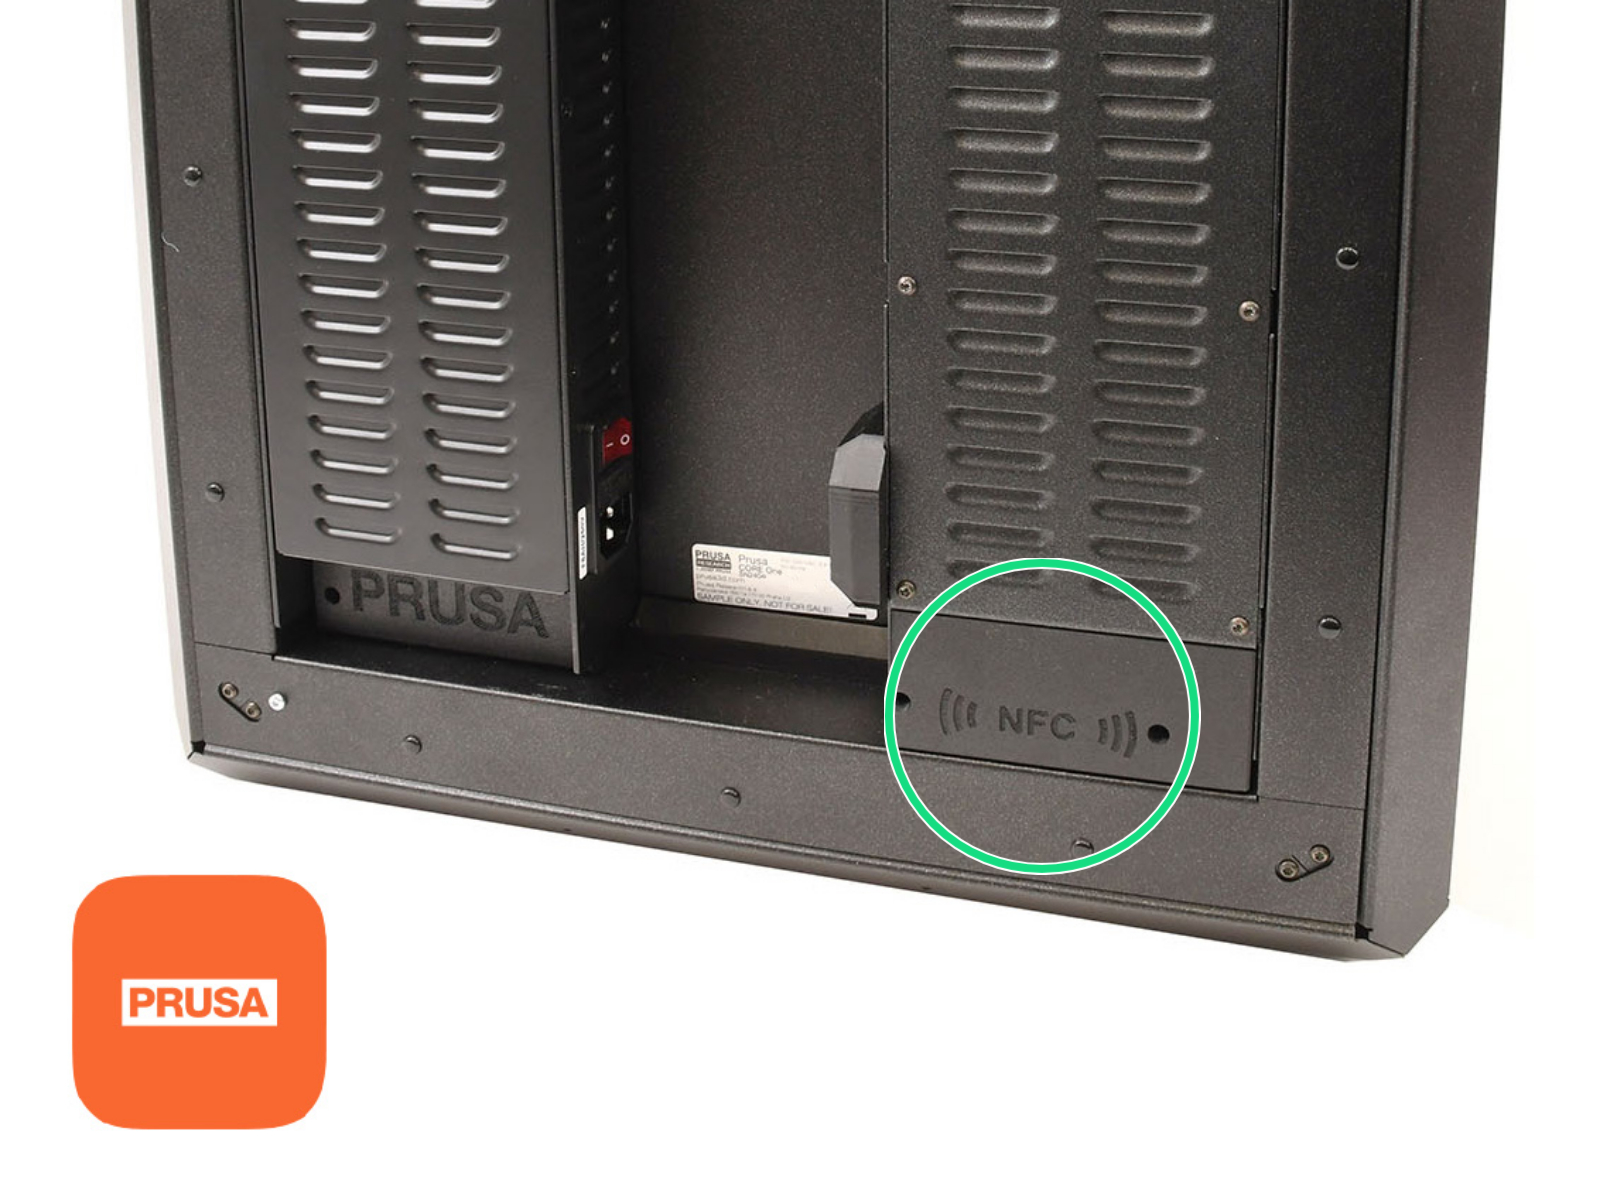
La Prusa CORE One e le Original Prusa MK4S/MK3.9S sono dotate di un'antenna Near Field Communication, abbreviata NFC. Ciò consente di scrivere rapidamente i dati nel chip NFC presente sulla scheda xBuddy, e i dati possono essere utilizzati dalla stampante.
Il nostro impiego è la scrittura di credenziali Wi-Fi, utilizzando un dispositivo mobile che supporta l'NFC.
Il chip dell'antenna NFC è passivo. Non può attivare la comunicazione con un altro dispositivo. Tuttavia, la stampante può memorizzare e leggere i dati trasmessi dall'antenna NFC.
Montaggio (MK4S, MK3.9S)
La versione preassemblata della MK4S viene fornita con l'antenna NFC già montata. Nel kit MK4S, l'antenna viene assemblata con i seguenti passaggi.
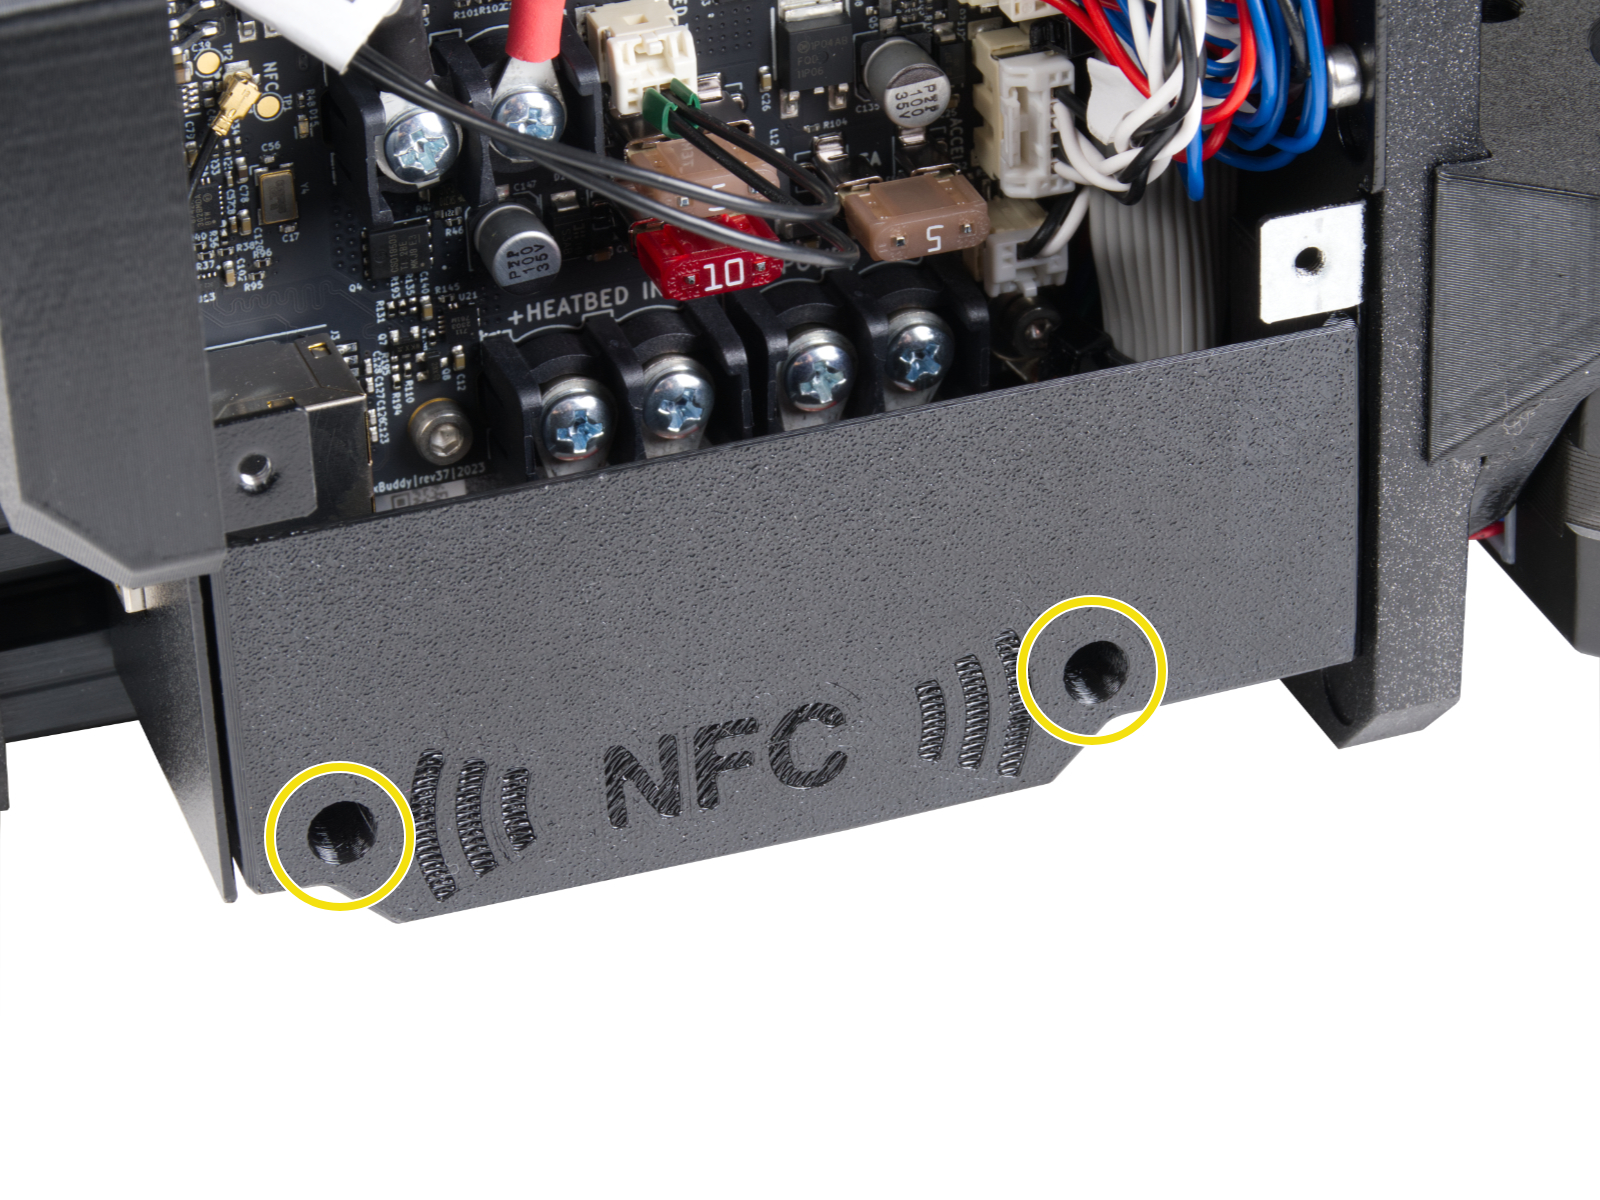
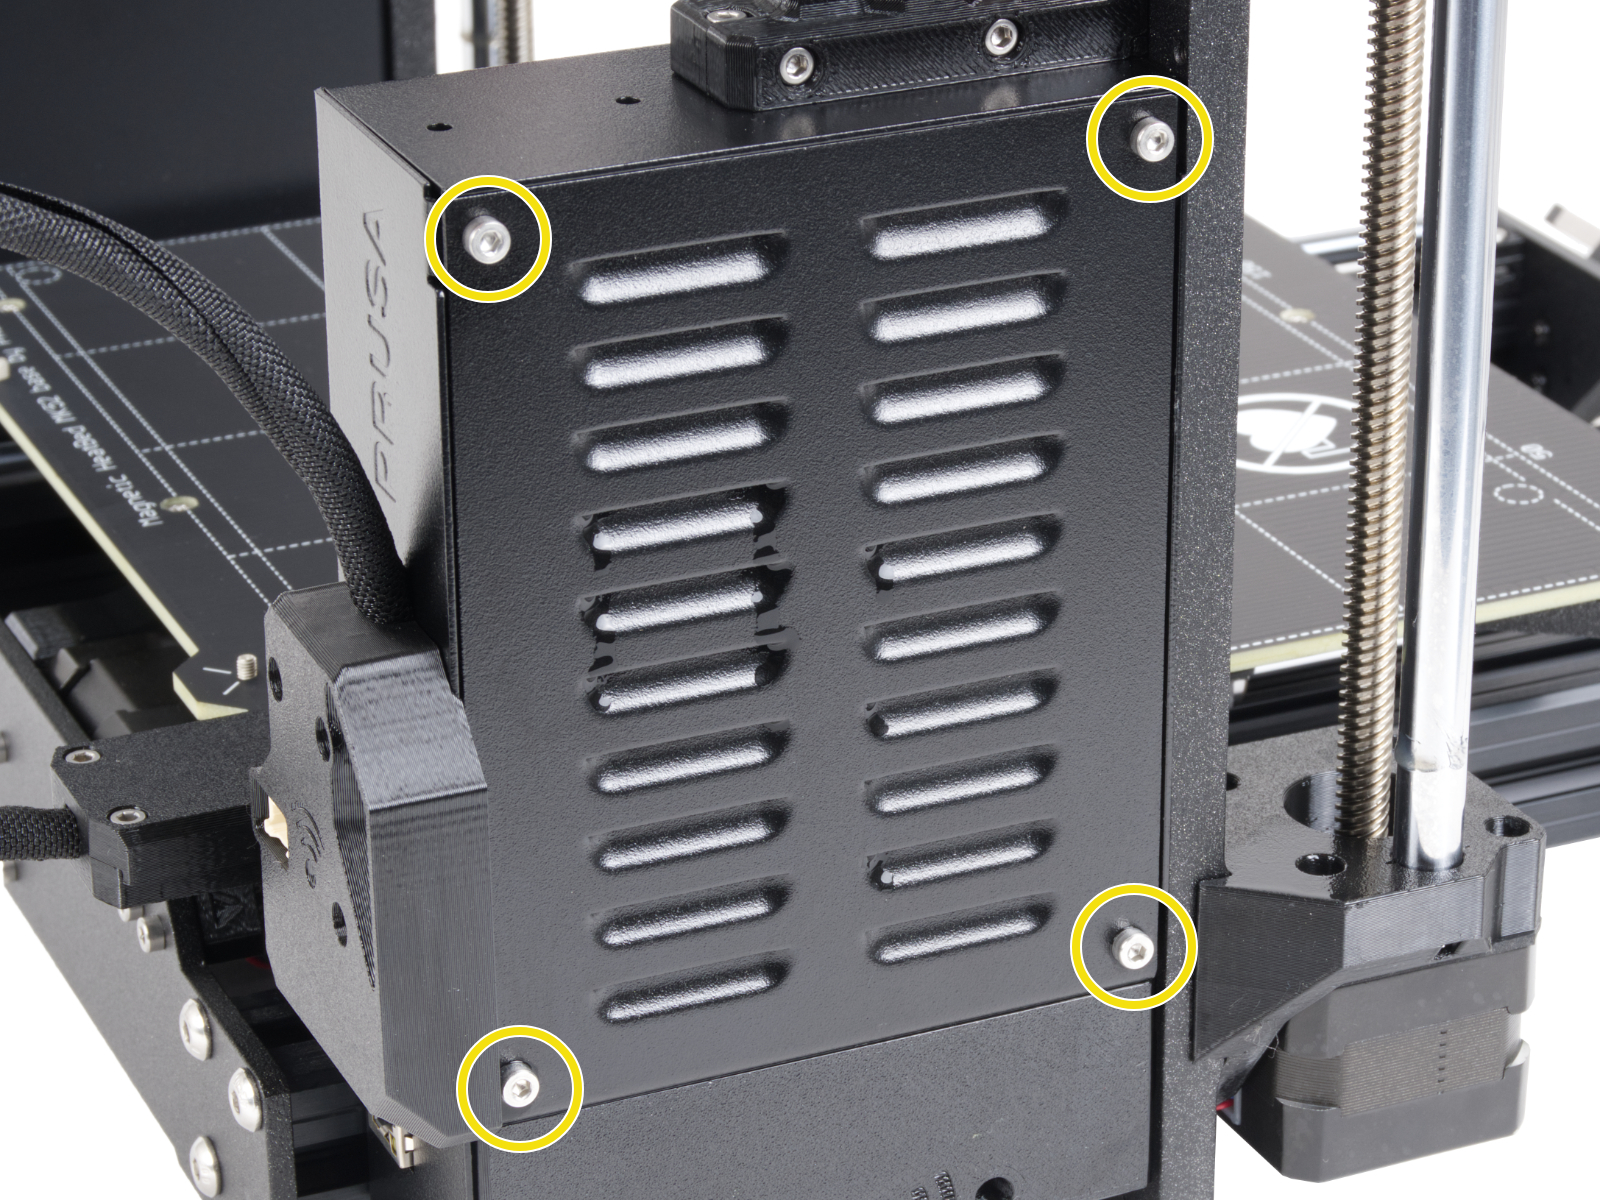
- Accedere al coperchio inferiore della scheda xBuddy. Se il componente è assemblato, allentare le due viti M3x10 per accedere al coperchio inferiore.
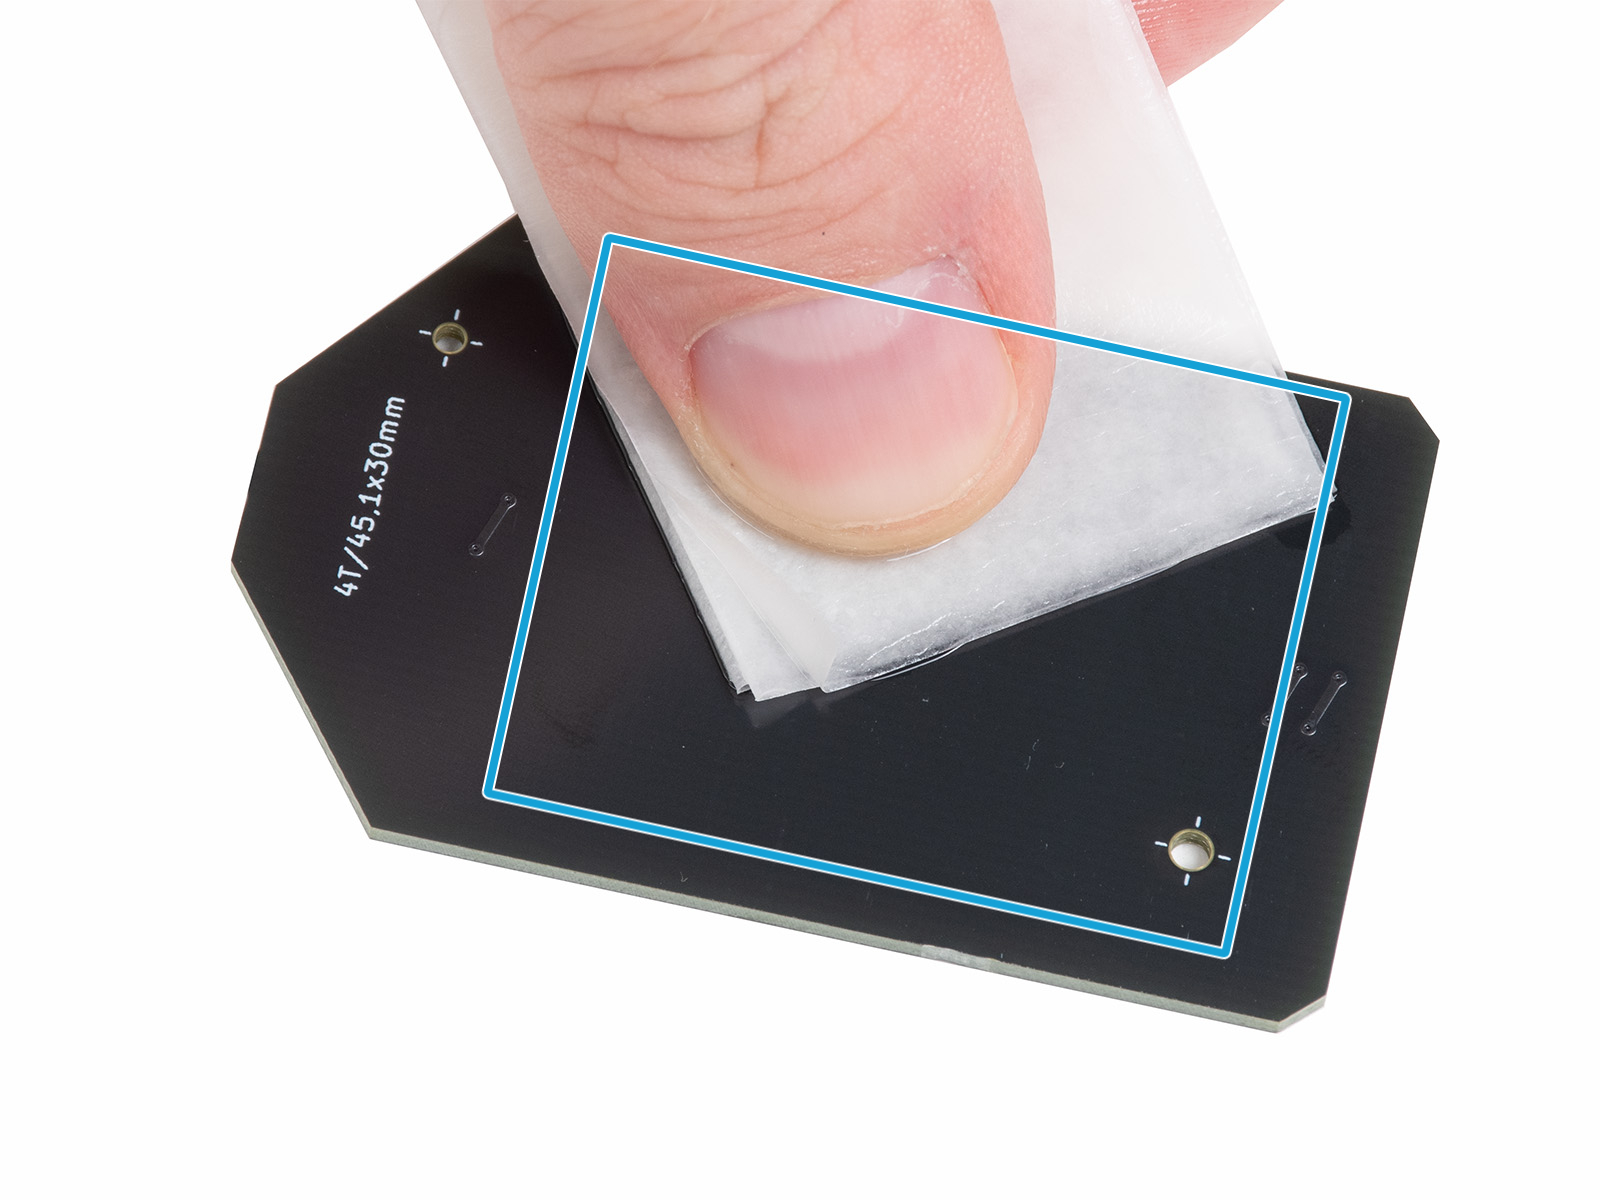
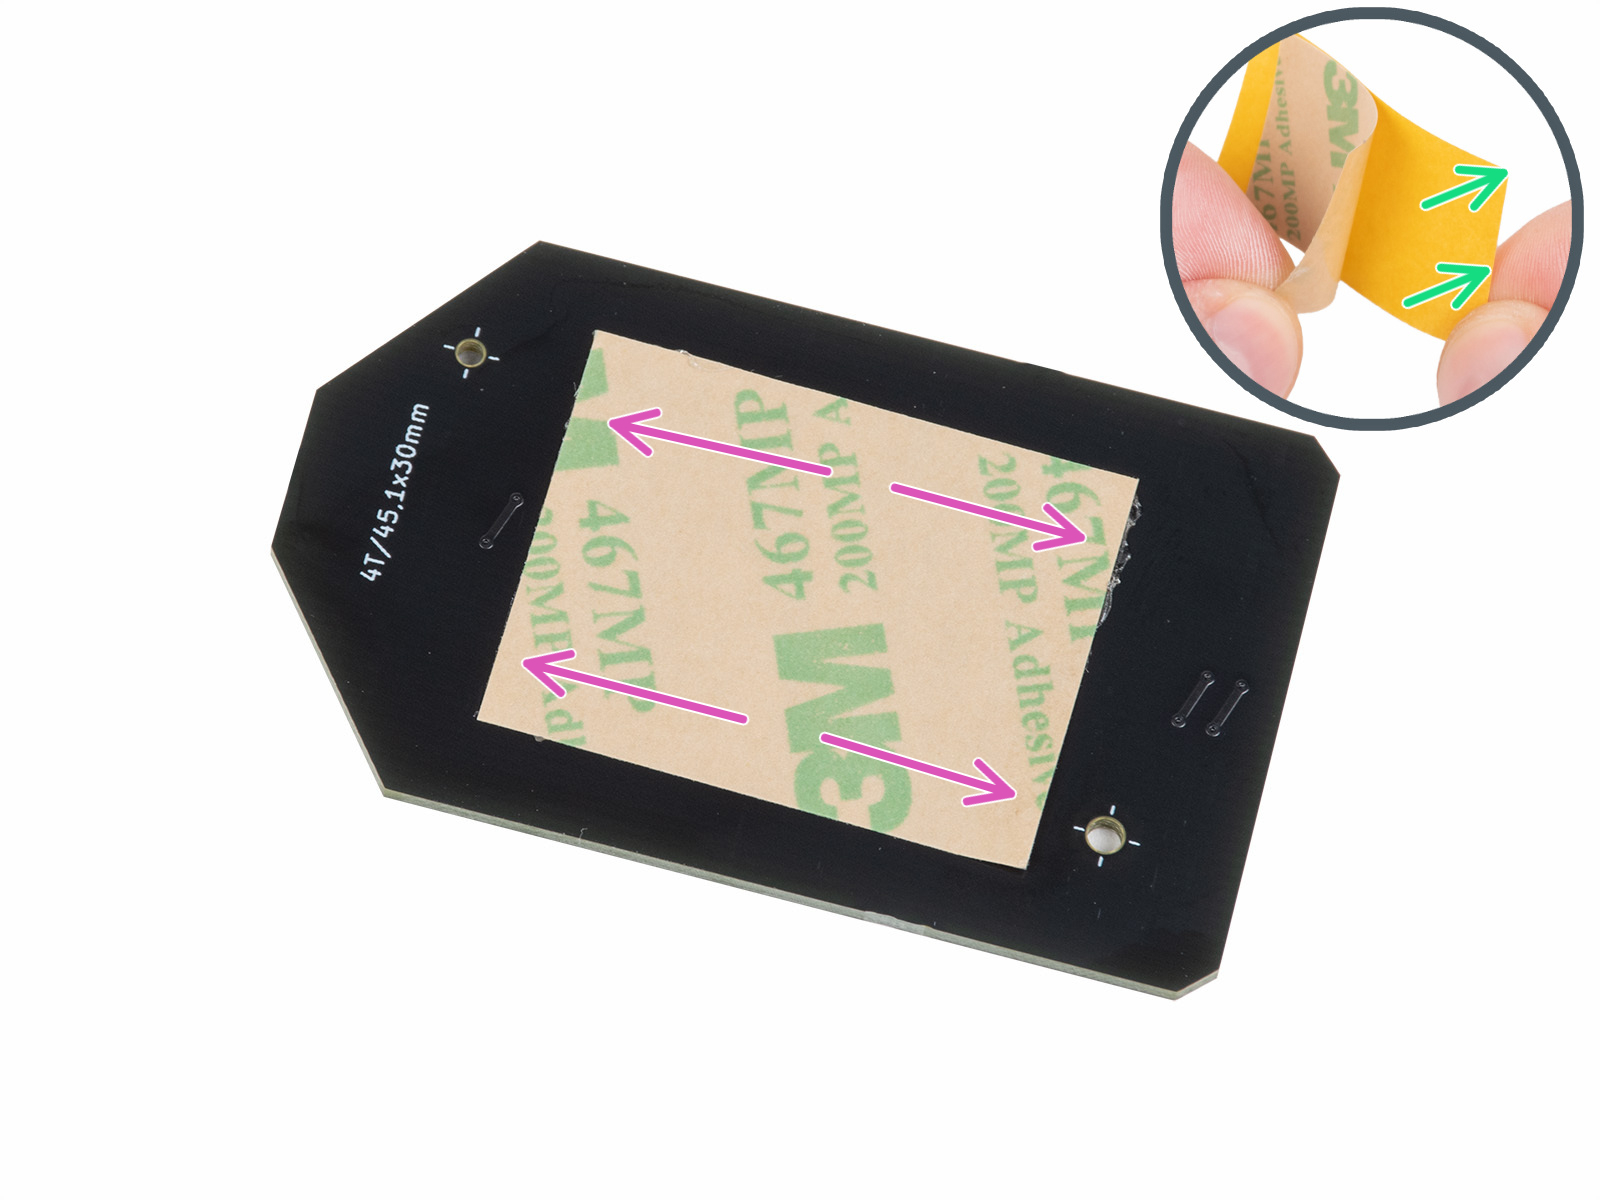
- Su un nuovo kit, pulire la scheda NFC con alcool isopropilico e incollarla con la pellicola adesiva fornita, come mostrato nelle immagini.
Attenzione: sull'antenna è presente uno strato autoadesivo. Non posizionare il nastro adesivo sui fori della scheda!
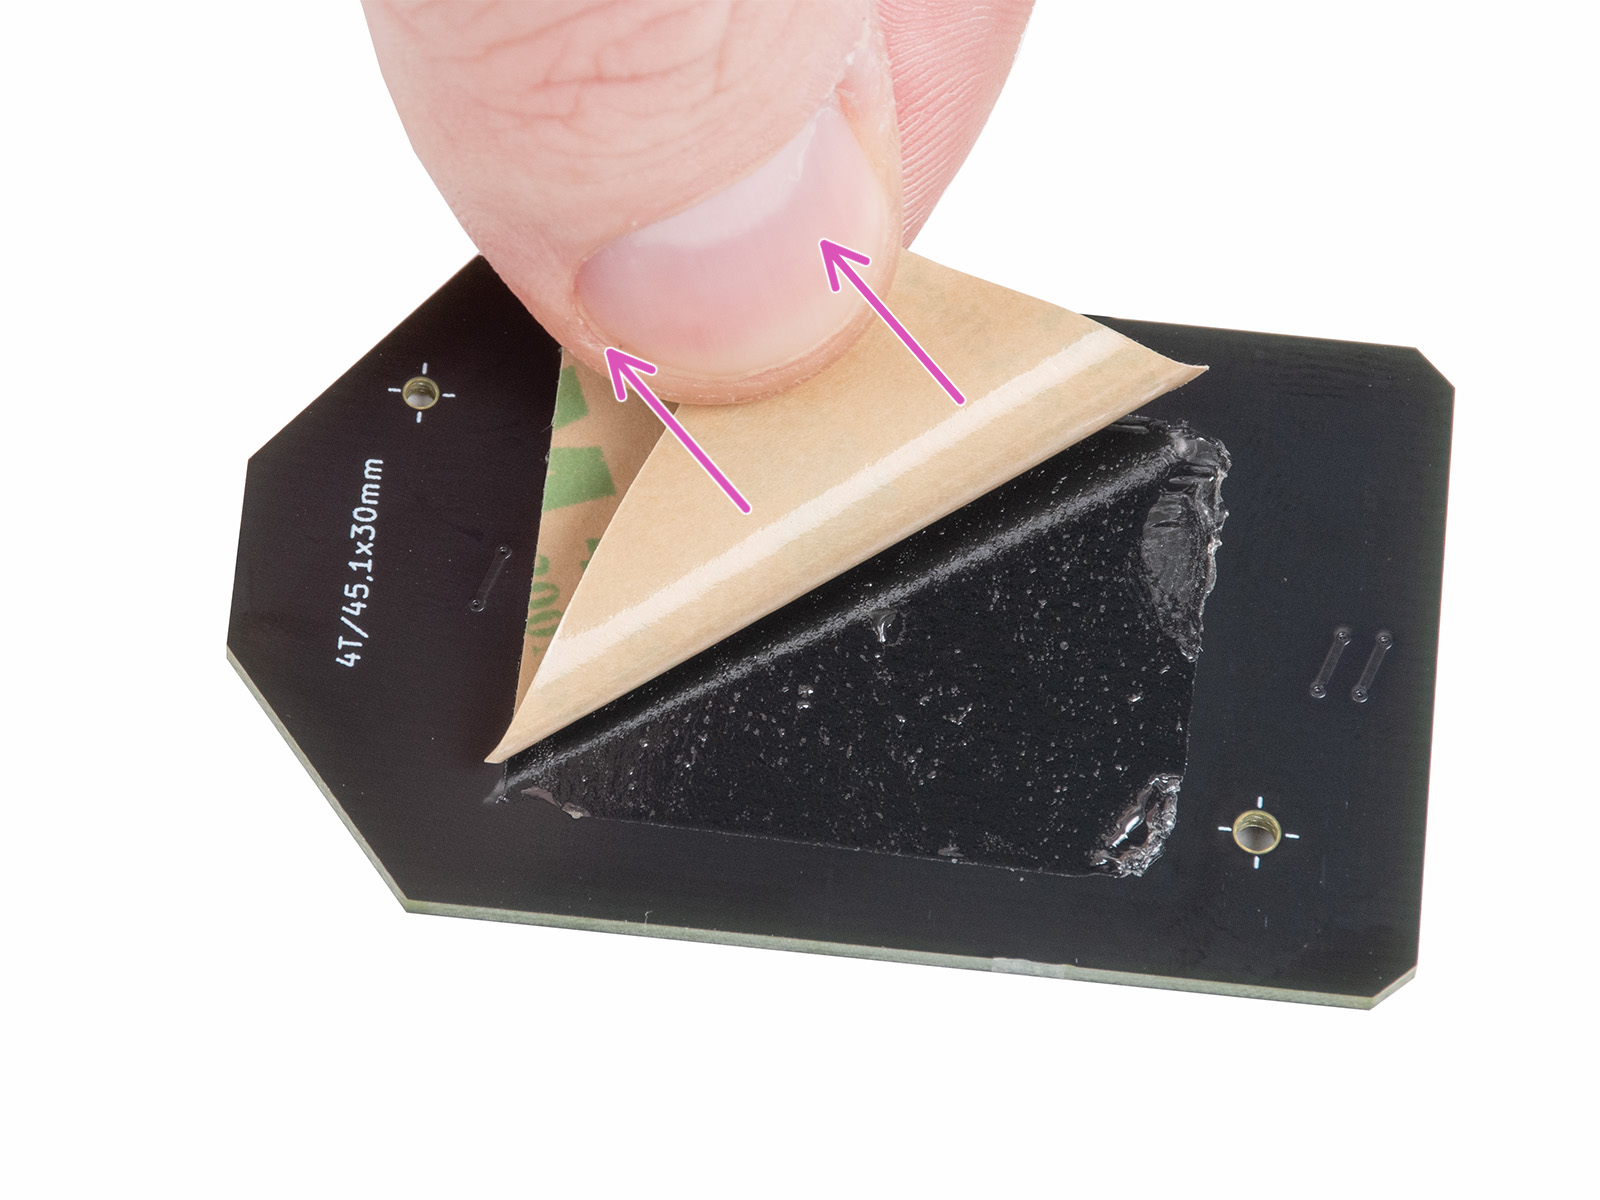
- Staccare lo strato di nastro adesivo dall'antenna NFC. Incollare l'antenna NFC sul lato interno del coperchio inferiore dell'elettronica, come indicato nell'immagine. Lasciare almeno 2 mm di spazio tra l'antenna NFC e il bordo del coperchio.
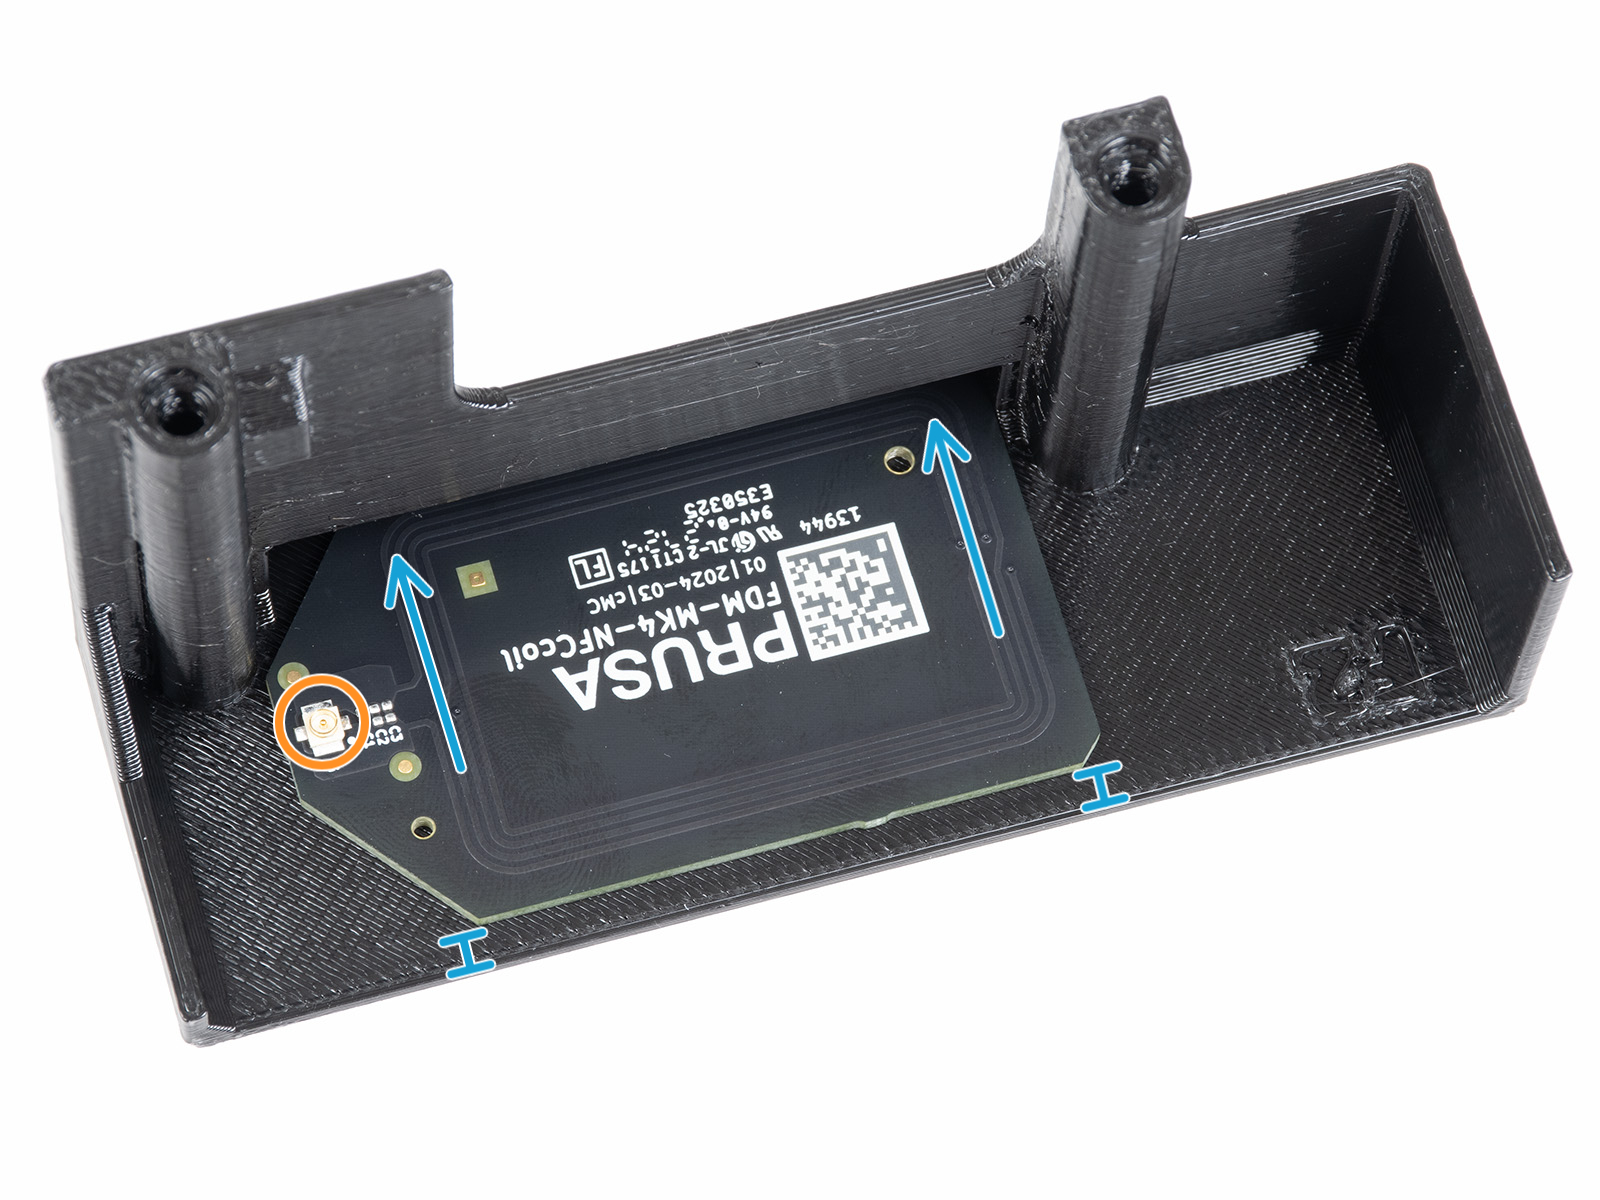
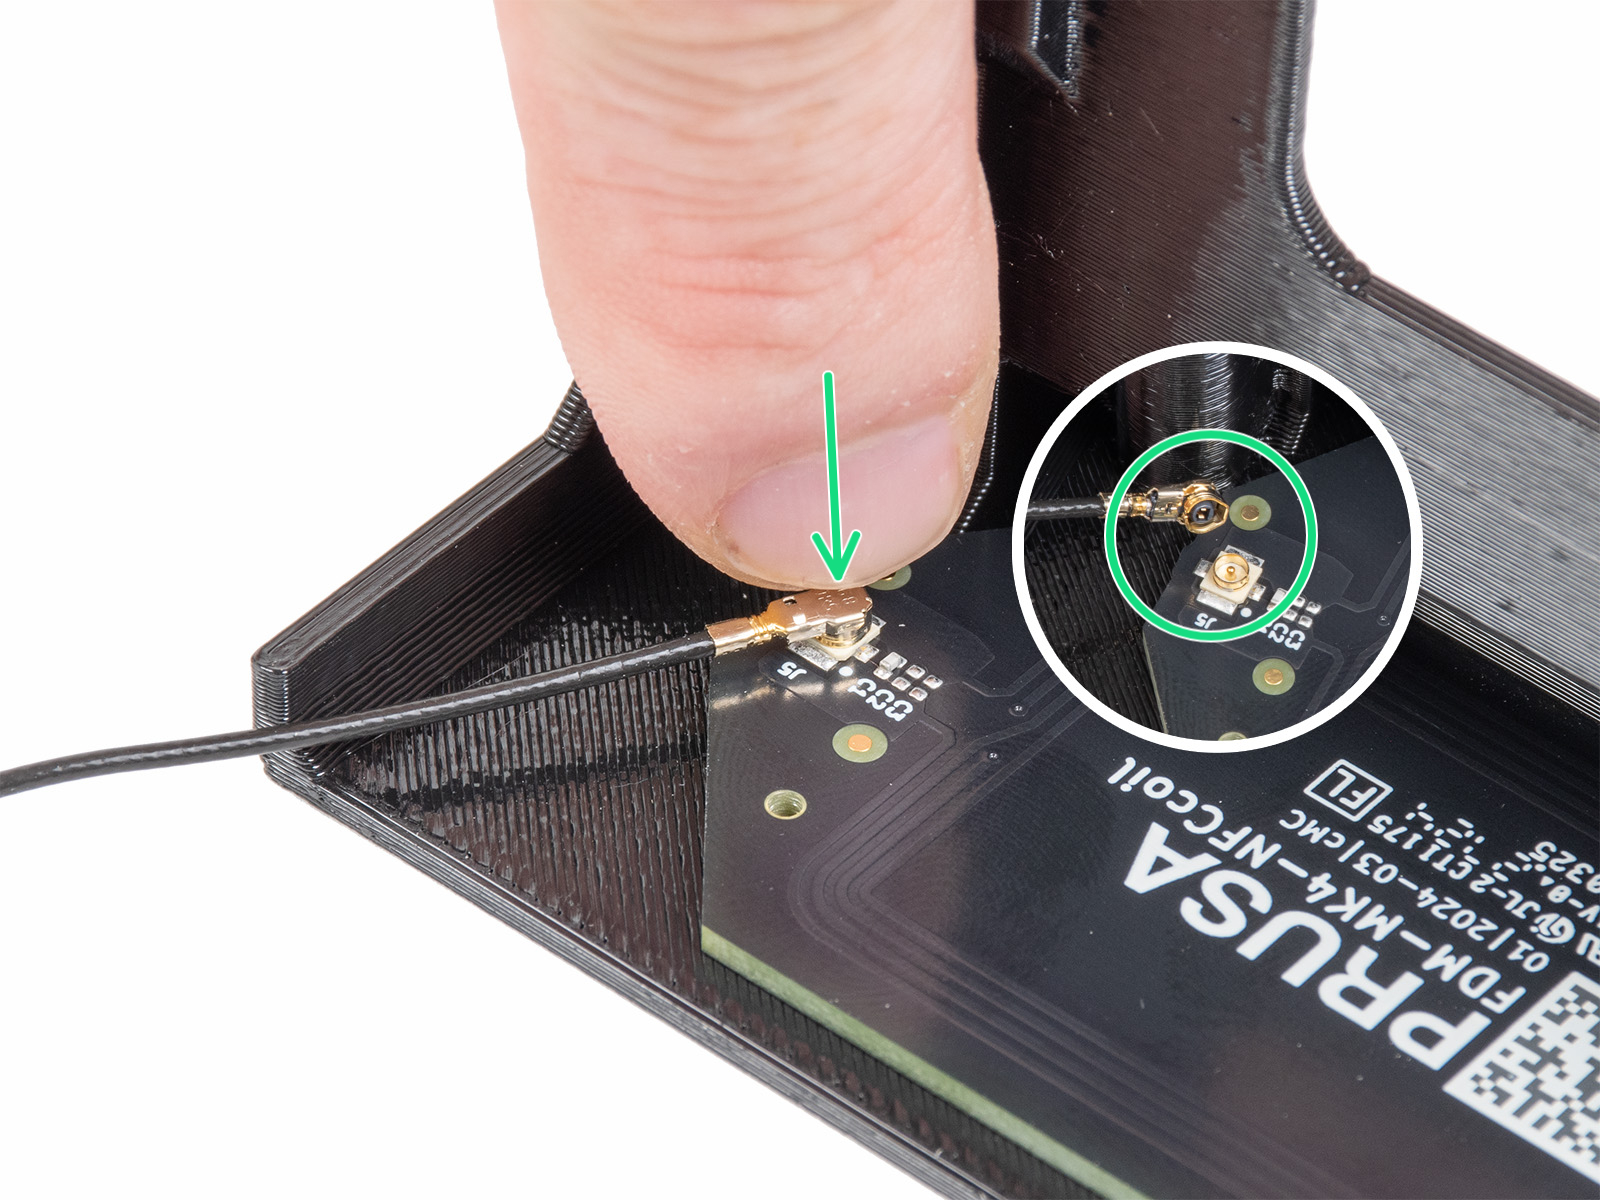
- Collegare il cavo sul lato dell'antenna NFC. Incastrare i connettori e premere leggermente, finché non si sente uno scatto.
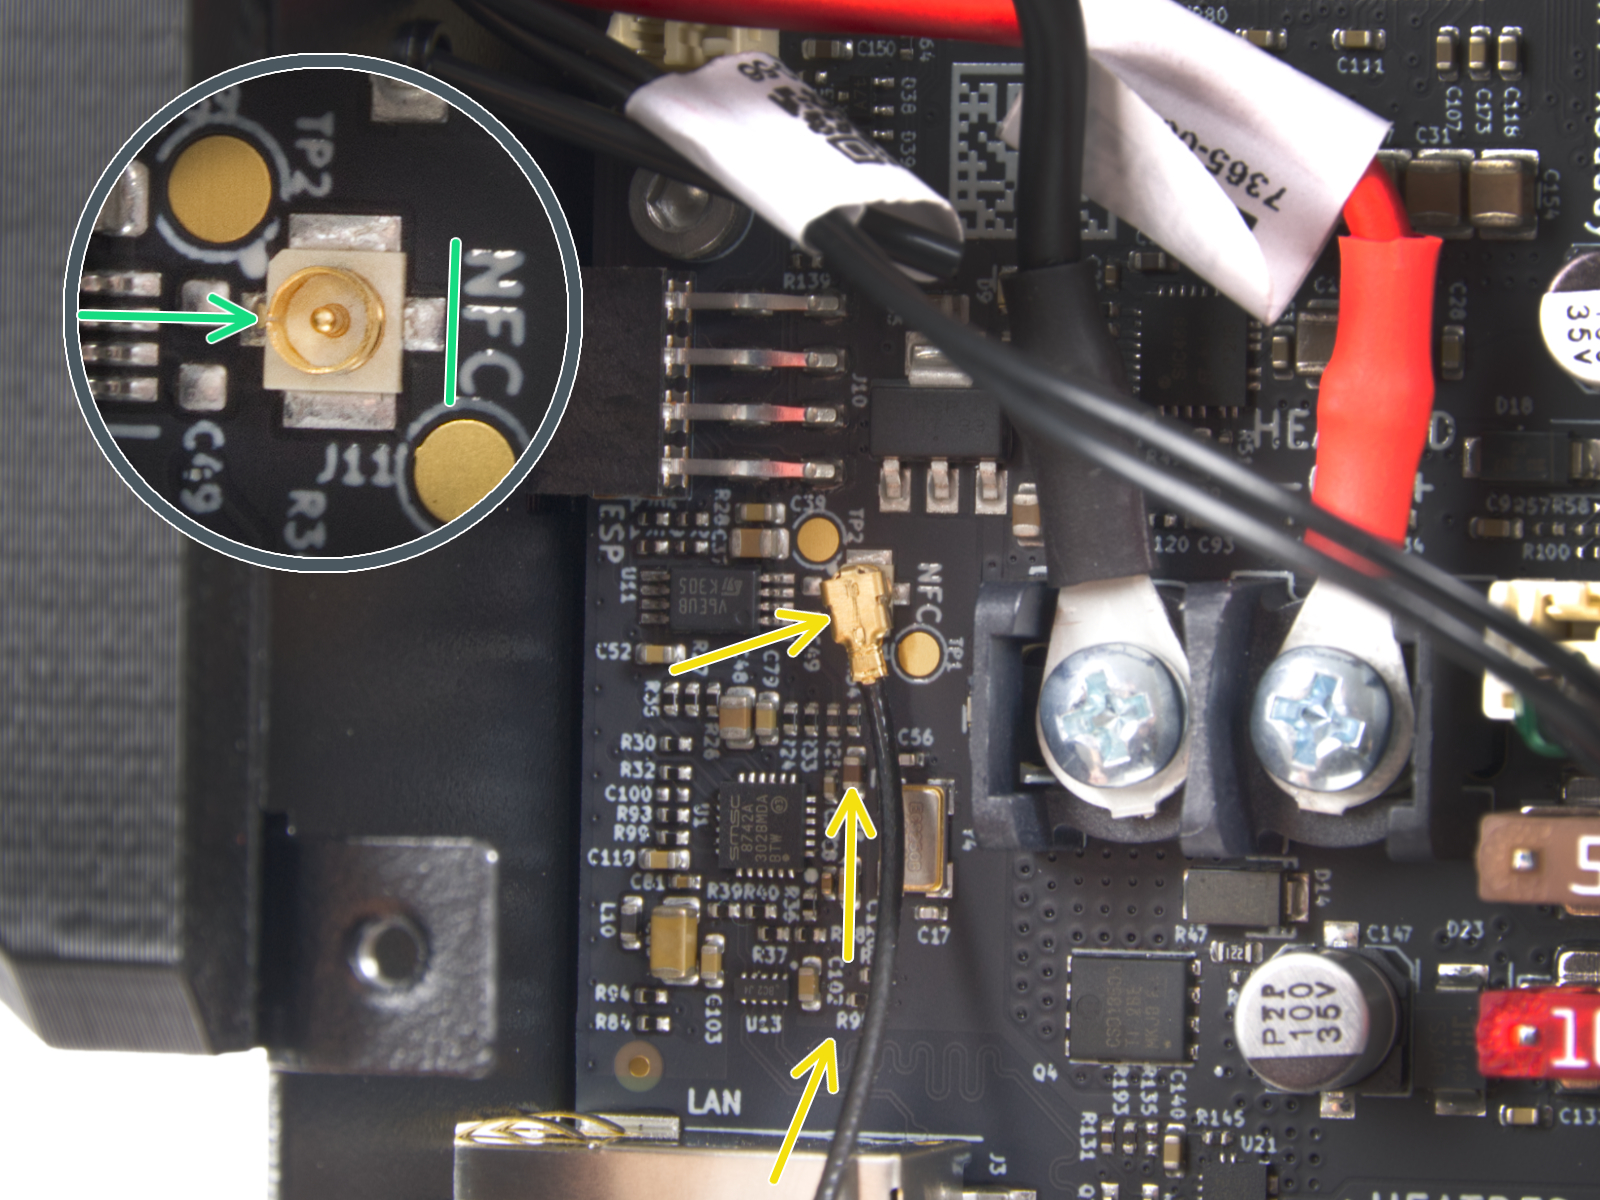
- Se necessario, allentare le quattro viti M3x6 per accedere alla scheda xBuddy. L'immagine a destra mostra il collegamento del cavo al connettore dell'antenna sulla scheda xBuddy.
Connessione al Wi-Fi tramite NFC
Scaricare l'applicazione Prusa sul proprio dispositivo mobile. Nell'app, navigare su Menu -> Imposta il Wi-Fi della stampante.
L'applicazione guida l'utente attraverso i passaggi, compreso l'inserimento delle credenziali Wi-Fi. Dopo aver inserito le credenziali, l'app mostra che sta inviando le informazioni alla stampante. In questa fase, avvicinare il dispositivo alla parte inferiore della scatola dell'elettronica, ad una distanza massima di 2-3 cm.
 Prusa CORE One Prusa CORE One | 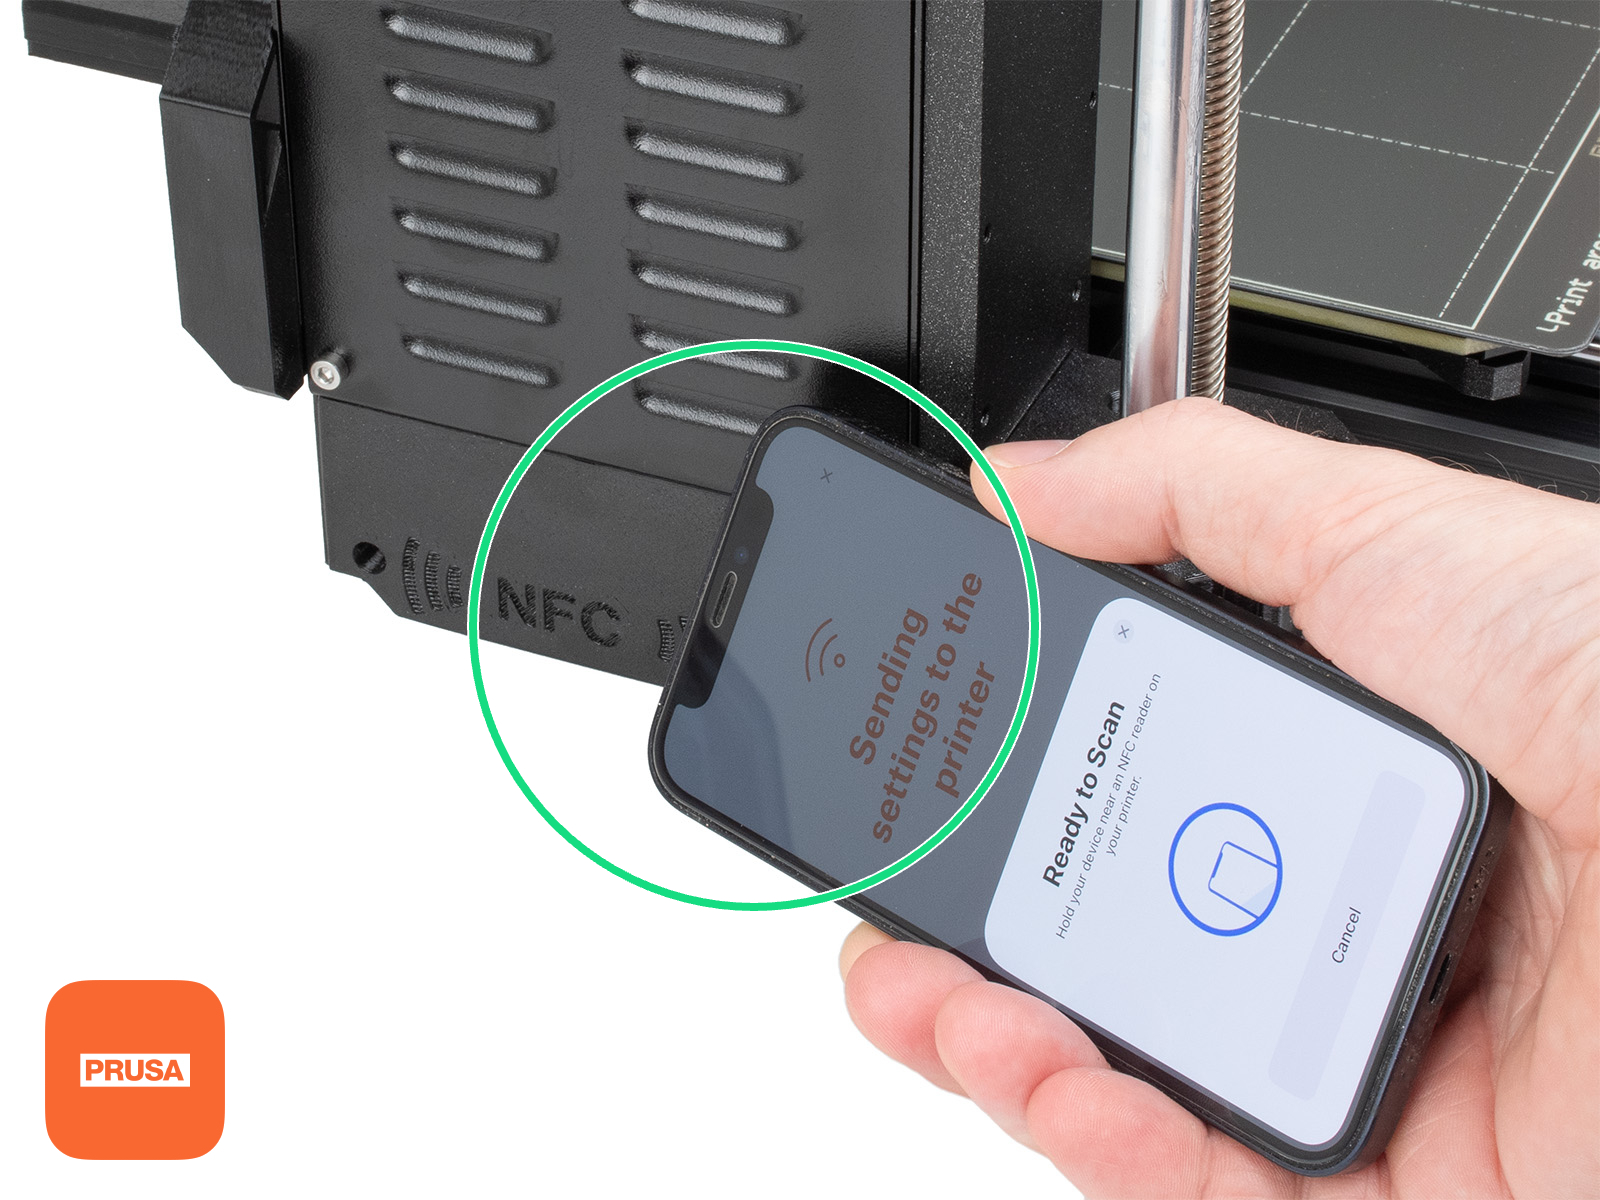 MK4S, MK3.9S MK4S, MK3.9S |
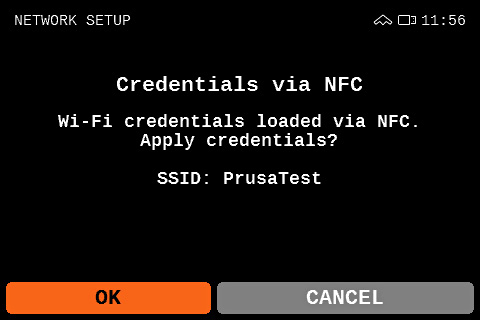
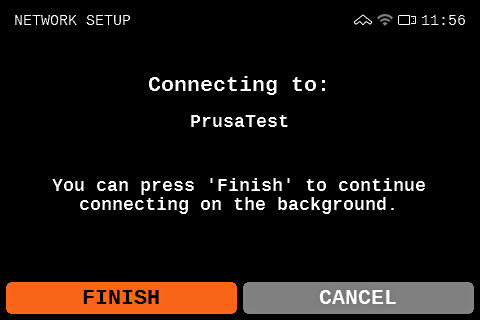
Lo schermo della stampante richiede una conferma. Una volta confermate, le credenziali Wi-Fi vengono lette dalla stampante, che è in grado di connettersi alla rete Wi-Fi specificata.
 |  |