English

1. Begin assembly
Step 1 of 20 (Chapter 16 of 21)
Contents
Comments
Contents
Printer maintenance
- How to install the Nextruder V6 nozzle adapter (CORE One L)
- How to replace the Prusa Nozzle (CORE One L)
- How to replace a hotend assembly (CORE One L)
- How to replace the hotend fan (CORE One L)
- How to replace the side filament sensor (CORE One L)
- How to install the Advanced Filtration (CORE One L)
- How to replace the Buddy3D camera cable (CORE One L)
- How to replace a Hotend Heater (CORE One L)
- How to replace a Heatsink Thermistor (CORE One L)
- How to replace Nextruder Filament Sensor (CORE One L)
- How to replace the print fan (CORE One L)
- How to replace the Accelerometer (CORE One L)
- How to replace Hotend Heatsink (CORE One L)
- How to reverse the door orientation (CORE One L)
- How to replace Loveboard (CORE One L)
- How to replace a Hotend Thermistor (CORE One L)
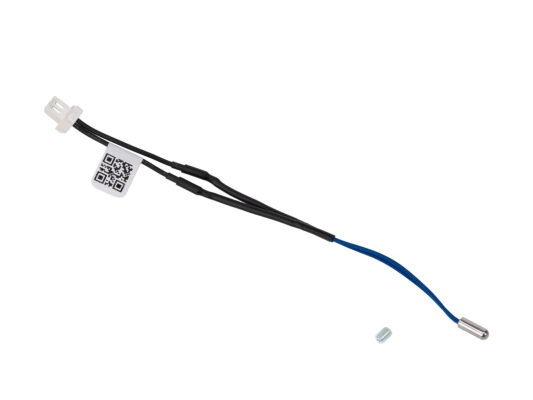
- Begin assembly
- Tools necessary for this guide
- Printer preparation (part 1)
- Printer preparation (part 2)
- Removing the printer top cover
- Protecting the heatbed
- Accessing the hotend cables
- Disconnecting the hotend cables
- Removing the hotend assembly
- Silicone Sock Removal
- Thermistor Removal
- Thermistor Preparation
- Thermistor Installation
- Inserting the hotend
- Connecting the hotend cables
- Guiding the hotend cables
- Attaching the Printhead-cover-left
- Attaching the printer top cover
- Turning the printer on
- Final check
- How to replace the White LED strip (CORE One L)
- How to pack CORE One L for return
- How to replace the heatbed fans (CORE One L)
- How to replace the heatbed (CORE One L)
- How to replace the AC box (CORE One L)
Comments
Log in to post a comment
No comments