The MINTEMP error (written sometimes as min temp) occurs when the temperature readout from the heatbed thermistor or hotend thermistor drops below a certain amount within a certain time frame. It is a safety feature that prevents the printer from overheating in case of a faulty thermistor because, by default, the printer is set to balance out any heat loss by pumping more power into the heat bed or hotend heater cartridge.
WARNING: The temperature limits triggering the MINTEMP were set after rigorous testing. Adjusting them is NOT RECOMMENDED and might lead to damage to the printer and a possible fire hazard!
MK2/S & MK2.5/S
Due to the hardware design of the MiniRAMBo and accounting for manufacturing tolerances, there is a temperature below which the thermistors are unable to read reliable values:
- Hotend thermistor - temperatures below 22 °C (71.6 °F)
- Heatbed thermistor - temperatures below 15 °C (59 °F)
For safety reasons, the MINTEMP error is triggered in case the measured temperatures are below these limits. This is for the firmware to accurately detect a damaged or disconnected thermistor. For a technical explanation of this limitation, please see this Github issue.
MK3 & MK3S & MK3S+
The EinsyRambo board of the MK3/S/+ was allowed by its improved thermistor circuitry design to have a wider range of scale when it comes to temperature (thermistor) readings. It also has an onboard thermistor for ambient temperature. This has allowed the firmware to allow for a lower temperature threshold than on the previous generation (MiniRAMBo).
- Hotend thermistor - temperatures below 10 °C (50 °F)
- Heatbed thermistor - temperatures below 10 °C (50 °F)
Also, printing in very cold environments, outside of the recommended operational temperature, can have negative effects due to other factors than the printer's electronics, like material properties.
What does it look like?
When one of the thermistor cables is broken, it can be observed when the temperature on the LCD screen starts randomly jumping up and down during the Y-axis or X-axis movement.
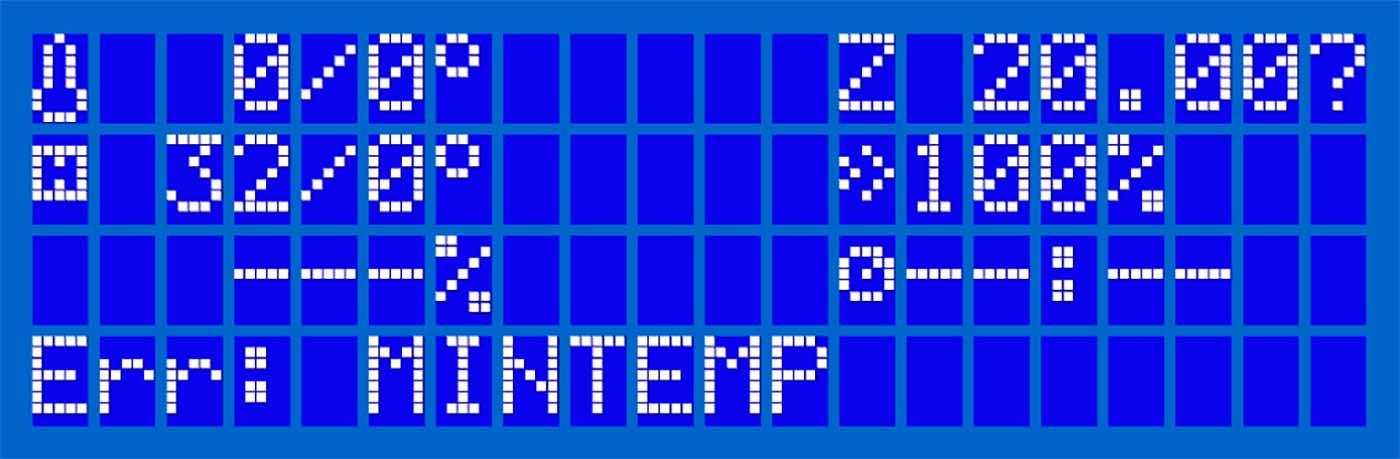
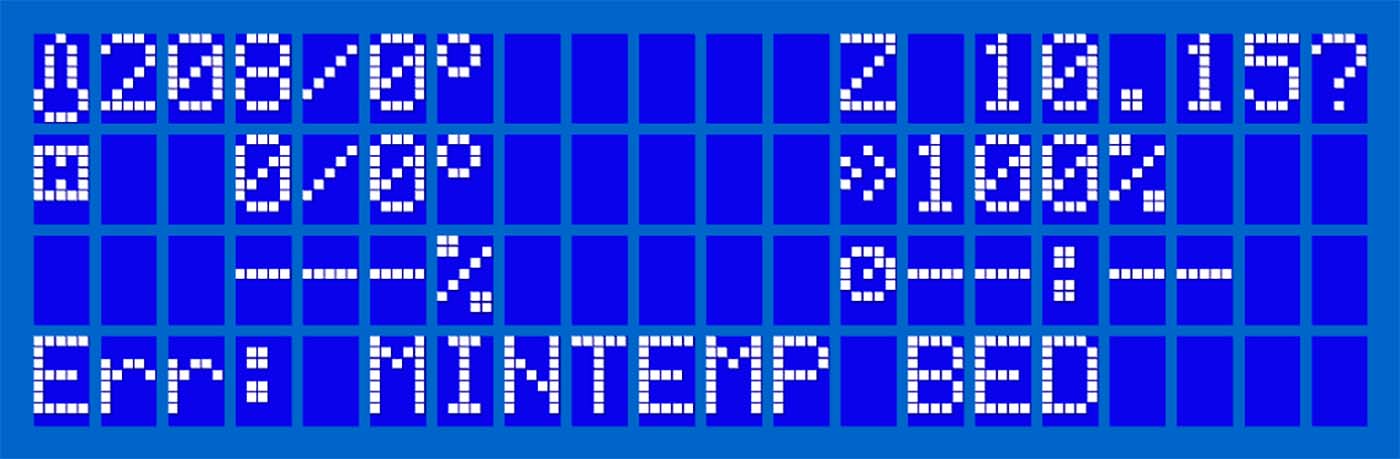
It is important to distinguish between the MINTEMP error and the MINTEMP BED error.
 |  |
|
MINTEMP - problem with the hotend temperature readout. |
MINTEMP BED - problem with the heatbed temperature readout. |
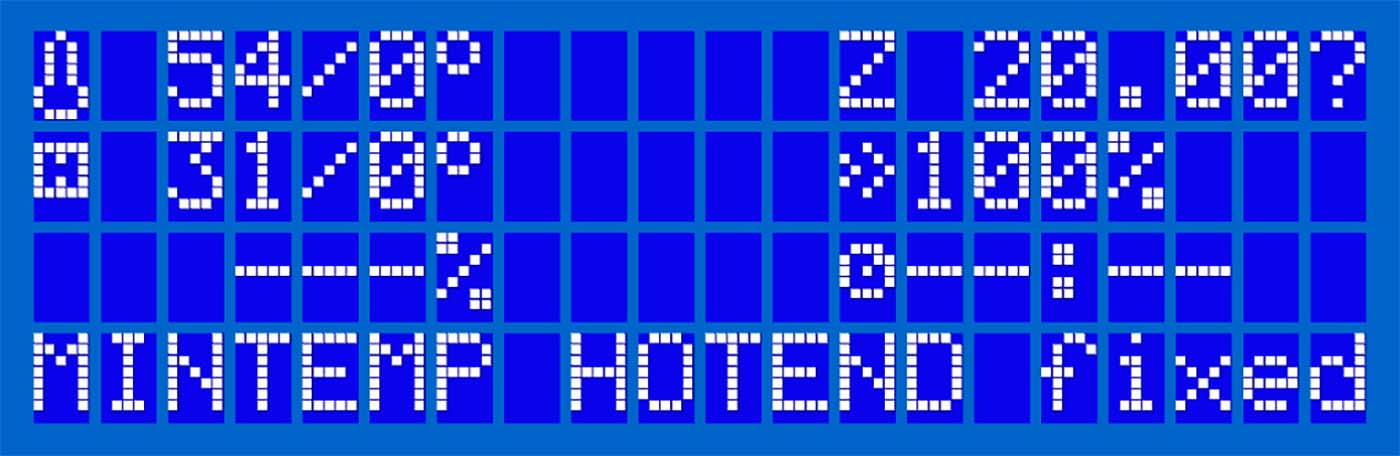
MINTEMP HOTEND/BED fixed
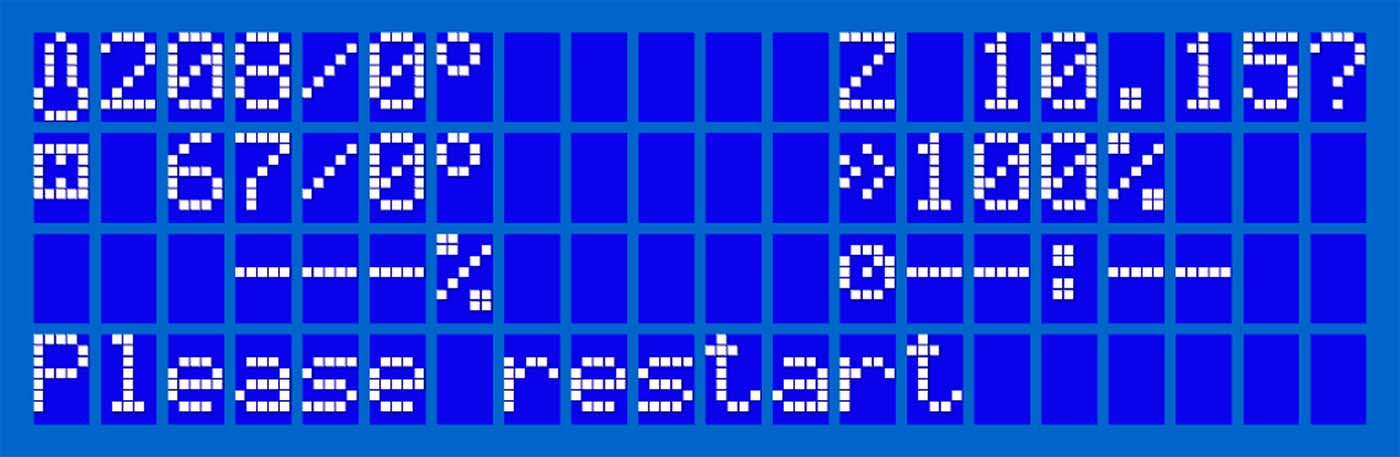
If the cable regains a proper connection and a correct reading from the thermistor, the printer will update the error to "MINTEMP fixed" or "MINTEMP fixed", followed by "Please restart". This does not mean the issue is permanently resolved. You should continue the troubleshooting described in this article.
 |  |
Testing the thermistor
You can also test it with a multimeter (our article Multimeter usage can guide you). If it fails to read the resistance on the metal inserts in the jumper connectors, then the wire is broken. At room temperature, it should have a resistance you can expect resistance of 80 kΩ - 125 kΩ.
RAMBo board connector
That the RAMBo is the cause is highly unlikely, as the board would not pass the final testing that we do in our factory. However, try switching the Hotend and Heatbed thermistors on the board (both have 3 pins), if the MINTEMP does not turn into MINTEMP BED or if the MINTEMP BED does not turn into MINTEMP, the electronics board connector is broken and a new board is needed. You should also notice the temperature reading on the LCD change.
To find the thermistor see Mini RAMBo electronics wiring (MK2S, MK2.5, MK2.5S) or Einsy RAMBo electronics wiring (MK3/MK3S/MK3S+), depending on your printer.
Wiggle it!
If you do not have a multimeter, a good way to test the cable of the thermistor is to simply wiggle it. Pre-heat to PLA (215/60) and move the extruder or bed by hand, all the way to the end of each side. See if there is any great change in temperature-reading on the LCD (tens of degrees or zeroing out).
 |  |
Grab the textile sleeve and manipulate and wiggle it, again checking if there is any change in temperature. If there is, it indicates a microfracture of the cable when the connection changes depending on orientation. You then need to replace the thermistor.
How to fix it
Temperature
Make sure the temperature of the room where you operate the printer is not below 20 ° C (happens easily if you keep the printer in a basement during winter). Also make sure the printer is not placed next to an opened window, air conditioning, or in a way of a breeze that might cause a sudden temperature fluctuation.
If the issue is only caused by the ambient temperature of the room, you can use a hairdryer on the bed / hotend until it reaches a temperature above 18C to initiate a print. However, some materials, like ASA / ABS, may misbehave if printed in a cold ambient temperature without an enclosure.
Glitch
As mentioned above, the error might have been triggered by a simple glitch. Try to reset your printer by pressing the X button under the knob and see if it will print afterward.
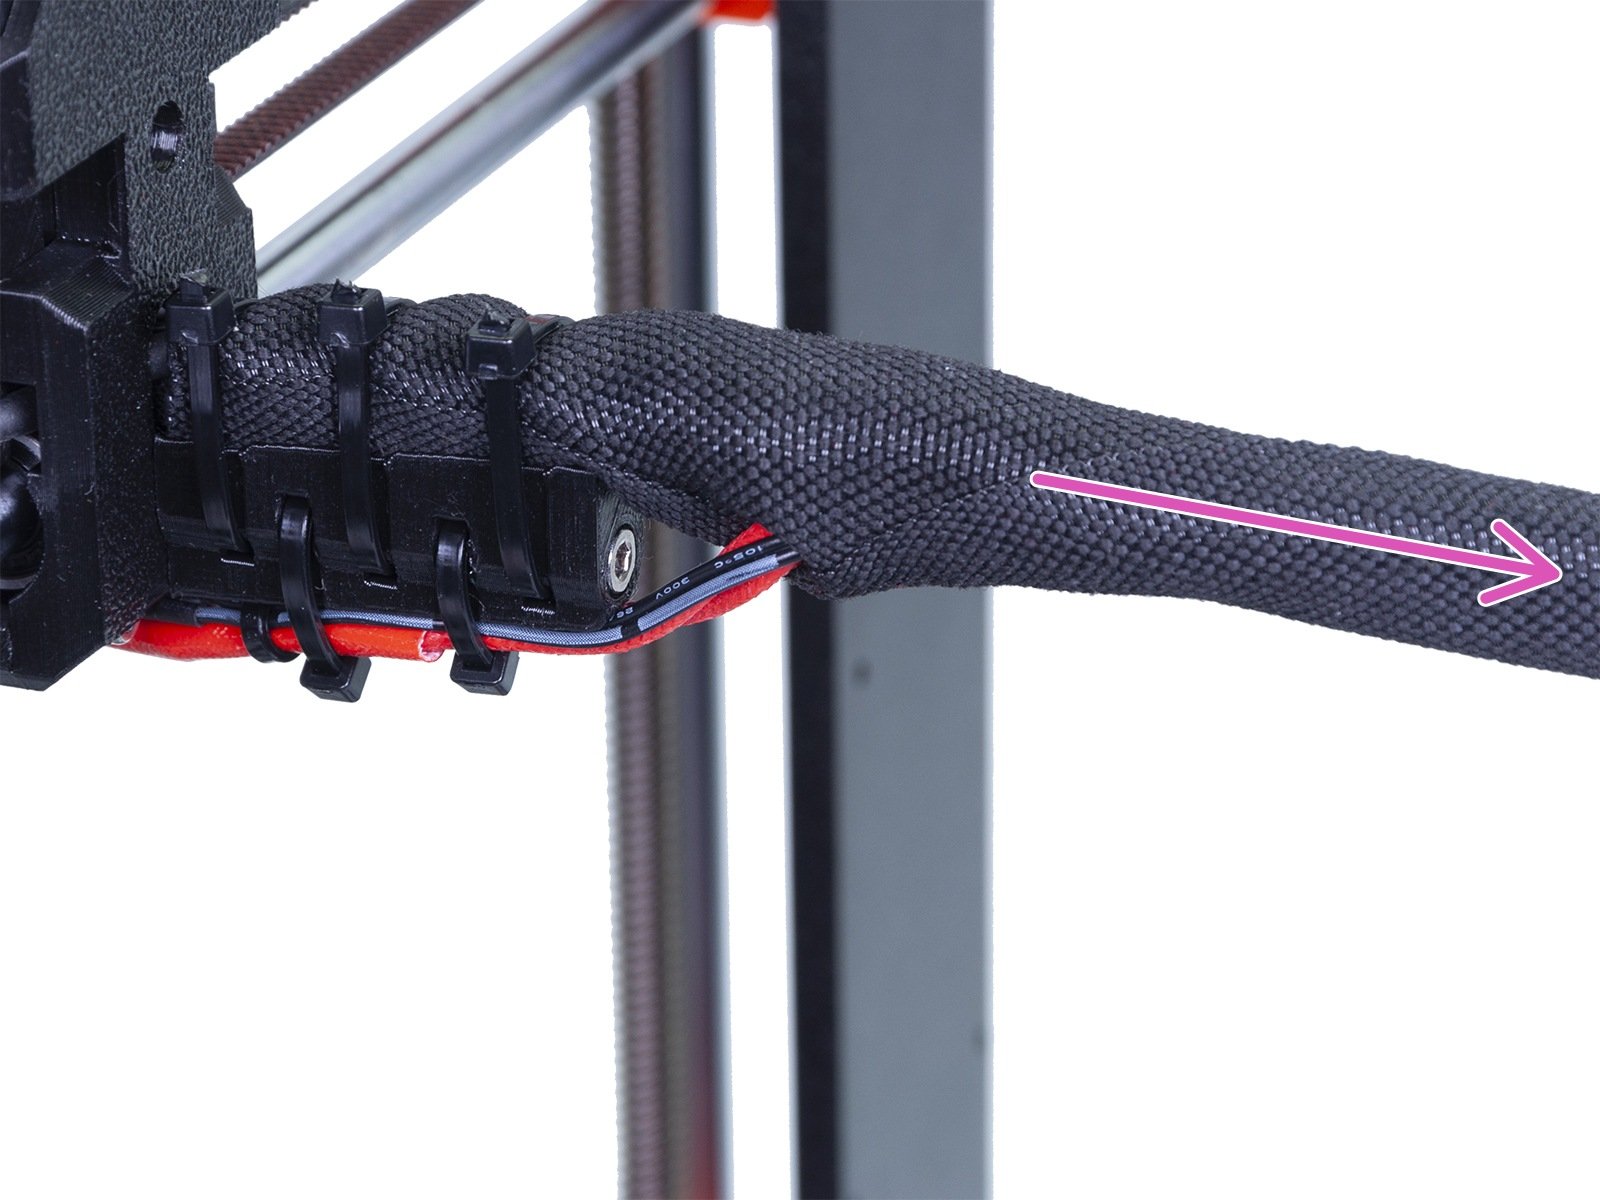
Thermistor connection
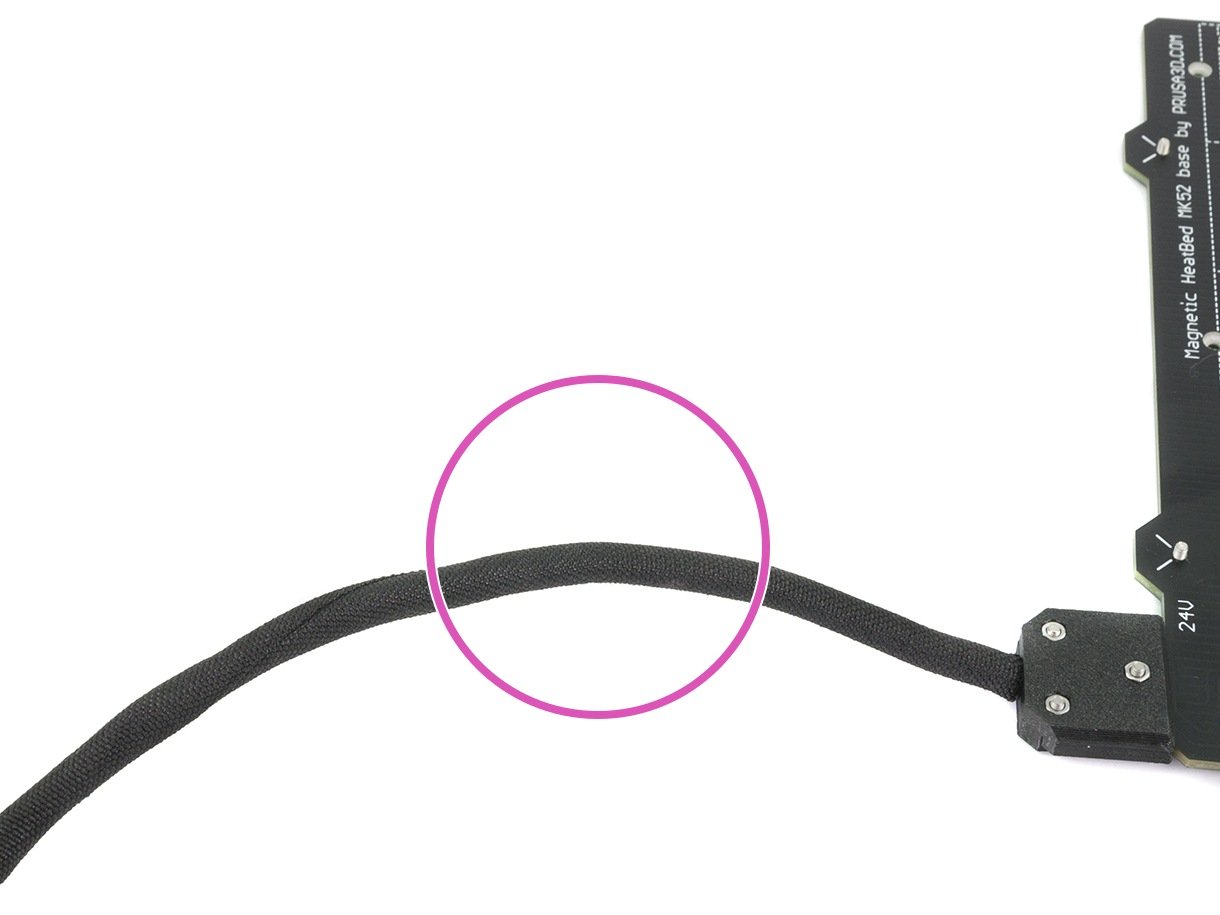
Check if the thermistor is properly connected to the RAMBo board: there is a latch on the connector that needs to snap in place. To find the thermistor see Mini RAMBo electronics wiring (MK2S, MK2.5, MK2.5S) or Einsy RAMBo electronics wiring (MK3/MK3S/MK3S+), depending on your printer. Also, make sure the textile sleeve protection of the extruder cable bundle did not snap and that it is still protecting the cables, especially around the spot where they enter the electronics casing.
Hotend thermistor
At the other end of the hotend thermistor cable, inspect the wire where it goes into the heater block. This point is fragile and can get damaged.
Heat bed thermistor
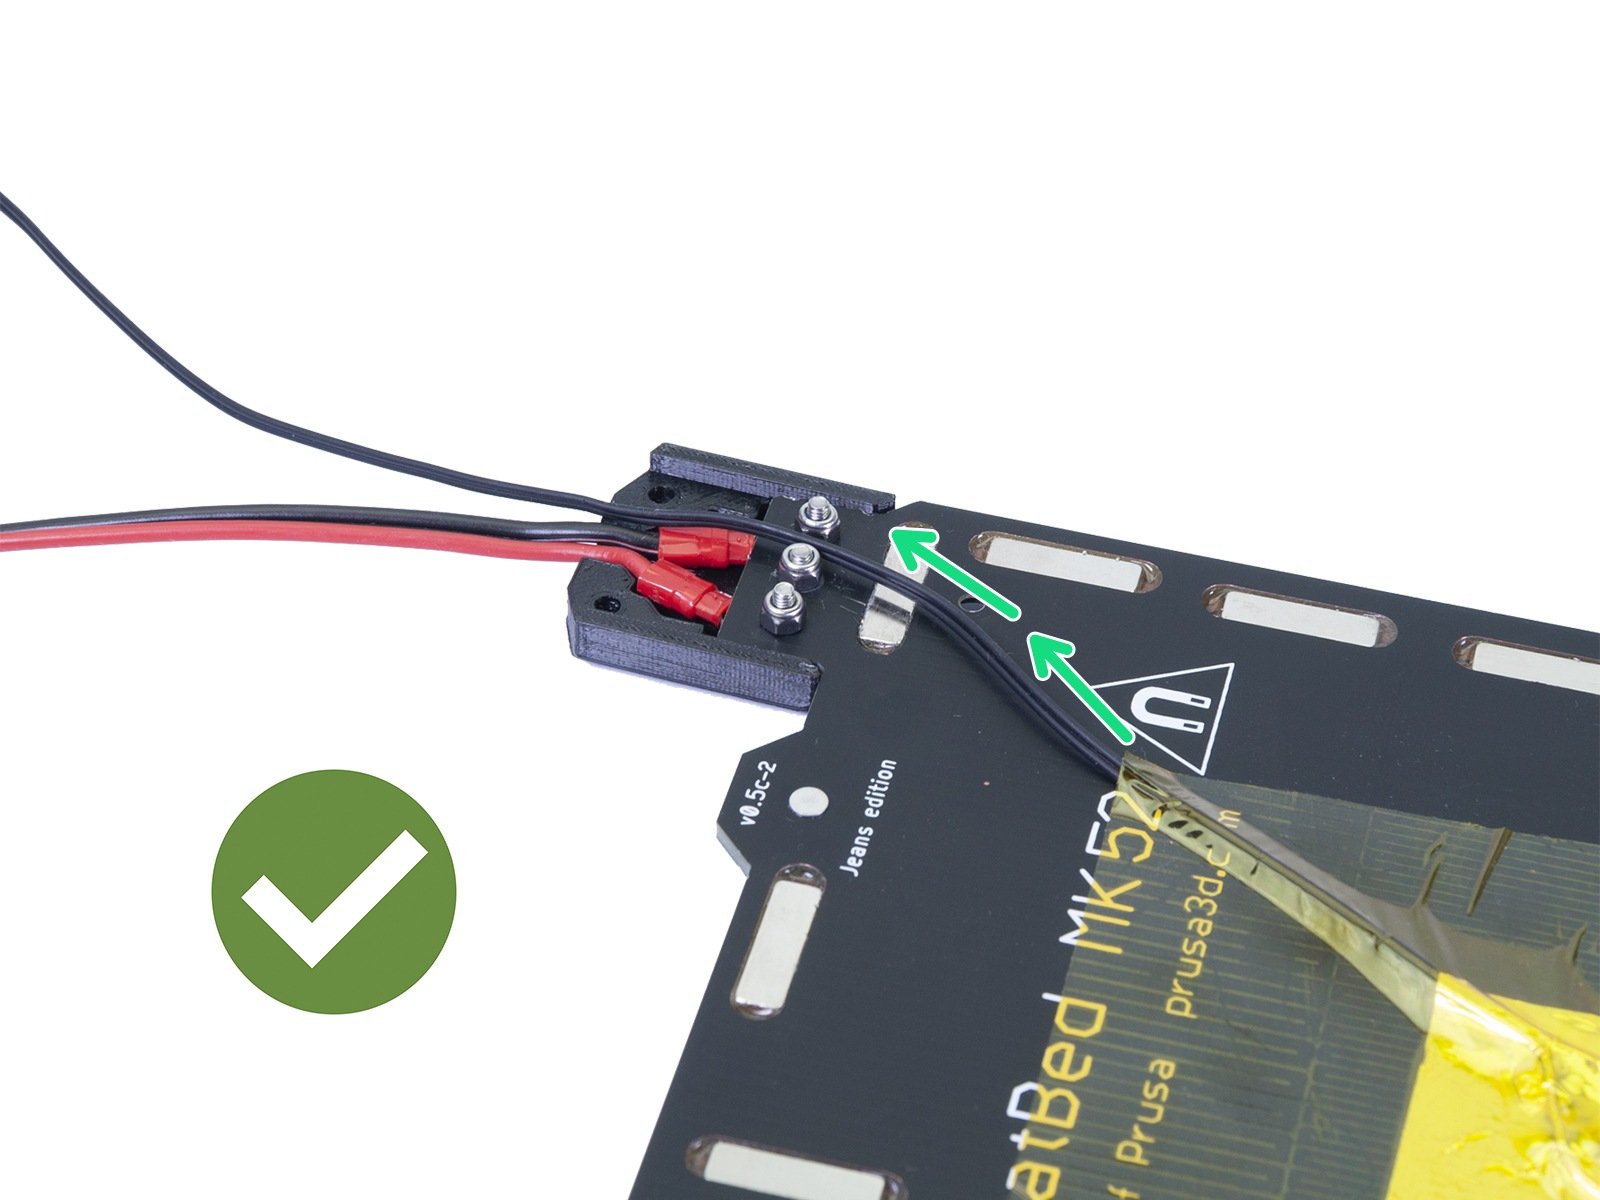
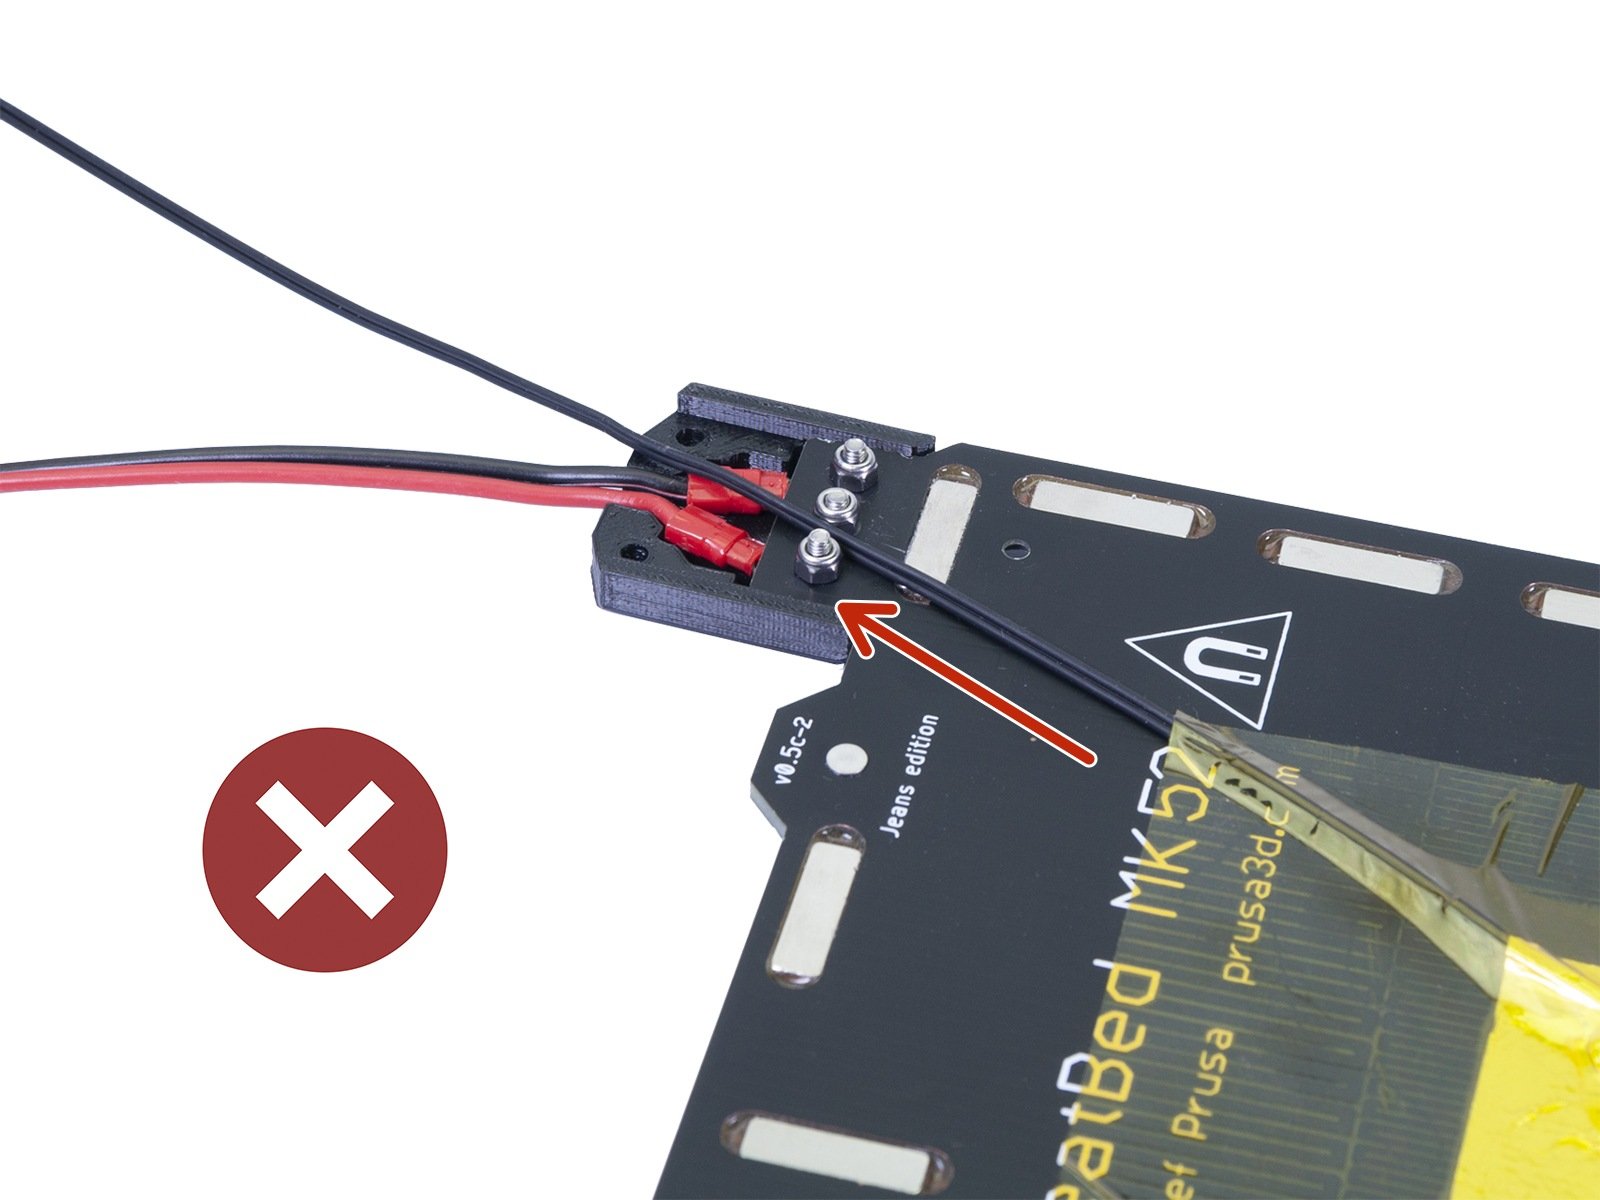
As for the heat bed thermistor cable, make sure it is firmly attached to the underside of the heated bed with the golden Kapton tape. If not, try to press it back on. Make sure that the thermistor cable has some slack, as shown in the right picture below. It is also important that it is not being pinched by the printed cable cover when put together. This is so it won't be worn down by the movement of the bed.
 |  |
Replacement
In case there is visible damage on the cable, or if it behaves erratically, the thermistor must be replaced. You can follow our guides How to replace a heatbed thermistor (MK3S+/MK3S/MK2.5S/MK2S) or How to replace a hotend thermistor (MK2S).
79 comments
I also seem more likely to get this issue in the winter, when the basement is colder...
The error is pointless when first turning the system on in the cold.
After about 15 hours of printing (all PLA), I keep getting the Mintemp error. I found that this means it's the hotend. I've just received my order of Original Prusa Hotend Thermistor XL,MK4 × 1, and I've tried to find instructions for changing it, and the best I've found is a youtube video, and this page here, all of them for previous models. Are there any instructions for changing this with the Core One? I'm quite new to 3d printing (other than resin), so anything that keeps it basic would be greatly appreciated.
Thanks so much for any help.