The Bed leveling failed error appears when there is something wrong with the last stage of the calibration. This calibration is the last step of XYZ calibration and is performed before each print.
For MK2.5/MK2.5S printers that have the SuperPINDA installed, you MUST use firmware version 3.9.3, or above!
There can be three different error messages related to the Bed leveling failed:
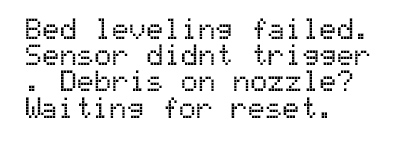
- Sensor didnt trigger. Debris on nozzle? Waiting for reset.
- Sensor triggered too high. Waiting for reset.
- Sensor disconnected or cable broken. Waiting for reset.
Troubleshooting
"Sensor didn't trigger. Debris on nozzle? Waiting for reset"
- Make sure the nozzle and heatbed are clear of any plastic.
- Do the Z calibration through the LCD Menu - Calibration - Calibrate Z, which also levels the X-axis.
- Try to resume the calibration or start the print again (depending on when the error occurred).
- If you are still struggling with these error messages, it is recommended to go through the whole calibration again. You can follow this walkthrough XYZ-calibration error-messages (MK3/MK3S/MK3S+) or XYZ Calibration error-messages (MK2/S).
"Sensor triggered too high. Waiting for reset."
- Make sure the hotend is fully inserted into the extruder.
- Do the Z calibration through the LCD Menu - Calibration - Calibrate Z, which also levels the X-axis.
- Try to resume the calibration or start the print again (depending on when the error occurred).
- If you are still struggling with these error messages, it is recommended to go through the whole calibration again. You can follow this walkthrough XYZ-calibration error-messages (MK3/MK3S/MK3S+) or XYZ Calibration error-messages (MK2/S).
Sensor disconnected or cable broken. Waiting for reset.
- Make sure that the P.I.N.D.A. sensor is properly plugged into the electronics board. You can double-check that using the Einsy RAMBo electronics wiring (MK3/MK3S/MK3S+) or Mini RAMBo electronics wiring (MK2S, MK2.5, MK2.5S) guides.
- Visually check the PINDA sensor cable, look for any overtightened zip-ties which might be preventing the P.I.N.D.A. sensor to work properly.
- Check the PINDA sensor, you can find more information on how to do that at P.I.N.D.A./SuperPINDA Sensor testing.
After adjusting the PINDA sensor or any other hardware, we recommend running the Calibration Wizard from the beginning.
Was this article helpful?
This action is available only to registered users. Please log-in.
4 comments
It obviously didn’t pass the XYZ axis test and after carefully checking the alignment I realized the XZ axis was way off. It was so bad that I had to loosen 16 bolts to realign it. It’s now completely square.
I also checked the PINDA and it’s working fine at the correct height.
Meanwhile, it passes all of the self tests and printed a beautiful line during the first layer Z test, so I know that it knows where the bed is and that the bed is level.
Still, it will not print. It gives me the bed level failure each and every time. - Any suggestions?
"Sensor didn't trigger. Debris on nozzle? Waiting for reset"
You may want to add something like:"Make sure the PINDA sensor didn't move (eg. because of a collision in the previous print). It should be ca. 1mm higher than the nozzle tip."This was my case.Found the solution here:https://forum.prusaprinters.org/forum/original-prusa-i3-mk3s-mk3-hardware-firmware-and-software-help/ed-leveling-failed-sensor-didnt-trigger-debris-on-nozzle/