The components installed on your printer rely on firmware configuration. To facilitate the installation of components sourced from third-party vendors, we introduced an experimental settings menu. Since different hardware has different specifications, the firmware can adjust the defining parameters of some components.
To activate the experimental menu, navigate to LCD menu -> Settings and scroll down to Hardware without selecting it with a short-press (left picture). Instead, hold the LCD encoder for 2-3 seconds, and the Experimental menu will appear (right image).
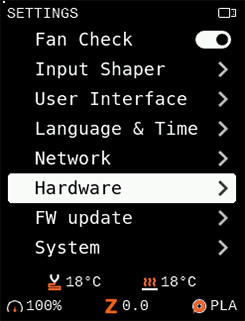 | 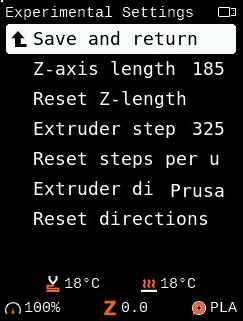 |
| Long-press this option. | After holding 2-3 seconds this menu will appear. |
Experimental settings on an Original Prusa XL.
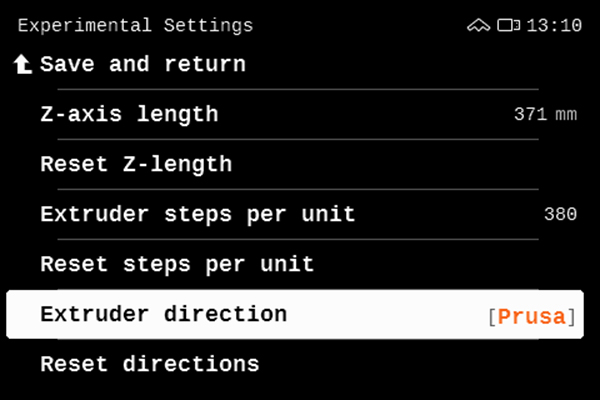
Save and return: Saves the current values and returns to the previous screen.
- Z-axis length: In this menu, the Z-axis length can be adjusted according to the size of your extruder.
- Reset Z-length: resets the Z-axis length to default/stock.
- Extruder step / Extruder steps per unit: set the steps appropriate for your extruder.
- Reset steps per unit: resets Extruder steps to default/stock.
- Extruder direction: shows two options for the extruder motor direction. The default/stock is "Prusa", and the other is "Wrong".
- Reset directions: resets extruder direction to default/stock.
Save and return
After the correct settings are changed, select Save and return. The printer will ask you whether you want to save the changes and reboot the printer. On reboot, your printer will have the new settings for your custom extruder. This will ensure that even with adjusted parameters the printer can still perform First Layer Calibration, Live Adjust Z, and print.

3 comments
At least one can reset manipulations when not done physically.