Prusa
  • SHOP
    • Latest products
    BY CATEGORY
    • 3D printersnew
    • 3D printer upgradesnew
    • Materials
    • Accessories
    • Spare parts
    • Courses
    • Merch
    • Get a price quote
    QUICK LINKS
    • Shipping & delivery
    • Returns & refunds
    • Payment & financing
    • Warranty
    • VAT & Customs fees
    • FAQ

    0 item in your cartitems in your cart

    Your cart is empty

    Go to cartShop 3D printers

    My profile

    Log in to see orders, saved items

    My profile

    Signed in as

    • Orders
    • Logout
  • 3D PRINTING
    • Explore 3D printing
    FOR BEGINNERS
    • 3D printing 101
    • How FDM printing works
    • Buying your first printer
    • 3D model catalog
    BY APPLICATION
    • Rapid prototyping
    • Manufacturing
    • Engineering
    • Research
    • Arts & design
    GO DEEPER
    • Materials guide
    • Courses
    • Webinars
    • Case studies
    • Custom 3D printing
  • 3D PRINTERS
    • All 3D printers
    FOR
    • Home or garageHobbyists, tinkerers and home printing
    • BusinessIn-house production for small teams
    • EnterpriseFleets, security and scale
    • Which Prusa is right for me
    SHOP & BROWSE
    • CORE One+new
    • CORE One+ INDXnew
    • CORE One L+new
    • CORE One L+ INDXnew
    • XL+new
    • MK4S
    • Prusa Pro HT90
    • Prusa Pro AFS
    • Prusa Pro SLX
    MORE FROM PRINTERS
    • Parts & upgradesnew
    • Spare parts
    • Critical infrastructure
    • Case studies
    • Signature Oak
    • Kits
  • MATERIALS
    • All materials
    BY USE
    • Every-day & design
    • Functional engineering
    • Composites
    • Pro speciality
    • SLA resins
    PRUSAMENT
    • PLA
    • PETG
    • ASA
    • PC
    • PA11
    • Flex
    • TPU
    MORE FROM MATERIALS
    • Materials guide
    • We make material in house
    • Sustainability
    • Order on the store
  • SOFTWARE
    • All software
    PREPARE THE PRINT
    • PrusaSlicer 3.0New
    PRINT & MONITOR
    • Prusa Connect
    • EasyPrint
    • iOS & Android app
    • Prusa Farm
    GET STARTED
    • Download & install
    • Knowledge base
    MORE FROM SOFTWARE
    • 3D model catalog
  • SUPPORT
    • Explore support
    FIND ANSWERS
    • Knowledge base
    • Troubleshooting
    • Courses
    • Webinars
    GET HELP
    • Contact us
    • Livechat
    • Shipping & delivery
    • Warranty
    • Returns & refunds
    • Service & spare parts
    • Service & Repair
    COMMUNITY
    • Forum
    • Reddit
    • Printables
  • TRUST CENTER
    • Trust Center overview
    BY TOPIC
    • GDPR
    • Certificates
    • Security
    • Compliance
    COMMITMENTS
    • Sustainability report
    TALK TO US
    • Contact the security team
  • COMPANY
    • About Prusa
    GET TO KNOW US
    • Our story
    • How we make printers
    • Open source
    • Brand & media kit
    NEWS
    • Blog
    • Newsroom
    • Events
    TRUST & PARTNERS
    • Sustainability
    • Resellers & distributors
    • Affiliate program
    • Contact
    • English
    • Čeština
    • Deutsch
    • Español
    • Français
    • Italiano
    • Polski
    • 日本語
  • Signed in as

    • Orders
    • Address
    • In-stock Alerts
    • My Courses
    • Subscription
    • Edit Account
    • Logout

Log in to see orders, saved items

Signed in as
  • Orders
  • Address
  • In-stock Alerts
  • My Courses
  • Subscription
  • Edit Account
  • English
  • Čeština
  • Deutsch
  • Español
  • Français
  • Italiano
  • Polski
  • 日本語
Shop

0 item in your cartitems in your cart

Your cart is empty

Go to cartShop 3D printers

My profile

Log in to see orders, saved items

My profile

Signed in as

  • Orders
  • Logout
SHOP
  • Latest products
BY CATEGORY
  • 3D printersnew
  • 3D printer upgradesnew
  • Materials
  • Accessories
  • Spare parts
  • Courses
  • Merch
  • Get a price quote
QUICK LINKS
  • Shipping & delivery
  • Returns & refunds
  • Payment & financing
  • Warranty
  • VAT & Customs fees
  • FAQ

Featured products

    Popular categories

      Trending searches

        Articles

          Blog

            Products

              Categories

                Suggested searches

                  Searching…
                  No results
                  Something went wrong.
                  ↑↓ Select↵ OpenEsc Close search
                  1. Support
                  2. Prusa Signature Oak
                  3. Printer maintenance
                  4. Regular printer maintenance (Signature Oak)
                   

                  Contents

                  • Printer maintenance
                  • Useful tools
                  • Frequent maintenance
                  • Sporadic maintenance
                  • Annual maintenance
                  • Wooden parts care
                  • Environment and Natural Wood Properties
                  • Regular Cleaning Instructions
                  • Oiled Surface Maintenance

                  Blog

                  • Prusament Pellets: Raw material batches for large-format 3D printing or small-scale polymer research & development
                  • Print colorful and glowing Halloween decorations with our spooky offer
                  • Factorio Has Arrived on Printables

                  Newsletter

                  Signup and get our monthly squeeze on updates, blog, printables and much more.

                  By clicking, you agree to receive our newsletter.

                  This site is protected by reCAPTCHA Enterprise and the Google Privacy Policy and Terms of Service apply.

                  Heavy Duty Keyboard Holder (No Supports)
                  E-shop
                  • 3D Printers
                  • Printer Upgrades
                  • Filaments
                  • Accessories
                  • Prusa Merchandise
                  Prusa

                  © Prusa Research a.s.

                  Printables
                  • 3D Models
                  • Store
                  • Clubs
                  • 3D Design Contests
                  • Brands
                  Community
                  • World Map
                  • Forum
                  • User Groups
                  • Events
                  Help
                  • Prusa Help
                  • Prusa Academy
                  • 3D Printing Calculators
                  Software
                  • PrusaSlicer
                  • Prusa.app
                  • Prusa Connect
                  • Drivers and Software
                  Company
                  • About Us
                  • Blog
                  • Official Prusa Resellers
                  • Contact Us
                  • Certified for ISO 9001, ISO 14001, ISO 45001
                  • General Terms and Conditions
                  • General Terms and Conditions of Use of the PRUSA Websites
                  • Privacy Policy
                  • Information about cookies
                  • Customer Complaints Policy
                  • Status Page
                  • Do Not Sell or Share My Personal Information
                  • Supplemental Statements
                  Prusa
                  • General Terms and Conditions
                  • General Terms and Conditions of Use of the PRUSA Websites
                  • Privacy Policy
                  • Information about cookies
                  • Customer Complaints Policy
                  • Status Page
                  • Do Not Sell or Share My Personal Information
                  • Supplemental Statements

                  © Prusa Research a.s.

                  JOSEF PRUSA®, PRUSA RESEARCH®, PRUSA POLYMERS®, PRUSA ORANGE®, PRUSA 3D ® AND PRUSAMENT® are registered trademarks of Prusa Development a.s. used by Prusa Research a.s. under licence from Prusa Development a.s.

                  Regular printer maintenance

                  (Signature Oak)

                  Relevant for

                  Signature Oak
                  Article is also available in following languages
                  English
                  Čeština
                  Polski
                  Deutsch
                  Français
                  Español
                  Italiano
                  日本語

                  The Prusa Signature Oak was designed from the beginning as a true print "workhorse". Despite its high reliability, it is still a device with mechanical components that require maintenance.  

                  Printer maintenance

                  Useful tools

                  Besides the usual tools, such as Allen keys, needle-nose pliers, and IPA (Isopropyl Alcohol) + paper towels, you might need:

                  • Compressed air: also known as canned air. Be sure not to hold it upside down while spraying, otherwise you could damage any electronic components while trying to clean them.
                  • Brass Nozzle Brush: useful for cleaning the heaterblock. If you don't have a brass brush, any brush with hard bristles will do the job.
                  • Prusa Lubricant:  used to lubricate the smooth rods with linear bearings, and to lubricate the Z-axis leadscrews. DO NOT use Prusa Lubricant on the linear rail! 
                  • Linear rail lubrication set: a set that includes Microlube GL 261, Dosing needle SSS15 2, Cartridge with manual piston 2/2,5mm, and two nitrile gloves. 
                  • Alcohol-free cleaner: used to clean the printer panels. DO NOT use alcohol products, including IPA, to clean the panels. 

                  Frequent maintenance 

                  The following points should be checked before every print. 

                  Keeping the printer clean 

                  After several hours of printing, various kinds of debris may start to accumulate around the printer parts or under the heatbed - pieces of filament, dust, scraps, broken supports, etc. Always make sure that the parts of the printer are clean. You can use a brush, a small broom, or a vacuum to remove debris. 

                  Do not clean the transparent panels with alcohol-based cleaning solutions. This can damage the transparent panels, resulting in cracked surfaces. 

                  Hotend cleaning 

                  CAUTION: Heated parts can cause severe burns!

                  It is fundamental for the hotend to be clean. Debris on the nozzle or heaterblock can cause printer failures, for example, with the residue falling onto the printed model while the print is in progress.

                  To clean the nozzle and heaterblock, heat the nozzle for three to five minutes at 250 °C, as the remains of the filament must be warmed up slightly so that they can be removed more easily.

                  Use a small brass brush to clear away any old plastic stuck on the nozzle and heaterblock.

                  Avoid contact of the brush with the hotend cables, as this could cause a short circuit.

                  Caution: the printer is still at a hot temperature! Wait until the hot parts are cooled down to ambient temperature. It takes approximately 10 minutes. Do not touch it! Always check the values on the display.

                  Flexible print sheet

                  Acetone should be used sparingly for cleaning, and only be used on the Smooth print sheet! Never use acetone on the Textured or Satin print sheet, as the surface will be permanently damaged.

                  Never clean the special PA Nylon sheet with acetone, IPA (isopropyl alcohol), or other alcohol-based solvents (window cleaners, Windex, etc.)! This will damage the surface. 

                  All flexible print sheets should be cleaned regularly to ensure adhesion, but the exact methods and washing solutions can differ depending on the print sheet type. 

                  You can find more information on how to take care of your flexible print sheet in this article.

                  Sporadic maintenance

                  The following checks should be done every 200 hours of printing time. 

                  Axes check - Linear Rail (X-axis)

                  Ensure that there is no debris or dust on the (X-axis) linear rail. If there is, clean it using a clean paper tissue or a clean cloth with NO de-greaser and with no chemicals, as these might damage the rubber in the carriage. 

                  We recommend lubricating the linear rail every 3-6 months, using the dedicated linear rails lubrication set. 

                  On linear rails, DO NOT use Prusa Lubricant or other products that are not part of the linear rails lubrication set. 

                  Axes check - Smooth Rods and Linear Bearings (Y-axis)

                  Clean the (Y-axis) smooth rods with a clean paper towel, and lubricate them using a small amount of Prusa Lubricant.

                  Only in case you feel the axis is not running smoothly anymore even after recently cleaning and lubricating the smooth rods, bearings can be taken out, cleaned with alcohol, and greased on the inside, still using a small amount of Prusa Lubricant. 

                  Axes check - Belt

                  Over a long printing time, the belt can slightly loosen, causing issues such as layer shifting, or bad printing quality. The easiest way to check the belt tension is to print a circular object. If the result is not perfectly round, a belt adjustment is needed. 

                  Fans

                  The RPM (revolutions per minute) of both fans is constantly measured. This means that the printer will report an error if the fan suddenly slows down, for example, due to a piece of filament stuck in it.

                  In such a case, check and remove any dirt from the relevant fan. Do not try to bypass the RPM check, as this could damage the printer!

                  Both fans should be checked and cleaned after every few hundred hours of printing. Dust can be removed with compressed air in a spray can, small plastic threads can be removed with tweezers. 

                  CAUTION: Do not blow compressed air on the running fan. 

                  Nextruder

                  Do not open the gearbox unless you have the PG-assembly-adapter. Doing this can result in misaligning the gearbox, causing print failures. 

                  PG assembly adapter e-shop
                  PG assembly adapter printable part, included in the Nextruder Assembly folder. 

                  The primary gear and the bearings attached to the Idler Shaft in the extruder do not need any lubricant. Over time, a deposit of filament debris can form in the grooves of the primary gear, which then causes insufficient filament extrusion. Access the extruder by lifting the Idler Nut, and then moving the Idler Shaft. You can blow away the dirt with compressed air, or use a brass brush or an ordinary toothpick. Use the access hole on the side of the extruder. 
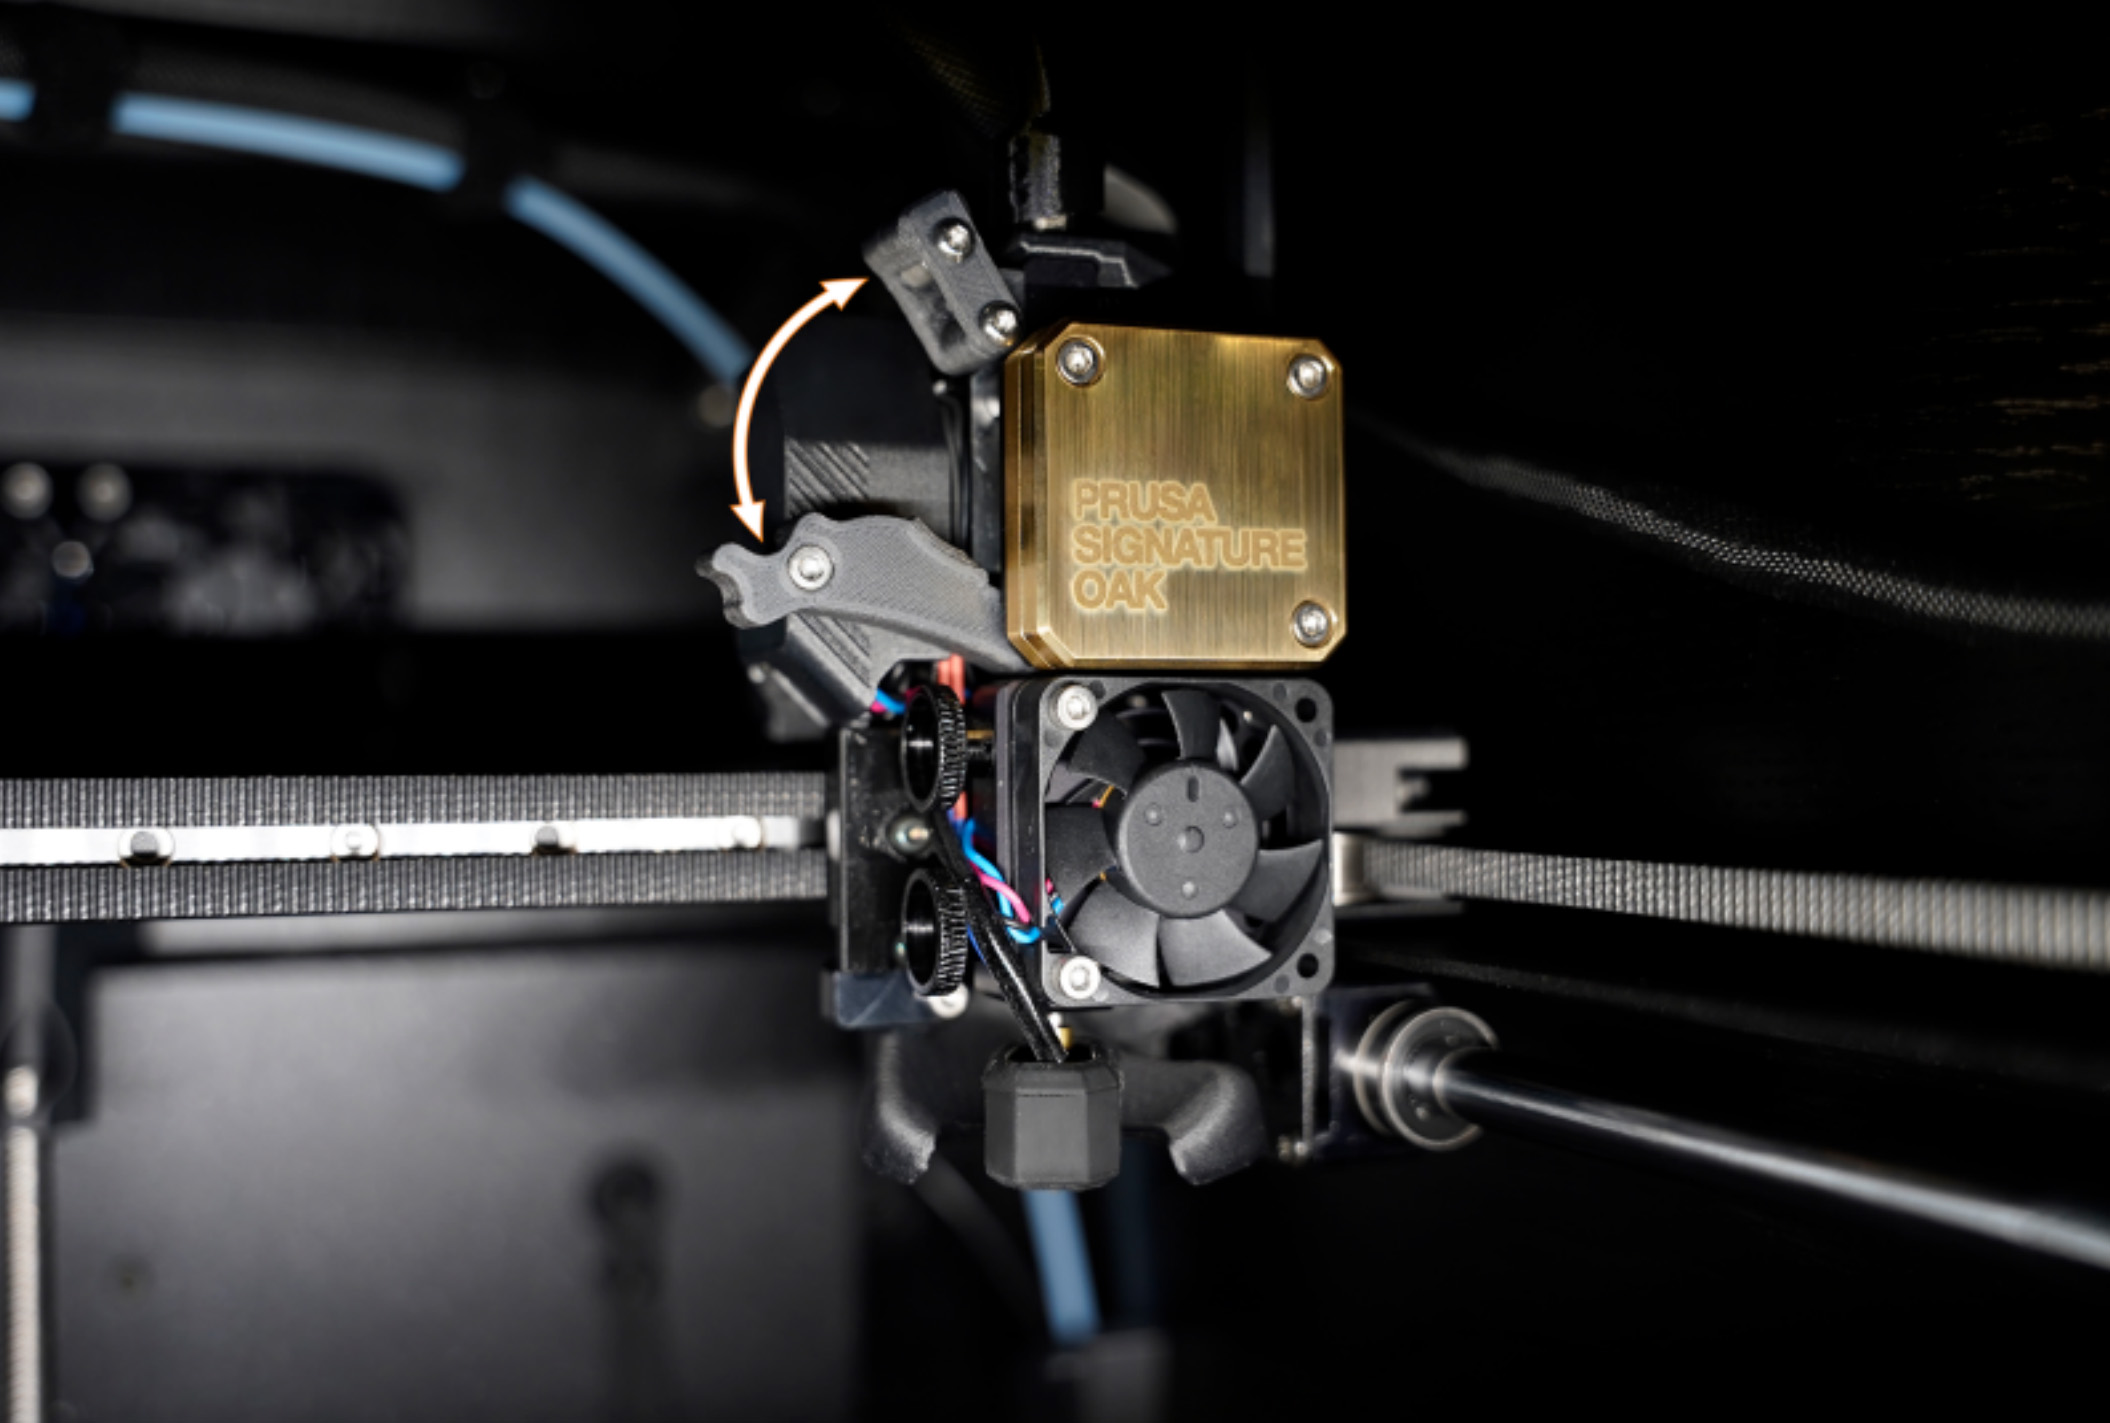
                  Nextruder filament sensor

                  If you encounter problems with the Nextruder filament sensor, such as incorrect or random readings, make sure that everything in the Nextruder is correctly wired and that there is no debris in the filament path inside the extruder, either using tweezers or a can of compressed air. 

                  To access the right side of the LoveBoard, loosen two M3x6 bolts, and remove the cover. 

                  To clean the Nextruder filament sensor, follow the dedicated article. 

                  Panels cleaning 

                  Use an alcohol-free cleaner or soapy water to clean the printer panels. 

                  DO NOT use products that contain alcohol, including IPA. Repeat exposure will weaken the panels, causing them to become brittle over time. 

                  Annual maintenance

                  Electronics

                  Before touching the electrical connections, please make sure that the printer is off, and unplugged from the main power source.

                  It is a good practice to check and optionally reconnect the electrical connectors on the xBuddy board, Loveboard, heatbed, PSU, and xLCD every 600-800 hours of printing. 

                  In particular, ensure that the screw-attached connectors are fully tightened, and the Molex-attached connectors properly connected. 

                  CAUTION: for Molex-attached connectors, it is necessary to press the latch before disconnecting. Otherwise, the connector may get damaged. 

                  Wooden parts care

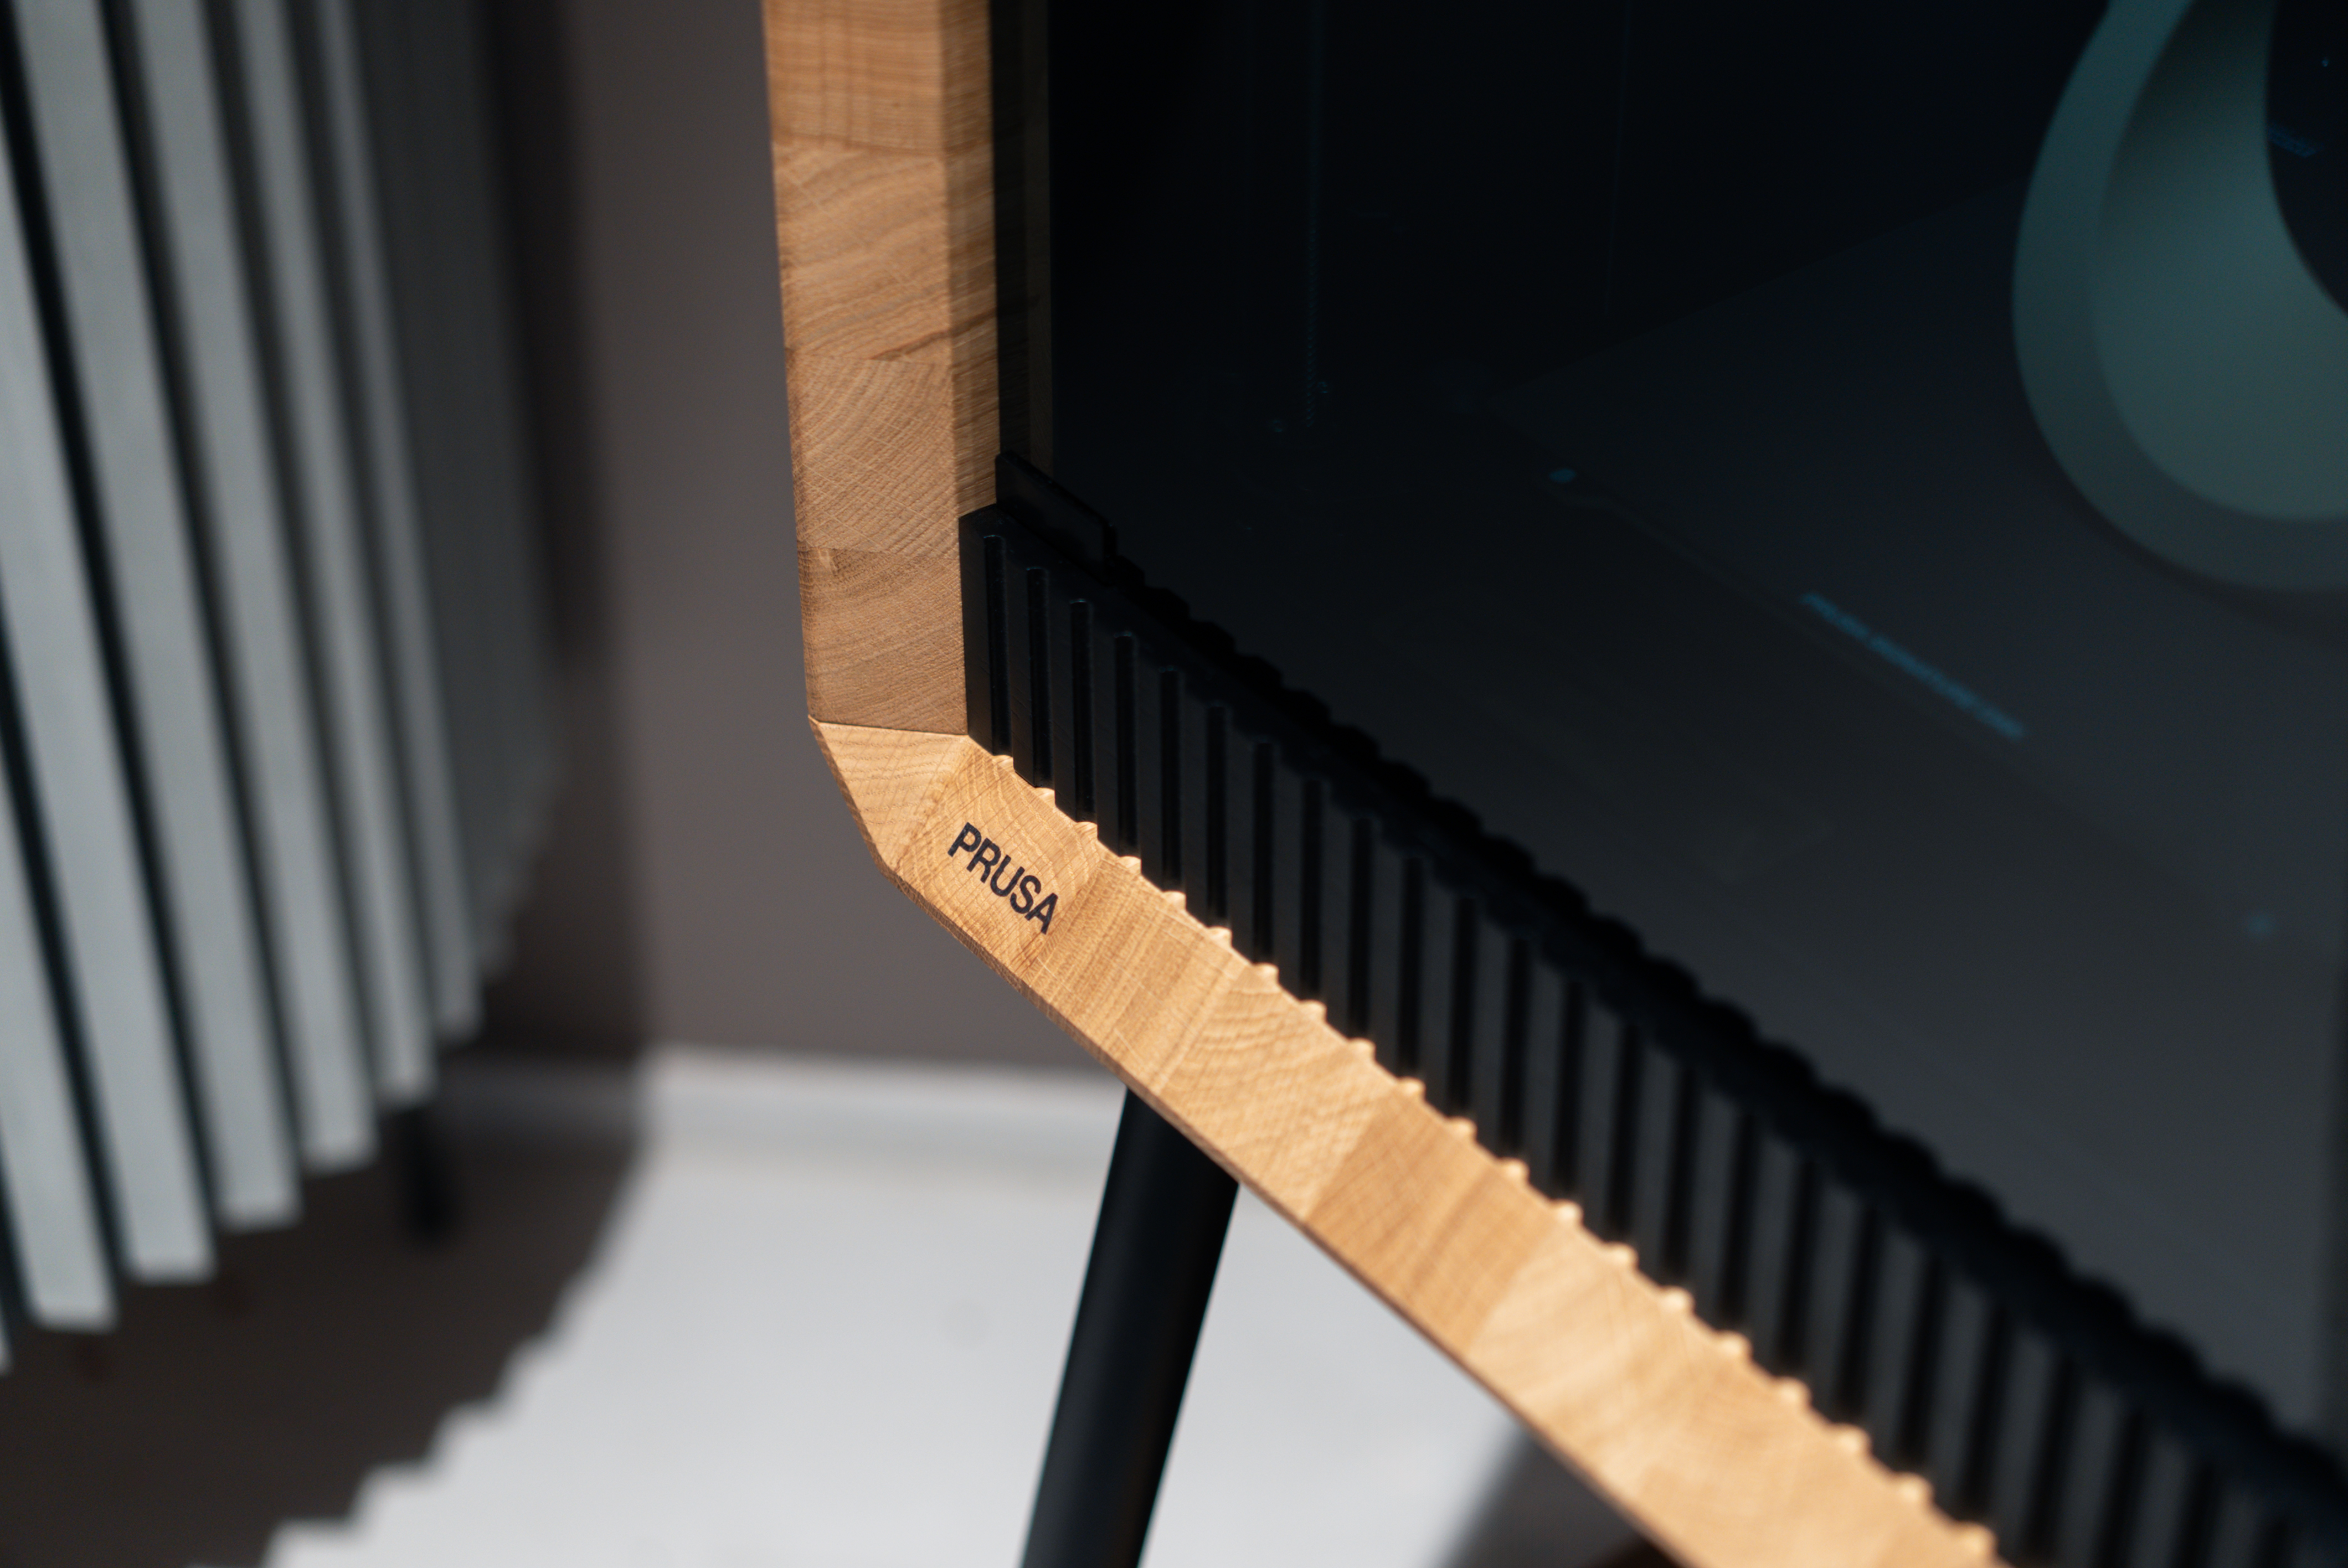
                  The Prusa Signature Oak is a unique 3D printer, featuring structural components made from solid oak. As a living, natural material, wood is sensitive to environmental conditions and external factors, such as humidity, temperature changes, and physical damage. While the wooden parts of the 3D printer come with a protective finish, regular and proper maintenance is crucial to preserve their beauty and function.

                  Below is a summary of the most important procedures, with the full details available on the dedicated article Care and maintenance of wooden parts (Prusa Signature Oak).
                  Environment and Natural Wood Properties

                  Every piece of wood is unique in its grain and tone. Knots or medullary rays are natural growth features of this living material. Exposure to sunlight can cause slight color changes and oxidation over time. Wood constantly "breathes" and reacts to its environment, which may lead to fine microcracks in the finish or a slight raising of the wood grain. These characteristics are normal for natural materials and are not considered defects.

                  Regular Cleaning Instructions

                  Dusting: Remove dust and dirt using a soft, dry, lint-free cloth (e.g., microfiber or cotton).
                  Spills: If liquid is spilled on the printer, wipe it dry immediately with a paper towel or soft cloth.
                  Do not place items containing liquids, such as plant pots, on the wooden surfaces.
                  Stains: To remove stains or sticky residue, gently wipe the surface with a slightly damp cloth, then immediately dry the area. Never leave the surface wet.
                  Signed Plaque: The front of the printing chamber features a numbered plaque with Josef Prusa's signature. Although the signature is sealed with a protective coating, clean the surface using only a dry, soft cloth. Do not use cleaning agents or excessive pressure, as these could damage the finish and erase the signature.

                  Never use abrasive cleaning agents, polishing pastes, aggressive chemicals, or solvents. Avoid contact with acetone and isopropyl alcohol (IPA), as these will permanently damage the oiled surface.

                  Oiled Surface Maintenance

                  The solid oak components of the Prusa Signature Oak are treated with a premium protective oil finish that requires regular maintenance. Over time, the oil will dry out or be absorbed by the wood. This can lead to rough spots, dull areas, or a patchy appearance.

                  To preserve a consistent look, apply a fresh coat of wood care oil regularly. The standard reapplication interval is once every three years. However, high-contact areas (e.g., the top cover) may require more frequent treatment.

                  To make this maintenance easier, a specialized Wood Maintenance Kit is included with your printer. This includes:
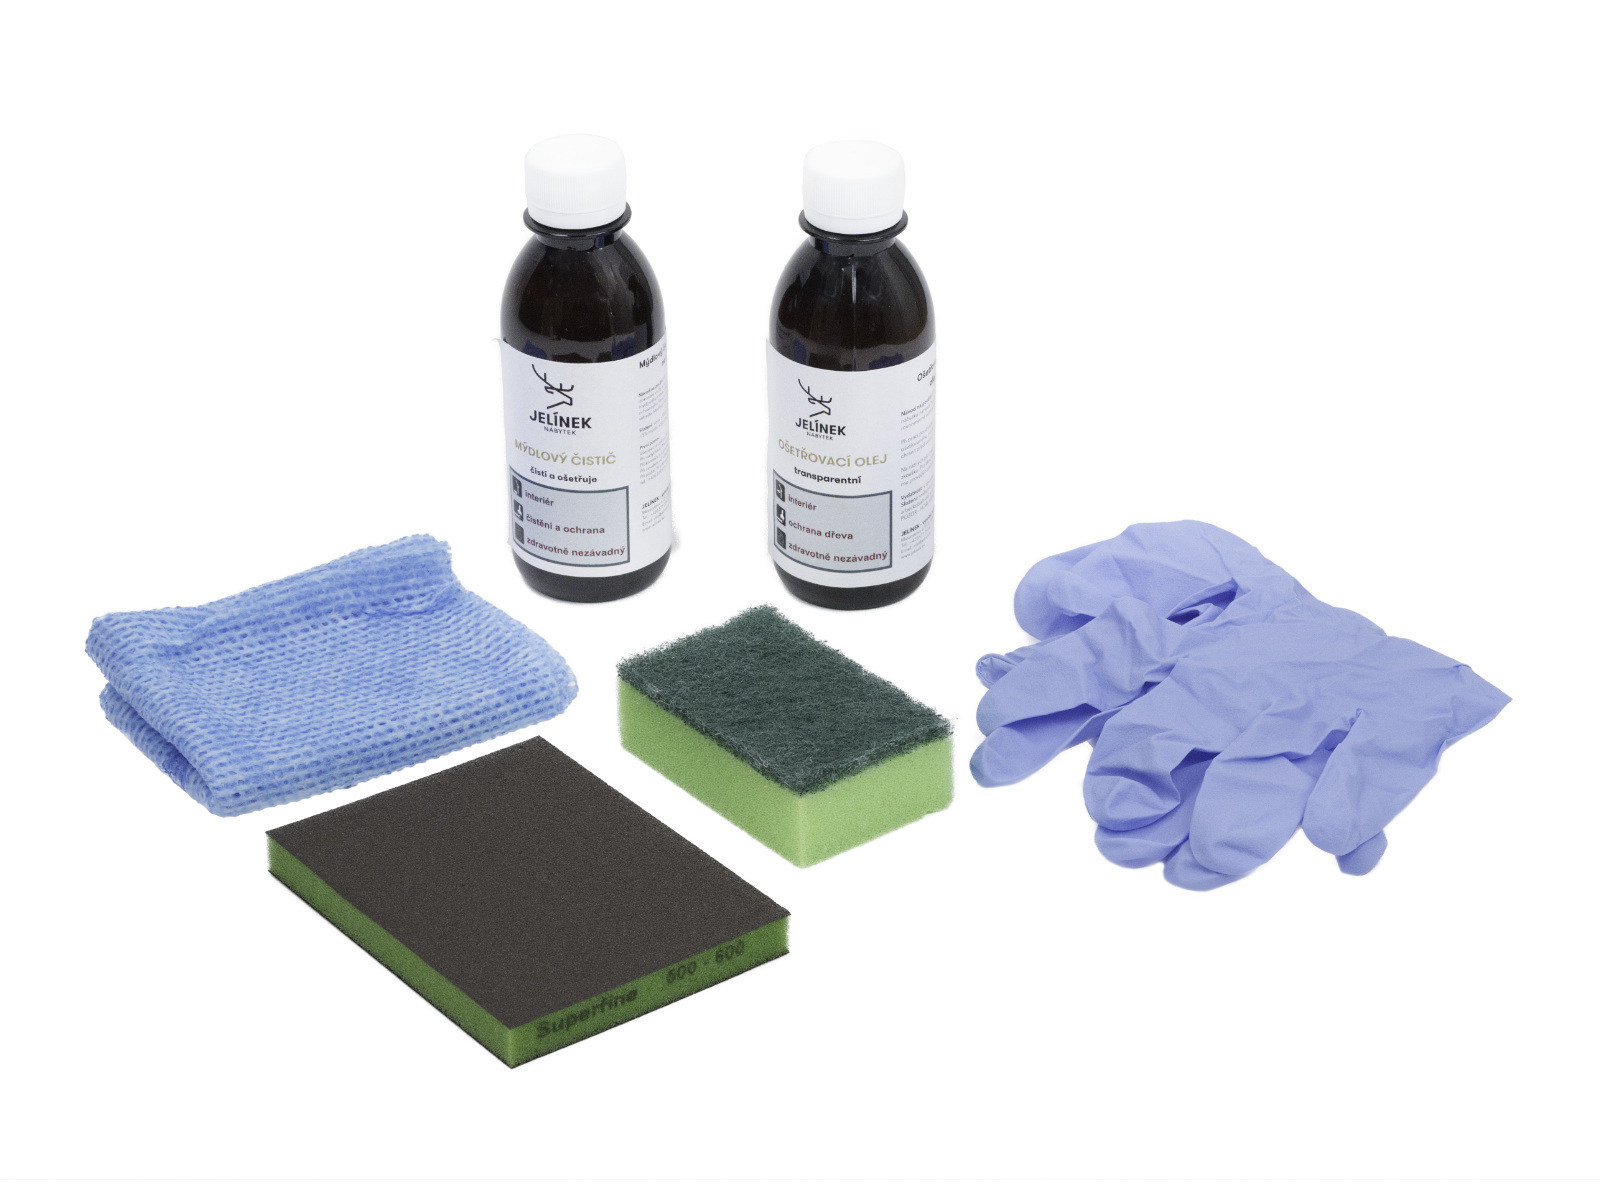
                  • Wood Cleaner (200 ml) - Soap-based cleaner
                  • Wood Care Oil (200 ml) - Universal clear oil
                  • Sanding sponge
                  • Application sponge
                  • Cloth (for wiping dry
                  • Protective gloves

                  Surface Cleaning (Deep Clean)

                  Use the soap-based cleaner only for heavily soiled surfaces. For routine maintenance, dusting is sufficient.

                  1. Mix a solution of 5 ml of cleaner with 200 ml of water.
                  2. Apply the solution evenly using a well-wrung damp cloth or sponge.
                  3. Do not rinse with clean water, as this would remove the protective film.
                  4. Allow the surface to dry completely before applying oil.

                  Repairing Minor Damage (Optional)

                  Minor damage, such as scuffs, fine scratches, or stubborn stains, can be repaired by sanding.

                  1. Lightly sand the damaged area with the provided sanding sponge. Always sand in the direction of the wood grain. When sanding the wooden parts, wear protective gear, as oak wood dust can irritate your respiratory system.
                  2. Thoroughly remove all sanding dust.
                  3. Proceed to apply the oil.

                  Applying Wood Care Oil

                  Ensure the surface is clean and perfectly dry.

                  1. Shake the oil bottle well before use.
                  2. Apply a thin layer of oil using the application sponge or a cloth.
                  3. Spread it evenly and let it sit for 3 to 5 minutes.
                  4. Wipe off any excess oil completely with a dry cloth. The surface should not feel wet to the touch.

                  Curing Time

                  The treated surface will cure within 24 hours. During this time, protect the surface from water and humidity, and do not place any objects on it.

                  For extensive damage or structural issues, please contact our technical support.

                  Oil-soaked cloths and sponges carry a risk of spontaneous combustion and can self-ignite if not handled properly. Immediately after use, soak all used cloths and sponges in water. Then place them in a sealed metal container or let them dry outdoors, fully unfolded, before disposal.

                  Dispose of empty containers and maintenance waste in accordance with local regulations.

                  Was this article helpful?
                  This action is available only to registered users. Please log-in.
                  Log in  to post a comment
                  No comments

                  Topics

                  • Using the printer
                    • Printer maintenance
                      • Regular printer maintenance (Signature Oak)
                      • Changing or replacing the Prusa Nozzle
                      • Installing or changing the Nextruder V6 Nozzle Adapter
                      • How to update firmware (CORE One L, CORE One, CORE One INDX, MK4/S, MK3.9/S, MK3.5/S, XL)
                      • How to downgrade firmware (CORE One/+, MK4/S, MK3.9/S, MK3.5/S, XL)
                      • Changing or replacing the Nextruder Hotend
                      • How to replace the Prusa Nozzle (CORE One)
                      • Care and maintenance of wooden parts (Prusa Signature Oak)
                    • 3D models
                    • Material guide
                    • Slicing
                    • Prusa Connect & PrusaLink