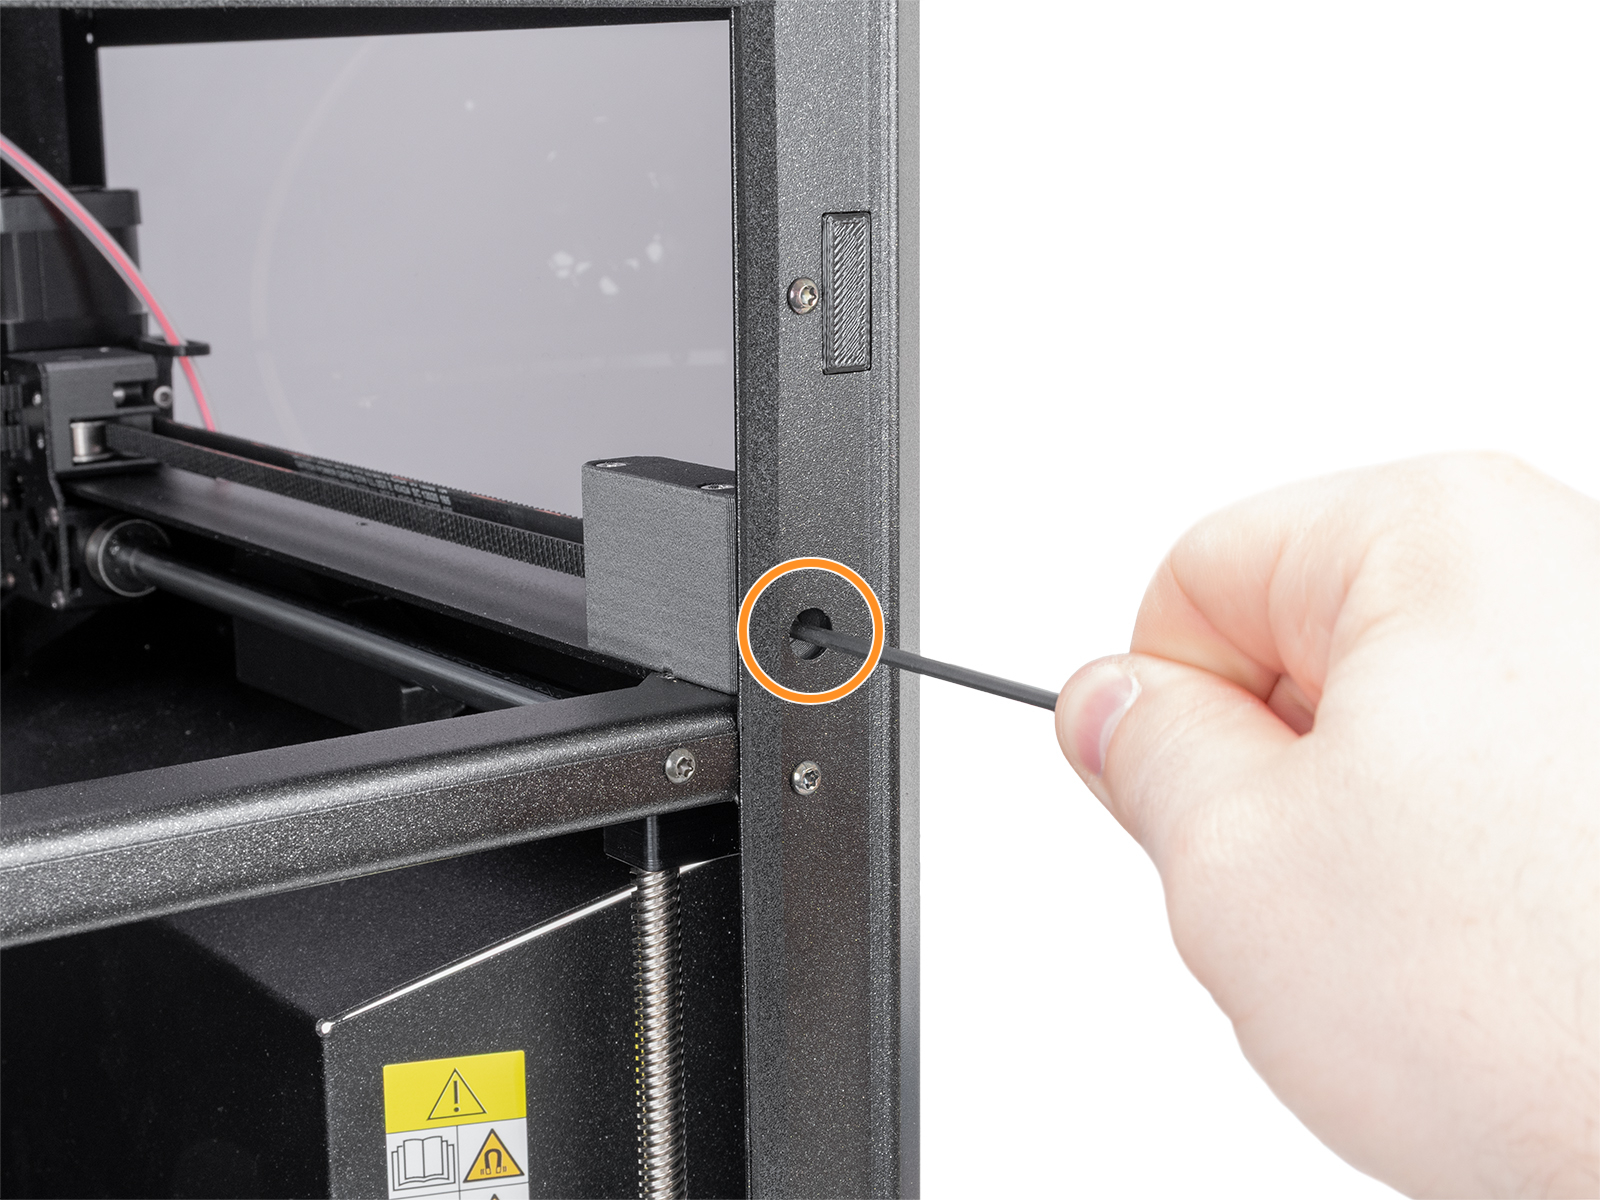
On the Prusa CORE One, CORE One+, CORE One INDX, and CORE One L, adjusting the belt to optimal tension is crucial for achieving high-quality prints. A loose belt can cause Layer shifting, Ghosting, or other print abnormalities, like getting an irregular shape instead of a perfect circle. An over-tightened belt can cause an irregular movement in the X and Y axes.
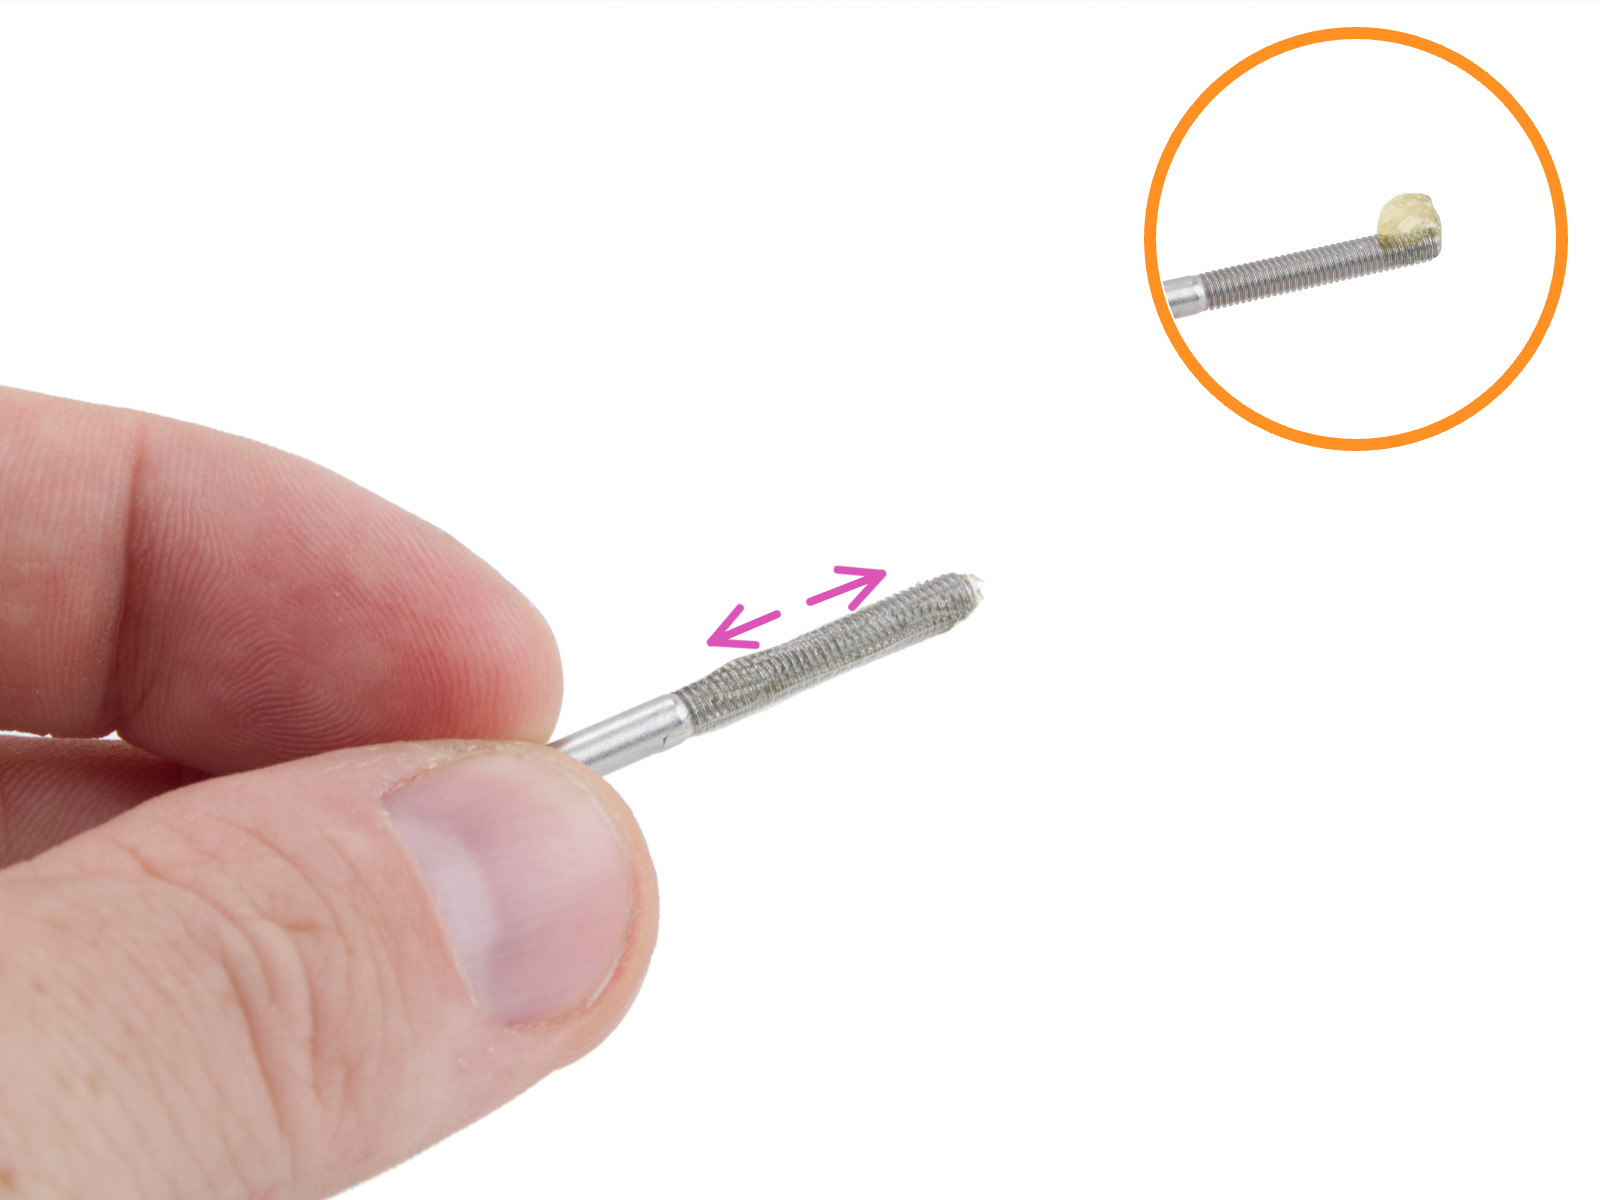
Assembly reminder - lubricate tensioner screws (CORE One kit)
The following check applies exclusively to CORE One and CORE One+ kits. Pre-assembled CORE One, CORE One+, and CORE One L have this step done at the factory.
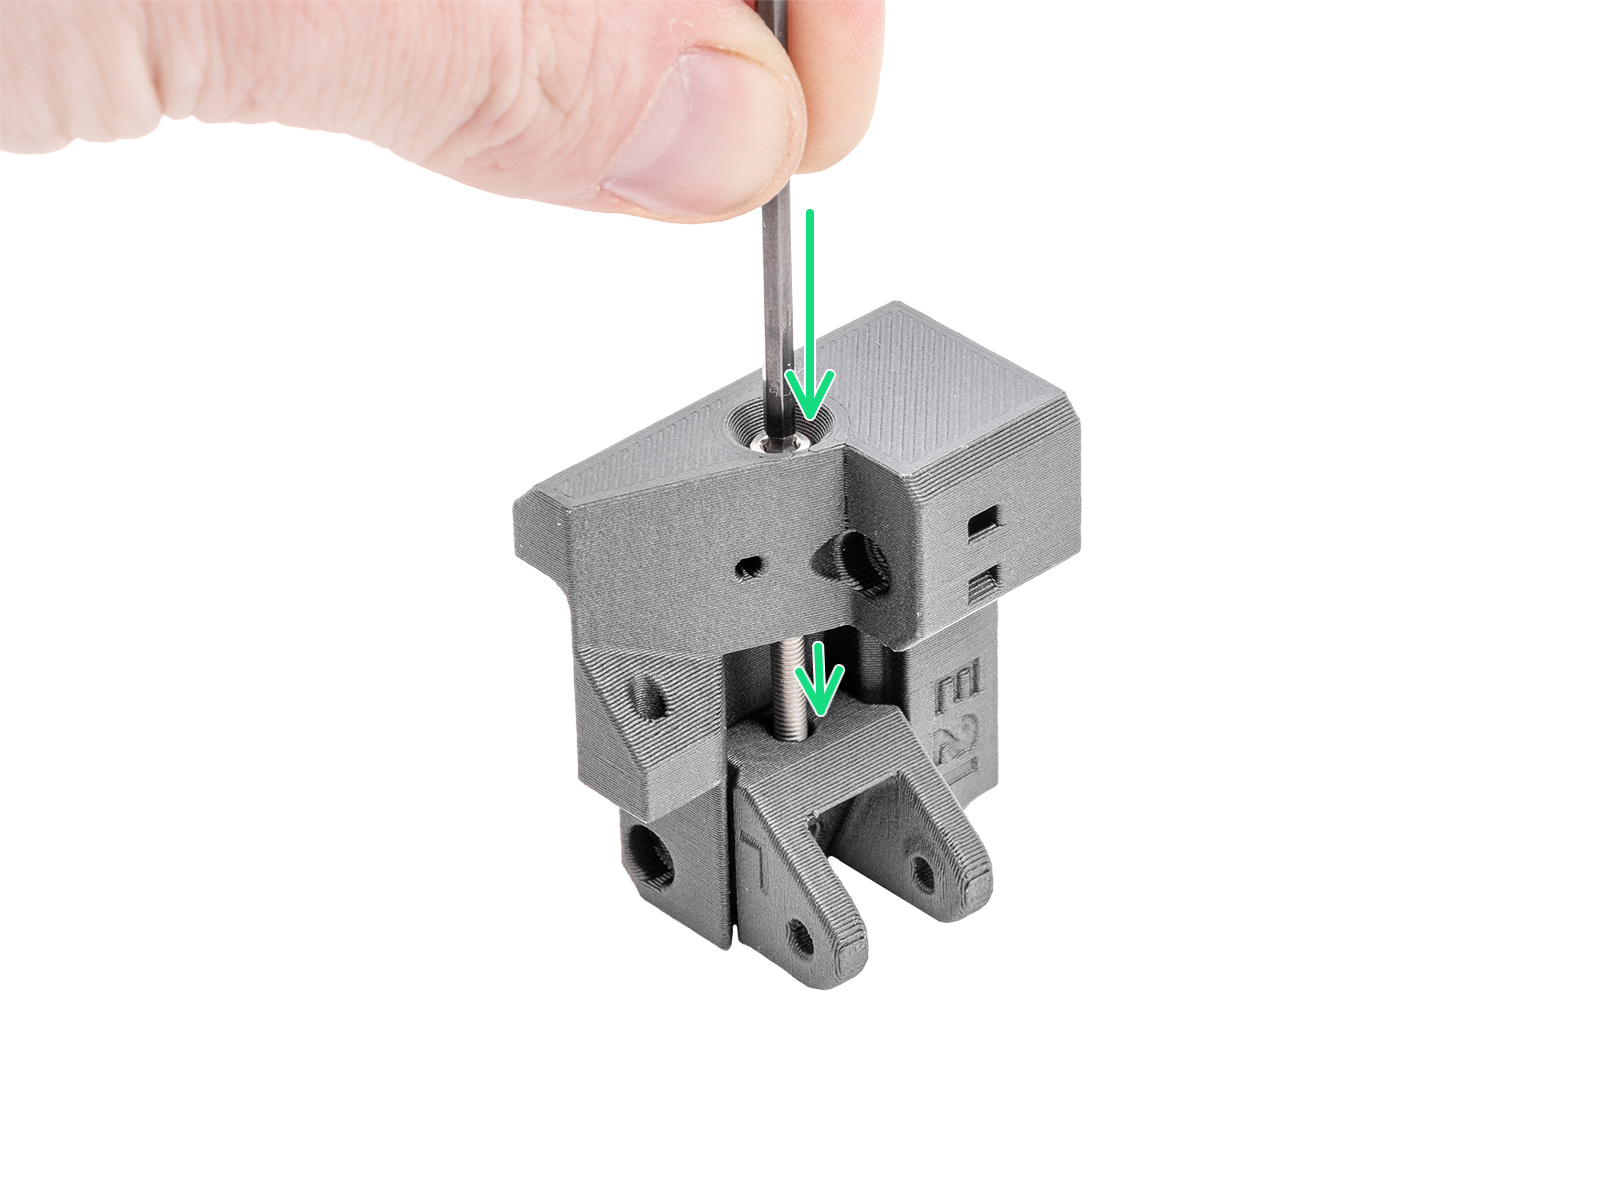
During the assembly process, we instruct you to apply a small amount of Prusa lubricant to the tips of both M3x30 screws for the belt tensioner parts. If this was done during the assembly of the kit, there is no need to redo it. Proceed directly to the next steps.
However, early CORE One kits did not have this step recommended in our manual. If this is the case, and other steps have not worked, the belt tensioner right/left and their attached belt tensioner pulleys might need to be replaced.
- How to replace the Belt Tensioner Left (CORE One)
- How to replace the Belt Tensioner Right (CORE One)
- How to replace the Belt Tensioner Pulley (CORE One)
 |  |
Alignment (CORE One/+, CORE One L)
For printers equipped with INDX upgrade, skip to the next paragraph Alignment (CORE One INDX).
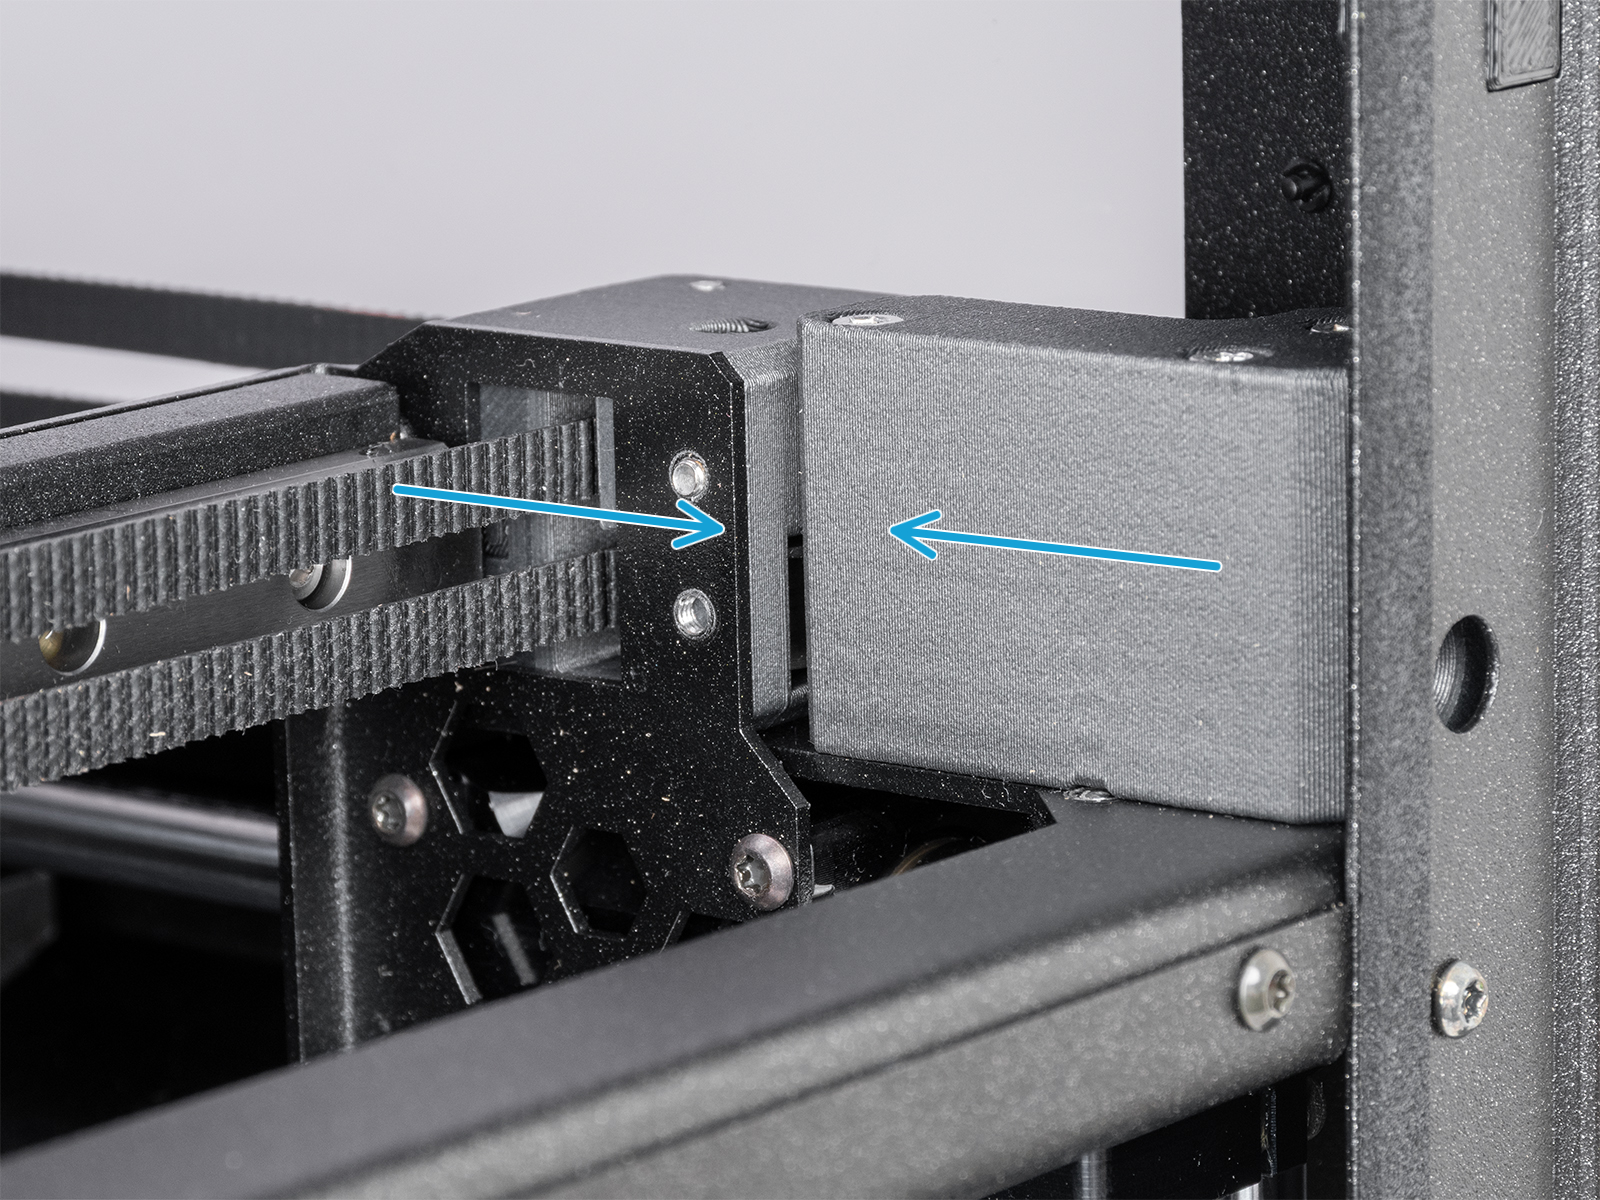
Before adjusting the belt, ensure the proper alignment of the CoreXY structure.
- Ensure the stepper motors are disabled. This can be done by switching the printer off, or through the LCD Menu -> Control -> Disable Motors.
- By hand, move the Nextruder to the frontmost Y-axis position and to the center of the X-axis.
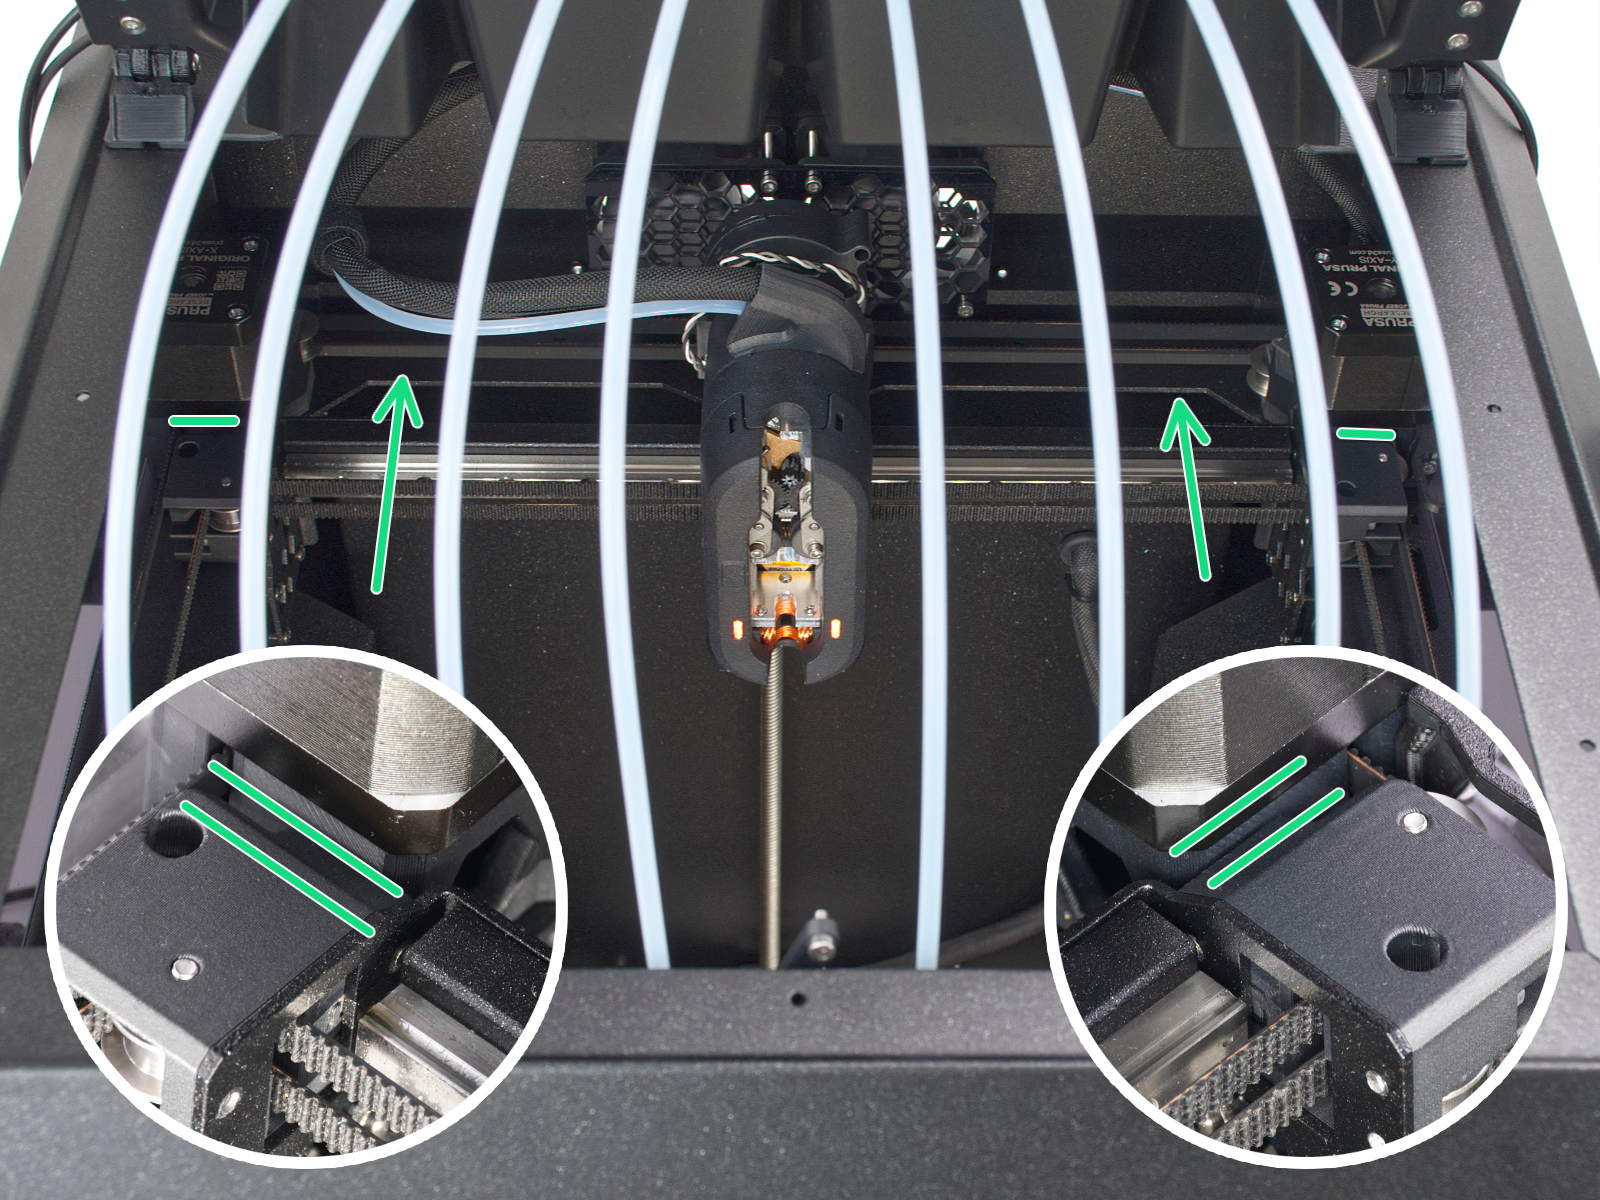
- Press the gantry corner against the front of the CoreXY, and make sure there is no play. Do this procedure on both sides. If there is any play in either side, perfect alignment is not achieved yet.

 Quick gantry alignment
If there is a gap in either side of the gantry, you can try to force it in the opposite direction manually:1. Fully loosen both tensioner bolts; this will allow free gantry movement.
2. Move the gantry halfway back along the rails.
3. Grip the gantry firmly on both ends and apply a gentle counter-force in the opposite direction of the tilt until it straightens.
4. Check the alignment with the belts still loose, and carefully push the gantry forward. Since the loose belts will not pull it all the way, you may need to guide it by hand. Verify that there is no gap on either side at the front position.
5. Tighten both tensioner bolts gradually, alternating between them, tightening each by the same amount to keep the gantry straight. You may hold the gantry in place with your hand while tightening. After tightening both belts, make sure no gap has reappeared.Note: Apply force carefully to avoid damaging belts or bearings.
- Slightly loosen both the belt tensioner bolts. Loosen the bolt on the corner with less play than the other.
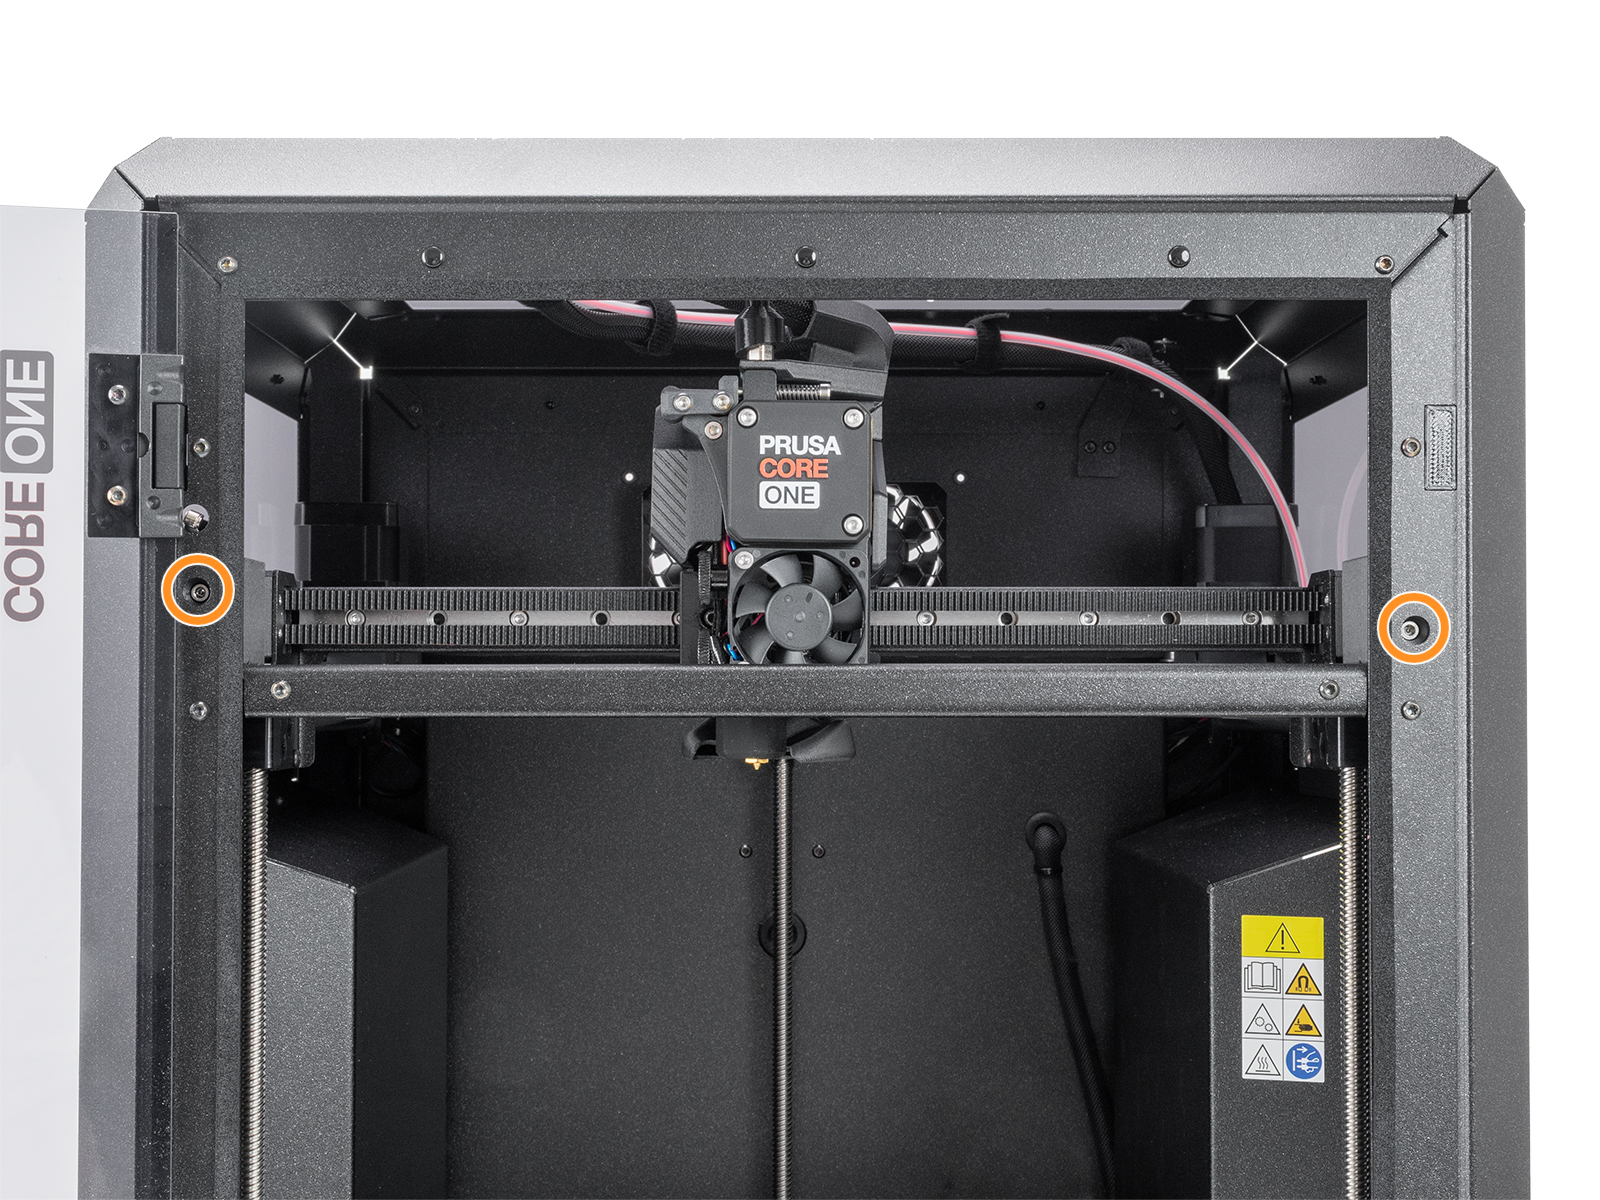
- Repeat steps 3 and 4 until a perfect alignment is reached. Do not worry if the belt is loose at this stage; adjusting the belt tension is done at a later step.
Alignment (CORE One INDX)
Before adjusting the belt, ensure the proper alignment of the CoreXY structure.
- Ensure the stepper motors are disabled. This can be done by switching the printer off or through the LCD Menu -> Control -> Disable Motors.
- By hand, move the Nextruder to the back Y-axis position and to the center of the X-axis.
- Press the gantry corner against the back of the CoreXY, and make sure there is no play. Do this procedure on both sides. If there is any play on either side, perfect alignment is not yet achieved.
Quick gantry alignment
If there is a gap on either side of the gantry, you can try to force it in the opposite direction manually:
1. Fully loosen both tensioner bolts; this will allow free gantry movement.
2. Move the gantry halfway back along the rails.
3. Grip the gantry firmly on both ends and apply a gentle counter-force in the opposite direction of the tilt until it straightens.
4. Check the alignment with the belts still loose, and carefully push the gantry forward. Since the loose belts will not pull it all the way, you may need to guide it by hand. Verify that there is no gap on either side at the front position.
5. Tighten both tensioner bolts gradually, alternating between them, tightening each by the same amount to keep the gantry straight. You may hold the gantry in place with your hand while tightening. After tightening both belts, make sure no gap has reappeared.
Note: Apply force carefully to avoid damaging belts or bearings.
- Slightly loosen both the belt tensioner bolts. Loosen the bolt on the corner with less play than the other.
- Repeat steps 3 and 4 until a perfect alignment is reached. Do not worry if the belt is loose at this stage; adjusting the belt tension is done at a later step.
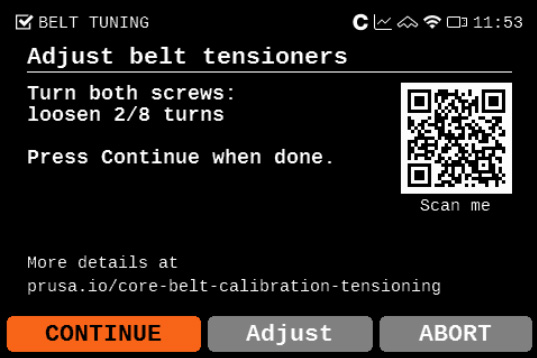
Belt tuning wizard
Starting from firmware 6.4.0, a belt tuning wizard is available in the printer menu, navigating to LCD Menu -> Settings -> Manual Belt Tuning. The printer uses controlled belt excitation combined with stroboscopic feedback to visualize belt resonance.
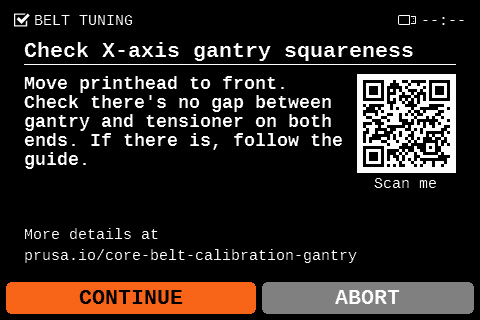
The wizard begins by prompting the user to check that the gantry is properly aligned, as misalignment can affect measurement accuracy. Follow the in-screen instructions to verify the gantry alignment, and in case of misalignment, follow the steps in the previous alignment paragraph.
The wizard then measures the vibration frequency of both belts and recommends whether to tighten or loosen them. Follow the in-screen instructions to turn the encoder to vary the vibration frequency, and at the same time, observe the vibrating movement made by the selected belt as the frequencies are changed.
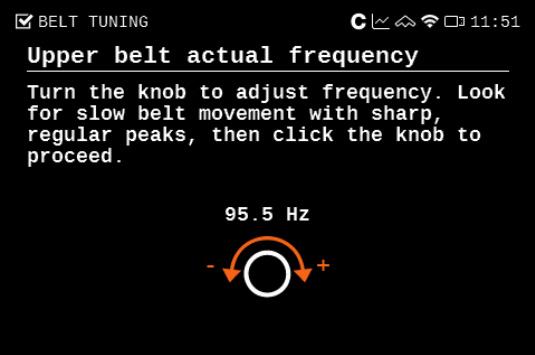
Look for a slow, extended, and steady resonating movement of the selected belt. Once you see that movement on the selected belt, select the current frequency on the printer screen.
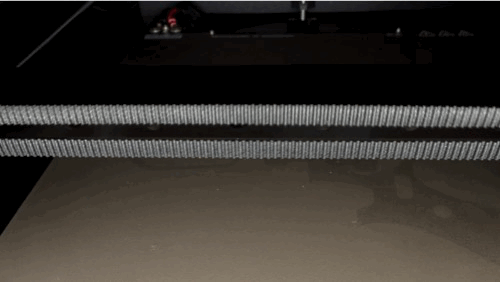 | 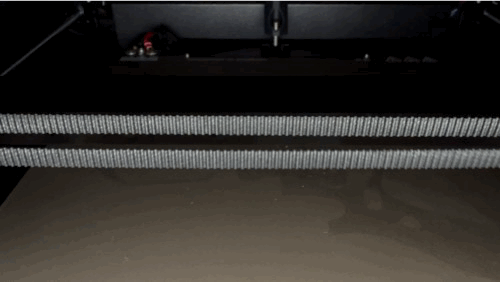 |
| Upper belt resonating movement | Lower belt resonating movement |
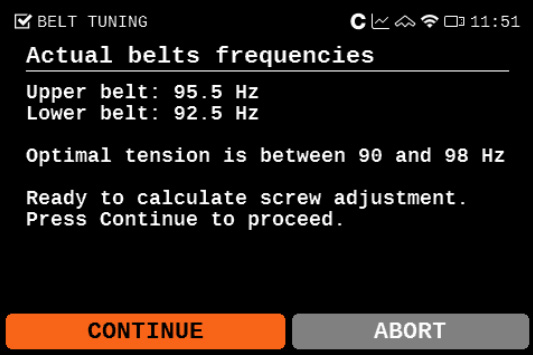
On CORE One, the ideal target frequency range is a maximum of 98 Hz for the upper belt and a minimum of 90 Hz for the lower belt.
On CORE One L, the ideal target frequency range is a maximum of 95 Hz for the upper belt and a minimum of 85 Hz for the lower belt.
Once the resonance test is completed, the printer dialog shows the found resonating frequencies and the suggested adjustment.
Important: always tighten both tensioner bolts evenly and alternately. This ensures that the gantry stays square during adjustment.
 |  |
Belt tuner (CORE One/+)
We have our own belt tuner, available on our belt tuner webpage. The belt tuner can also be accessed in our Prusa App, navigating to >Menu >Belt Tuner.
The belt tuner uses your device's microphone and determines the belt tension by measuring the frequency of the vibration generated by strumming it.
Select CORE One, then select XY-belt, and follow the instructions shown on your device. When ready to measure the belt frequency, tap on Start listening to use your device's microphone.
Adjusting the belts
On CORE One, the ideal target frequency range is a maximum of 98 Hz for the upper belt and a minimum of 92 Hz for the lower belt.
On CORE One L, the ideal target frequency range is a maximum of 95 Hz for the upper belt and a minimum of 85 Hz for the lower belt.
If your gantry is out of alignment, you may not be able to reach these exact values. In some cases, the lower belt can even show a slightly higher frequency than the upper belt. This is acceptable as long as the difference between the two does not exceed 8 Hz, and both values remain within the 90–98 Hz range (CORE One) and within the 85-95 Hz range (CORE One L).
If you cannot achieve this, you will need to square the gantry manually before adjusting the belt tension. See the instructions in “Quick Gantry Alignment” above or “Extensive Adjustment of gantry and belts” at the bottom of this article.
Important: Always tighten both tensioner bolts evenly and alternately. This ensures that the gantry stays square during adjustment.
Small adjustment
-
- Ensure the stepper motors are disabled. This can be done by switching the printer off, or through the LCD Menu -> Control -> Disable Motors.
- By hand, move the Nextruder to the frontmost Y-axis position, and to the rightmost X-axis position.
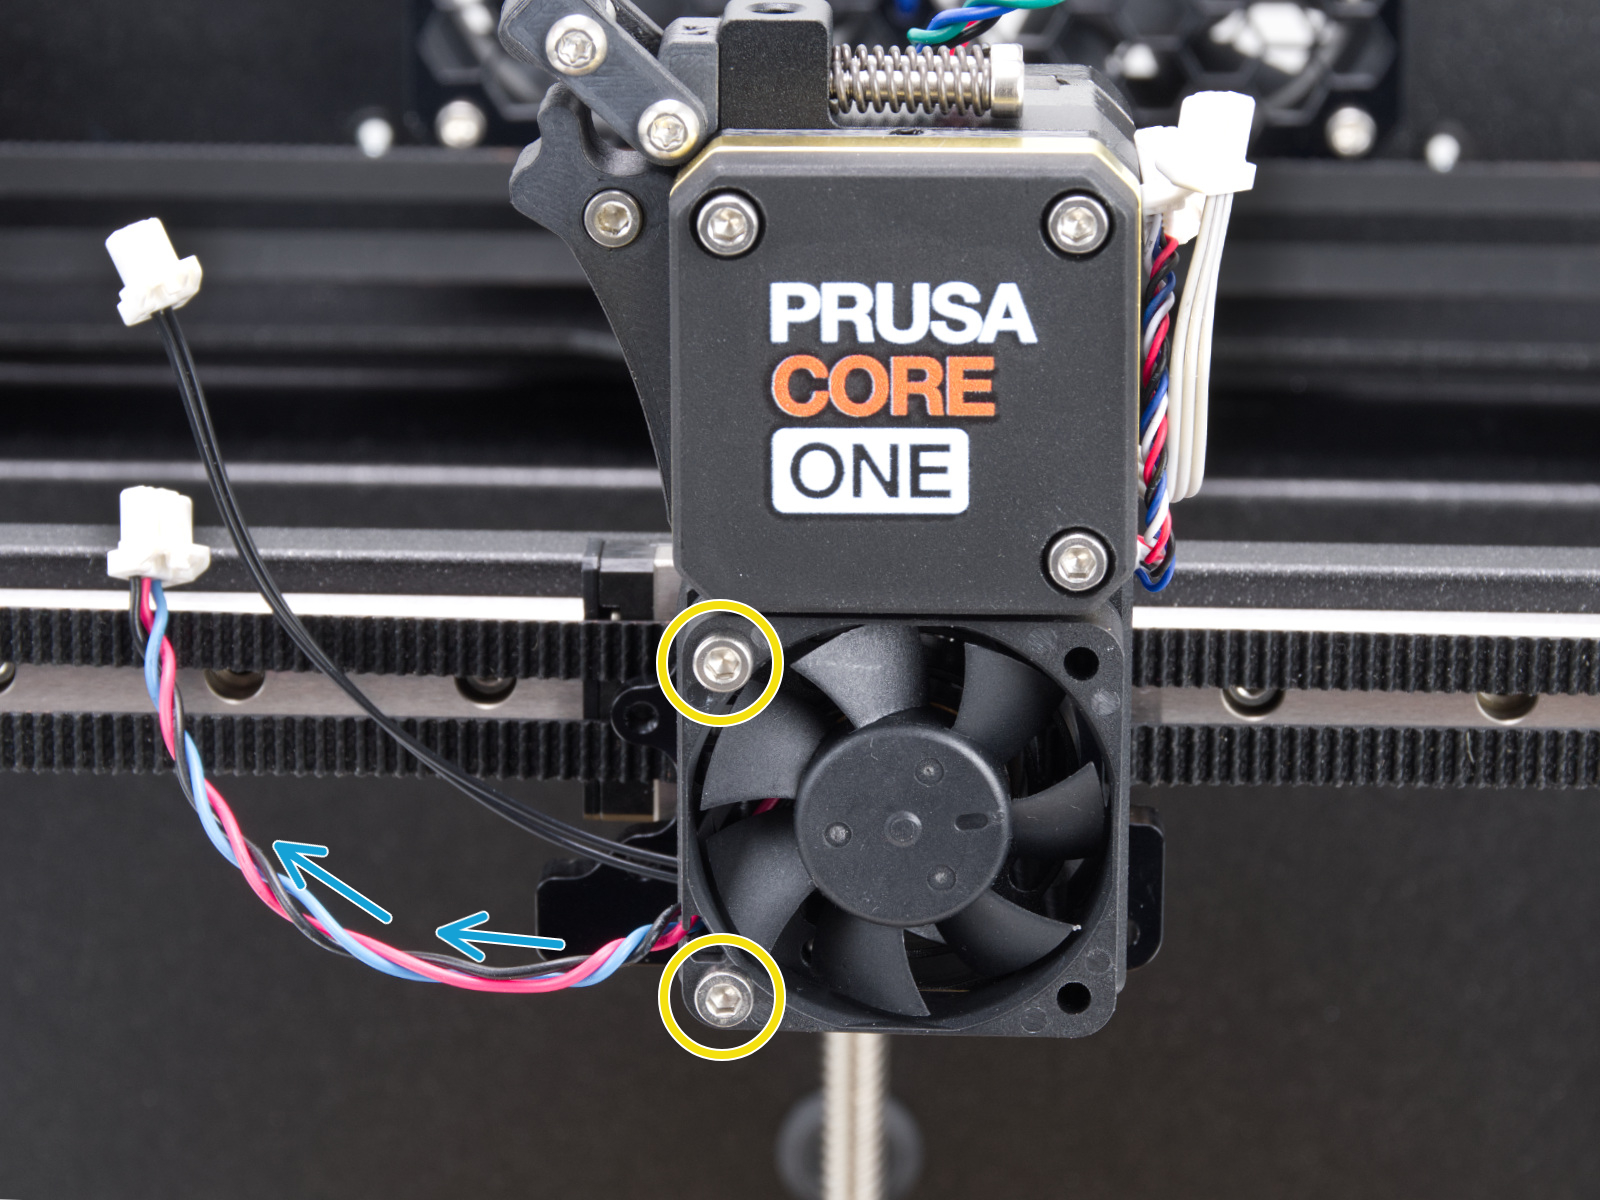
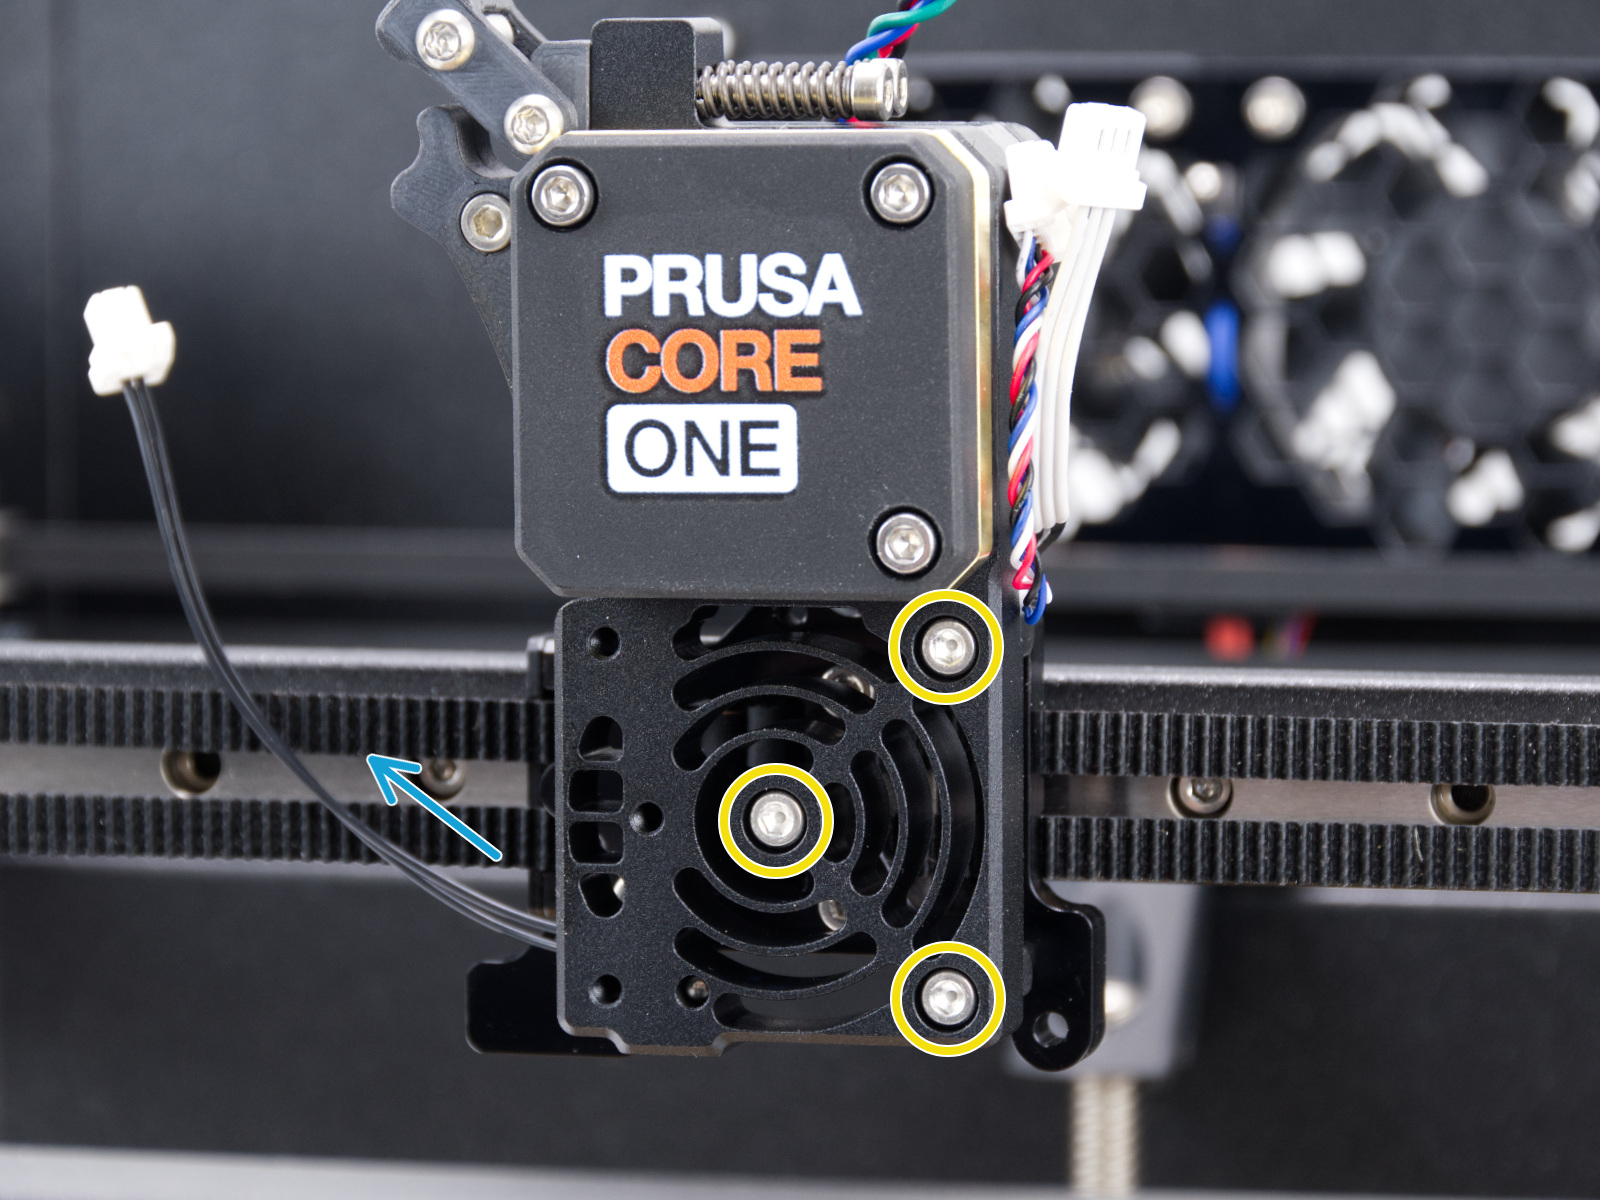
- On the front of the gantry, strum the middle of the upper belt. Place your device next to the belt during this step, to measure the frequency in Hz of the belt sound.
On CORE One/+, the ideal frequency for the upper belt is 98Hz. For CORE One L and INDX, it is a range shown on the belt turning wizard.
- On the front of the gantry, strum the middle of the lower belt. Place your device next to the belt during this step to measure the frequency in Hz of the belt sound.
For CORE One/+, the ideal frequency for the lower belt is 92Hz. For CORE One L and INDX, it is a range shown on the belt tuning wizard.
- Adjust the belts by tightening or loosening the belt tensioner screws by the same amount, each 1/2 turn at a time, to equalize the tension in the system. Then measure the frequency again.
A tighter bolt causes a higher frequency, and vice versa.
The left screw controls the upper belt, the right screw controls the lower belt.Important: If a gap appears on one of the front corners when tightening, both tensioner screws must be loosened, and the gantry alignment must be started again (Alignment section above).
 |  |
Extensive adjustment of gantry and belts (CORE One/+)
The belt tensioners should be able to solve most belt issues. However, if you need to make a larger adjustment because of a really out-of-alignment gantry or a belt that has slipped from the holder, follow the steps below to access the belt.
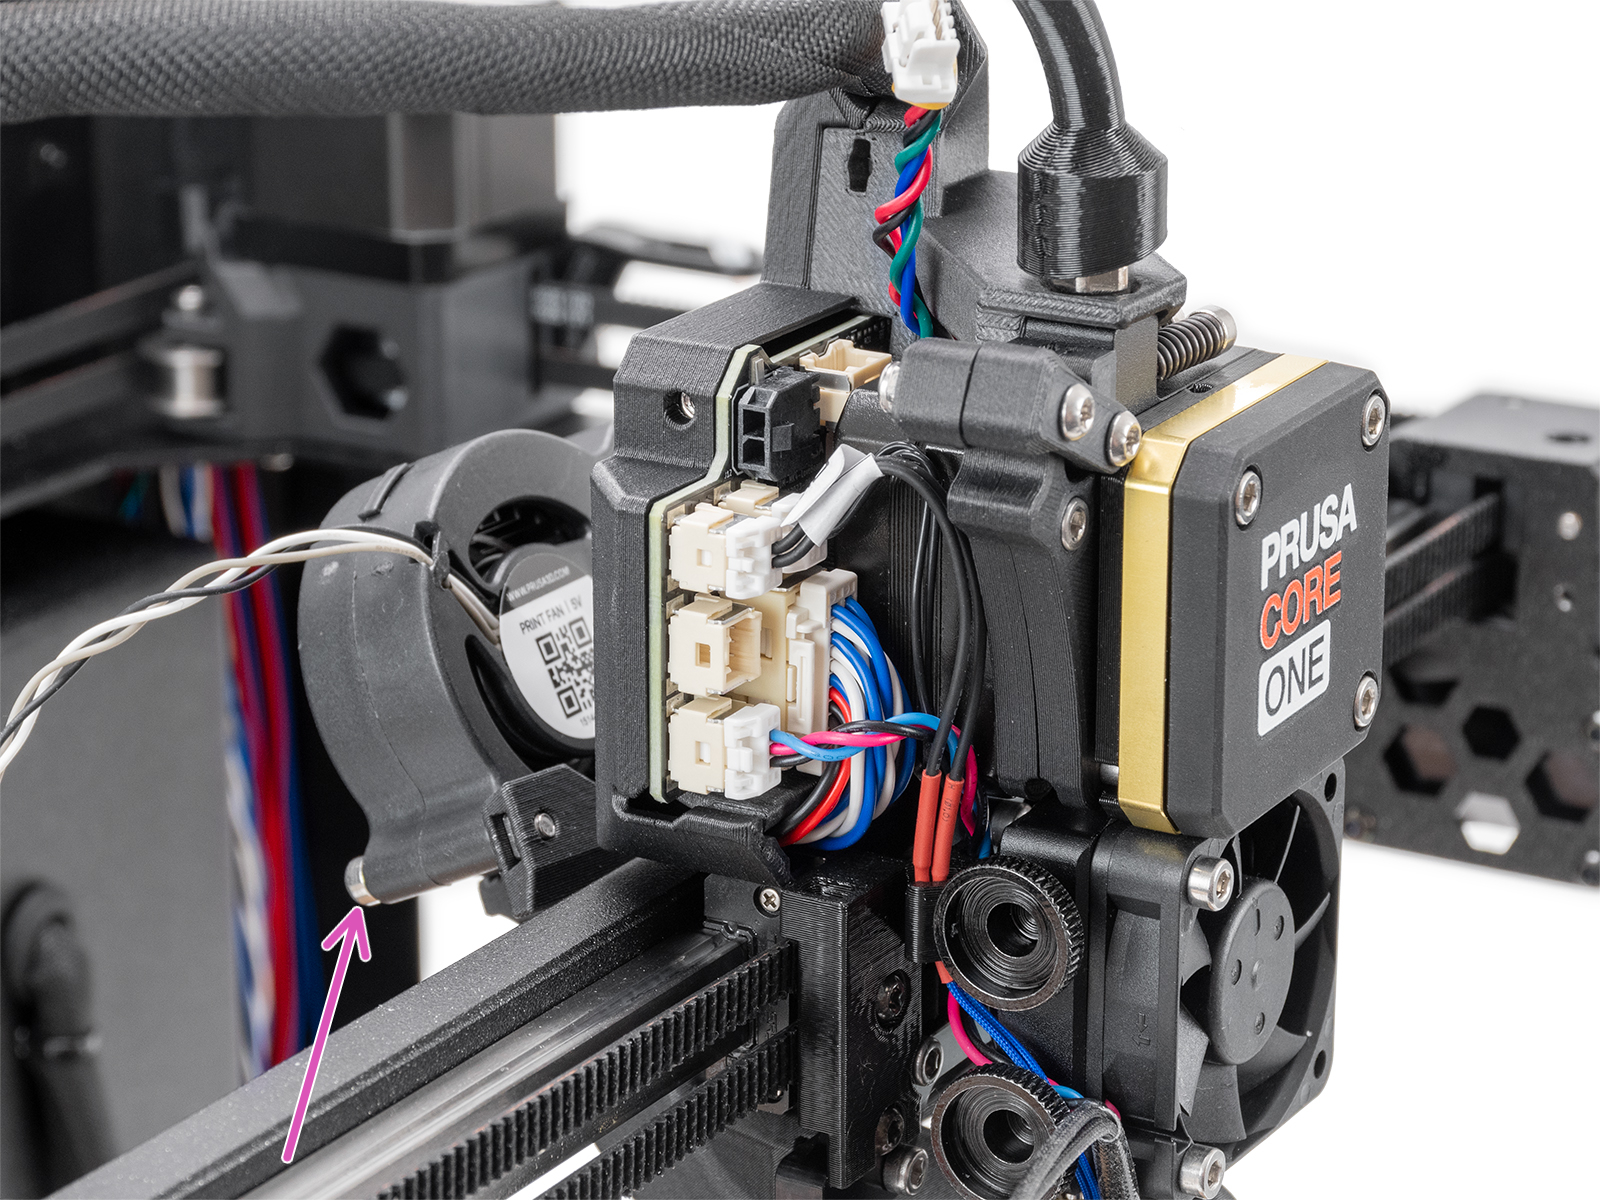
- Manually move the Nextruder to the front and position it in the center to allow access from both sides.
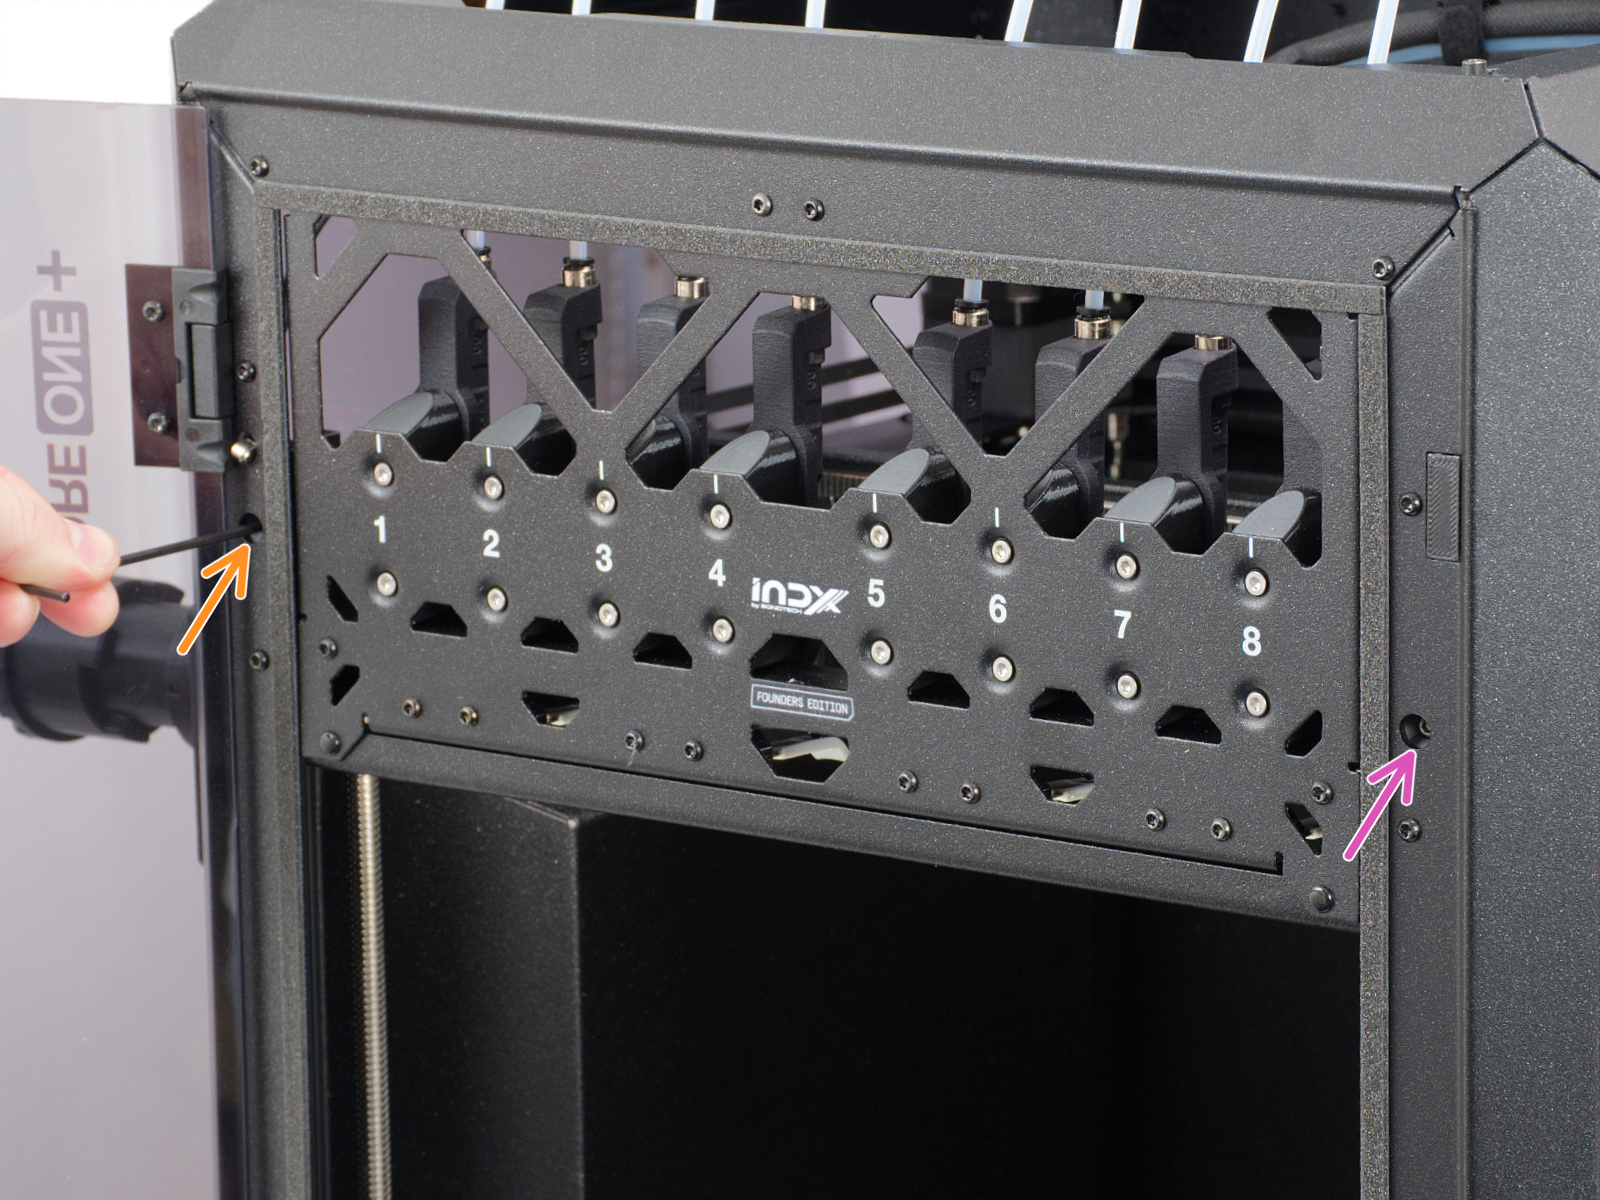
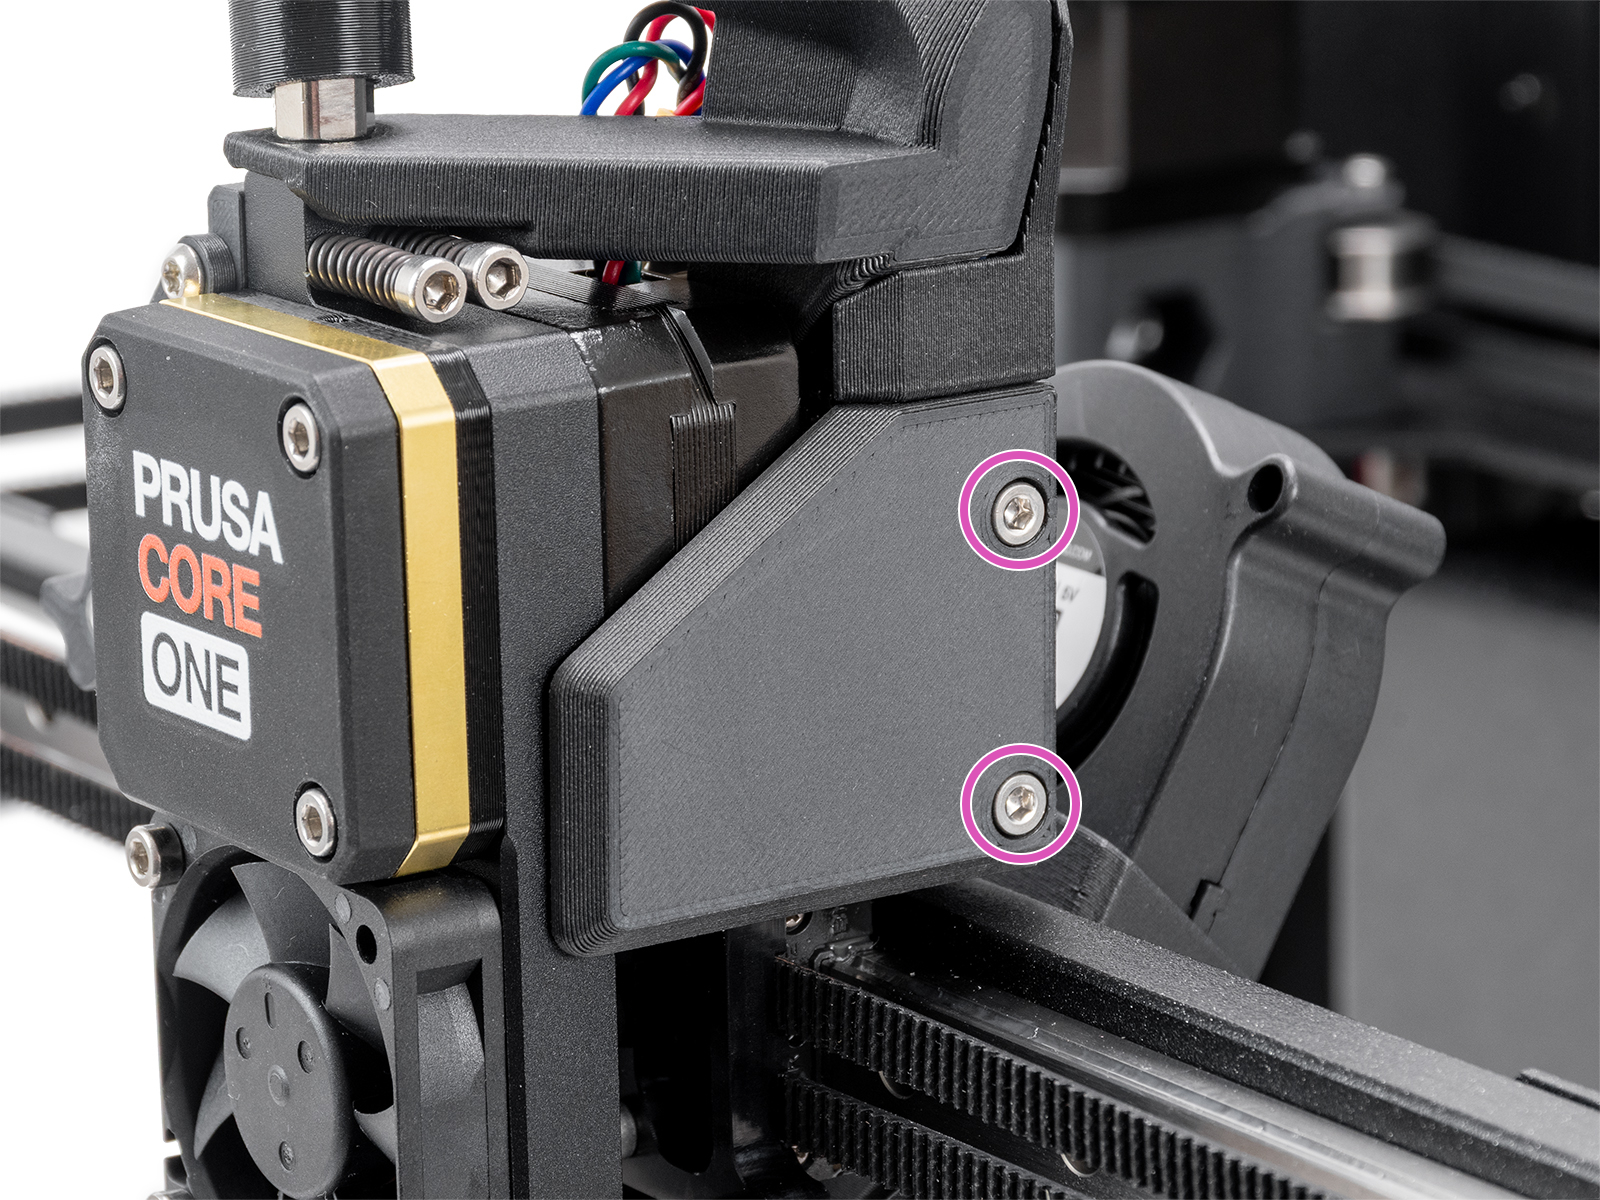
- Remove the print head cover left and print head cover right by removing the M3x10 screws shown below.
 |  |
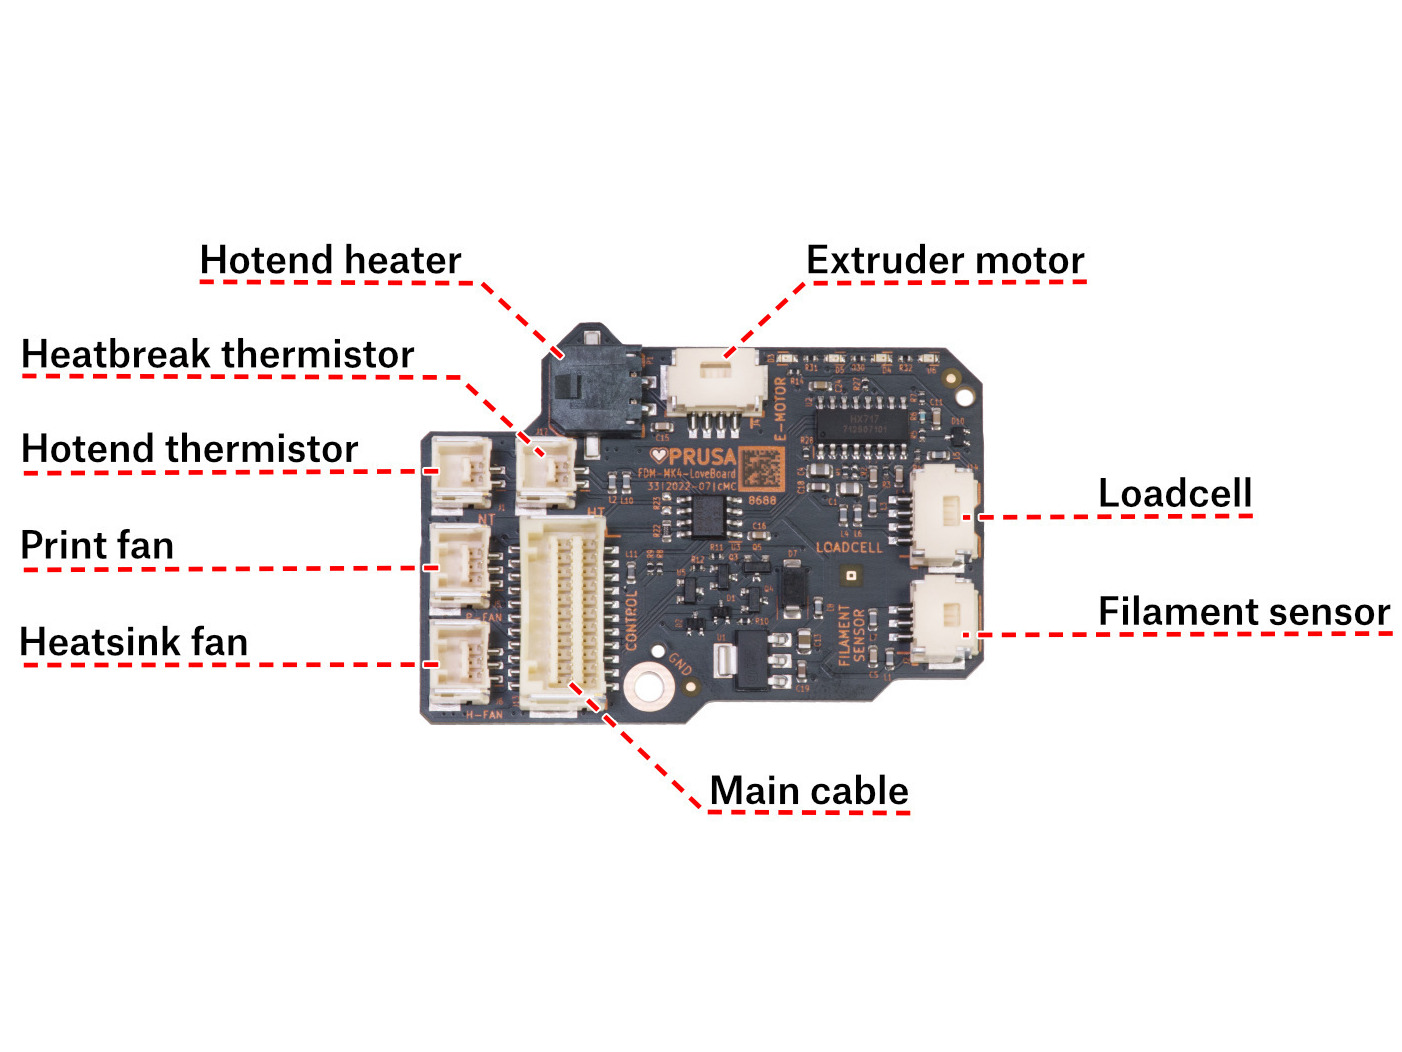
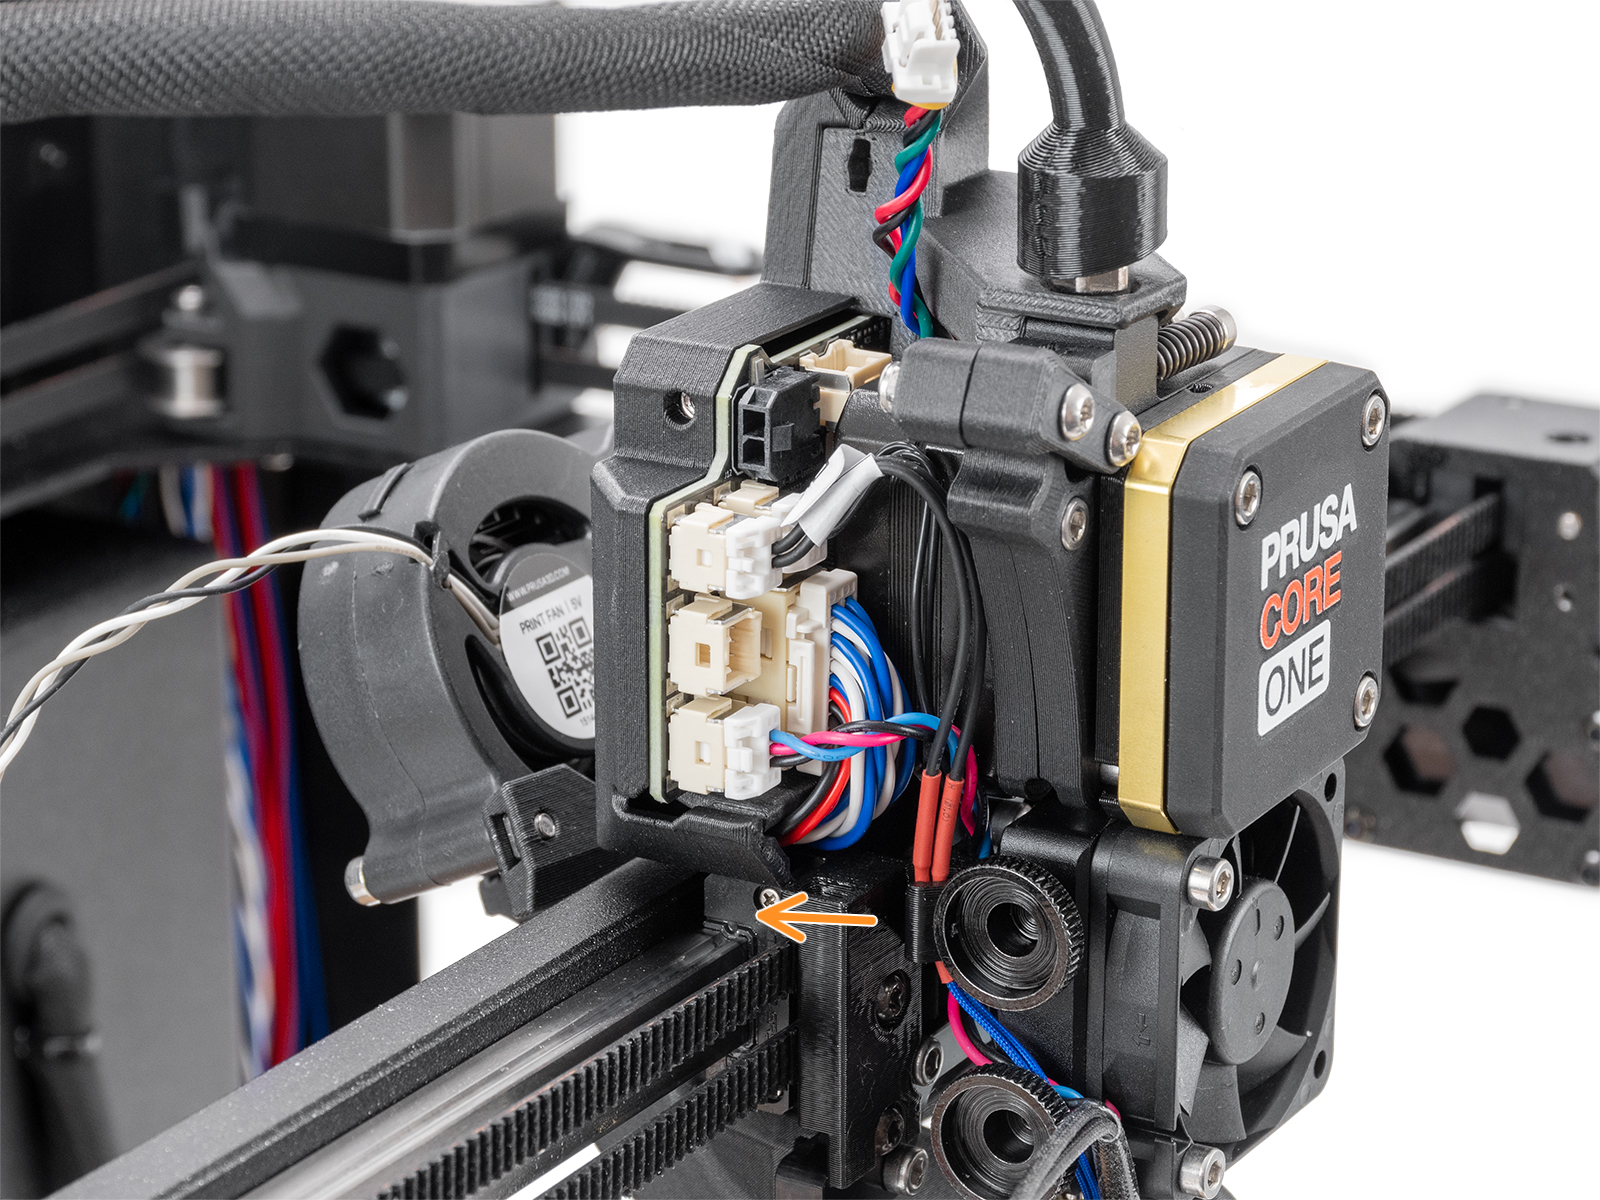
- Disconnect all connectors from the LoveBoard, except the main cable.
- Pull up the Bowden-bend from the fitting on top of the extruder, and unscrew the fitting.
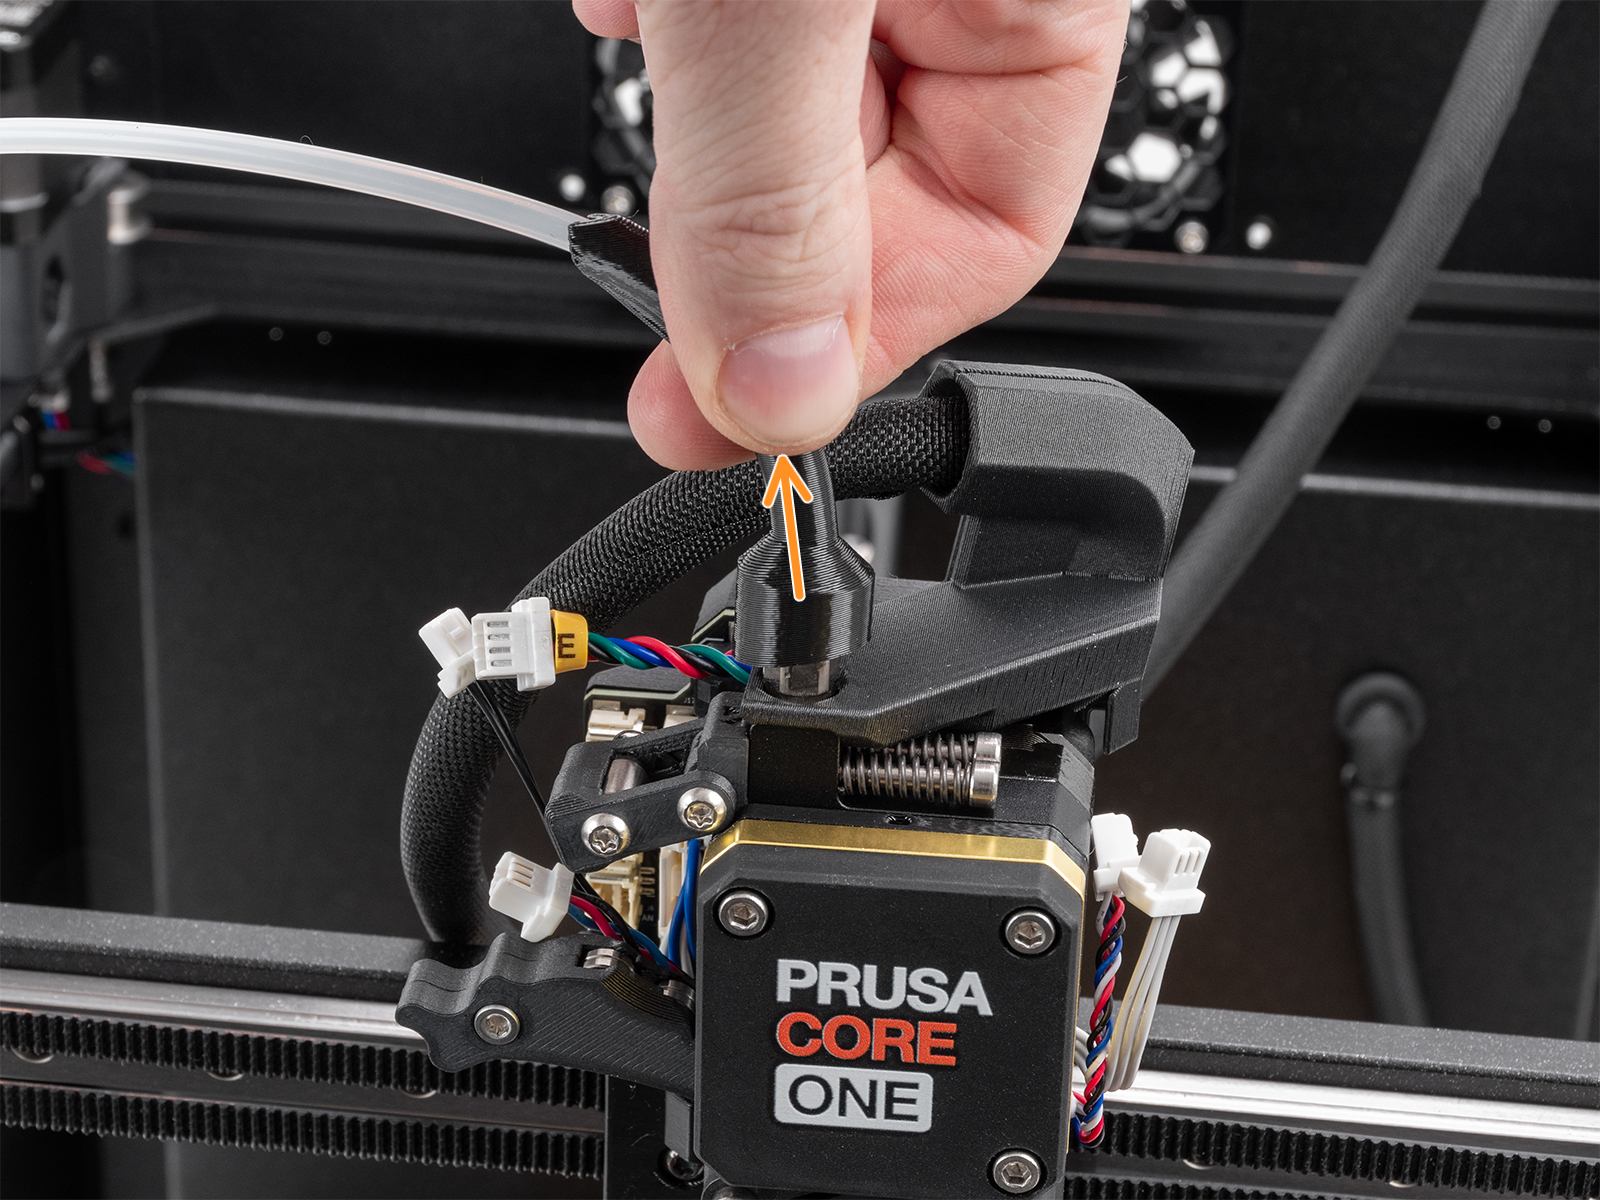
- Untighten the M3x25 screw to temporarily release the fan shroud, and have enough space to release the M3x10 screws that hold the LoveBoard assembly.
 |  |
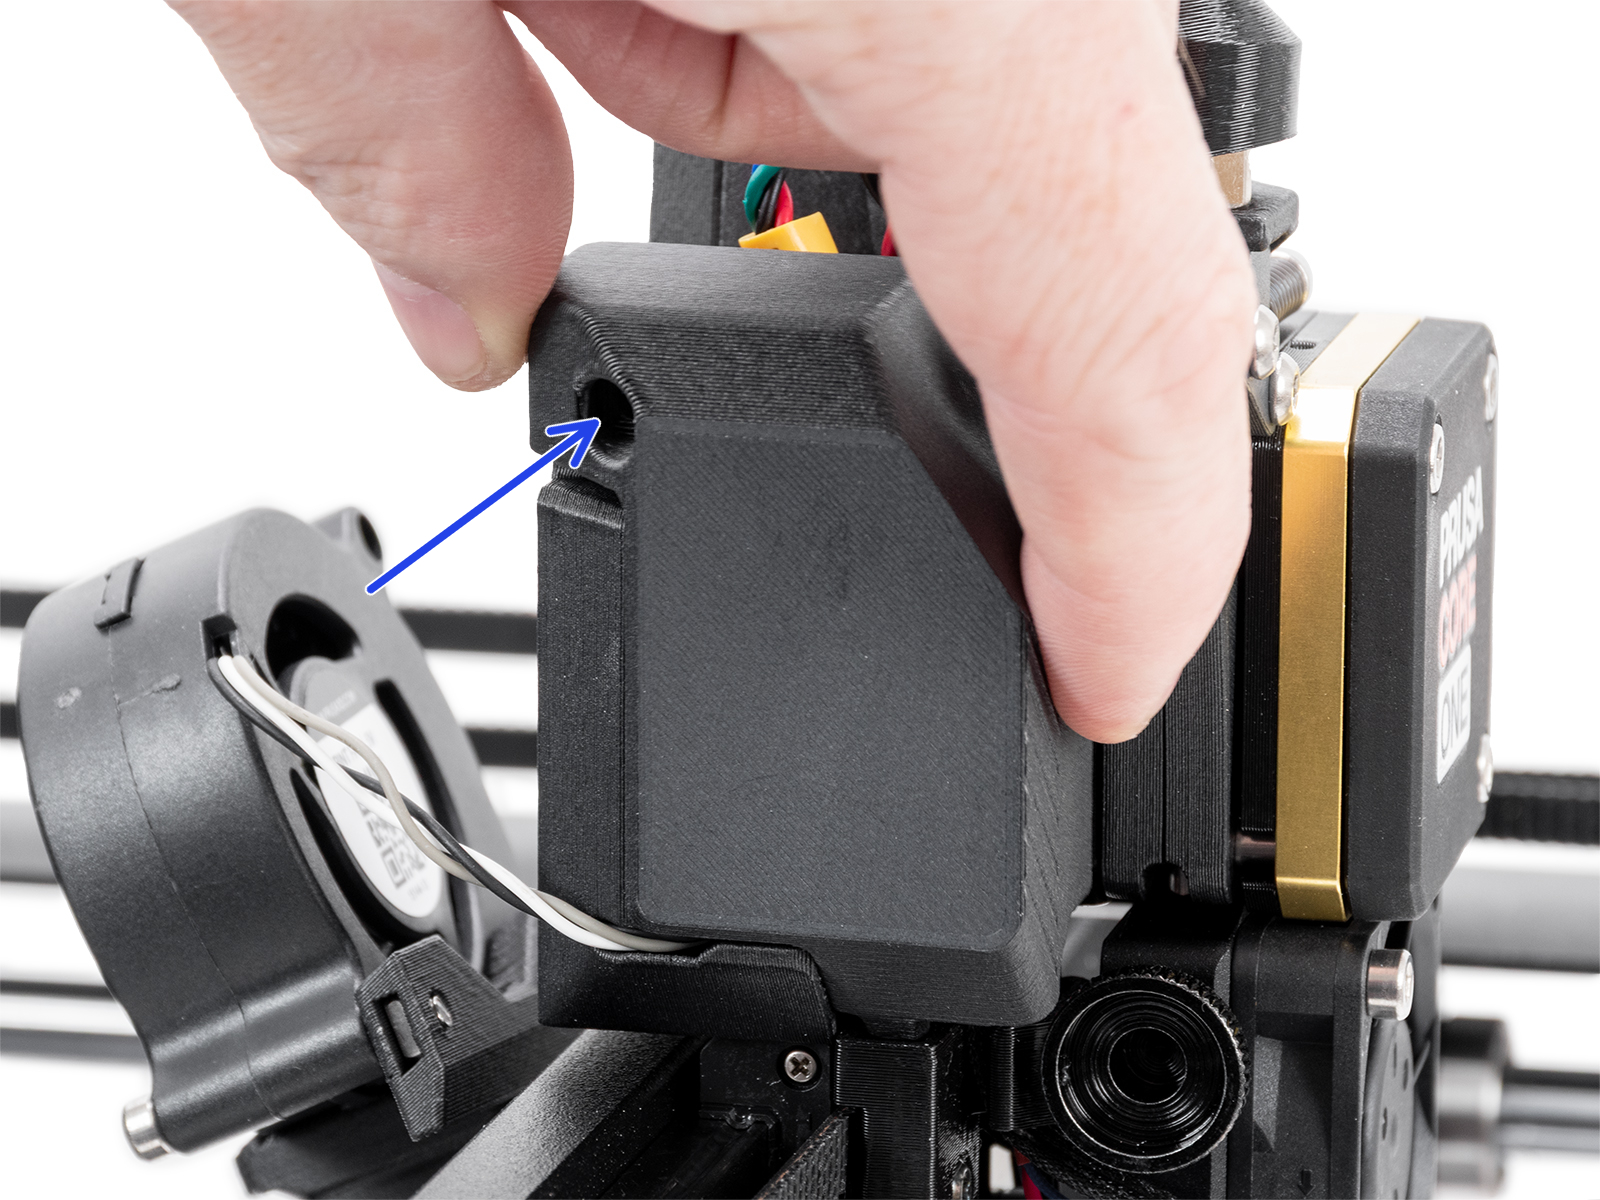
- Remove the hotend thermistor and heater cables from the cable clip. Open the thumb screws and remove the hotend, being careful with the cables.
 |  |
- Unscrew the two M3x4rT screws on the hotend cable clip, and pull it to remove the heatsink fan and heatsink thermistor cables.
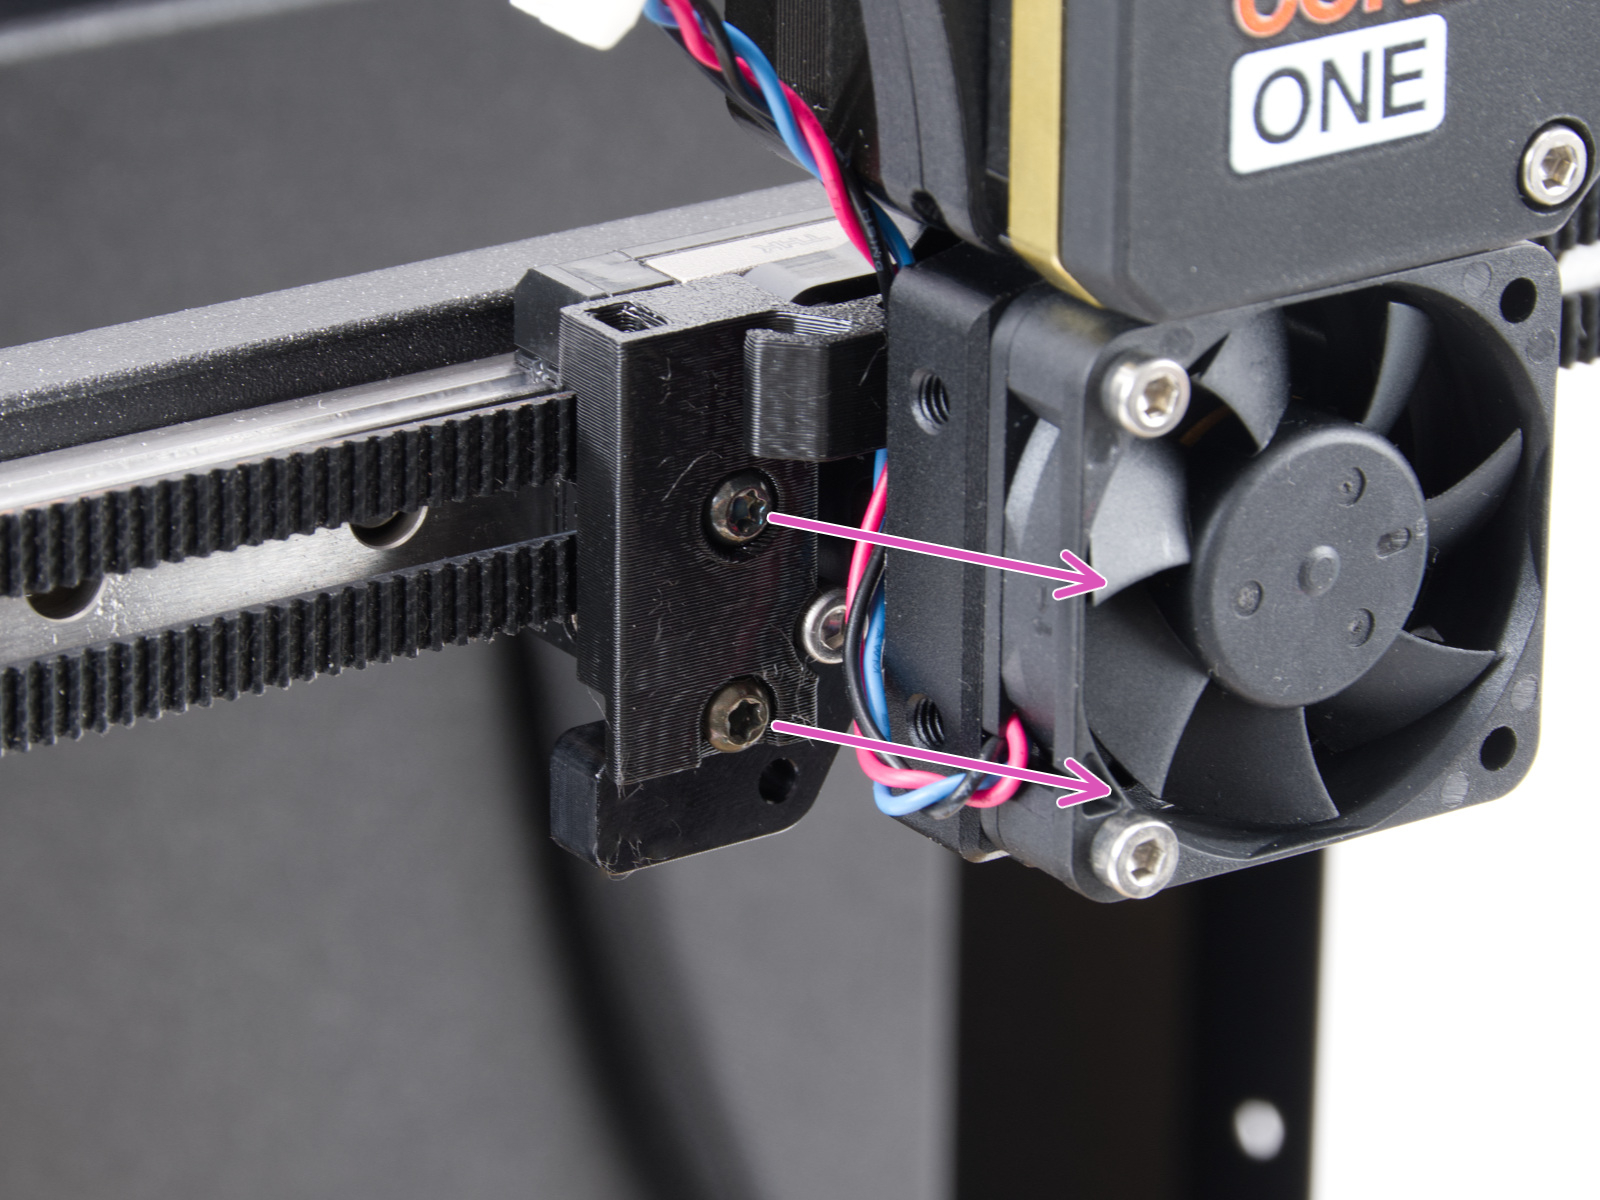 |  |
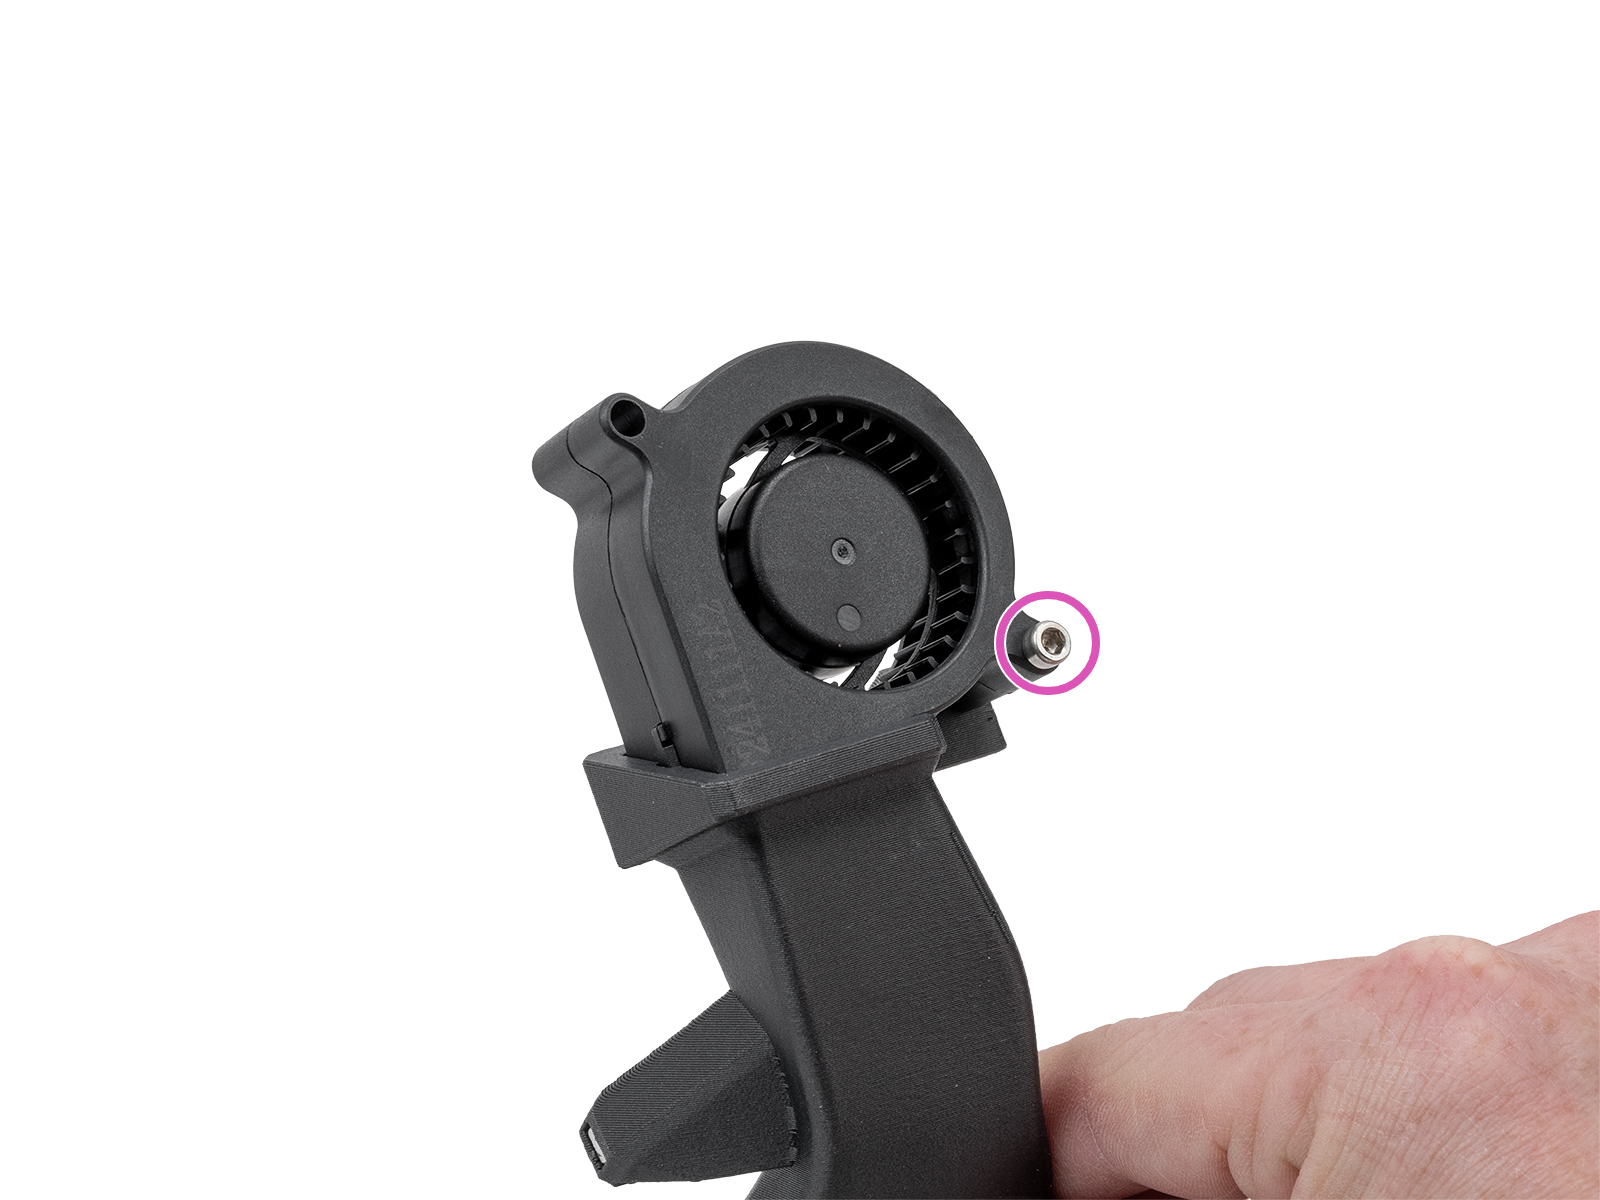
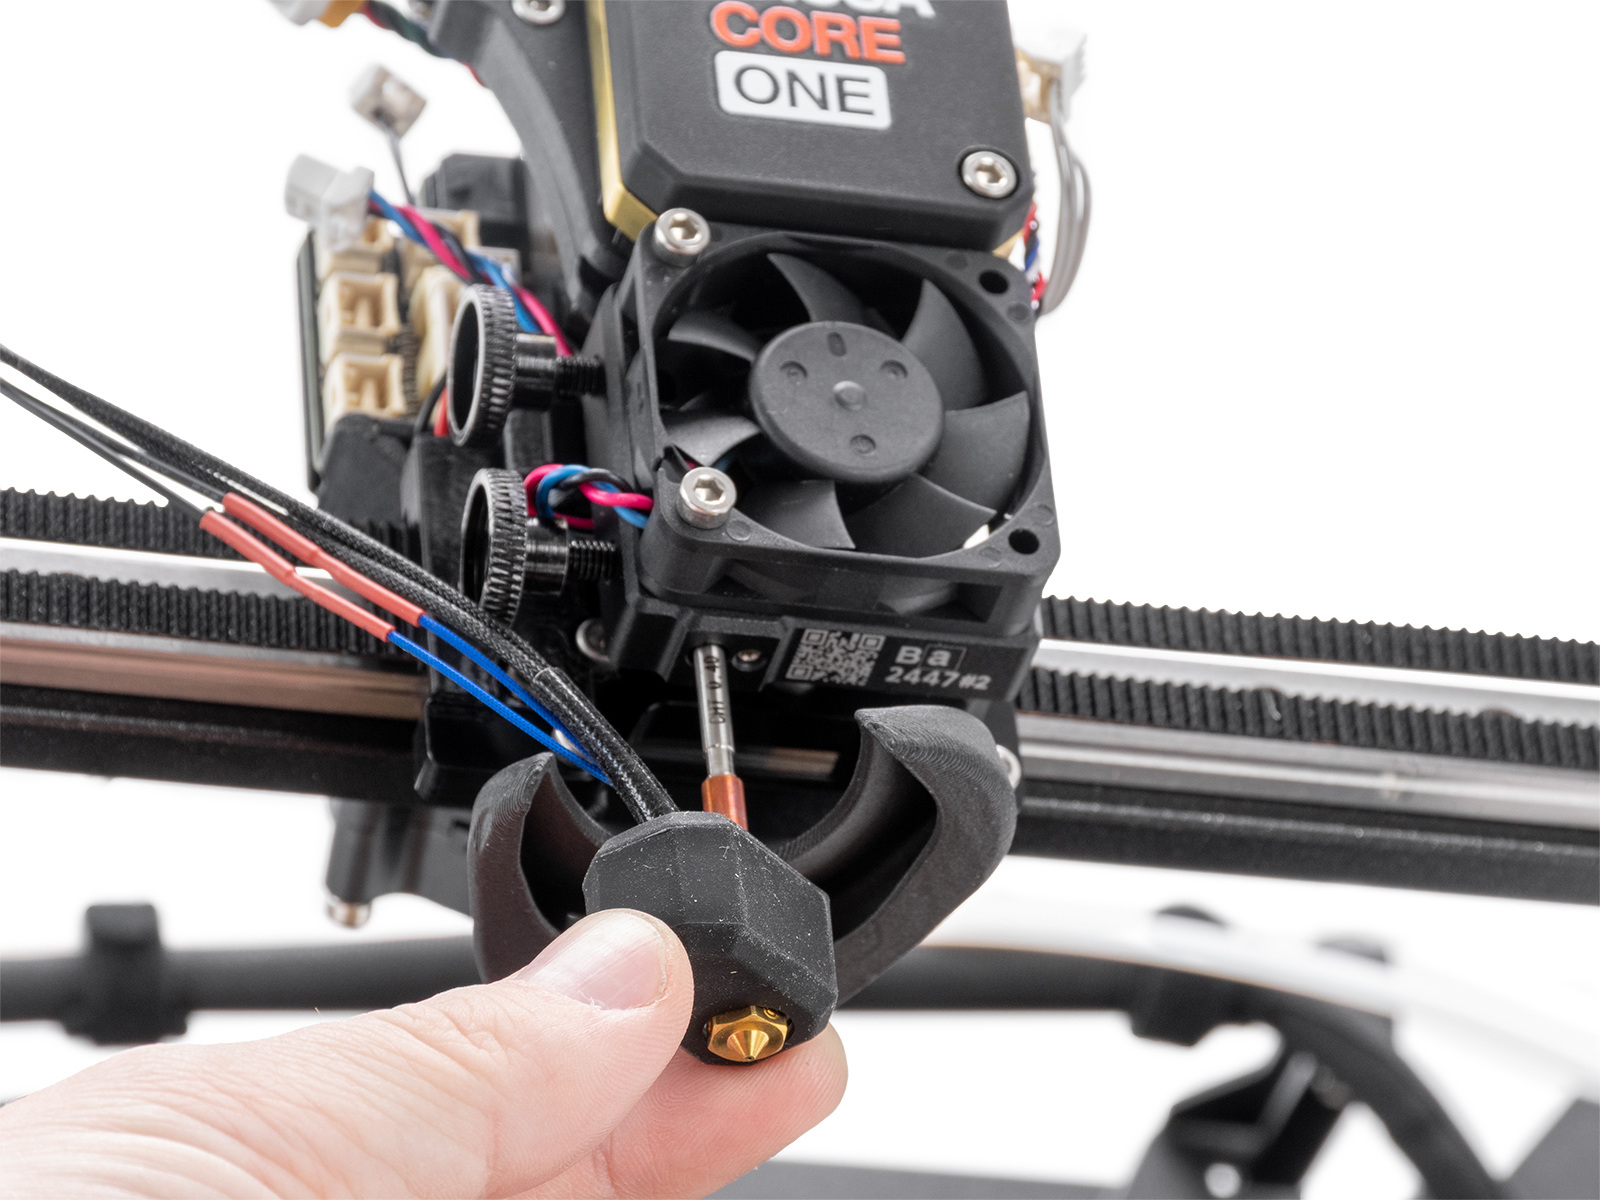
- Unscrew the M3x18 screws from the heatsink fan to remove it.
- Unscrew and remove the three M3x10 screws holding the heatsink and pull it out. Be careful with the cables.
 |  |
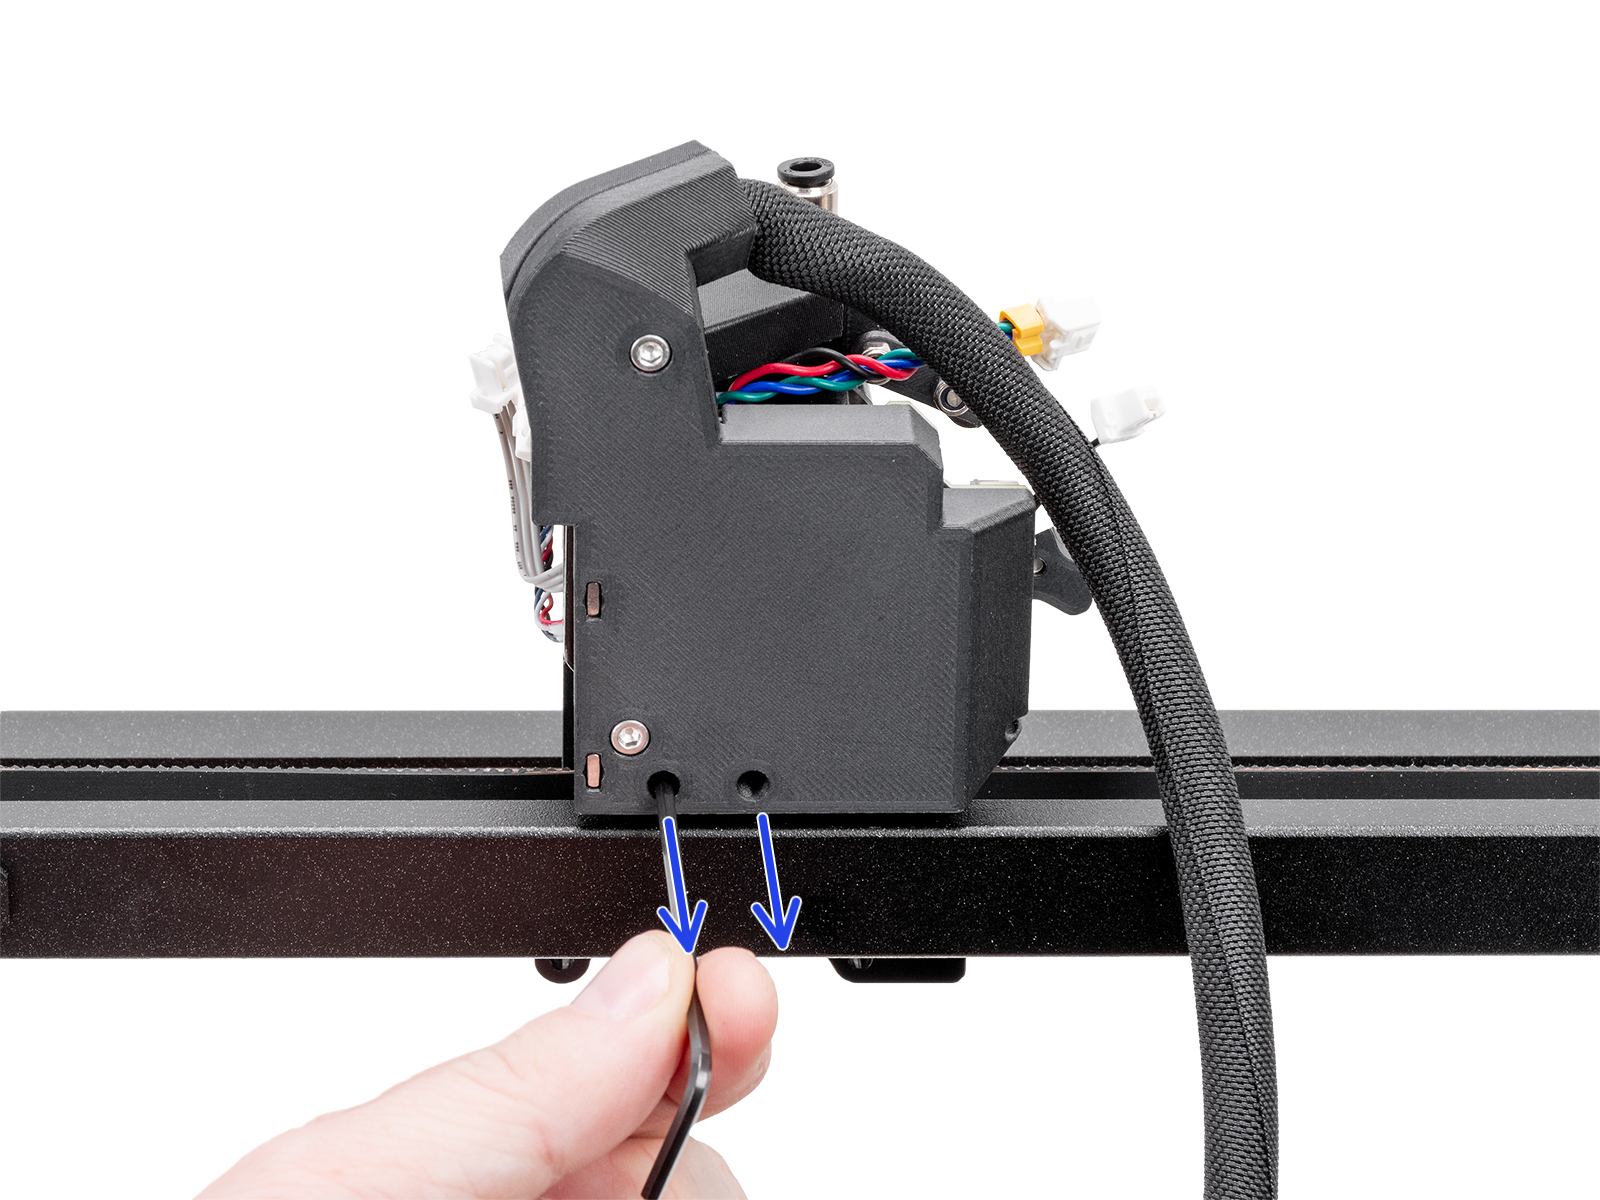
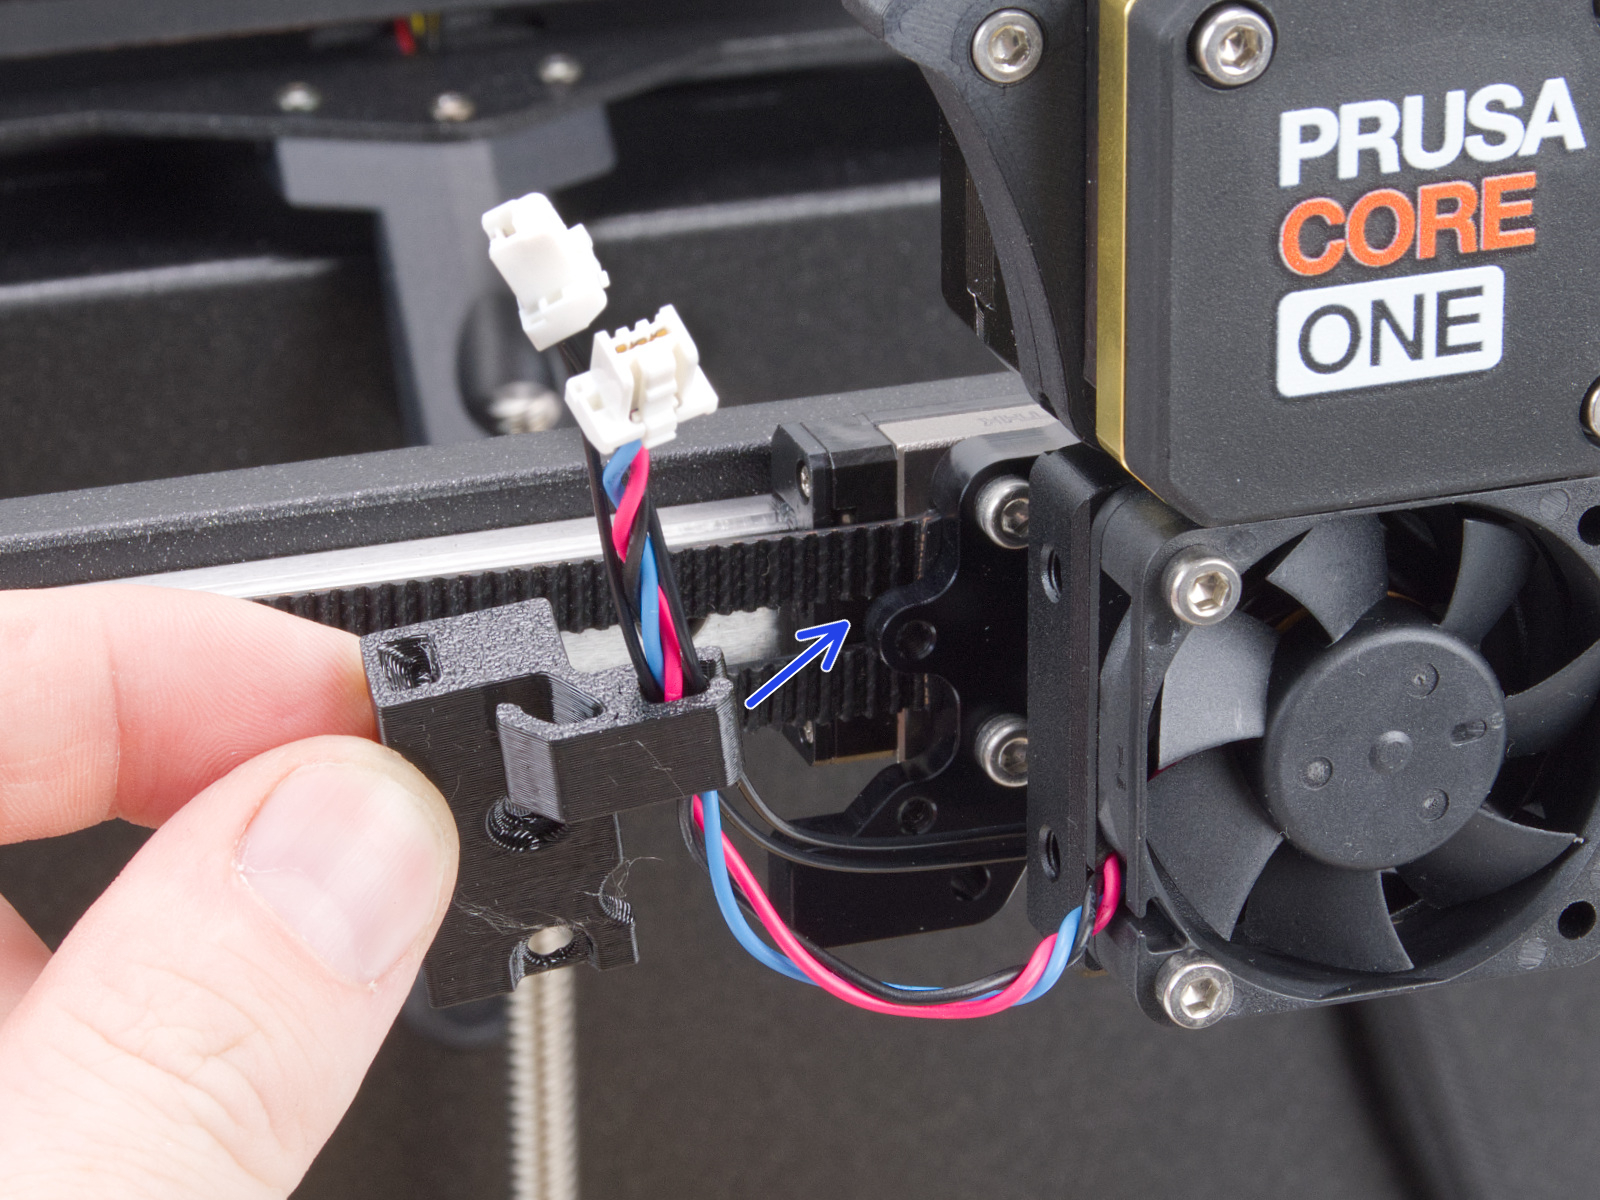
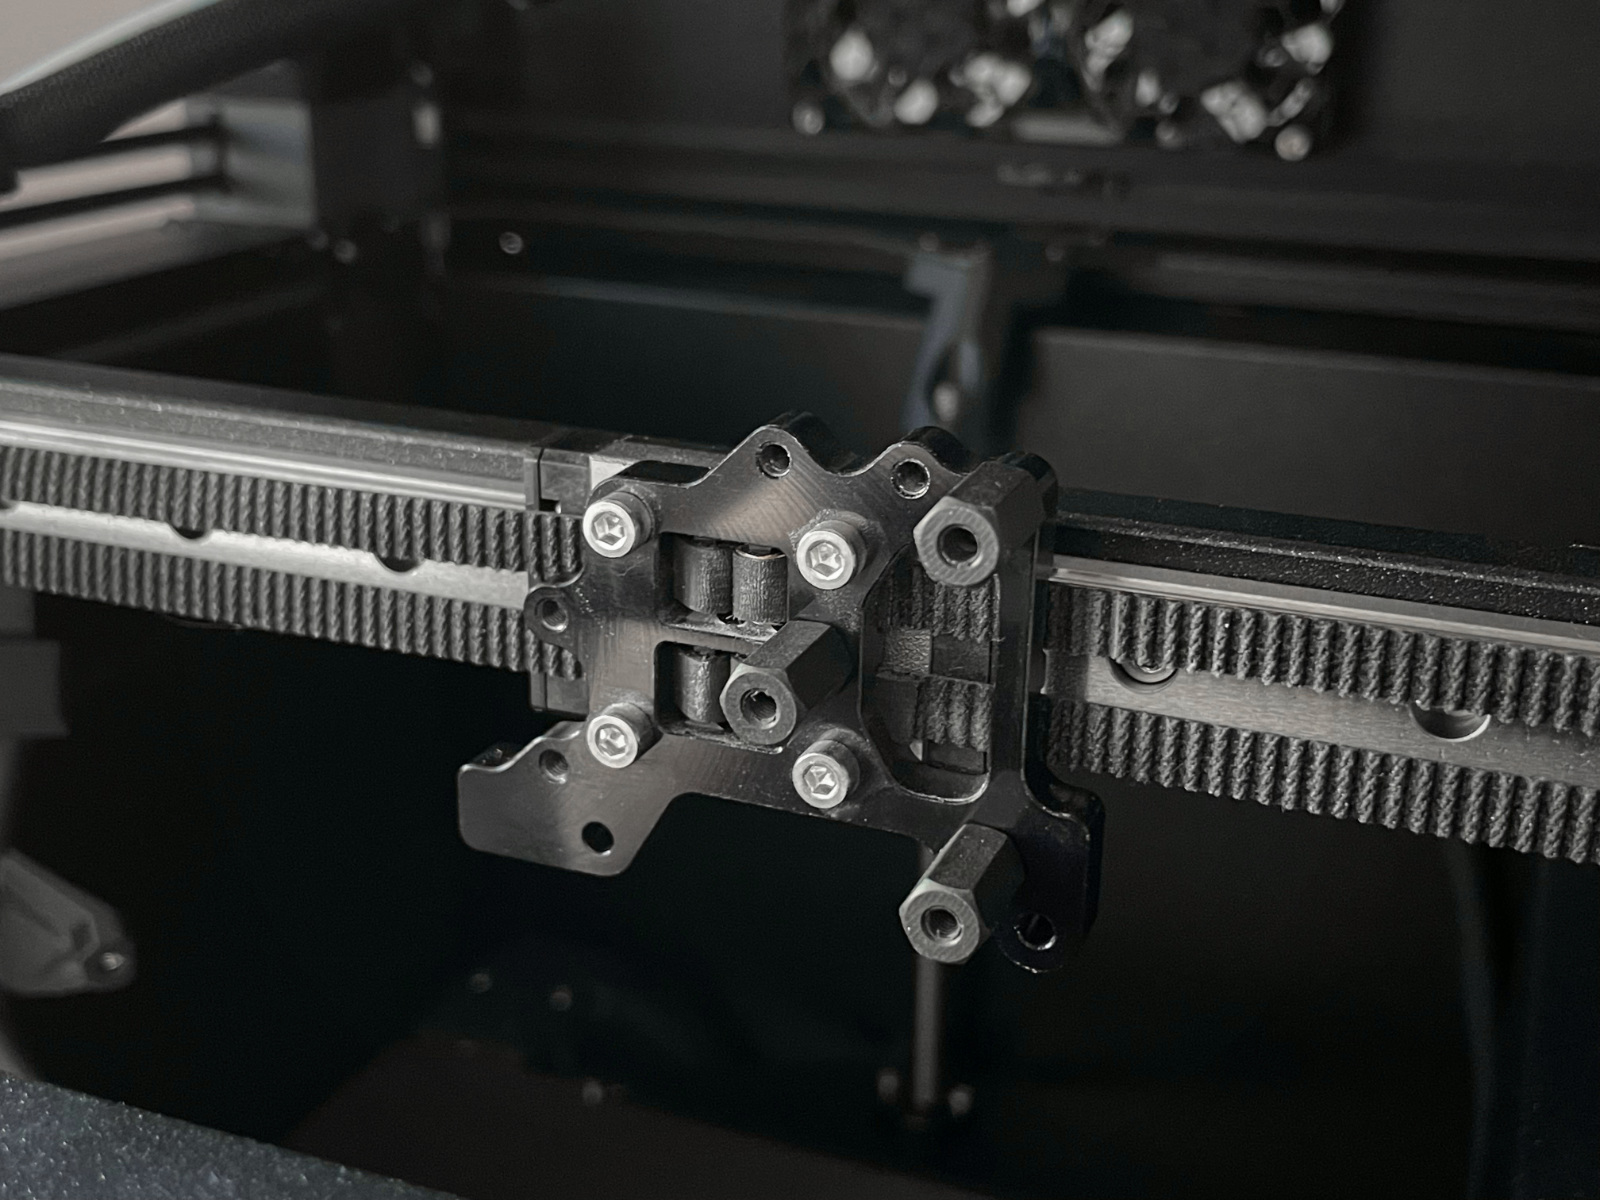
- Now you have access to the Nextruder holder with the belts. Make sure to add the belts that slipped out, or move the belt that is too loose. If the belt is too difficult to reattach, try loosening the belt tensioner bolts. If you need more access, unscrew the four screws that attach the holder to the carriage.
- To reassemble, follow the Assembly manual and redo the belt adjustment with the belt tuner app.
92 comments
For reference, my belts were set at 3 tabs each and fully loose. I had to tighten 42 one-half turns on each side to get it so there was no slack in the belts and to pass the X Axis test...
Tried many small adjustments to belt tensioner screws, but to no avail. It appears that the only option now is to do "extensive adjustment." But I have zero idea what adjustment is required. Presumably, this means changing how far the belts go through the Nextruder holder to make the belts--maybe tighter--maybe looser? (During assembly I sought to follow the instructions at 5.49 (Y belt guiding: belt tensioner), 5.51 (Y belt guiding: securing the belt), 5.55 (X belt guiding: belt tensioner) and 5.57 (X belt guiding: securing the belt).) I am not too keen on dissembling things to make an extensive adjustment because I don't know what I am looking for. What should I look for if I go the extensive adjustment route? This is our first 3d printer. I assembled it in January, but can't get past the Homing Calibration.
It also seems odd to me that the side of the belts with teeth would be positioned in such a way that they could come into contact with the rear fan guard while the printer is in use. I would expect that to be a possible point of failure over the life time of the device.
UPDATE:
After finding the web-app to use my phone to listen the belts for tuning, I was able to get both belts tuned... I just had to turn off EVERYTHING in the house before it was able to reliably work. (IE, after turning off music, or TV, I had to turn off my AC, and wait for my refrigerator's compression cycle to end. - Seriously, make sure there isn't ANYTHING making noise, if you have to pass gas do it when you're not tensioning your belts.)