The Original Prusa Printers with the Nextruder are equipped with a Prusa Nozzle. A dedicated silicone sock can be attached to this nozzle.
We offer Nextruder silicone socks in a set of three on our e-shop.
Why use a silicone sock?
The main function of a silicone sock is to keep the temperature in the heater block stable, which improves the printer's performance. There are additional benefits to using the silicone sock, like keeping your hotend clean from filament dirt and protecting it in case the print detaches from the print surface. They are instrumental if you want to print high-temperature filaments.
The Nextruder silicone sock also has a low chance of slipping off your hotend. The Nextruder has the cables on the top of the heater block, so there is no need for the sock to have cable openings on the side.
Cleaning the hotend
Before installing the sock on your hotend, it is necessary to have the heaterblock and the hotend clean of the remains of the filament. For that, go to the printer menu to Control -> Temperature -> Nozzle Temperature and use the knob to set the temperature to 250°C. Wait for about five minutes so that all of the filament remains can be softened. Then, using the brass brush, carefully clean the heaterblock and the hotend from the filament residue. Avoid contact of the brush with the hotend cables, as this could cause a short circuit.
After that, go to the printer menu to Preheat -> Cooldown. Wait until the hotend reaches a temperature below 50 ºC before continuing.

Preliminary steps
Heated parts can cause severe burns!
Prusa CORE One, CORE One L
- Move the printer axes, in particular the Z-axis, so that the bottom of the hotend is accessible. This is done by navigating to LCD Menu -> Control -> Move Axis.
- Fully cool down the printer to room temperature and switch it off.
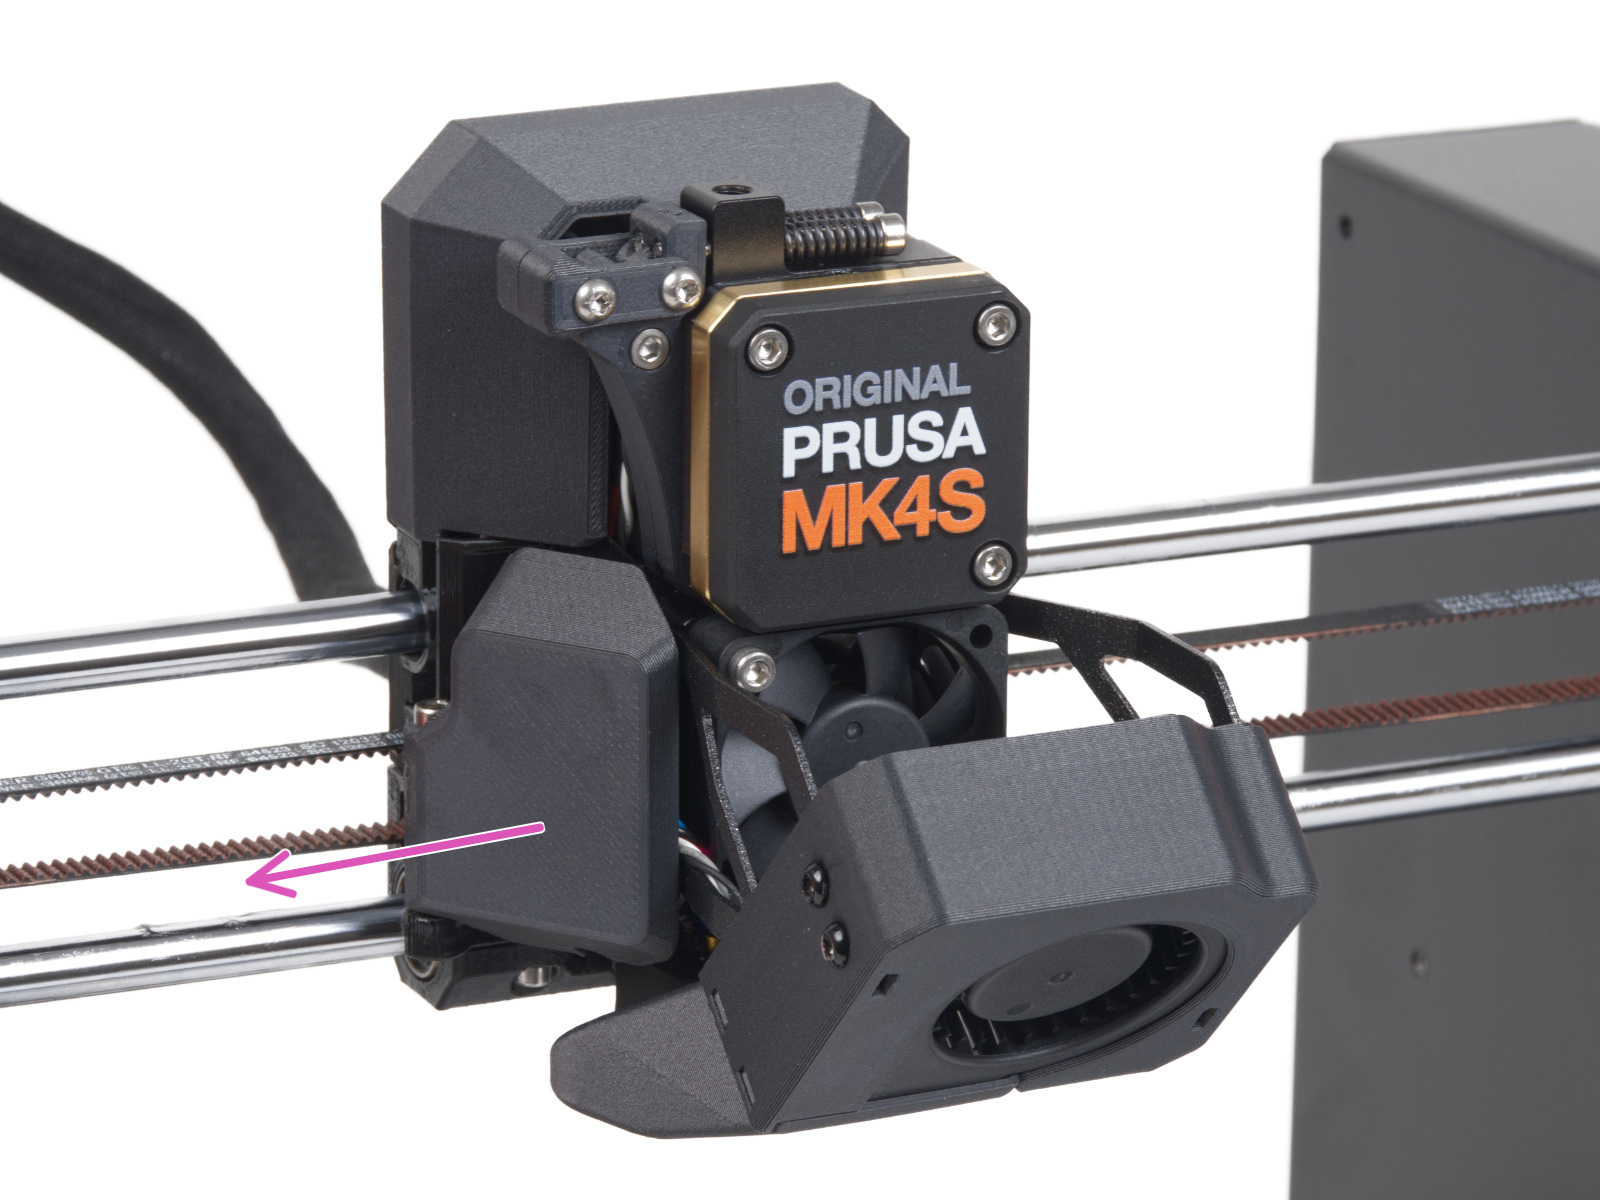
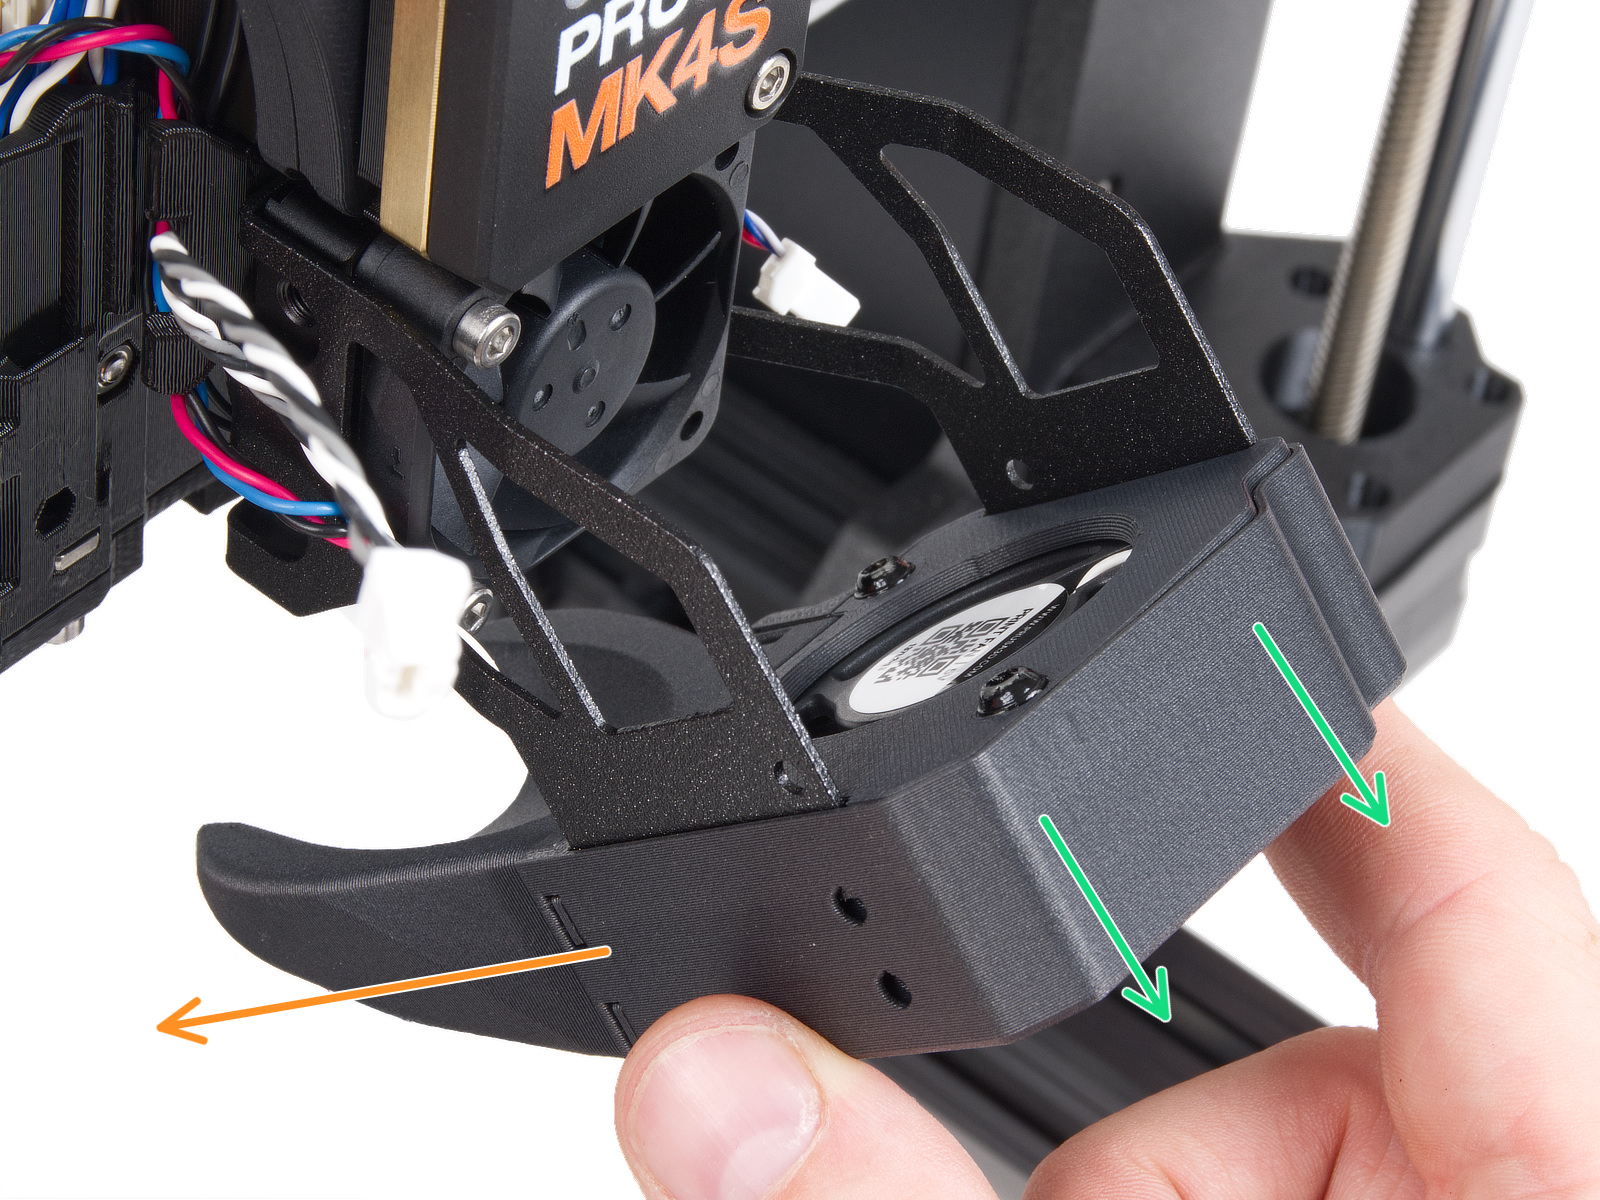
Original Prusa MK4S, MK3.9S
- Move the printer axes, in particular the Z-axis, so that the bottom of the hotend is accessible. This is done by navigating to LCD Menu -> Control -> Move Axis.
- Fully cool down the printer to room temperature and switch it off.
- Rotate the fan-door-cover to open it completely.
 | 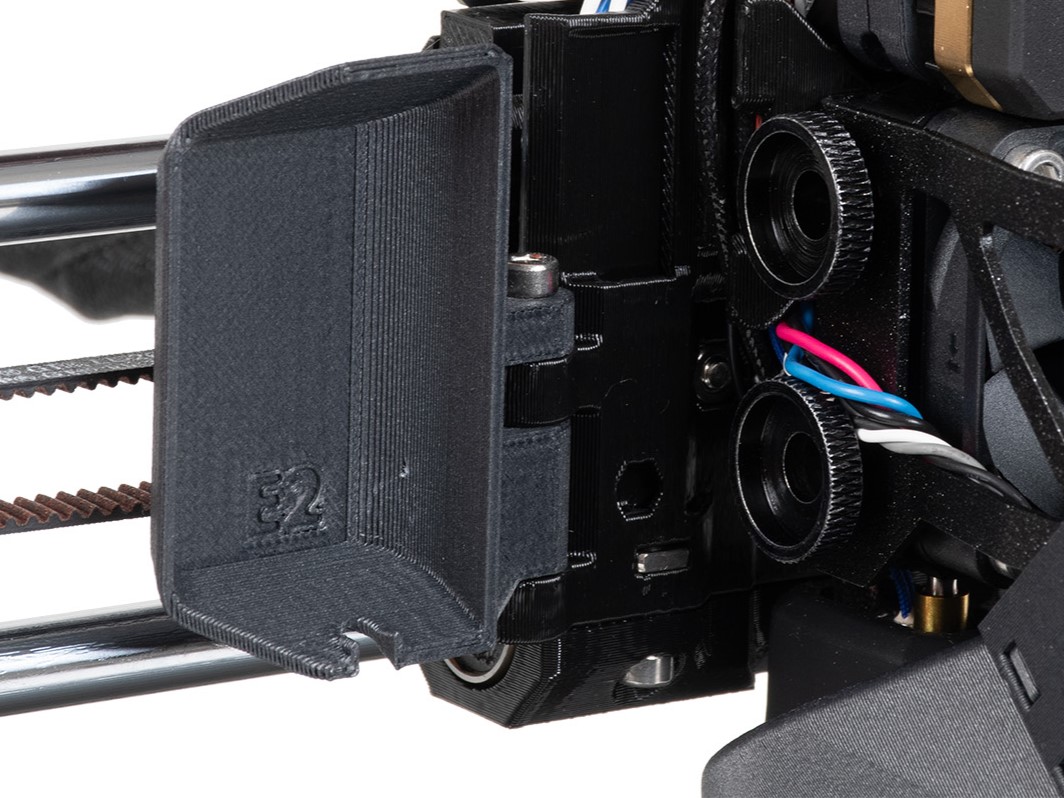 |
- Loosen 4x M3x5rT screws, two on the left and two on the right.
 | 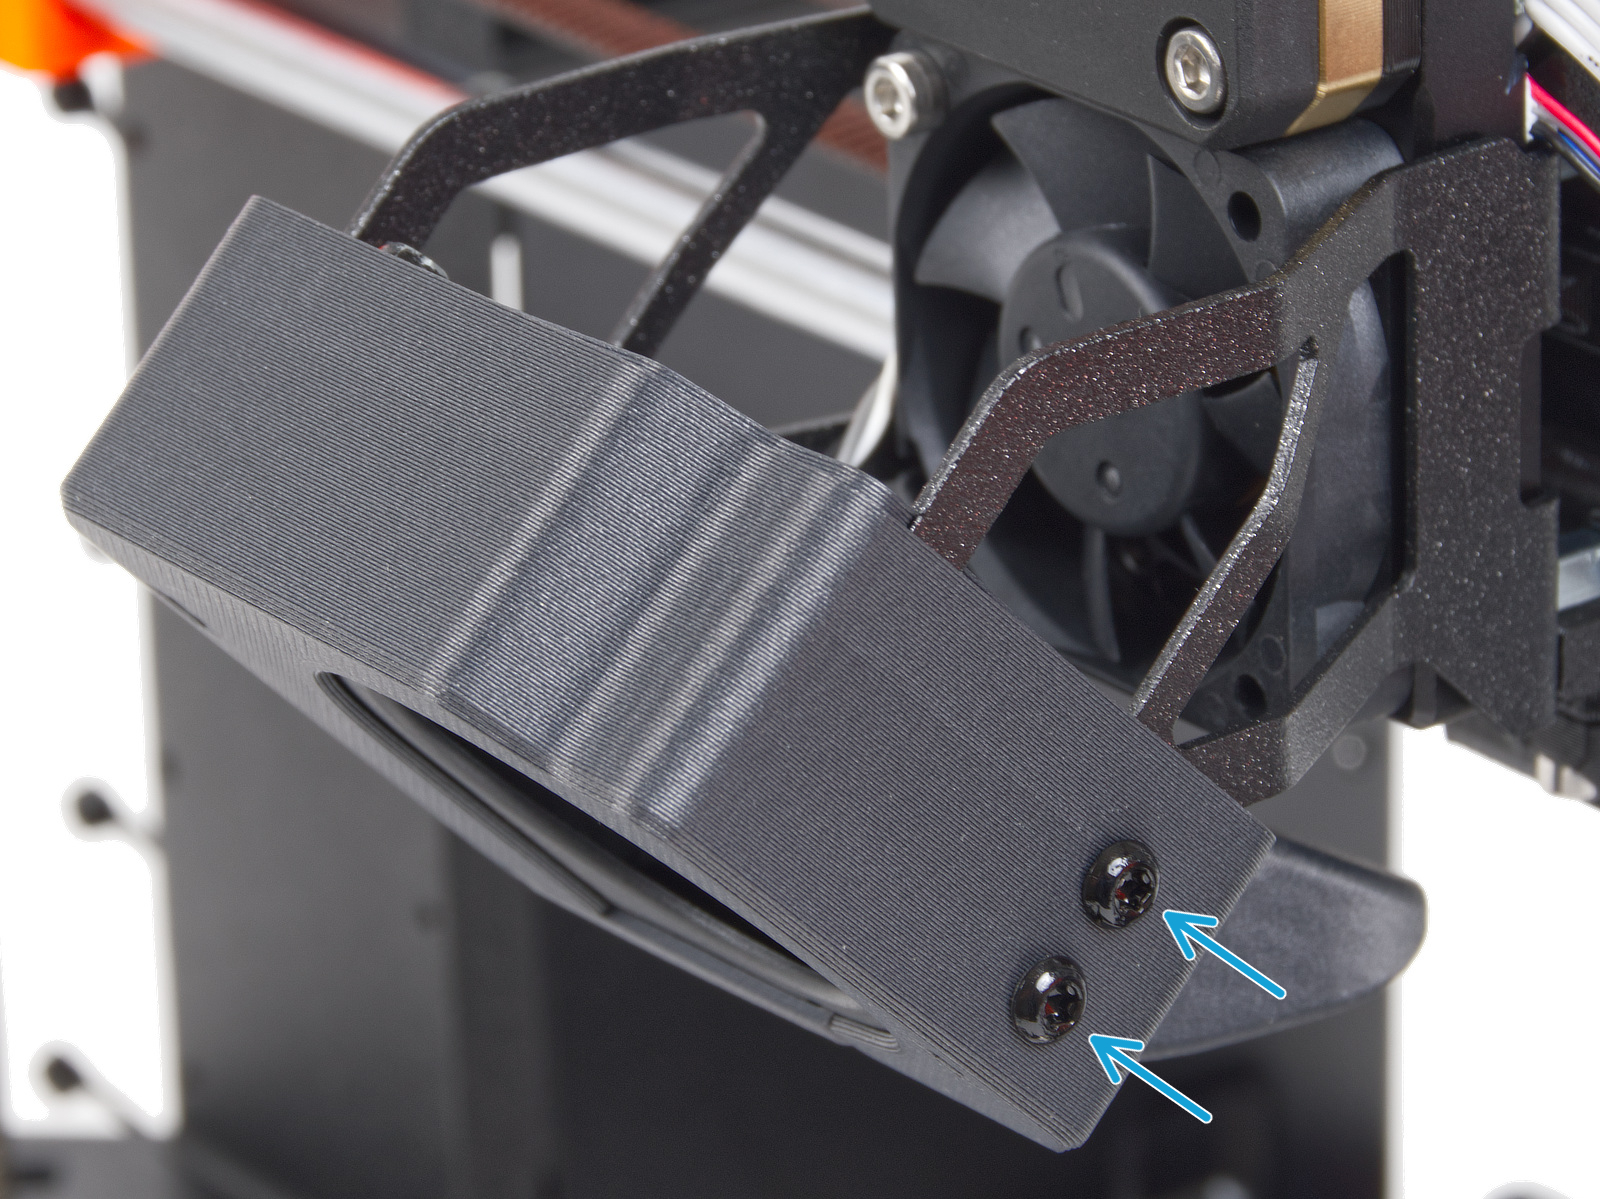 |
- Slide out the print fan assembly, and place it to the left of the hotend. Be careful to not excessively pull or pinch the attached cables.
Original Prusa MK4, MK3.9
- Move the printer axes, in particular the Z-axis, so that the bottom of the hotend is accessible. This is done by navigating to LCD Menu -> Control -> Move Axis.
- Fully cool down the printer to room temperature and switch it off.
- Rotate the print fan so that it is parallel to the X-axis.
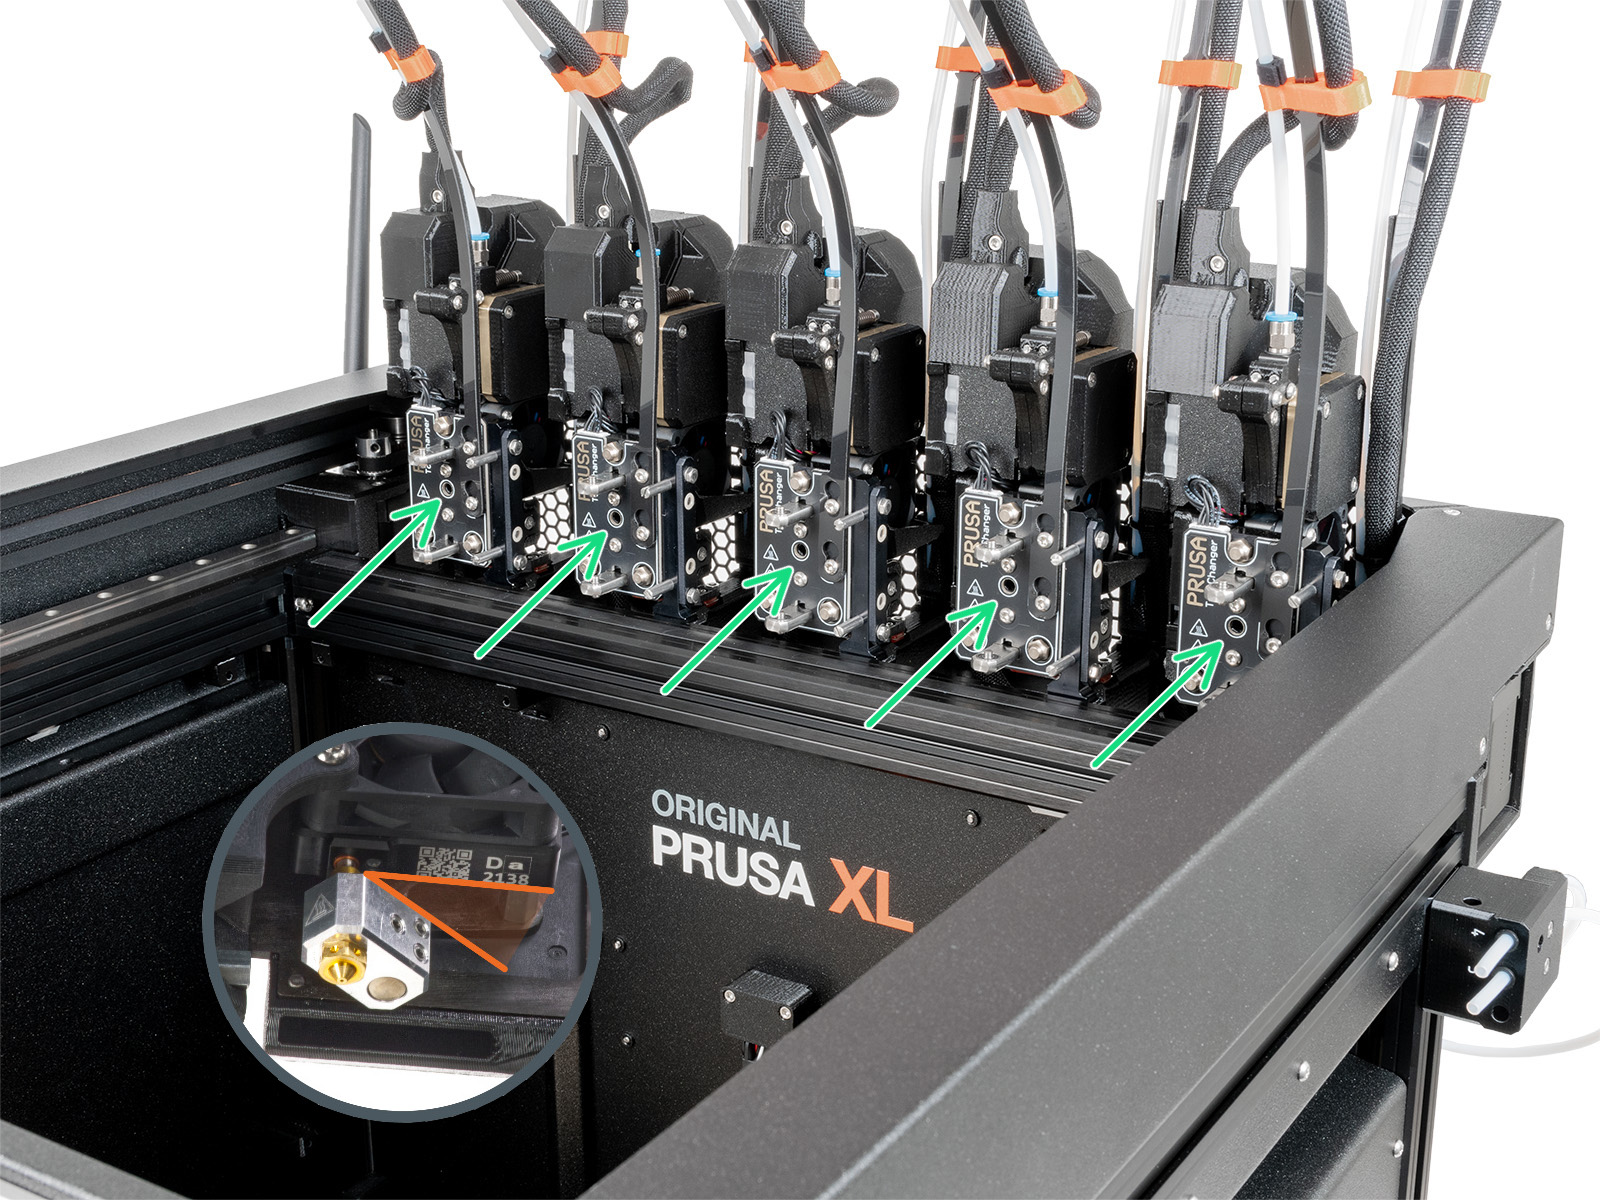
Original Prusa XL
The hotend is installed at a 35°-40° angle. If you notice the sock would not fit due to a lack of space between the heaterblock and fan shroud, follow these steps:
- Access the grub screw that secures the hotend.
- On single-tool XL, remove the x-carriage cover. This component is located at the front of the print head.
- On the multi-tool XL, park the tool. To do so, navigate to LCD Menu -> Control -> Pick/Park Tool -> Park Current Tool.
- Slightly loosen the grub screw that secures the hotend, so you can slightly reposition the hotend angle. Keep as much as possible of the initial 35°-40° angle.
- Push the hotend upward and tighten the grub screw, without using extra force.
Prepare the printer for silicone sock installation with the following steps:
- On the multi-tool XL, pick the tool. Navigate to LCD Menu -> Control -> Pick/Park Tool -> Pick Tool #.
- Move the printer axes, in particular the Z-axis, so that the bottom of the hotend is accessible. This is done by navigating to LCD Menu -> Control -> Move Axis.
- Fully cool down the printer to room temperature and switch it off.
 |  |
Installing the silicone sock
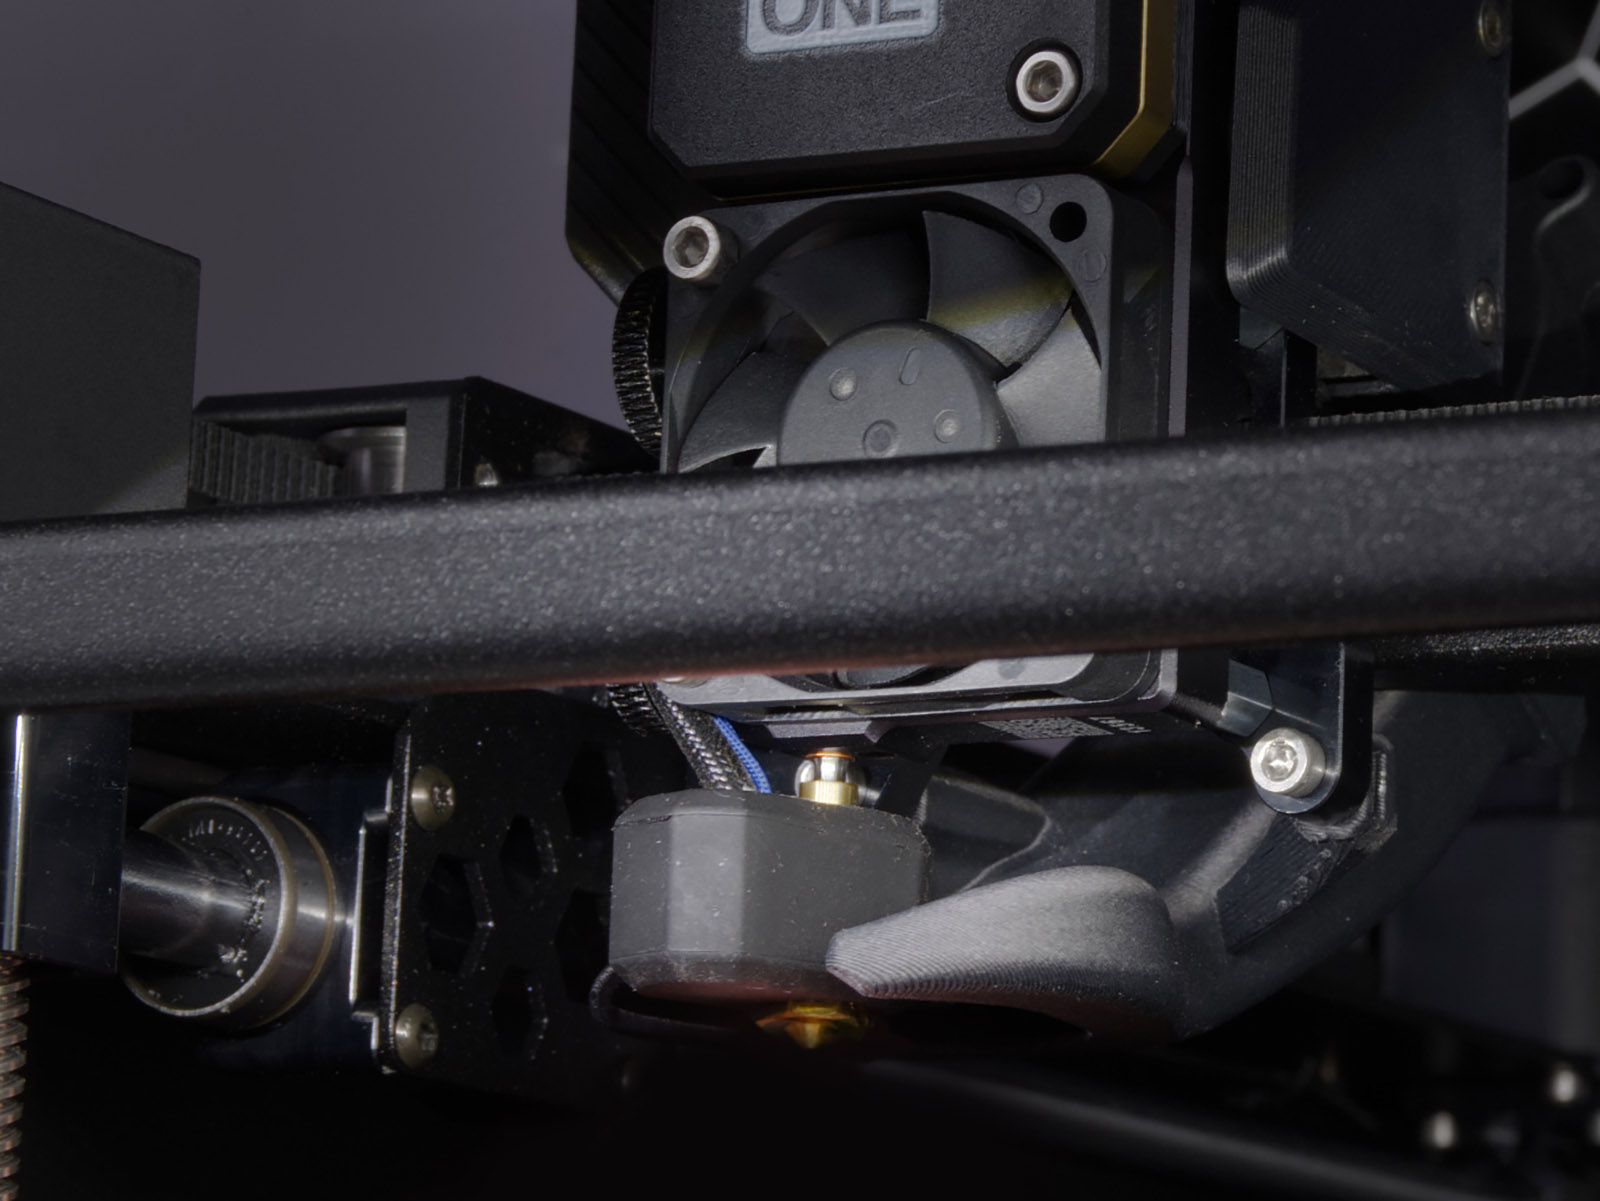
Push the sock from the bottom of the hotend. If there is any resistance, do not attempt to push the sock harder, as excessive force might bend the heatbreak.
Once the silicone sock is installed, the printer needs to be adjusted. Navigate to LCD Menu -> Settings -> Hardware -> Nextruder Silicone sock, and set it to ON. This step is not performed on the XL.
 |  |
| CORE One, CORE One L | MK4S, MK3.9S |
 |  |
15 comments
The filament sensor have 3 positions of the orange tap, at the right position it show an orange X.
That last bit about this not being performed on the XL is no longer accurate. The path through the menus is different, but there is now a silicon sock toggle in the XL firmware.
1. Es wäre hilfreich, wenn das Tool zum Lösen (Torx T8) als Hinweis erscheinen würde.
2. An das hotend kommt man nur mit der Hand ran, wenn man den Extruder abnimmt und in der Hand hält.