W rzadkich przypadkach drukarka może błędnie wykryć narzędzie w głowicy drukującej, mimo że w rzeczywistości nie zostało pobrane, uniemożliwiając ukończenie Kalibracji gniazda narzędzi.
Kroki rozwiązywania problemów
- Spróbuj zadokować błędnie wykryte narzędzie, przechodząc do Menu LCD → Sterowanie → Wybierz/zaparkuj narzędzie.
- Jeśli to nie jest możliwe lub się nie powiedzie, spróbuj zastosować funkcję uwolnienia zablokowanej dyszy, w Menu LCD → Sterowanie → Uwolnij zablokowane narzędzie.
- Sprawdź, czy na dolnej części wyświetlacza jest wyświetlana temperatura. Jeśli tak, zanotuj ją na wypadek kontaktu z naszym zespołem wsparcia technicznego.
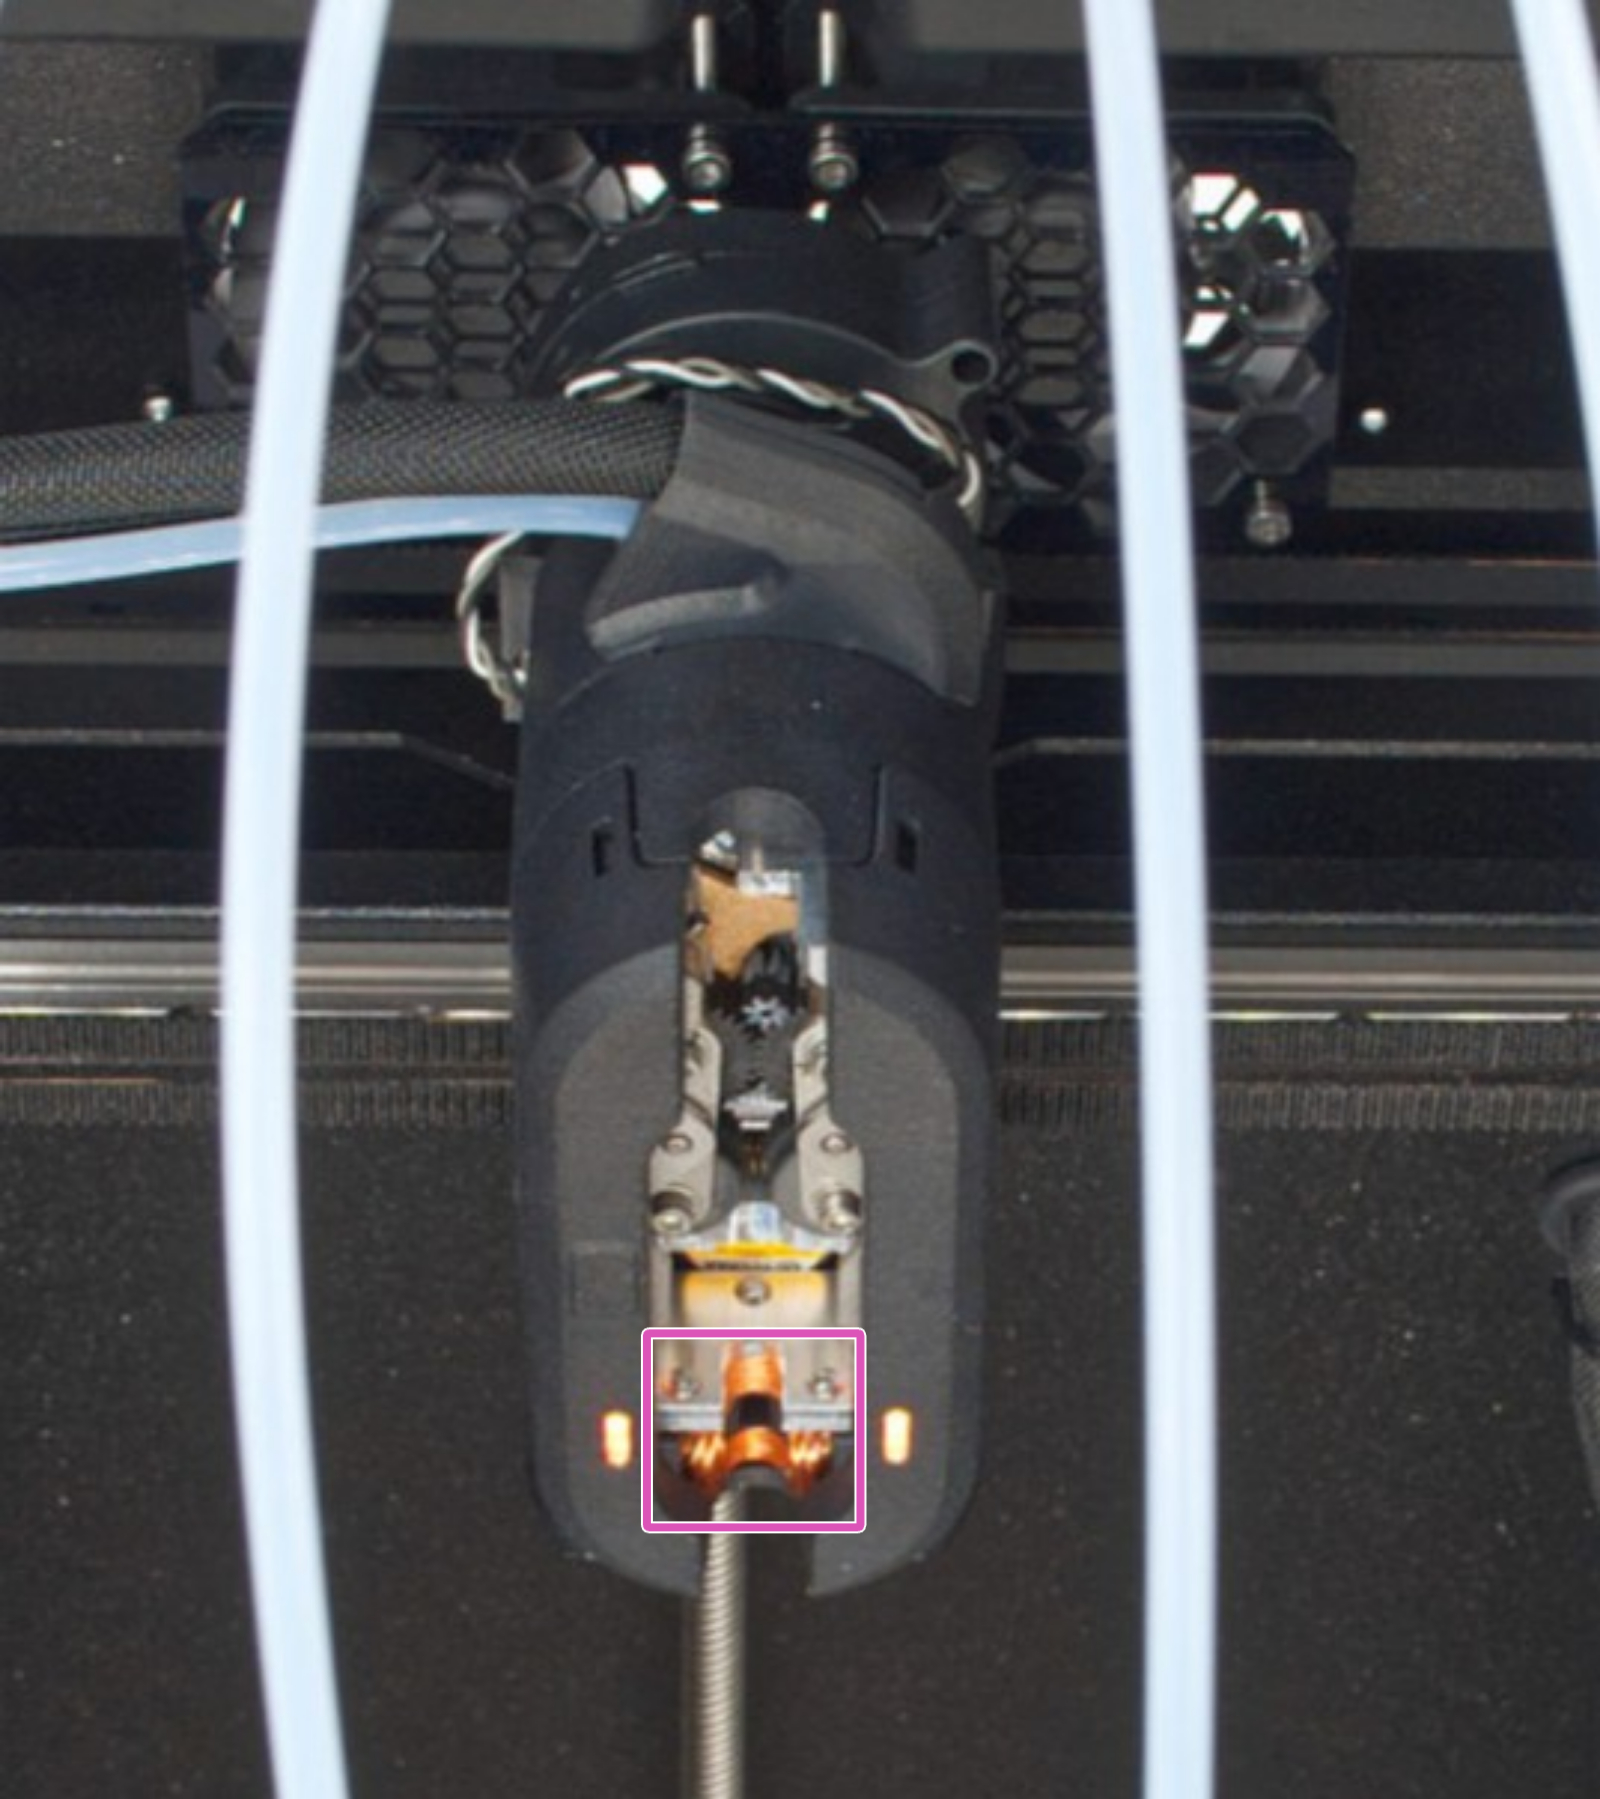
- Sprawdź stan widocznej części cewki w zmieniarce narzędzi. Cewka powinna być czysta, bez śladów smaru, zarysowań lub zagnieceń, a także bez żadnych uszkodzeń mechanicznych, takich jak przetarcia, przerwany drut miedziany lub pęknięta cewka. W razie potrzeby możesz wykonać kilka zdjęć w celu przygotowania się do kontaktu z naszym wsparciem technicznym.
Zanim zaczniesz poniższy proces resetowania do stanu fabrycznego, musisz podłączyć do drukarki pamięć USB z kompatybilnym plikiem firmware umieszczonym w katalogu głównym.
- Jeśli żaden z poprzednich kroków nie zadziałał, zalecamy pełny reset (wymaga USB z firmware) dostępnego w Menu LCD → Ustawienia → System → Reset ustawień fabrycznych. Istnieje możliwość, że procedura ta zmieni wynik detekcji. Pełny reset powoduje utratę wszystkich kalibracji. Więcej informacji na temat tej procedury znajdziesz w artykule Reset ustawień fabrycznych (CORE One L, CORE One, MK4/S, MK3.9/S, MK3.5/S, MINI/+, XL).
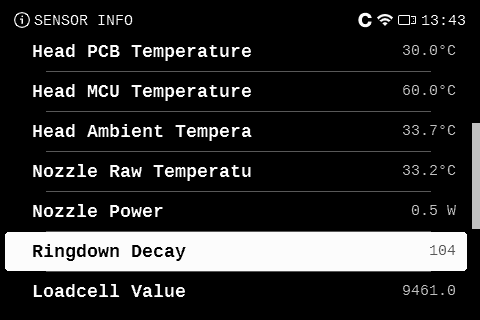
- Jeśli to nie zadziałało, sprawdź wartość Tłumienie zaniku drgań [Ringdown Decay] w menu LCD → Info → Sensor info → Tłumienie zaniku drgań.
Wartość zmienia się w zależności od tego, czy narzędzie jest fizycznie pobrane, czy zaparkowane. Najlepiej spróbować ręcznie pobrać narzędzie i sprawdzić wartości zarówno z narzędziem w głowicy INDX, jak i bez niego.
Jeśli drukarka nie potrafi pobrać narzędzia, możesz delikatnie przybliżyć je do głowicy INDX, bez konieczności blokowania, aby sprawdzić, czy wartość się zmieni.
- Wartość poniżej 40 oznacza, że nie wybrano żadnego narzędzia.
- Wartość większa niż 95 oznacza, że narzędzie zostało pobrane.
- Wartość między 40 a 95 jest nierozstrzygająca.
Nie wahaj się skontaktować z naszą pomocą techniczną 24/7 w dowolnym momencie. Miej pod ręką informacje zebrane w trakcie wykonywania kroków opisanych w tym artykule, a my przejmiemy sprawę dalej.


