


What happened?
On the Prusa CORE One/+ and Prusa CORE One L, communication with the peripheral boards (e.g. xBuddy extension board) is achieved using the MODBUS protocol. In MODBUS, there are two types of devices: the master and the slave, also known, respectively, as client and server. On the firmware, the master is the xBuddy, and each slave is called puppy.
After assigning an address to each puppy, the xBuddy establishes communication with the puppy by sending a request. If the puppy does not respond to the request, the printer will show the message: "Puppy # not responding", where in place of #, the name of the device not responding is shown.
Error name: Puppy not responding
Error code: #31514 (CORE One) #35514 (CORE One L) #36514 (CORE One INDX)
The error indicates, most likely, a configuration problem that might have stemmed from the firmware. In other cases, it can be caused by a faulty connection of the xBuddy extension board, and on a printer equipped with an INDX upgrade, it could also be caused by a damaged print head main cable.
How to fix it?
Printer equipped with INDX
Check wheter the main cable is properly plugged into the print head and connected into the xBuddy board. At the same time, assess any possible visible damage along the cable or on either connector, for example a pinched cable.
Attempt unplugging the cable and re-plug it while pushing the connector in place to verify whether it wasn’t caused by a weak connection or shifted pins.
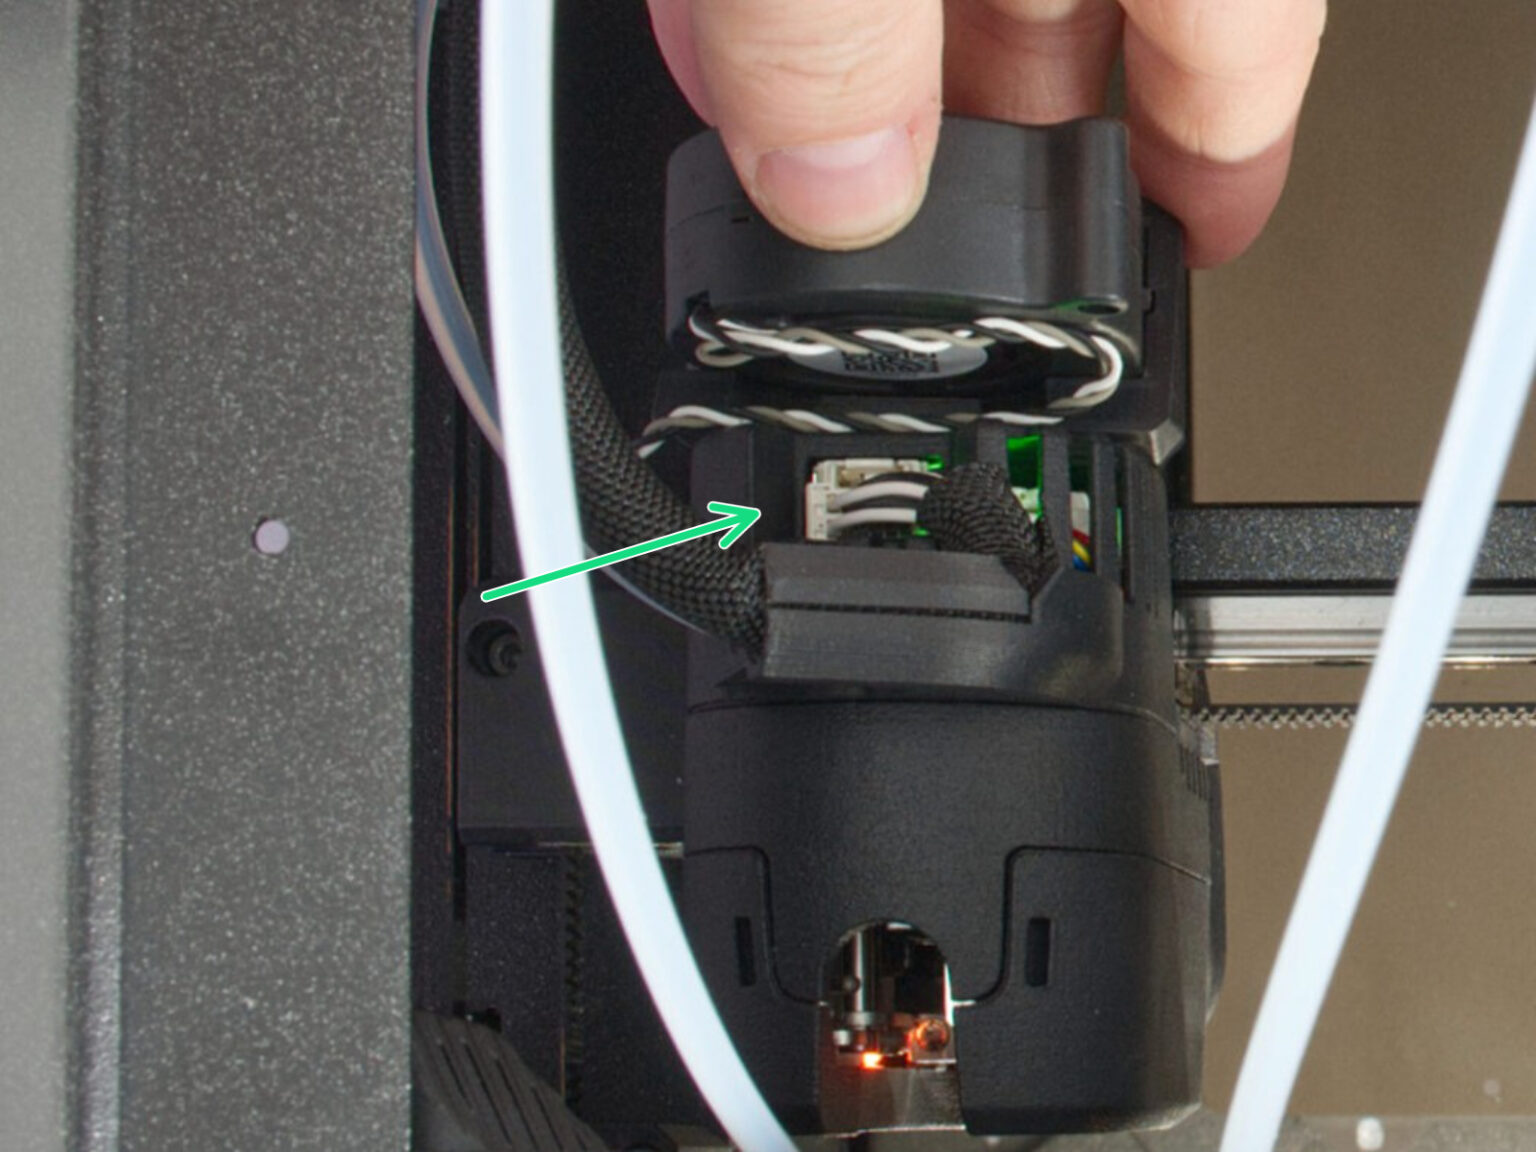 | 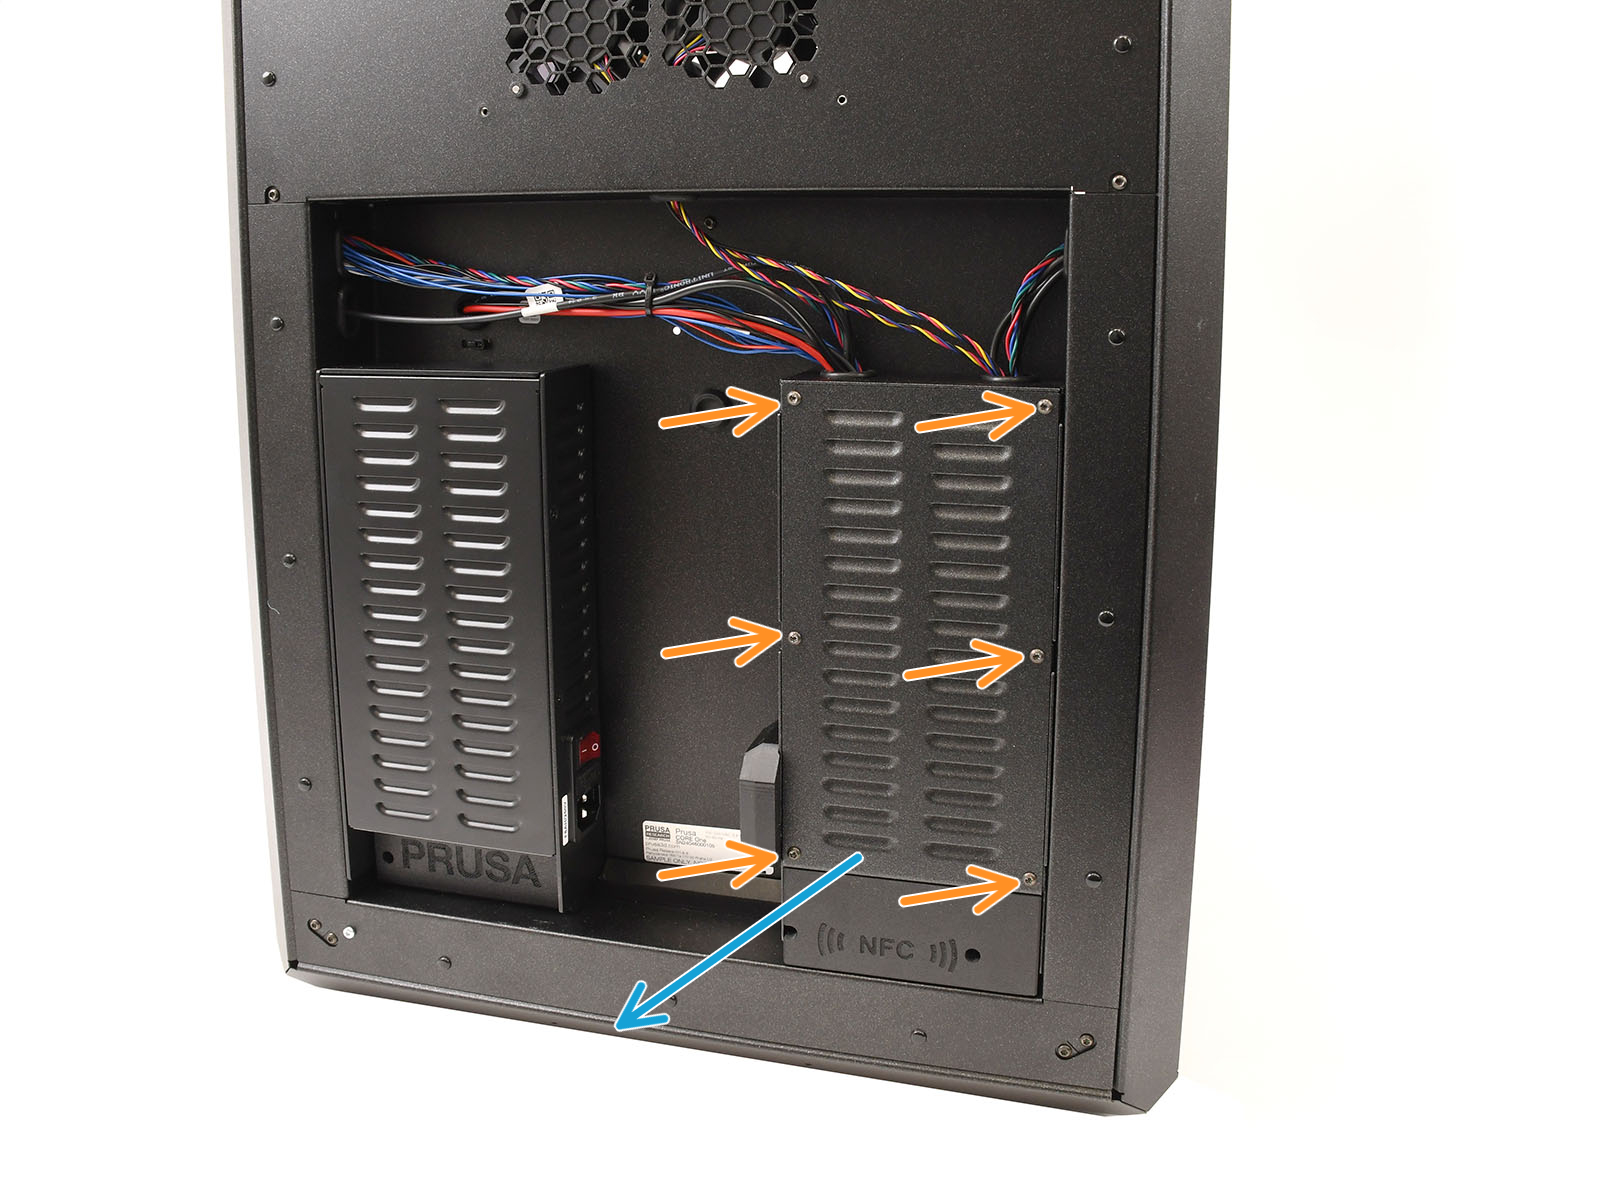 |
| Print head main cable | xBuddy cover removal |
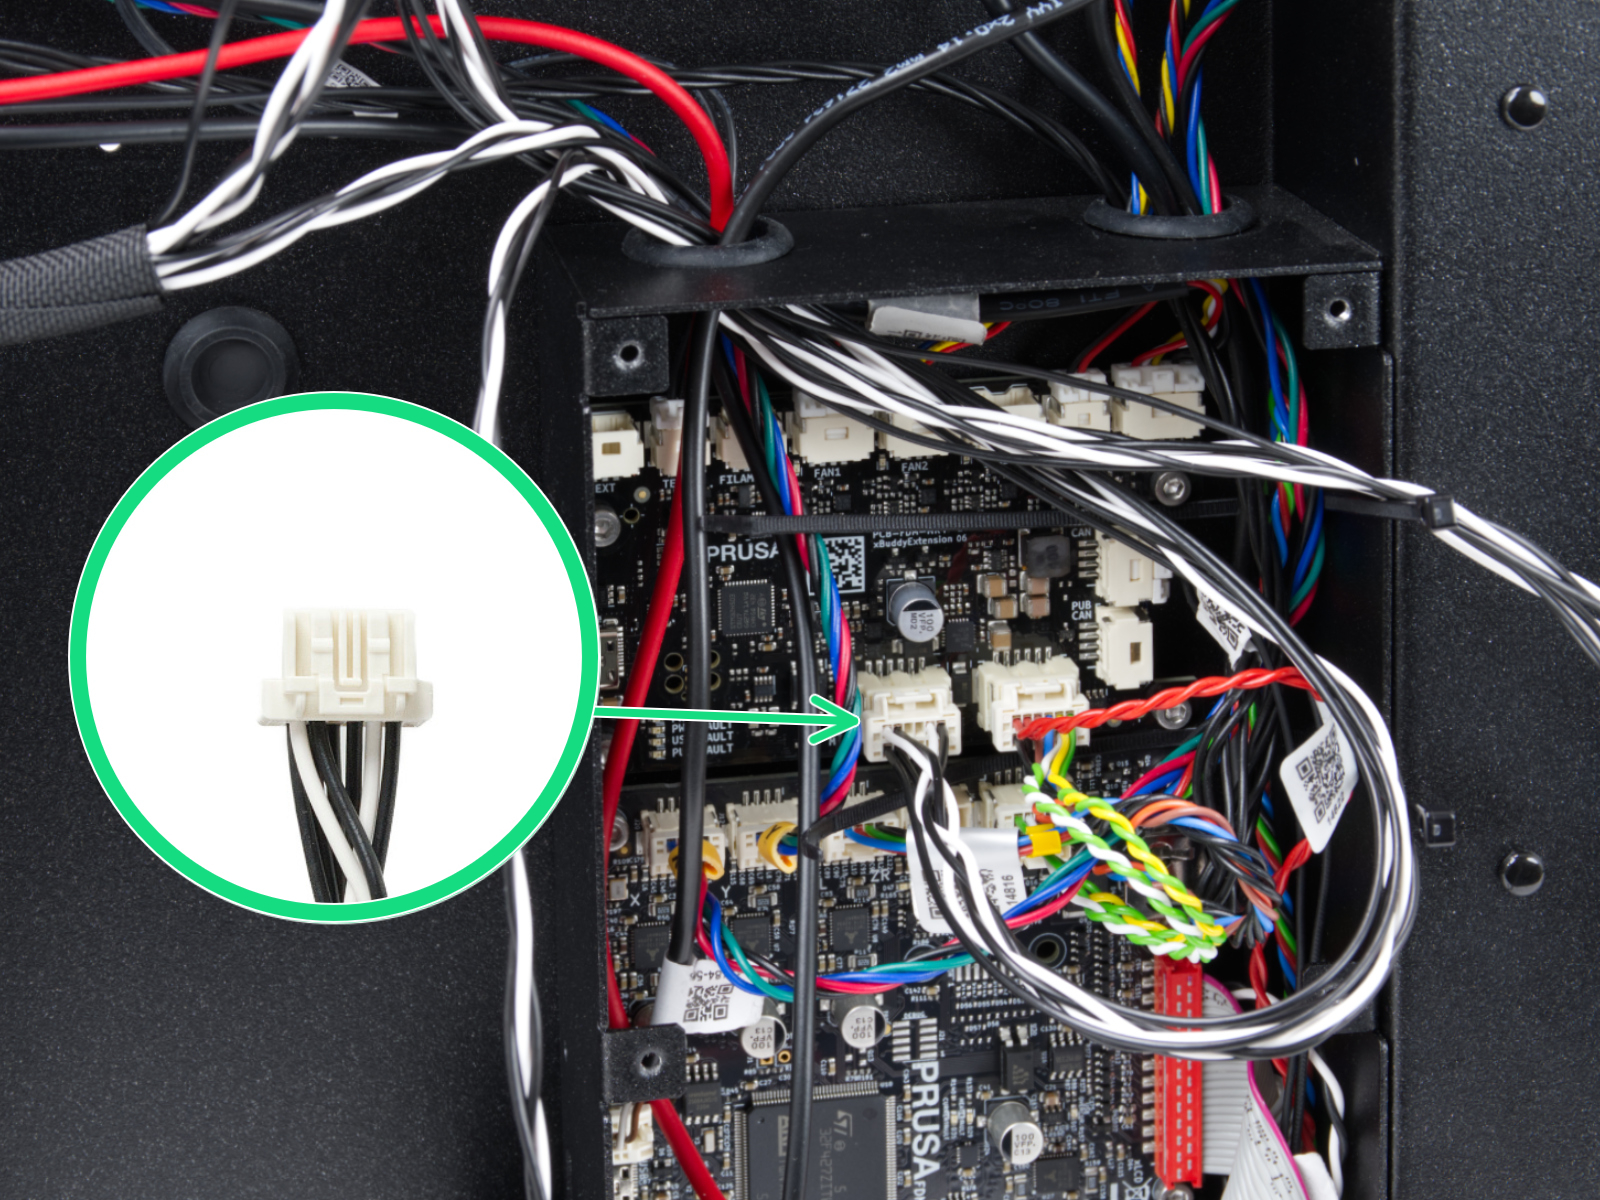 | 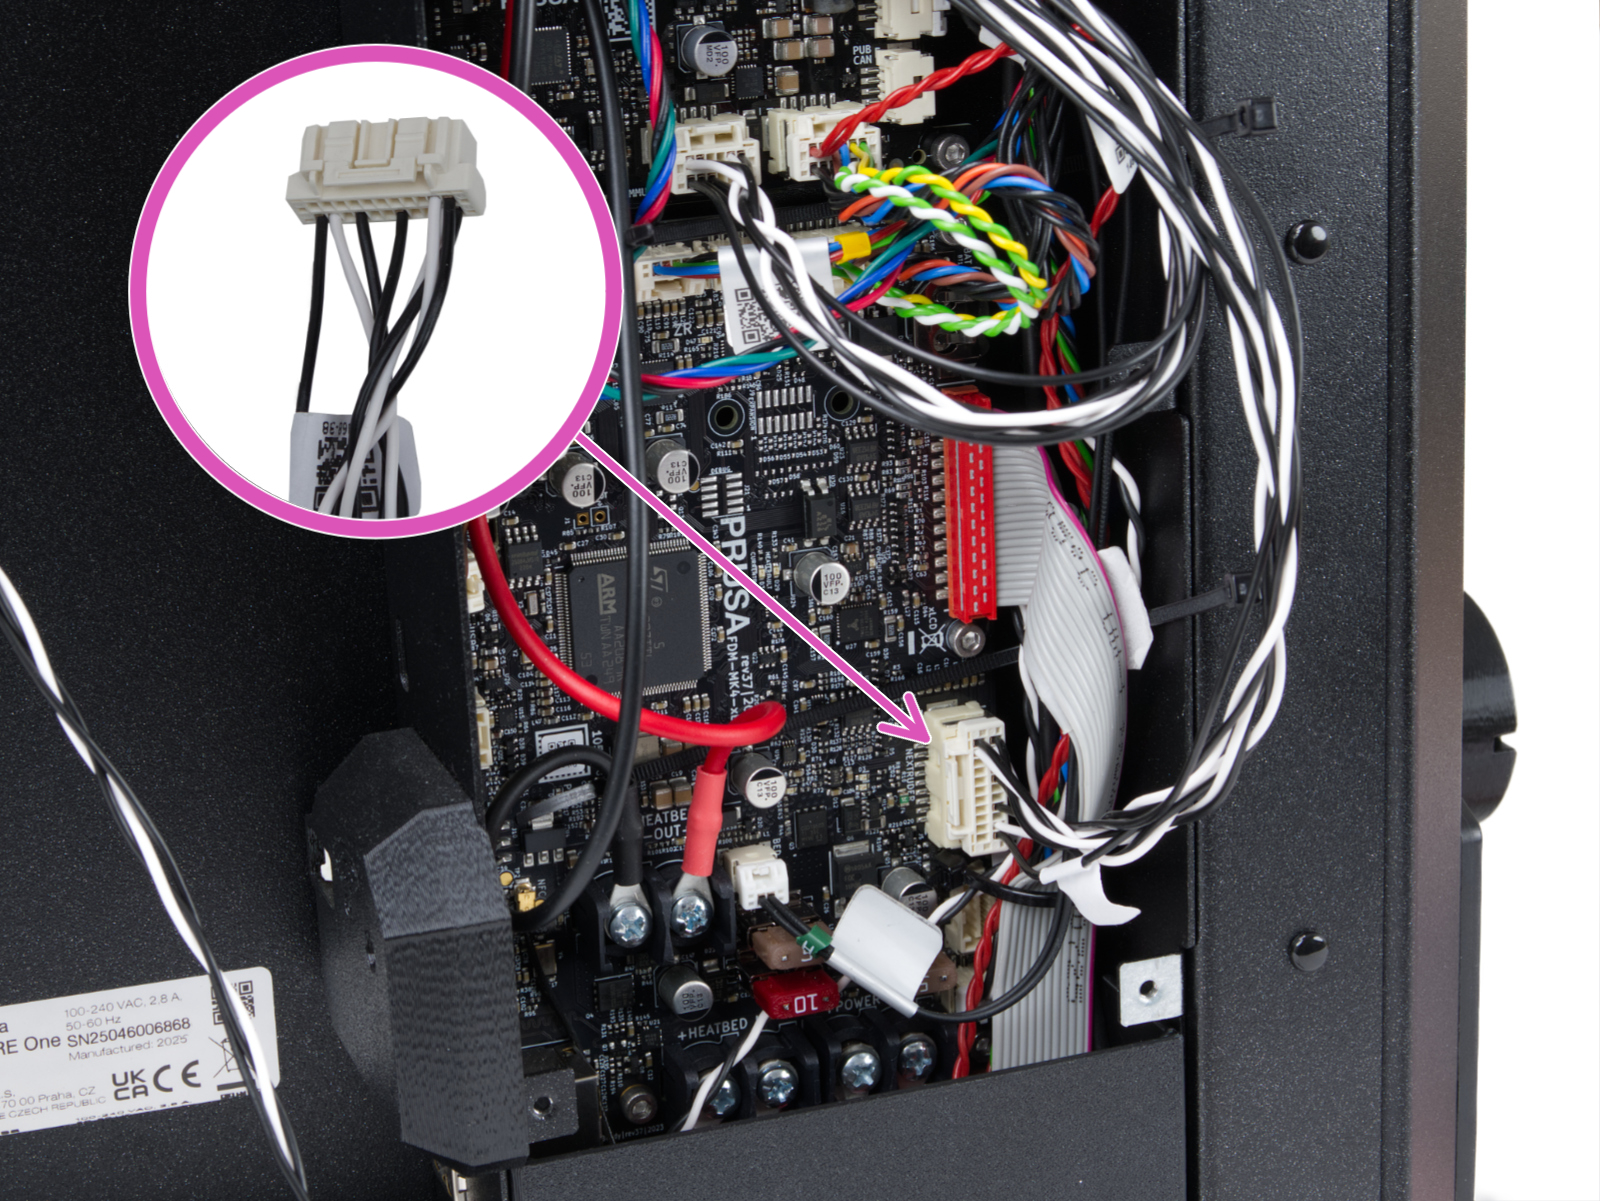 |
| CORE One INDX - head cable Narrow connector, plugged into the MMU-labeled slot on the xBuddy Extension board. | CORE One INDX - head cable Wide connector, plugged it into the Nextruder-labeled slot on the xBuddy board. |
If this still does not solve it, if possible, please note the version of the board in LCD menu -> Info -> Version -> Board info, the last two digits after the slash. This might be possible after rebooting the printer.
If the printer is stuck at the red screen, with no possibility to access the menu, it is possible to check the revision of the mainboard, although not the version, typically stamped in the middle of the xBuddy board.
With that info, do not hesitate to contact our カスタマーサポート, we will help you solve the issue, that most likely is related with the print head main cable.
CORE One/+ - Extension board check
Access the xBuddy and xBuddy extension boards by loosening six M3x4bT bolts to remove the cover. Once visible, check the boards for visible damage on their surface, and check the connection between xBuddy and xBuddy extension for any irregularities.
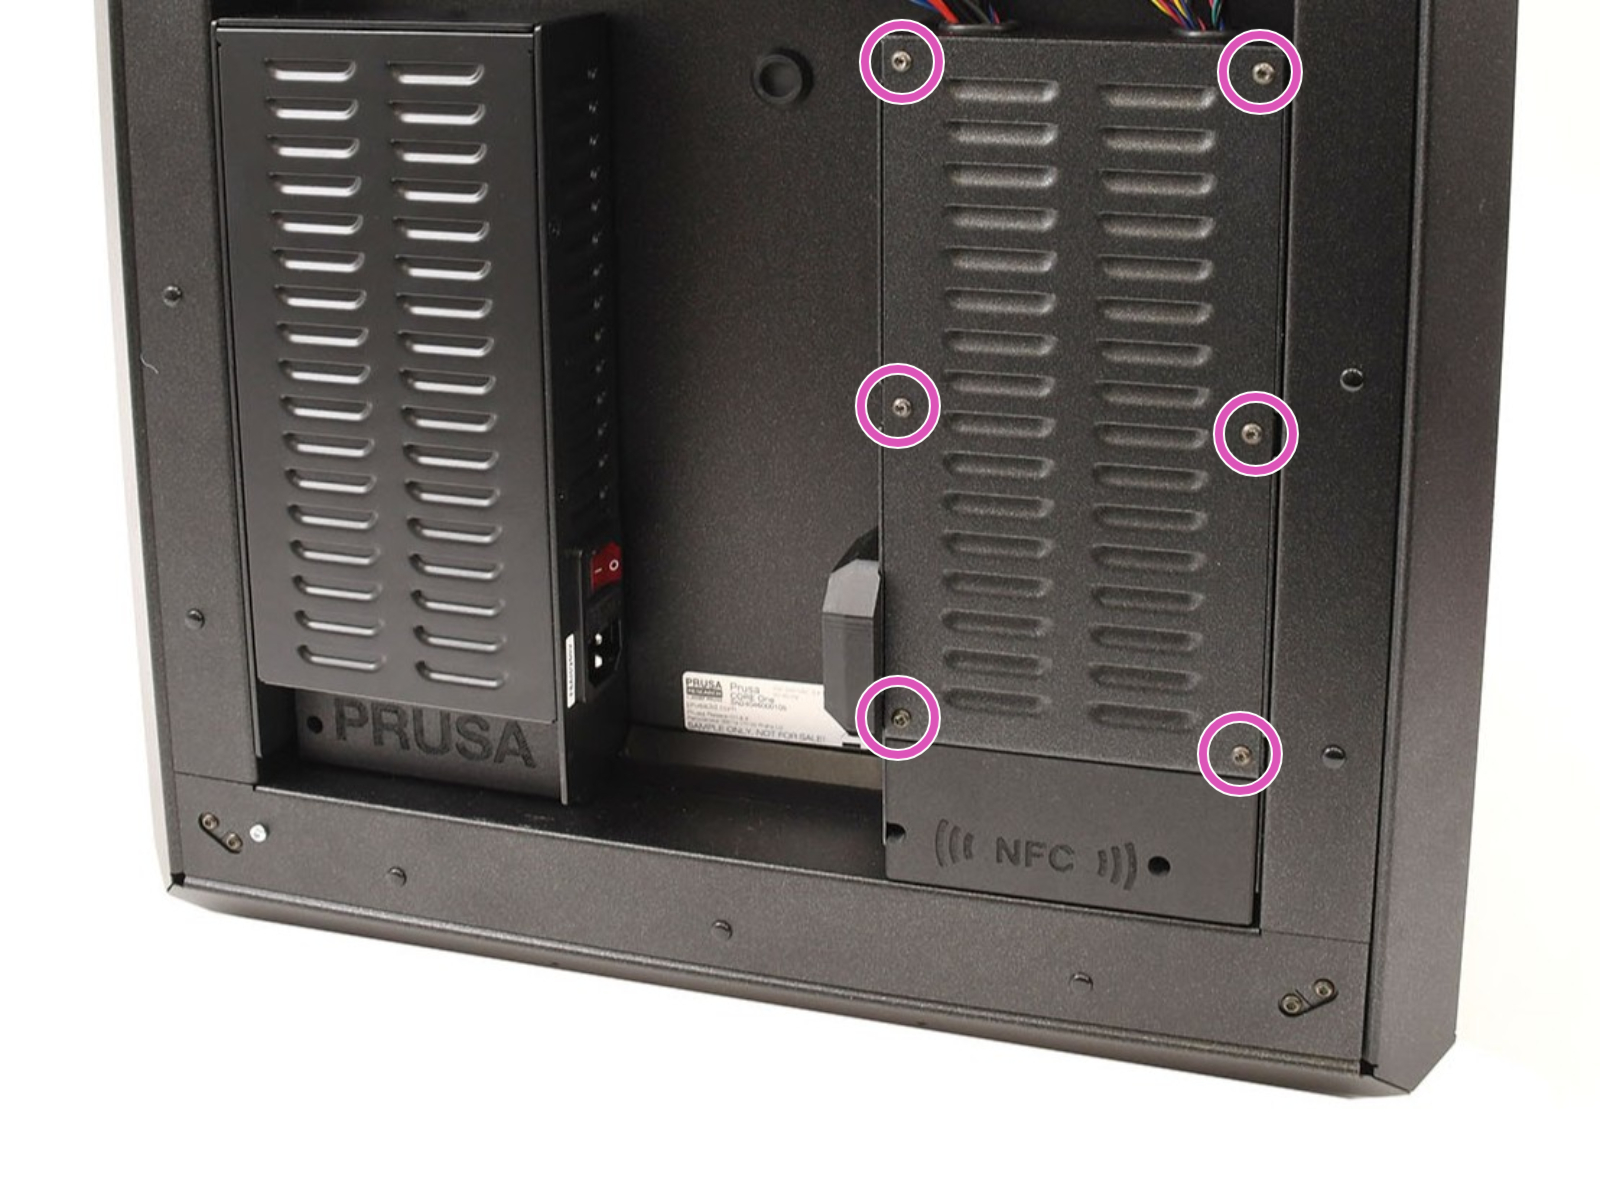 | 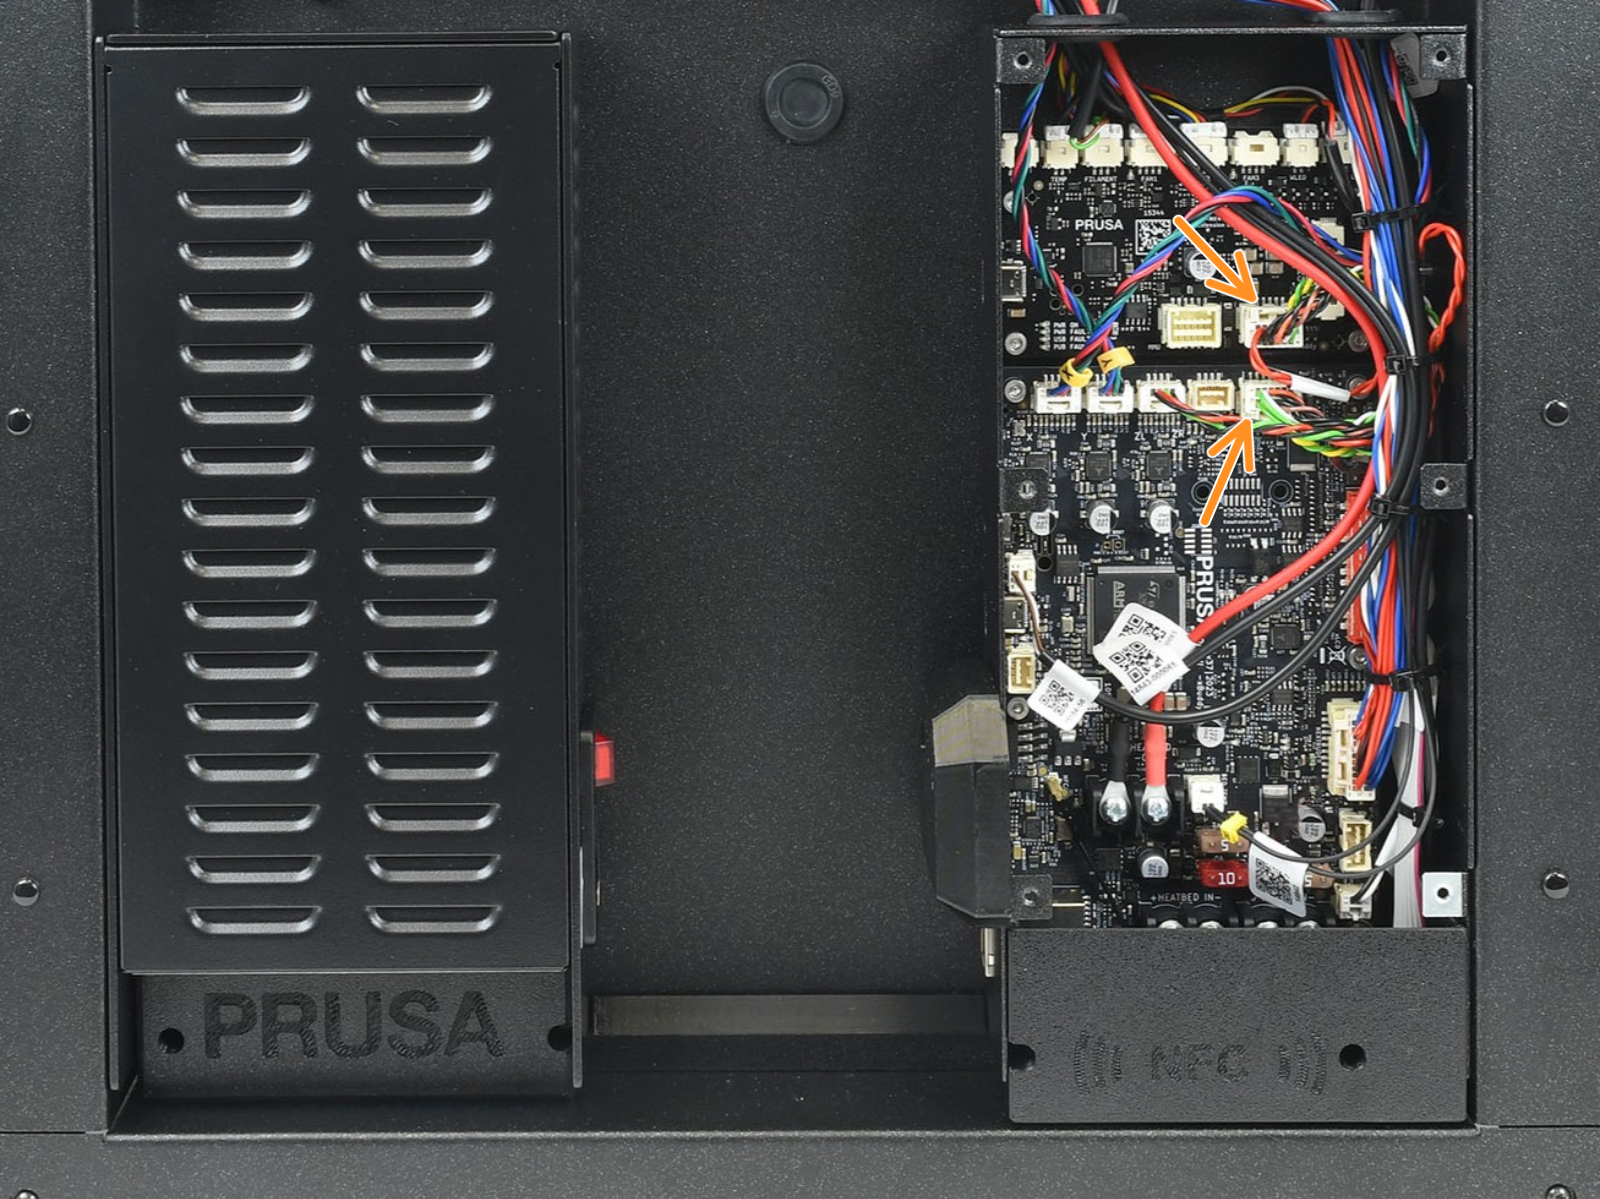 |
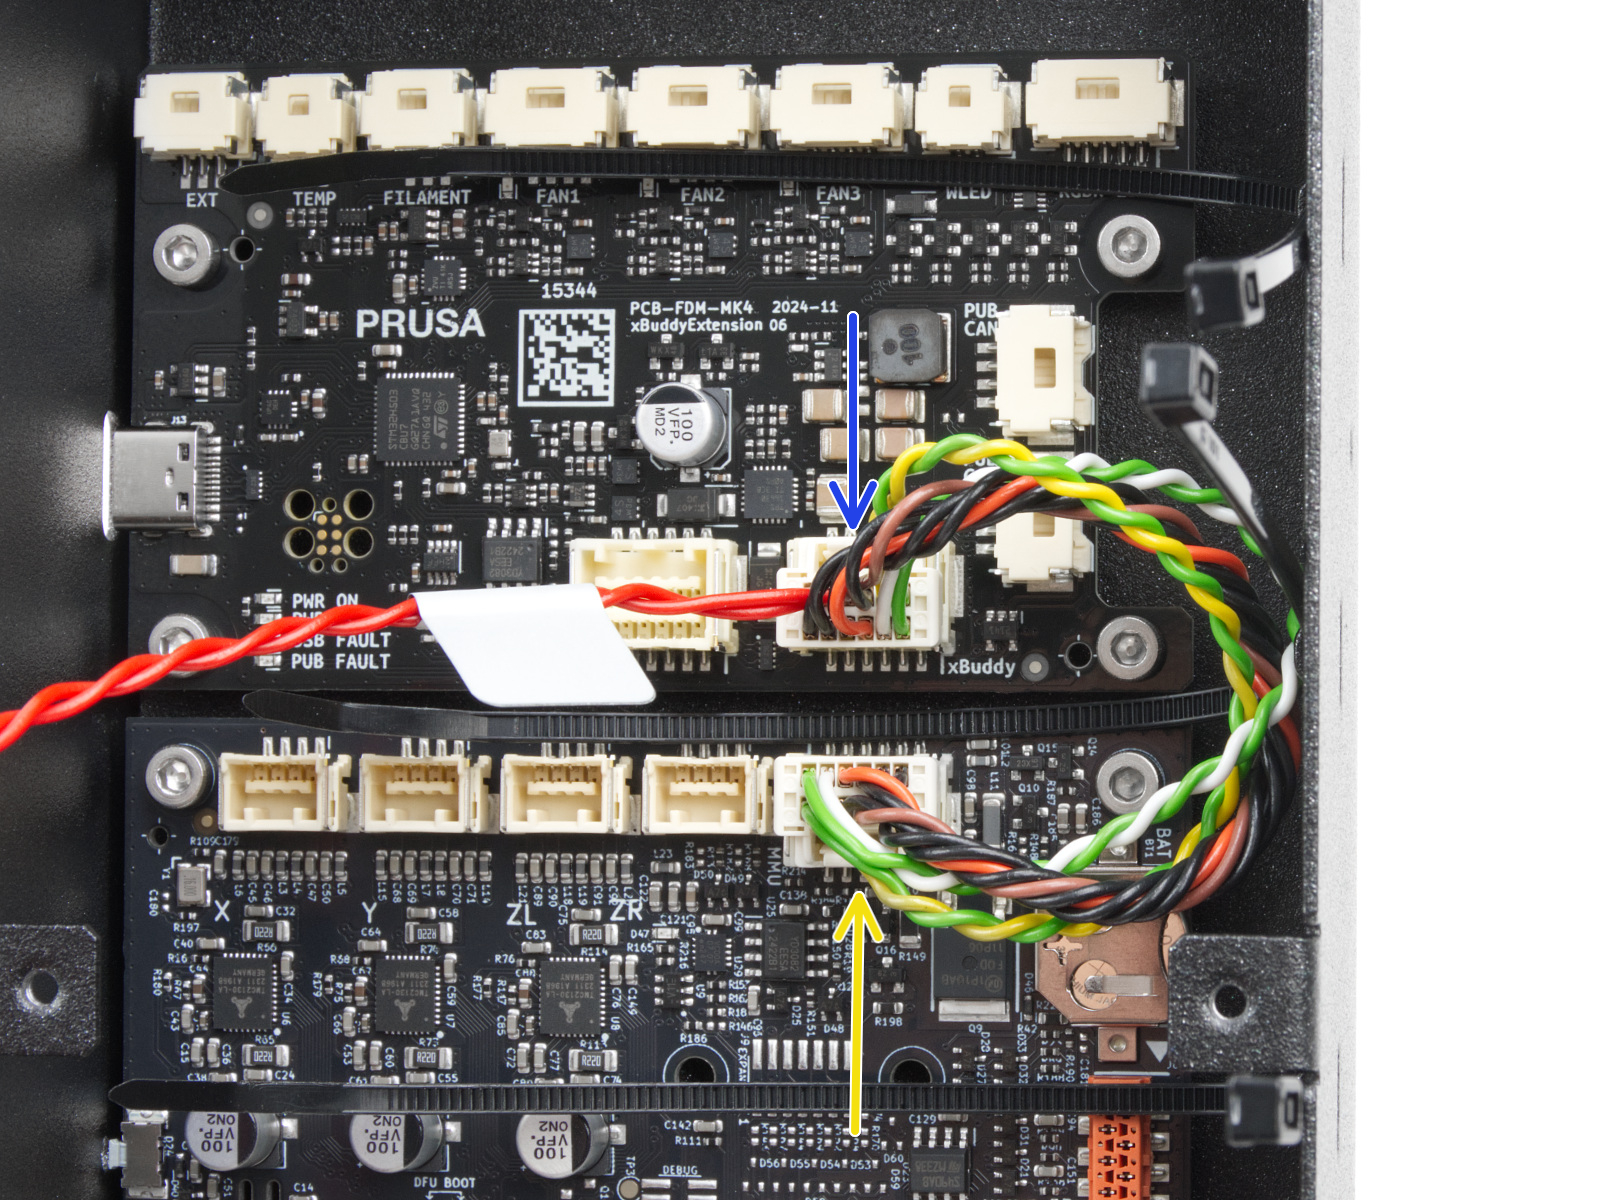
CORE One L - Extension board check
To access the CORE One L electronics, the first step is locating the Wi-Fi module on the rear panel of the printer. Using a 2.5 mm Allen key, remove the M3x14 screw. Gently pull the Wi-Fi module straight downward to remove it from the printer.
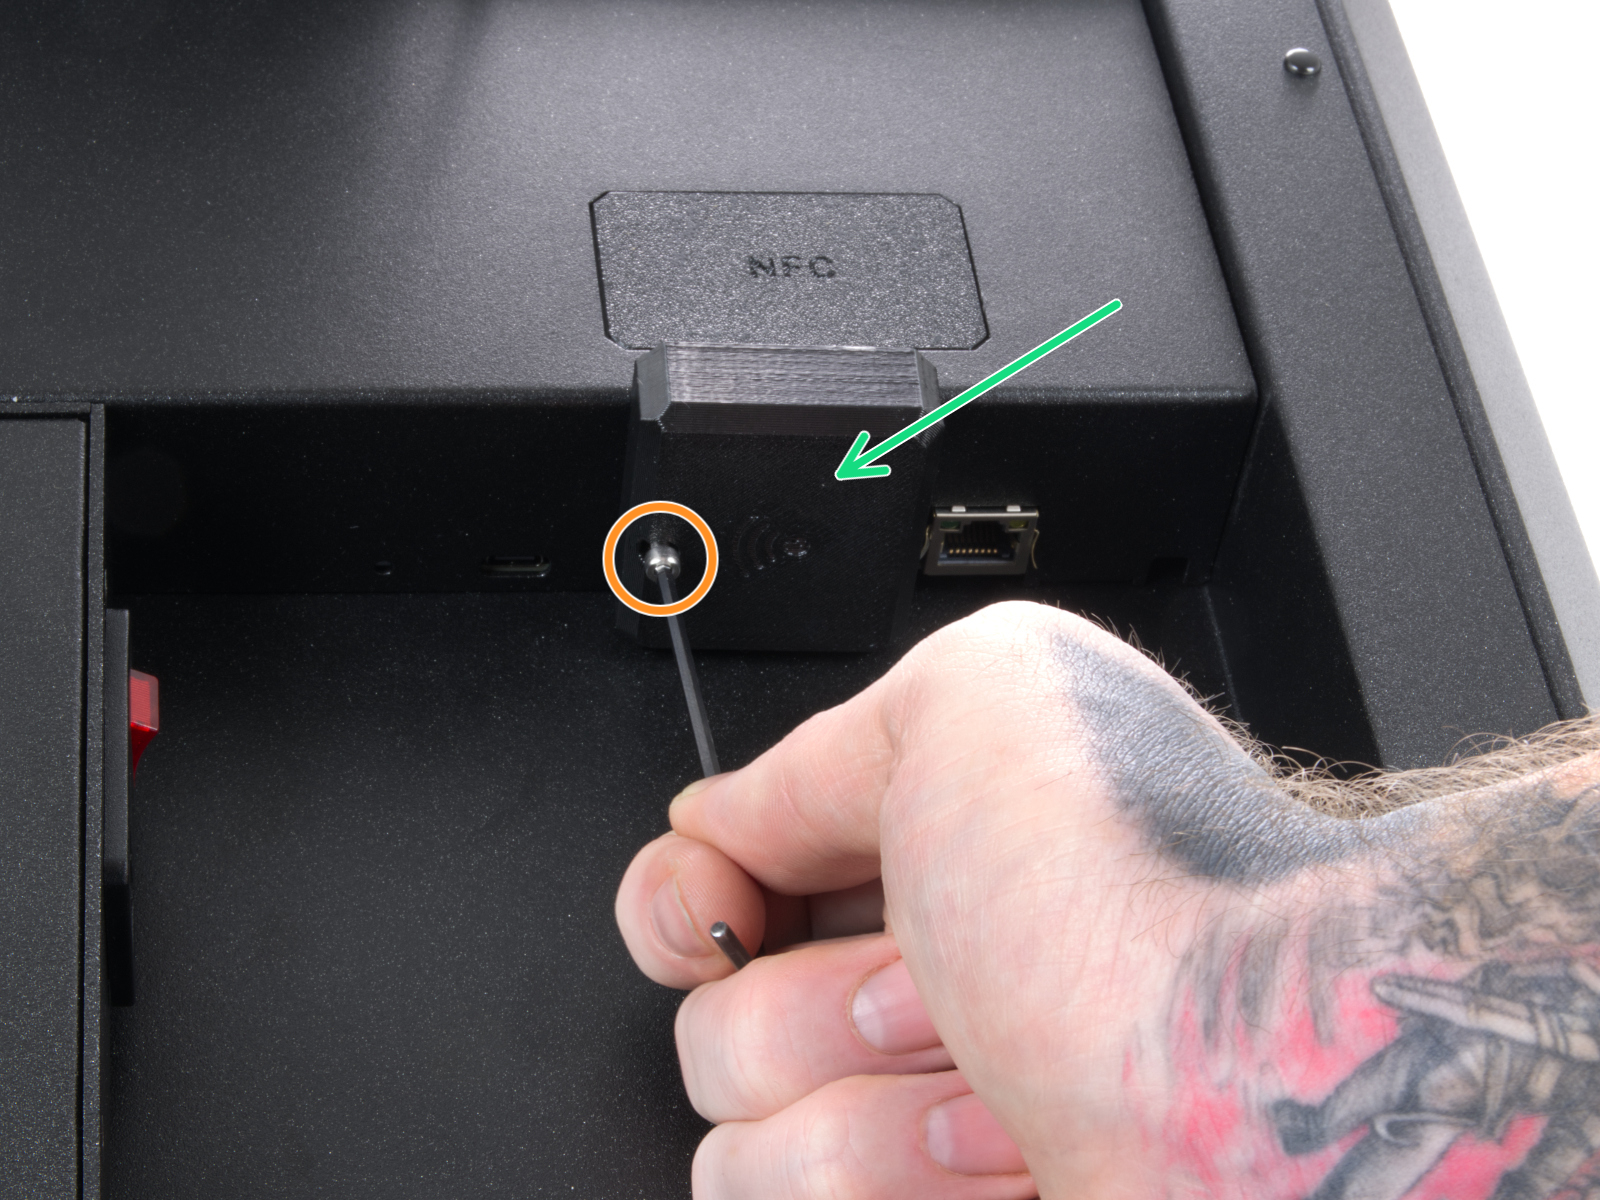 | 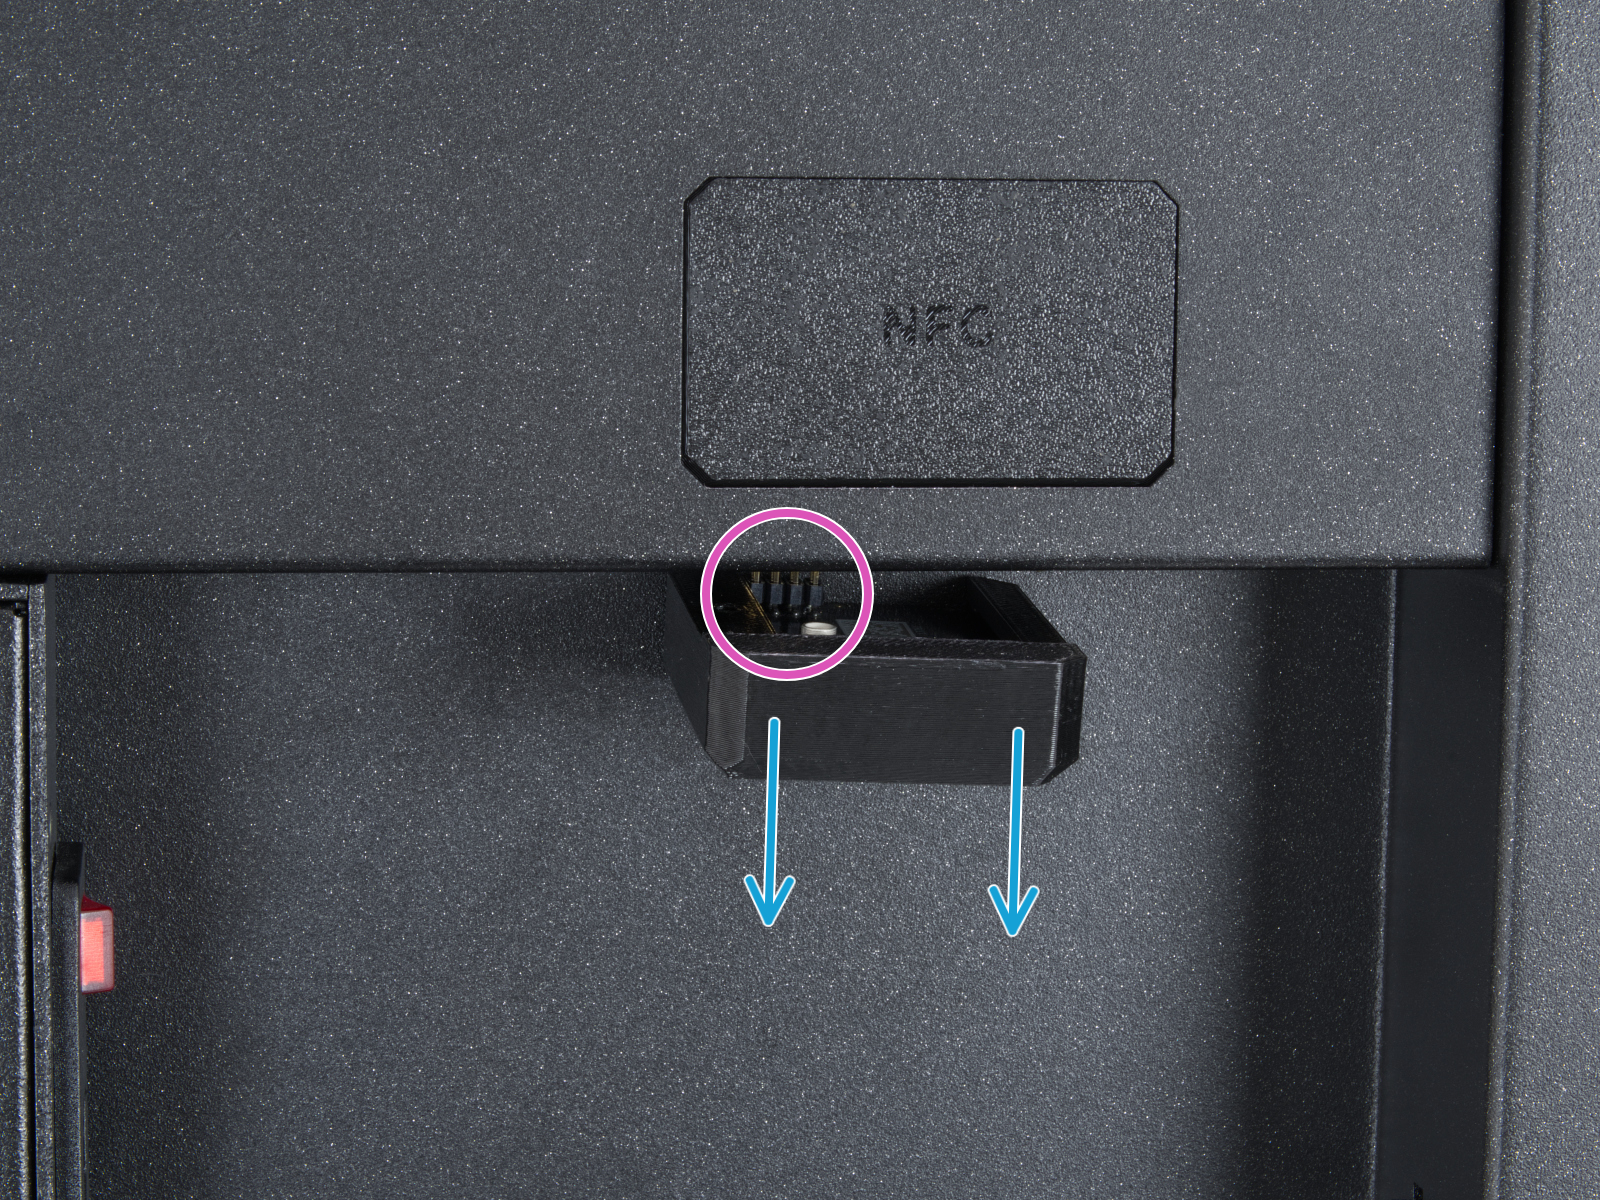 |
From the inside of the printer, locate on the rear side the highlighted M3x4bT bolts.
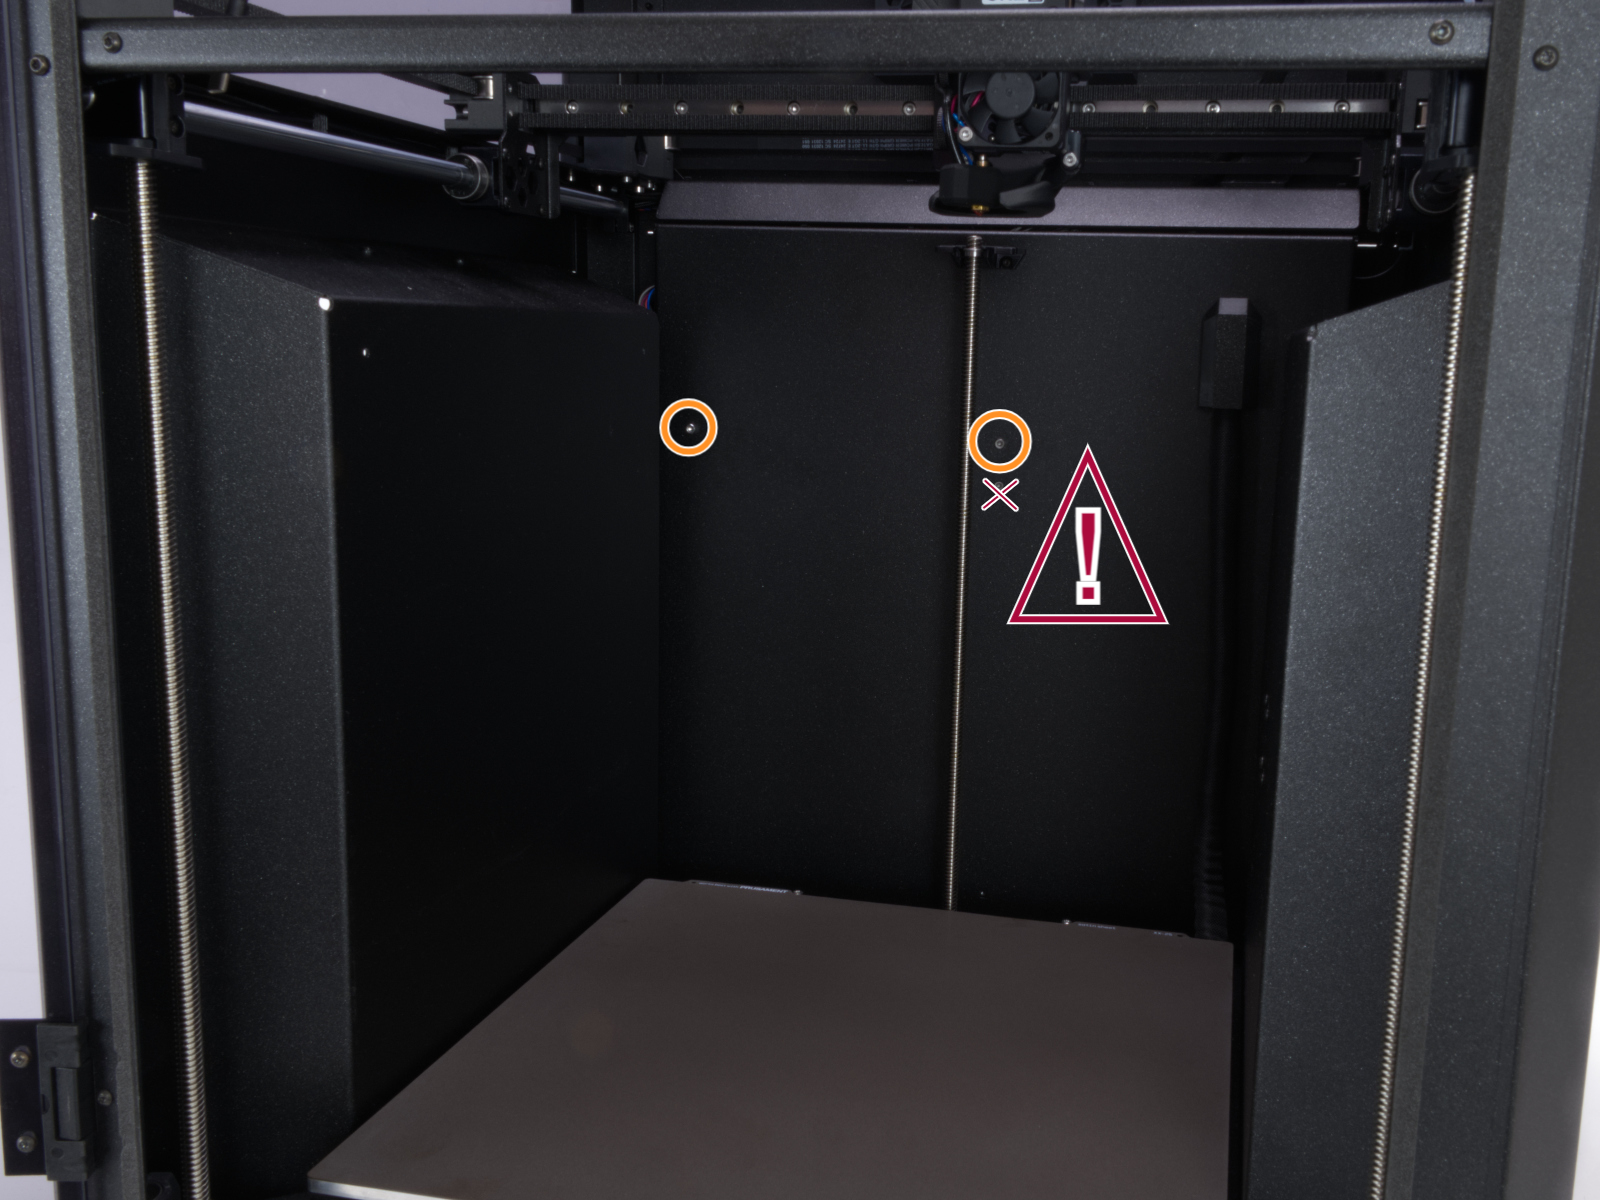
Using a T10 Torx key, remove two M3x4rT bolts to release the rear xBuddy box cover. Lift the cover to expose the xBuddy and xBuddy extension boards.
Once visible, check the boards for visible damage on their surface, and check the connection between xBuddy and xBuddy extension for any irregularities.
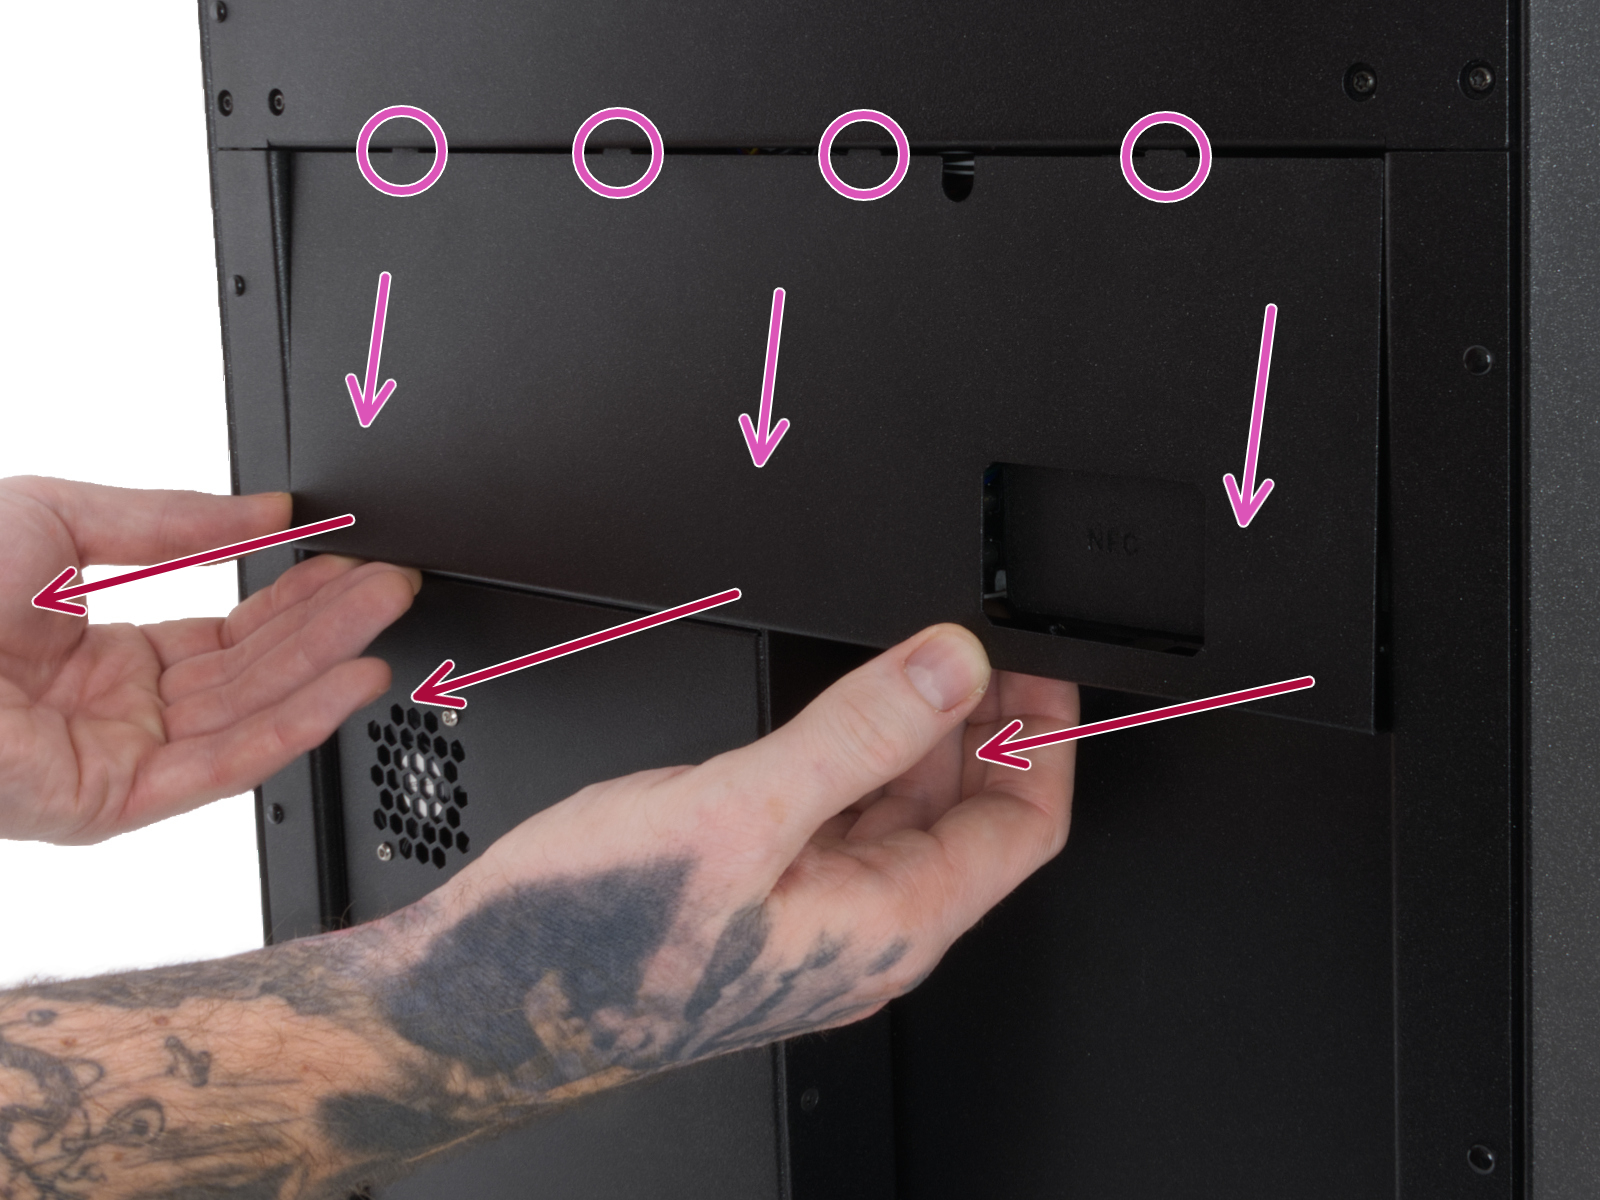 | 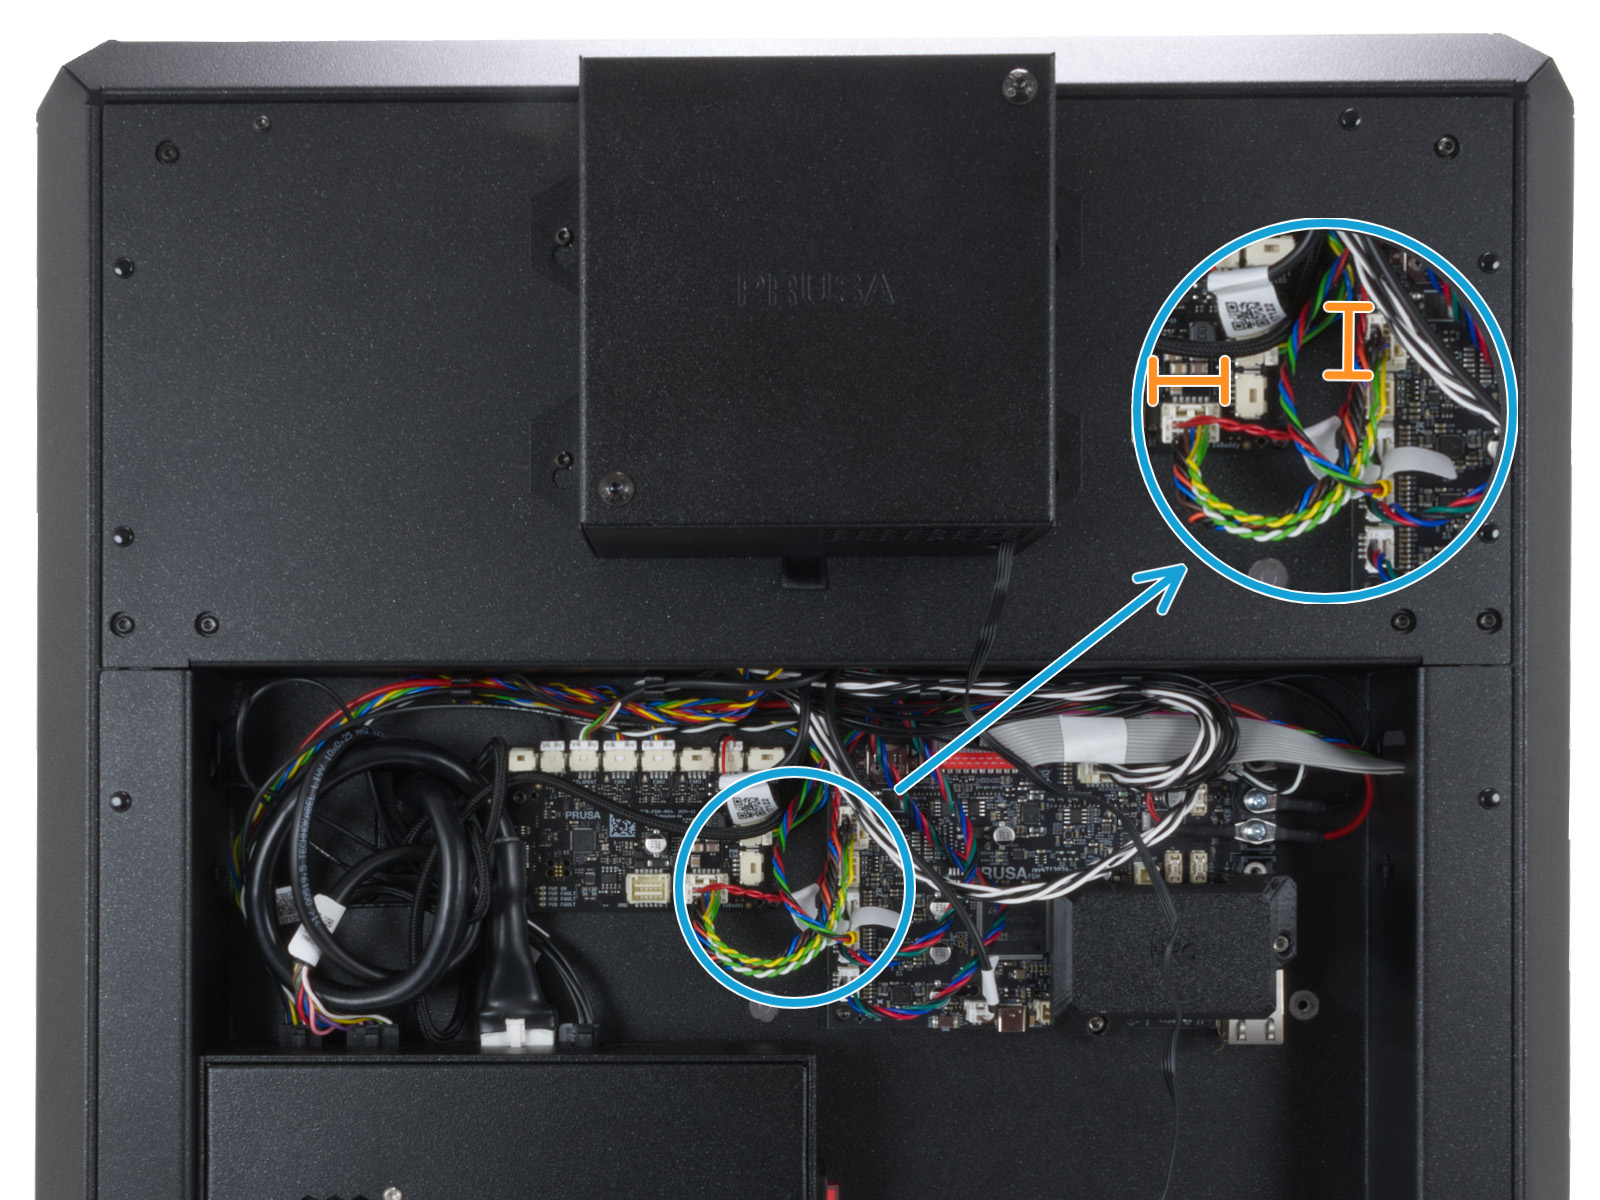 |