Relevante para


It is recommended to regularly take some time to maintain your Prusa CORE One INDX. This should be done even if the printer is working perfectly.
Besides the usual tools, such as Allen keys, needle-nose pliers, and IPA (Isopropyl Alcohol) + paper towels, you might need:
The following points should be checked before every print.
After several hours of printing, various kinds of debris may start to accumulate around the printer parts or under the heatbed - pieces of filament, dust, scraps, broken supports, etc. Always make sure that the parts of the printer are clean. You can use a brush, a small broom, or a vacuum to remove debris.
Never clean the special PA Nylon sheet with acetone, IPA (isopropyl alcohol), or other alcohol-based solvents (window cleaners, Windex, etc.)! This will damage the surface.
All flexible print sheets should be cleaned regularly to ensure adhesion, but the exact methods and washing solutions can differ depending on your type of sheet.
You can find more information on how to take care of your flexible print sheet in this articlein this article.
The following checks should be done every 200 hours of printing time. Cleaning the nozzle can be performed as needed, or every 200 hours of printing time, whichever occurs first.
Never heat the nozzle with an external heat source! This could cause irreversible damage to the nozzle.
Ensure that there is no debris or dust on the (X-axis) linear rail. If there is, clean it with a clean tissue or a clean cloth, no degreaser or chemicals, as these might damage the rubber in the carriage.
We recommend lubricating the linear rail every 3-6 months, using the dedicated linear rail lubrication set at the spots shown below.
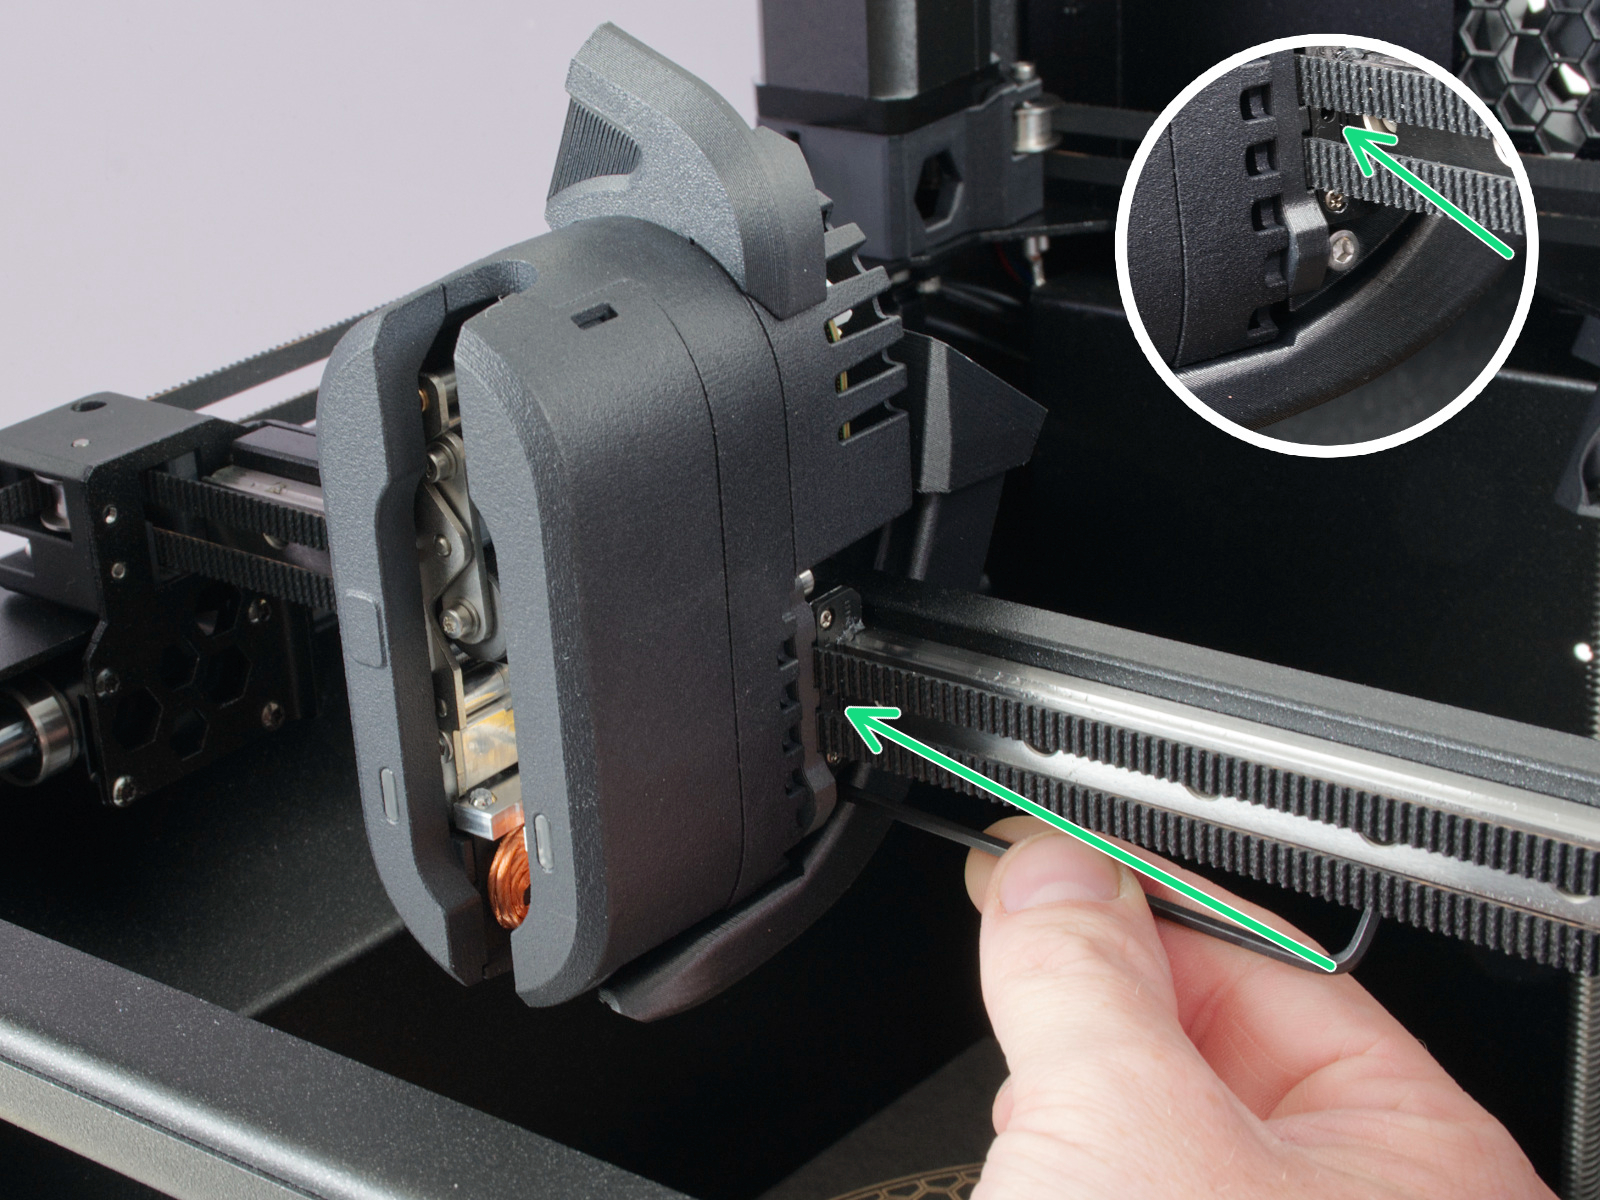 | 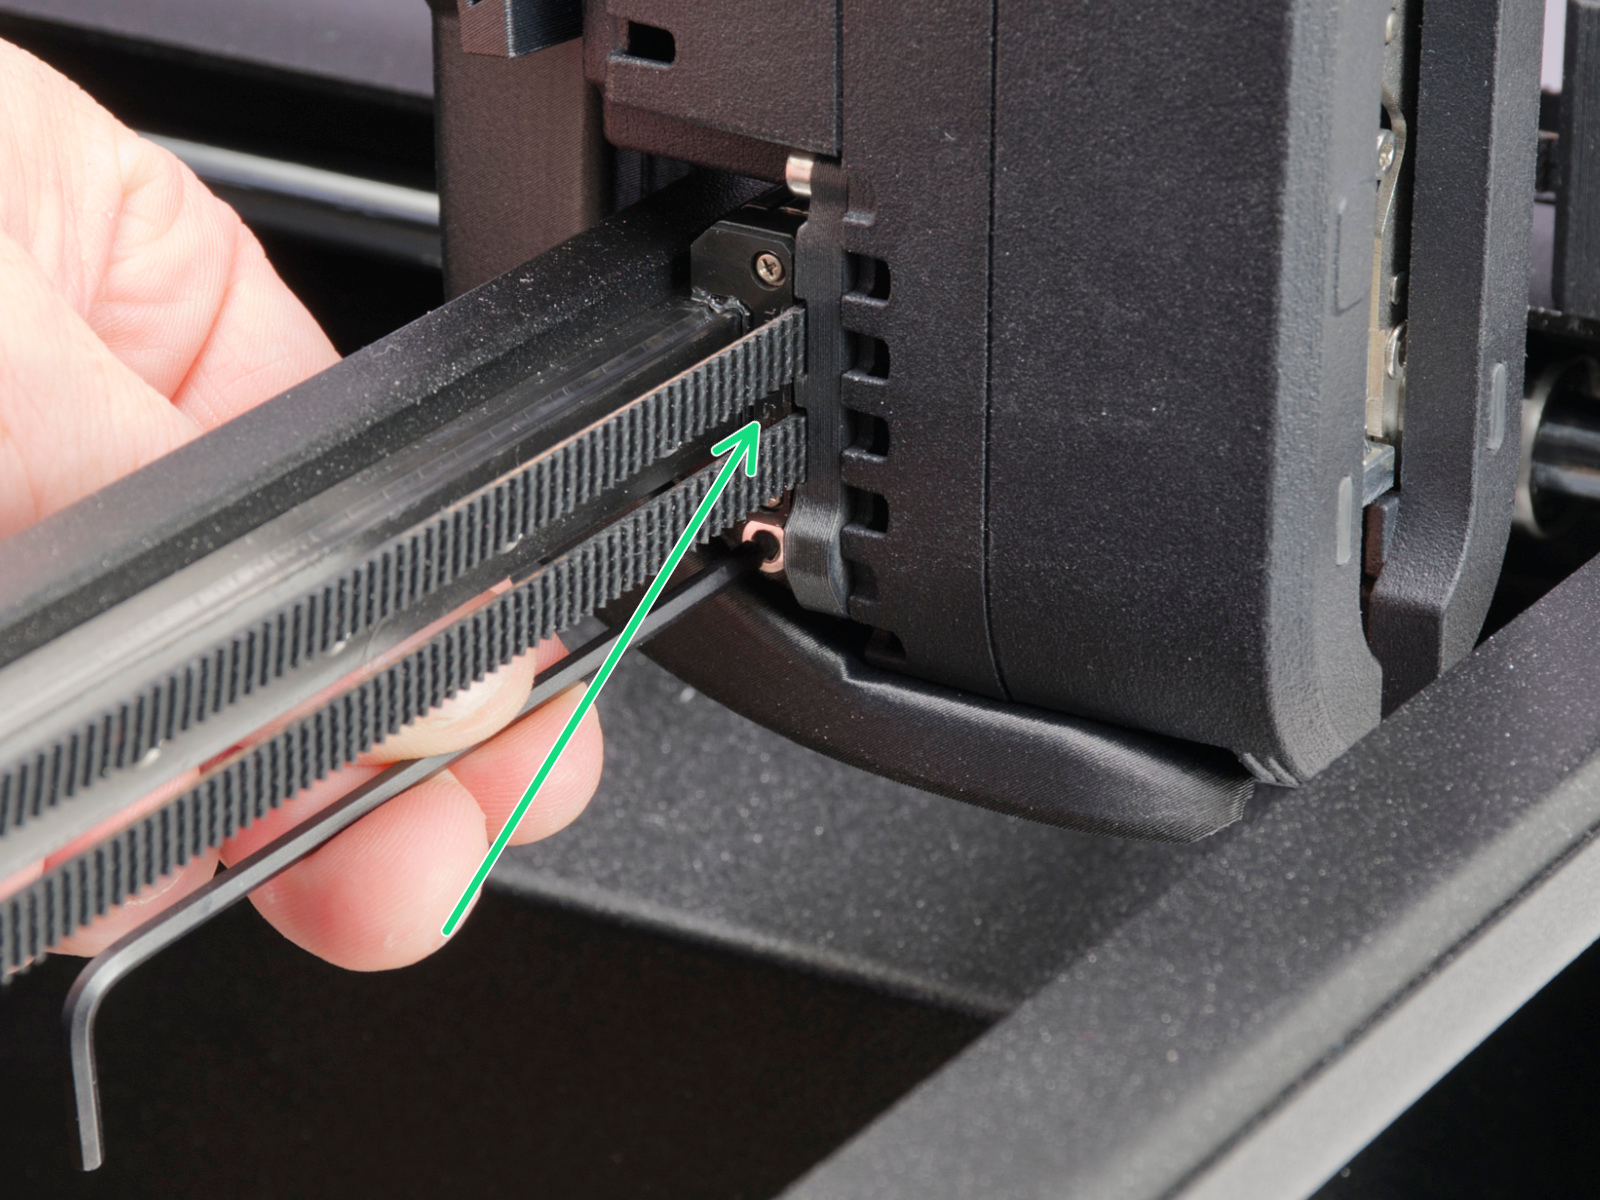 |
On linear rails, DO NOT use Prusa Lubricant or any products not part of the linear rails lubrication set.
Clean the (Y-axis) smooth rods with a clean paper towel, and lubricate them using a small amount of Prusa Lubricant.
Only in case you feel the axis is not running smoothly anymore, even after recently cleaning and lubricating the smooth rods, the bearings can be taken out, cleaned with alcohol, and greased on the inside, still using a small amount of Prusa Lubricant.
Over a long printing time, the belt can slightly loosen, causing issues such as layer shifting or bad printing quality. The easiest way to check the belt tension is to print a circular object. If the result is not perfectly round, a belt adjustment is needed.
The feeding gear in the extruder does not need any lubricant. However, over time, a filament powder deposit may form in the grooves, causing poor extrusion of filament. Remove the debris using compressed air. Small plastic threads can be carefully removed with tweezers.
Use an alcohol-free cleaner or soapy water to clean the printer panels.
DO NOT use products that contain alcohol, including IPA. Repeat exposure will weaken the panels, causing them to become brittle over time.
It is a good practice to check and optionally reconnect the electrical connectors on the xBuddy board, INDX Toolhead, heatbed, PSU, and xLCD every 600-800 hours of printing.
In particular, ensure that the screw-attached connectors are fully tightened, and the Molex-attached connectors are properly connected.
CAUTION: for Molex-attached connectors, it is necessary to press the latch before disconnecting. Otherwise, the connector may get damaged.