Artículo está también disponible en los siguientes idiomas
The nozzle tool remains attached to the print head after a tool change or print completion. The printer is unable to pick up or switch to another tool, and tool change operations may repeat or fail. Clicking sounds may be heard from the print head during parking attempts, but the tool does not release.
How to unlock the nozzle tool
WARNING: Turn off the printer and disconnect it from power before performing any intervention.
WARNING: Allow all components to cool down to room temperature before handling the nozzle tool.
Before you begin, remove the steel sheet and place an empty cardboard box on the heatbed (e.g. Prusament box) to protect it from accidental damage.
At first, skip the red-colored parts. In case the process does not work, repeat it including the red-colored steps.
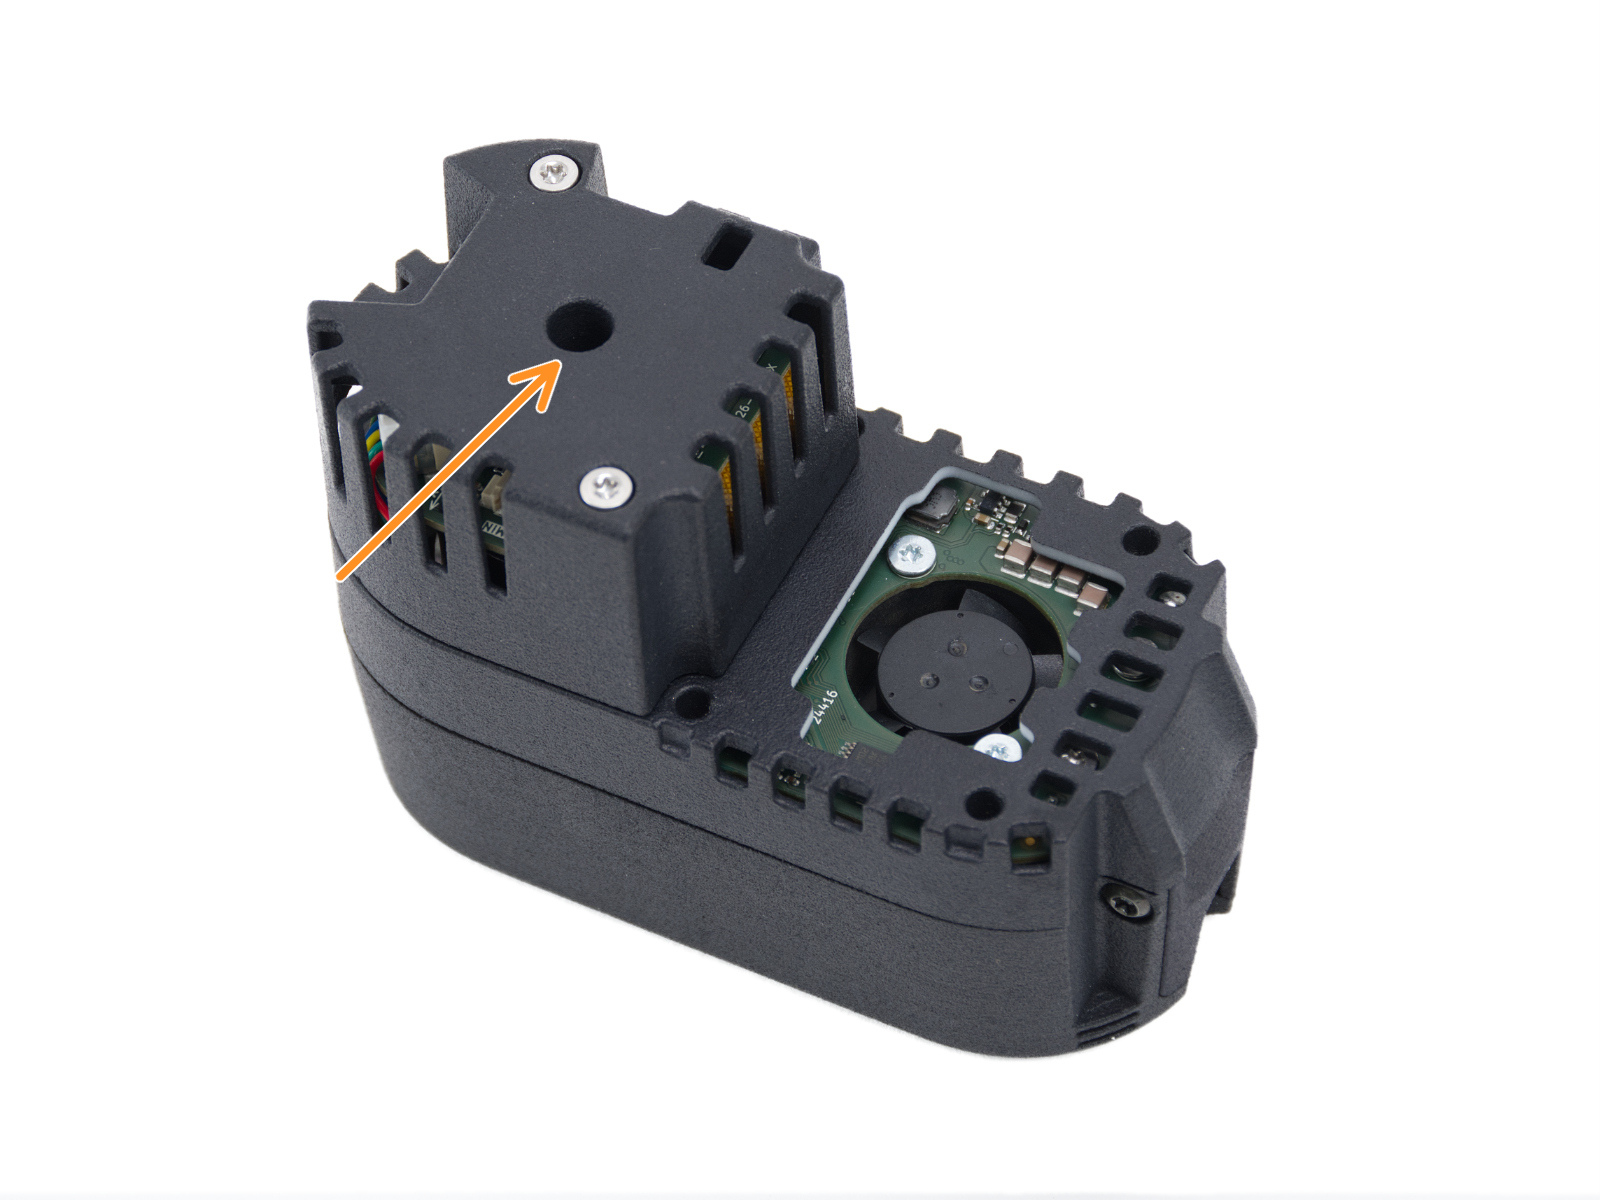
The manual release access hole is located behind the print fan assembly.
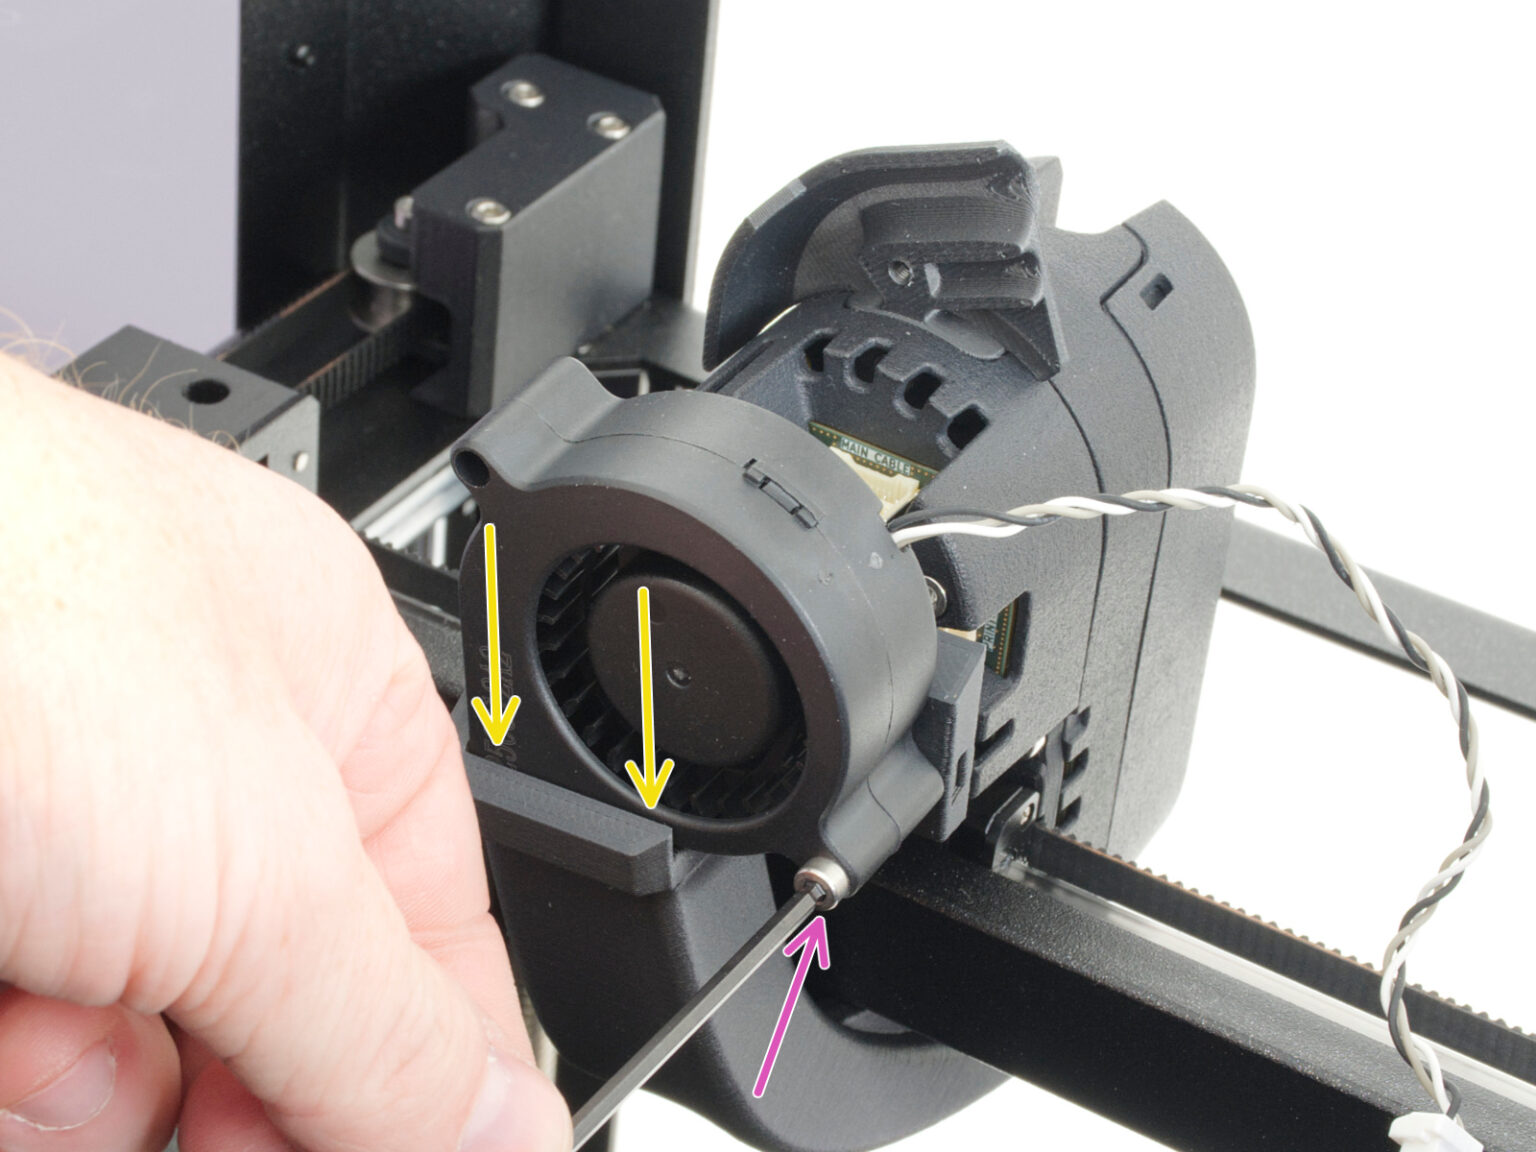
Loosen the print fan mounting screw and carefully remove the fan from the fan shroud.
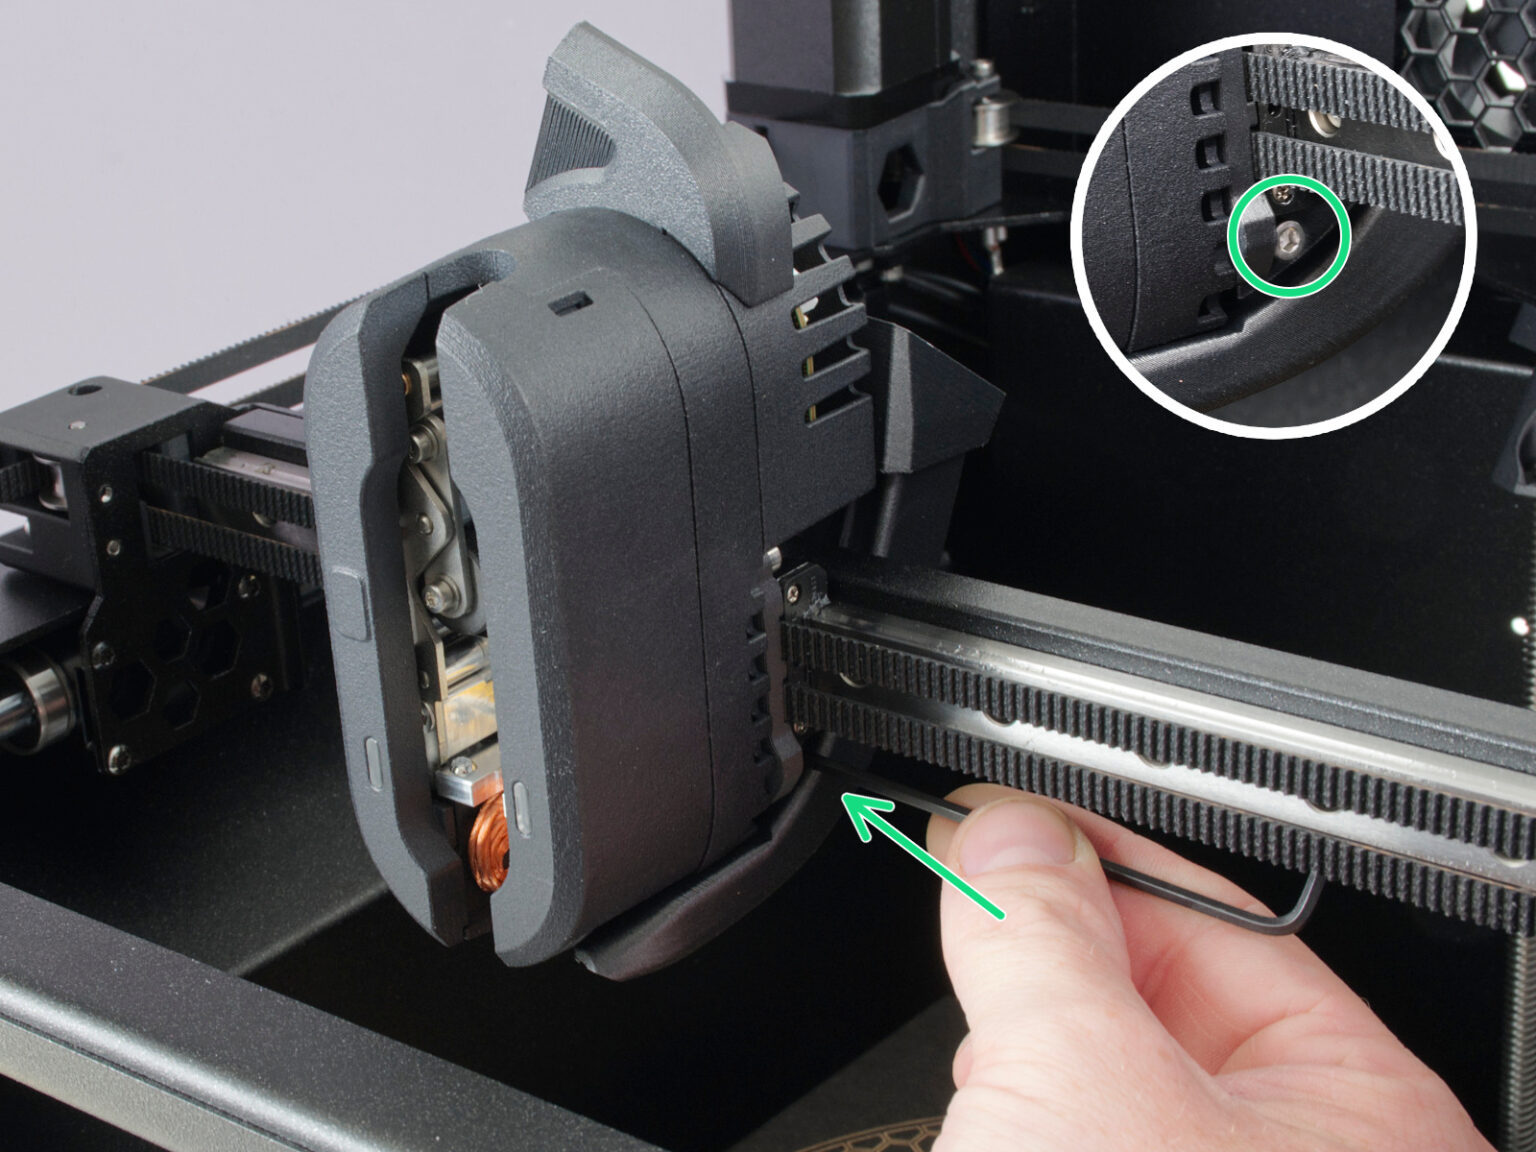
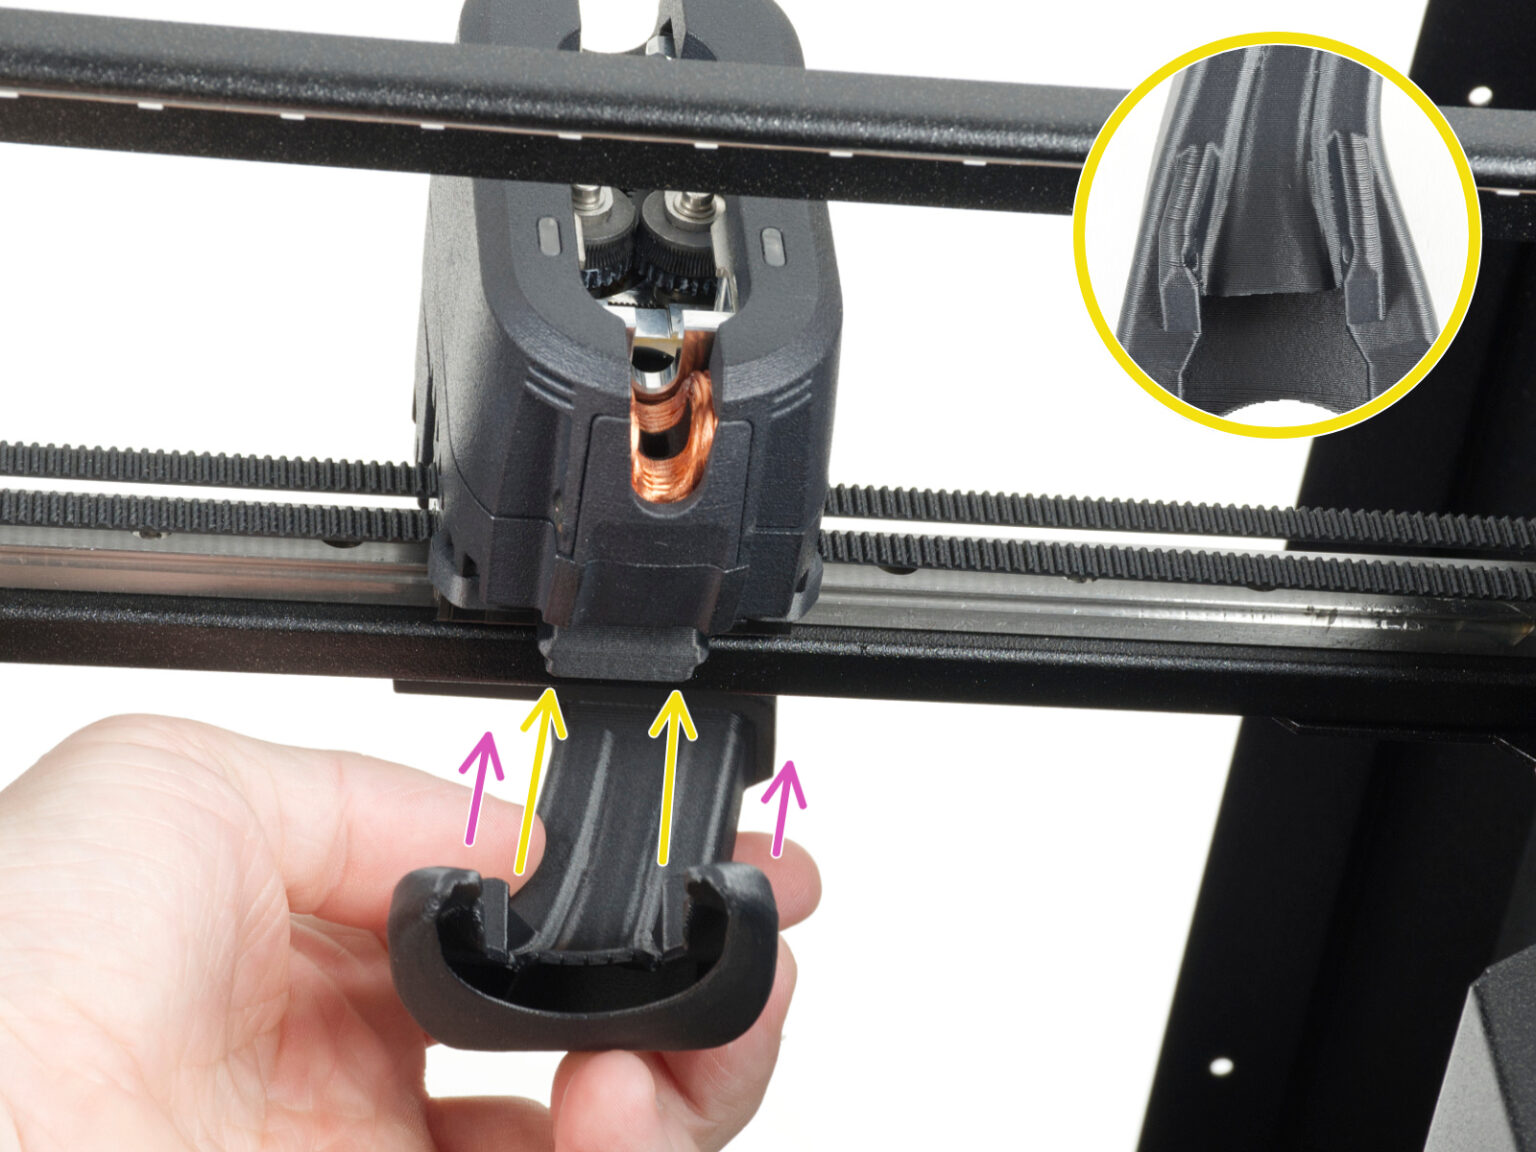
Loosen the two screws securing the fan shroud on both sides of the print head, then remove the fan shroud from the printer.
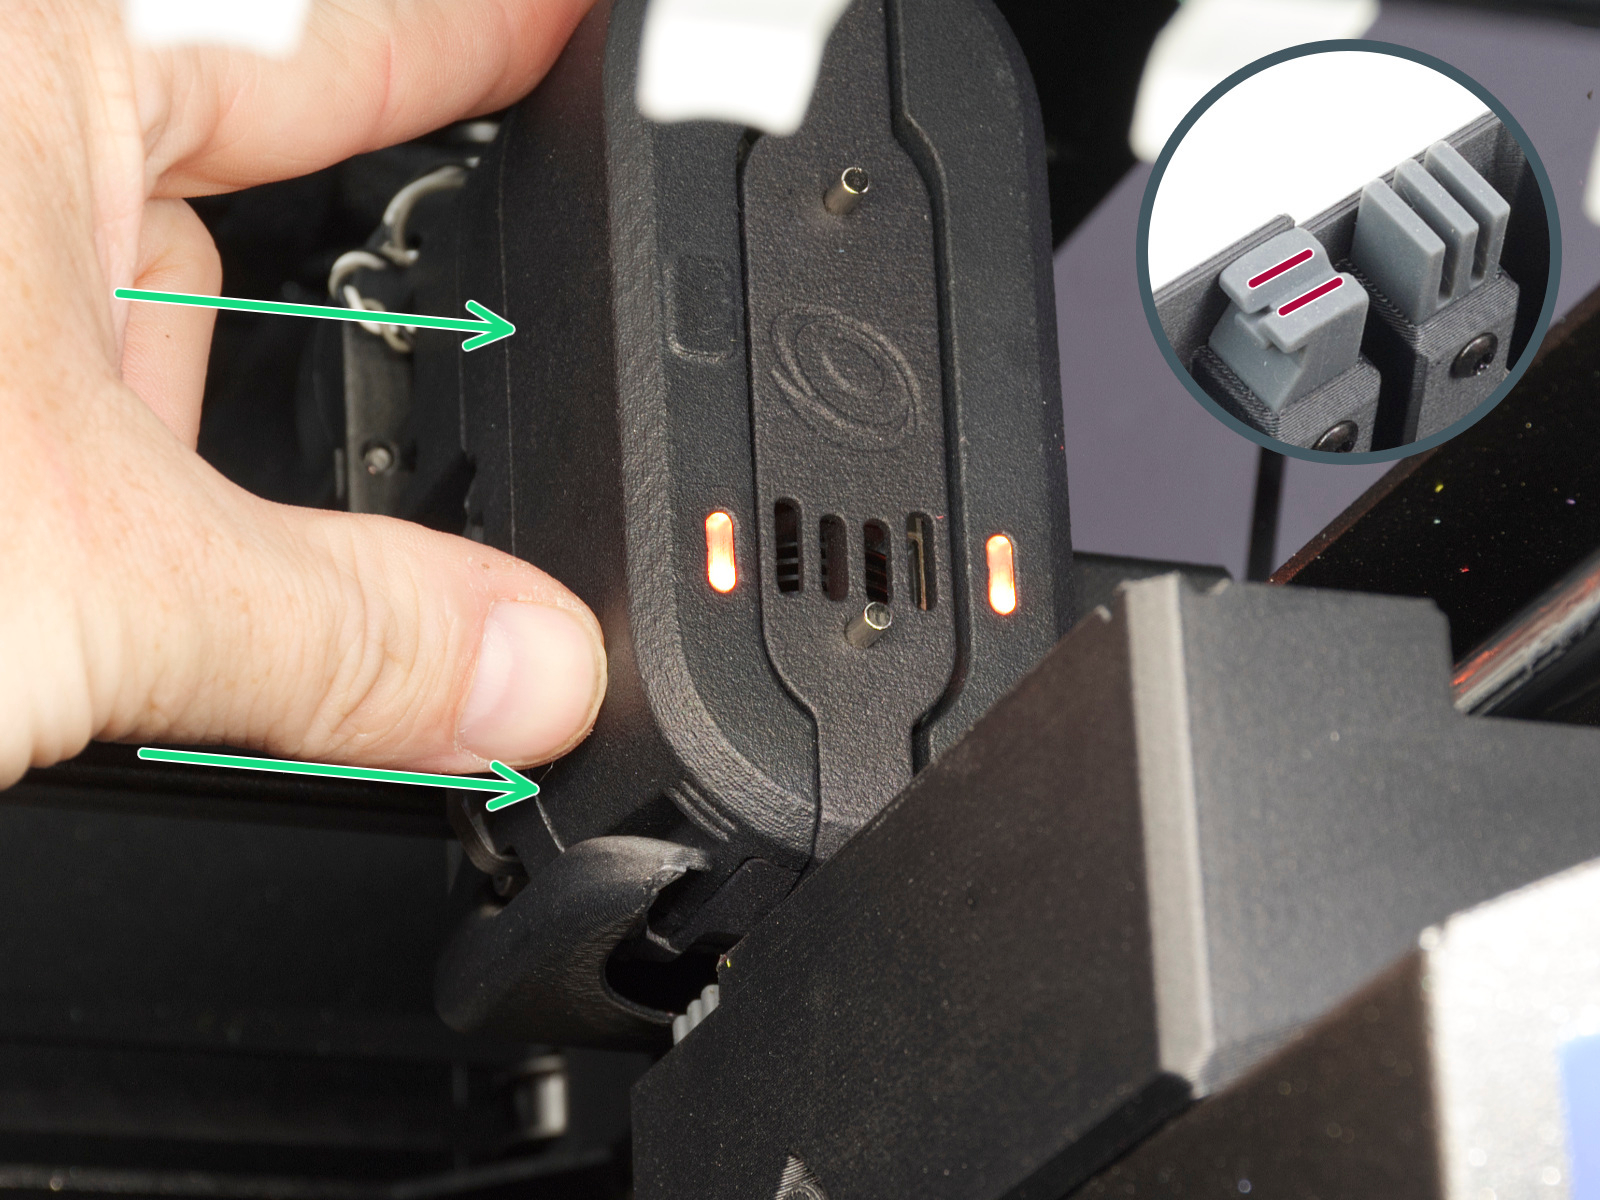
The release mechanism only activates when a magnet is touching a rectangle shaped point on the print head cover on left front (pictured in step 4), or if you move the print head close to the appropriate dock so the nozzle tool is aligned with it.
Attempt moving the print head to the dock position.
If the previous step was not enough to release the print head, place a magnet onto front notch, where the magnet from dock engages the gate.
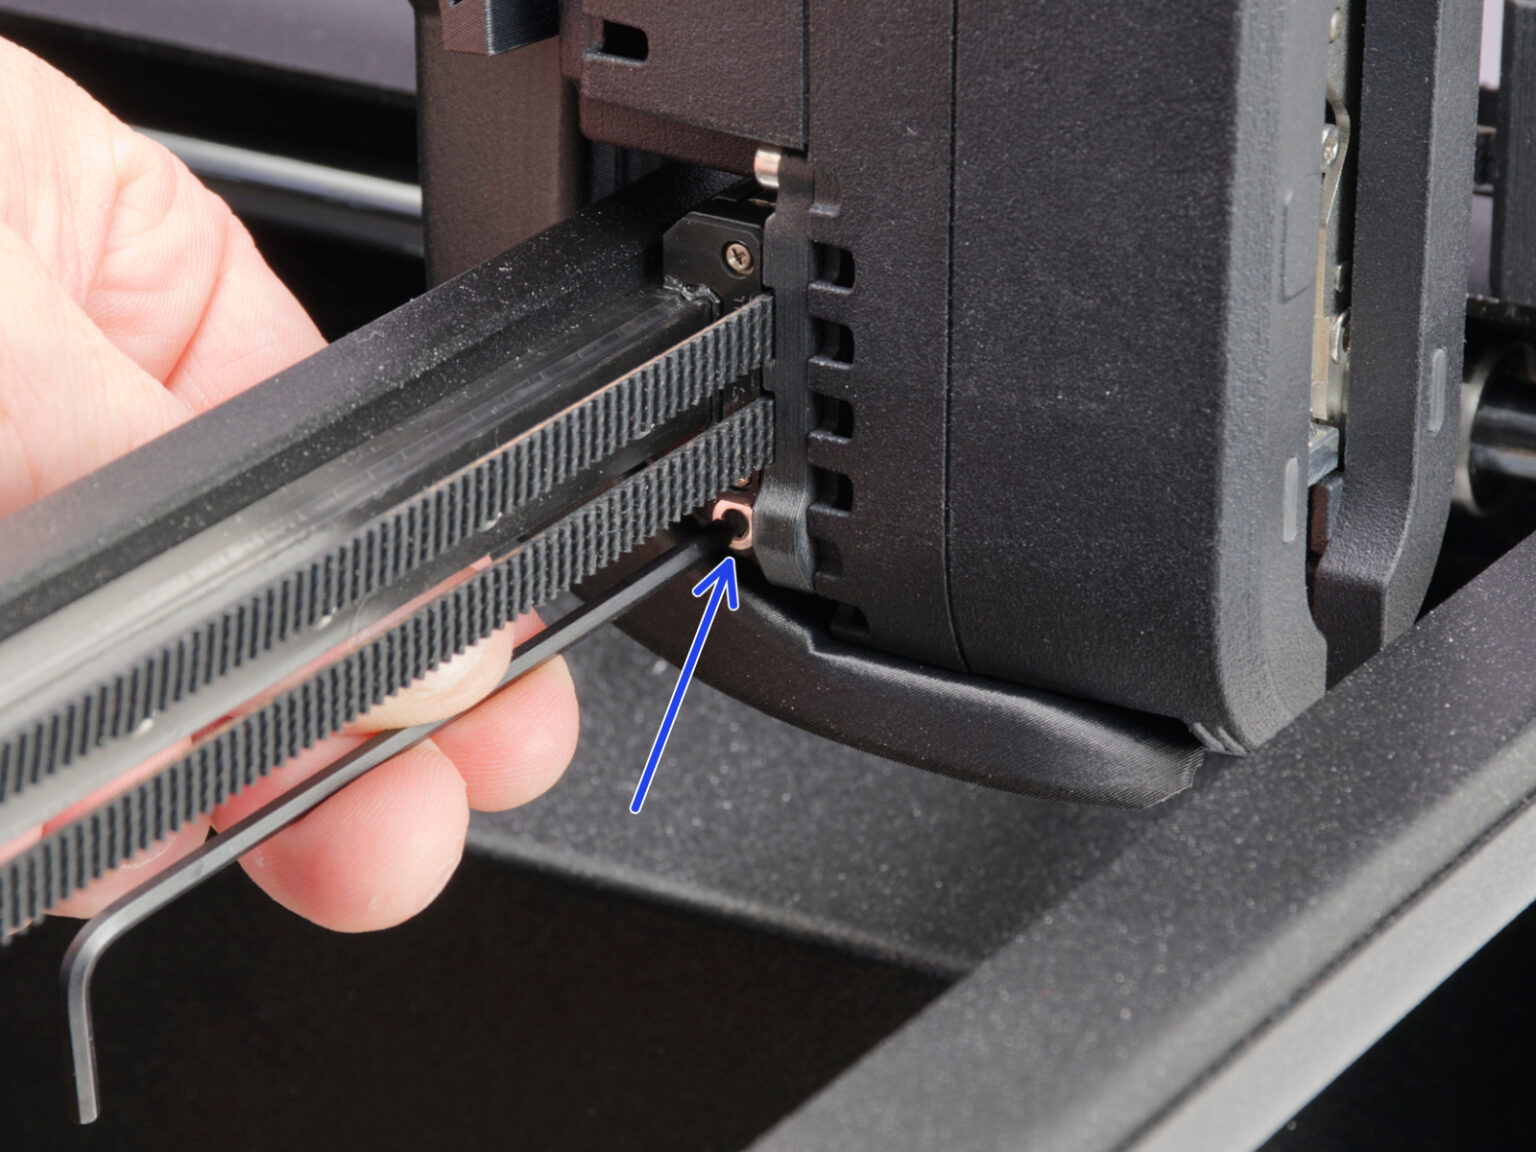
Locate the access hole behind the print fan.
Insert the flathead screwdriver into the center circle access hole until it engages with the internal mechanism. Only insert it on the center hole, any other hole such as rectangular hole on the side should not be used.
Note: Use a flathead screwdriver with a sufficiently thin shaft. Forcing a larger screwdriver into the access hole may damage the mechanism.
Clicking sounds usually indicate that the mechanism is being actuated. The release mechanism only activates when the printer detects the nozzle tool in the dock position. Move the print head close to the appropriate dock so the nozzle tool is aligned with it.
Note: If the nozzle tool is not correctly positioned near the dock magnet, rotating the mechanism may only move the extruder motor without releasing the tool.
Carefully rotate the screwdriver while keeping the nozzle tool aligned with the dock. This should disengage the mechanism.
Once the locking mechanism disengages, the nozzle tool should remain in the dock.
After manually releasing the tool:
Make sure the nozzle tool is fully seated in the dock.
Check whether the mechanism of the print head is clean without any bits or filament residue.
Check that the print head can move freely away from the dock.