EN
  • Čeština
  • Español
  • Italiano
  • Deutsch
  • Polski
  • Français
Login

4. Idler Body Assembly

4. Idler Body Assembly

4. Idler Body Assembly
Relevant for:
Last updated 6 months ago
4. Idler Body Assembly
 Difficulty
Difficult
 Steps
18
 Available languages
CSPLDEESITFR
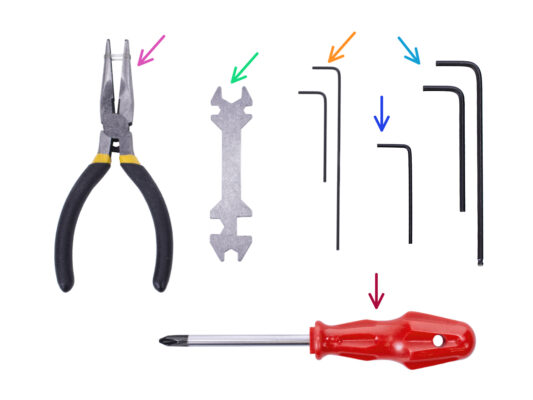
Tools necessary for this chapter
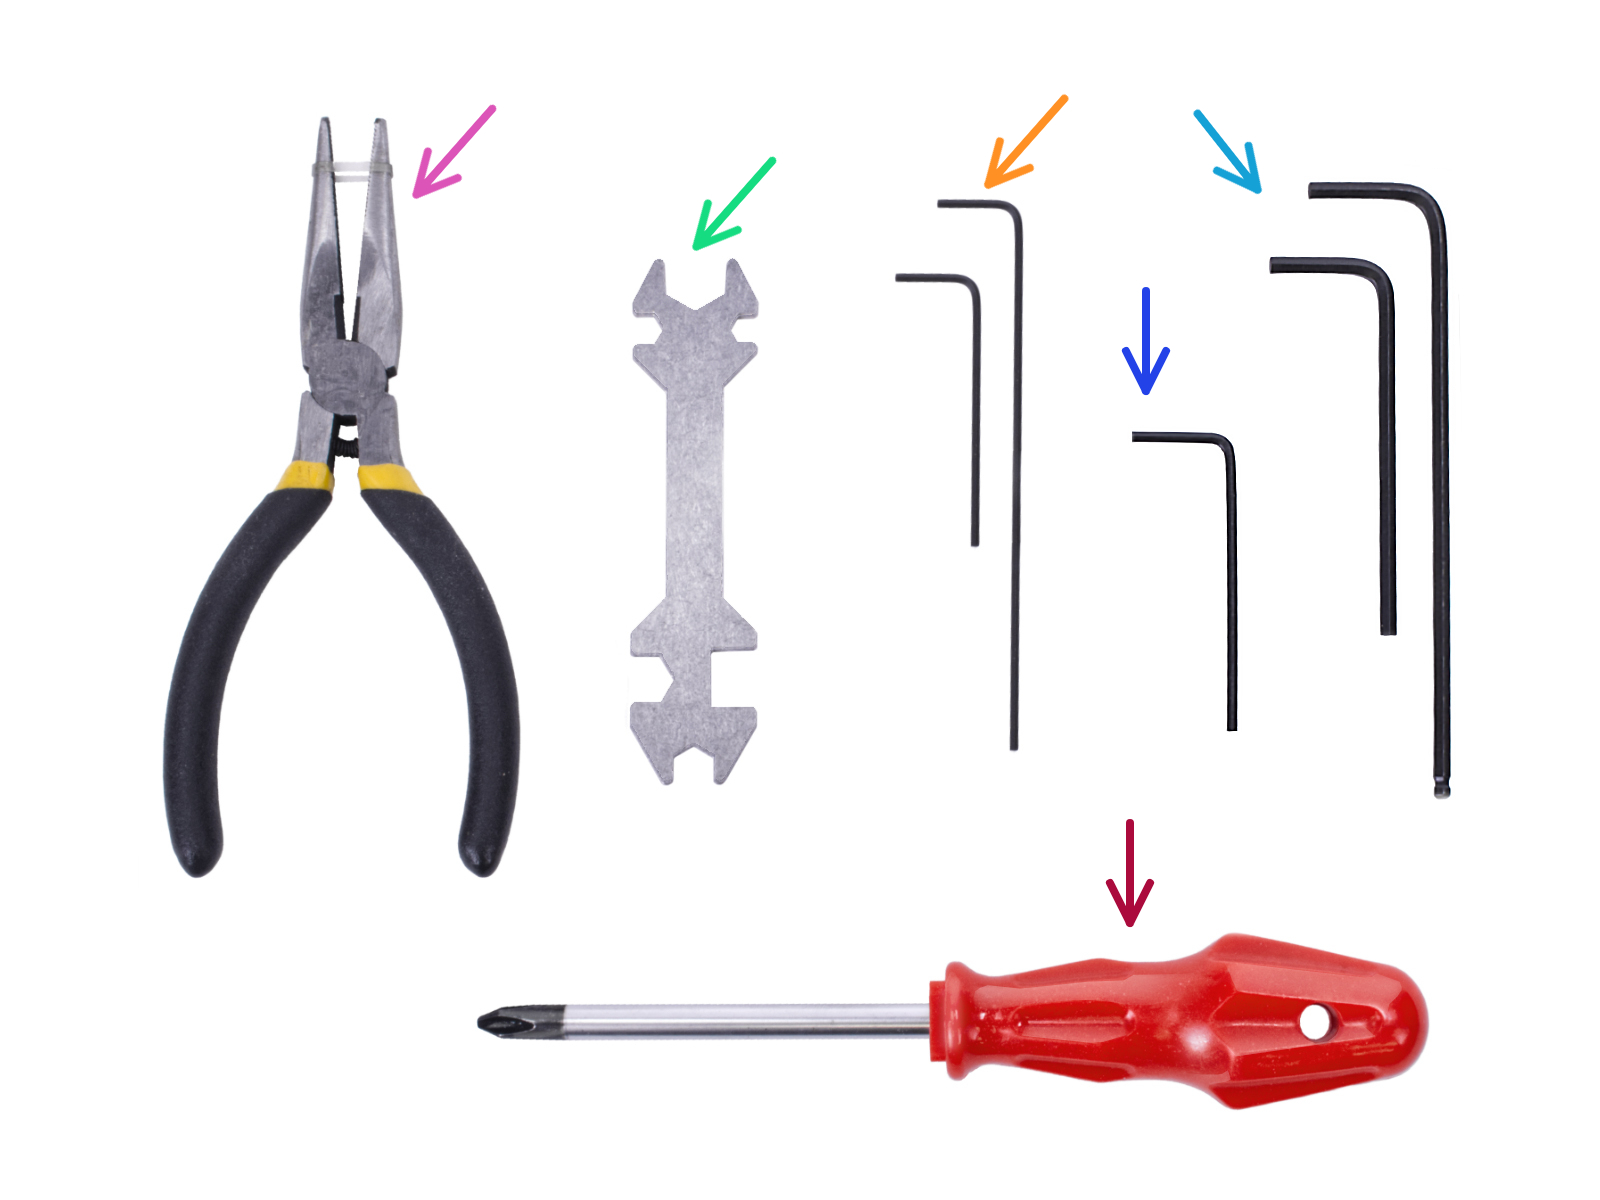
Please prepare tools for this chapter:
Needle-nose pliers
1.5mm Allen key for possible nut alignment
2mm Allen key for M4 grub screws
2.5mm Allen key for M3 screws
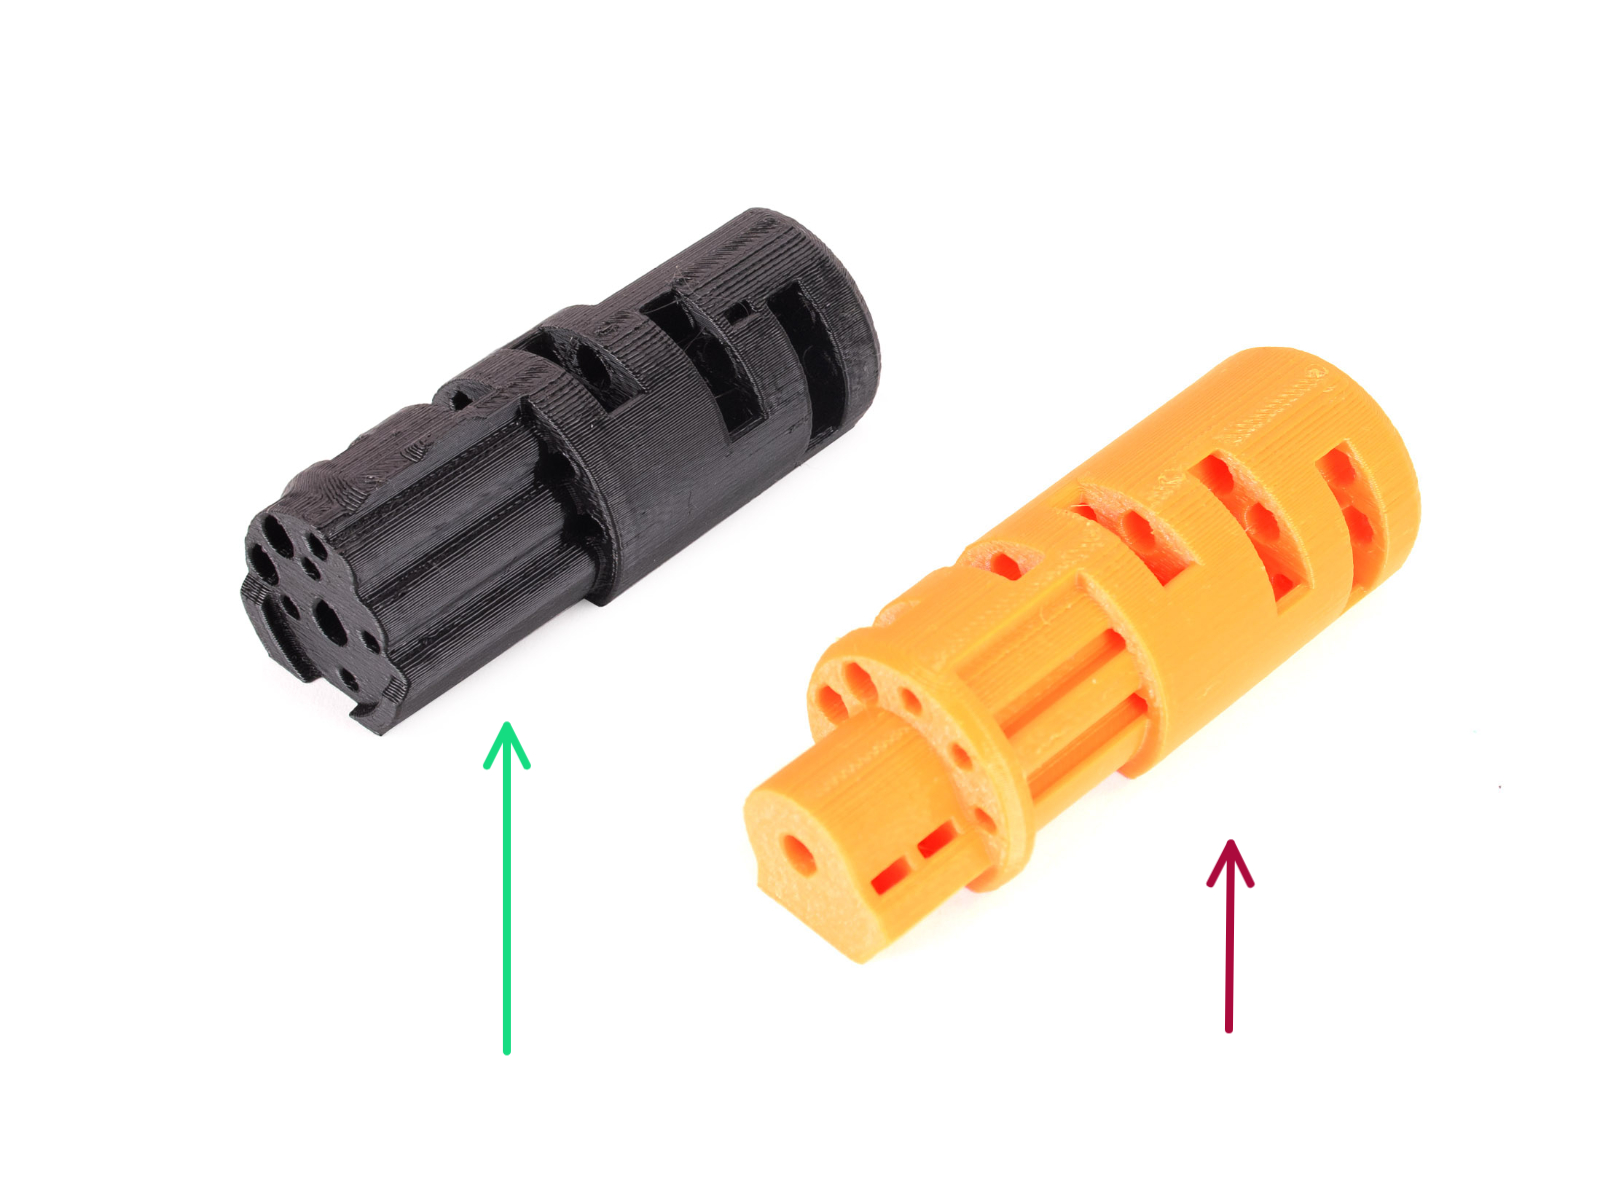
Idler versions
Idler versions
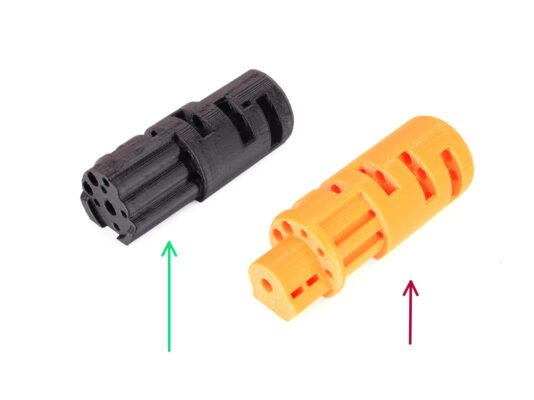
There were two versions of the Idler:
1. The MMU3 Idler to be used with the metal Coupler
This is the correct part bundled in the MMU3 Kit.
2. The old MMU2S Idler with a printed coupling part.
This is an obsolete version which shouldn't be used in MMU3.
Idler parts preparation
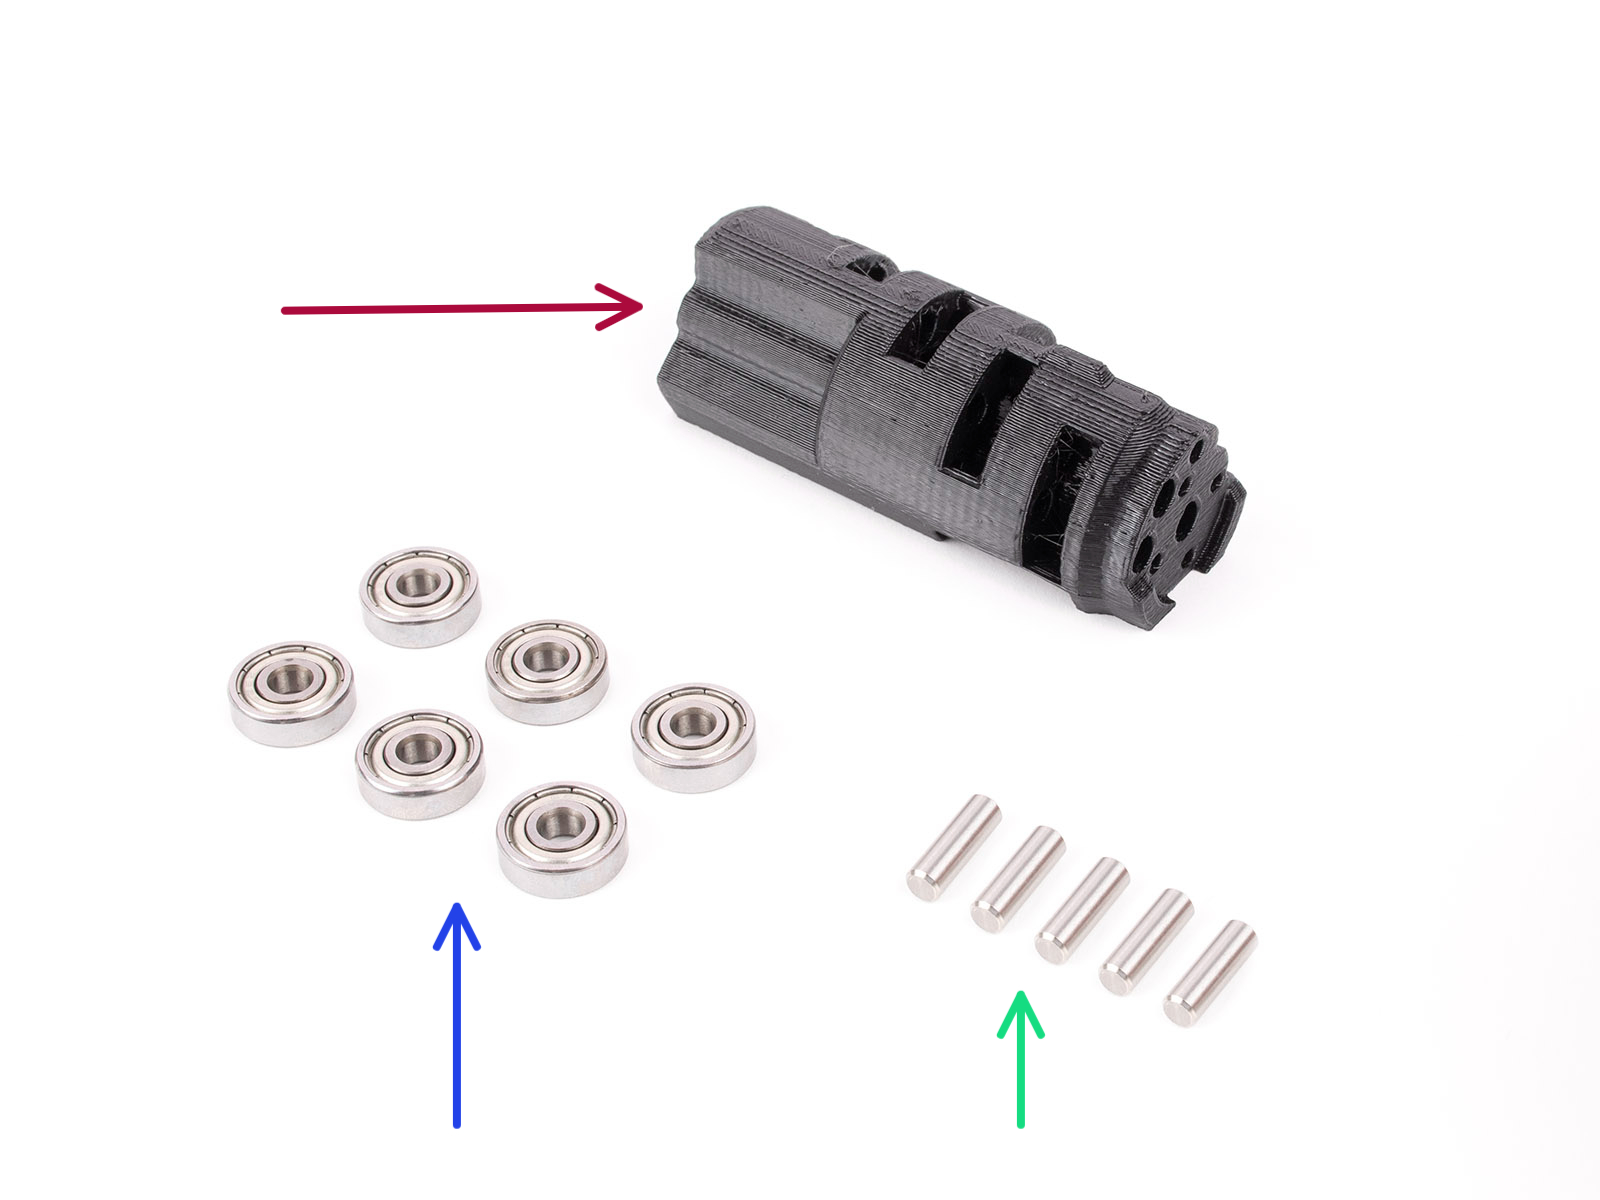
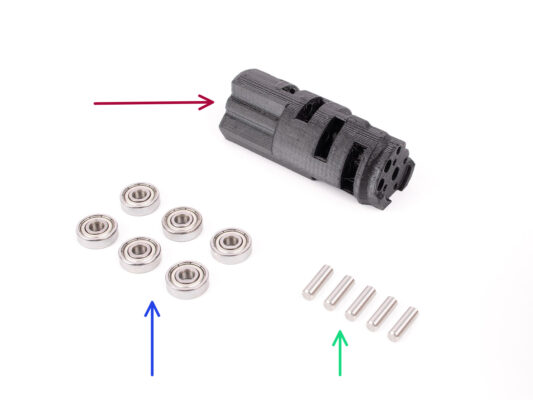
For the following steps, please prepare:
Idler (1x)
625 Bearing (6x)
5x16sh Shaft (5x)
Note you need 6 bearings, but only 5 shafts ;)
Idler bearings assembly (part 1)
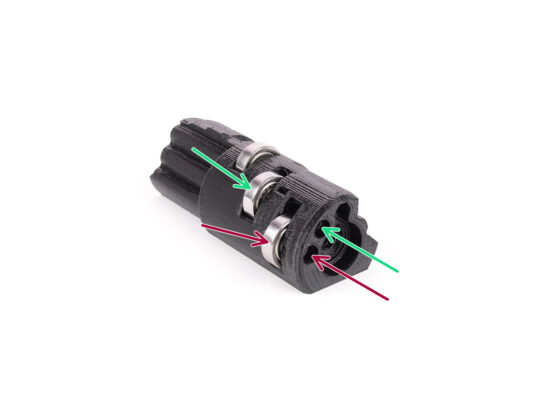
WARNING: read the instructions carefully, you have to assemble bearings in the correct order, otherwise you will encounter problems later!
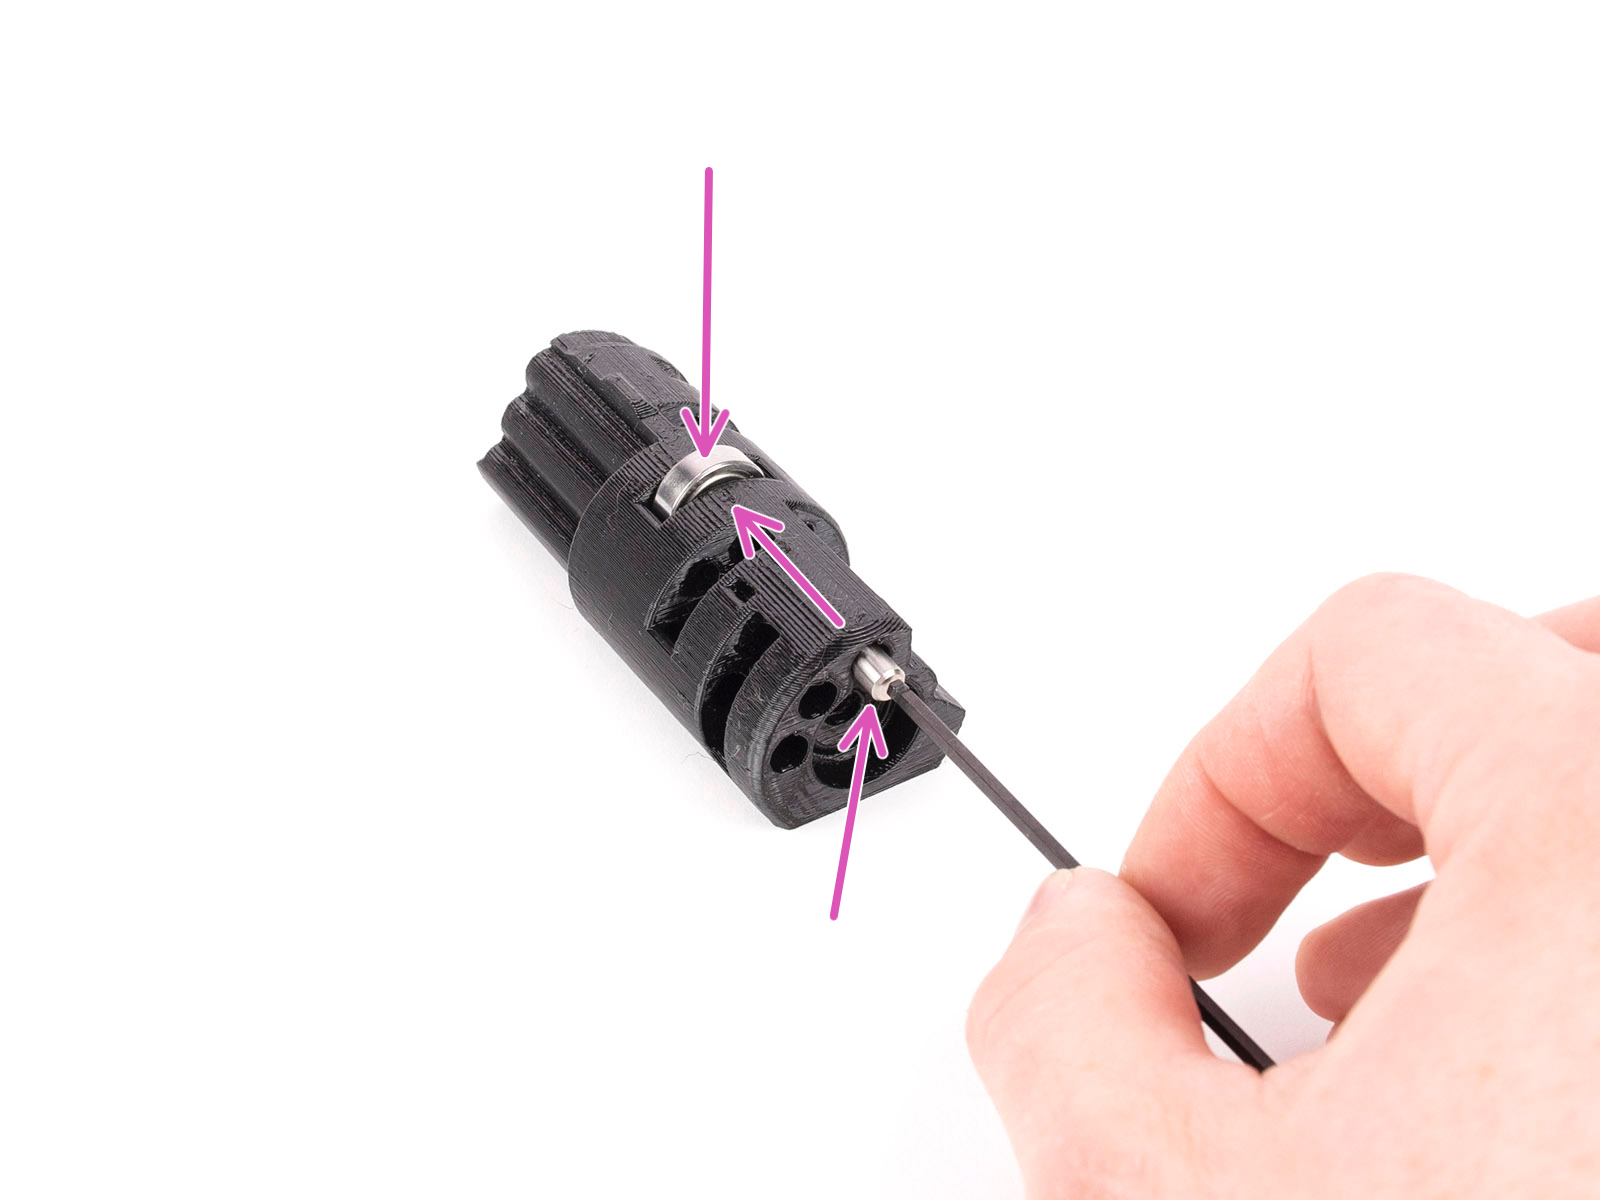
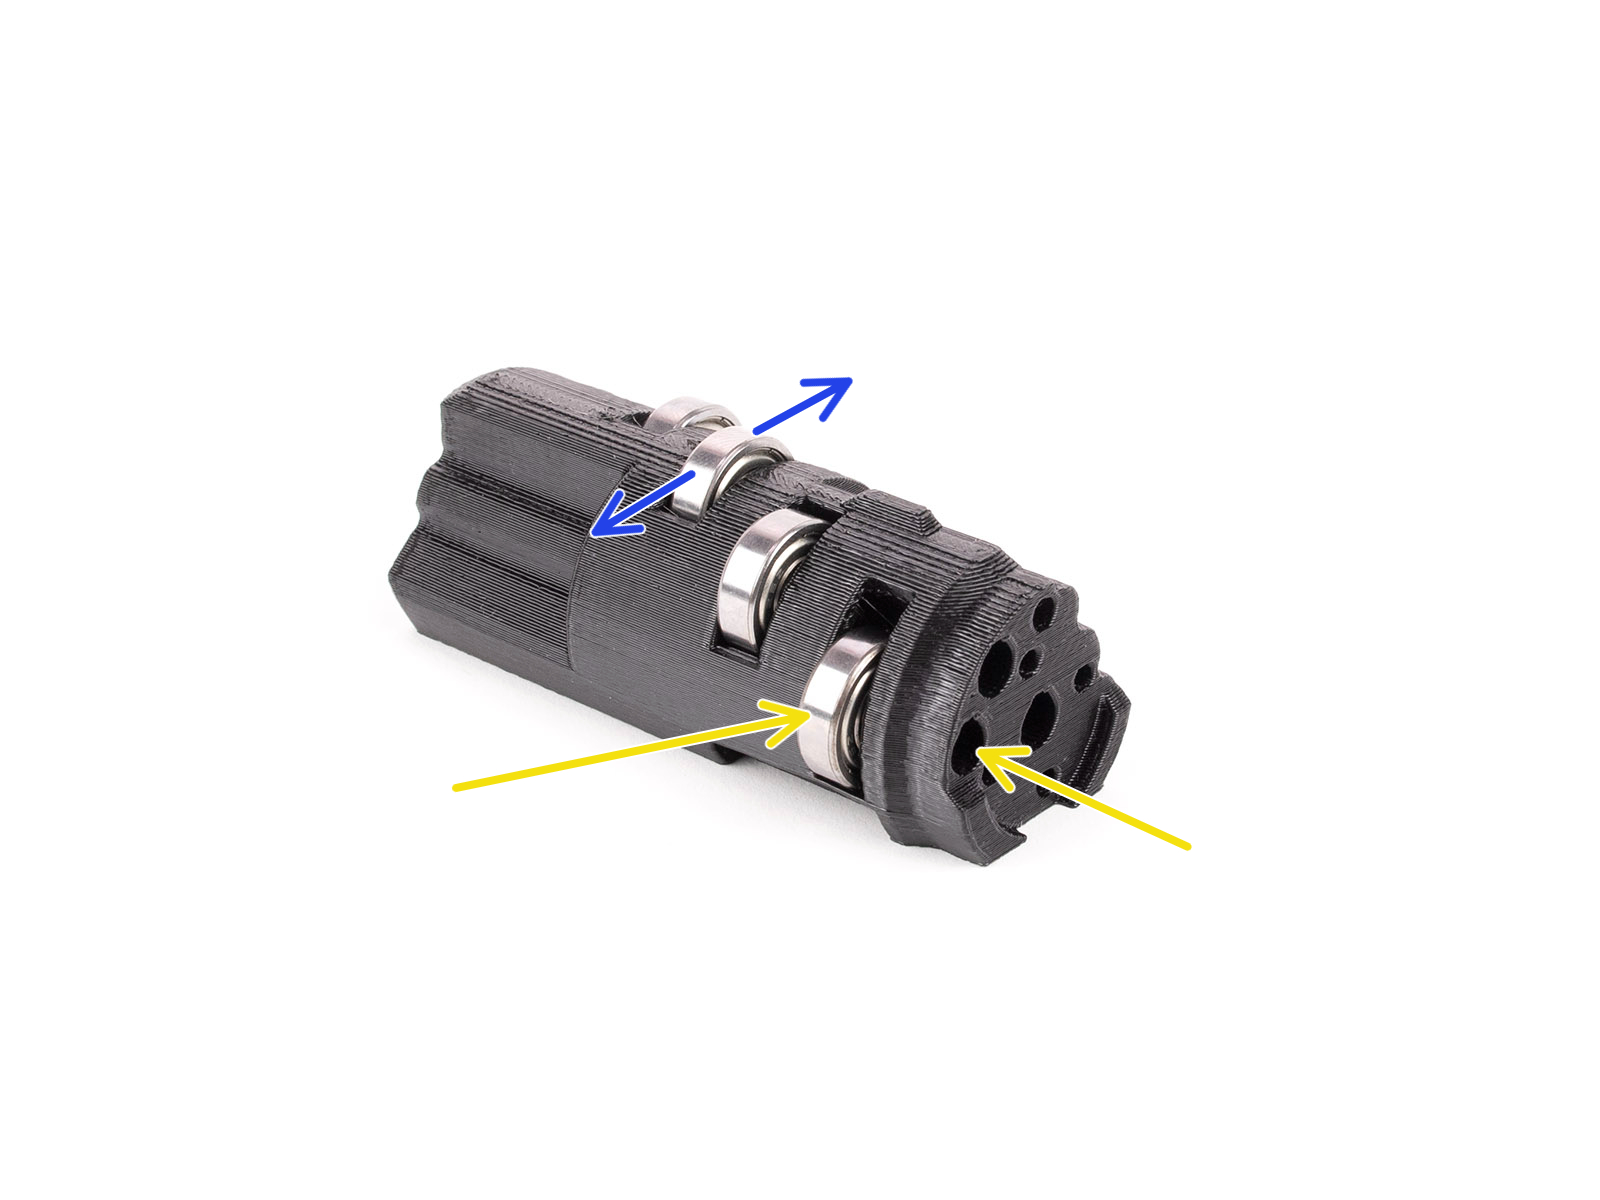
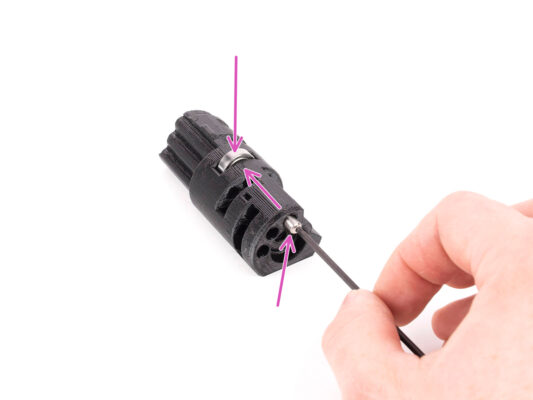
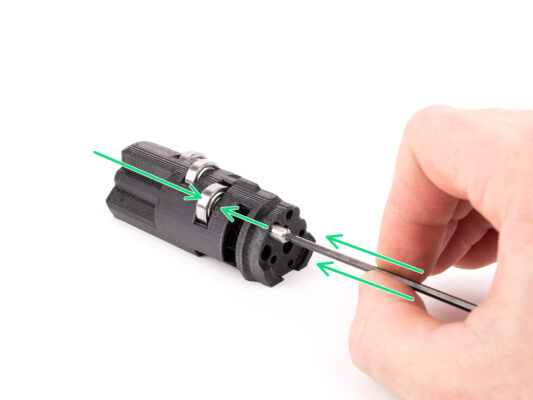
Insert one of the bearings into the middle slot in the idler. Insert the shaft from the side as seen in the picture. Make sure you are inserting it from the correct side and into the correct opening.
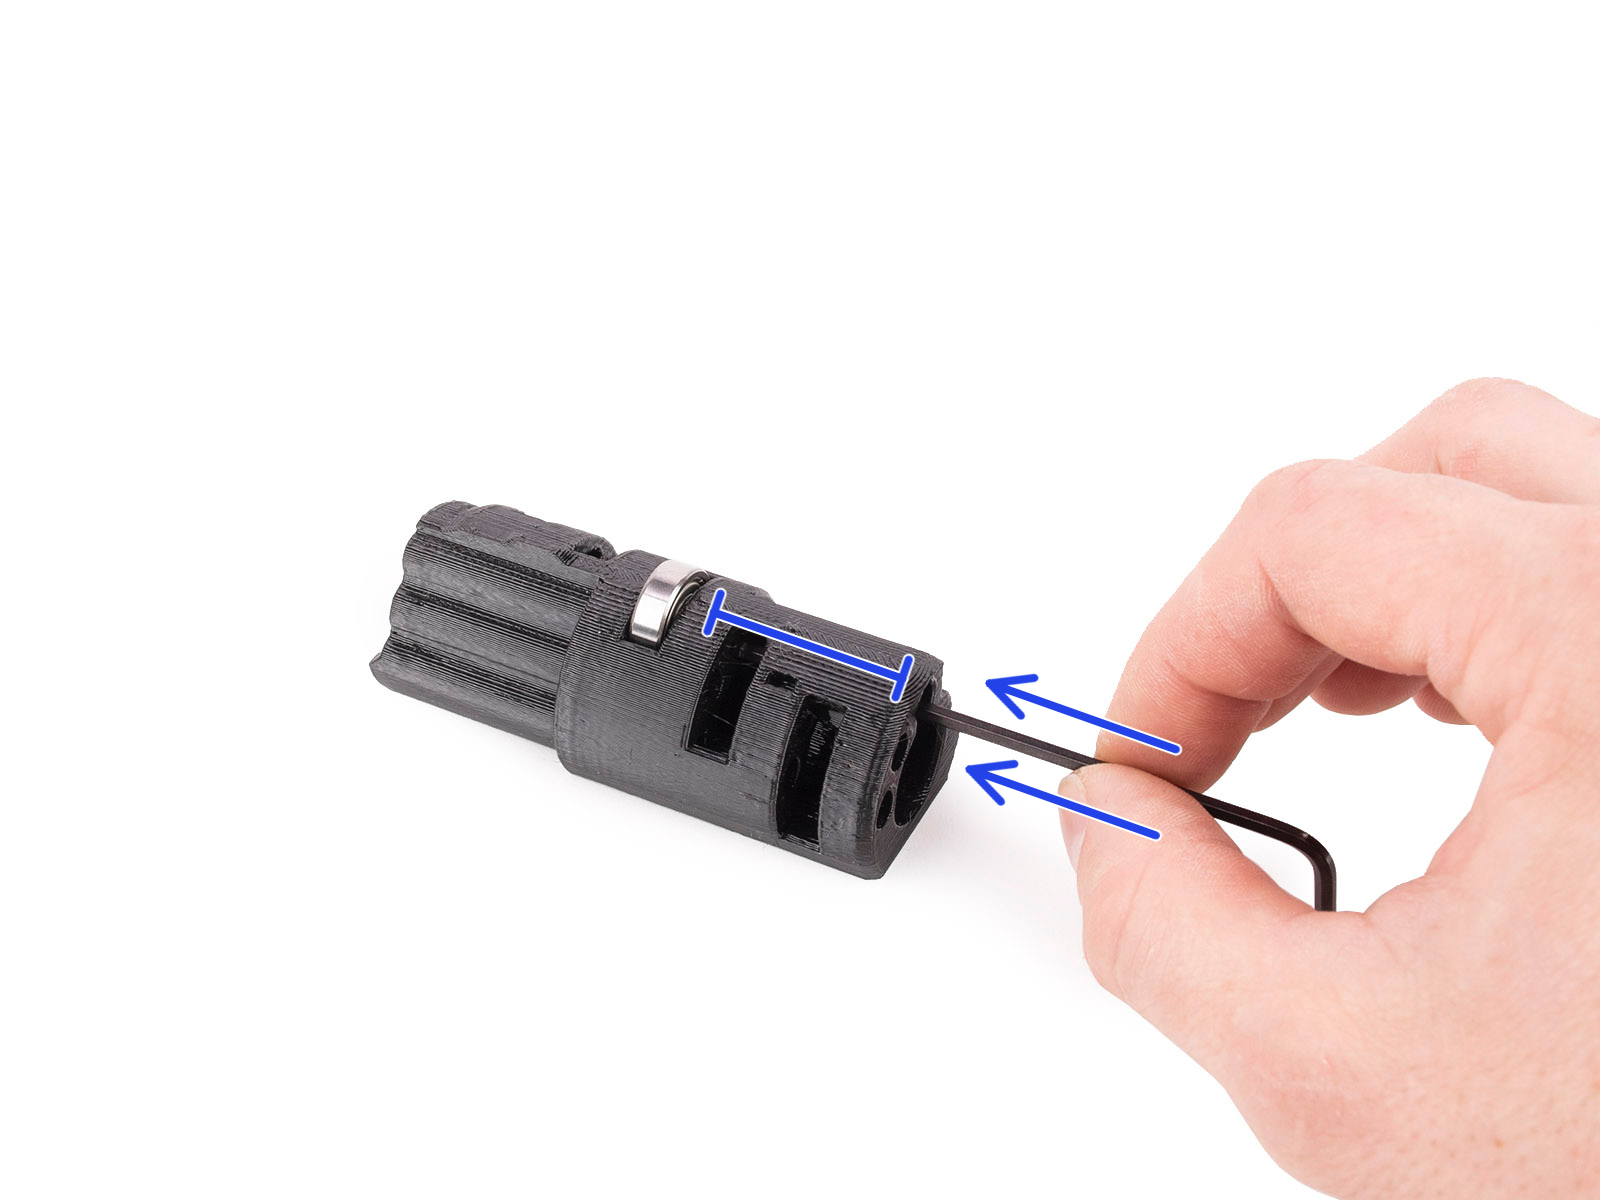
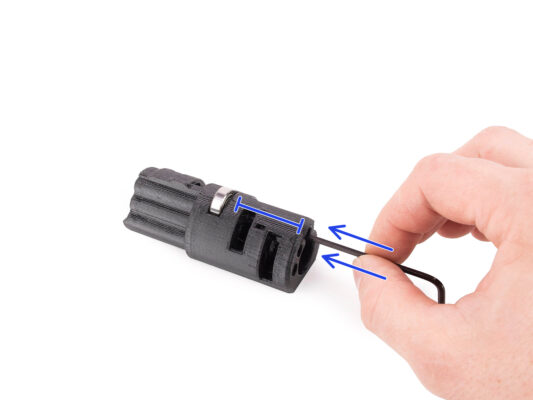
Push the shaft all the way in using the 2.5 mm Allen key. Make sure the shaft is all the way in and not blocking the other bearing slots.
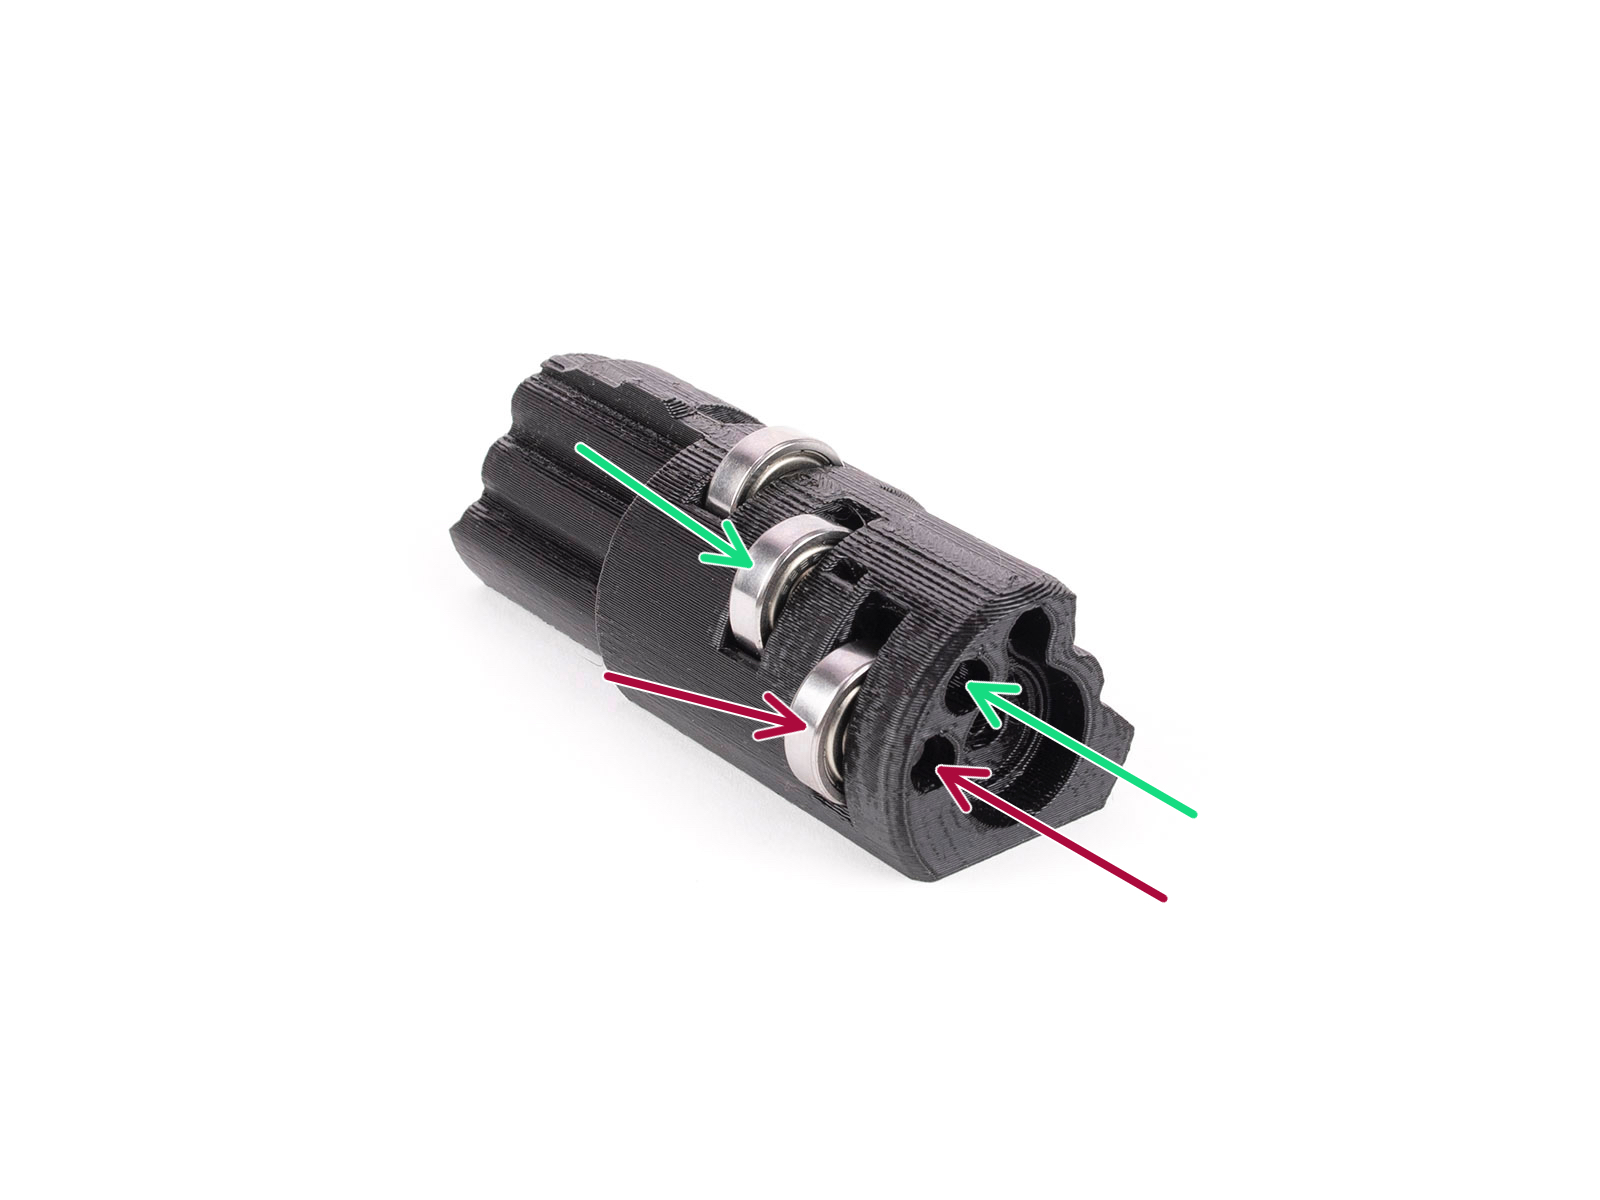
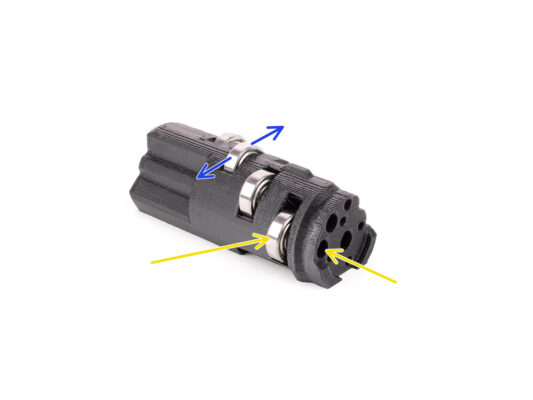
Install the second bearing and the shaft in the same way as the first one. Make sure you are inserting the parts into the exact same openings as seen in the picture.
Install the third bearing and the shaft into the corresponding opening using the same technique.
Idler bearings assembly (part 2)
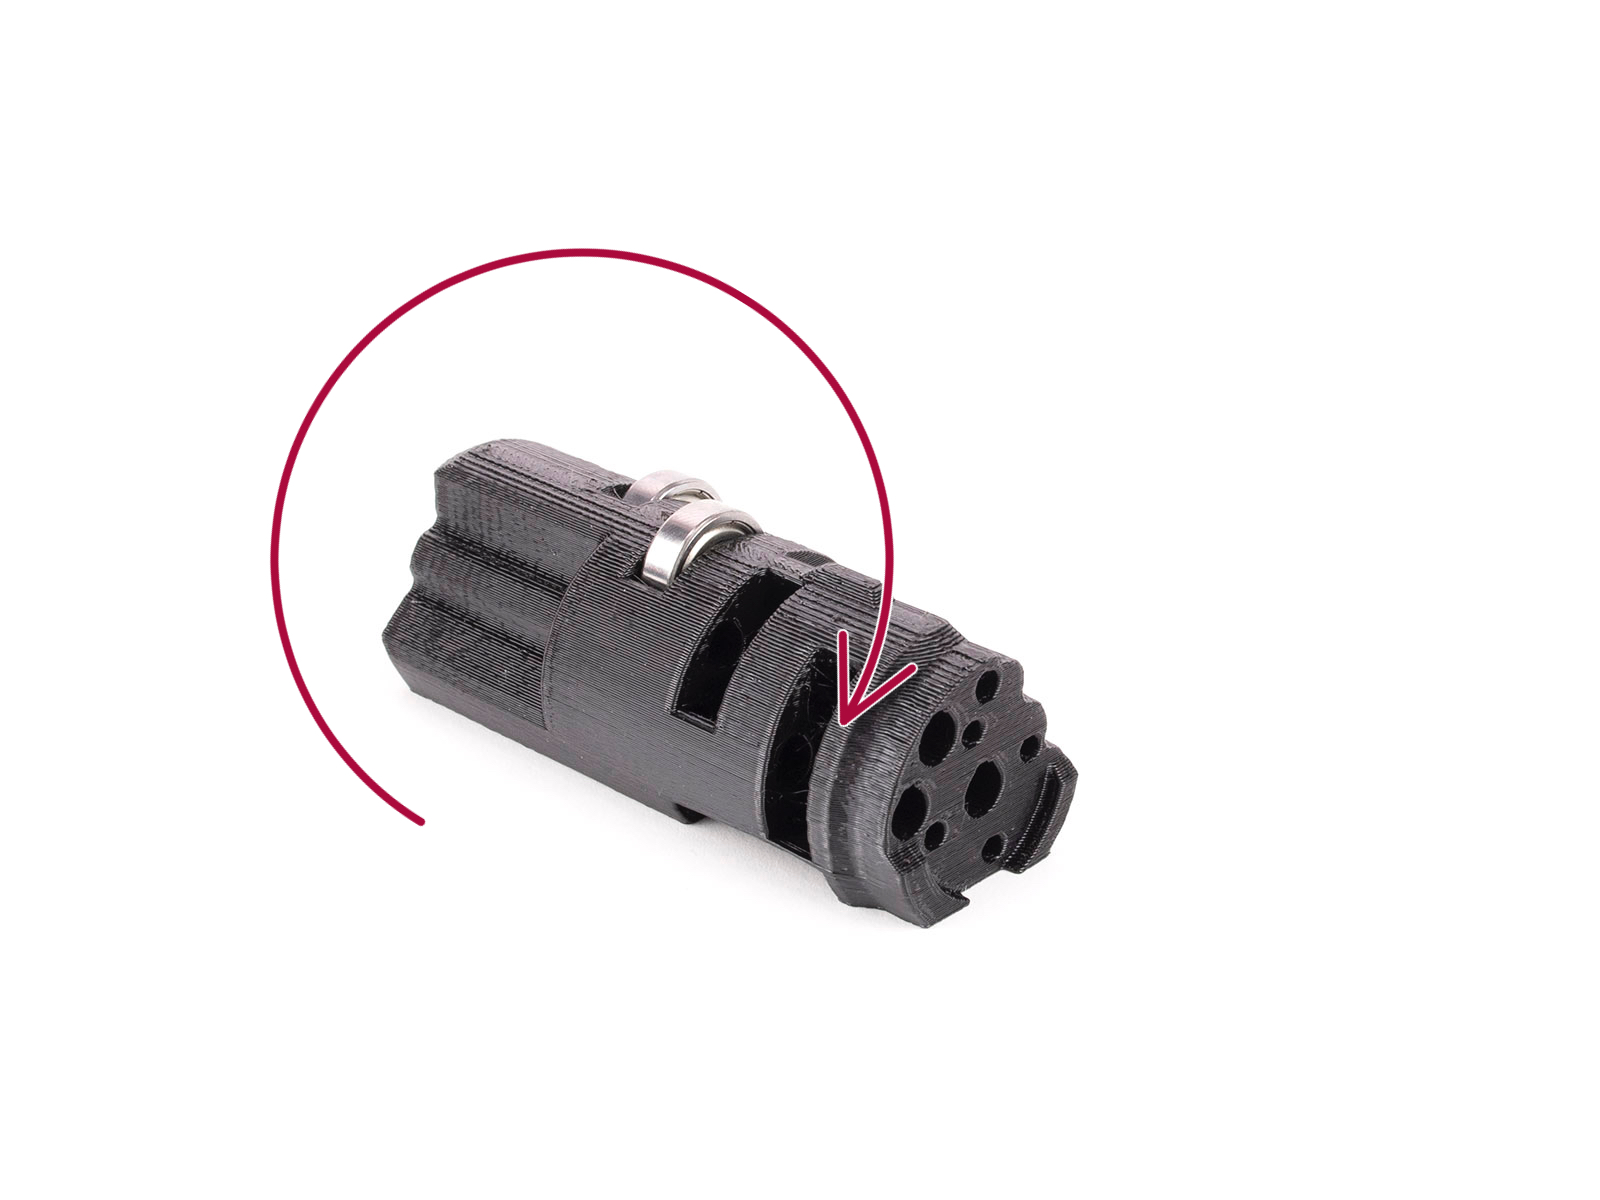
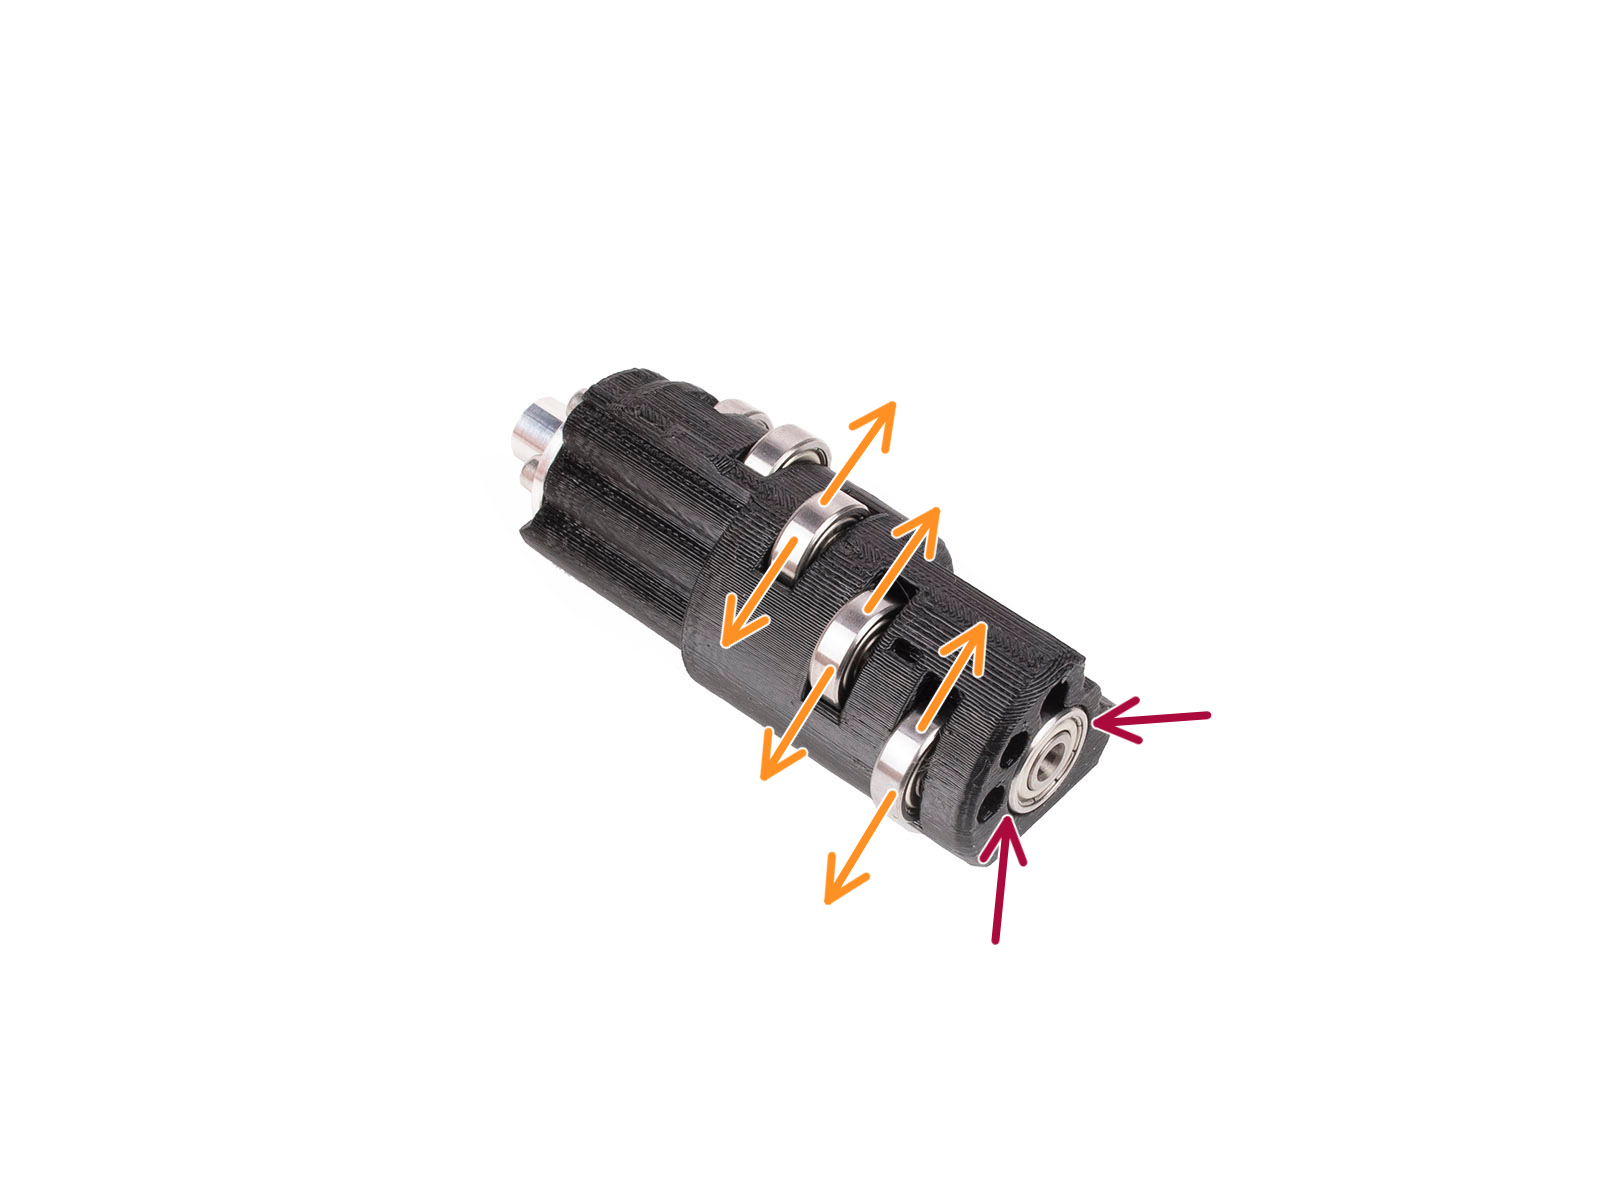
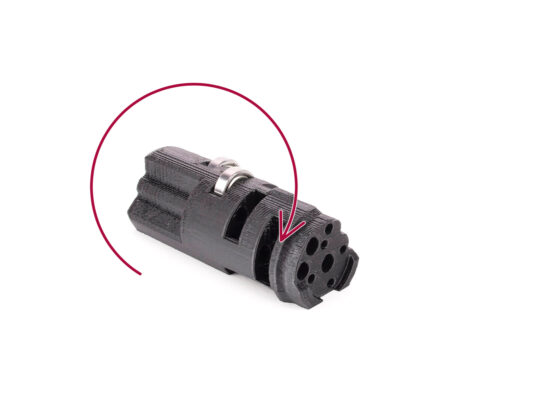
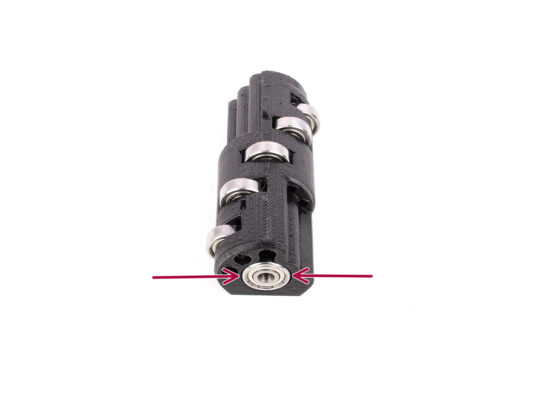
Turn the idler around to continue with the bearing assembly from the other side.
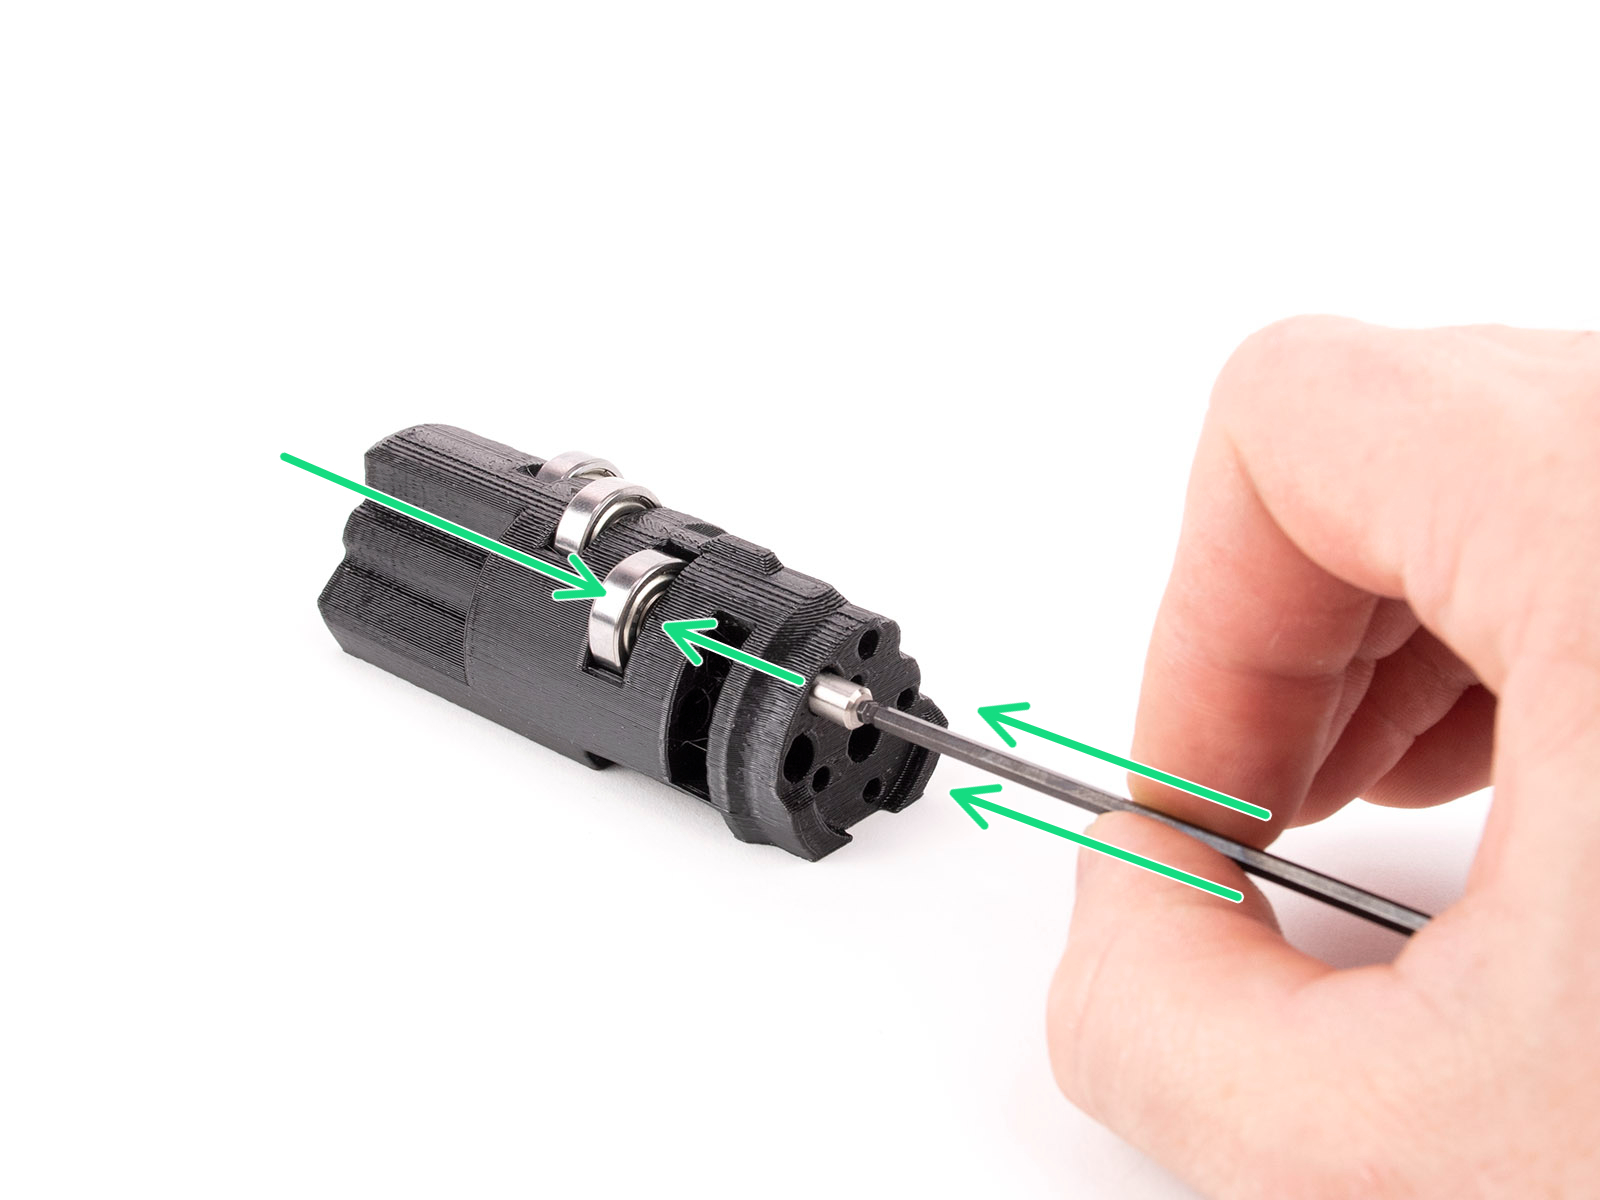
Insert a bearing and then a shaft into the empty slot closer to the center of the idler.
Finish bearing assembly with the last slot on the side.
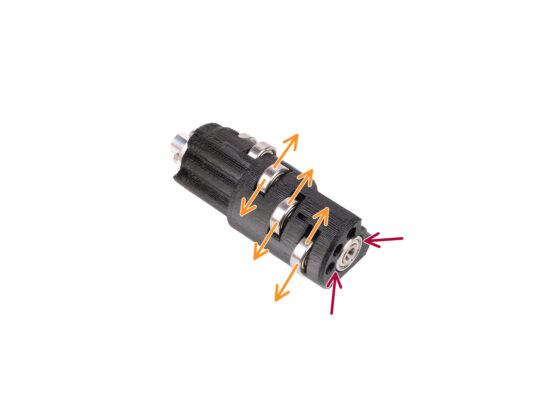
Ensure all bearings can rotate freely. You shouldn't feel significant friction or bumps while rotating the bearing.
There are small openings, which can be used to push a shaft out in case of a disassembly. Shafts can be pushed out using a 2mm Allen key in the opposite order from the installation.
Idler center bearing assembly
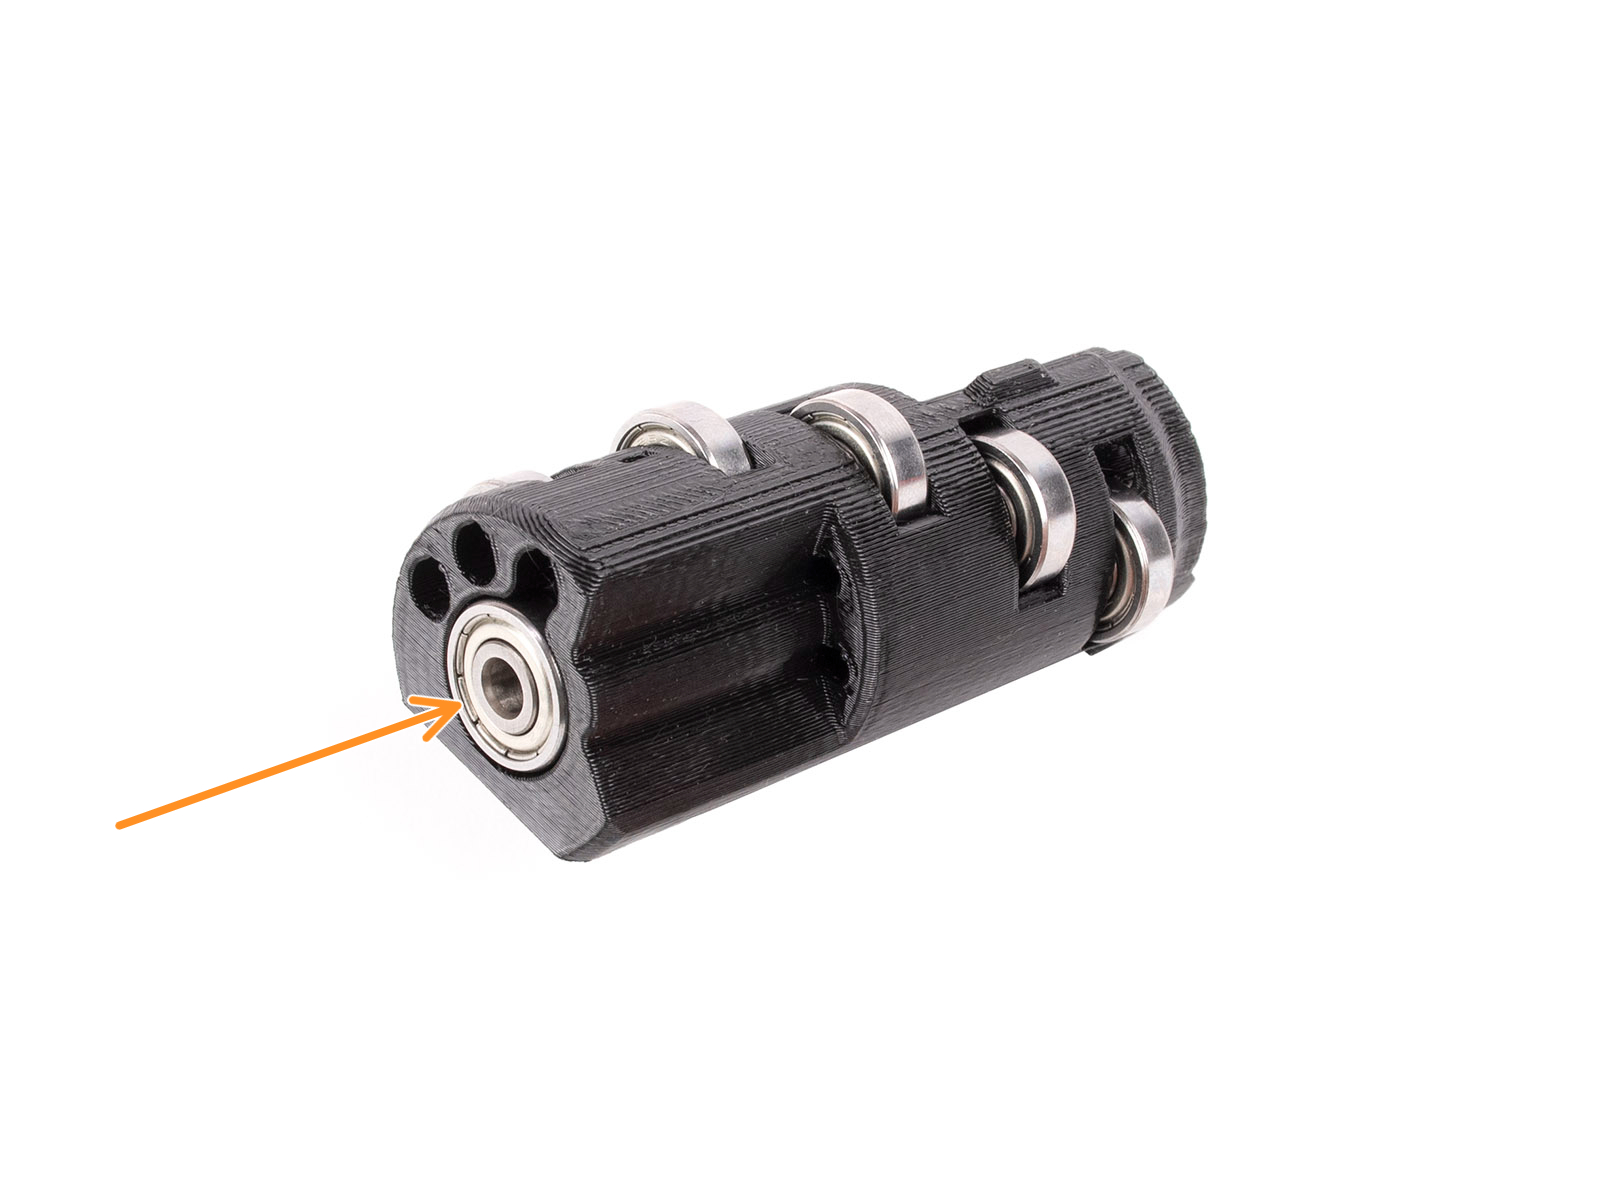
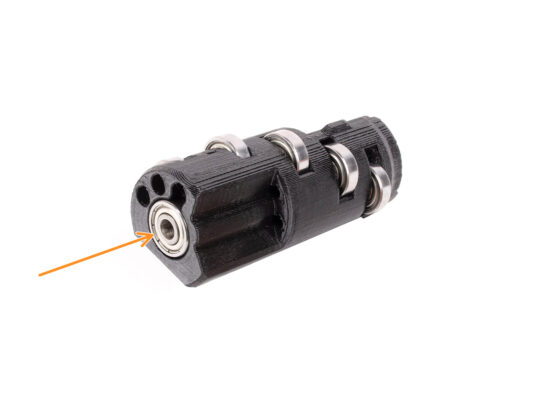
Take the remaining bearing and push it into the opening on the side of the idler.
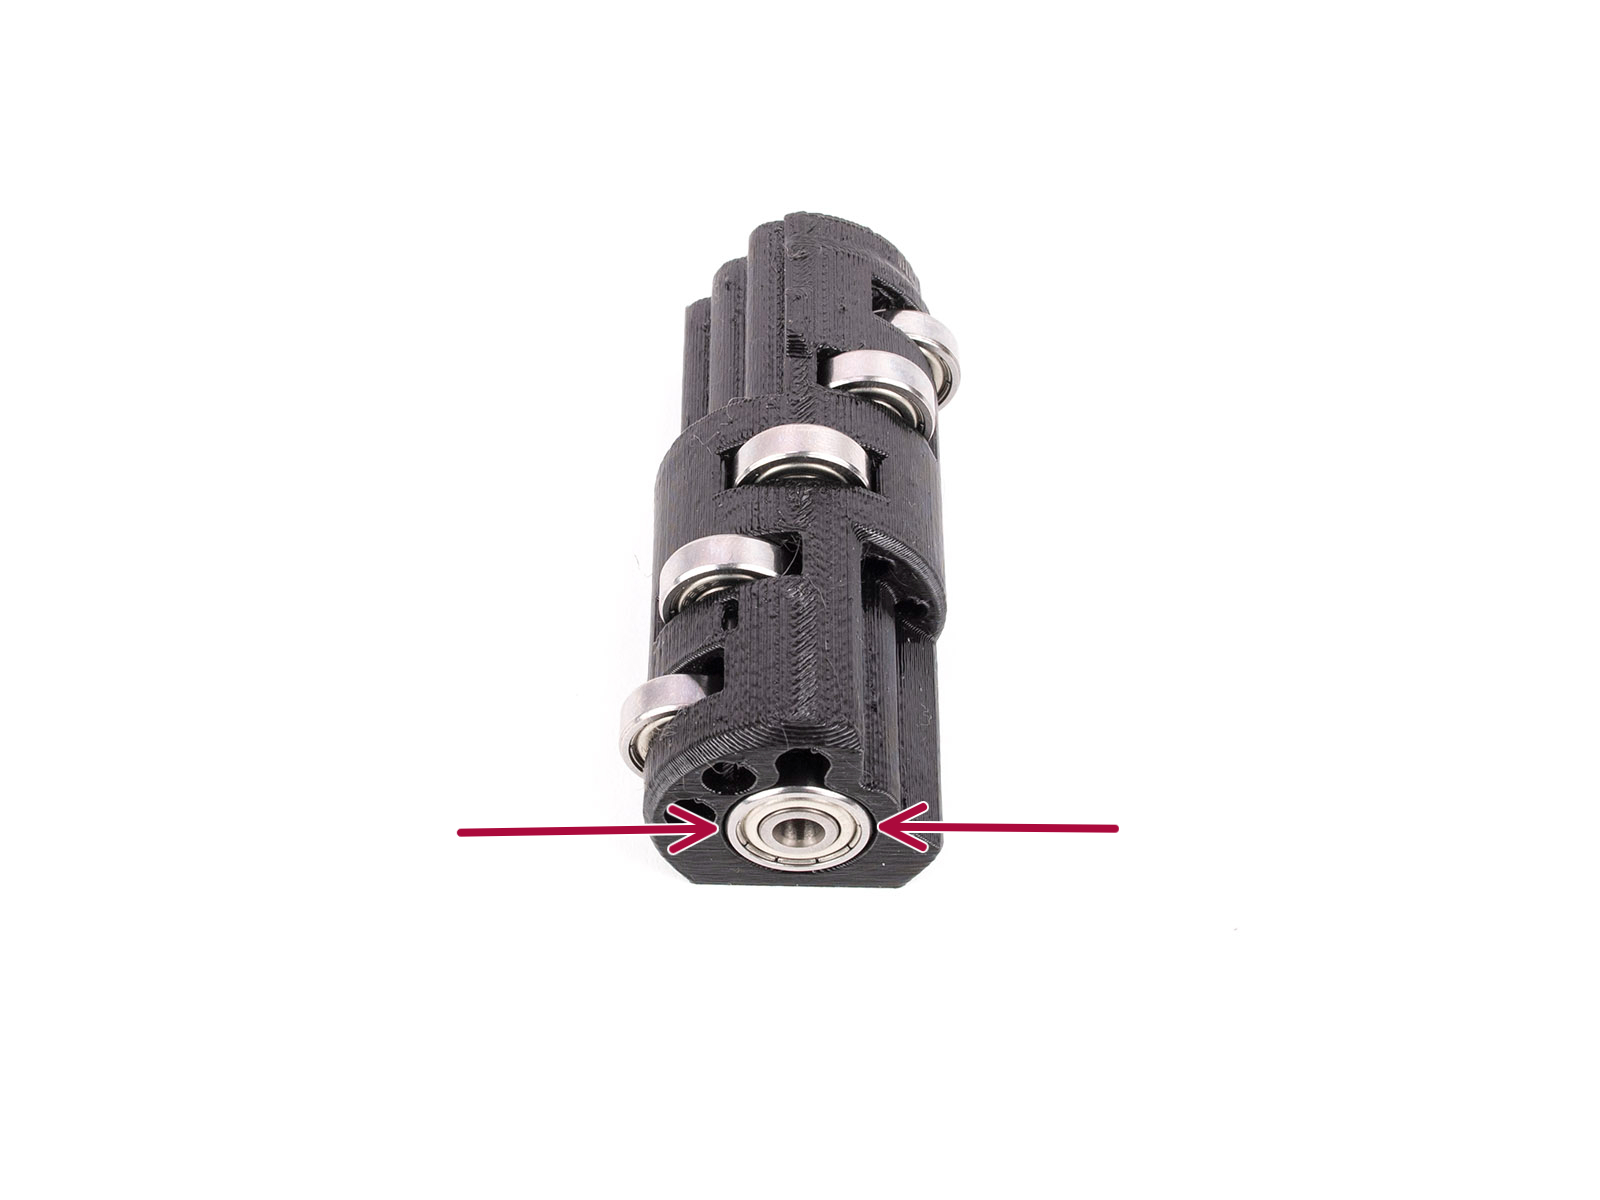
Make sure the bearing is flush (aligned) with the surface.
Coupler preparation
Coupler preparation
Coupler preparation

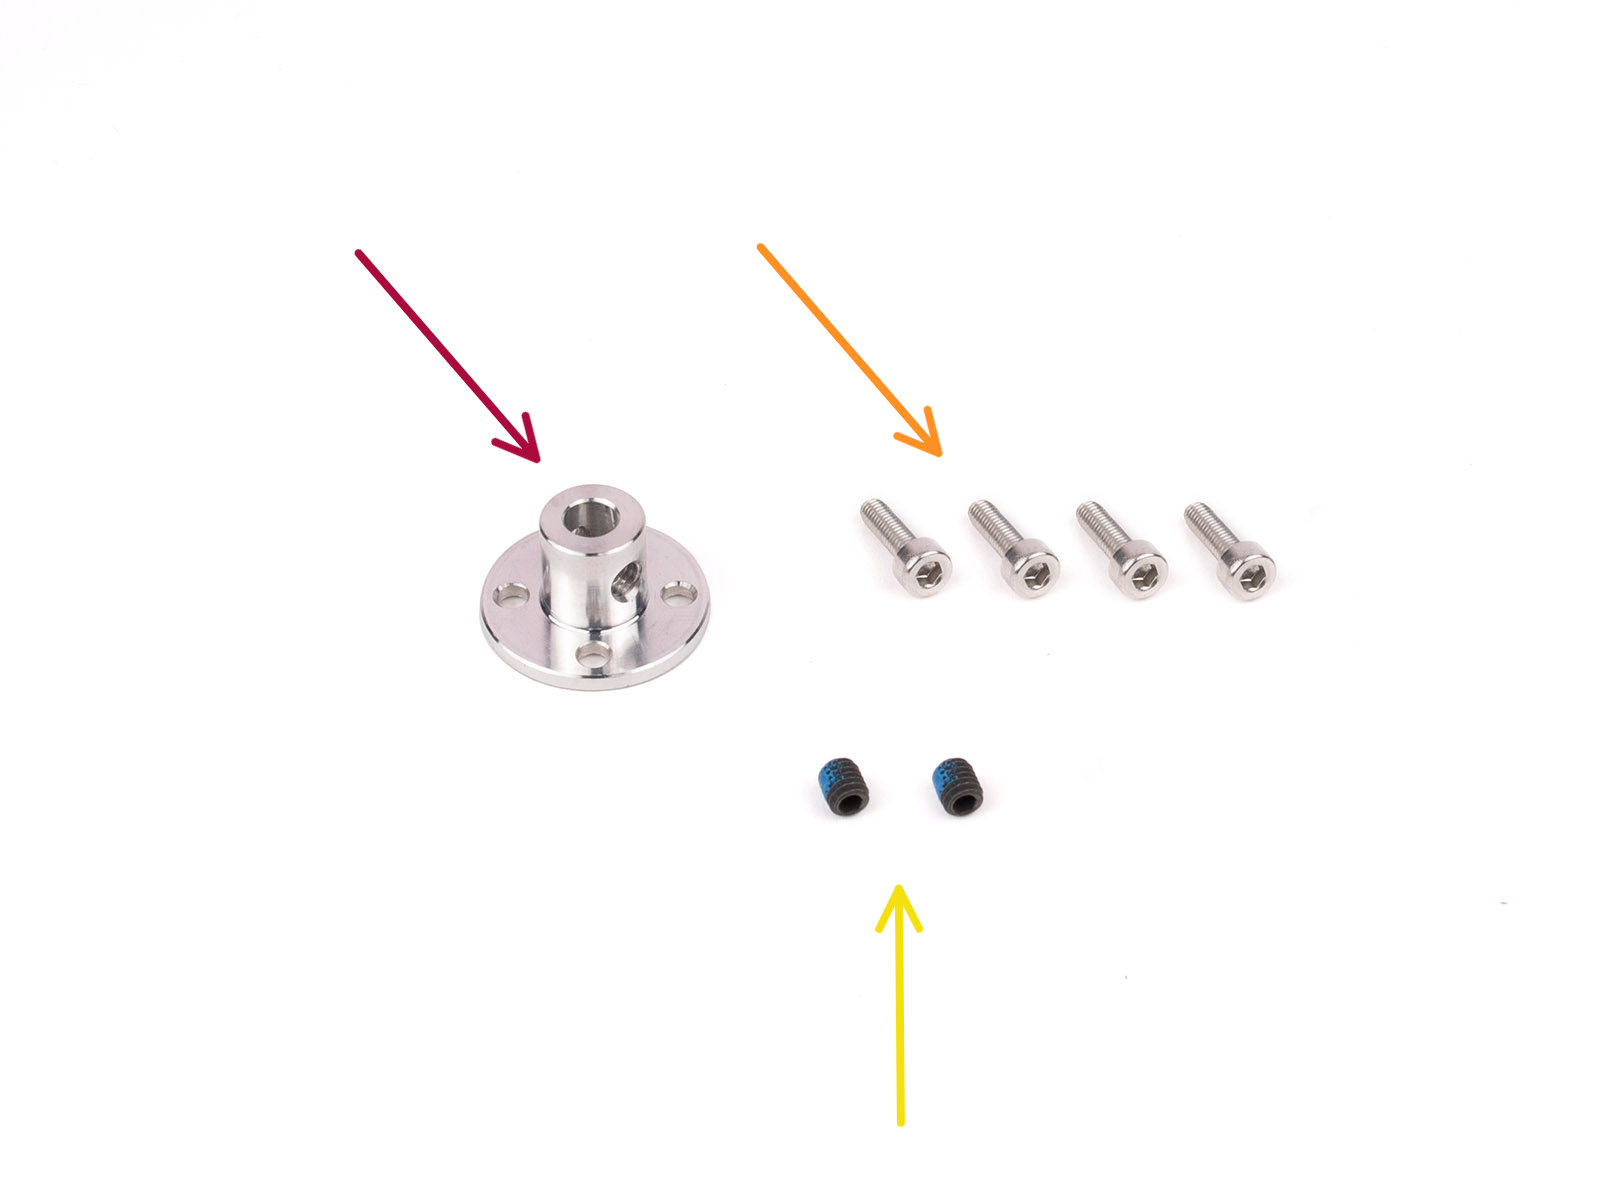
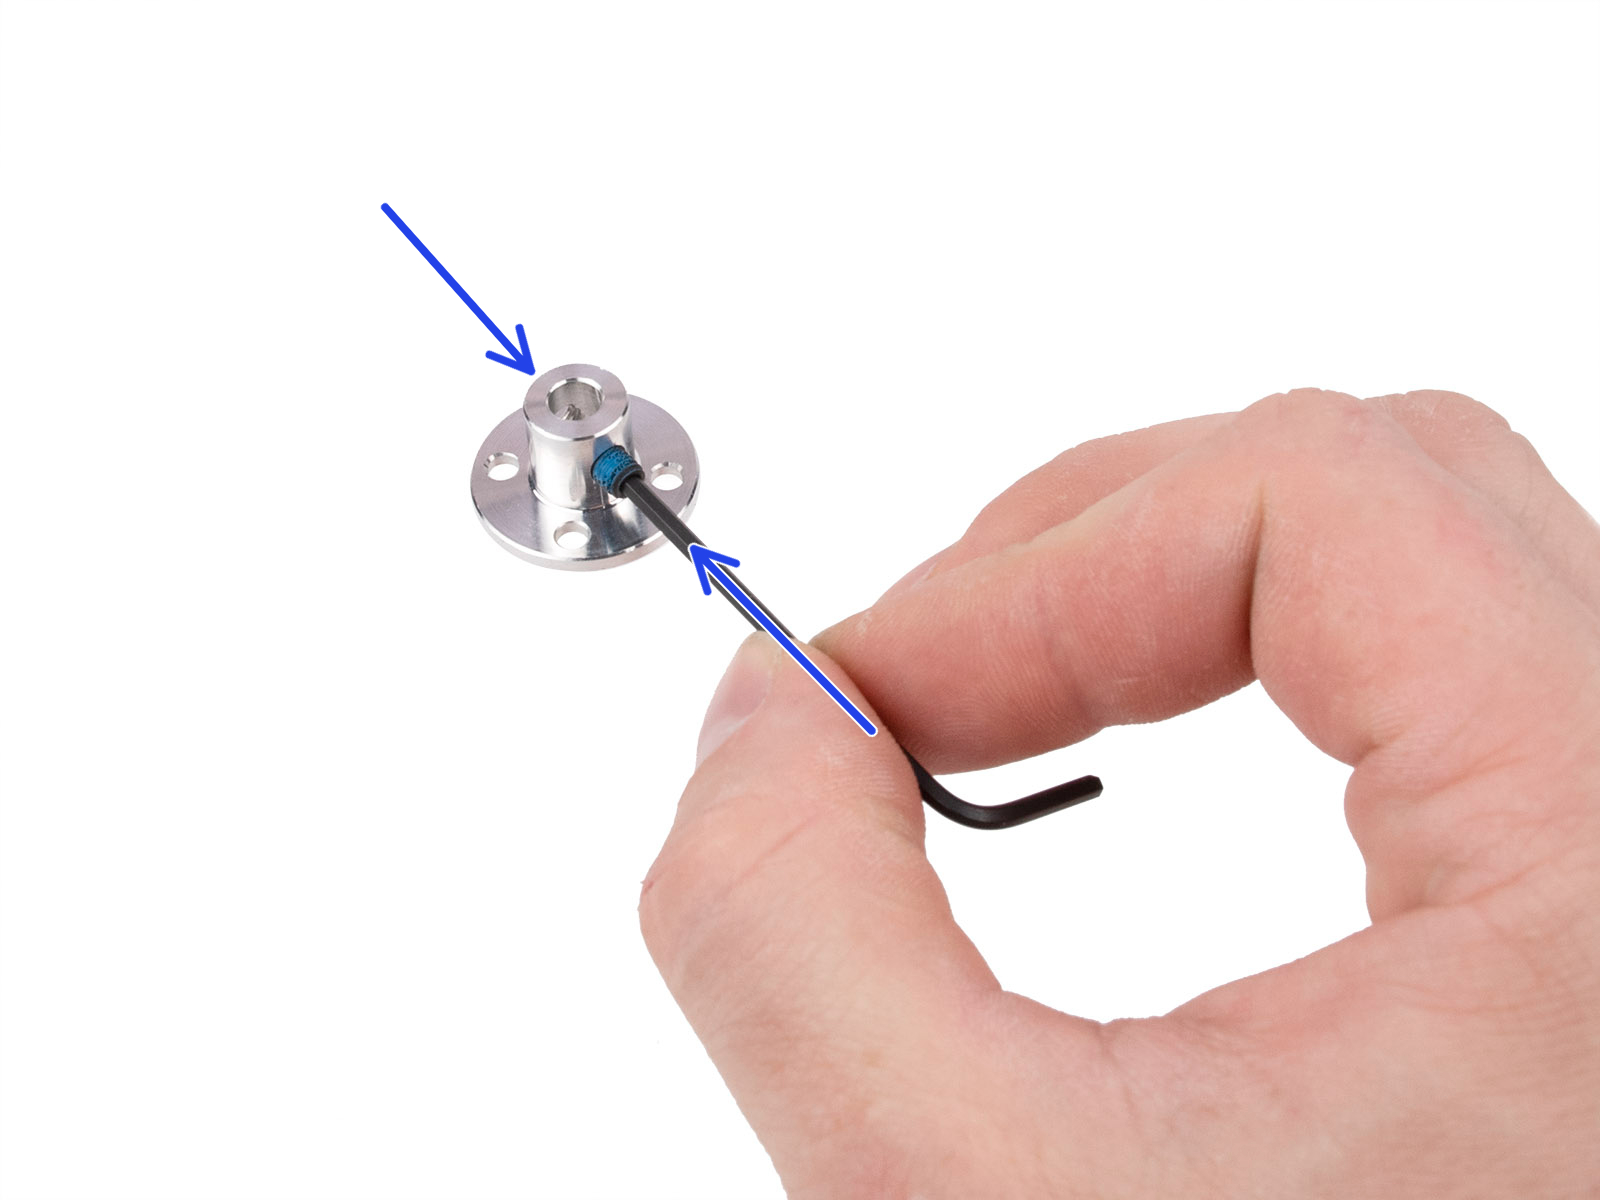
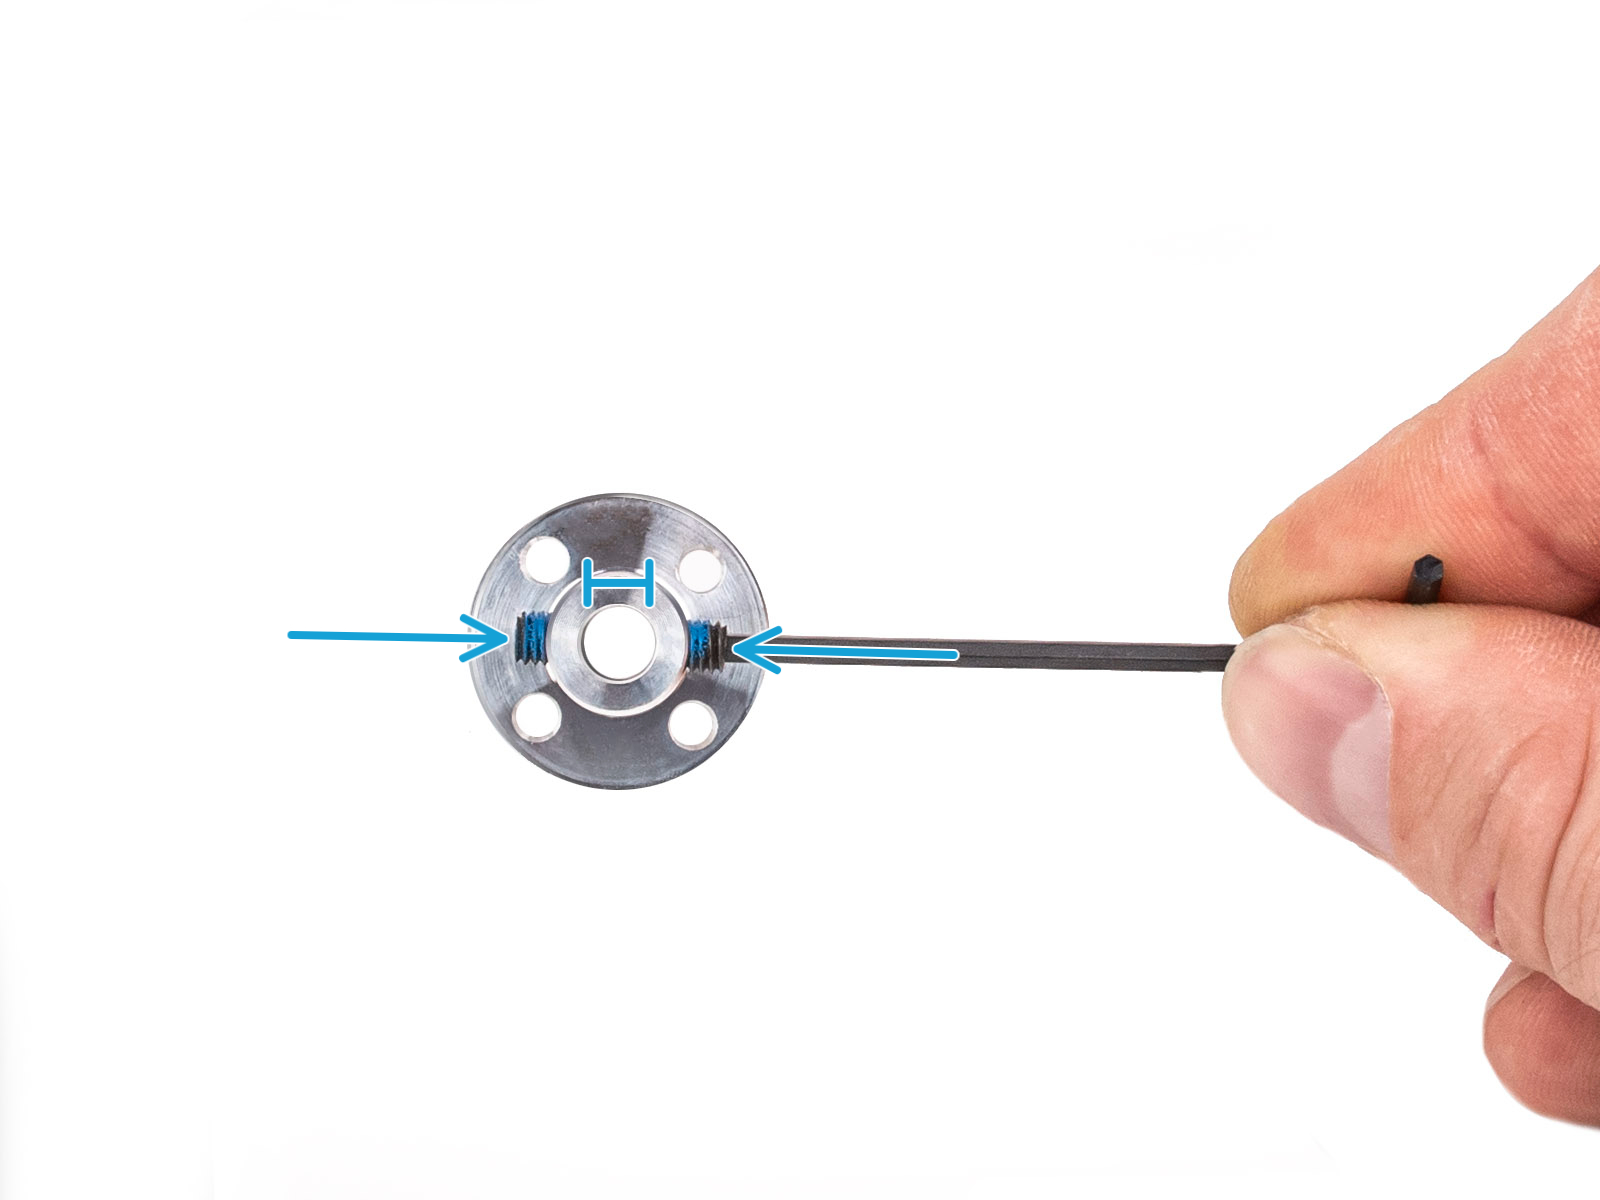
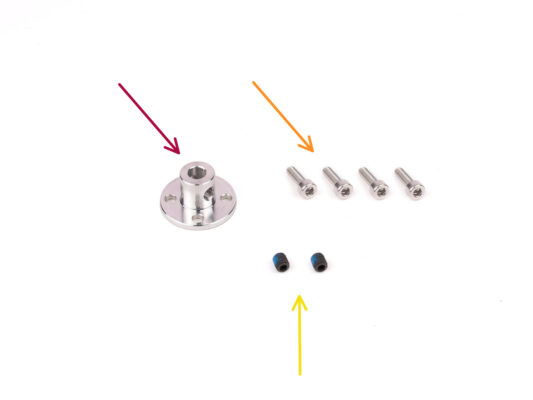
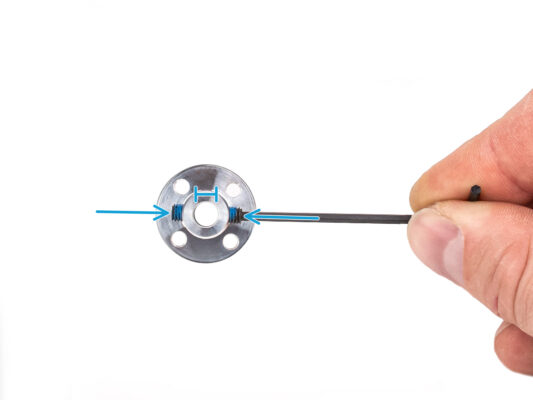
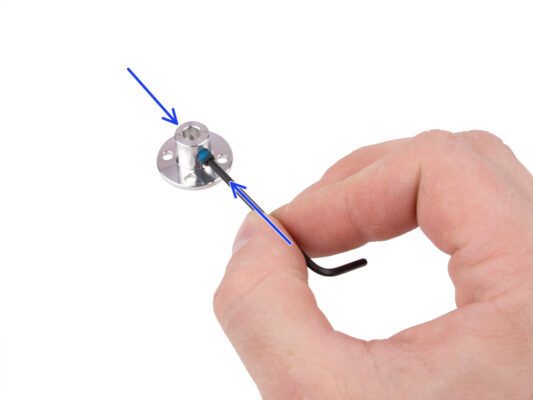
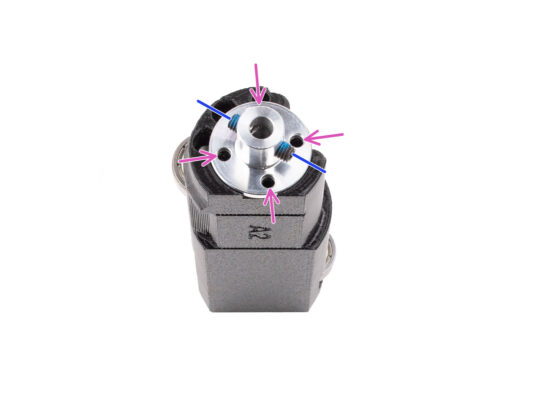
Using the 2mm Allen key, install the M4 grub screws into the threaded openings on the sides of the coupler.

Just start the thread so that the grub screw holds in.
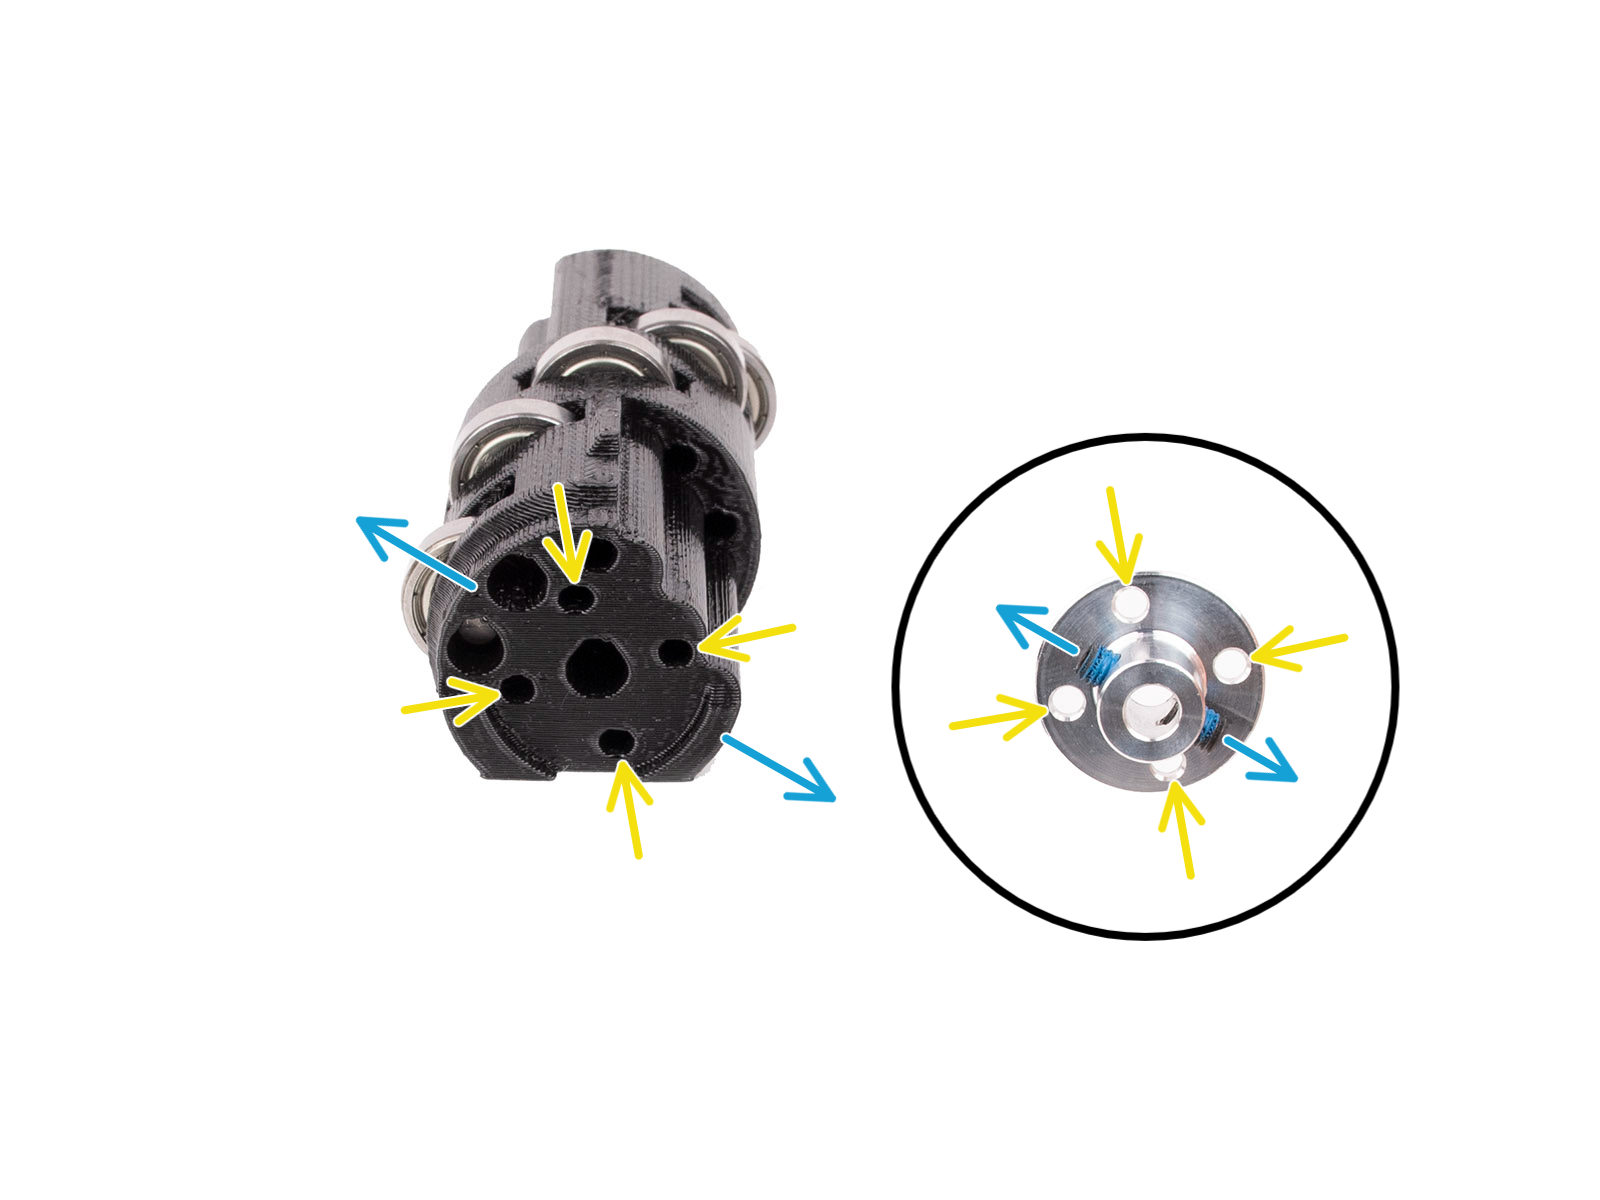
Make sure none of the two grub screws is protruding into the opening in the center. Otherwise, the coupler will be hard to slide onto the motor shaft later on.
Coupler assembly
Coupler assembly
Coupler assembly
Coupler assembly
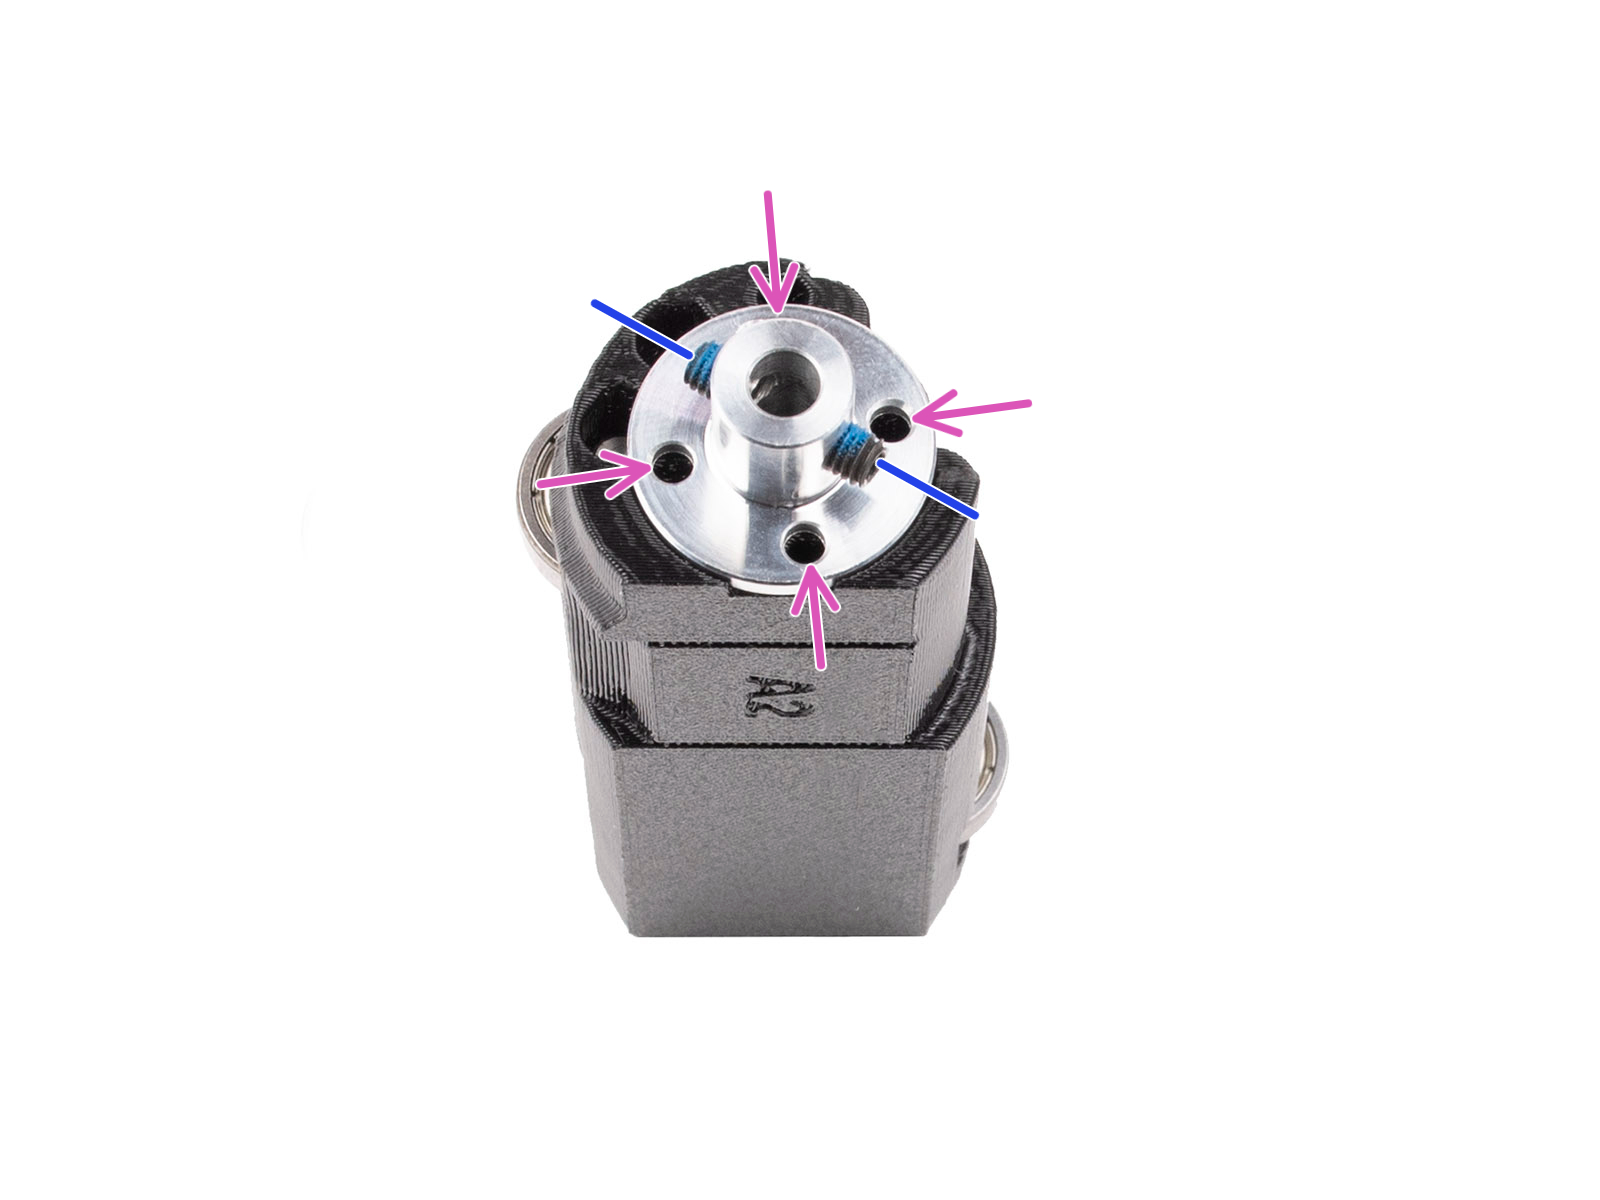
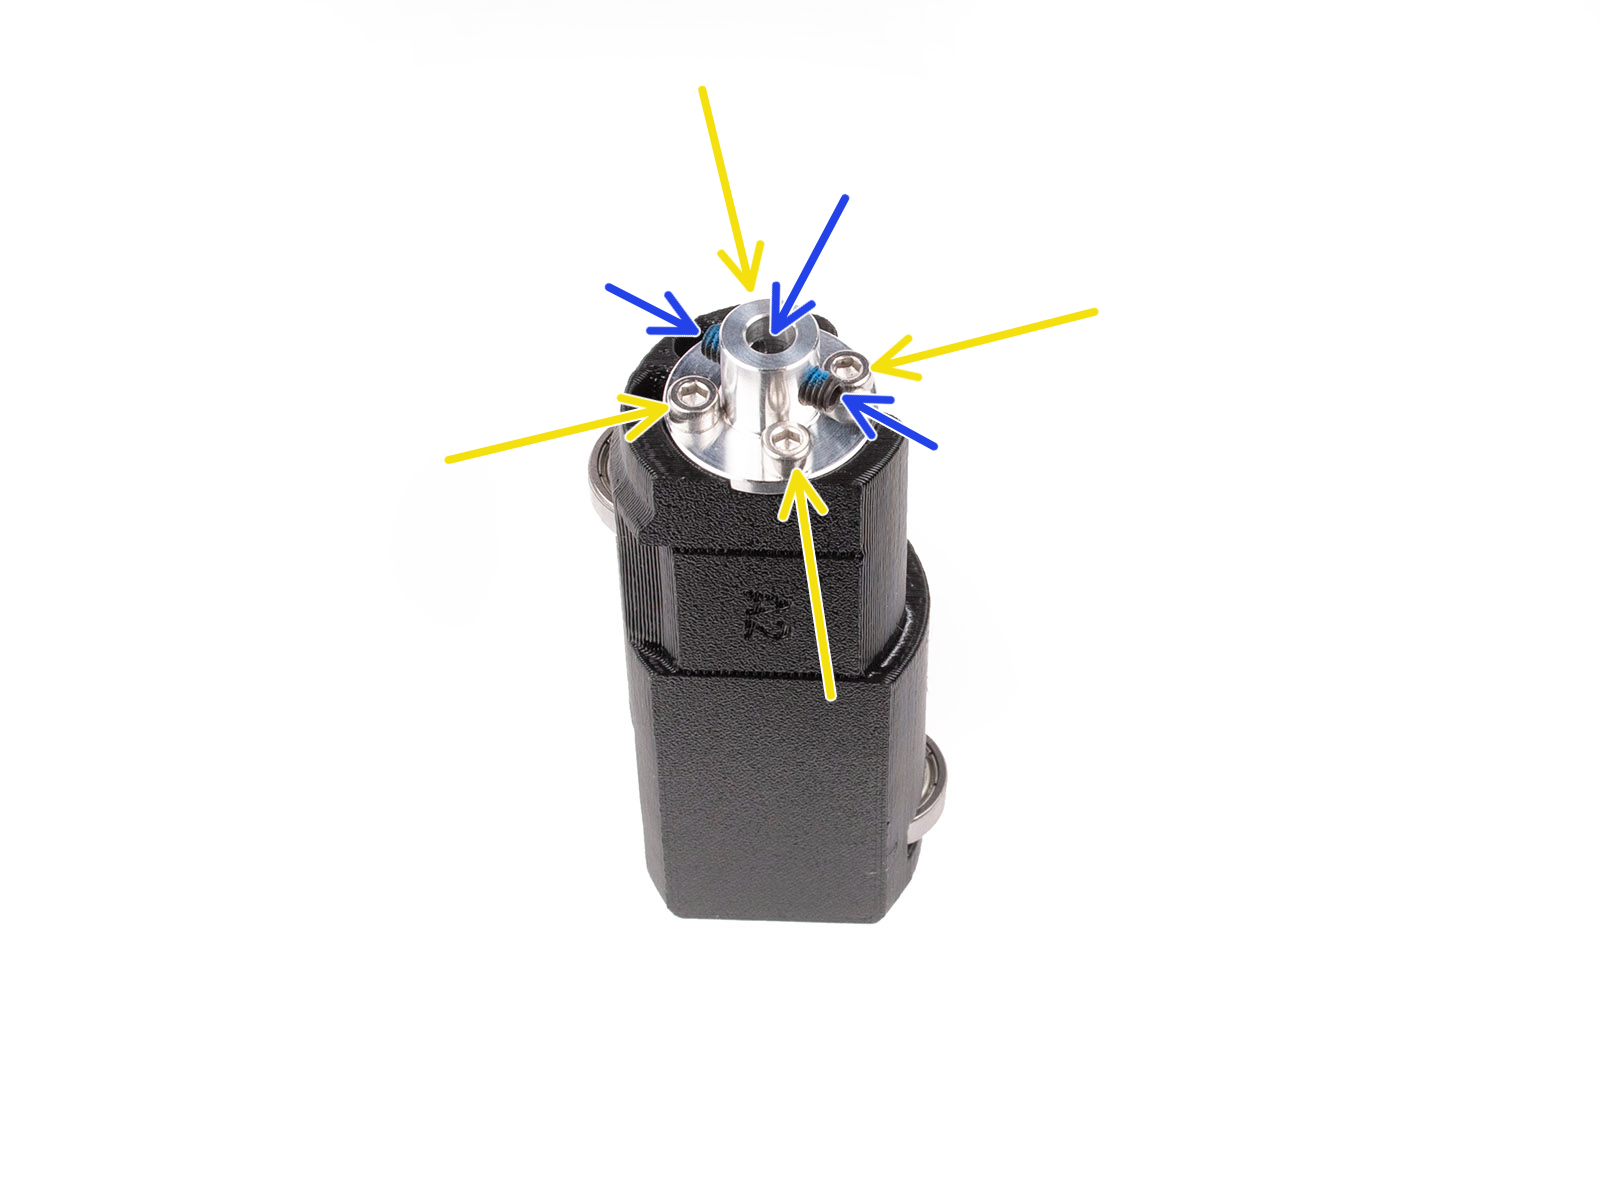
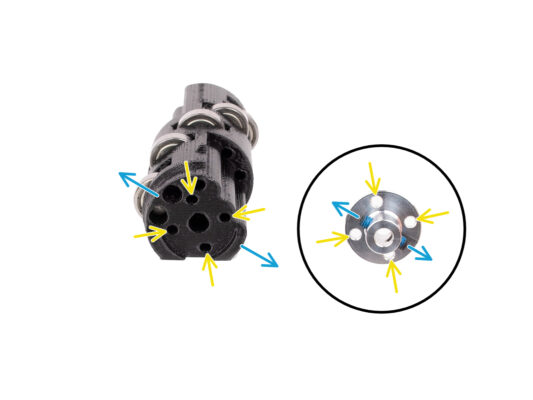
Before we install the Coupler onto the Idler, Take a look at both parts. There are four screw openings that must line-up.
Orient the coupler so that the two grub screws are oriented exactly as in the picture.
Add the Coupler onto the side of the Idler in a way so that all four screw openings line up.
Before proceeding, make sure the M4 grub screws are oriented as seen in the picture.
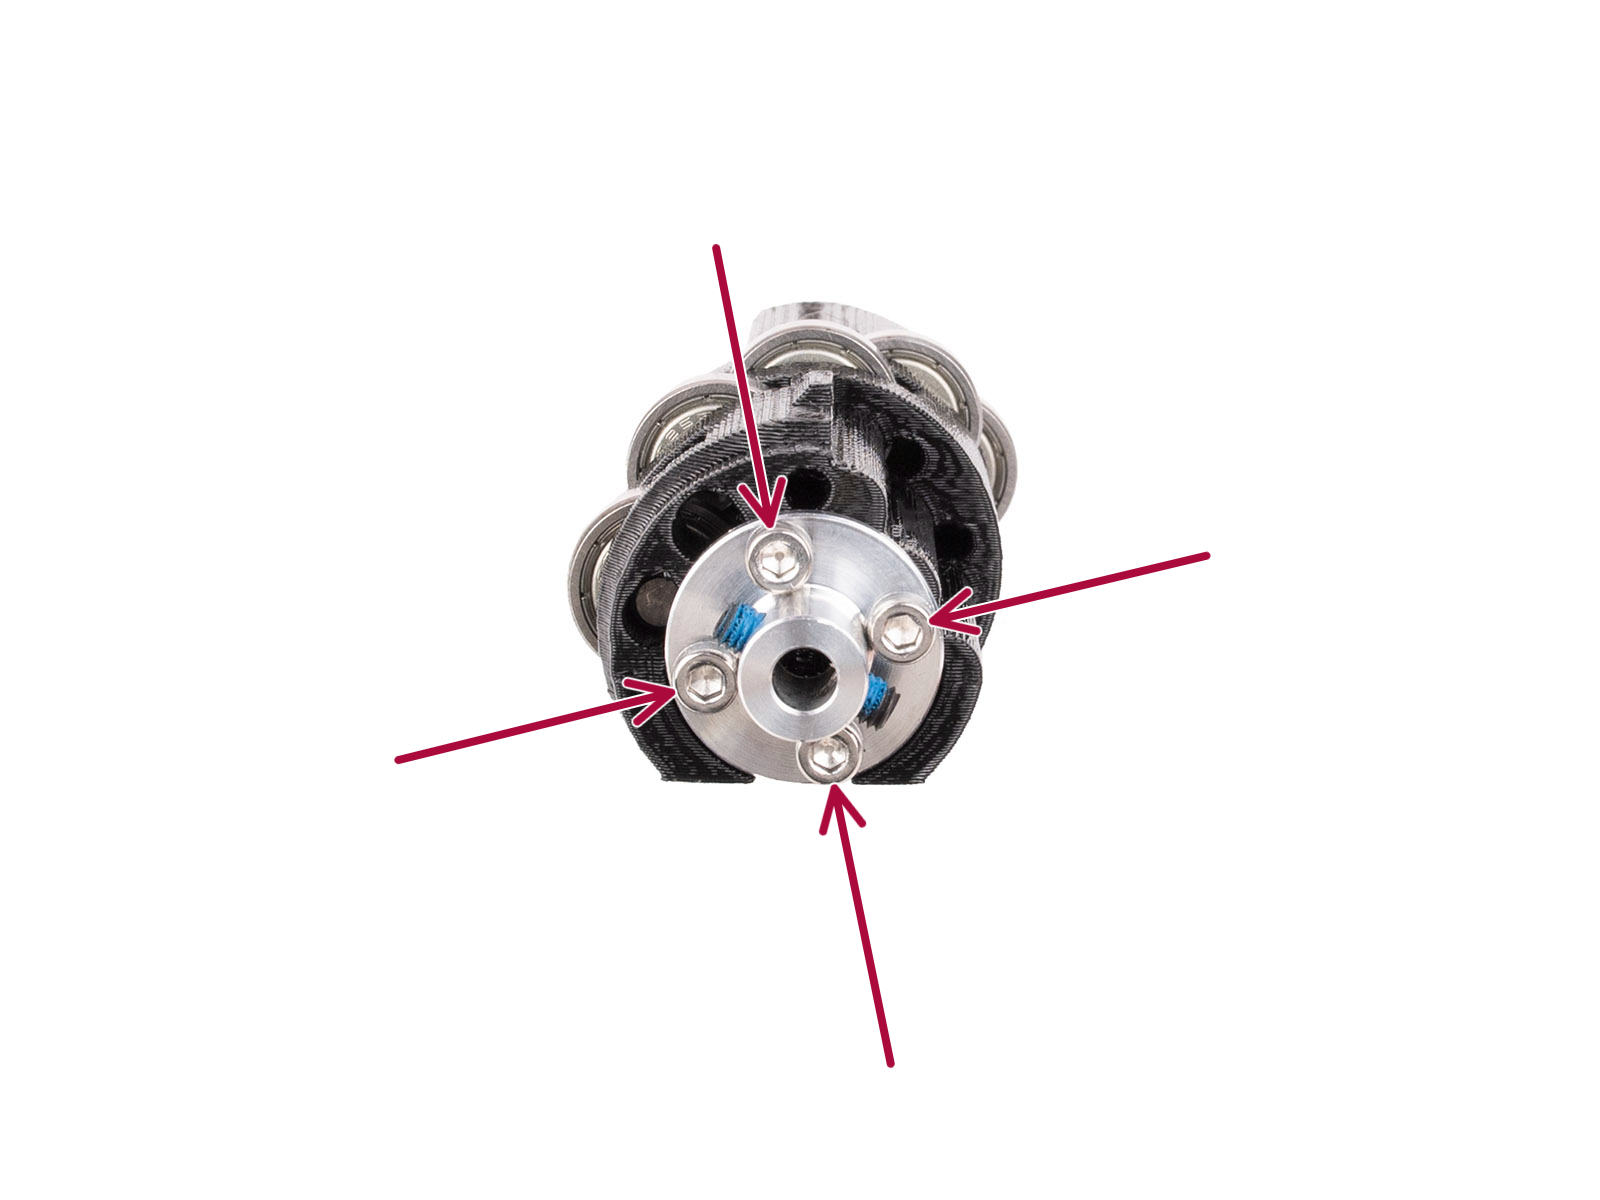
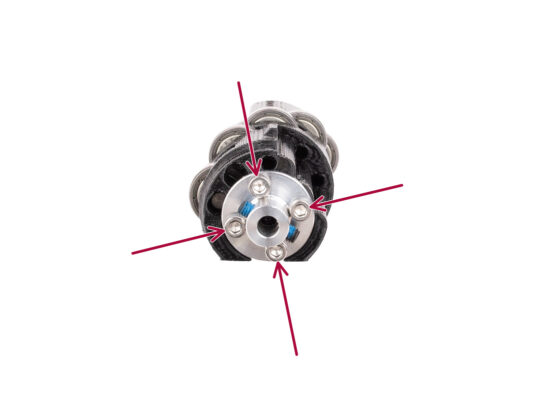
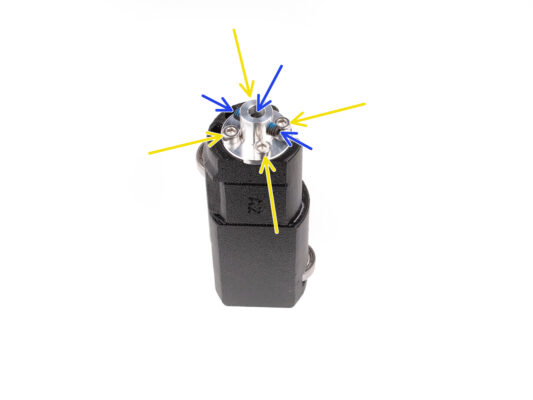
Fix the Coupler to the Idler using four M3x10 screws.
Final check
Final check
Final check
Before you proceed, check the following:
All M3x10 screws are tight.
The grub screws are oriented properly and not protruding into the center opening in the coupler.
The grub screw orientation is important so that the grub screws remain accessible even after the Idler is installed inside the MMU unit.
All five bearings are able to rotate.
The sixth bearing is flush with the surface.
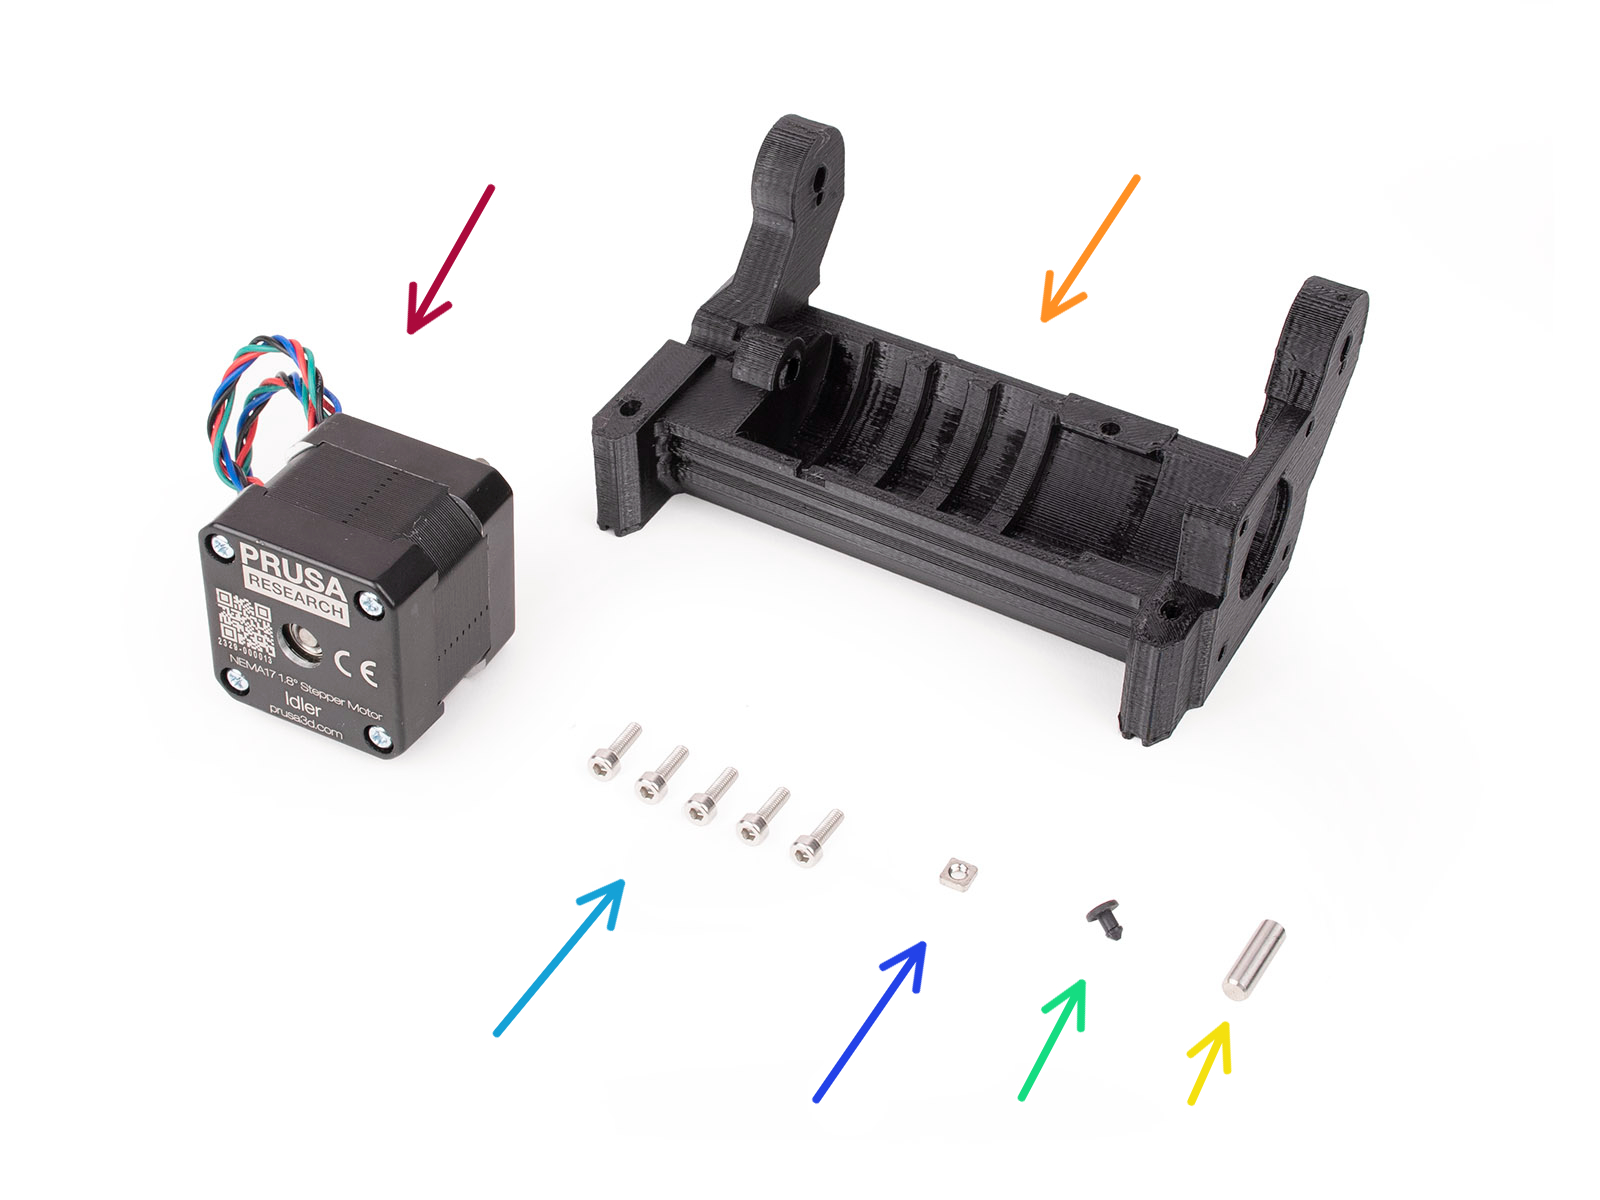
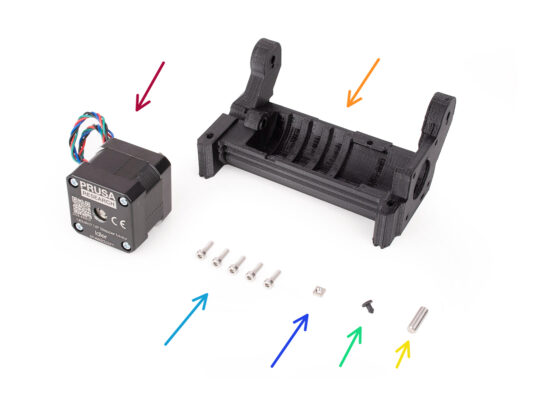
Idler Body parts preparation
For the following steps, please prepare:
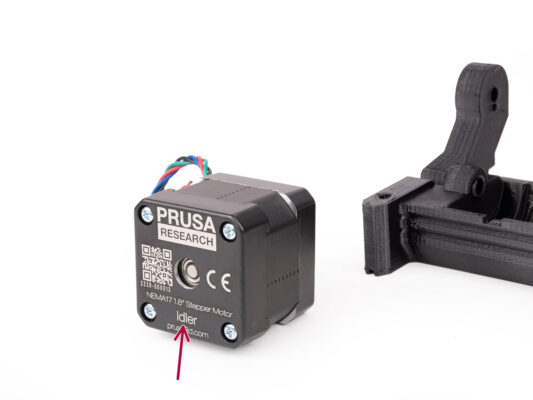
Idler motor (1x) (the one with a short shaft) 
Idler Body (1x)
M3x10 screw (5x)
M3nS nut (1x)
Silicone stopper (1x)
Shaft 5x16sh (1x)
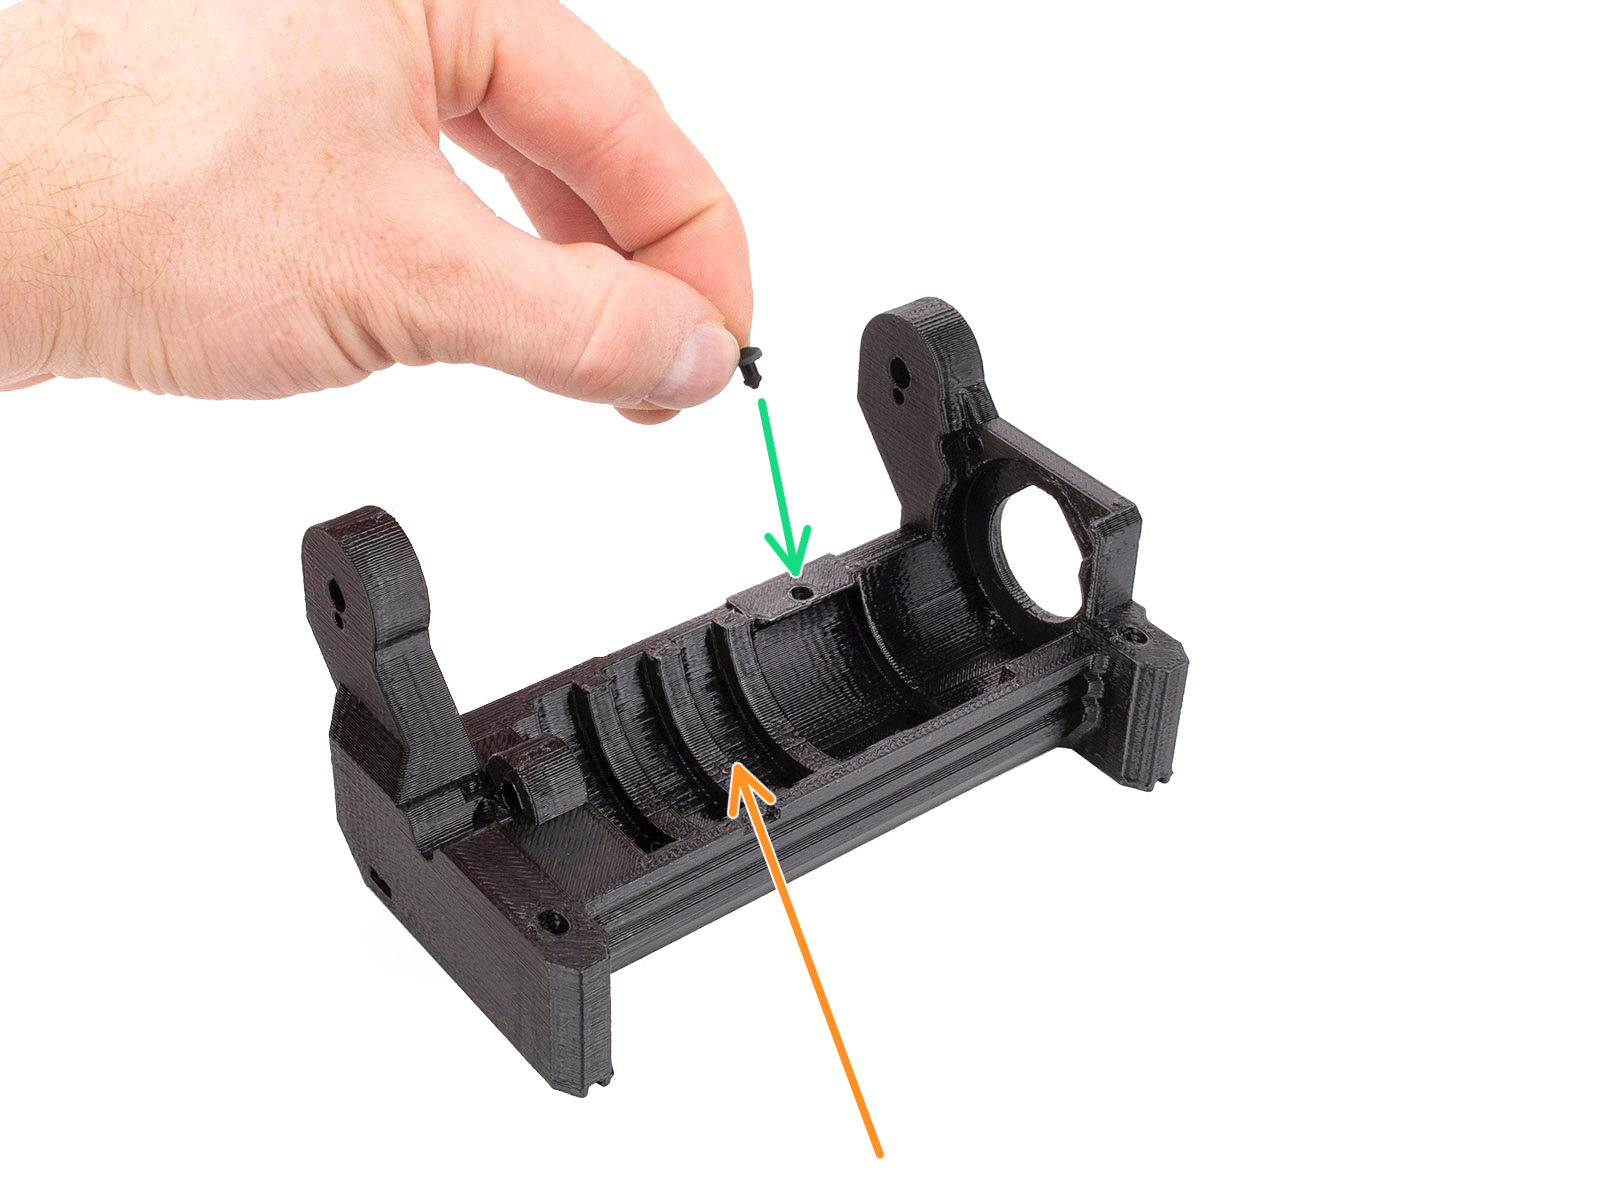
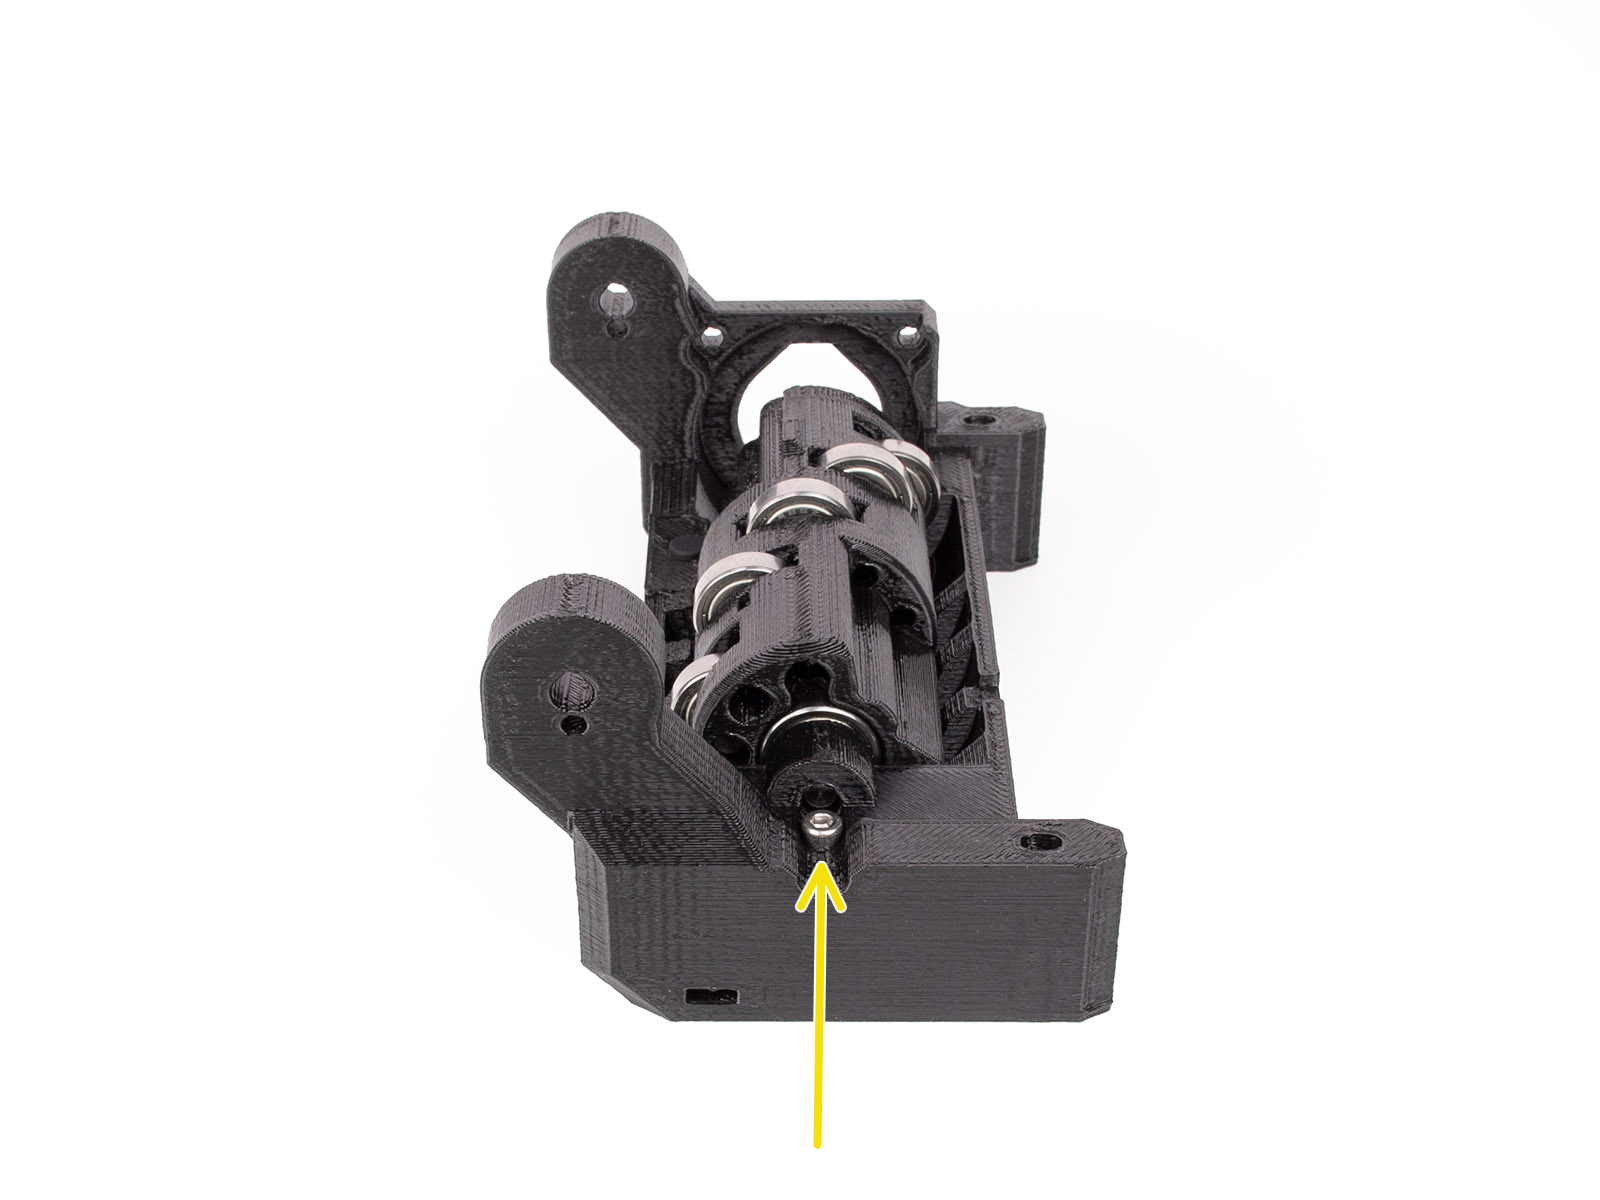
Silicone stopper instalation
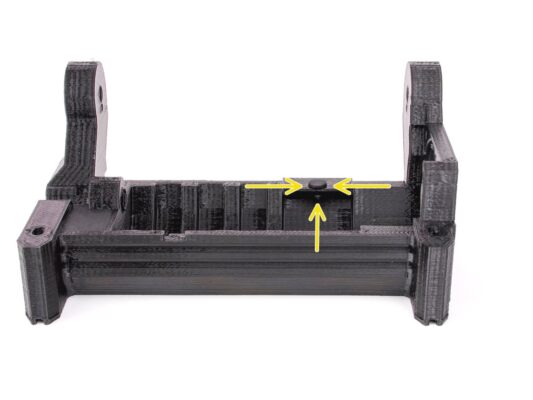
Orient the Idler body as seen in the picture.
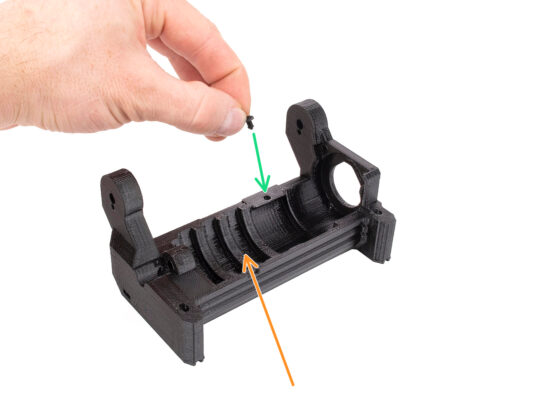
Insert the silicone stopper into the small opening on the Idler body.
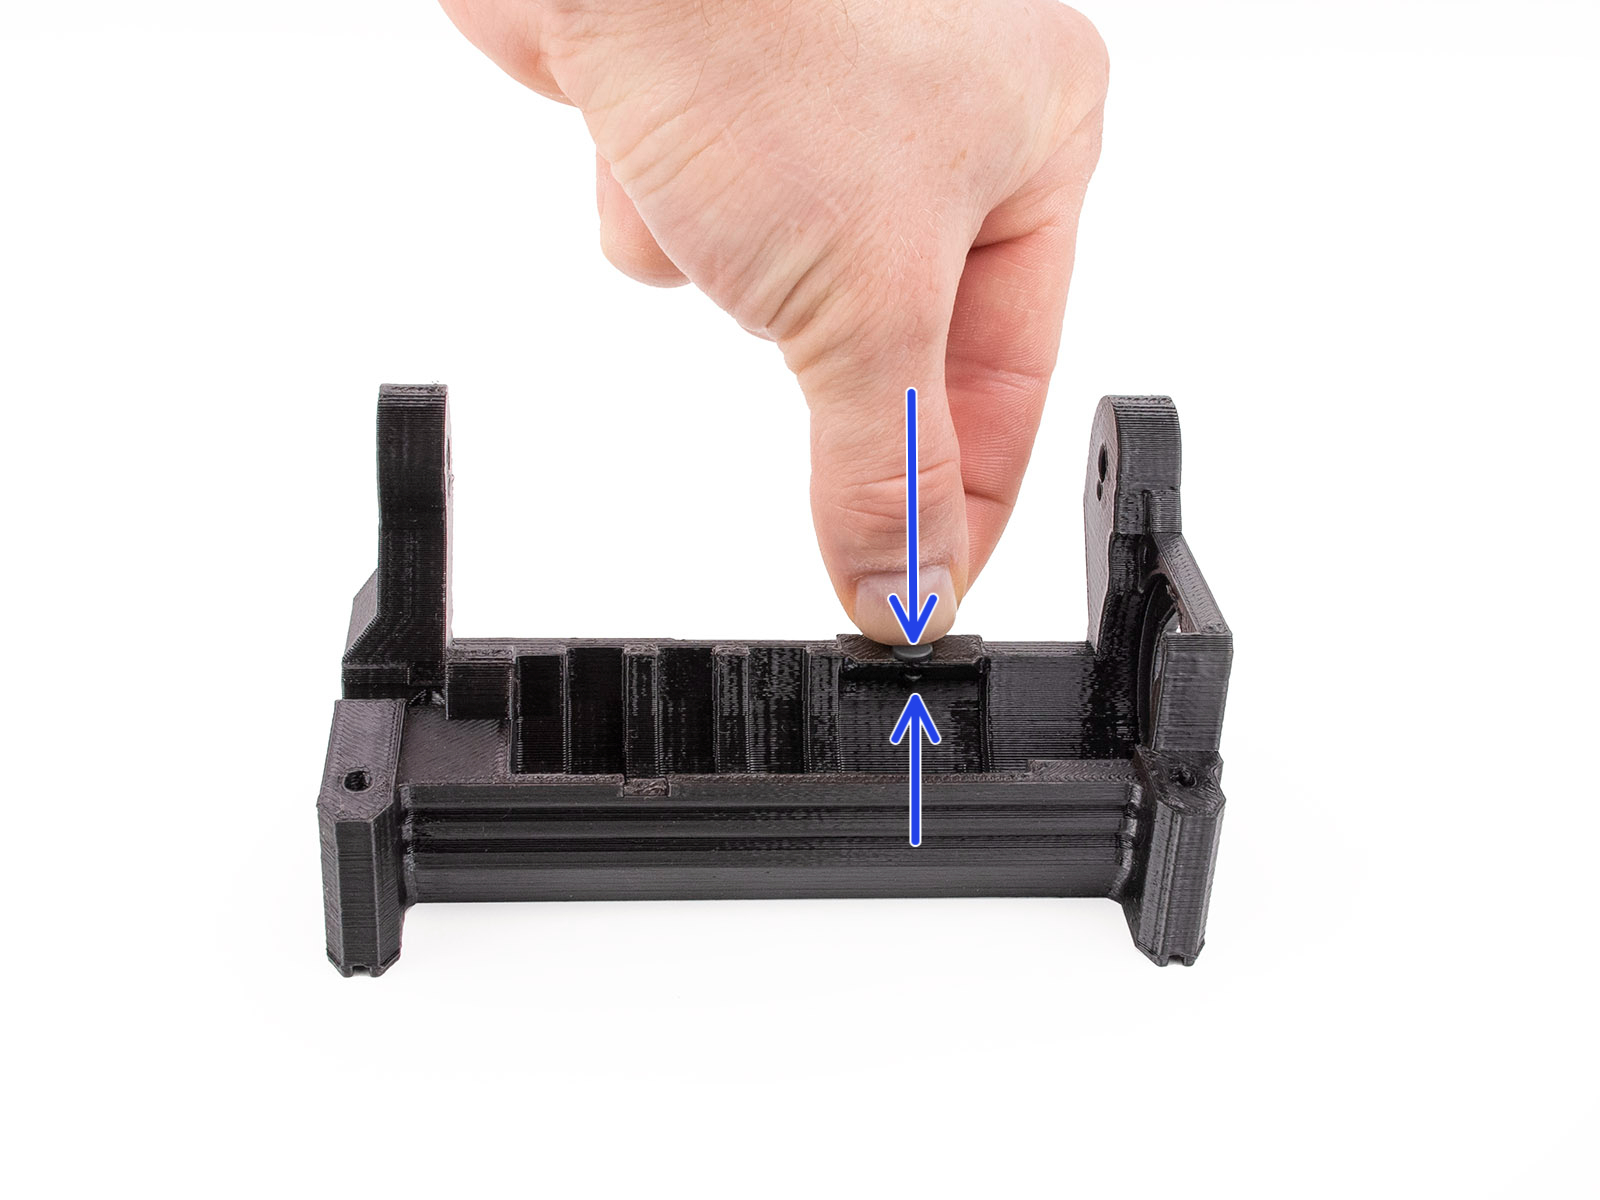
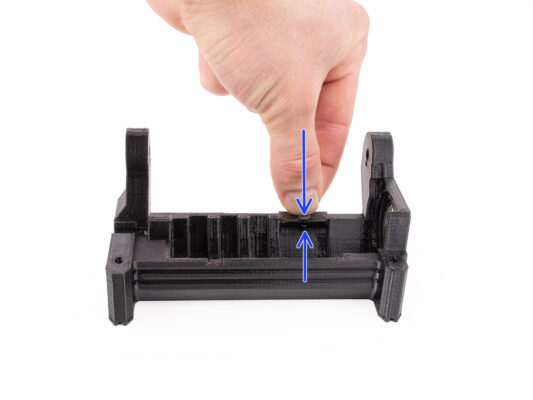
Push it in and keep it pressed with your finger until you feel it fully engage into the opening. If it doesn't engage, try cleaning up the opening with an Allen key and rotating the stopper while inserting.

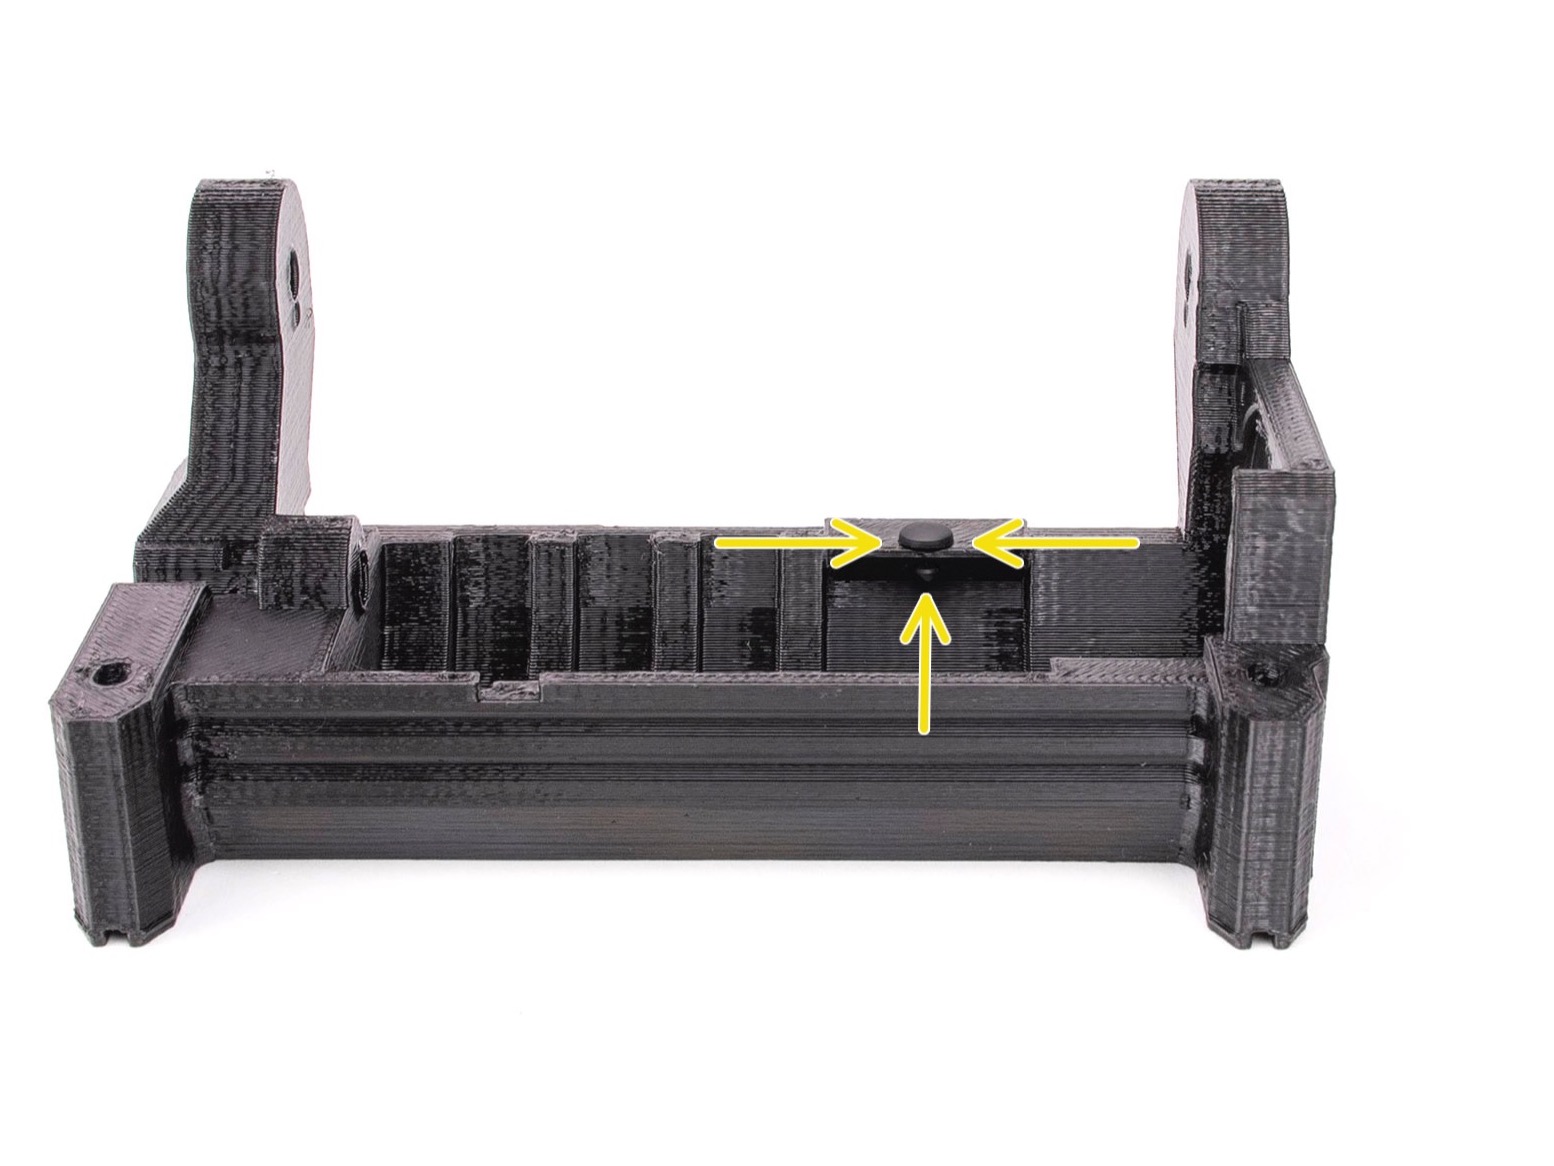
Verify it is seated properly and won't fall out. 

The top part should be flush and there should be bottom part of the stopper visible from the side.
Idler installation
Idler installation
Idler installation
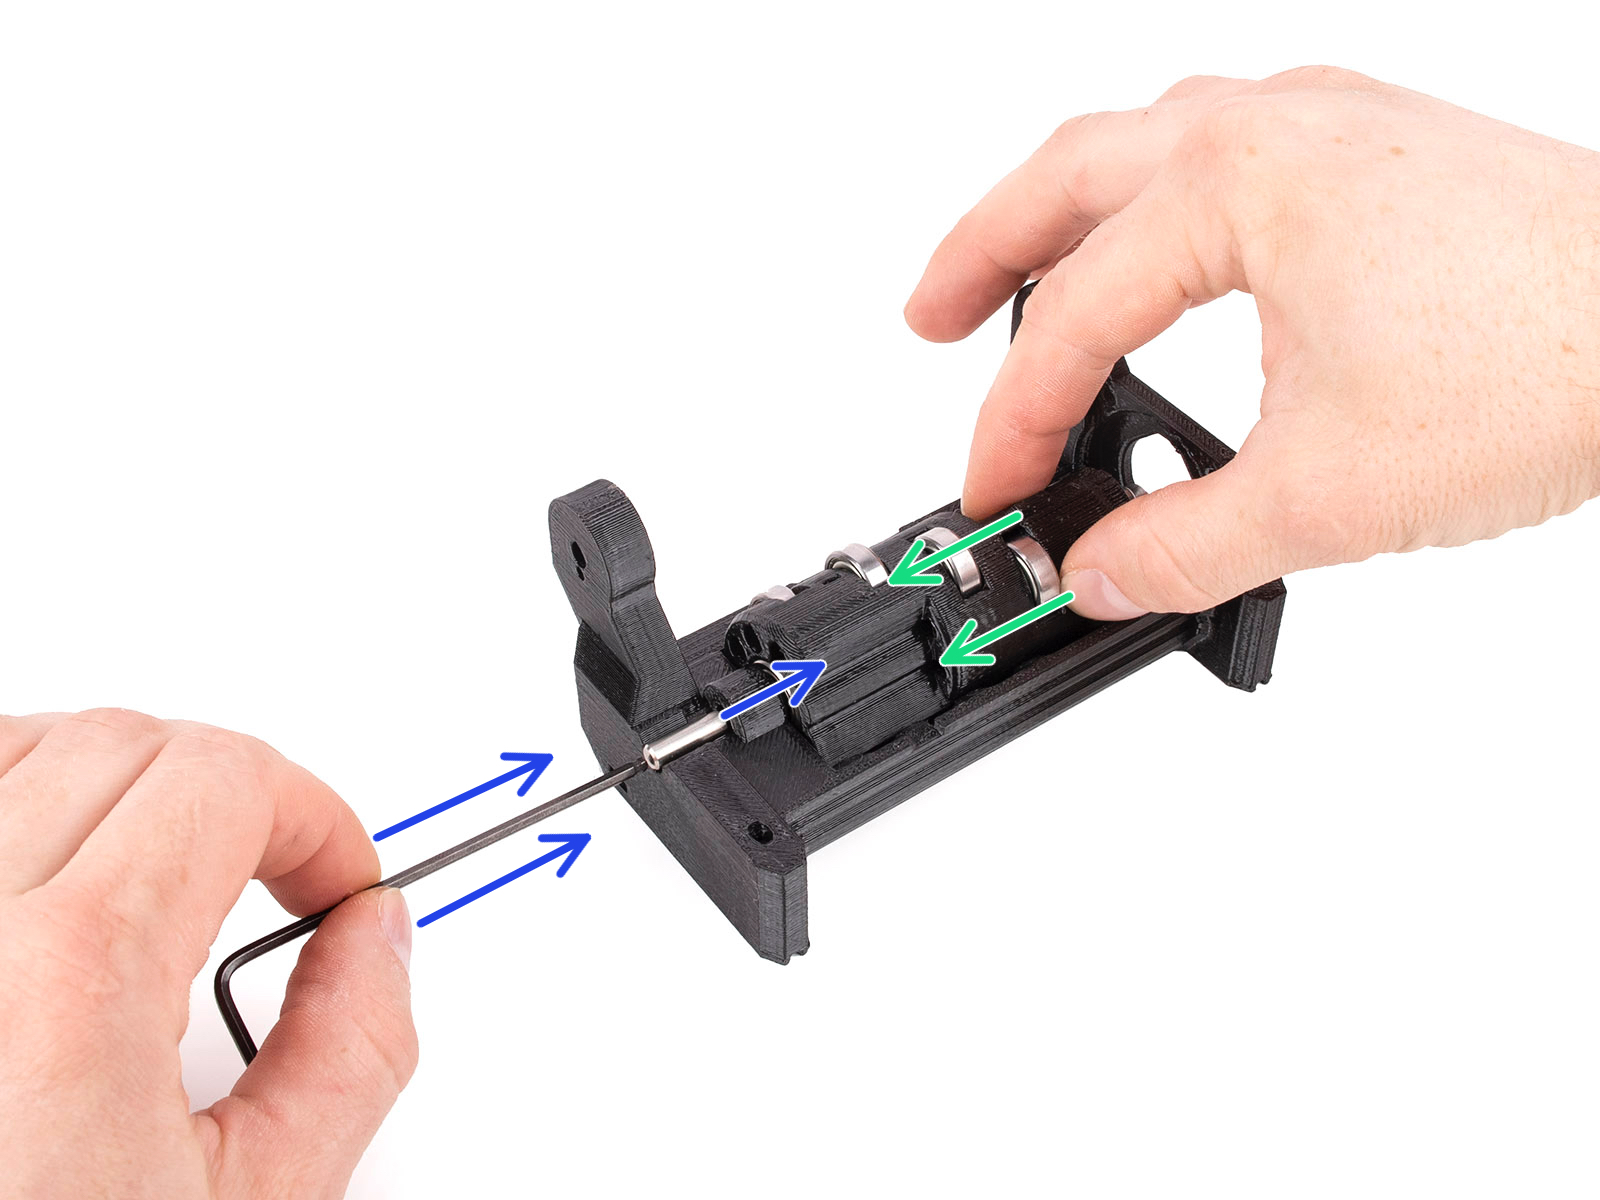
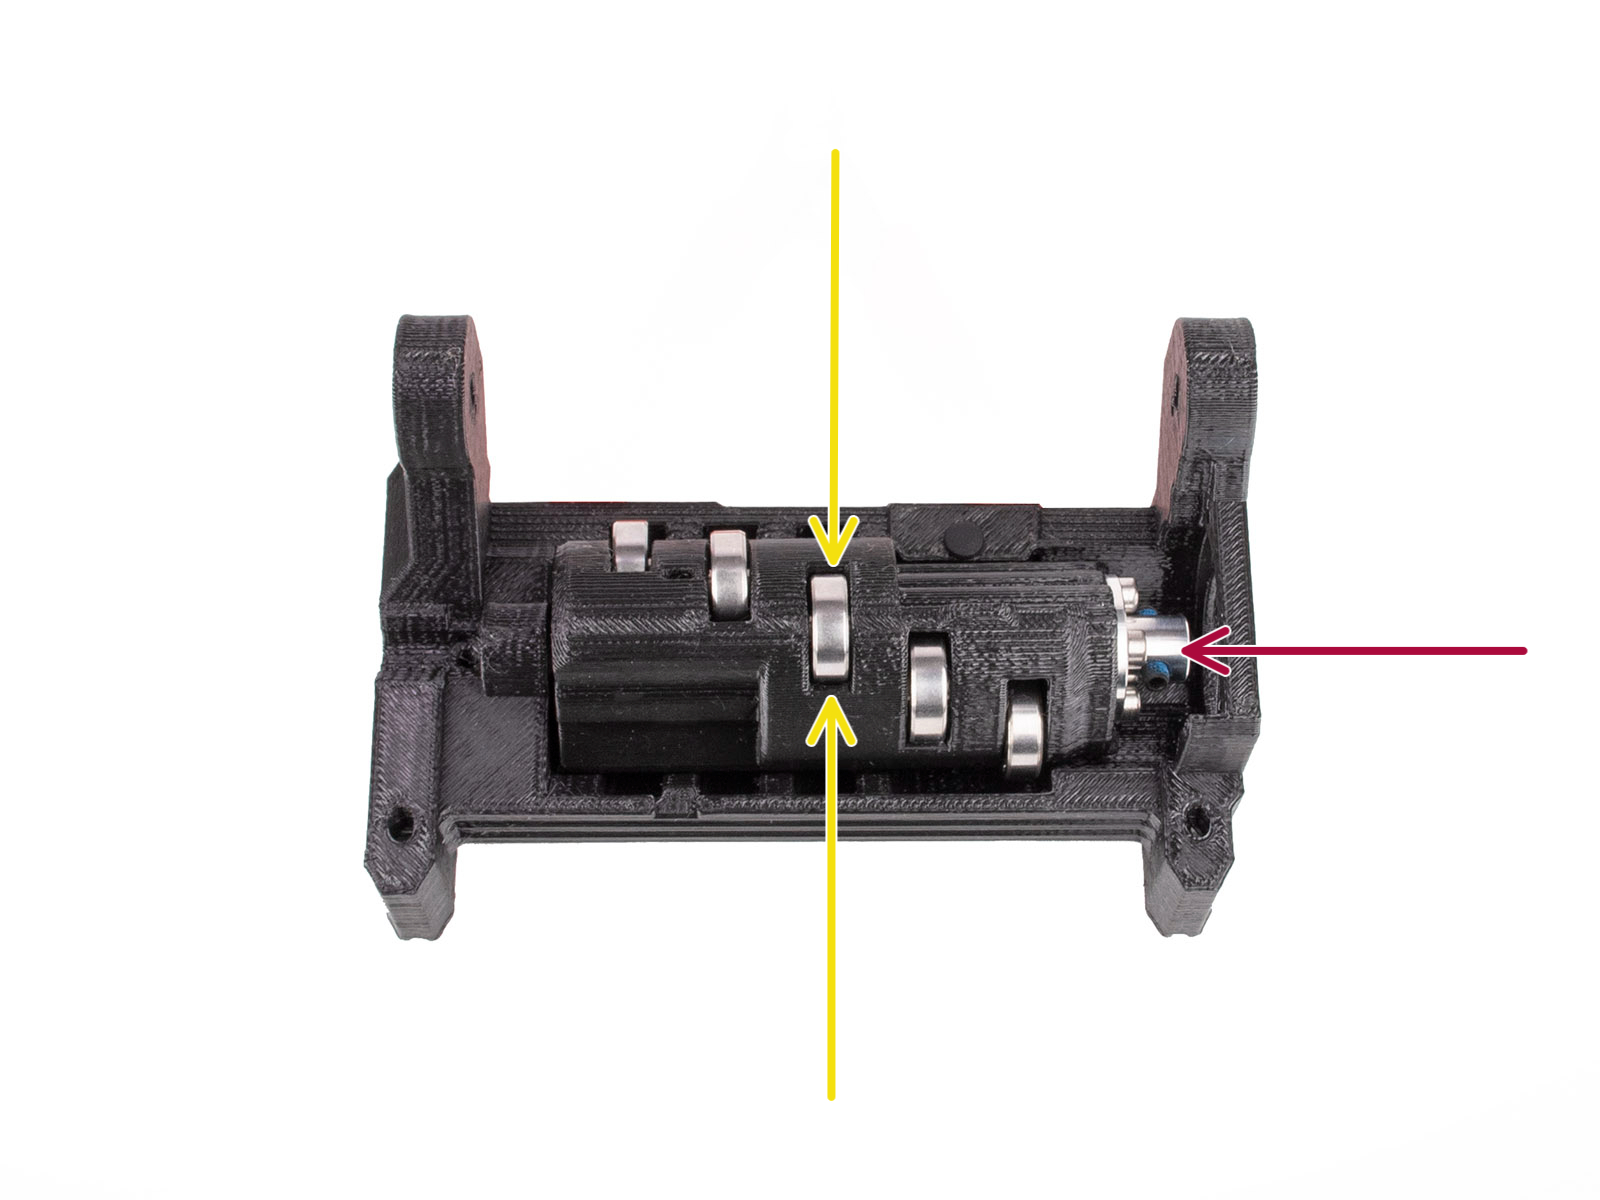
Insert the Idler into the Idler body. Correct orientation is important. Make sure the middle bearing is pointing to the top.
Make sure the metal coupler is pointing to the large opening in the Idler body.
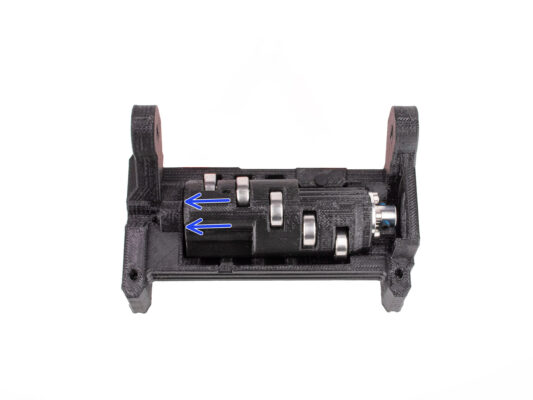
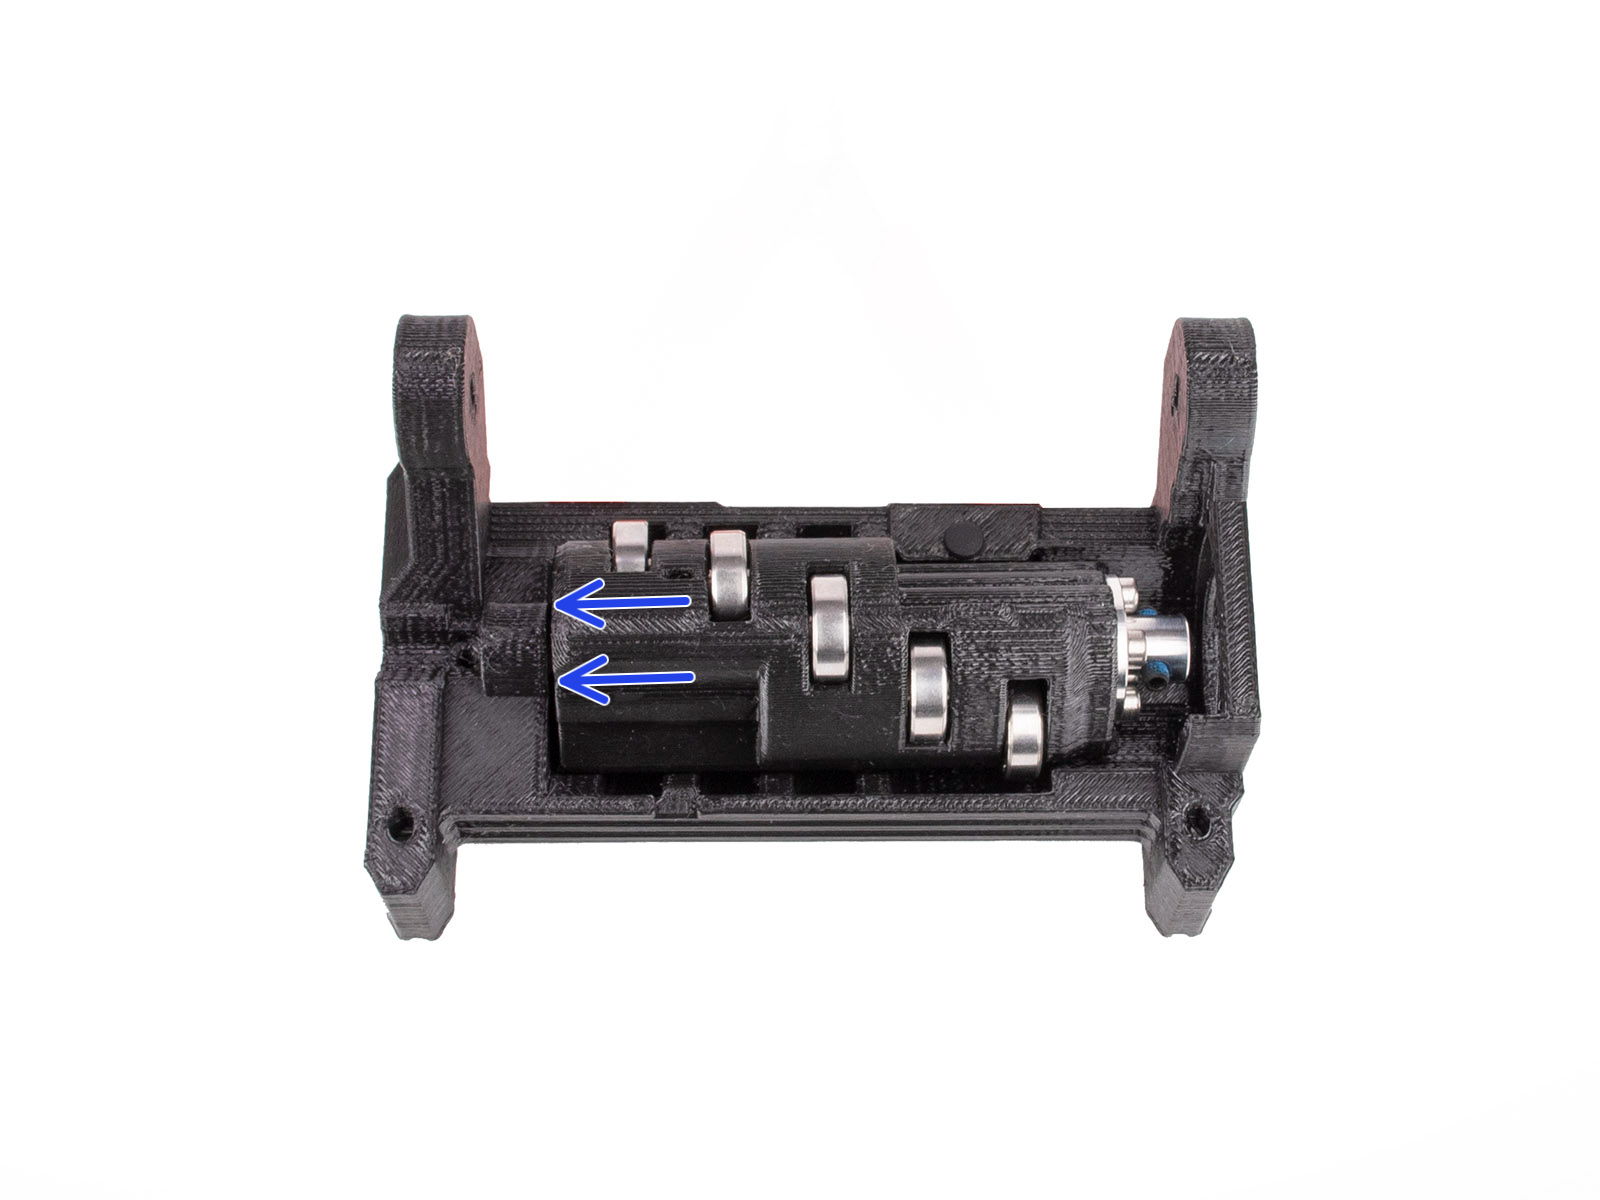
Push the Idler to the left so that there is as small gap as possible.
Idler center shaft assembly
Hold the Idler in place with your hand and keep pushing it to the left side.
Insert the 5x16 shaft into the opening on the left side of the idler body and push it in all the way through.
The shaft must engage into the bearing in the Idler. Press the shaft all the way in using the 2.5mm Allen key.
Lock the shaft in place by attaching an M3x10 screw into the marked position. Tighten it up.
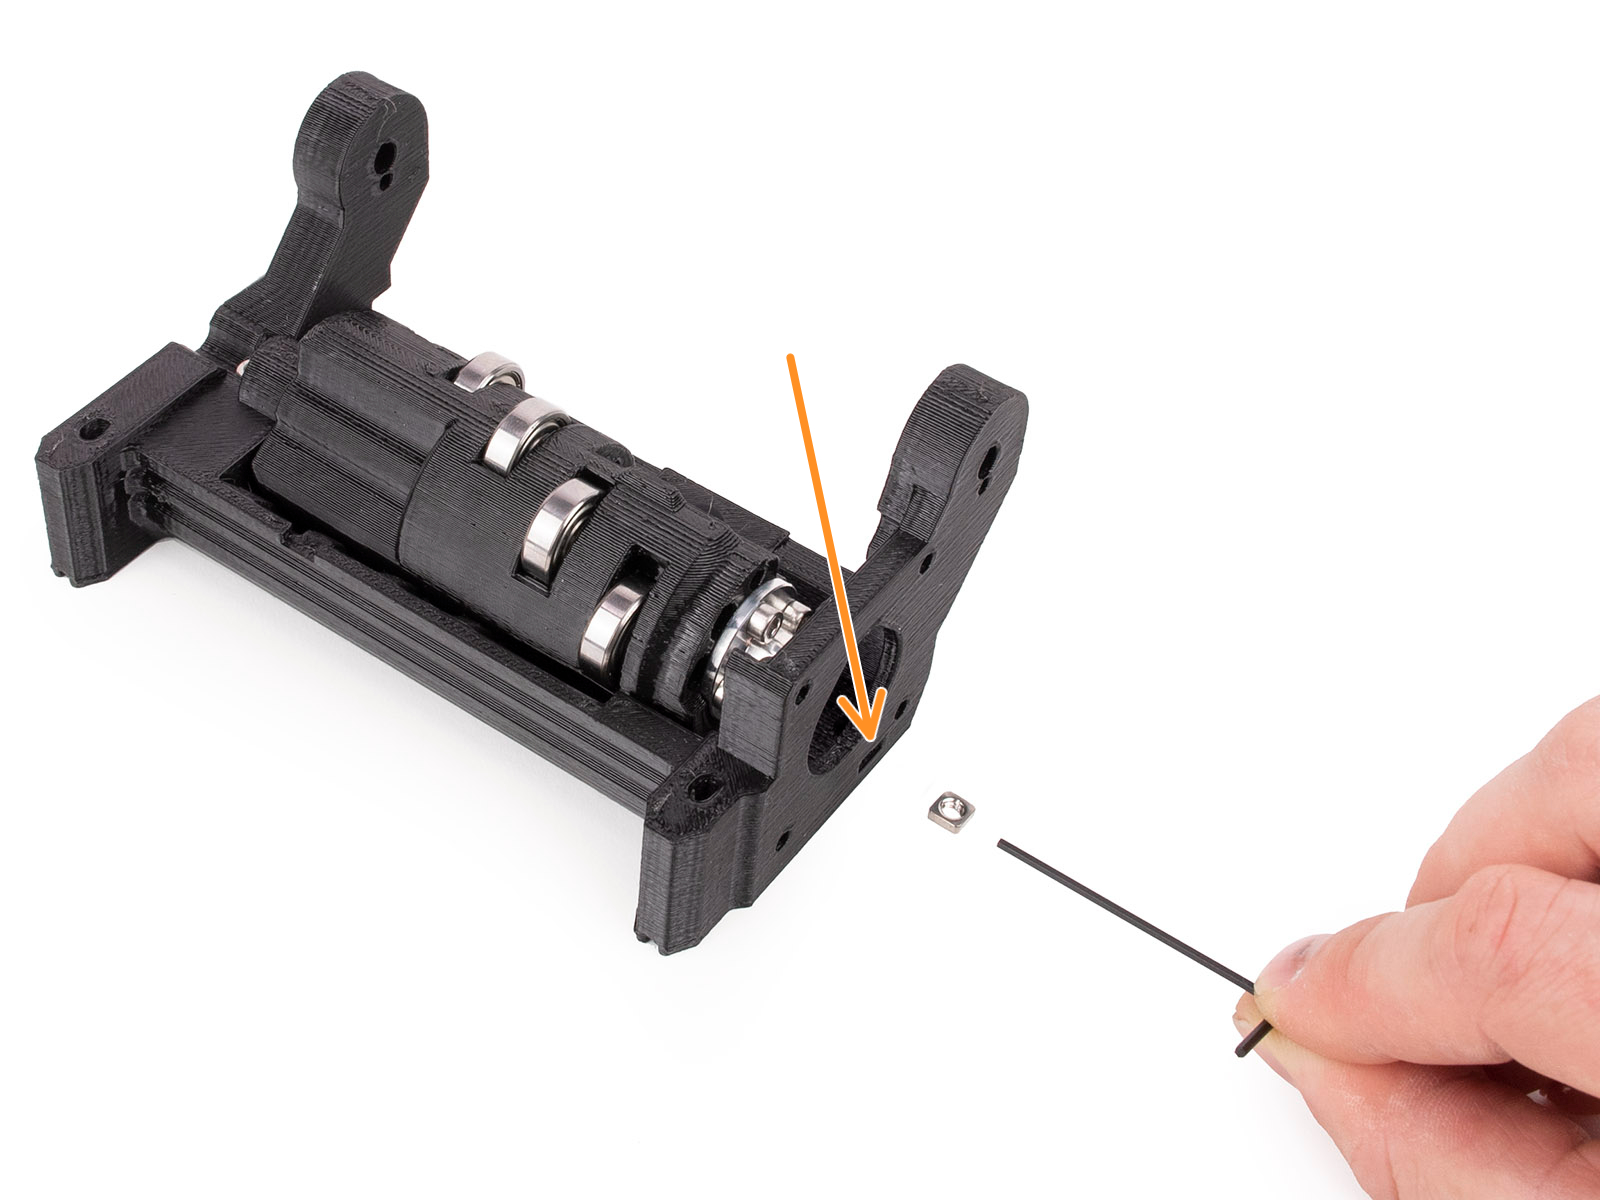
Idler body M3nS nut
Idler body M3nS nut
Idler body M3nS nut
This will be easy!
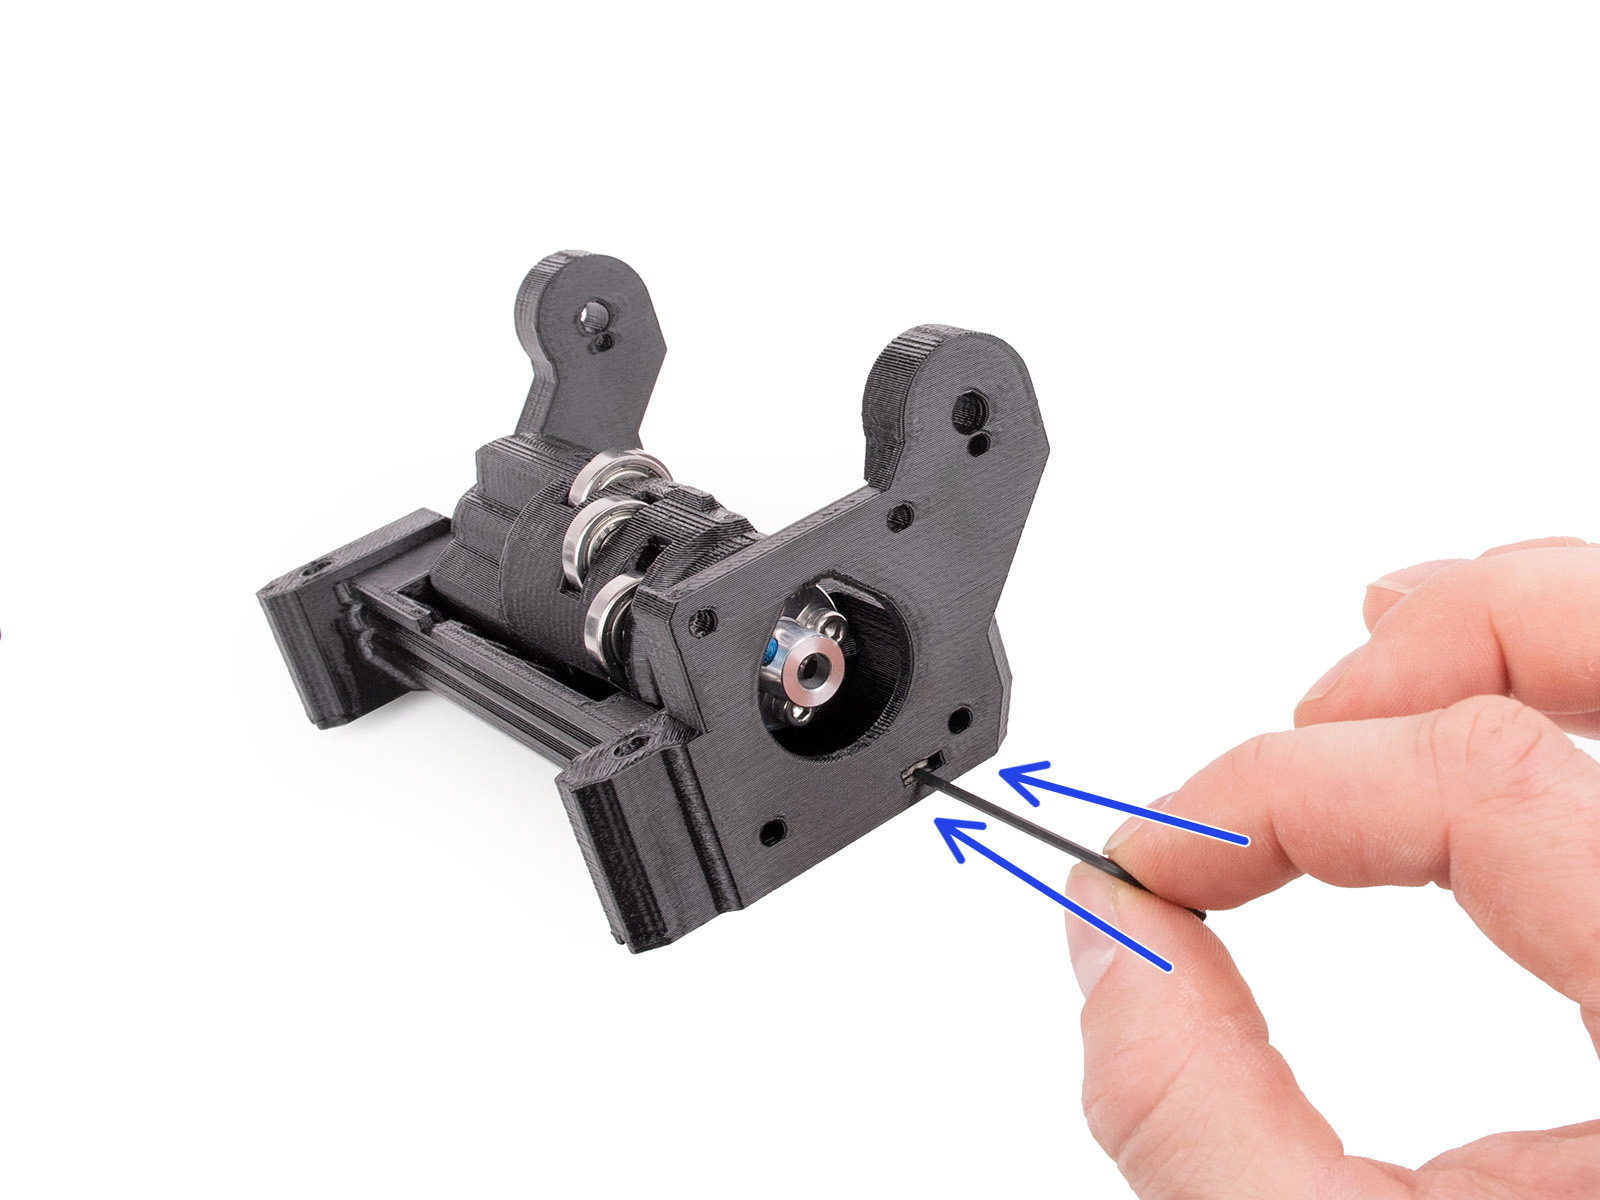
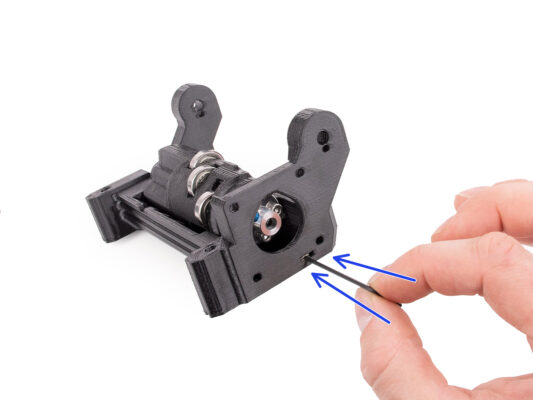
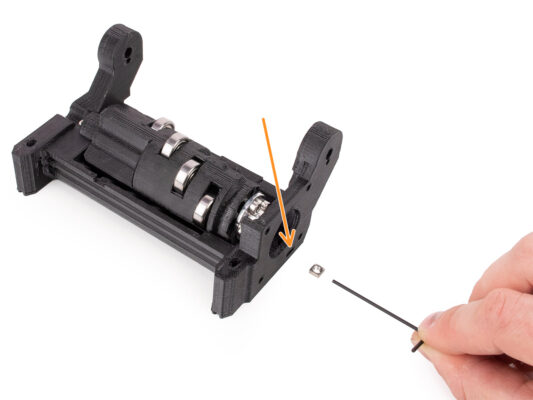
Insert the M3nS nut into the marked opening on the Idler body.
Using the 1.5mm Allen key, push the nut all the way in.
Idler motor assembly (part 1)
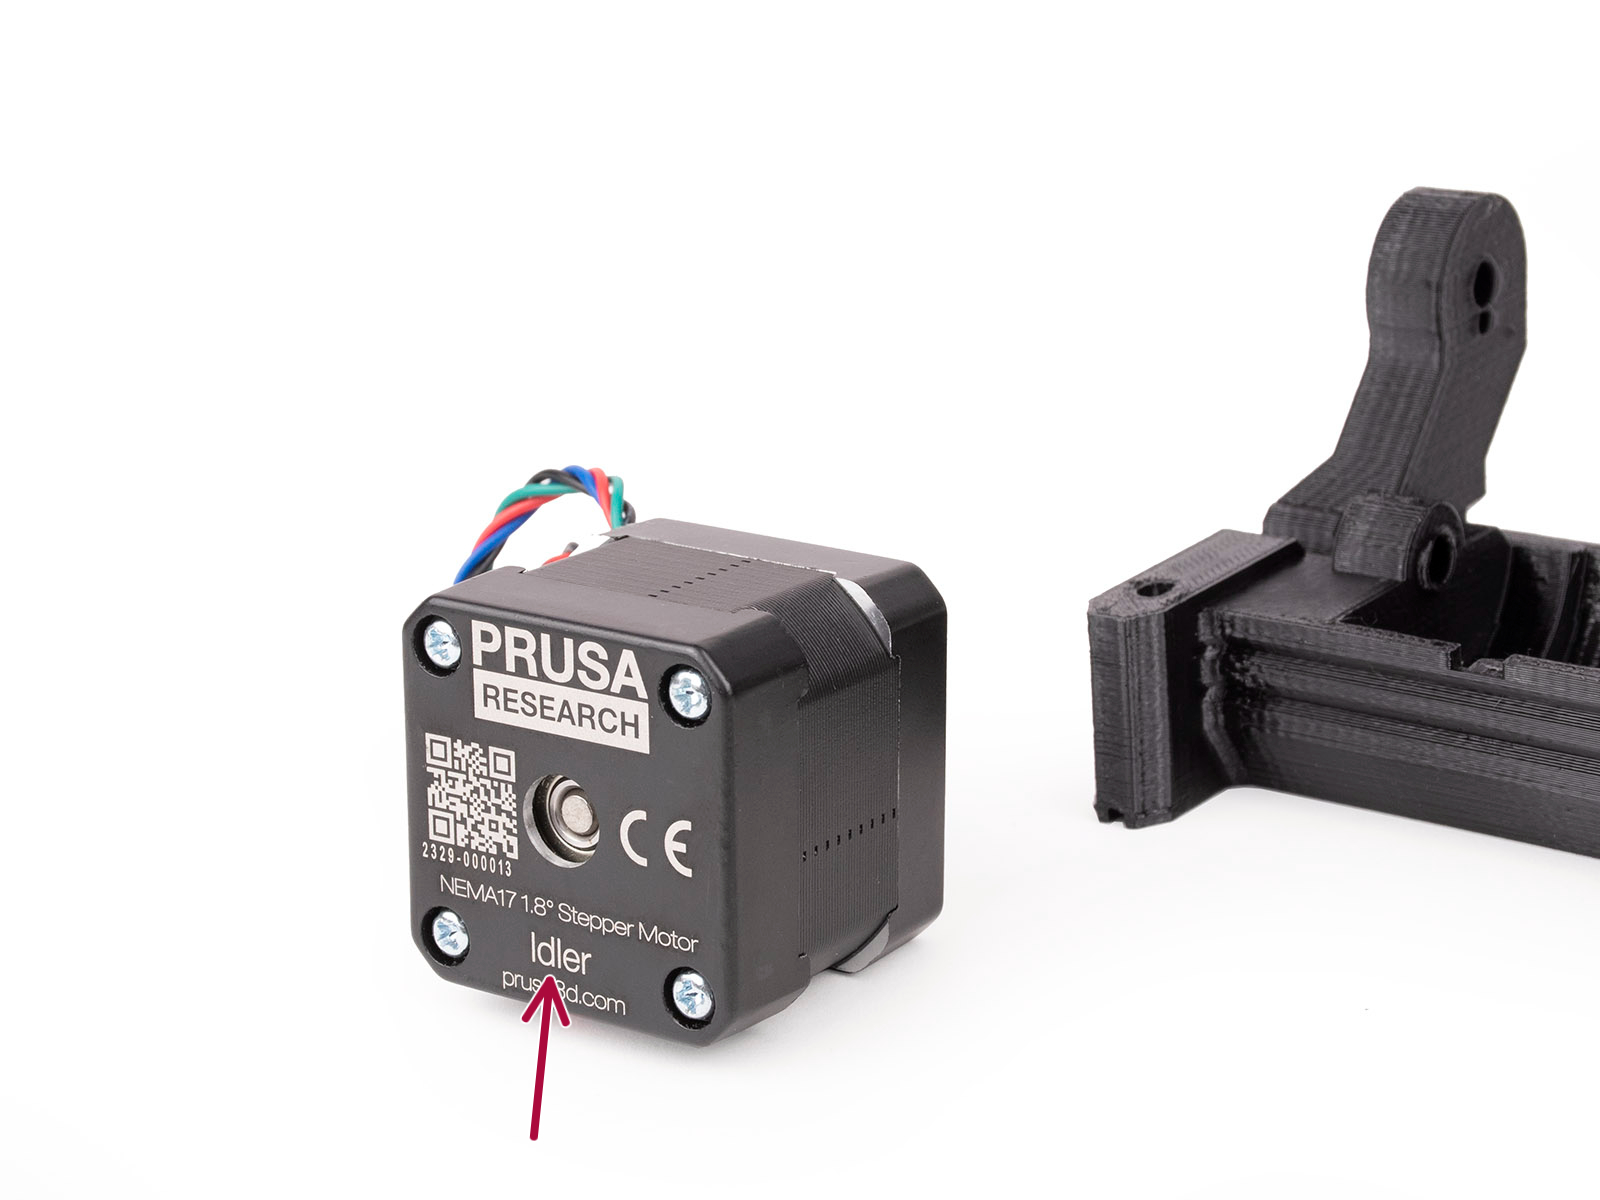
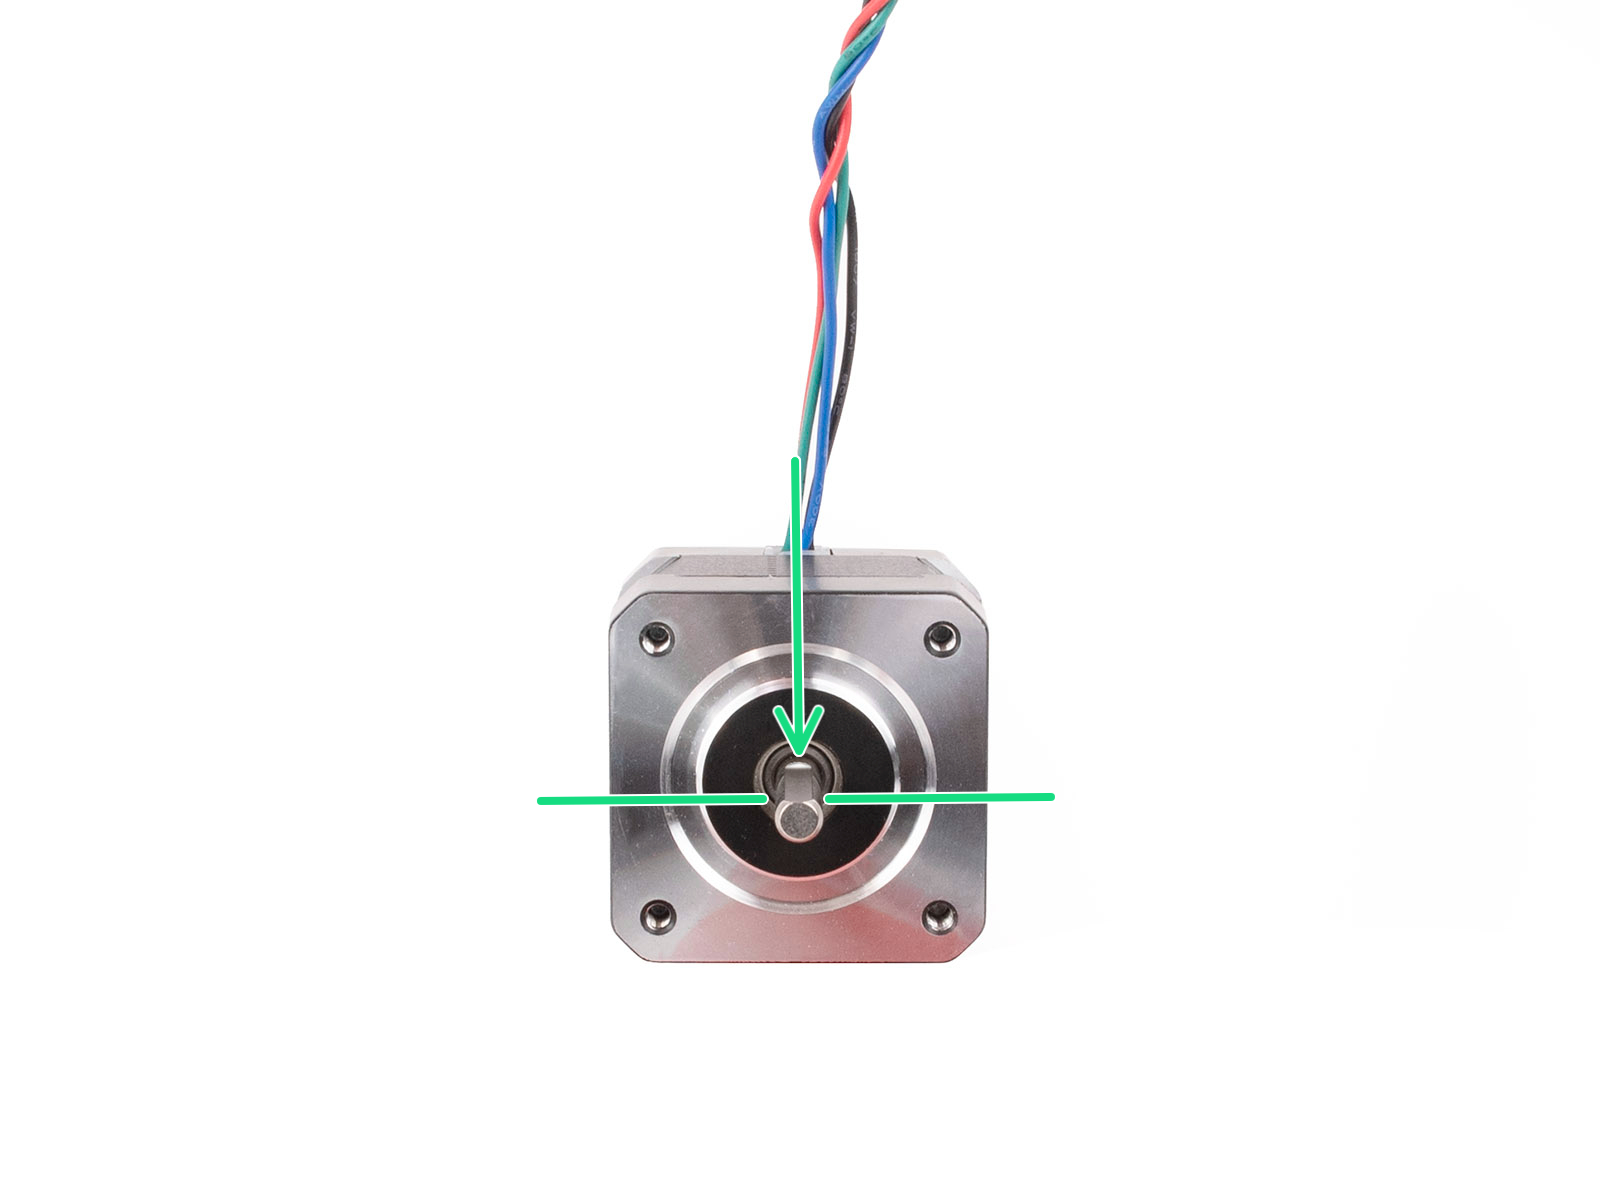
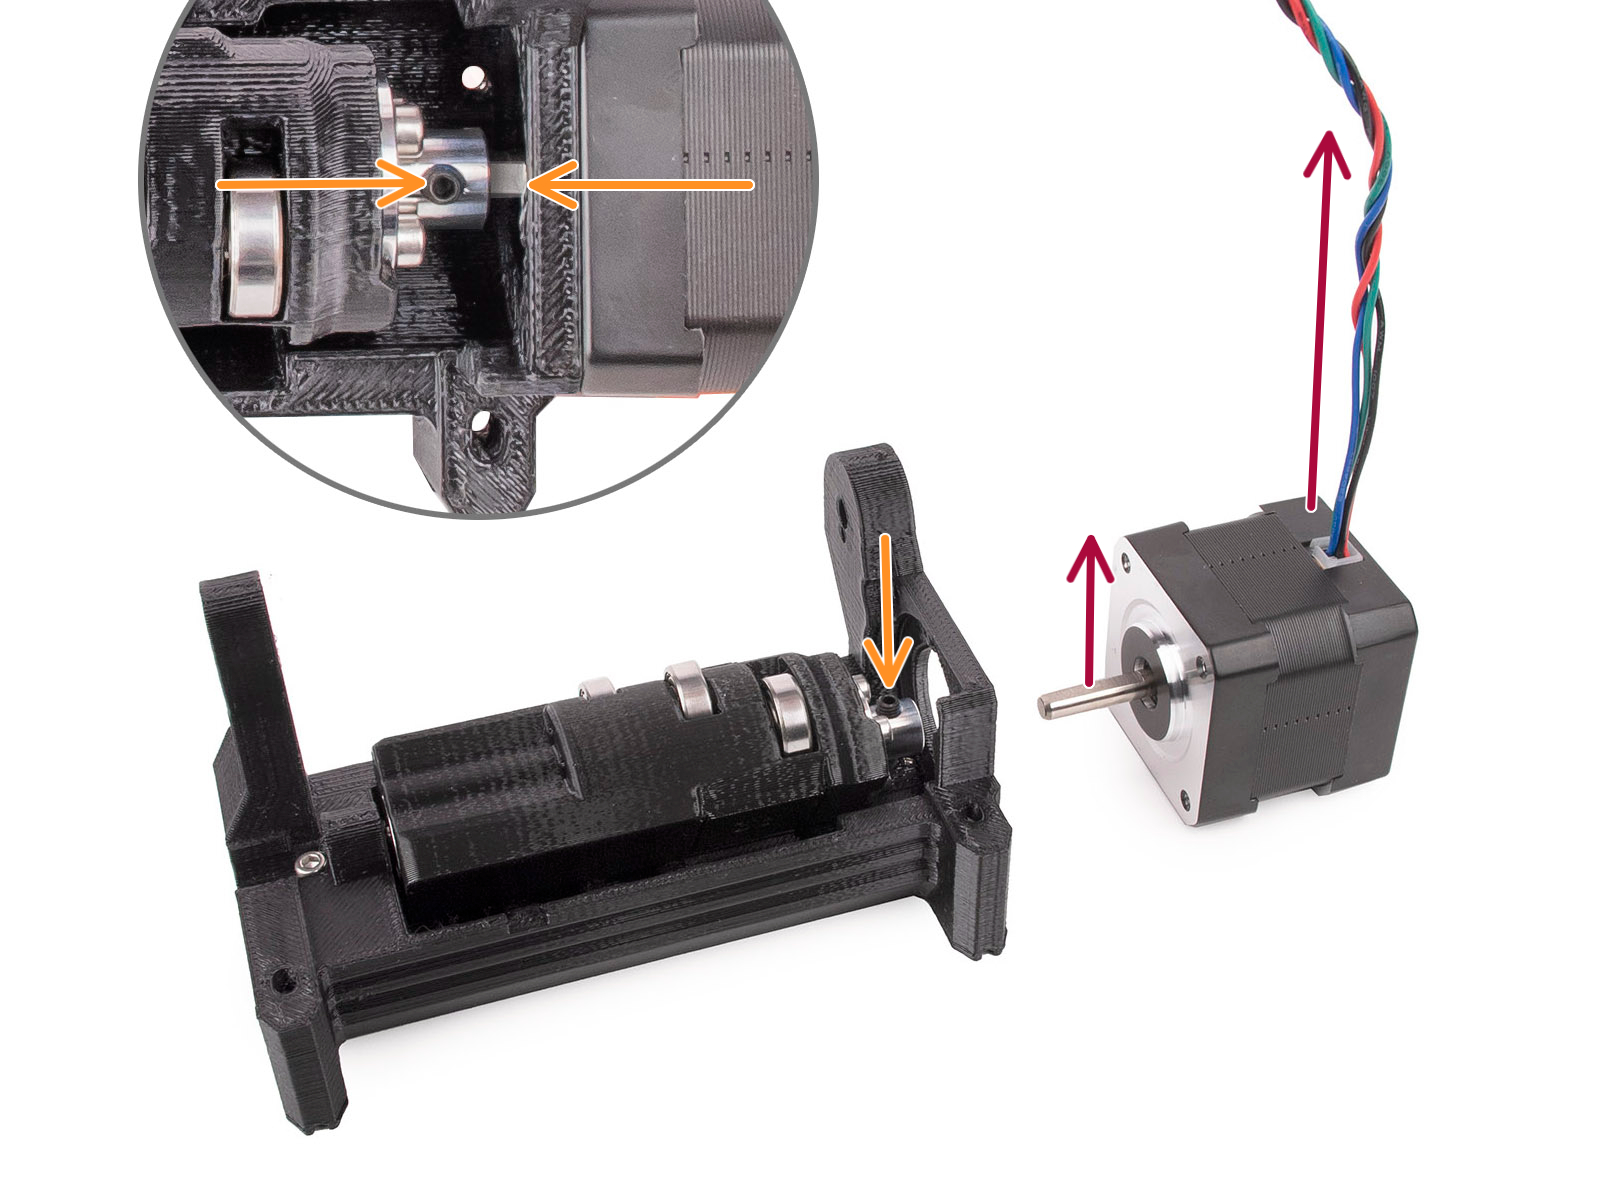
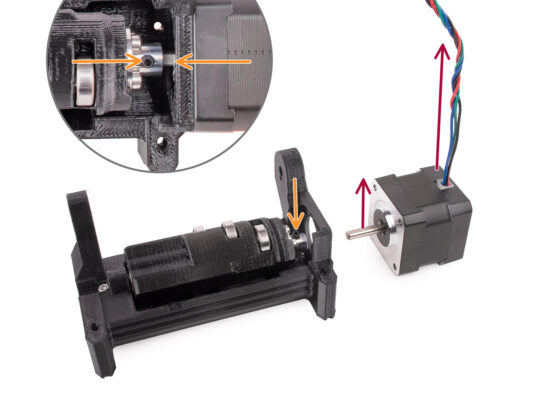
Before we add the motor to the assembly, we need to align the motor shaft and the idler coupler.
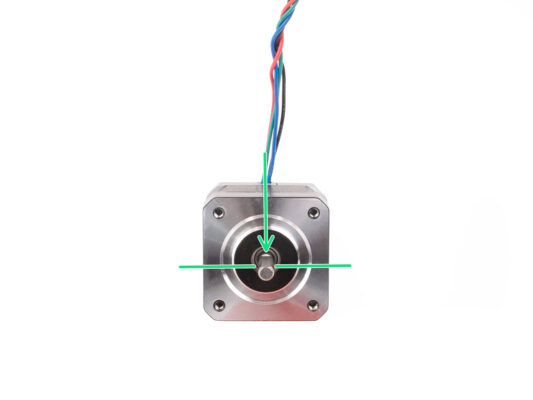
Notice there is a flat part on the motor shaft.
Orient the motor as seen in the picture, so that both the flat part of the shaft and the cable are pointing up.

Before you start installing the motor, the flat part of the motor shaft must be aligned with one of the two grub screws in the metal coupler. 

Orient the coupler so that one of the grub screws is pointing up.
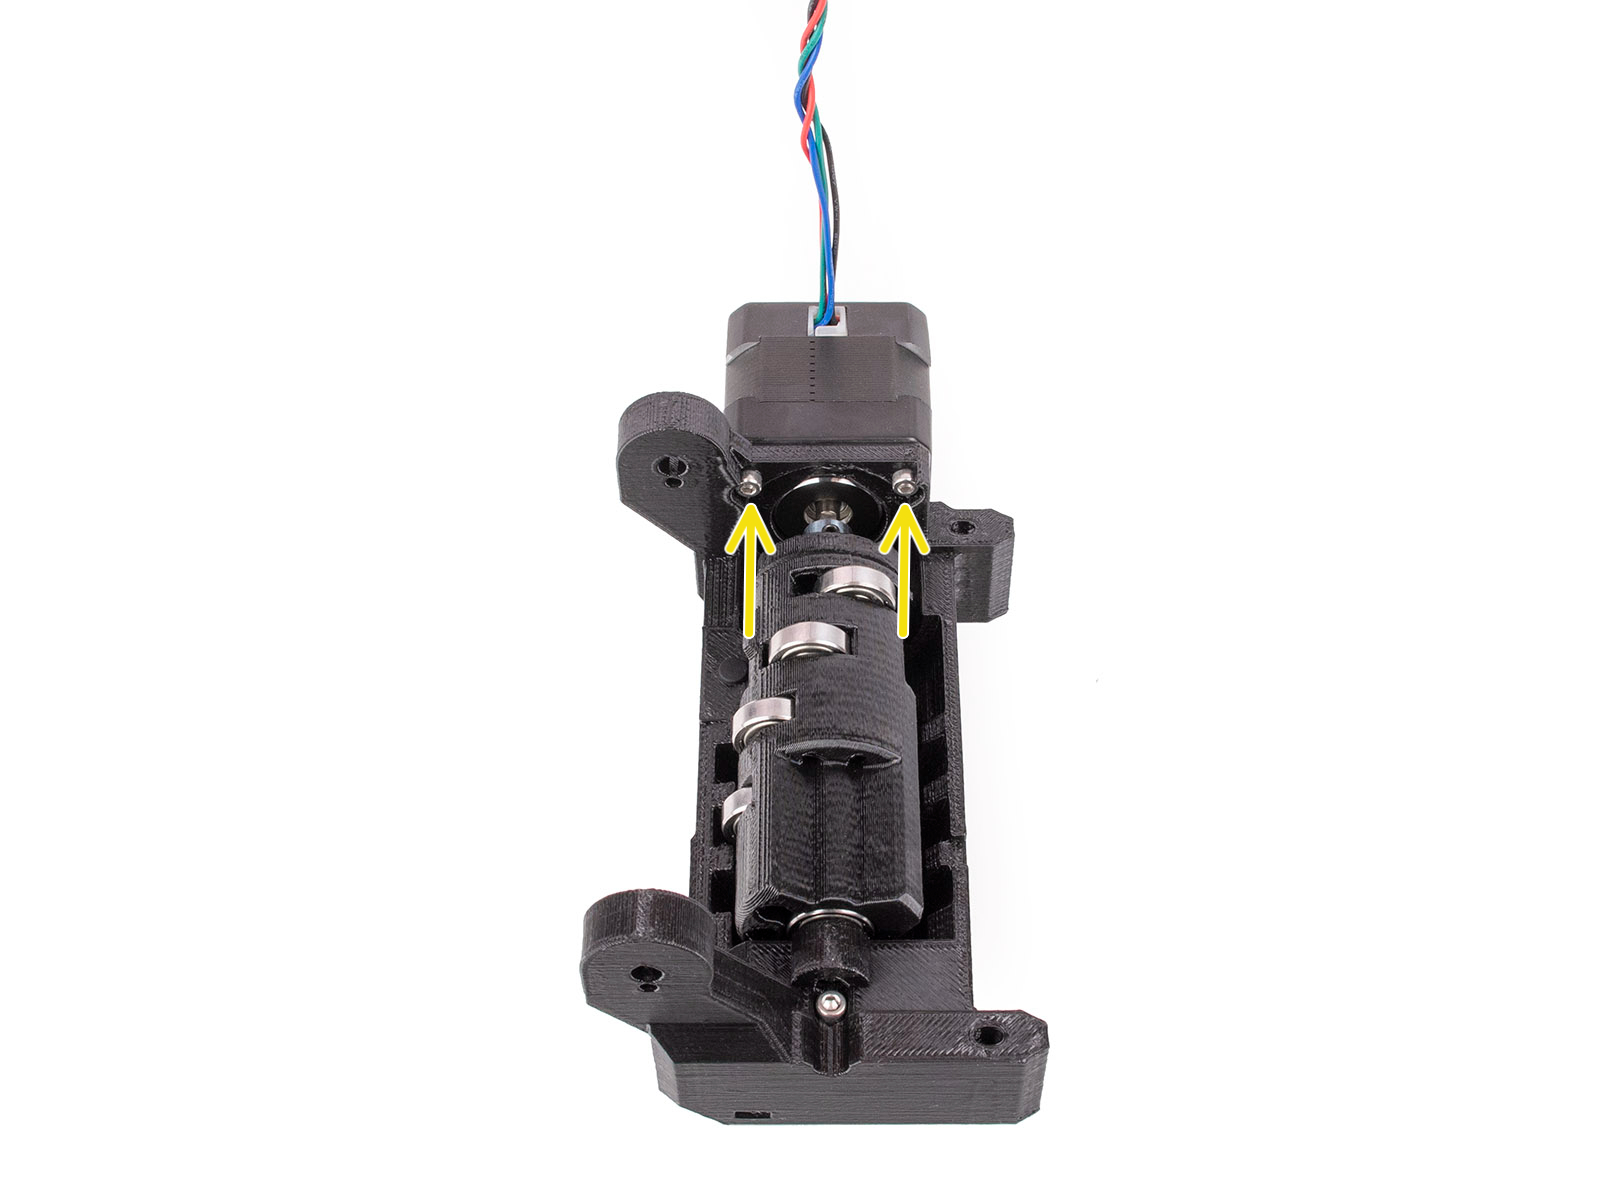
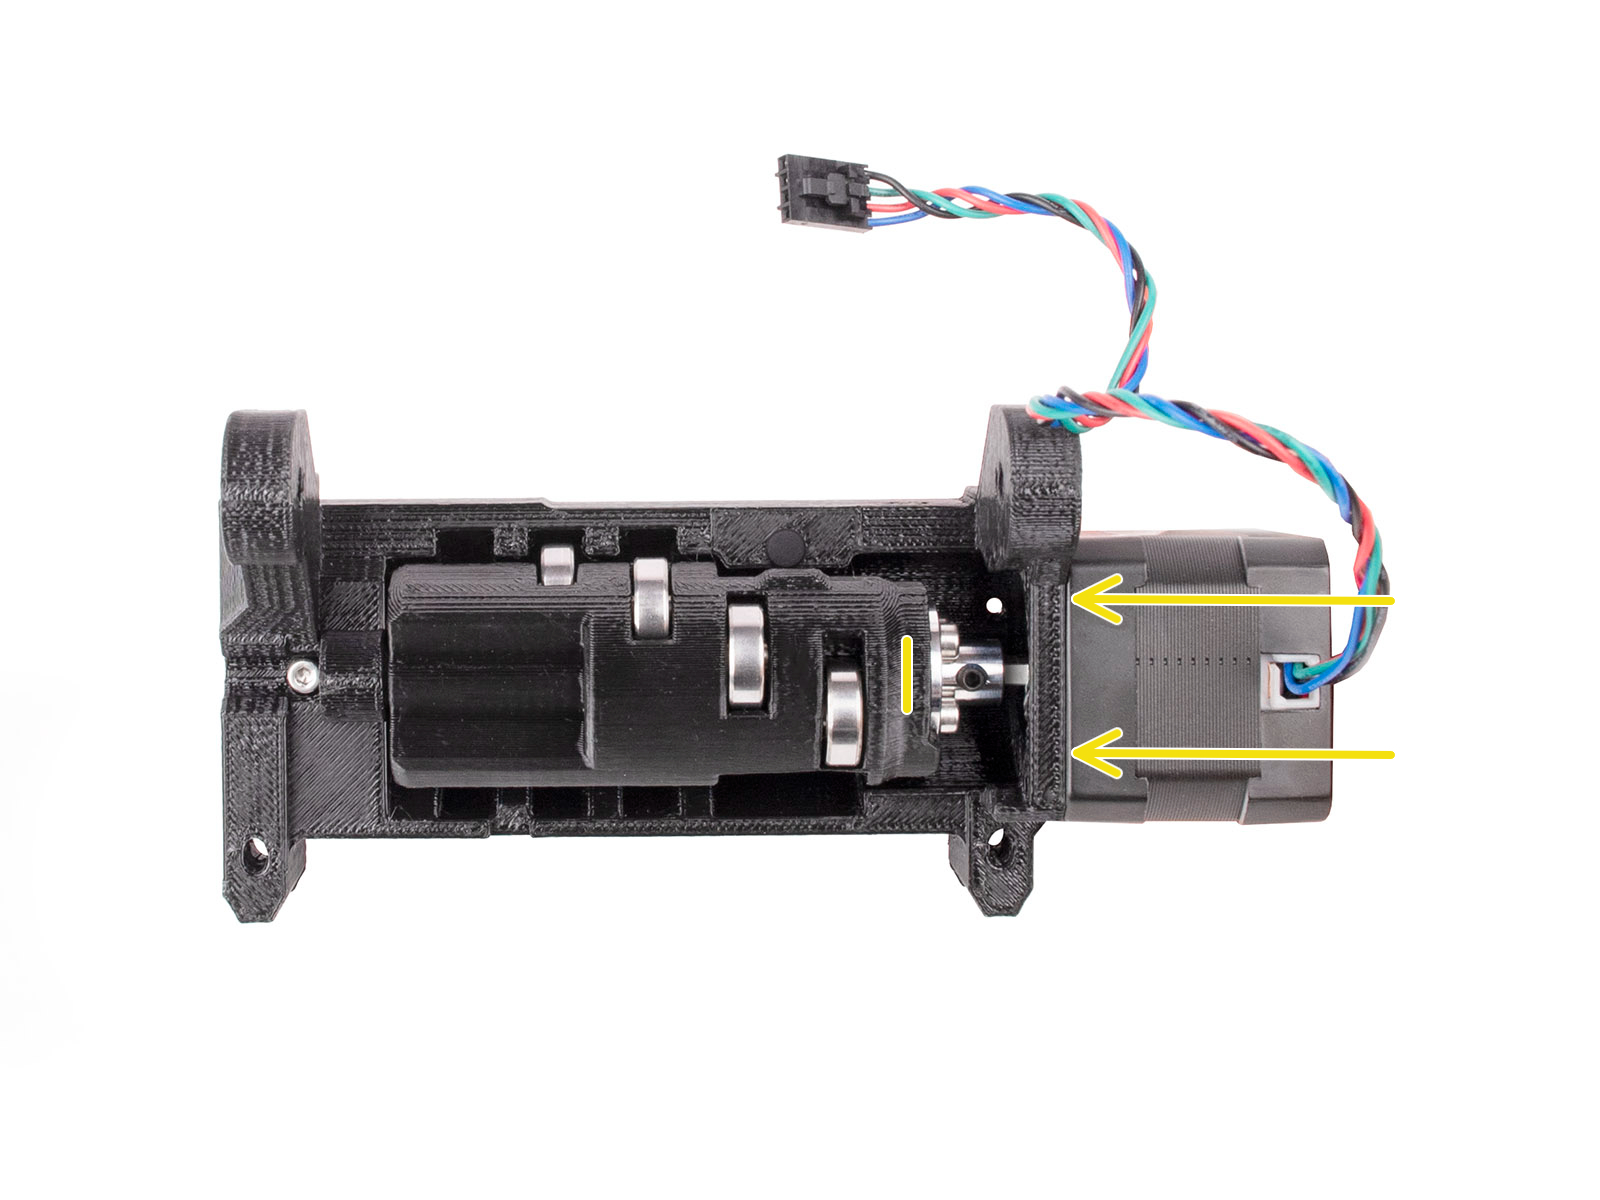
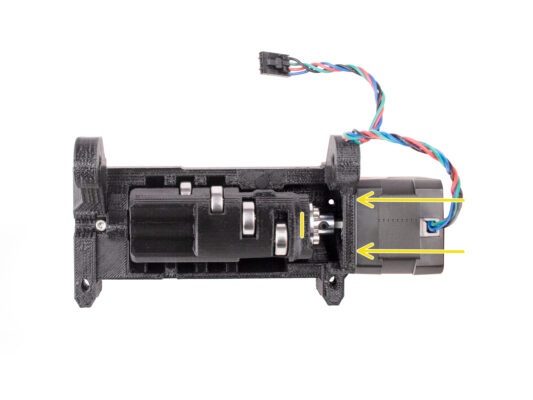
Insert the motor shaft into the metal coupler on the Idler. Push the motor towards the Idler body until flush.
Idler motor assembly (part 2)

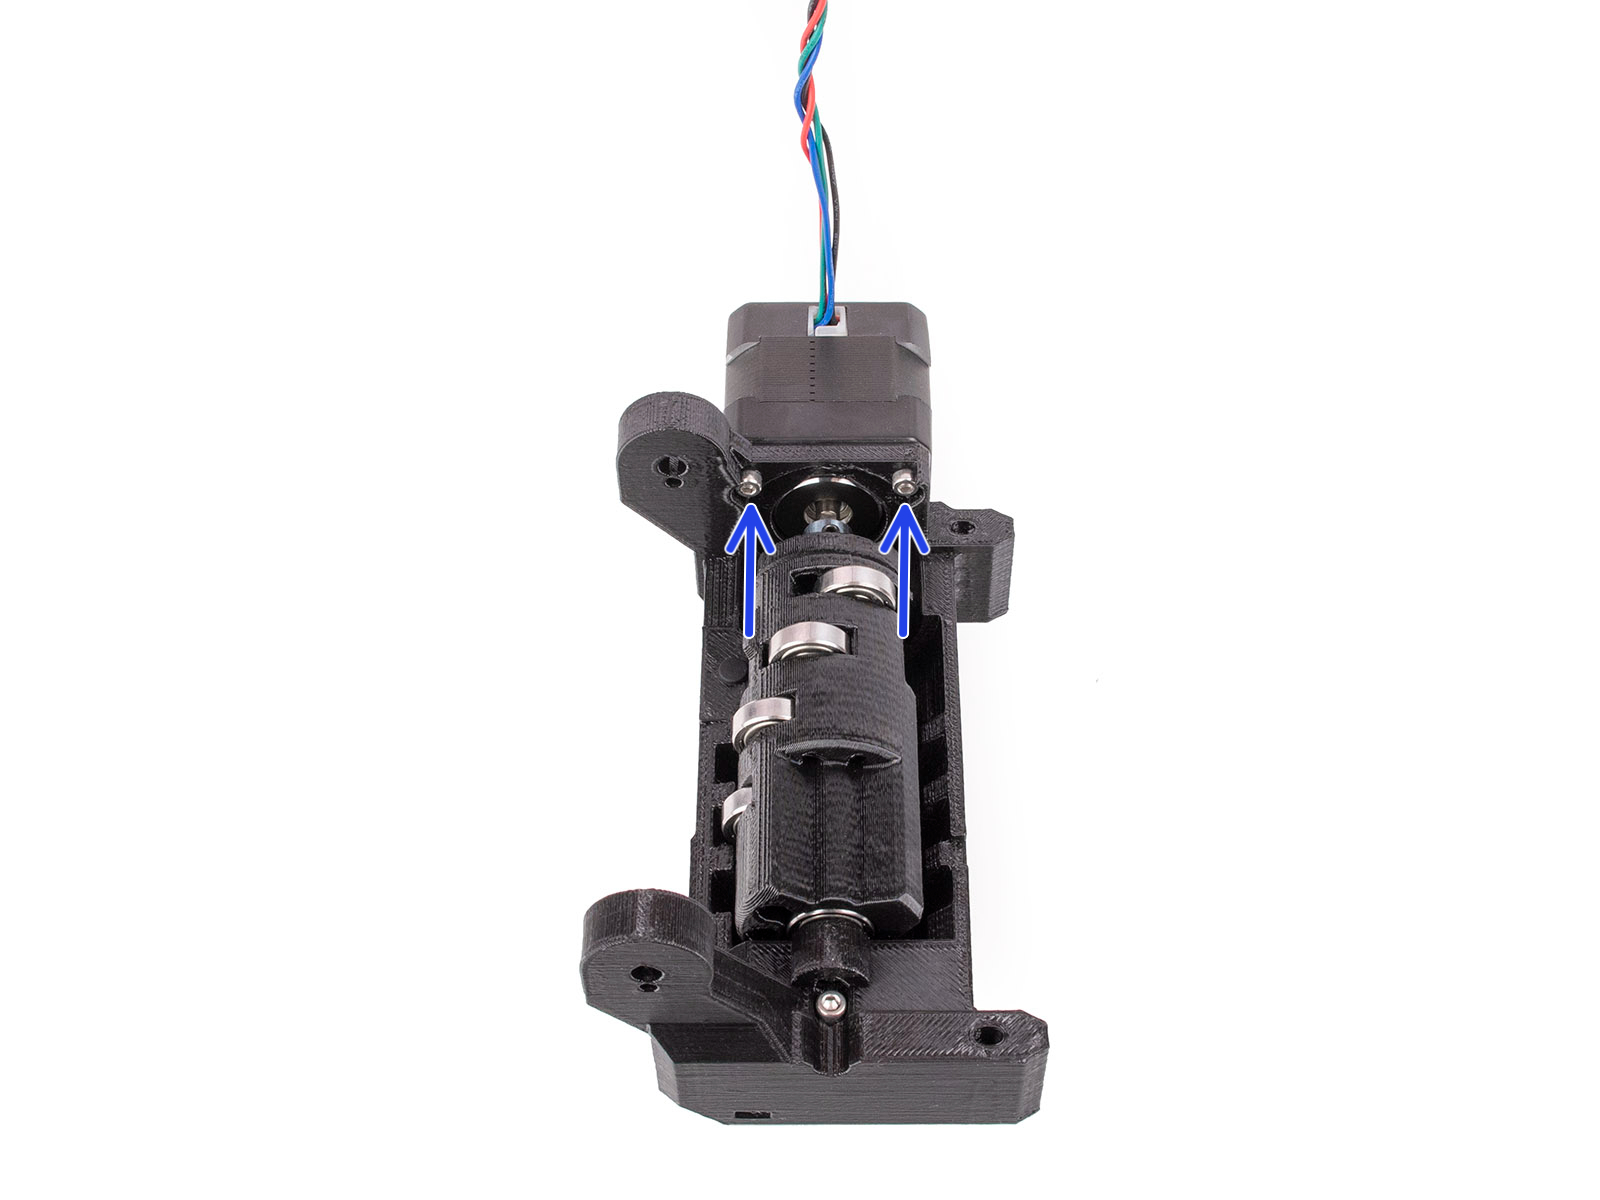
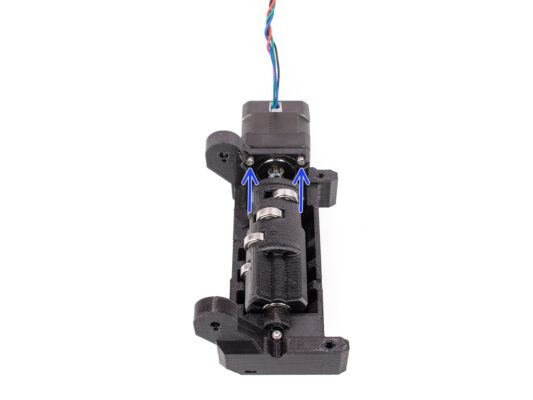
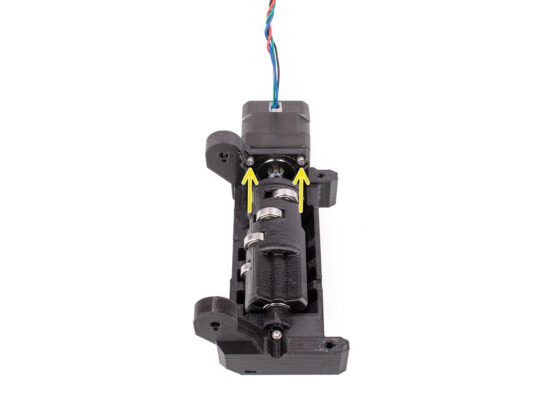
Insert two M3x10 screws into the marked openings. 

Start the thread so that the screws engage into the motor. Don't tighten them up all the way yet!

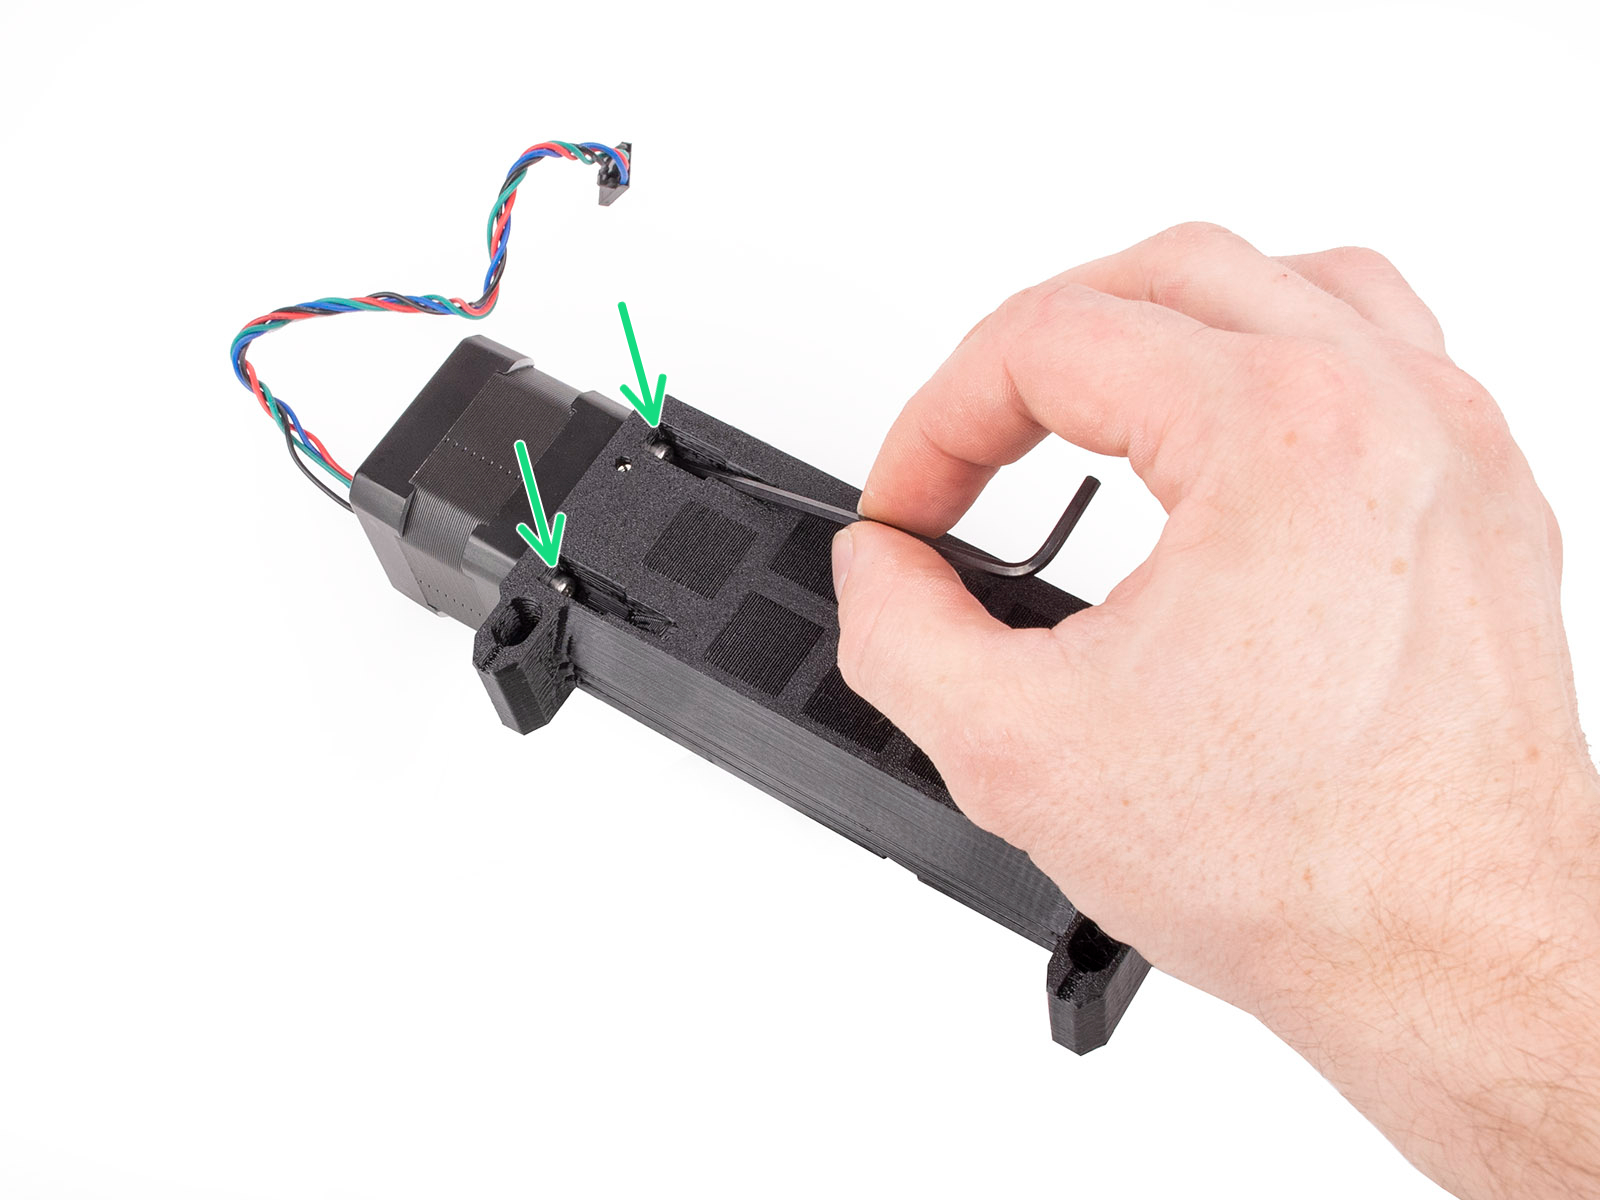
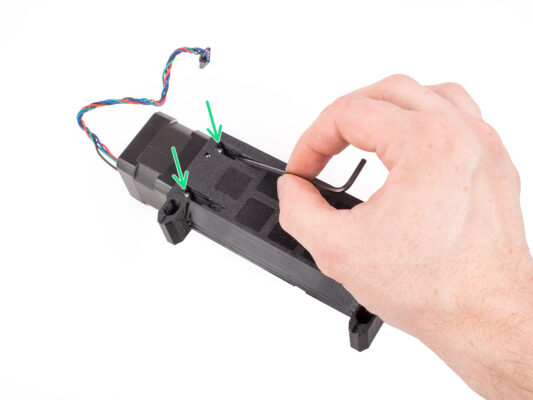
Turn the unit around.

From the opposite side, add another two M3x10 screws into the openings. Push them towards the motor. Using the ball-end 2.5mm Allen key at an angle, tighten them up fully. 
Make sure the screw is perfectly perpendicular to the motor while tightening it. If it is hard to turn, release the screw fully, re-align it, and start tightening it from the beginning to avoid cross-threading it.
Now, tighten the first two M3x10 screws fully.
Idler motor assembly (part 3)
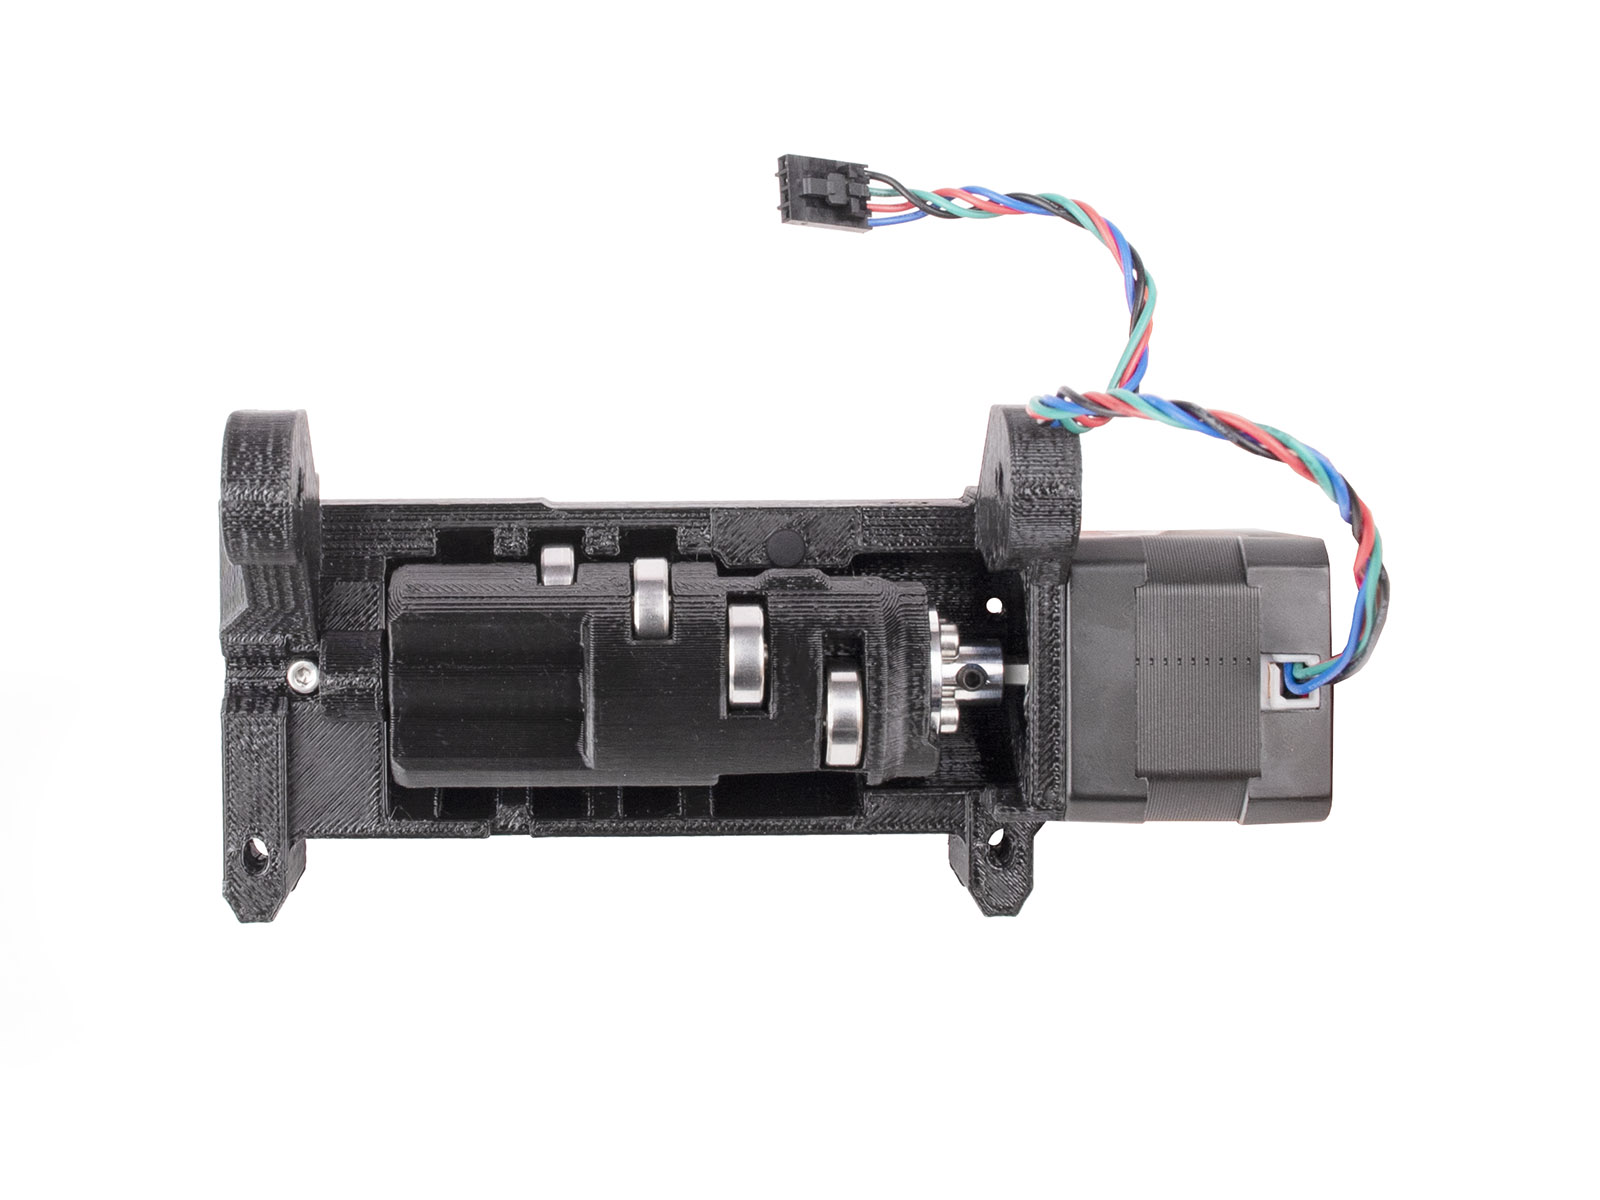
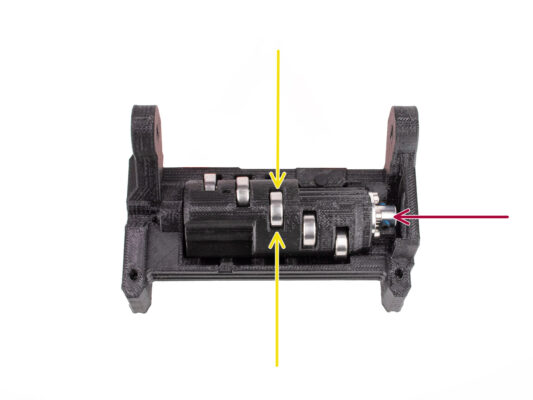
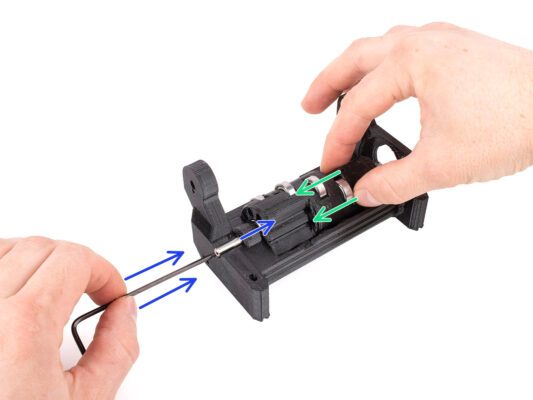
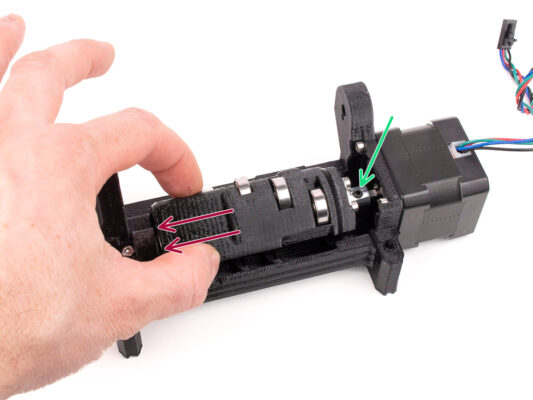
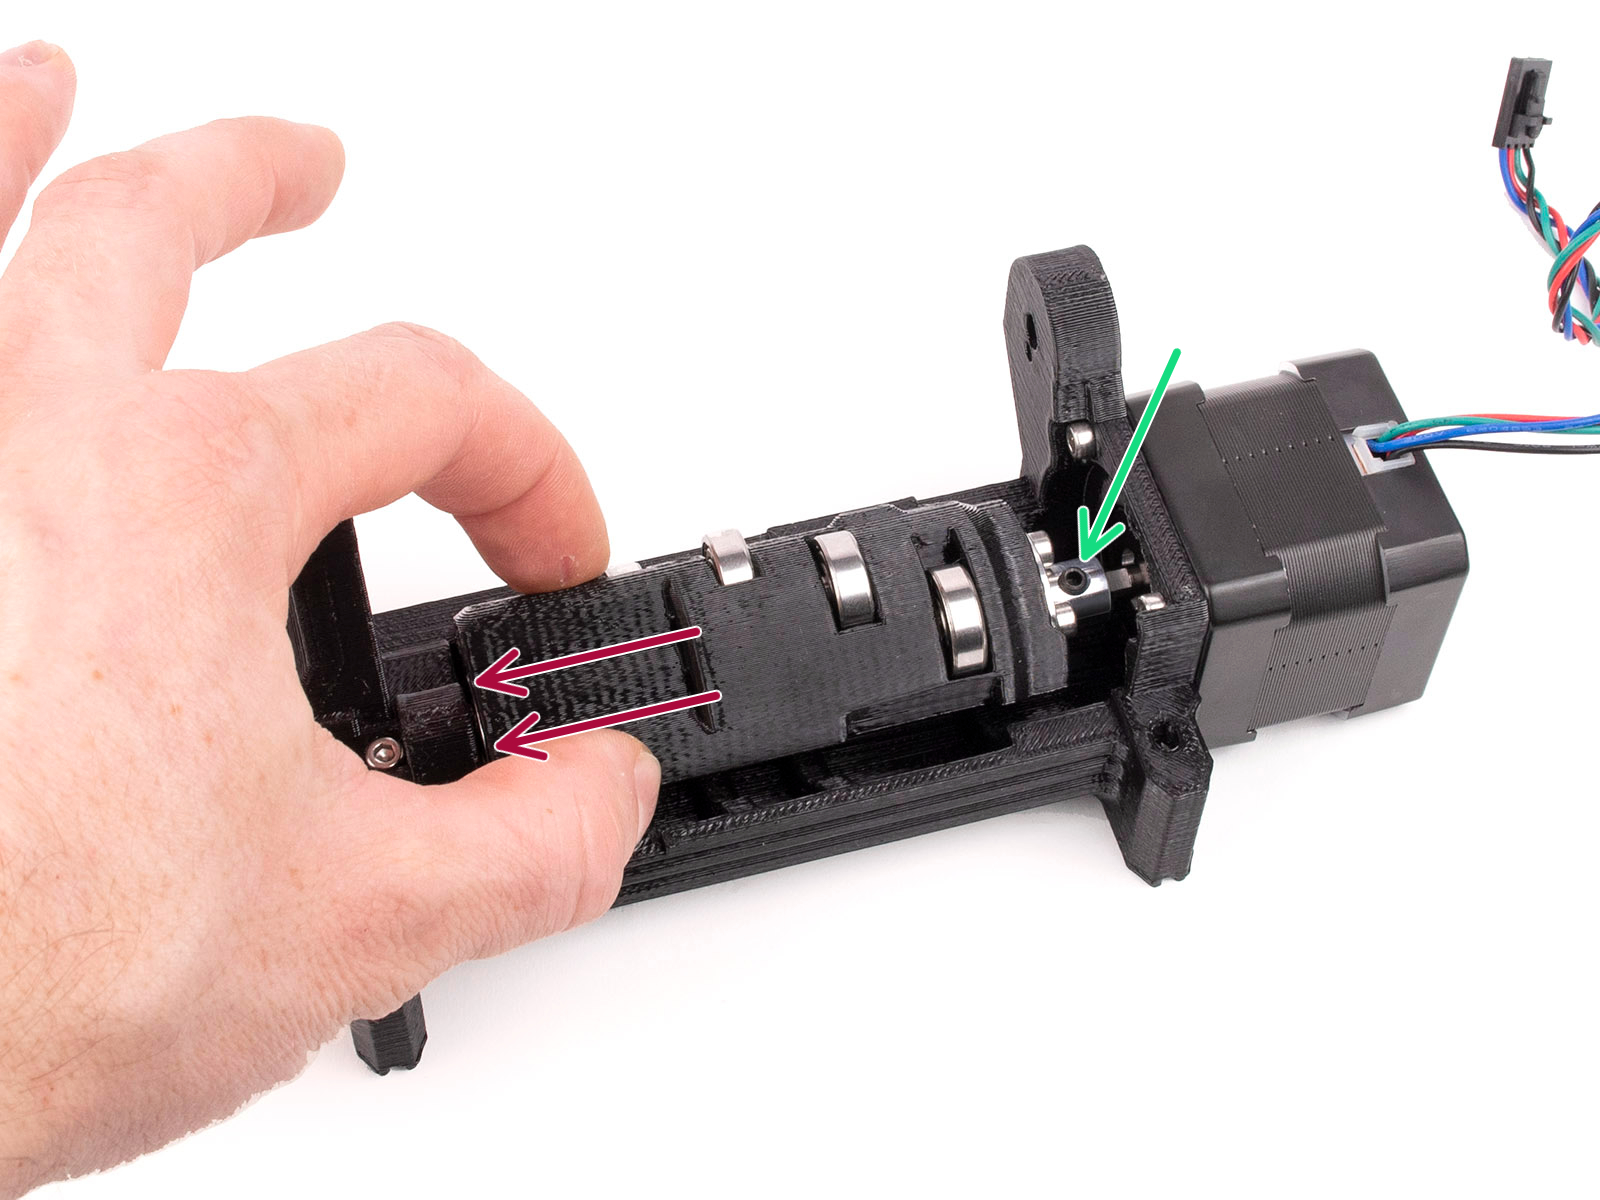
Pull the idler to the side all the way away from the motor. There should be just a very small gap on the left side.
A substancial gap could cause the MMU to experience difficulties with filament loading/unloading, as the idler bearings might not align correctly with the filaments.
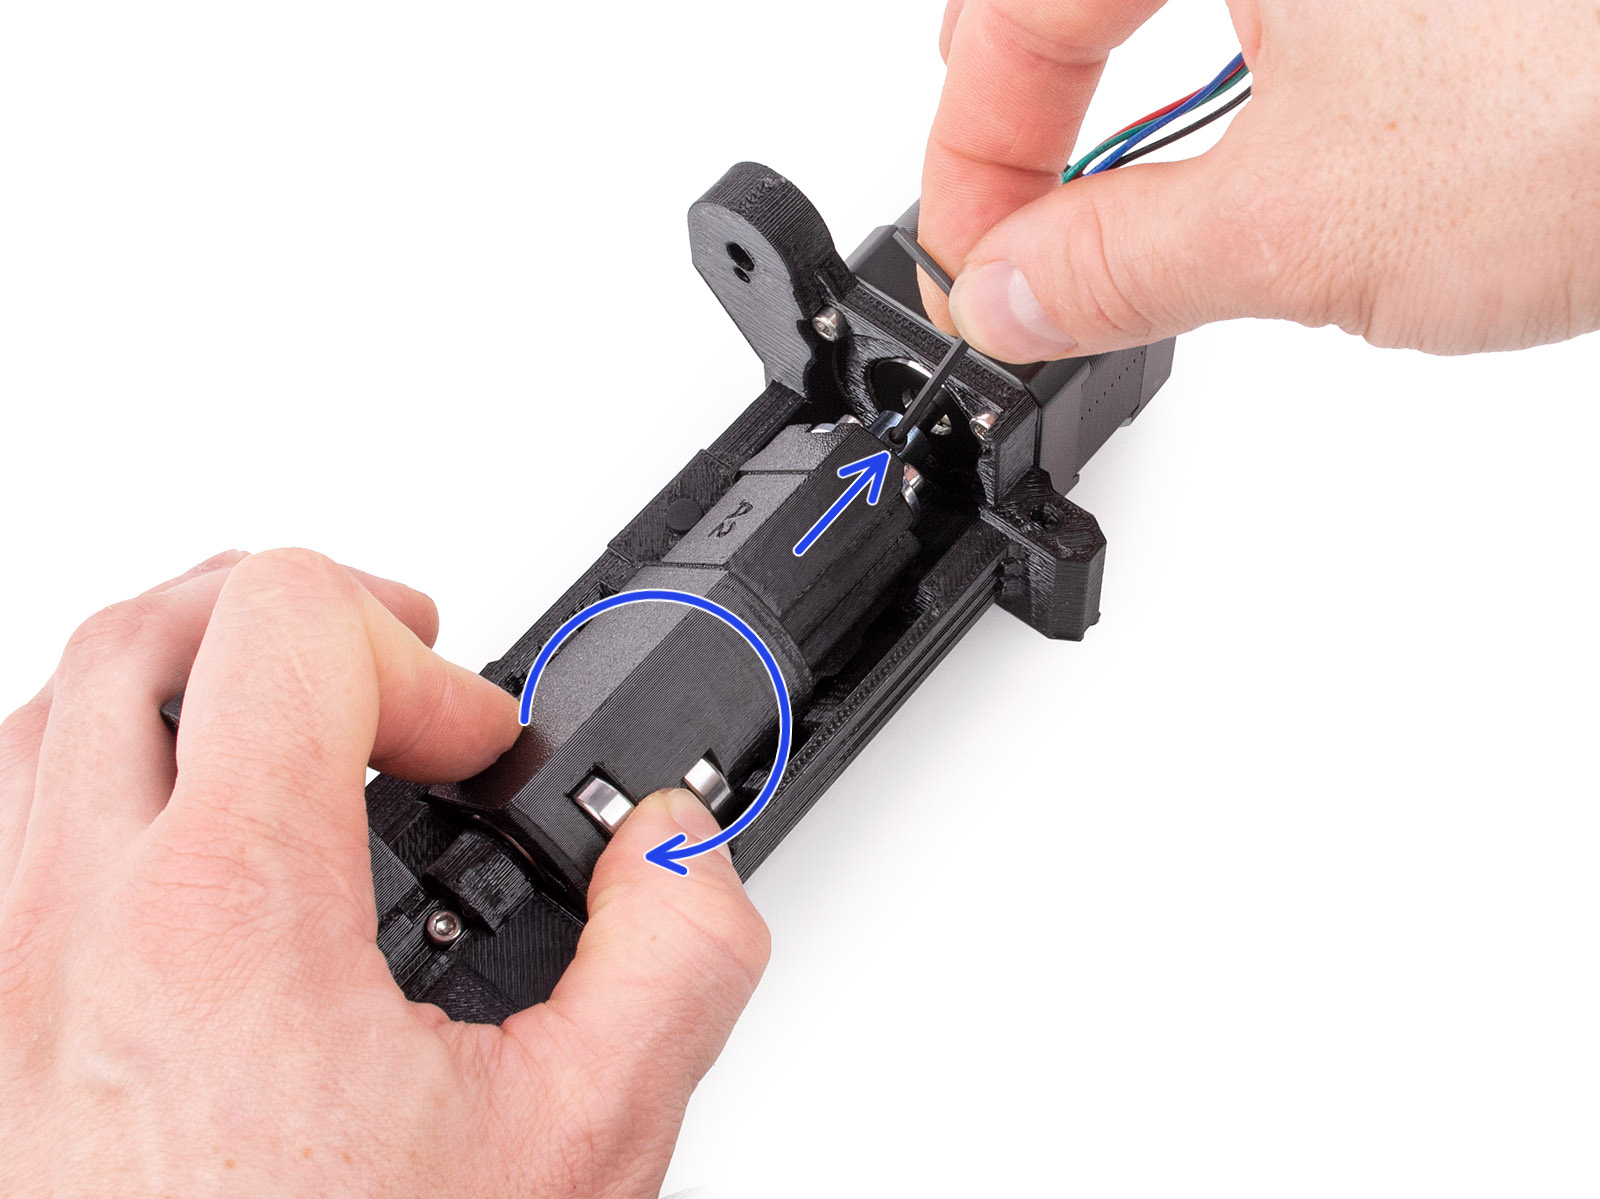
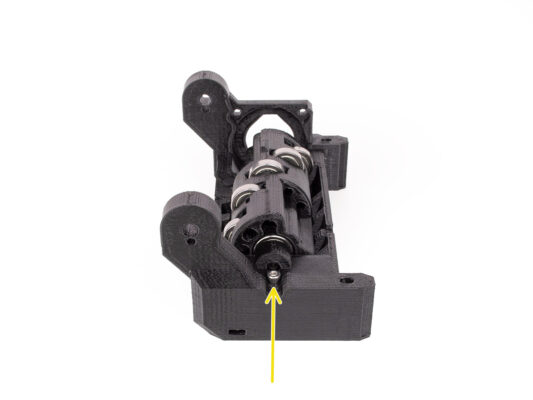
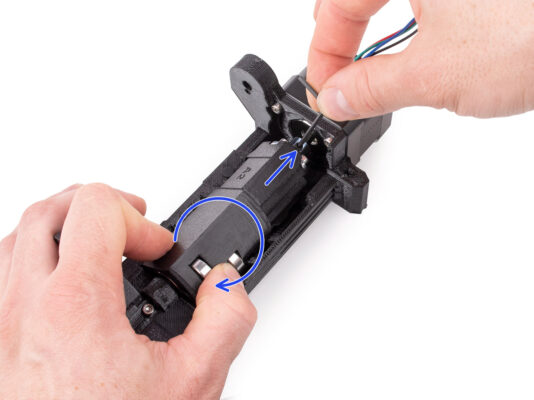
Make sure the grub screw in the metal Coupler is still aligned to the flat part of the motor shaft. Tighten it up fully using the 2mm Allen key.
Rotate the idler so that the second grub screw on the metal coupler is accessible. Tighten the other grub screw fully too.
Was this guide helpful?

Comments

Still have questions?

Still have questions?

If you have a question about something that isn't covered here, check out our additional resources.
And if that doesn't do the trick, you can send an inquiry to [email protected] or through the button below.
Contact us